MKW-13M - Coffee machine MPM - Free user manual and instructions
Find the device manual for free MKW-13M MPM in PDF.

| Brand | MPM |
| Model | MKW-13M |
| Product type | Espresso coffee machine with steam nozzle |
| Power supply | 220-240 V ~ 50-60 Hz |
| Power | 1100 W |
| Water tank capacity | 1.8 L |
| Power cord length | 1.0 m |
| Power consumption in off mode | 0.44 W |
| Automatic shut-off | After 25 minutes of inactivity |
| Functions | Espresso preparation, milk frothing, cup preheating, steam dispensing |
| Included filters | Small filter (1 cup) and large filter (2 cups) |
| Steam nozzle | With protection, adjustable |
| Drip tray | With grid, removable |
| Maintenance | Descale every 4 to 5 weeks, clean after each use |
| Noise level | Not specified |
| Color | Not specified |
| Dimensions | Not provided |
| Weight | Not provided |
Frequently Asked Questions - MKW-13M MPM
User questions about MKW-13M MPM
0 question about this device. Answer the ones you know or ask your own.
Ask a new question about this device
Download the instructions for your Coffee machine in PDF format for free! Find your manual MKW-13M - MPM and take your electronic device back in hand. On this page are published all the documents necessary for the use of your device. MKW-13M by MPM.
USER MANUAL MKW-13M MPM
EN We wish you satisfaction from using the product and invite you to check a wide range of other MPM appliances
NYOMAS AI ATT A | OKAVFFOZO
MACCHINA DA CAFFE ESPRESSO
SI ECONIS KAVOS APARATAS
ESPRESSO AUTOMATS
SPRLSSOMACHNL
CIGNIFNIOWY FKSPRFS DO KAWY
MASINA OL CALLA SUB FRESIUNL
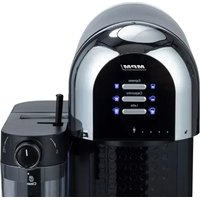
natural_image
Exterior view of a modern MPM monosupper with a glass mug in the foreground (no visible text or symbols)cz NAVOD K OBSLUZE 3
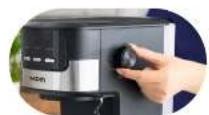
Smooth steam power adjustment
Removable 1.2-litre water tank

Indicator lights
Milk frothing nozzle
Anti-slip suction cups for the countertop

Removable drip tray
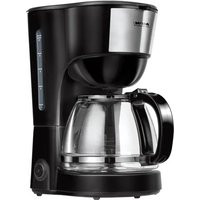
natural_image
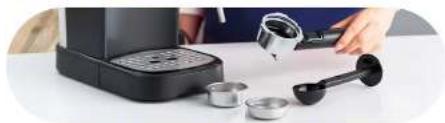
Person using a black espresso machine with a hand pouring liquid into it (no visible text or symbols)Includes: 1 cup filter (10 g), 2 cups filter (20 g), coffee measuring spoon with tamper
BEZPEČNOSTNÍ POKYNY PŘI POUŽÍVÁNÍ
natural_image
Mechanical assembly diagram showing a lever with a bucket and a container, labeled Abb. 1 (no text or symbols on the diagram itself)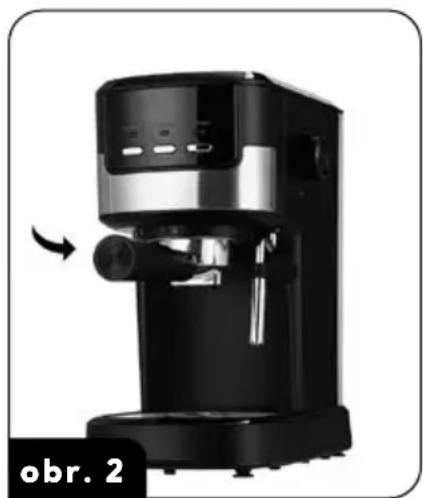
natural_image
Exterior view of a black and silver coffee maker with control panel and side-mounted funnel (no visible text or symbols)natural_image
Exterior view of a black and silver coffee maker with control panel (no visible text or symbols)natural_image
Mechanical assembly diagram showing a lever lifting a container with a downward arrow (no text or symbols)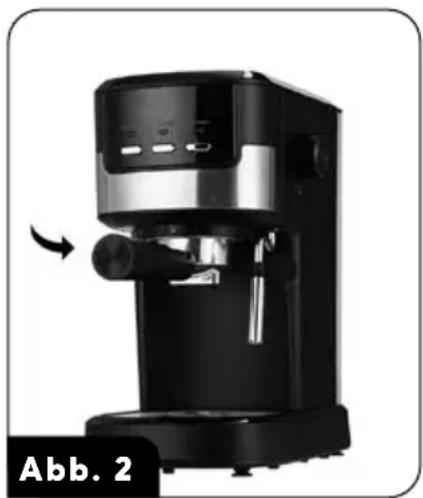
natural_image
Exterior view of a black and silver coffee maker with a lever mechanism, labeled 'Abb. 2' (no other text or symbols visible)AUFFÜLLEN DES WASSERBEHÄLTERS
natural_image
Exterior view of a black and silver coffee maker with control panel (no visible text or symbols)natural_image
Exterior view of a Joonis 2 coffee maker with control panel and lever mechanism (no text or symbols on device)natural_image
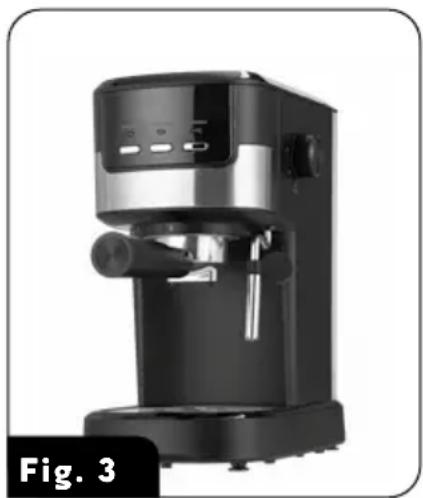
Black and white photo of a Joonis 3 coffee maker with control panel and side buttons (no visible text or symbols on device body)natural_image
Black and silver espresso machine with a scroll wheel, no visible text or symbols on the device itself.natural_image
Black and silver espresso machine with control panel, no visible text or symbols on the device itself- Read the instructions carefully before use.
- Do not immerse the device, cable or plug in water or other liquids!
- Take special care when children are near the device!
- Fill the tank only with cold water.
- Never use a damaged device, including one with a damaged cord or plug, in which case have it repaired at an authorised service centre.
- Use of accessories not recommended by the manufacturer may cause damage to the device, fire or personal injury.
- Do not hang the cable on sharp edges or allow it to come into contact with hot surfaces.
- Do not use the device outdoors.
- Before cleaning, first unplug the device from the mains socket and wait until it has cooled down completely.
- Never leave the device connected to a power source unattended.
- Do not exceed the maximum filling volume indicated on the device.
- Do not start the device without water.
- Do not place the device near electric or gas cookers, burners, ovens, etc.
- After the device is switched on, do not pour water into the tank.
- The heated spot for cups is hot. Maintain precautions when placing and collecting cups.
- Always unplug when not in use or before cleaning.
- The device should be switched off when finished working!
- Do not use the device for purposes other than those for which it was intended.
- The device is intended for domestic use only.
- The device should be connected to a mains socket outlet with a grounding pin.
- This equipment may be used by children of at least 8 years of age and by persons of diminished physical and mental capacity and persons with inexperience and lack of familiarity with the equipment, if supervision or instruction is provided on how to use the equipment safely so that the associated risks are understood. Cleaning and maintenance must not be carried out by
children unless they are at least 8 years old and are supervised. Unsupervised children must not carry out cleaning/maintenance.
- Keep the device and its cord out of reach of children under 8 years of age.
- Children must not play with the device.
- The temperature of the device's surfaces may be higher during operation.
- Use the device on a smooth and stable surface.
- Do not pull the plug out of the power socket by pulling the cord.
- Do not connect the plug to the power socket with wet hands.
- For the safety of children, please do not leave freely accessible parts of the packaging (plastic bags, cardboard boxes, polystyrene, etc.).
-WARNING! Do not allow children to play with the film. Danger of suffocation!
- CAUTION! The portafiler is hot during operation. Use porta filter holders.
- The working appliance must not be placed in a cupboard.
-CAUTION! In order to maintain the efficiency of the appliance and to prevent food contamination, clean the appliance regularly, as indicated in the section “CLEANING AND MAINTENANCE”.

CAUTION! Hot surface! The symbol on the appliance indicates that its components may become hot during operation.
-CAUTION! Do not start the coffee maker without the portafilter mounted with the selected filter.
DESCRIPTION OF THE APPLIANCE
- Coffee maker housing
- Heated place for empty cups
- Steam dispensing knob
- Water heater ON/OFF switch with indicator light
- Water pump on/off switch (COFFEE) with indicator light
- Steam heater on/off switch (STEAM) with indicator light
-
Steam ejector nozzle
-
Steam ejector rubber holder
- Nozzle cover
- Portafilter assembly slot
- Assembly place of the drip tray
- Drip tray grille
- Drip tray
- Water tank cover
- 1,2 L water tank
- Small coffee filter
-
Large coffee filter
-
Portafilter for the filter with coffee
-
Filter lock lever
-
Portafilter holder
-
Coffee measuring spoon with tamper
ASSEMBLY/DISASSEMBLY OF THE PORTAFILTER WITH A FILTER IN THE COFFEE MAKER
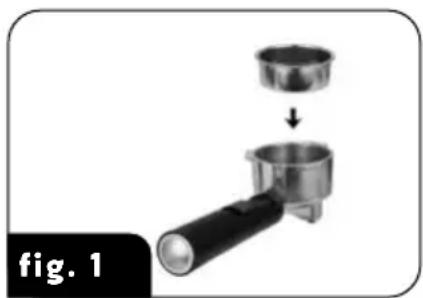
- Place the selected filter (16) or (17) in the portafilter (18) (fig. 1).
- Place the portafilter (18) with the installed filter (16) or (17) in the portafilter mounting slot (10) so that the portafilter holder (20) aligns with the open padlock symbol on the front panel of the coffee maker.
- Turn the portafilter holder (20) slightly to the right so that it aligns with the open padlock symbol on the front panel of the coffee maker (fig. 2).
- Removal of the portafilter from the coffee maker and the filter from the portafilter is done in the reverse order of assembly, i.e. turn the portafilter holder (20) slightly to the left, remove the portafilter (18) from the portafilter mounting slot (10) and remove the filter from the portafilter.
CAUTION! Always hold the portafilter by its holder (20). There is a lever (19) in the holder that allows the filter to be locked when it is shaken during cleaning. The portafilter may be hot. Exercise caution.
natural_image
Mechanical assembly diagram showing a lever lifting a container with a handle (no text or symbols)
natural_image
Black and silver industrial coffee maker with control panel and side-mounted shaft (no visible text or symbols)FILLING THE WATER TANK
- Disconnect the device from the mains.
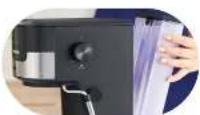
- Tilt up the water tank lid (14) then grasp the handle under the lid and pull up the water tank (15).
- Pour no more than 1,21 (MAX level) of cold drinkable water but no less than 0.121 (MIN level).
- Fit the tank in the rear part of the stove-pot espresso maker. When fitting the tank, make sure that the hook on the tank housing rests against the hinge in the rear part of the coffee maker.
- You can also pour water into the tank without removing the tank by using another vessel, however, take special care not to flood the device with water. At this time, the coffee maker must not be connected to the mains. In the case of flooding, do not use the coffee maker until it is completely dry.
CAUTION! Do not fill the water tank above the "MAX" level. Do not start the device when the tank is empty or when there is no tank. Use cold drinkable water only. Do not pour in hot water.
BEFORE FIRST USE
- Unpack the device from the packaging. Remove any bags, shipping locks, fillers and labels.
- Make sure the device has not been damaged during transport. In case of suspected damage, do not start the device and consult the seller.
- Make sure the electrical mains parameters match the data on the device's name plate.
-
In order to ensure better taste of the brewed coffee, carry out the procedure of scalding the coffee maker with hot water. Perform the following activities:
-
Remove the water tank (15) from the coffee maker, pour about 1 litre of cold and potable water into it, but no more than 1.2 litres (MAX level). Fit the tank in the rear part of the device.
- Fit the filter (16) or (17) in the portafilter (18), and fit the portafilter in the device. However, do not pour coffee into the selected filter.
- Fit the drip tray (13) in place and put the grille (12) on the tray at the place where the drip tray is to be fit (11). Place an empty cup on the grille. Make sure that the steam dosing knob (3) is located in the extreme upper position.
CAUTION! The coffee maker is not provided with cups for coffee. Use your own cups.
- connect the coffee maker to the power source and start heating the water with the button (4) - the backlit button starts flashing. When the water is heated up, the button will be lit steadily. Start the water pump with the button (5) - this will allow the water heater to be filled with water and additionally, the heater will be vented. Hot water will start to drip into the cup. When the backlit button (4) starts to pulsate, switch off water supply and empty the cup of water. When the button is lit again (4), start the process again and repeat it 2 more times.
CAUTION! It is always possible to hear unusual sounds during the initial start-up of the water pump, which cease after about 30 seconds. This indicates that the pump is being vented and it is a perfectly natural phenomenon.
USING THE DEVICE
To get the best aroma from your coffee, heat the device, filter portafilter and cup according to the instructions given below:
- Remove the water tank from the device and fill it with cold and potable water. The water level should not exceed the "MAX" level and should not be less than the "MIN" level. Fit the tank in the device.
- Fit the selected filter (16) or (17) in the portafilter (18) and fit the portafilter in the portafilter mounting slot (10). Do not pour coffee into the selected filter.
- Fit the drip tray (13) in place and put the grille (12) on the tray at the place where the drip tray is to be fit (11). Place a cup for coffee on the grille.
- Make sure that the steam dosing knob (3) is located in the extreme upper (closed) position. Connect the device to the mains.
- Connect the coffee maker to the power source and start heating the water with the button (4) - the backlit button starts flashing. When the water is heated up, the button will be lit steadily. Press the water pump button (5) – the hot water will start dripping into the cup. After approx. 20 seconds, stop feeding water with button (5) – the coffee maker, the portafilter and the installed filter have been preheated.
CAUTION! When the water heating is switched on, the button (4) will periodically illuminate with a pulsating and steady light, indicating that the coffee maker's thermostat is maintaining the temperature.
BREWING COFFEE
- Heat the device according to the description given above.
- Remove the portafilter (18) and filter (16) or (17) from the coffee maker. Pour well and finely ground coffee into a suitable filter and then tamp it with the tamper (21) so that when it is tamped, a clear threshold is visible between the level of the tamped coffee and the edge of
the filter. Filter (16) allows one cup of coffee to be obtained while filter (17) allows two cups of coffee to be obtained.
CAUTION! Do not pour more than 10 g of coffee into the small filter or 20 g of coffee into the large filter.
- Fit the portafilter with the suitable filter filled with coffee in the device.
CAUTION! The portafilter and the filter are both hot. Use portafilter holders. Maintain precautions - risk of burning.
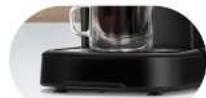
- Place the cup for coffee on the protective grille of the drip tray, in its central place. You can heat the cups using the heated place for cups (2).
- Make sure that the coffee maker is sufficiently warmed up after the heating process. The button (4) must be lit with a steady light, which means that the temperature of water for coffee brewing is ideal. If the illumination flashes then wait a moment - heating is in progress.
CAUTION! The coffee maker is ready for use approximately 60 seconds after its start. Depending on the temperature of the used water, the external temperature and the atmospheric pressure, this time may be slightly longer.
- Start the water pump with with the button (5). Water under pressure starts to flow into the portafilter with coffee and flows out through two openings in the bottom part of the portafilter. Remember to pour the coffee only when the button (4) is illuminated - only water at the right temperature is able to give the full aroma of the brewed coffee.
- If you have installed a filter (17) for two coffees in the portafilter, prepare two cups. The openings in the grille are located precisely below the place where the brewed coffee comes out of the portafilter.
- Put the cup containing the coffee away from the coffee maker, switch the device off and disconnect it from the mains, then remove the portafilter from the coffee maker and the filter from the portafilter, then rinse it and dry it immediately before brewing again.
CAUTION! The portafilter with the holder, the filters and the place where the portafilter is fitted are all hot. Be careful not to burn yourself. Always hold the portafilter by its holder. Remove liquid from the drip tray on a regular basis.
CAUTION! Check the amount of water in the tank on a current basis. Do not let the coffee maker run without water. Do not remove the water tank while using the coffee maker.
CAUTION! The coffee maker can be switched off automatically after 25 minutes from the moment it has been switched on.
MILK FROTHING
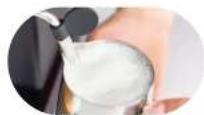
With the frothing function, you can easily froth and heat the milk used when serving coffee. Frothing takes place thanks to the hot steam ejected from the steam ejection nozzle (7). Remember to first prepare the coffee and froth the milk only after that.
CAUTION! Use cold milk (at a temperature of approximately 5^ C) with a fat content of at least 3.2% to ensure an optimal frothing effect.
CAUTION! The ejected steam is hot Be careful not to burn yourself.
- Using the steam nozzle holder (8), tilt the steam ejection nozzle to the right side of the device as shown in fig.3. This will make the insertion of the nozzle into the milk container easier.
natural_image
Black and silver industrial coffee maker with control panel and side-mounted funnel (no visible text or symbols)- Start the steam heater with the switch (6) and wait until the switch illuminates with a steady light, indicating that it is ready to feed steam.
CAUTION! When the steam heater is activated, the water heater is automatically switched off to provide more heat for the steam.
- Place an empty vessel under the nozzle (7) and gently turn the steam dosing knob (3) counterclockwise to get rid of any residual water in the dispenser. Water, steam with water droplets and then steam alone will start to come out of the nozzle. Then turn the steam dispenser knob (3) to the extreme upper position (0).
CAUTION! The steam ejection nozzle (7) is provided with a cover (9). While using the steam ejector, the cover (9) must be mounted on the nozzle. Risk of burning!
- Place the container with milk under the nozzle (7) so that the nozzle is gently submerged in the milk and then, using the knob (3), gradually increase the steam ejection while making gentle circular movements with the container with milk. Submerge the nozzle gradually in the milk.
- If, while frothing milk, the illuminated button (6) starts to flash, stop the process and wait a moment until the illuminated button begins to shine continuously again. During this time, the coffee maker heats up the steam to the correct temperature. Finish the milk frothing process by the third steam heating cycle at the latest. Do not froth the milk for a period longer than one minute at a time.
- When you have finished frothing the milk, switch off the steam heating using the button (6). When the steam function is switched off, the illumination of the button (5) lights up pulsatingly with high frequency, which indicates that the temperature is too high for the coffee to be brewed again. Wait until the coffee machine has cooled down before brewing again. You can speed up the process of cooling down the coffee machine by dropping some steam underneath a saucer. When you are done with the coffee maker, turn off the machine using the button (4).
CAUTION! When the milk frothing process is complete, place a container of water under the nozzle and rinse the nozzle and its housing in it. This will prevent stains that are difficult to remove from occurring.
PRACTICAL ADVICE WHEN BREWING COFFEE
- Brew your ESPRESSO in a hot cup. Use the cup heating area (2) for heating. You can also get your cup heated quickly by pouring the hot water obtained from the coffee maker into the cup beforehand (without filling the filter with coffee). A classic ESPRESSO coffee should be brewed from a mixture of several varieties of coffee in a cup of approximately 70 ml and should not be poured more than halfway.
- When frothing milk for CAPPUCCINO coffee, use approximately 100 ml of milk at a time. Pour the frothed milk into the previously brewed coffee. Sprinkle the whole thing lightly with a little bit of cocoa. In the classic CAPPUCCINO coffee, the base is 25 ml of ESPRESSO coffee.
- For a better visual effect you may brew your CAPPUCCINO in a transparent cup.
- Always remove residues of coffee from previous brewing from filters. Even small amounts of old coffee have a negative effect on the taste of the newly brewed coffee.
- Use cold milk (at a temperature of approximately 5^ C) with a fat content of at least 3.2% to ensure an optimal frothing effect. Froth the milk in a vessel with a small diameter so that the foam does not spread to the sides. The frothed milk can increase its volume significantly.
- Do not brew coffee directly after frothing the milk as the temperature of the coffee maker will be too high for the ideal flavour. Wait minimum 5 minutes.
CLEANING AND MAINTENANCE
CAUTION! Disconnect the device from the mains and wait until it cools down before cleaning!
CAUTION! Do not submerge the coffee maker housing in water or other liquids.
- Clean the device after each use.
- Clean the housing of the coffee maker gently with a damp cloth and then wipe it thoroughly dry.
- Wash the portafilter (18) including the holder (20), filters (16) and (17), drip tray (13), grille (12) and water tank (15) in warm water with mild detergent and then rinse them all and dry them thoroughly.
- Clean the steam ejection nozzle (7) after each use. Submerge the nozzle in water and start the frothing process. Then remove its cover (9) from the nozzle, wash it in warm water, rinse it, dry it and install it on the nozzle.
- Periodically clean and check the operation of the valve at the bottom of the water tank. Rinse the valve under running water and gently press it a few times. Also check and clean the water valve seat area in the housing of the device periodically.
-
After approximately 50 cups of coffee, clean the filter located in the portafilter mounting slot (10). Follow the instructions below to clean the filter:
-
using a flat screwdriver (the screwdriver is not part of the MKW-13M product), unscrew the screw that holds the flat circular filter located at the portafilter mounting slot and remove the spring with the orange piston located behind the filter inside the coffee maker.
- Wash the dismantled filter and piston in warm water with a detergent and then rinse and dry them, make sure the screw holes are clear.
-
The cleaned sieve and the piston with the spring should be fitted in its place and the screw should be tightened, the piston should be placed on the spring and the spring should be inserted into the hole in the coffee maker (with the piston towards the centre of the device) before installation in the coffee maker.
-
Every 4-5 weeks or so, carry out a descaling operation on the coffee maker. Periodic descaling ensures better-tasting coffee and also has an impact on the life span of the coffee maker. To descale the coffee maker, follow the instructions below:
- Fill the water tank with approx. 1 l of clean water and descaling agent for coffee makers
CAUTION! Use the commercially available descaling agents for coffee makers. Observe the recommendations of the descaling agent manufacturer. Other agents may damage the materials from which parts of the coffee maker are made and/or have the zero descaling effect.
- mount the portafilter with filter (empty, without coffee) at the place where the portafilter will be mounted and place the drip tray with grille, place the empty vessel on the tray
- connect the device to the mains, switch on the water heater using the button (4) and wait for it to heat up
- start the water pump and pour about 150 ml of water through the portafilter, wait a moment and repeat the operation 3 times, empty the container regularly.
- press the button (6) to turn on the steam heating, wait for it to heat up, place a container under the steam ejection nozzle and apply steam through the nozzle for about a minute.
- pour out the remaining unused water with descaling agent from the tank and then fill it with fresh clean water
- Repeat the process of pouring the water through the portafilter and the steam through the nozzle several times to rinse the coffee maker of any remaining mixture.
- put away the drip tray, switch off the device, unplug it from the mains and wait for it to cool down completely.
TROUBLESHOOTING
| PROBLEM CAUSE SOLUTION | ||
| Water leakage from under the device | Overfilled drip tray Empty the drip tray | |
| Defective operation of the coffee maker | Contact an authorised service centre | |
| The coffee maker is not working | No power supply Switch on the coffee maker, check the connection to the mains, if necessary contact an authorised service centre | |
| Steam does not froth milk | Steam temperature too low | Wait until the coffee maker ejects the steam |
| Milk container too big Use a narrow and high cup | ||
| Skimmed milk at too high a temperature | Use fat-free or semi-skimmed, cold milk | |
| Sour taste of the brewed coffee | Inaccurate rinsing of the coffee maker after the descaling process | Brew several times with water alone, when the filter is empty |
| Inappropriate storage of coffee | Use freshly ground coffee Keep the coffee in a leak-tight vessel. | |
TECHNICAL DATA
| Model | MKW-13M |
| Power supply 220-240V | ~ 50-60Hz |
| Power 1100W | |
| Off and standby mode available available | |
| Power consumption in standby mode - | |
| Power consumption in off mode 0,44W | |
| Power consumption in network standby mode | - |
| It automatically goes into standby mode after - | |
| Automatically goes into shutdown mode after >30min. | |
| Network standby mode, if the device has a connection function with the application | - |
| Length of mains cable 1,0m |
CE
NOTE! MPM agd S.A. reserves its right to modify the technical data!
Proper disposal of the product (waste electrical and electronic equipment)
Marking on the product indicates that after the service-life of the product expires, it should not be disposed with other type of municipal waste. Used equipment may have a negative impact on the environment and health of people due to potentially containing hazardous substances, mixtures and components. Mixing electric waste with other types of waste or disassembling those in an unprofessional manner may cause a release of substances that are hazardous to the environment and health.
Used equipment should be handed-over to a point for collection of electric waste. In order to obtain detailed information regarding the electric waste collection points, the user should contact the municipal point of electric waste collection or used equipment processing department.
natural_image
Mechanical assembly diagram showing a lever lifting a container into a motor (no text or symbols)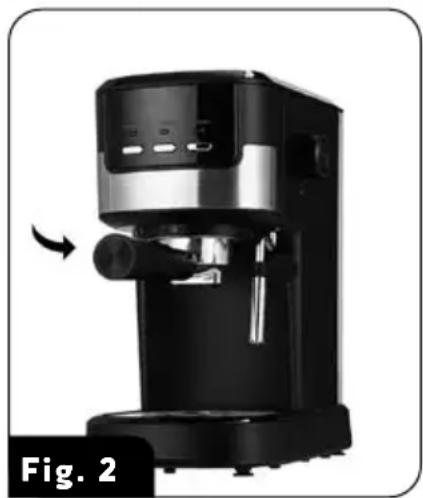
natural_image
Exterior view of a black and silver coffee maker with control panel and side-mounted funnel (no visible text or symbols)natural_image
Exterior view of a black and silver coffee maker with control panel (no visible text or symbols)natural_image
Exterior view of a black and silver coffee maker with a brush, labeled 'Dessin 2' (no other text or symbols visible)REMLISSAGE DU RÉSERVOIR D'EAU
natural_image
Exterior view of a black and silver coffee maker with control panel and side-mounted lever (no visible text or symbols)natural_image
Exterior view of a black and silver coffee maker with a lever, labeled '2. ábra' (no other text or symbols visible)natural_image
Exterior view of a black and silver coffee maker with control panel (no visible text or symbols)natural_image
Mechanical assembly diagram showing a lever lifting a container with a downward arrow (no text or symbols)
natural_image
Black and silver industrial coffee maker with control panel, labeled Fig. 2 (no visible text or symbols on device)natural_image
Black and silver industrial coffee maker with control panel and side-mounted shaft (no visible text or symbols)natural_image
Exterior view of a black and silver coffee maker with a side-mounted shaft, labeled '2 pav.' (no other text or symbols visible)PRIPILKITE VANDENS | TALPA
natural_image
Exterior view of a black and silver coffee maker with control panel and side-mounted shaft (no visible text or symbols)natural_image
Exterior view of a black and silver coffee maker with a lever mechanism (no text or symbols visible)ÜDENS TVERTNES PIEPILDİŞANA
natural_image
Exterior view of a modern black and silver coffee maker with control panel (no visible text or symbols)BESCHRIJVING VAN HET APPARAAT
natural_image
Mechanical assembly diagram showing a lever lifting a container with a downward arrow (no text or symbols)
natural_image
Black and silver industrial coffee maker with control panel, labeled Fig. 2 (no visible text or symbols on device)VULLEN VAN HET WATERRESERVOIR
natural_image
Exterior view of a black and silver coffee maker with control panel (no visible text or symbols)natural_image
Close-up of a mechanical device with a metallic bowl and lever, labeled 'rys. 1' (no text or symbols on the diagram itself)
natural_image
Exterior view of a black and silver coffee maker with a lever mechanism, labeled 'rys. 2' (no other text or symbols visible)natural_image
Exterior view of a black and silver coffee maker with control panel (no visible text or symbols)PROBLEMY ISPOSÓB ICH ROZWIAZANIA
natural_image
Mechanical assembly diagram showing a lever lifting a container with a downward arrow (no text or symbols)
natural_image
Black and silver coffee maker with a lever mechanism, labeled 'Fig. 2' (no visible text on device)natural_image
Black and silver industrial coffee maker with control panel and side-mounted lever (no visible text or symbols)natural_image
Mechanical assembly diagram showing a lever lifting a container with a downward arrow (no text or symbols)
natural_image
Black and silver industrial machine with a scroll wheel, shown in a photo frame (no visible text or symbols)natural_image
Exterior view of a black and silver coffee maker with control panel (no visible text or symbols)natural_image
Exterior view of a black and silver coffee maker with a lever mechanism, labeled 'obr. 2' (no other text or symbols visible)PRED PRVÝM POUŽITÍM
natural_image
Exterior view of a black and silver coffee maker with control panel (no visible text or symbols)natural_image
Mechanical assembly diagram showing a lever lifting a container into a motor (no text or symbols)