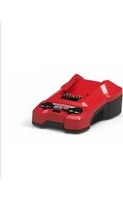
P2448C - Battery charger Powerworks - Free user manual and instructions
Find the device manual for free P2448C Powerworks in PDF.


| Product Type | Charger for lithium-ion batteries 24-48 V |
| Brand | Powerworks |
| Model | P2448C (and P2448C4 for 4A version) |
| Input Power | 230 V AC, 50/60 Hz, 2 A (P2448C) / 2.5 A (P2448C4) |
| Charge Output | 24 V DC, 2 A (P2448C) / 4 A (P2448C4) |
| Compatible Voltage | 24 V and 48 V (use with Powerworks dual voltage range) |
| Battery Type | Powerworks 24-48 V lithium-ion battery packs |
| LED Indicators | Flashing green (charging), solid green (fully charged), solid red (battery too hot), flashing red (battery defective) |
| Safety Features | Overcurrent protection, battery diagnosis, temperature detection, automatic shutdown |
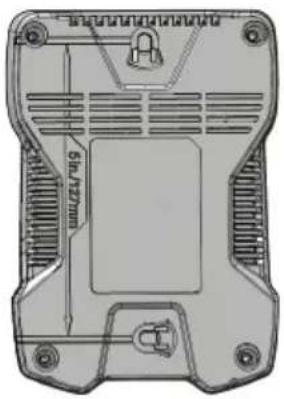
| Wall Mounting | Yes, with 2 screws (distance 127 mm) |
| Usage | Indoor only |
| Maintenance | Clean with a soft, dry cloth; vacuum the ventilation slots |
| Operating Temperature | 6 °C to 40 °C for charging |
| Weight | Approximately 0.5 kg (estimation) |
| Warranty | 3 years on charger, 2 years on batteries (private use) |
| Compliance Standards | Low Voltage Directive 2014/35/EU and EMC Directive 2014/30/EU |
Frequently Asked Questions - P2448C Powerworks
User questions about P2448C Powerworks
0 question about this device. Answer the ones you know or ask your own.
Ask a new question about this device
Download the instructions for your Battery charger in PDF format for free! Find your manual P2448C - Powerworks and take your electronic device back in hand. On this page are published all the documents necessary for the use of your device. P2448C by Powerworks.
USER MANUAL P2448C Powerworks
CE
CAM805/CAM806
Original Instructions / Übersetzung der Originalanweisungen / Traducción de las instrucciones originales / Traduzione delle istruzioni originali / Traduction des instructions d'origine / Vertaling van de originele gebruiksaanwijzing / Alkuperäisten ohjeiden käännös / Översättning av original instruktionerna / Produsentens instruksjoner / Oversættelse af de originale vejledninger / Překlad originálního návodu / Preklad originálneho návodu / Prevod originalnih navodil / Prijevod izvornih uputa / Az eredeti utasítás fordítása / Превод на оригинаналните инструкции / Orijinal Talimatların Tercümesi / Originaalkasutusjuhendi tõlge
DE The POWERWORKS dual voltage 24V/48V battery automatically adjust the required voltage - 24V or 48V * depending on the POWERWORKS dual voltage device used. * Only usable within the POWERWORKS dual voltage 24/48V series.
i HINWEIS
Ad- No. 65 (3-4) Xinggang Rd., Zhonglou Zone,
res- Changzhou 213101 China.
se:
i NOTA
Indi- No. 65 (3-4) Xinggang Rd., Zhonglou Zone,
riz- Changzhou 213101 Cina.
Z0:
10 DÉCLARATION DE CONFORMITÉ CE
Ad- No. 65 (3-4) Xinggang Rd., Zhonglou Zone, res- Changzhou 213101 Chine.
se :
1 Important Safety Instructions.....19
2 Symbols on the machine...... 19
3 Recycle....19
4 Environmentally safe battery disposal.... 19
5 Operation....20
5.1 Charge procedure.... 20
5.2 Examine the charger.... 20
5.3 Mount the charger.... 20
6 Maintenance....21
6.1 Clean the machine.... 21
6.2 Store the machine.... 21
7 Troubleshooting......21
8 Technical data.... 21
9 Warranty....21
10 EC Declaration of conformity.....22
EN
English
1 IMPORTANT SAFETY INSTRUCTIONS
- SAVE THESE INSTRUCTIONS - DANGER: TO REDUCE RISK OF FIRE OR ELECTRICAL SHOCK CAREFULLY OBEY THESE INSTRUCTIONS.
- Confirm the voltage available at each country location before using the charger.
- If the sharp of the plug does not fit the power outlet, use an attachment plug adaptor of the proper configuration for the power outlet.
- DO NOT probe the charger with conductive materials.
- DO NOT allow liquid inside the charger.
- DO NOT try to use the charger for any other purpose than what is presented in this manual.
- Unplug the charger before cleaning and when there is no battery pack in the charger.
- Do not try to connect two chargers together.
- Do not use the charger in the circumstances that the output Polarity does not match the load polarity.
- For indoor use only.
- The cover may under no circumstances be opened. If the cover is damaged, then the charger may no longer be used.
- Do not recharge non-rechargeable batteries.
WARNING
To avoid risk of fire, electrical shock, or electrocution:
- Do not use a damp cloth or detergent on the battery or battery charger.
- Always remove the battery pack before cleaning, inspecting, or performing any maintenance on the tool.
2 SYMBOLS ON THE MACHINE
You can use below symbols on the machine. Please study them and learn their definitions. Correct interpretation of these symbols let you operate the tool better and safer.
| Symbol | Explanation |
 | Class II |
 | For indoor use only |
 | Before charging, read the instructions |
| Symbol Explanation | |
| Fuse | |
3 RECYCLE
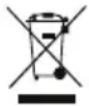 | Separate collection. You must not discard with usual household waste. If it is necessary to replace the machine, or if it is no more use to you, do not discard it with household waste. Make this machine available for separate collection. |
 | Separate collection of used machine and packaging let you recycle materials and use them again. Use of the recycled materials helps prevent environmental pollution and decreases the requirements for raw materials. |
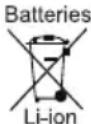 | At the end of their useful life, discard batteries with a precaution for our environment. The battery contains material that is dangerous to you and the environment. You must remove and discard these materials separately at a equipment that accepts lithium-ion batteries. |
4 ENVIRONMENTALLY SAFE BATTERY DISPOSAL

English
WARNING
If the battery pack cracks or breaks, with or without leaks, do not recharge it and do not use. Dispose of the battery and replace with a new battery pack. DO NOT ATTEMPT TO REPAIR IT! To avoid injury and risk of fire, explosion, or electric shock, and to avoid damage to the environment:
- Cover the battery's terminals with heavy-duty adhesive tape.
- DO NOT attempt to remove or destroy any of the battery pack components.
• DO NOT attempt to open the battery pack. - If a leak develops, the released electrolytes are corrosive and toxic. DO NOT get the solution in the eyes or on skin, and do not swallow it.
- DO NOT place these batteries in your regular household trash.
• DO NOT incinerate. - DO NOT place them where they will become part of any waste landfill or municipal solid waste stream.
• Take them to a certified recycling or disposal centre.
5 OPERATION
5.1 CHARGE PROCEDURE E
i NOTE
Before use charge the battery pack fully to make sure that the battery pack can get the maximum run time. This battery pack does not have a memory. You can charge it all the time.
- Connect the plug of charger (2) to an AC power outlet.
- Put the battery pack (1) into the charger (2).
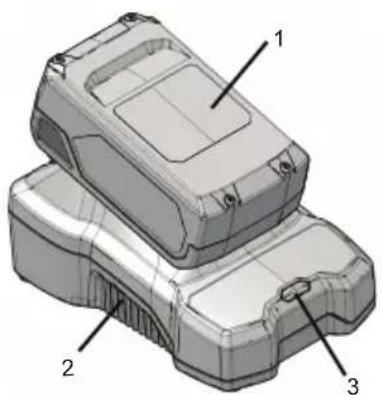
This is a diagnostic charger. The Charger LED Light (3) illuminates in a specified order to show the current battery status. They are as follows:
| CHARGING PROCEDURE (LED INDICATOR) | |
| BATTERY IS CHARGING | GREEN BLINKING |
| FULLY CHARGED | GREEN |
| BATTERY IS TOO WARM (REMOVE FOR APPROX. 30 MINUTES TO ALLOW TO COOL) | RED |
| DEFECTIVE BATTERY (REMOVE AND REPLACE WITH A NEW BATTERY) | RED BLINKING |
Incorrect Defect Note:
- Put the battery pack into the charger.
-
If the status LED blinks RED, remove the battery pack from the charger for 1 minute.
-
Put the battery pack into the charger again.
- If the status LED blinks GREEN, the battery pack is good.
- If the status LED stays blinking RED, remove the battery pack and disconnect the charger.
- Wait for 1 minute and put the battery pack into the charger again.
- If the status LED shows blinks GREEN, the battery pack is good.
- If the status LED stays blinking RED, the battery pack is defective and it is necessary to replace the battery pack.
5.2 EXAMINE THE CHARGER
If the battery pack does not charge correctly:
- Examine the current of the power outlet with different machines. Make sure that the outlet works.
- Examine that the charger contacts are not short-circuited.
- If the charger is not under usual room temperature, move the charger and battery pack to a location where the temperature is between 6 °C and 40°C.
WARNING
If you put the battery pack into the charger in warm or hot environment, the charger LED light is red. Pull out the battery pack and let the battery cool for approximately 30 minutes.
5.3 MOUNTTHECHARGER
- Get the location of the wall to attach the charger.
English
- Use 2 wood screws to attach the charger on the wood studs.
- Drill two paralleled holes 5" (127 mm) on center.
- Use wall anchors and screws to attach the charger to the drywall.
i NOTE
If you do not use the battery pack and charger for a long time, please remove the battery from the charger and pull out the AC power plug.
6 MAINTENANCE
6.1 CLEAN THE MACHINE
i NOTE
Keep the air vent free of blockage, saw dust, and wood dust. Do not spray, wash, or put the air flow in water.
- Clear the unwanted material out of the air vent with a vacuum.
- Clean housing and the plastic components with a dry and soft cloth.
i IMPORTANT
Do not use strong solvents or detergents on the plastic housing or components.
6.2 STORE THE MACHINE
- Remove the battery pack before you store the charger or disconnect the charger.
7 TROUBLESHOOTINGING
| PROBLEM POSSIBLE CAUSE | SOLUTION | |
| Charger doesn't work. Charger shows defective mode. (LED flashes Red) | Battery pack or charger is defective or there is a bad connection between the battery pack and charger. | Try to remove and reinsert the battery pack in the charger. |
| Try charging a different battery pack. | ||
| Unplug the charger and wait until the red LED goes out, then reconnect the plug to the power supply. | ||
| Charger doesn't work. Charger shows evaluation mode (LED indicates Red solid ON). | Battery pack is either too hot, or too cold. | Allow the battery pack to reach normal temperature. Charging will begin when the battery pack returns to 3°C-47°C (37°F-117°F). |
8 TECHNICAL DATA
| Model P2448C | |
| Voltage 24 - 48 V | |
| Input 230 V AC 50-60 Hz 2 A | |
| Output 4V DC 2A | |
| Model P2448C4 | |
| Voltage 24 - 48 V | |
| Input 230 V AC 50-60 Hz 2,5 A | |
| Output 24V DC 4A | |
9 WARRANTY
(The full warranty terms and conditions can be found on webpage)
The warranty is 3 years on the product, and 2 years on batteries (consumer/private usage) from the date of purchase. This warranty covers manufacturing faults. A faulty product under warranty might be either repaired or replaced. A unit that has been misused or used in other ways then described in the owner's manual might be rejected for warranty. Normal wear, and wear parts are not considered as warranty. The original
manufacturer warranty is not affected by any additional warranty offered by a dealer or retailer.
A faulty product must be returned to the point of purchase in order to claim for warranty, together with the proof of purchase (receipt).
10 EC DECLARATION OF CONFORMITY
Name and address of the manufacturer:
Nam Changzhou Globe Co., Ltd. e:
Add- No. 65 (3-4) Xinggang Rd., Zhonglou Zone, ress: Changzhou 213101 China.
Name and address of the person authorised to compile the technical file:
Nam Peter Söderström e:
Add- Propellergatan 1, 211 15 Malmö, Sweden ress:
Herewith we declare that the product
Serial number: See product rating label
Year of Construction: See product rating label
- is in conformit with the relevant provisions of the Low Voltage Directive 2014/35/EU
- is in conformit with the provisions of the following other EMC directive (2014/30/EU).
And furthermore, we declare that the following (parts/clauses of) European harmonised standards have been used
EN 60335-2-29, EN 60335-1, EN 62233, EN 55014-1, EN 55014-2, EN 61000-3-2, EN 61000-3-3
Place, date: 10.10.2018
Signature: Quality Director
Ted 24
Nederlands
i OPMERKING
7 PROBLEM/EXPLOSSING
Ad- No. 65 (3-4) Xinggang Rd., Zhonglou Zone,
res: Changzhou 213101 China.
i NOTA
Di- No. 65 (3-4) Xinggang Rd., Zhonglou Zone,
rec- Changzhou 213101 China.
ción:
5.2 ZKOUŠKA NABÍJEČKY
5.3 MONTÁŽ NABÍJEČKY
i POZNÁMKA
1 DÔLEŽITÉ BEZPEČNOSTNÉ POKYNY
i POZNÁMKA
Ak akumulátor a nabíjačku dlhšiu dobu nepoužívate, vyberte akumulátor z nabíjačky a vytiahnite siet'ovú zástrčku.
6 ÚDRŽBAŽBA
6.1 ČISTENE IETROJA
i POZNÁMKA
Udržujte vetracie otvory bez upchania, prachu z rezania a prachu z dreva. Nesprejujte, neumývajte ani nedávajte pod vodu.
i OPOMBA
i MEGJEGYZÉS
Cím: No. 65 (3-4) Xinggang Rd., Zhonglou Zone, Changzhou 213101 China.
i NAPOMENA
Ako baterijski modul i punjač dugo nećete upotrebljavati, izvadite bateriju iz punjača i iskopčajte utikač iz mrežne utičnice.
6 ODRŽAVANJE
6.1 OČISTIETETROJOJ
i NAPOMENA
Održavajte otvor za hlađenje treba biti slobodan, bez piljevine i drvene prašine. Nemojte prskati, prati ili stavljati otvor za hlađenje u vodu.
- Usisivačem za prašinu odstranite neželjeni materijal od otvora za usis zraka.
- Očistite kućište i plastične dijelove suhom i mekom krpom.
HR
i VAŽNO
Nemojte upotrebljavati jaka otapala ili deterdžente na plastičnim kućištima ili dijelovima.
6.2 SKLADISTETNESTROJA
- Izvadite baterijski modul prije spremanja ili iskapčanja punjača.
7 OTKLANJANJE PROBLEMA
| PROBLEM MOG | JÚDUZRÓK.RJEŠE | ENJEŠENJE |
| Punjač ne radi. Punjač pokazuje neispravan način rada. (LED trepće crveno) | Baterijski modul, adapter ili punjač su neispravni ili je spoj između baterijskog modula i punjača loš. | Uklonite i zatim vratite baterijski modul u punjač. |
| Pokušajte puniti drugi baterijski modul. | ||
| Odspojite punjač od električnog napajanja i priče-kajte da se crve-ni LED svjetlosni indikator isključi, a zatim ponovno utaknite utikač u električnu utični-cu. | ||
| Punjač ne radi. Punjač prikazuje režim procjene (LED stalno svijetli crveno). | Baterijski modul je previše vruć ili previše hladan. | Pričekajte da baterijski modul dostigne normal-nu temperaturu. Punjenje će za-početi kada se temperatura baterijskog modula vrati na 3°C-47°C (37°F-117°F). |
8 TEHNIČKI PODACIACI
| Model P2448C | |
| Napon 24 - 48 V | |
| Ulaz 230 V AC 50-60 Hz 2 A | |
| Izlaz 24V DC 2A | |
| Model P2448C4 | |
| Napon 24 - 48 V | |
| Ulaz 230 V AC 50-60 Hz 2,5 A | |
| Izlaz 24V DC 4A | |
9 JAMSTVOTVO
Ad- No. 65 (3-4) Xinggang Rd., Zhonglou Zone,
resa: Changzhou 213101 Kina.
Naziv i adresa osobe ovlaštene za kompiliranje tehničke datoteke:
Na- Peter Söderström
ziv:
Ad- Propellergatan 1, 211 15 Malmö, Švedska
resa:
i БЕЛЕЖКА
Адр No. 65 (3-4) Xinggang Rd., Zhonglou Zone, ec: Changzhou 213101 China.
i NOT
Ad- No. 65 (3-4) Xinggang Rd., Zhonglou Zone, res: Changzhou 213101 Qin.
i BEMAERK
6.2 OPBEVÄRING AF MASKINENEN
i MERK
Hvis du ikke skal bruke batteripakken og laderen over lengre tid, tar du batteriet ut av laderen og trekker ut strømledningen.
6 VEDLIKEHOLD
6.1 RENGJ∅RE MASKINEN
i MERK
Hold luftventilen fri for blokkeringer, sagflis og treflis. Ikke spray, vask eller senk luftstrømmen ned i vann.
Norsk
Ad- No. 65 (3-4) Xinggang Rd., Zhonglou Zone, res- Changzhou 213101, Kina. se:
Svenska
i NOTERA
Ad- No. 65 (3-4) Xinggang Rd., Zhonglou Zone, press: Changzhou 213101, Kina.
HUOMAA
1 OLULISED OHUTUSJUHISED
i MÄRKUS
8 TEHNEHSED AND MEDIED
| Mudel P2448C | |
| Pinge 24 - 48 V |
| Sisend 230 V AC | 50-60 Hz 2 A |
| Väljund 24V DC 2A | |
| Mudel P2448C4 | |
| Pinge 24 - 48 V | |
| Sisend 230 V AC | 50-60 Hz 2,5 A |
| Väljund 24V DC 4A | |
9 GARANTINTII
Aad- No. 65 (3-4) Xinggang Rd., Zhonglou Zone, ress: Changzhou 213101, Hiina.
- CAM805/CAM806
- I HINWEIS
- I NOTA
- 10 DÉCLARATION DE CONFORMITÉ CE
- EN
- ENGLISH
- 1 IMPORTANT SAFETY INSTRUCTIONS
- WARNING
- 2 SYMBOLS ON THE MACHINE
- 3 RECYCLE
- 4 ENVIRONMENTALLY SAFE BATTERY DISPOSAL
- 5 OPERATION
- 5.1 CHARGE PROCEDURE E
- I NOTE
- 5.2 EXAMINE THE CHARGER
- 5.3 MOUNTTHECHARGER
- 6 MAINTENANCE
- 6.1 CLEAN THE MACHINE
- I IMPORTANT
- 6.2 STORE THE MACHINE
- 7 TROUBLESHOOTINGING
- 8 TECHNICAL DATA
- 9 WARRANTY
- 10 EC DECLARATION OF CONFORMITY
- NEDERLANDS
- I OPMERKING
- 7 PROBLEM/EXPLOSSING
- 5.2 ZKOUŠKA NABÍJEČKY
- 5.3 MONTÁŽ NABÍJEČKY
- I POZNÁMKA
- 1 DÔLEŽITÉ BEZPEČNOSTNÉ POKYNY
- 6 ÚDRŽBAŽBA
- 6.1 ČISTENE IETROJA
- I OPOMBA
- I MEGJEGYZÉS
- I NAPOMENA
- 6 ODRŽAVANJE
- 6.1 OČISTIETETROJOJ
- HR
- I VAŽNO
- 6.2 SKLADISTETNESTROJA
- 9 JAMSTVOTVO
- I БЕЛЕЖКА
- I NOT
- I BEMAERK
- 6.2 OPBEVÄRING AF MASKINENEN
- I MERK
- 6 VEDLIKEHOLD
- 6.1 RENGJ∅RE MASKINEN
- NORSK
- SVENSKA
- I NOTERA
- HUOMAA
- 1 OLULISED OHUTUSJUHISED
- I MÄRKUS
- 8 TEHNEHSED AND MEDIED
- 9 GARANTINTII
Brand : Powerworks
Model : P2448C
Category : Battery charger