
185861 - Weather Station HAMA - Free user manual and instructions
Find the device manual for free 185861 HAMA in PDF.

| Product type | Wireless weather station with color display |
| Brand / Model | Hama / 185861 |
| Base station power supply | 2 AA batteries (3 V) or 5 V DC / 0.6 A AC adapter included |
| Outdoor sensor power supply | 2 AA batteries (3 V) |
| Indoor temperature measurement range | 0 °C to +50 °C (32 °F to 122 °F) |
| Outdoor temperature measurement range | -20 °C to +60 °C (-69 °F to +140 °F) |
| Measurement accuracy | 0.1 °C for temperature, 1% for humidity |
| Radio range (without obstacles) | Up to 50 m |
| Radio frequency | 433 MHz |
| Radio-controlled clock | DCF (Central Europe), manual setting possible |
| Main functions | Indoor/outdoor temperature and humidity, weather forecast (12-24 h), moon phases, dual alarm, snooze function, weather trends, comfort indicator, max/min values, outdoor temperature alarm |
| Max. number of outdoor sensors | 3 (additional compatible sensors optional) |
| Display | Color, adjustable backlight (3 levels on mains power, timed on batteries) |
| Alarm | Dual alarm with snooze function (5 minutes) |
| Mounting | On desk or wall (recesses on the back) |
| Maintenance and cleaning | Disconnect before cleaning, slightly damp lint-free cloth, no detergents |
| Safety instructions | Domestic use, avoid moisture, interference fields, do not open, observe battery polarity, keep out of reach of children |
| Spare parts and repairability | Standard batteries (AA), AC adapter included. Repair by qualified technician only |
| Package contents | Base station, outdoor sensor, 2 AA batteries, AC adapter, user manual |
| Weight / Dimensions | Not specified (typical: base station ~200 g, sensor ~100 g) |
Frequently Asked Questions - 185861 HAMA
User questions about 185861 HAMA
0 question about this device. Answer the ones you know or ask your own.
Ask a new question about this device
Download the instructions for your Weather Station in PDF format for free! Find your manual 185861 - HAMA and take your electronic device back in hand. On this page are published all the documents necessary for the use of your device. 185861 by HAMA.
USER MANUAL 185861 HAMA
OperatingInstructions
Bedienungsanleitung
Moded'emploi
Instruccionesdeuso
Gebruiksaanwijzing
Istruzioniperl'uso
Instrukcjaobsługi
Használatiútmutató
Manualdeutilizare
Návodkpoužití
Návodnapoužitie
Manualdeinstruções
Bruksanvisning
natural_image
Technical line drawing of a cylindrical device with internal channels and a labeled dimension (30), no readable text or symbols beyond the label.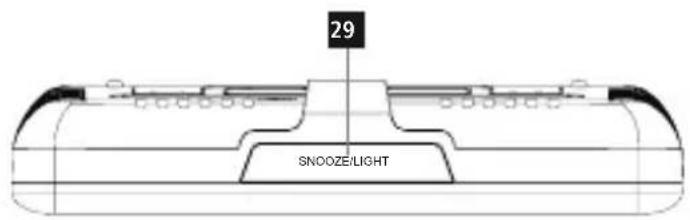

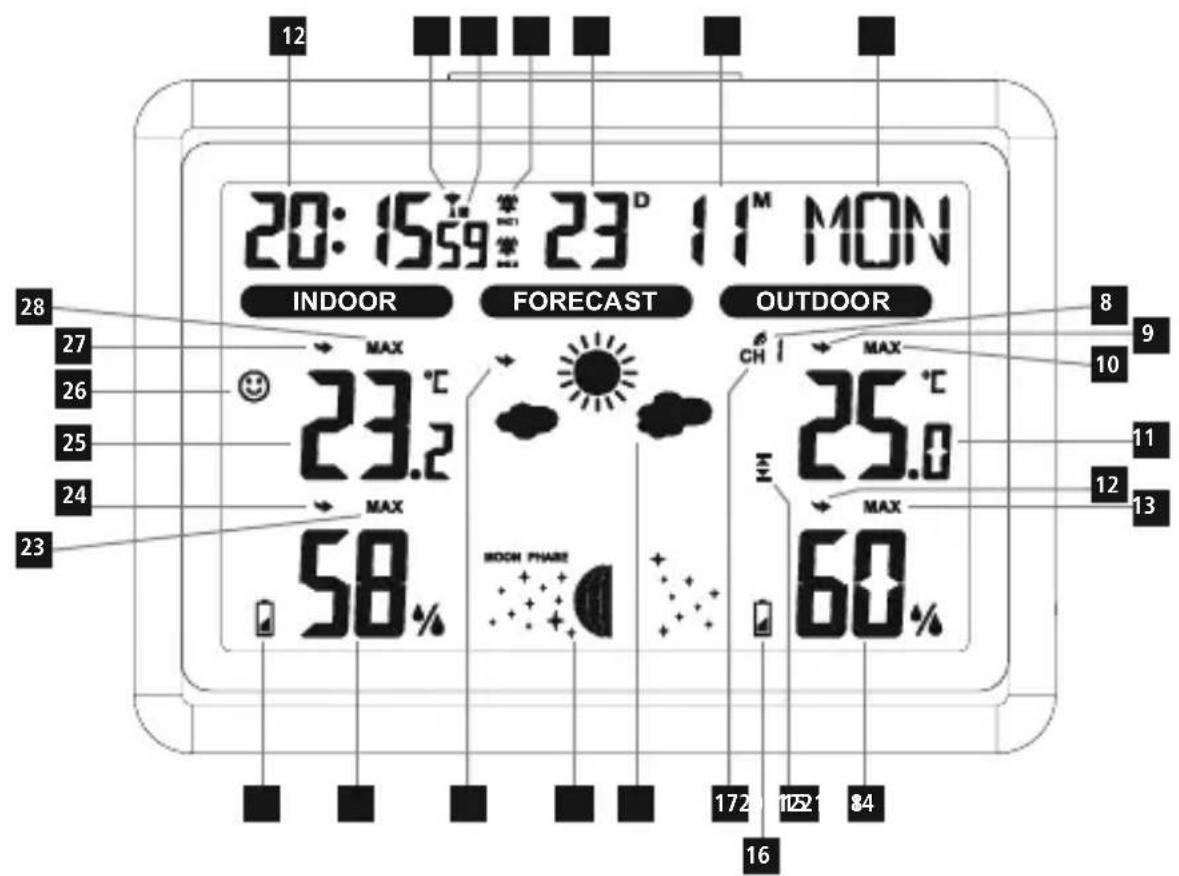
1. Controlsanddisplays
Basestation
1.Time
-
Measuringstationradiosignal
-
Outdoor temperature trend
10.Max./min.outdoortemperature
-
Outdoor temperature
-
Outdoorambienthumidity trend
13.Max./min.outdoorambienthumidity
-
Outdoorambienthumidity
-
Outdoor temperature warnings symbol
-
Measuringstationbatterywarningindicator
-
Channelindicator(CH1, CH2, CH3)
-
Weatherforecastsymbol
19.Phaseofthemoon
20.Weathertrend
21.Indoorambienthumidity
- Basestation battery warning indicator
23.Max./min.indoorambienthumidity
24.Indoorambienthumiditytrend
25.Roomtemperature
26.Comfortdisplay
- Roomtemperaturetrend
28.Max./min.indoortemperature
29.Snooze/LightSnoozefunction/backlight
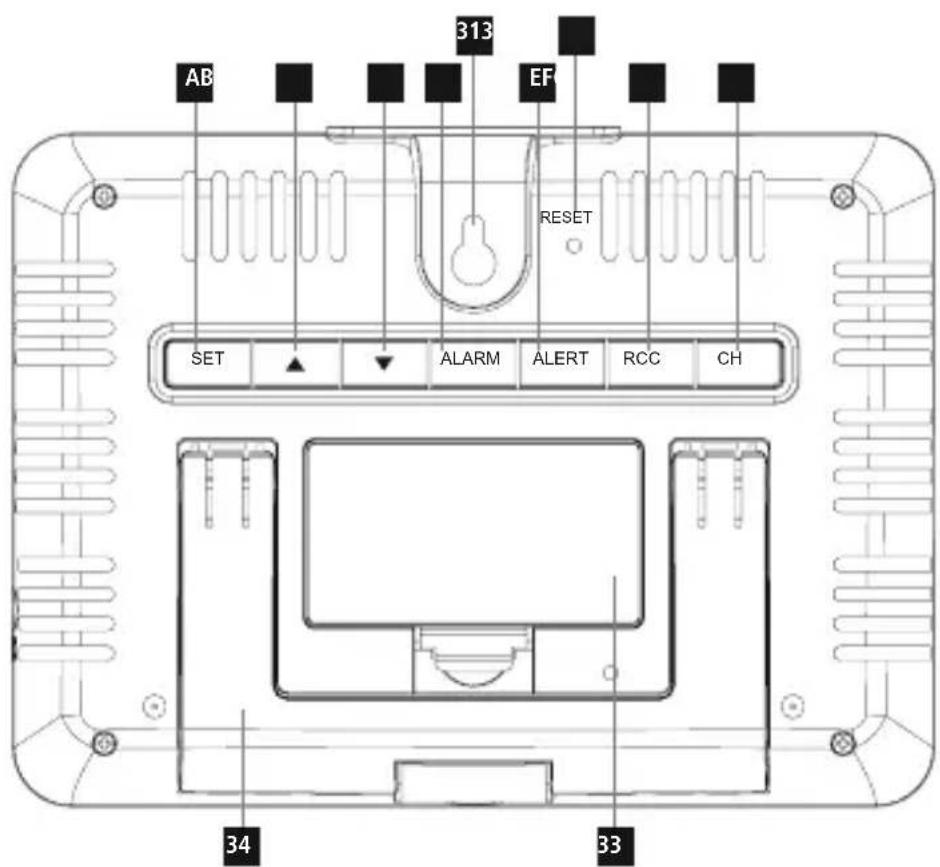
- Powersupplyunitconnectionsocket
31.Cut-outforwallmounting
- Resetbutton
33.Batterycompartment
34.Fold-outbase
Functionbuttons
A. SETbutton:Settings(year, month/day, month, day, timezone, hours, minutes, 12/24hr, language, DCFsignal), alarmmode, confirmationofthesettingvalue
B. ▲button: Togglebetweencurrent, maxandmintemperatures /ambienthumidity, increasethesettingvalue
C. ▼button:C°/F°,reductionofthesettingvalue
D. ALARMbutton:Activate/deactivatethealarm
E.ALERTbutton:Settingoftheminimumandmaximumvalues forthetemperaturealarm
F.RCCbutton: DCFsignalsearch
G.CHbutton:Channelselection
Measuringstation
-
Display
-
Transmission indicator light
-
Cut-outforwallmounting
38.Batterycompartment
- Channel switch (CH1, CH2, CH3)
2. Explanationofwarningsymbolsandnotes
Riskofelectricshock

This symbol indicates a risk of electric shock from touching uninsulated product parts that may carry hazardous voltage.
Warning

This symbolised to indicate safety instructions sort to draw your attention to specific hazards and risks.
Note

This symbol is used to indicate additional information or important notes.
3.Packagecontents
- Weatherstation(basestationforindoors/measuringstation foroutdoors)
• 2xAAMignonbatteries
• 1powersupplyunit
• Theseoperatinginstructions
4. Safetyinstructions
• The product is intended for private, non-commercial use only.
- Donotoperatetheproductoutsidethepowerlimitsgiveninthe specifications.
- Donotusetheproductinadampenvironmentandavoidsplashing water.
- Donotusetheproductintheimmediatevicinityofheaters,other heatsourcesorindirectsunlight.
- Donotusetheproductinareasinwhichelectronicproductsare notpermitted.
- Donotplacetheproductnearinterferencefields, metalframes, computers, TVs, etc. Electronicdevicesandwindowframescan negativelyaffecttheproduct'sfunctionality.
- Donotdroptheproductanddonotexposeittoanymajorshocks.
- Keep the packaging material out of there each of children rendueto the risk of suffocation.
- Disposeofpackagingmaterialimmediatelyinaccordancewiththe locallyapplicableregulations.
- Donotmodifytheproductinanyway.Doingsovoidsthewarranty.
- Usetheproductonlyfortheintendedpurpose.
- Aswithallelectricalproducts, thisdevicesshouldbekeptoutofthe reachofchildren.
- Onlyusethearticleundermoderateclimaticconditions.
• Theproductisintendedonlyforuseinsidebuildings.
- Routeallcablessothatthereisnoriskoftripping.
- Donotbendorcrushthecable.
- Alwayspulldirectlyontheplugwhendisconnectingthecable, neveronthecableitself.
Warning-Batteries

- Wheninsertingbatteries, notethecorrectpolarity(+and-markings)andinsertthebatteriesaccordingly. Failuretodoso couldresultinthebatteriesleakingorexploding.
- Onlyusebatteriesthatmatchthespecifiedtype. Keepthe instructionsforthecorrectchoiceofbatteriesincludedwith theoperatinginstructionsofdevicessafeforfuturereference.
- Before you insert the batteries, clean the battery contacts and the polarity contacts.
- Donotallowchildrentochangebatterieswithoutsupervision.
- Replaceallthebatteriesinasetatthesametime.
- Donotmixoldandnewbatteries,orbatteriesofdifferent typesorfromdifferentmanufacturers.
- Removethebatteriesfromproductsthatarenotbeingused foranextendedperiod(unlessthesarebeingkeptreadyfor anemergency).
- Donotshort-circuitbatteries.
- Donotchargebatteries.
- Donotburnbatteriesorheatthemup.
- Neveropen,damageorswallowbatteriesorallowthemto entertheenvironment.Theycancontaintoxic,environmentally harmfulheavymetals.
- Removespentbatteriesfromtheproductanddisposeofthem withoutdelay.
Warning-Batteries

- Avoidstoring, charging and using inextremetemperatures and atextremely low atmospheric pressures (such as at high altitudes).
- Ensure that batteries with damaged housings do not come into contact with water.
- Keepbatteriesoutofthereachofchildren.

Riskofelectricshock

- Donotopenthedeviceorcontinuetooperateitifitbecomes damaged.
- Donotusetheproductifthe ACadapter, theadaptercableorthemainscableare damaged.
- Donotattempttoserviceorrepairtheproductyourself.Leave anyandallserviceworktoqualifiedexperts.
5.Setup

Warning
- Onlyoperatetheproductfromanapprovedsocketthatis connectedtothepublicpowersupply. Thesocketmustbe installedclosetotheproductandmustbeeasilyaccessible.
- Disconnect the product from the powersupply using the On/Offswitch—if this is not available, unplug the power cord from the socket.
- Ifusingamulti-socketpowerstrip, makesurethatthetotal powerconsumptionofallconnecteddevicesdoesnotexceed thesocketstrip'smaximumthroughputrating.
- If you will not be using the product for a prolonged period, disconnect it from mains power.
5.1 Insertingbatteries/powersupply
Measuringstation
- Removetheprotectivefilmfromthedisplay.
- Openthebatterycompartment(38)andremovethecontact breaker.
- Thenclosethebatterycompartmentcover.
Note

Pleaseremember, duringcommissioning, toalwaysinsertthe batteries intothemeasuringstationfirst.
Basestation
- Removetheprotectivefilmfromthedisplay.
- Thenconnecttheenclosedpowersupplyunittothepowersupply unitconnectionsocketontheside(30).
- Connecttheweatherstation'spowersupplyunittoacorrectly installedmainssocket.
• Alternatively, you can also insert 2x AABatteries. However the displays switch chest on illuminated standby mode after 10 seconds with battery operation.
5.2Changingbatteries
Measuringstation
- Ifthebatterywarningsymbol
ambienthumidity, replacethebatteriesinthemeasuringstation withtwonewbatteries. - Openthebatterycompartment(38), remove and dispose of the spent batteries and insert twonew A Abatteries, observing the correct polarity. Then closethe battery compartment cover.

Basestation
- Ifthebatterywarningsymbol
ambienthumidity, replacethebatteriesinthemeasuringstation withtwonewbatteries. - Openthebatterycompartment(33), remove and dispose of the spent batteries and insert twonew A Abatteries, observing the correct polarity. Then closethe battery compartment cover(33).

6. Installation
Note-Installation

- Were recommend initially positioning the basestation and measuring station at the preferred setup locations without installing them and carrying out all these settings as described in 6. Operation-first.
- Donotinstallthestation(s)untilthesettingsarecorrectandtheradioconnectionisstable.
Note

• Therangeoftheradiotransmissionbetweenthemeasuring stationandthebasestationisupto50minunobstructed areas.
- Beforeinstalling, makesurethattheradiotransmissionisnot influencedbyinterferingsignalsorobstaclessuchasbuildings, trees, vehicles, high-voltagepowerlines, etc.
- Before final installation, make sure that there is sufficient reception between the desired installation locations.
- Wheninstallingthemeasuringstation,takecaretoensure thisispositionedsothatitisprotectedfromdirectsunlight andrain.
• The international standard height for measuring air temperature is 1.25 m (4 ft) above ground.
Warning

- Buyspecialorsuitableinstallationmaterialfromaspecialist dealerforwall-mounting.
- Ensure that you donot install any faulty ordamaged parts.
- Neverapplyforceduringassembly. Thesecandamagethe product.
- Beforemounting, check that the wally you have chosen is suitable for the weight to be mounted. Also makes sure that there are no electric, water, gas or other lines running through the wall at themountingsite.
- Donotmounttheproductabovelocationswherepersons mightsitorstand.
6.1 Basestation
- Placethebasestationonaflatsurfaceusingthestand(34).
• Alternatively, you can mount the basestation on a wall using the recess(31)ontheback.
6.2 Measuringstation
- Youcanalsosetupthemeasuringstationonanevensurface outdoors.
- Were recommend mounting themeasuring station securely and firmly onto an outdoor wall.
- Securethedowel, screw, nail, etc. in the wall provided.
- Hangthemeasuringstationontoitusingthecut-out(37) provided.
7.Operation
7.1 Connectiontothemeasuringstation
• Afterconnectiontothemainssupply, thebasestation automaticallysearchesforaconnectiontothemeasuringstation andcarriesouttheinitialsetuproutine.
Note

- Initialsetuptakesaround3seconds.
- TheradiosymbolMeasuringstation(8)flasheswhensearching foraconNECTION.
- Avoidanyoperationofthebuttonsduringthistime! Otherwise,errorsandinaccuraciesmayoccurinthevalues andtheirtransmission.
- Theprocessisfinishedassoonastheindoorandoutdoor measurementdataaredisplayed.
Ifnosignalisreceivedfromthemeasuringstationonarepeated basis,pressandholdtheCHbutton(G)foratleast3secondsto startthemanualsearchforthesignal.
Note-temperaturedisplay

"HH.H" is shown in the display (11) when the outdoor temperature is above 50°C.
Note-faultytransmissionofthemeasured values

- In some cases, interference caused by a WiFinetwork, computer, TV, etc.,forexample,maycausethetransmission of measured values between the base and measuring station to fail.
- If this happens, resynchronis thestations by briefly removing the batteries from both stations and reinserting them.
- Ifthemeasuredvaluesarenottransmittedagain,replace the batterieswithnewones.
- If necessary, choose anewlocation for the base station to avoid the possible interferences signals in the future.
- Themeasuringstationandbasestationmaybeplacedmax. 50mapartfromeachother.
- Stayatleast2.5mawayfrominterference
7.2 Channelselection/Additionaloutdoorsensors
Note

-
Youcaninstalltwofurtheroutdoorsensorsinadditiontothe outdoorsensorsupplied.Whendoingso,ensurethesame channelsettingonthebasestationandeachoutdoorsensor.
• Suitableoutdoorsensorscanbefundatwww.hama.com -
Channel1ispre-selected.
-
PresstheCHbutton(G)repeatedlytosetthesamechannelason theoutdoorsensorinquestion.Channel1,2or3isdisplayed.
-
Ifthesynbllappears, the weatherstation automatically changesthechanneldisplayevery5seconds. As soon as the required channel is displayed, presstheCHbutton(G)again tostoreit.
- Tochangethechannelonthemeasuringstation, openthe batterycompartmentandsetthechannelswitch(39)tothesame channelasthebasestation.
7.3 Automatic setting according to the DCF signal
- Aftersuccessfultransmissionoftheindoorandoutdoor temperaturesbetweenthemeasuringandbasestations,the weatherstation(afteraround3minutes)automaticallystarts searchingforaDCFsignal.Duringthesearchprocess,theDCF radiosignal(2)flashesandthedisplaygoesdark.
- Whentheradiosignalisreceived, the date and time areset automatically. This cantakea further 10 minutes.
Note
LanguageandtimezonearepresettoGermany.

Note-settingthetime
- IfnoDCFradiosignalisreceivedwithinthefirstfewminutes oftheinitialsetupprocedure,thesearchisterminated.The radiosymboldisappears.
- Intheeventofreceptionproblems, were recommend leaving theclockstandingovernightsincetheinterferencesignalsare generallyfewerinnumberatthistime.
- Meanwhile, you can carry out a manual search for the DCF radiosignal at different location or set the date and time manually.
• The clock automatically continues to search for the DCF radio signal daily (01:00, 02:00, 03:00, 04:00 and 05:00). Once the signal is received successfully, them manually sett time and date are overwritten
If the weather station does not receive the DCF signal, press the RCC button (F) for at least 3 second start the sign a search again. Theradiosymbol flashes during these search and the display goes dark. If a signal is still not received after that, the time and date must be set manually.
7.4 Manual setting of the time, date and units
- PressandholdtheSETbutton(A)foraround3secondstocarry outthefollowingsettingsinsequence:
• Year
- Display"Month/Day"(M/D)or"Day/Month"(D/M)
• Month(M)
• Day(D)
• Timezone(0-12, default"0" for CET)
•Hours
• Minutes
• 12/24-hourformat
- Language(GER=German, FRE=French, ENG=English, RUS=Russian, ITA=Italian, DAN=Danish, DUT=Dutch, SPA=Spanish)
-
SwitchingtheDCFsignalon/off(ON/OFF)
-
To select the individual values, press the arrow keys ▲ (B) or ▼ (C). Confirm these selection by pressing the SET button (A).
- PresstheSETbutton(A)toadoptandskipthedisplayedvalue. Ifnoentriesaremadefor20seconds, theclockautomatically exitssettingsmode.
Note-timezone

• The DCF signal can be received in many places, however it does not always correspond to the CET applicable in Germany. You should therefore represent to take into account the time difference in countries with different timezone.
- Moscow,forexample,is3hoursaheadofGermany.Setthe timetothetimezone+3.Theclockwillthenautomaticallyset itself3hoursaheadofthetimereceivedfromtheDCFsignal orthetimesetmanually.
7.5 Maximum and minimum temperature and humidity values
- Thebasestationautomaticallystoresthemaximumandminimum temperaturevaluesintheoutdoorandindoorareas.
- Repeatedlypressthe ▲button(B)toswitchfromthecurrent temperaturetothemaximumtemperature(MAX)andthentothe minimumtemperature(MIN).
- Themaximumandminimumtemperaturesaredisplayedfor5 seconds.
7.6 Highest and lowest outdoor temperature values alarm
- PresstheALERTbutton(E)toactivatethealarmmode. The alarmsymbol(15)appearsonthedisplay.
- NowpressandholdtheALERTbutton(E)untiltheoutdoor temperature(11)startsflashing.
- Thetemperaturedisplayflashesforaround20seconds.Pressing thearrowkeys(B)or(C)allowsyoutofirstsetthemaximum andthentheminimumvalue.Atthemaximumvaluetheupper arrowinthealarmsymbol(15)flashes,atthemiminumvalue thelowerarrow.
- Toscrollrapidlythroughthevalues, holdthearrowkeydown untilthedesiredvalueisreached.
- BypassingtheALERTbutton(E)again,youcanselectthe respectivevalue.
- Whenamaximumorminimumvalueisreached, the outdoor temperaturedisplayflashesanda5-secondalarmsoundsevery minute.
- Toturnoffthealarm,youmustdeactivatethealarmmodeagain. Todothis,presstheALERTbutton(E)once,thealarmsymbol (15)isnownolongerdisplayed.
7.7Weatherforecast
- Usingchangesinatmosphericairpressureandthestoreddata, thebasestationcanmakepredictionsregardingtheweather forecastforthenext12to24hours.
Note-weatherforecast

During the first few hours of operation, the weather forecast is not possible due to missing data that is only stored during operation.
- The weather stations show the weather development of then next 12 to 24 hours by means of the following weathers symbols.
| SymbolWeather | |
 | Sunny |
 | Partlycloudy |
 | Overcast |
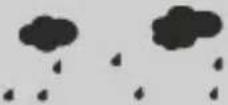 | Rainy |
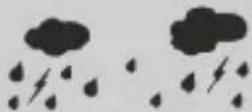 | Heavyrain |
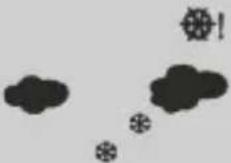 | Snowfall |
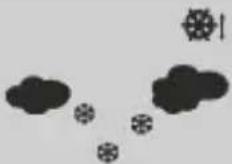 | Heavysnowfall |
7.8 Temperature and ambient humidity trend
Note
In the first hour of operation, the trend display is not possible due to missing data that is only stored during operation.

The weather station gives at trend for the outdoor temperature/humidity and indoor temperature/humidity of how the values will probably develop over them next few hours.
| DisplayTrend | ||
 | Rising | |
 | Constant | |
 | Falling | |
7.9Comfortdisplay
The basestation display the following comfort ranges based on the ratio of room temperature and humidity:
| Display | Temperature range | Ambienthumidity range | Comfort range |
| [ST2V] | -20°C-+50°C<40% | Dry Ambientair toodry | |
 | 20°C-28°C40%-70% | Comfort Ideal temperatureand ambienthumidity | |
| [WZDH] | -20°C-+50°C>70% | Wet Humiditytoo high |
7.10 Phasesofthemoon
Thebasestationshowsyouthecurrentphaseofthemoon(19)by meansofthefollowingsymbols:
| DisplayPhaseofthemoon | |
 | Newmoon |
 | Halfmoonwaxing |
 | Halfmoon |
 | Fullmoonwaxing |
DisplayPhaseofthemoon
 | Fullmoon |
  | Fullmoonwaning |
 | Halfmoon |
  | Halfmoonwaning |
7.11 Alarmclock Settingthealarm
Youcansettwodifferentialalarmtimes;"A1"foralarmtime1 and "A2"foralarmtime2appearnexttothetimeinthedisplay.
- Briefly press the SET button (A) to switch to "A1" alarm mode.
- PressandholdtheSETbutton(A)foraround3seconds.
• Thehourdisplaystartstoflash. - Press the ▲ (B) or ▼ (C) arrow key to select the hour of the alarmtime and confirm theselection bypassing the SET button(A).
- Theminutedisplaystartstoflash.Repeattheprocedureforthe minutesofthealarmtime.
- Confirm the selection by pressing the SET button (A).
PresstheSETbuttontwiceinquicksuccessiontoenterthe"A2" alarmmode.
Repeat the abovestepstosetthealarmtime.
Deactivating/activatingthealarm
PresstheALARMbutton(D)repeatedlytoactivateordeactivate thealarm.Thealarmclockisactivated/deactivatedinthefollowing order: Alarm 1 active → Alarm 2 active → Alarm 1 + 2 active → Alarm1+2 deactivated.
Anactivealarmclockisshowninthedisplaywiththealarm symbol(4).
Note-Snoozefunction

- Duringthealarmsignal, press the SNOOZE/LIGHTbutton(29) to activate the snoozefunction. The alarmsignal is interrupted for 5 minutes and then triggered again.
- Thesnoozefunctioncanbeterminedbyanybuttonexcept theSNOOZE/LIGHTbutton.
8. Backlight
- Inpowerunitmode, press the Snooze / Lightbutton (29) repeatedly to toggle between the 3 lighting stages (bright, dimmed, off).
- Inbatterymode, presstheSnooze/Lightbutton(29) to illuminatethedisplayforaround10seconds.
9. Careandmaintenance

Note
Disconnect the device from themains before cleaning and during prolonged period so of non-use.
- Onlycleanthisproductusingalint-free,slightlydampclothand donotuseanyharshcleaners.
- Ensure that now waterisable to enter the product.
10.Warrantydisclaimer
HamaGmbH&CoKGassumesnoliabilityandprovidesno warrantyfordamageresultingfromimproperinstallation/mounting, improperuseoftheproductorfromfailuretoobservetheoperating instructionsand/orsafetynotes.
11.Technicaldata
SpecificationsaccordingtoRegulation(EU)
2019/1782

| Brandname,commercialregister number,address | Hama,HRA12159,DresdnerStr.9,86653Monheim |
| ModelidentifierHX075-0500600-AG-001 | |
| Inputvoltage100-240V | |
| InputACfrequency50/60Hz | |
| Outputvoltage/outputcurrent/outputpowertotal | 5.0VDC0.6A3.0W |
| Averageefficiencyduring operation | 72.8% |
| Efficiencyatlowload(10%)59.1% | |
| Powerconsumptionatzeroload0.06W |

| Basestation | Measuring station | |
| Power supply | 3.0V2xAAbatteryPowersupplyunit:IN:100-240V~50/60HzOUT:5.0V 0.6A | 3.0V2xAAbattery |
| Measuring range Indoors | 0°C-+50°C/32°F-+122°F | |
| Measuring range Outdoors | -20°C-+60°C/-69°F-+140°F | |
| Measuring increments Temperature ambient humidity | 0.1°C/0.2°F1% | 0.1°C1% |
| ColourdisplayYesNo | ||
| DCFradioclockYesNo | ||
| HygrometerYesYes | ||
| ThermometerYesYes | ||
| BarometerYes(internal,nodisplay)No | ||
| AlarmfunctionYesNo | ||
| Max.number ofmeasuring stations | 3 | |
| Reach≤50m | ||
12. Declaration of conformity
CE HamaGmbH&CoKGherebydeclaresthatthe radioequipmenttype[00185861]isincompliance withDirective2014/53/EU.Thefulltextofthe EUdeclarationofconformityisavailableatthe
followingInternetaddress:
https://uk.hama.com → Q → 00185861Downloads
| Frequencyband(s)433MHz | |
| Maximumradio-frequency Powertransmitted | 0.123mW |
- Activer/désactiverlesignalDCF(ON/OFF)
D. ALARM-knop: Wekkeractiveren/deactiveren
Alarmactiveren/deactiveren
5.2 Trocar as pilhas
Estação de medição
86652Monheim/Germany
Service&Support
www.hama.com
+499091502-0
D | GB
CE


All listed brands are trademark of the corresponding companies. Errors and mission excepted, and subject to technical changes. Our general terms of delivery and payment are applied.

- Controlsanddisplays
- Basestation
- Functionbuttons
- Measuringstation
- Explanationofwarningsymbolsandnotes
- Riskofelectricshock
- Warning
- Note
- 3.Packagecontents
- Safetyinstructions
- Warning-Batteries
- 5.Setup
- Insertingbatteries/powersupply
- 5.2Changingbatteries
- Installation
- Note-Installation
- Basestation
- Measuringstation
- 7.Operation
- Connectiontothemeasuringstation
- Note-temperaturedisplay
- Note-faultytransmissionofthemeasured values
- Channelselection/Additionaloutdoorsensors
- Automatic setting according to the DCF signal
- Note-settingthetime
- Manual setting of the time, date and units
- Note-timezone
- Maximum and minimum temperature and humidity values
- Highest and lowest outdoor temperature values alarm
- 7.7Weatherforecast
- Note-weatherforecast
- Temperature and ambient humidity trend
- 7.9Comfortdisplay
- Phasesofthemoon
- Alarmclock Settingthealarm
- Deactivating/activatingthealarm
- Note-Snoozefunction
- Backlight
- Careandmaintenance
- 10.Warrantydisclaimer
- 11.Technicaldata
- Declaration of conformity
- Alarmactiveren/deactiveren
- Trocar as pilhas
- Estação de medição
- 86652Monheim/Germany
- Service&Support
Brand : HAMA
Model : 185861
Category : Weather Station