AD 7860 - Fan ADLER - Free user manual and instructions
Find the device manual for free AD 7860 ADLER in PDF.
| Product type | Air dehumidifier |
| Brand | Adler |
| Model | AD 7860 |
| Power supply | 220-240 V ~ 50 Hz |
| Nominal power | 90 W |
| Maximum power | 150 W |
| Water tank capacity | 1 L |
| Dehumidification efficiency | 500 ml / 24 h |
| Noise level | 35 dB(A) |
| Operating temperature | 5 °C to 35 °C |
| Operating modes | Automatic, Clothes drying (CNT), Standby |
| Digital display | With color code (red, green, blue) according to humidity |
| Maintenance | Clean with a soft cloth; do not immerse in water |
| Safety | Automatic shut-off when tank is full; do not use with damaged cord |
| Continuous drainage function | Possible via a hose (not included) |
Frequently Asked Questions - AD 7860 ADLER
User questions about AD 7860 ADLER
0 question about this device. Answer the ones you know or ask your own.
Ask a new question about this device
Download the instructions for your Fan in PDF format for free! Find your manual AD 7860 - ADLER and take your electronic device back in hand. On this page are published all the documents necessary for the use of your device. AD 7860 by ADLER.
USER MANUAL AD 7860 ADLER
natural_image
White industrial water purifier unit with digital display and ventilation grille (no visible text or symbols)AD 7860
GENERAL SAFETY CONDITIONS
IMPORTANT SAFETY INSTRUCTIONS READ CAREFULLY AND KEEP FOR FUTURE REFERENCE
- Before using the device, read the operating instructions and follow the instructions contained therein. The manufacturer is not liable for any damage caused by the use of the device contrary to its intended use or improper operation.
- The appliance is intended for domestic use only. Do not use for other purposes not in accordance with its intended use.
- The device should only be connected to an AC 220-240V \~ 50Hz grounded socket. In order to increase the safety of use, many electrical devices should not be connected to one electric circuit simultaneously.
- Be especially careful when using the device when children are in the vicinity. Do not allow children to play with the device and do not let children or people unfamiliar with the device use it.
- WARNING: This equipment may be used by children over 8 years of age and people with reduced physical, sensory or mental capabilities, or people with no experience or knowledge of the equipment, if this is done under the supervision of a person responsible for their safety or has been provided to them. instructions on the safe use of the device and are aware of the dangers associated with its use. Children should not play with the equipment. Cleaning and user maintenance should not be performed by children, unless they are over 8 years old and these activities are performed under supervision.
- Always remove the plug from the outlet after use, holding the outlet with your hand. DO NOT pull on the cord.
- Do not immerse the cable, plug and the entire device in water or any other liquid. Do not expose the device to weather conditions (rain, sun, etc.).
- Periodically check the condition of the power cord. If the power cord is damaged, it should be replaced by a specialist repair shop in order to avoid a hazard.
- Do not use the appliance with a damaged power cord, or if it has been dropped or damaged in any way, or if it is not working properly. Do not repair the device yourself as there is a risk of electric shock. Take the damaged device to an appropriate service center for inspection or repair. Any repairs may only be carried out by authorized service points. Incorrectly performed repairs can pose a serious threat to the user.
- Place the device on a cool, stable, even surface, away from any kitchen appliances that heat up, such as: electric cooker, gas burner, etc.
- Make sure that nothing is blocking the air inlet and outlet of the device
- Use the device only on an even and horizontal surface to prevent condensation water from spilling out
- For additional protection, it is advisable to install a residual current device (RCD) in the electrical circuit with a rated residual current not exceeding 30mA. In this regard, please contact an electrician.
- To ensure effective drying, there should be a distance of at least 50 cm between the
side walls of the device and the wall, furniture or curtains.
- To avoid the risk of fire or explosion, do not spray the dryer with a spray
- To prevent the casing parts from melting or catching fire, do not place the dehumidifier in the vicinity of heating devices.
- Remove the water that has accumulated in the tank. Accidentally drinking water or using it for other purposes may make you sick.
Product description: Air Dehumidifier AD7860 – Figure 1 and 2
- Air outlet 2. Control panel
2A. Power on icon 2B. Auto mode icon
2C. Drying clothes mode icon 2D. Sleep mode icon
2E. Digital humidity value display 2F. Full water tank icon - Switch button 4. Front cover
- Handle 6. Air inlet
- Water drain hole (for pipe) 8. Water tank 1L
- The float inside water tank closed by lid 10. Pipe for continuous drain (not shown at figures).
Before first use
- The device working environment: temperature 5\~35°C, the minimum humidity is 70% for Automatic mode and Sleep mode and 20% for Continuous mode CNT.
- Keep the device away from direct sunlight. Do not insert fingers or other objects into air outlet (1) or air inlet (6).
- In the process of use, please close the doors and window to avoid wet air entering and affecting proper dehumidification effect.
- When the device is used, make sure there are no objects within the area of 50cm.
- Before use, please ensure that the water tank is placed in the correct position to avoid water following out.
- Before moving the device, empty the water tank at first.
Usage
- Turning on the dehumidifier
When the device is powered on for the first time, the screen light up for 1 second, a buzzer beeps, the screen shows "--", and the device is in stand-by mode.
Press the switch (3), the power on icon (2A) lights up, the digital humidity value display (2E) lights up also and shows the corresponding color according to the current environmental humidity:
- red: when room relative humidity is above or equal to 80%,
- green: when room relative humidity is 71-79%,
- blue: when room relative humidity is below or equal 70%.
2. Automatic mode
Press the switch (3) again, the icon (2B) will keep light after flashing 3 seconds, and the display (2E) shows the current environment humidity value. The device will enter into the automatic mode, the automatic mode icon (2B) lights up and the fan will run at high fan speed when room humidity higher than 70%. When room humidity is below 70% the device stops to operate.
3. Drying clothes / continuous operation mode CNT
Press the switch (3) again, the icon (2C) will keep light after flashing for 3 seconds, and the display (2E) shows the current environment humidity value. The device enters CNT mode, the drying clothes / continuous operation mode icon (2C) lights up and the fan will run at high speed. The mode is suitable for drying clothes up to the moment the water tank is full or for continuous dehumidification scenarios after assembling the pipe to the water drain hole (7). The device will dehumidify continuously at high fan speed, until the environmental humidity reaches 20%, then device will stop working.
4. Sleep mode
Press the switch (3) again, the icon (2D) will keep light after flashing for 3 seconds, and the display (2E) shows the current environment humidity value. The device enters sleep mode, the sleep mode icon (2D) starts to light up, whole display (2E) will be dim to do not impact sleeping comfort of people in room. In the sleep mode, the device will dehumidify the air automatically according to below rule: the fan will run at low speed if the room humidity will be above 70%, if it be below 70% then the fan stops work and the process of dehumidification will be stopped, in order to do not make the air dry in room. The comfort air humidification level for human body is around 70%.
5. Turning off the dehumidifier
Press the switch (3) again, the display (2E) will show "--", the device stops working.
The switch (3) operation order is shown by Figure 3.
6. Full water tank
When the dehumidifier works longer time, the water tank (8) will be filled by water collected from humidified air, it means the float (9) will lift up and then the full water tank icon (2F) will light up in red. Empty the tank by pouring collected water out via wholes in water tank upper part. When device is often use there is no need to open the lid of water tank to empty the water, water can be poured out via wholes.
WARNING: the float (9) located inside water tank should be put inside correct place again after seasonal cleaning the water tank. Look at Figure 4.
Trouble shooting:
Trouble description no 1: Full water tank icon (2F) turns red
Possible reason no 1: the tank float (located inside the water tank) is stuck. Look at Figure 4.
Solution for reason no 1: swing the water tank to let the float fall down and moves smoothly.
Possible reason no 2: poor air flow.
Solution for reason no 2: there should be left 50cm free space around the device.
Trouble description no 2: Poor dehumidification effect
Possible reason no 1: the air inlet (6) and the air outlet (1) are blocked.
Solution for reason no 1: clean the device inlet and outlet.
Possible reason no 2: the ambient temperature is too low.
Solution for reason no 2: change the using place.
Trouble description no 3: Noise
Possible reason no 1: the device does not place right.
Solution for reason no 1: please the device upright on flat surface.
Possible reason no 2: the air inlet (6) and the air outlet (1) are blocked.
Solution for reason no 2: clean the device inlet and outlet.
Cleaning and maintenance
-
Unplug the device. Do not immerse the device in water.
-
Do not directly wash it with water. Wipe the surface with a soft cloth. Wipe the control panel with a dry cloth.
-
For severely dirty places, please dip a soft cloth in a small amount of neutral cleaning agent and wipe the housing.
-
In order to clean the water tank (8), lift the water tank's lid. Wipe the inside of the tank with a soft cloth.
-
When no use the device for long time (seasonal storage), then:
a. Unplug the device, then drain out the water from the water tank, clean it and keep the water tank dry.
b. Storage the device store upright in a cool, dry place.
Technical specification
Power: 90W
Max Power: 150W
Power supply: 220-240V \~50Hz
Water tank capacity: 1 liters
Efficiency: 500ml /24 hours
Noise level: 35dB (A)

Please transfer cardboard packaging to waste paper. Pour the polyethylene bags (PE) into the plastic container Worn device should be returned to the appropriate point storage because it is dangerous in the device ingredients may pose a threat to the environment. The electrical device should be handed over to limit its reuse and use. If in the device there are batteries you have to take out and give to the point stored separately.
DEUTSCH
OPĆI USLOVI SIGURNOSTI
VAŽNE SIGURNOSNE UPUTSTVA MOLIM VAS PROČITAJTE PAŽLJIVO I SAČUVATE ZA BUDUĆE REFERENCE
- Prije korištenja uređaja, pročitajte upute za uporabu i slijedite upute sadržane u njima. Proizvođač nije odgovoran za bilo kakvu štetu uzrokovanu upotrebom uređaja suprotno njegovoj namjeni ili nepravilnim radom.
- Aparat je namenjen isključivo za kućnu upotrebu. Nemojte koristiti u druge svrhe koje nisu u skladu s njegovom namjenom.
-
Uređaj treba da bude povezan samo na AC 220-240V \~ 50Hz uzemljenu utičnicu. Kako bi se povećala sigurnost upotrebe, mnogi električni uređaji ne bi trebali biti povezani na jedno električno kolo istovremeno.
-
Budite posebno oprezni kada koristite uređaj kada su djeca u blizini. Ne dozvolite djeci da se igraju s uređajem i ne dopustite djeci ili osobama koje nisu upoznate s uređajem da ga koriste.
- UPOZORENJE: Ovu opremu mogu koristiti djeca starija od 8 godina i osobe sa smanjenim fizičkim, senzornim ili mentalnim sposobnostima ili osobe bez iskustva ili znanja o opremi, ako se to radi pod nadzorom osobe odgovorne za njihovu sigurnost ili im je pružena. upute o sigurnom korištenju uređaja i svjesni ste opasnosti povezanih s njegovom upotrebom. Deca ne bi trebalo da se igraju sa opremom. Čišćenje i korisničko održavanje ne smiju obavljati djeca, osim ako su starija od 8 godina i te aktivnosti se obavljaju pod nadzorom.
- Uvek izvucite utikač iz utičnice nakon upotrebe, držeći utičnicu rukom. NEMOJTE vući za kabl.
- Ne uranjajte kabel, utikač i cijeli uređaj u vodu ili bilo koju drugu tekućinu. Ne izlažite uređaj vremenskim uslovima (kiša, sunce, itd.).
- Povremeno proveravajte stanje kabla za napajanje. Ako je kabel za napajanje oštećen, treba ga zamijeniti u stručnoj radionici kako bi se izbjegla opasnost.
- Nemojte koristiti uređaj sa oštećenim kablom za napajanje, ili ako je pao ili oštećen na bilo koji način, ili ako ne radi ispravno. Nemojte sami popravljati uređaj jer postoji opasnost od strujnog udara. Odnesite oštećeni uređaj u odgovarajući servisni centar na pregled ili popravku. Bilo kakve popravke smiju obavljati samo ovlašteni servisi. Nepravilno obavljene popravke mogu predstavljati ozbiljnu opasnost za korisnika.
- Postavite uređaj na hladnu, stabilnu, ravnu površinu, dalje od svih kuhinjskih uređaja koji se zagrijavaju, kao što su: električni šporet, plinski plamenik itd.
- Uvjerite se da ništa ne blokira ulaz i izlaz zraka uređaja
- Koristite uređaj samo na ravnoj i horizontalnoj površini kako biste spriječili izlijevanje kondenzirane vode
- Za dodatnu zaštitu, preporučljivo je da se u električno kolo ugradi zaštitni uređaj (RCD) sa nazivnom rezidualnom strujom koja ne prelazi 30mA. U tom smislu, obratite se električaru.
- Da bi se osiguralo efikasno sušenje, treba da postoji razmak od najmanje 50 cm između bočnih zidova uređaja i zida, nameštaja ili zavesa.
- Da biste izbjegli rizik od požara ili eksplozije, nemojte prskati sušilicu sprejom
- Da biste spriječili topljenje ili zapaljenje dijelova kućišta, ne postavljajte odvlaživač zraka u blizini uređaja za grijanje.
- Uklonite vodu koja se nakupila u rezervoaru. Ako slučajno pijete vodu ili je koristite u druge svrhe, može vam se razboljeti.
6. Vol waterreservoir
natural_image
Glass water heater with blue liquid inside, labeled 'ADLER' on the side (no other text or symbols visible)Electric Kettle AD 1225

natural_image
Close-up of a textured, mesh-patterned fabric device with a white mouse on top (no visible text or symbols)Electric heating pad AD 7415

natural_image
White electric fan with perforated grille and a small base (no visible text or symbols)Desktop fan AD 7303

natural_image
Exterior view of a black waffle grill with control buttons (no text or symbols visible)Waffle Maker AD 3036

natural_image
Blue and white portable washing machine with blue filter cover (no visible text or symbols)Mini washing machine with spinning function AD 8051

natural_image
White ADLER air conditioner fan with a small inset showing its side arm (no text or symbols visible)Desk fan 15 cm with clip AD 7317

natural_image
White portable air conditioner with open lid and side shelves, no visible text or symbols on bodyQuartz Heater AD 7709

natural_image
White portable food heater with fruit layers and a control panel (no visible text or symbols)Food dryer AD 6654
natural_image
3D rendered image of a cylindrical device with purple and blue gradient coloring (no text or symbols visible)Bluetooth Speaker
AD 1169
natural_image
White glass water heater filled with blue liquid, no visible text or symbolsWater Kettle 1,0L AD 1283

text_image
ASLER Air iron Air Air Air AirSteam Iron AD 5032

natural_image
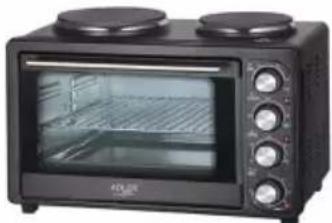
Black kitchen toaster oven with two top ovens and a front pane (no visible text or labels)Electric Oven With HOB AD 6020

Bending steam mop
AD 7038

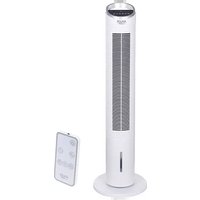
Tower Fan
AD 7319

natural_image
White portable electric heater with grid grille and control knobs (no visible text or symbols)Fan Heater AD 7717

natural_image
White industrial air purifier with visible cooling fan and wheels (no text or symbols)Air Conditioner AD 7916
ADLER
EUROPE

Hair Clipper
AD 2813

natural_image
Exterior view of a modern coffee machine with orange and black casing (no visible text or symbols)Espresso Machine AD 4404

natural_image
Black hair iron with a white band, resting on a white surface (no text or symbols visible)Hair Straightener AD 261

Hair Styler
AD 203

natural_image
Digital kitchen scale with a glass bowl filled with yellow granular material, placed on a digital display (no text or symbols visible)Diet Kitech Scale AD 3133
natural_image
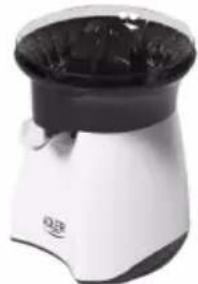
White and black industrial filter or scrubber with a circular top (no visible text or symbols)Citrus Juicer AD 4005

natural_image
Exterior view of a modern electric juice maker with black and silver casing (no visible text or symbols)Juice Extractor AD 4106

natural_image
White and white electric steamer with three food items, no visible text or symbols on the device itself.Egg Boiler AD 4459

natural_image
Modern glass coffee maker with AULCR branding, no visible text or symbols on the device itselfDripp Coffee Maker AD | 4407

natural_image
Exterior view of a modern stainless steel water heater (no text or symbols visible)Kettle AD 1203

natural_image
White desktop fan with three blades and a small base (no visible text or symbols)Table Fan AD 7302

natural_image
Metal mechanical device with a pointed tip and cylindrical body (no text or symbols visible)Hand Blender AD 4617

natural_image
White stainless steel kitchen tool with a side-mounted blade and meshing (no visible text or symbols)Meat mincer AD 4808

natural_image
Digital display of a square glass table with four black buttons and a digital display showing '80 - 100' (no text or symbols on the plate itself)Bathroom Scale AD 8121

natural_image
Black and white photo of a mobile phone with a grid keypad and open lid (no visible text or symbols)Nut Cookie Maker AD 3039

natural_image
Exterior view of a modern electric heating fan with visible cooling screen and heat sink (no text or symbols)Fan Heater AD 7703
ADLER
EUROPE

COFFEE GRINDER
AD 4446

natural_image
Exterior view of a modern stainless steel toaster with a digital display (no visible text or symbols)TOASTER 2 SLICE AD 3214

HAND BLENDER
Ad4625

natural_image
Close-up of a stainless steel kitchen appliance with a digital scale and control knob (no visible text or symbols)MIXER WITH BOWL AD 4222
natural_image
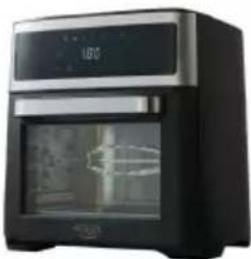
Exterior view of a black and white electric oven with digital display (no visible text or symbols)AIR FRYER OVEN AD 6309
natural_image
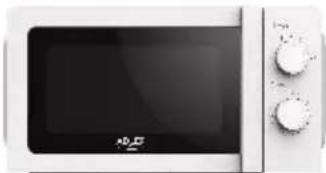
Front view of a white microwave oven with control knobs and a black screen (no visible text or symbols)MICROWAVE OVEN AD 6205

natural_image
Black rectangular electronic device with ports and lid (no visible text or symbols)WAFFLE MAKER AD 3049

natural_image
White digital kitchen scale with LCD display and control buttons (no visible text or symbols)KITCHEN SCALE AD 3170

natural_image
Glass water heater with blue liquid splashing, no visible text or symbolsELECTRIC KETTLE AD 1286

natural_image
Black rectangular device with a handle and label 'S20' (no readable text or symbols beyond branding)SANDWICH MAKER
AD 3043

natural_image
Exterior view of a modern industrial device with black and white casing (no visible text or symbols)PORTABLE FRIDGE AD 8077
natural_image
Black four-tier kitchen oven with two top ovens and front wheels (no visible text or labels)Electric Oven With HOB AD 6020

natural_image
White ADLER electric heater with visible grille and control knobs (no text or symbols)FAN HEATER AD 7728

natural_image
Black rectangular device with blue mesh pattern and a small cable attached (no visible text or symbols)MOSQUITO LAMP AD 7938

natural_image
Close-up of a dark textured fabric with a white cable attached (no visible text or symbols)HEATED PAD AD 7433

ORAL IRRIGATOR
AD 2176

AFTER SALE SERVICE NOTICE
| GB | If you want to buy spare parts or make any complaints, please contact the seller who issued the receipt directly. |
| DE | Wenn Sie Ersatzteile kaufen oder reklamieren möchten, wenden Sie sich bitte direkt an den Verkäufer, der die Quittung ausgestellt hat. |
| FR | Si vous souhaitez acheter des pièces de rechange ou faire des réclamations, veuillez contacter directement le vendeur qui a êmis le reçu. |
| ES | Si desea comprar repuestos o presentar alguna queja, comuniquese directamente con el vendedor que emitió el recibo. |
| PT | Se você quiser comprar peças de reposição ou fazer alguma reclamação, entre em contato diretamente com o vendedor que emitiu o recibo. |
| LT | Jei norite jsigyti atsarginių dalių ar pateikti nusiskundimų, susisiekite tiesiogiai su kvitą išdavusiu pardavėju. |
| LV | Ja vēlaties iegādāties rezerves daļas vai izteikt pretenzijas, lūdzu, sazinieties tieši ar pārdevēju, kurš izsniedza čeku. |
| EST | Kui soovite osta varuosi või esitada pretensioone, võtke otse ühendust kviitungi väljastanud müūjaga. |
| HU | Ha pótalkatrészeket szeretne vásárolni, vagy panaszt szeretne tenni, forduljon közvetlenül a bizonylatot kiállitó eladóhoz. |
| BS | Ako želite kupiti rezervne dijelove ili napraviti reklamaciju, obratite se direktno prodavaču koji je izdao račun. |
| RO | Если вы хотите купить запчасти или предъявить какие-либо претензии, пожалуйста, свяжитесь напрямую с продавцом, выдавшим чек. |
| CZ | Chcete-li zakoupit náhradní díly nebo uplatnit jakoukoli reklamaci, kontaktujte přimo prodejce, který účtenku vystavil. |
| RU | Dacă doriți să cumpărati piese de schimb sau să faceți vreo reclamație, vă rugăm să contactați direct vânzătorul care a emis chitanța. |
| GR | Eăv θέλετε va ayorăσετε ανταλλακτικά ἡν να κάνετε οποιαδήποτε παράπονα, επικοινωνήστε απευθείας με τον πωλητή που εξίδωσε την απόδειξη. |
| MK | Ако сакате да купите резервни делови или да поднесете какви било поплаки, контактирајте директно со продавачот koj ja издал сметката. |
| NL | Als u reserveonderdelen wilt kopen of een klacht wilt indienen, neem dan rechtstreeks contact op met de verkoper die de bon heeft afgegeven. |
| SL | Če želite kupiti nadomestne dele ali vložiti reklamacije, se obrnite neposredno na prodajalca, ki je izdal račun. |
| FI | Jos haluat ostaa varaosia tai tehdā valituksia, ota yhteyttä suoraan kuitin antaneeseen myyjään. |
| PL | W przypadku chęci zakupu części zamiennych lub zgłoszenia ewentualnych reklamacji należy kontaktować się bezpośrednio ze sprzedawca, który wystawił paragon. |
| IT | Se desideri acquistare pezzi di ricambio o presentare reclami, contatta direttamente il venditore che ha emesso la ricevuta. |
| HR | Se desideri acquistare pezzi di ricambio o presentare reclami, contatta direttamente il venditore che ha emesso la ricevuta. |
| SV | Om du vill köpa reservdelar eller göra några reklamationer, vänligen kontakta säljaren som utfärdat kvittot direkt. |
| DK | Hvis du ønsker at købe reservedele eller reklamere, bedes du kontakte sælgeren, som har udstedt kvitteringen, direkte. |
| UA | Якщо ви хочете придбати запчастини або подати будь-які претензії, зверниться безпосередньо до продавця, який видав чек. |
| SR | Ако желите да купите резервне делове или да уложите рекламацију, обратите се директно продавцу који је издао рачун. |
| SK | Ak si chcete küpit'náhradné diely alebo uplatnit' akúkol'vek reklamáciu, kontaktujte priamo predajcu, ktorý účtenku vystavil. |
| AR | إذا kéntت در عب في شراء قطع عيار أو تقدميم أي شكوي، هيرجي الاتصال بالبائع الذي أصدر الإ Corpus مياشرة. |
| BG | Ако искате да закупите резервни части или да направите оплаквания, моля, свържете се директно с продавача, който е издал касовата бележка. |
| AZ | Ehtiyat hissələri almaq və ya hər hansı śikayat etmək istəyirsinizsə, qəbzi verən satici ilə birbaşa əlaqə saxlayın. |