Junior Fix - Car seat Kinderkraft - Free user manual and instructions
Find the device manual for free Junior Fix Kinderkraft in PDF.
| Product type | Car seat group 2/3 (i-Size) |
| Brand | Kinderkraft |
| Model | Junior Fix (JUNIOR FIX 2 i-Size) |
| Safety standard | UN/ECE R129/03 (i-Size) |
| Use | Children from 100 to 150 cm (approx. 3.5 to 12 years) |
| Installation | Forward-facing, with ISOFIX and 3-point seat belt |
| Headrest adjustment | Height adjustable to 10 positions |
| Backrest adjustment | Reclining to fit the vehicle seat |
| Main components | Headrest, backrest, seat, armrests, belt guides, ISOFIX connectors |
| Cover | Removable, hand wash at max 30°C |
| Cleaning | Hand wash, do not spin or machine dry |
| Plastic maintenance | Clean with water and diluted soap |
| Warranty | 24 months, extendable to 120 months (10 years) under conditions |
| Color | Not specified (check product) |
| Seat weight | Not specified |
| Dimensions | Not specified |
Frequently Asked Questions - Junior Fix Kinderkraft
User questions about Junior Fix Kinderkraft
0 question about this device. Answer the ones you know or ask your own.
Ask a new question about this device
Download the instructions for your Car seat in PDF format for free! Find your manual Junior Fix - Kinderkraft and take your electronic device back in hand. On this page are published all the documents necessary for the use of your device. Junior Fix by Kinderkraft.
USER MANUAL Junior Fix Kinderkraft
Available only in selected countries Details on kinderkraft.com
natural_image
Line drawing of a children's car seat with green accents, no text or symbols presentATTENTION! Product graphics are for reference only
text_image
Diagram showing traffic flow with directional arrows and no-smoking symbols on vehicle seatsA.3

text_image
Diagram showing car seatbelting with green checkmark and red X marks indicating correct and incorrect matchesB.1

natural_image
Diagram showing two mechanical components with red arrows indicating motion or force direction (no text or symbols)B.2

text_image
PRESSB.3

text_image
Diagram showing two safety switch configurations with checkmark and cross symbols indicating failure or failure states.B.4a
natural_image
Simple line drawing of a curved object with a green checkmark and a shaded green band, no text or symbols present.B.4b

text_image
Illustration showing car seatbelt usage with green belt and safety icons for correct and incorrect use.B.4c

natural_image
Illustration of a person sitting on a bench with a green belt and a checkmark indicating the correct posture (no text or symbols present)
text_image
Illustration showing a person seated with a green belt and a red X mark, indicating a medical or safety scenario.B.5

text_image
PRESS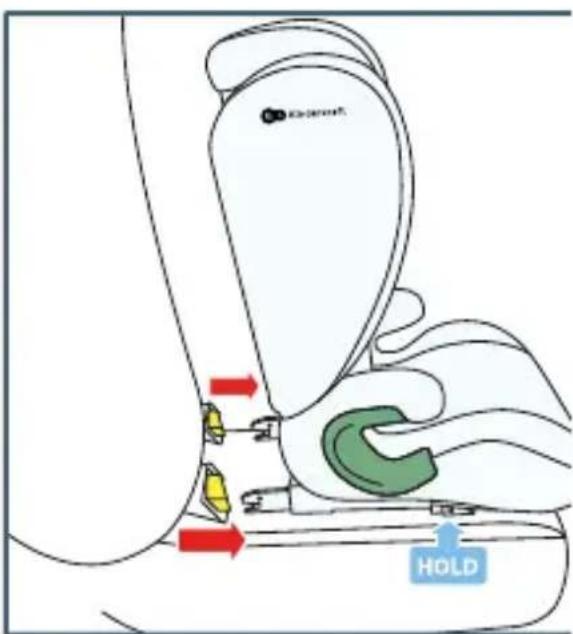
text_image
HOLDC.1
natural_image
Illustration of a person seated in a seat with a green belt and red dashed line indicating a threshold (no text or symbols)C.2

natural_image
Diagram of a device interior with a hand adjusting a component, showing no text or symbols.C.3
C.4
C.5

natural_image
Illustration of a hand using a belt buckle to adjust the seat (no text or symbols present)C.6
natural_image
Diagram of a car seatbelt buckle with a red arrow indicating direction (no text or symbols)D.1

text_image
M0 Kinderkaft
natural_image
Line drawing of a car seat with blue and red markers indicating specific points (no text or symbols)D.2

text_image
It n KinderkraftD.3
D.4
natural_image
Line drawing of a mechanical component with curved surfaces and a central oval feature (no text or symbols)
natural_image
Illustration of a medical procedure with a blue tool inserted into a green area, no text or symbols presentAR
Please read this user manual carefully before using your child's car seat for the first time. It is your responsibility to ensure your child's safety and failure to read this manual may affect it.
1.0 Car seat elements
- Headrest
- Headrest adjustment lever
- Car seat backrest 8. Backrest to seat connector
- Armrest
- ISOFIX latch
- Seat 10. ISOFIX system release button
- Shoulder belt guide 11. ISOFIX guides
- Lap belt guide 12. Plastic stick
2.0 Usage
The car seat has been designed, tested and approved under the requirements of UN/ECE Regulation No. 129 concerning the approval of child restraint systems (UN/ECE R129/03). The JUNIOR FIX 2 i-Size car seat is dedicated to transporting children between 100 and 150 cm in height (up to approx. 12 years of age).
The child shall be fastened with the use of 3-point seat belts for adults or 3-point seat belts for adults with additional mounting elements (ISOFIX installation system), see point 4.1. The car seat can be installed in the car in the positions indicated by the manufacturer in the vehicle's user manual. Reading the vehicle manufacturer's user manual is required.
3.0 Safety instructions
WARNINGS
Please take a few minutes to read this user manual to ensure your child's proper safety. Many easily avoidable injuries are caused by reckless and improper car seat use.
CAUTION! It is always good to have the user manual within reach. We advise you to keep it in the designated place located in the pocket underneath the car seat.
- The car seat is designed to be installed only on forward-facing seats. The car seat must not be installed on rear or side-facing seats/car benches (pic. A.2).
- DO NOT place a child car seat on seats equipped with an active front airbag, as this can be dangerous. That does not apply to side airbags (pic. A.2). Guidance on the suitability of the vehicle seat for use with a child car seat can be found in the car user manual.
- Before each journey, ensure the 3-point seat belts are correctly adjusted and fit tightly to the child's body. Under no circumstances can belts be twisted!
- The car seat is not suitable for installation in vehicles with two-point seat belts or lap belts. Using these types of seat belts can result in serious or fatal injuries to the child in case of an accident (pic. A.3).
- REMEMBER, THE CLOSER THE BELT FITS TO THE CHILD'S BODY, THE HIGHER THE LEVEL OF SAFETY. FOR THIS REASON, DO NOT WEAR THICK CLOTHING UNDER THE BELT.
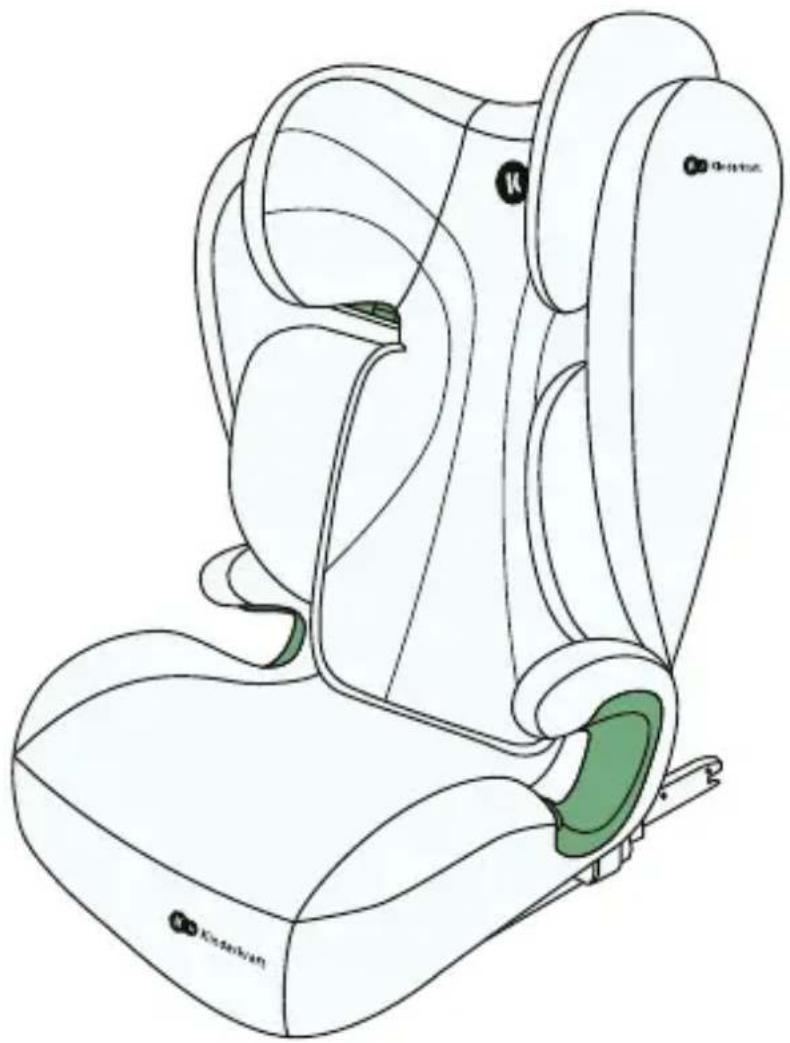
- The lap belts of the seat belt must run as low as possible across your child's pelvis to ensure an optimum effect in the event of an accident.
- Only an optimally adjusted headrest can provide your child maximum protection and comfort, ensuring appropriate belts fit simultaneously.
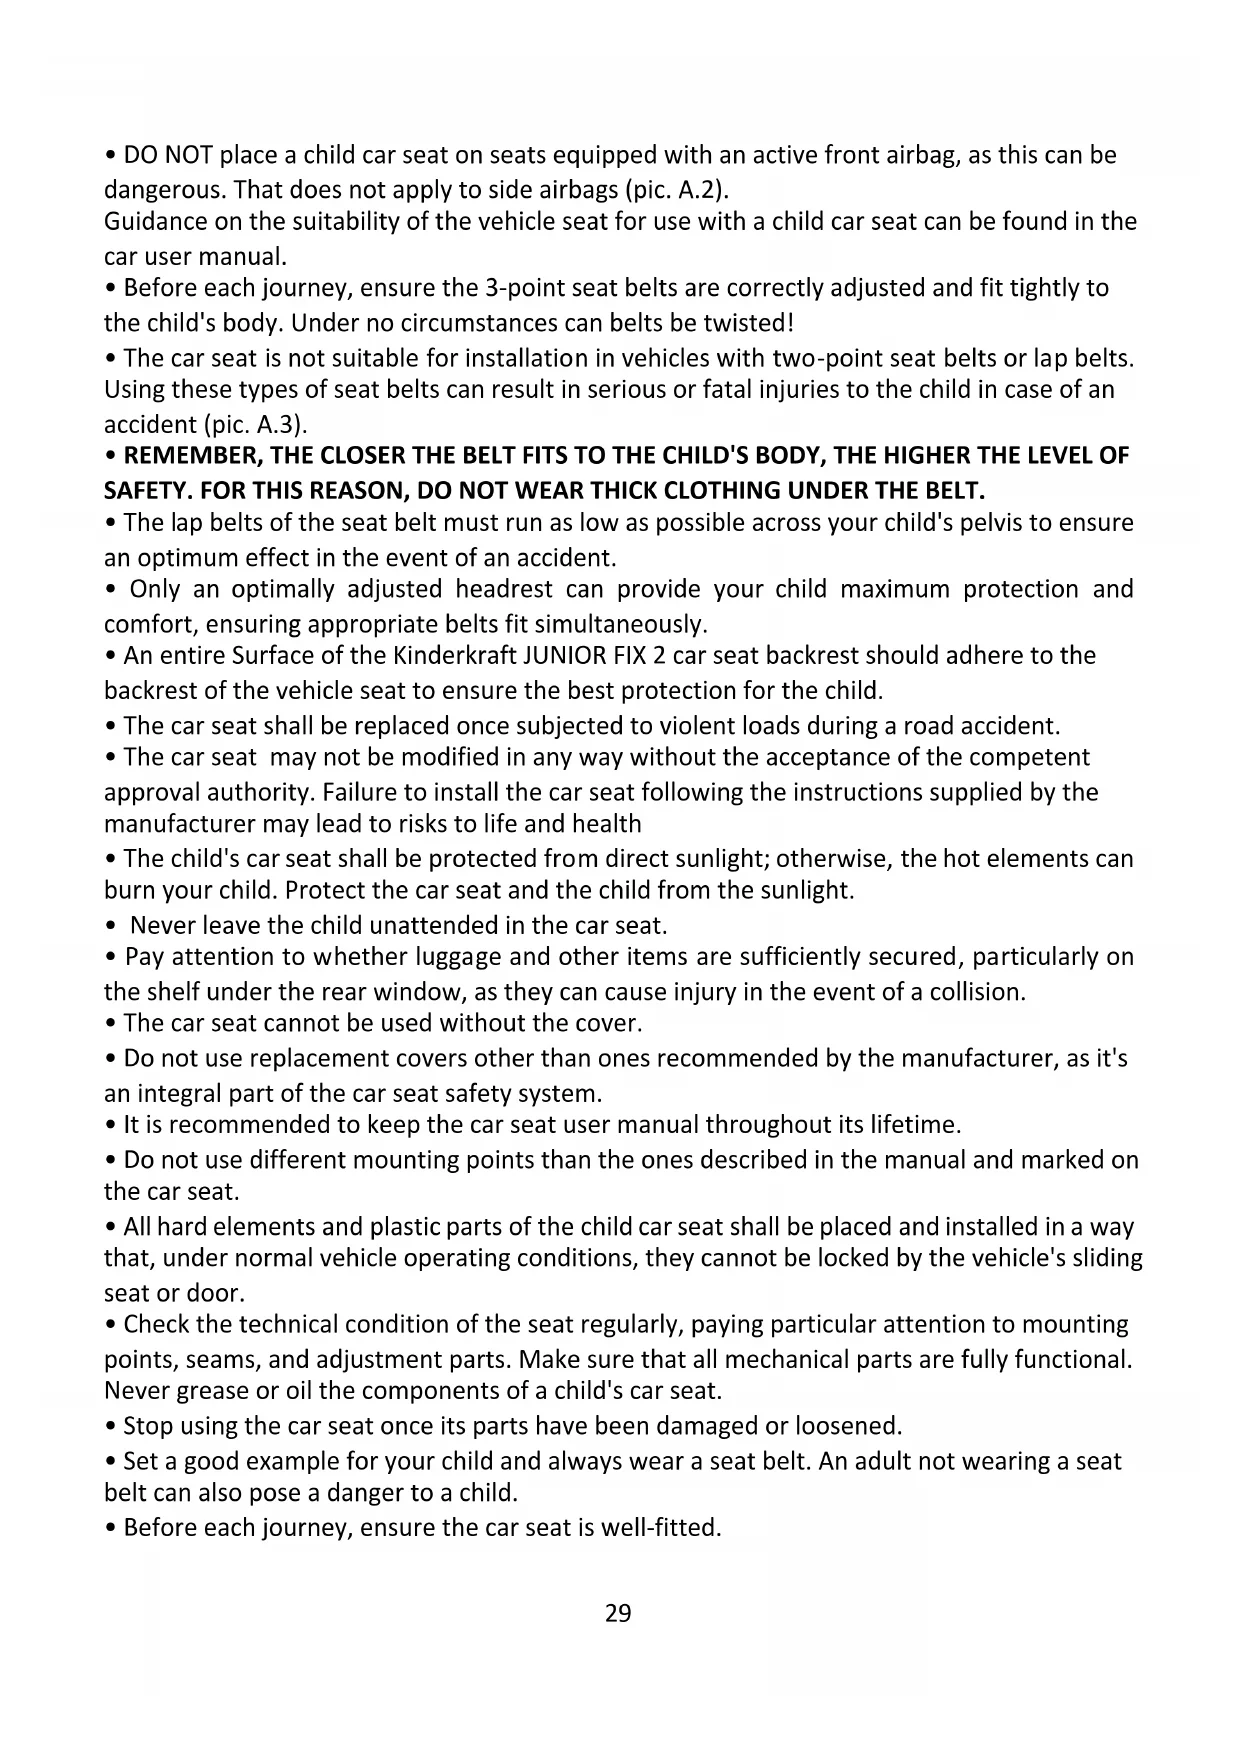
- An entire Surface of the Kinderkraft JUNIOR FIX 2 car seat backrest should adhere to the backrest of the vehicle seat to ensure the best protection for the child.
- The car seat shall be replaced once subjected to violent loads during a road accident.
- The car seat may not be modified in any way without the acceptance of the competent approval authority. Failure to install the car seat following the instructions supplied by the manufacturer may lead to risks to life and health
- The child's car seat shall be protected from direct sunlight; otherwise, the hot elements can burn your child. Protect the car seat and the child from the sunlight.
- Never leave the child unattended in the car seat.
- Pay attention to whether luggage and other items are sufficiently secured, particularly on the shelf under the rear window, as they can cause injury in the event of a collision.
- The car seat cannot be used without the cover.
- Do not use replacement covers other than ones recommended by the manufacturer, as it's an integral part of the car seat safety system.
- It is recommended to keep the car seat user manual throughout its lifetime.
- Do not use different mounting points than the ones described in the manual and marked on the car seat.
- All hard elements and plastic parts of the child car seat shall be placed and installed in a way that, under normal vehicle operating conditions, they cannot be locked by the vehicle's sliding seat or door.
- Check the technical condition of the seat regularly, paying particular attention to mounting points, seams, and adjustment parts. Make sure that all mechanical parts are fully functional. Never grease or oil the components of a child's car seat.
- Stop using the car seat once its parts have been damaged or loosened.
- Set a good example for your child and always wear a seat belt. An adult not wearing a seat belt can also pose a danger to a child.
- Before each journey, ensure the car seat is well-fitted.
- A car seat must always be fastened with a seat belt. Even when the child is not being transported in it. An unfastened car seat, even during emergency braking, can cause injury to passengers.
- In the case of some vehicle seats made of delicate fabrics, using car seats can leave a mark and/or cause discolouration. This can be avoided by placing a blanket, towel or a similar product underneath the car seat.
4.0 Installation in a car
4.1 Forward-facing car seat installation for children from 100 to 150 cm (approx. 3.5 to 12 years of age) using the vehicle's seat belt and ISOFIX system.
- Mount the ISOFIX guides (11) on the vehicle's seat joints.
- Press the ISOFIX system release buttons and slide out the ISOFIX latches (9) as far as possible (pic, B.1).
- Grab the car seat with two hands and slide in both latches into the vehicle's seat mountings (pic. B.2).
- After hearing the 'click' of each ISOFIX latches, push the car seat's seat to the backrest, exerting strong, equal pressure on both sides.
- CAUTION! The locking latches are correctly mounted only when both button indicators are completely green (pic. B.3).
- Grab the car seat and check if it's correctly mounted without looseness. Repeat the previous steps if the car seat moves and the ISOFIX latches (9) slide out.
- Fasten the child with seat belts. Details are described in the section of the manual on fitting the seat using the seat belt (see point 4.2).
4.2 Forward-facing car seat installation for children from 100 to 150 cm (approx. 3.5 to 12 years of age) using the vehicle's seat belt.
IMPORTANT! The vehicle manual provides the location of the mounting points and other necessary information regarding the installation of the car seat in the car. The user must ABSOLUTELY read the vehicle manual.
- Adjust the headrest to the child's height (see point 5.0).
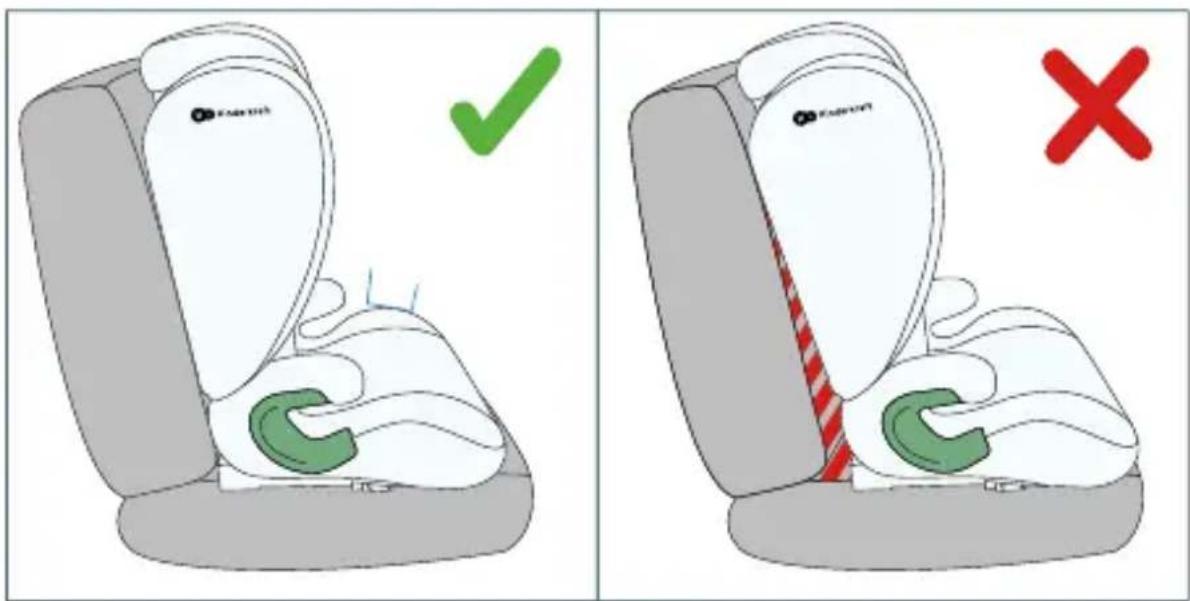
- Place the child's car seat on the vehicle's seat. Make sure to whether the car seat backrest adheres flat to the backrest of the vehicle seat (see point 5.1).
- Direct the shoulder belt thru the green guide (5) under the headrest (pic. B.4a).
- Place the child in the car seat and direct the seat belt on the front of the child. Fasten the belt in the buckle until hearing the characteristic 'click' (pic. B.4b).
- The lap belt should be placed under the armrests thru the lap belt guides (6). The shoulder belt shall be placed under the armrest (3) (pic. B.4c).
Tension the vehicle seat belt by pulling first the lap belt section, then the shoulder belt section. Ensure that the lap belt is stretched as low as possible over the child's hips, that it fits into the guides and that it is fastened with a buckle. The shoulder strap should pass between your child's shoulder and neck. Make sure the belt does not compress the child's neck.
4.3 Car seat disassembly (ISOFIX installation system)
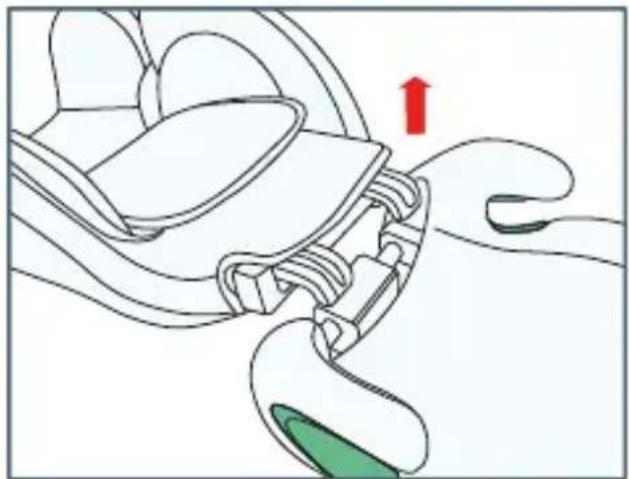
- Simulantaneously press the ISOFIX release buttons (10) on both shoulders of the ISOFIX connector (9). Once the latches release and the indicator's colour turns red, slide out the car seat from the ISOFIX guides (pic. B.5). The car seat is now disassembled from the ISOFIX installation system now. You can slide in the ISOFIX shoulders (9) back into the car seat base (pic. B.1).
5.0 Headrest height
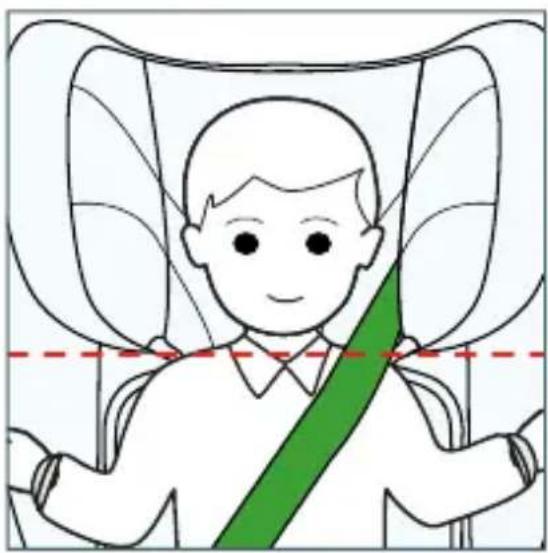
A correctly positioned headrest ensures optimal positioning of the seat belt shoulder section and provides protection and comfort for the child. CAUTION! The shoulder belt should be crossing between the child's shoulder and neck! The headrest should fit tightly around the child's head, and the lower part of the headrest should be at the child's shoulder height (pic. C.1).
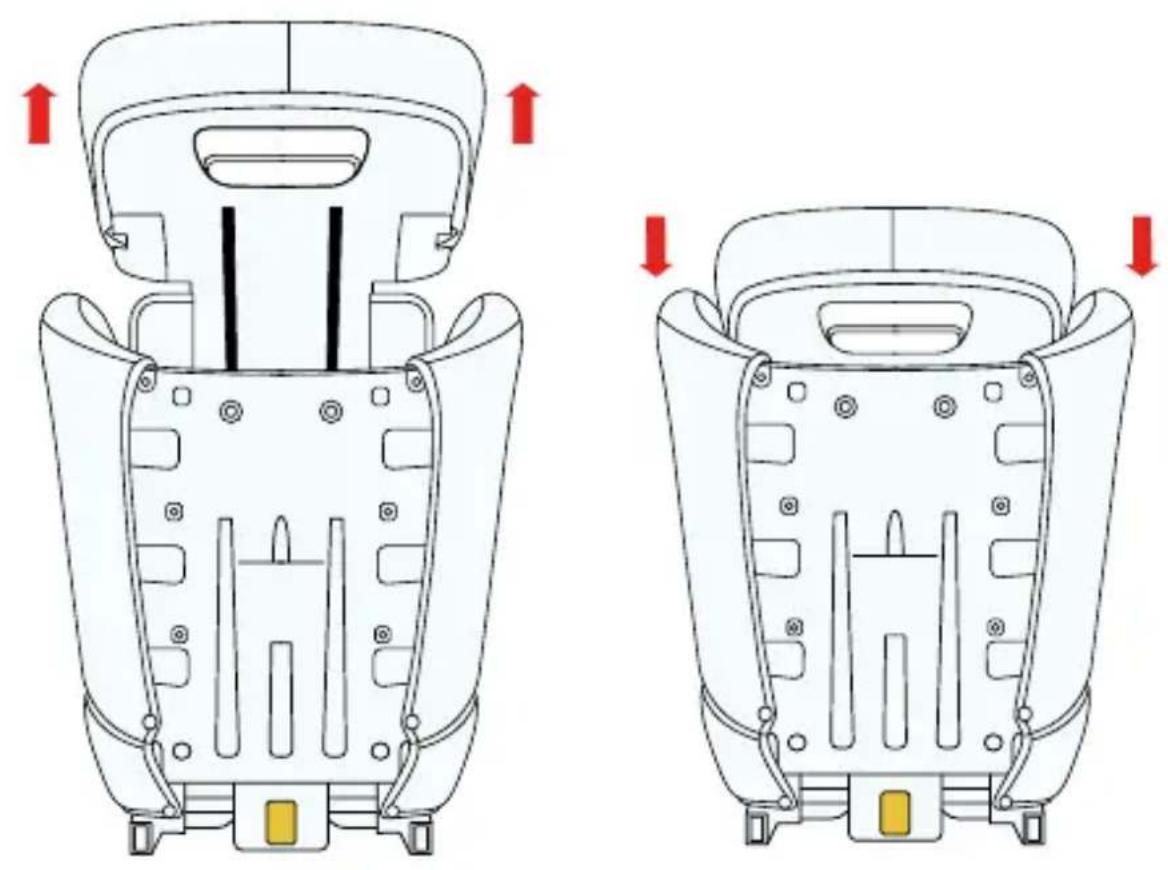
- Grab the headrest adjustment lever (7) located at the back of the headrest (1) and gently pull it upwards. The headrest is unlocked (pic. C.2).
- Now you can adjust the headrest (1) to the desired height in 1 of 10 selected positions (pic. C.3). Once the height is adjusted, release the adjustment lever(7), the headrest will lock after gentle up-down height adjustment.
IMPORTANT! Make sure the seat headrest is locked.
Place the car seat on the vehicle seat. Place the child in the car seat and check the height of the headrest. CAUTION! If necessary, repeat the headrest adjustment steps until reaching the optimal height.
5.1 Adjusting the backrest
The car seat's backrest (2) easily adapts to the position of the vehicle seat.
- The car seat backrest is mobile, which makes it possible to adjust it precisely to the plane of the vehicle seat. Recline the backrest until it is in a position adjacent to the seat (pic. C.4).
5.2 Assembly/disassembly of seat and backrest
To assemble the car seat, place the backrest flat behind the seat, hook the lower part of the backrest to the seat and twist the seat in the backrest to seat connector (8) as far as it is only possible to connect it with the seat (pic. C.5).
Adjust the backrest until it locks in a vertical position.
Danger! While turning the backrest, check if there's nothing around the backrest to the seat connector.
Disassembly: turn the backrest in the connector to the horizontal position to disconnect both car seat parts (pic. C.6).
6.0 Removing/fitting the cover
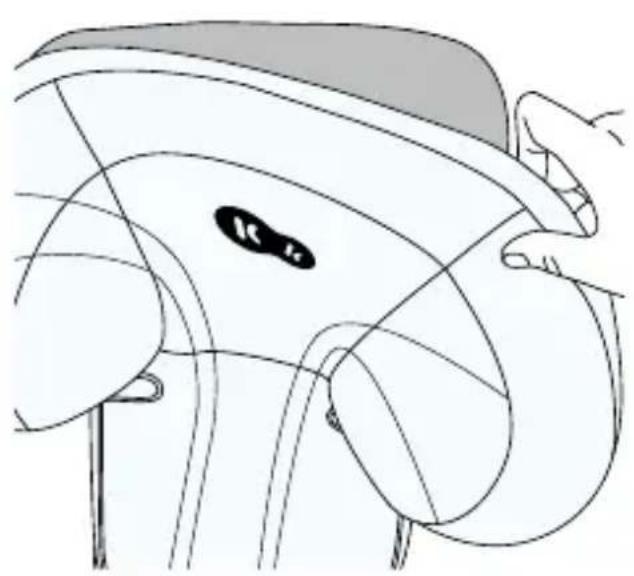
- Removing the backrest and seat cover: unzip the cover, the snaps are on its edges (four at the back of the car seat, two on the backrest in front) (pic. D.1). You can take the cover off the car seat (pic. D.2).
- Removing the headrest cover: Hold on to the top part of the cover located behind the headrest adjustment button and gently slide off the fabric from the top part of the headrest. Once the fabric from the top part is slid off, proceed with removing the cover on the sides of the headrest (pic. D.3).
To fit the cover again, simply reverse the above sequence of actions. In order to facilitate the installation of the cover in the vicinity of the waist belt guides (6), a white plastic stick (12) can be used (fig. D.4).
6.1 Cleaning
Use only the original cover, as it is an essential element for car seat safety.
CAUTION! Do not use the car seat without the cover.
- The cover can be removed and washed by hand at temperatures below 30°C. Please observe the washing instructions on the cover label. The colours may fade if washed at temperatures above 30°C. The cover should not be spun or tumble-dried (which may cause the fabric layers to separate).
- Plastic parts can be cleaned with water and diluted soap. Do not use aggressive cleaning agents (such as solvents).
ES
- All Kinderkraft products are covered by a 24-month warranty. The warranty period starts from the date the product is handed over to the Buyer.
- The warranty is only valid in the member states of the European Union, excluding overseas territories and the territory of the United Kingdom of Great Britain and Northern Ireland excluding the British Overseas Territories.
- The manufacturer's warranty does not apply to countries not listed above. The conditions of the additional warranty may be determined by the Seller.
- In some countries, it is possible to extend the warranty to a limited period of 120 months (10 years). The complete terms and conditions and the warranty extension registration form are available at WWW.KINDERKRAFT.COM
- Claims must be made by completing the form available at WWW.RMA.KINDERKRAFT.COM
- The warranty does not cover:
A. Cosmetic damage, including but not limited to: scratches, dents and cracks in plastic, unless the failure is due to a material or manufacturing defect;
B. Damage resulting from misuse or poor maintenance - including but not limited to: mechanical damage to products caused by misuse or poor maintenance. Refer to the instructions for use and installation of the product contained in the user manual;
C. Damage caused by improper assembly, installation or disassembly of products and/or accessories. Refer to the instructions for use and installation of the product contained in the user manual;
D. Damage caused by corrosion, mould or rust, resulting from improper maintenance, care and storage;
E. Damage caused by normal wear and tear or otherwise resulting from the normal passage of time. This includes: tears or punctures in inner tubes; tyre damage; tyre tread damage; fading of fabrics resulting from mechanical use (e.g. on joints and covering of moving parts);
F. Damage or erosion caused by sun, perspiration, detergents, storage conditions or frequent washing, etc;
G. Damage caused by accident, abuse, misuse, fire, contact with liquid, earthquake or other external causes;
H. Products that have been modified to change functionality without 4Kraft's written consent;
I. Products from which the serial number or lot number has been removed or tampered with in any way;
J. Damage caused by the use of third party components or products - including but not limited to: cup holders, umbrellas, reflectors, bells;
K. Damage caused by transport or by ground handling service providers.
7. The warranty period for accessories included with the product is 6 months from the date of sale, excluding the faults described above.
8. These warranty conditions are complementary to the Customer's statutory rights with respect to 4KRAFT sp. z o.o. The warranty does not exclude, limit or suspend the Customer's rights under warranty for defects in goods sold.
9. The full text of the Terms and Conditions of the Warranty is available on the website WWW.KINDERKRAFT.COM