
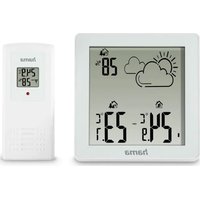
Full Touch 186421 - Weather Station HAMA - Free user manual and instructions
Find the device manual for free Full Touch 186421 HAMA in PDF.
| Product type | Weather station with touch display |
| Brand | Hama |
| Model | Full Touch 186421 |
| Base station power supply | 4.5 V (3 AAA micro batteries) |
| Measuring station power supply | 3.0 V (2 AA batteries) |
| Indoor temperature measurement range | -10 °C to +50 °C |
| Outdoor temperature measurement range | -40 °C to +70 °C |
| Air humidity measurement range | 20% to 95% |
| Maximum number of measuring stations | 3 |
| Radio transmission range | Approx. 30 m (outdoors) |
| Radio frequency | 433.92 MHz |
| Maximum transmitted radio frequency power | 0.2 mW |
| Main functions | Indoor/outdoor temperature/humidity display, weather forecast, moon phase, alarm clock, max/min value alarms, heat index, dew point |
| Time setting | Automatic via DCF signal, manual setting possible |
| Display | Touch screen with backlight |
| Display languages | German, French, Italian, Dutch, Spanish, Danish, English |
| Maintenance and cleaning | Clean with a slightly damp lint-free cloth, avoid aggressive detergents |
| Safety | Indoor use only, protect from moisture and shocks, observe battery polarity |
| Package contents | Base station, measuring station, 3 AAA batteries, 2 AA batteries, instruction manual |
Frequently Asked Questions - Full Touch 186421 HAMA
User questions about Full Touch 186421 HAMA
0 question about this device. Answer the ones you know or ask your own.
Ask a new question about this device
Download the instructions for your Weather Station in PDF format for free! Find your manual Full Touch 186421 - HAMA and take your electronic device back in hand. On this page are published all the documents necessary for the use of your device. Full Touch 186421 by HAMA.
USER MANUAL Full Touch 186421 HAMA
OperatingInstructions
Bedienungsanleitung
Moded'emploi
Instruccionesdeuso
Gebruiksaanwijzing
Istruzioniperl'uso
Instrukcjaobsługi
Használatiútmutató
Manualdeutilizare
Návodkpoužití
Návodnapoužitie
Manualdeinstruções
Bruksanvisning
- Transmission indicator light
- Cut-outforwallmounting
- Batterycompartment
- Channel switch (CH1, CH2, CH3)
1. Explanationofwarningsymbolsandnotes
Warning

This symbolised to indicate safety instructions sort to draw your attention to specific hazards and risks.
Note

This symbol is used to indicate additional information or important notes.
2.Packagecontents
- Weatherstation(basestationforindoors/measuringstation foroutdoors)
• 3xAAAMicrobatteries, 2xAAMignonbatteries
• Theseoperatinginstructions
3. Safetyinstructions
• The product is intended for private, non-commercial use only.
- Usetheproductonlyfortheintendedpurpose.
- Protect the product from dirt, moisture and overheating and use it indry environments only.
- Donotusetheproductintheimmediatevicinityofheaters, otherheatsourcesorindirectsunlight.
- Aswithallelectricalproducts, thisdevicesshouldbekeptoutofthereachofchildren.
- Donotoperatetheproductoutsidethepowerlimitsgivenin thespecifications.
- Donotusetheproductinareasinwhichelectronicproducts arenotpermitted.
- Donotusetheproductinadampenvironmentandavoid splashingwater.
- Donotplacetheproductnearinterferencefields, metalframes, computers, TVs, etc. Electronicdevicesandwindowframescan negativelyaffecttheproduct'sfunctionality.
- Donotdropheproductanddonotexposeittoanymajor shocks.
- Donotmodifytheproductinanyway.Doingsovoidsthe warranty.
- Keep the packaging material out of thereach of child rendueto therisk of suffocation.
- Disposeofpackagingmaterialimmediatelyinaccordancewith thelocallyapplicableregulations.
- Onlyusethearticleundermoderateclimaticconditions.
- Donotopenthedeviceorcontinuetooperateitifitbecomes damaged.
- Donotattempttoserviceorrepairtheproductyourself.Leave anyandallserviceworktoqualifiedexperts.
Warning-Batteries

- Wheninsertingbatteries, notethecorrectpolarity(+and-markings) and insertthebatteries accordingly. Failuretodo socouldresultinthebatteriesleakingoreexploding.
- Onlyusebatteries(orrechargeablebatteries)thatmatchthe specifiedtype.
- Before you insert the batteries, clean the battery contacts and the polarity contacts.
- Donotallowchildrentochangebatterieswithoutsupervision.
- Donotmixoldandnewbatteries,orbatteriesofdifferent typesorfromdifferentmanufacturers.
- Removethebatteriesfromproductsthatarenotbeingused foranextendedperiod(unlessthesarebeingkeptreadyfor anemergency).Donotshort-circuitbatteries.
- Donotchargebatteries.
- Donotburnbatteries.
- Keepbatteriesoutofthereachofchildren.
- Neveropen, damageorswallowbatteriesorallow themtoentertheenvironment. Theycancontaintoxic, environmentallyharmfulheavymetals.
- Removespentbatteriesfromtheproductanddisposeofthem withoutdelay.
- Avoidstoring, charging and using inextremetemperatures and atextremely low atmospheric pressures (such as high altitudes).
4. Commissioning

Note
Pleaseremember, duringcommissioning, toalwaysinsertthe batteriesintothemeasuringstationfirstandthenintothe basestation.
4.1 Inserting the batteries
Measuringstation
- Openthebatterycompartment(28)andinserttwoAAMignon batteriesobservingthecorrectpolarity.
- Thenclosethebatterycompartmentcover.
Basestation
- Removetheprotectivefilmfromthedisplay.
- Openthebatterycompartment(25)andinsertthreeAAAMicro batteriesobservingthecorrectpolarity.
- Thenclosethebatterycompartmentcover.
4.2Changingbatteries
Measuringstation
- If the batterywarningsymbol(3)appearsnexttothe outdoorhumidity,replace2AAbatteriesinthemeasuring stationwithtwonewbatteries.
- Openthebatterycompartment(28), remove and dispose of the spentbatteriesandinserttwonewAAbatteries, observing the correct polarity. Then close the battery compartment cover.
Basestation
- If the batterywarningsymbol(14)appearsnexttothe indoorhumidity,replace3AAAbatteriesinthebasestation withthreenewbatteries.
- Openthebatterycompartment(25), disposeofthespent batteriesandinsertthreenewAAAbatteries,observingthe correctpolarity.Thenclosethebatterycompartmentcover.

Note
- Beawarethat, after every battery change on theme measuring station or basestation, the stations will need to be resynchronised.
- Todothis, removethebatteries from the other station and re-insert them or changethem completely if required.

5. Installation
Note-Installation
- Were recommend initially positioning the basestation and measuring station at the preferred setup locations without installing them and carrying out all these settings as described in 6. Operation-first.
- Donotinstallthestation(s)untilthesettingsarecorrectandtheradioconnectionisstable.

Note
- Therangeoftheradiotransmissionbetweenthemeasuring stationandthebasestationisupto30minunobstructed areas.
- Beforeinstalling, makesurethattheradiotransmissionis notinfluencedbyinterferingsignalsorobstaclessuchas buildings, trees, vehicles, high-voltagepowerlines, etc.
- Before final installation, make sure that there is sufficient reception between the desired installation locations.
- When installing themeasuring station, take care to ensure this is positioned so that it is protected from direct sunlight and rain.
• The international standard height for measuring air temperature is 1.25m(4ft) above ground.
Warning
- Buyspecialorsuitableinstallationmaterialfromaspecialist dealerforwall-mounting.
- Ensure that you donot install any faulty or damaged parts.
- Neverapplyforceduringassembly. Thesecandamagethe product.
- Beforemounting, check that the wally you have chosen is suitable for the weight to be mounted. Also makes sure that there are no electric, water, gas or other lines running through the wall at themountingsite.
- Donotmounttheproductabovelocationswherepersons mightsitorstand.
5.1 Basestation
- Placethebasestationonaflatsurfaceusingthestand(24).
• Alternatively, you can mount the basestation on a wall using the recess(23)ontheback.
5.2 Measuringstation
- Youcanalso setup themeasuring station on an evensurface outdoors.
- Were recommend mounting themeasuring station securely and firmly onto an outdoor wall.
- Securethedowel, screw, nail, etc. in the wall provided.
- Hangthemeasuringstationontoitusingthecut-out(27) provided.
6.Operation
6.1 Connectiontothemeasuringstation
- Afterthebatteriesareinserted, thebasestationautomatically searchesforaconnectiontothemeasuringstationandcarries outtheinitialsetuproutine.
Note
- Initialsetuptakesaround3seconds.
- Theradiosymbolonthemeasuringstation(26)flasheswhen searchingforaconnection.
- Avoidanyoperationofthebuttonsduringthistime! Otherwise,errorsandinaccuraciesmayoccurinthevalues andtheirtransmission.
• The process is finished as soon as the indoor (8) and outdoor (2) measurement data are displayed. - Themeasuredvalueisautomaticallyupdatedbythebase deviceaboutevery58seconds.
- If the temperature value is outside of theme measuring range, LL. Lfortemperatures below theme measuring range or HH. Hfortemperatures above theme measuring range will be displayed in the temperature indicator.
- xIfnosignalisreceivedfromthemeasuringstationona repeatedbasis,pressandholdthe button(B)foraround 3secondstostartthemanualsearchforthesignal.

| Display | Signalfromthemeasuring station |
| Goodreception | |
| Poorreception | |
| Inactive-nosignalreception |

Note-faultytransmissionofthemeasured values
- In some cases, interference caused by a WiFinetwork, computer, TV, etc., forexample, may cause the transmission of measured values between the base and measuring station to fail.
- If this happens, resynchronisethestations by briefly removing the batteries from both stations and reinserting them.
- If themeasured values are not transmitted again, replace the batteries with new ones.
- If necessary, choose anewlocation for the base station to avoid the possible interferences signals in the future.
- Themeasuringstationandbasestationmaybeplacedmax. 30mapartfromeachother.
- Stayatleast1 mawayfrominterference.
6.2 Channelselection/Additionaloutdoorsensors
Note
- Youcaninstalltwofurtheroutdoorsensorsinadditiontothe outdoorsensorsupplied. Whendoingso,ensurethesame channelsettingonthebasestationandeachoutdoorsensor.
• Suitableoutdoorsensorscanbefoundatwww.hama.com
- Channel1ispre-selected.
- Pressthe button(B)repeatedlytosetthesamechannel asontheoutdoorsensorinquestion.Channel1,2or3is displayed.
- If the symbolappears, the weather station automatically changesthe channel display every 5 seconds. As soon as the required channel is displayed, press the button (B) again to store it.
- Tochangethechannelonthemeasuringstation, openthe batterycompartmentandsetthechannelswitch(29)tothe samechannelasthebasestation.

6.3 Basic setting and manual settings
AutomaticsettingaccordingtotheDCFsignal
- Aftersuccessfultransmissionoftheindoorandoutdoortemperaturesbetweenthemeasuringandbasestations,theweatherstation(afteraround3minutes)automaticallystarts
searchingforaDCFsignal.TheDCFradiosymbol duringthesearchprocess. (15)flashes
- Whentheradiosignalisreceived, the date and time are set automatically. This cantakea further 10 minutes. After successful reception, the DCF symbol changes from

Note-settingthetime
- IfnoDCFradiosignalisreceivedwithinthefirstfewminutes oftheinitialsetupprocedure,thesearchisterminated.The radiosymboldisappears.
- Intheeventofreceptionproblems, were recommend leaving theclockstandingovernightsincetheinterferencesignalsare generallyfewerinnumberatthistime.
- Meanwhile, you can carry out a manual search for the DCF radiosignal at different location or set the date and time manually.
- TheclockautomaticallycontinuestosearchfortheDCFradio signaldaily(01:00,02:00,03:00,04:00and05:00).Once thesignalisreceivedsuccessfully, themanuallysettime and dateareoverwritten
If the weather station does not receive the DCF signal, press and hold the button (E) for around 3 second start the signal search for further 10 minutes. Theradiosymbol flashes during the search. If signal is still not received after that, the time and date must be set manually.
6.4 Manual setting of the time, date and units
- Pressandholdthe button(A)foraround3secondstocarry outthefollowingsettingsinsequence:
• 12/24-hourformat - DCFsignalON/OFF
• Timezone(0-12, default"0"forCET)
• Hour
• Minute - Display"Month/Date"or"Date/Month"
• Year
• Month - Date
- Language(GE=German,FR=French,IT=Italian,DU=Dutch,SP=Spanish,DA=Danish,EN=English)
• °C(Celsius)or°F(Fahrenheit)
- Toselecttheindividualvalues,pressthearrowbuttons (D)or ▲ (E). Confirmtheselectionbypassingthe button(A).

- Pressthe button(A)toadoptandskipthedisplayedvalue.
- Ifnoentriesaremadefor20seconds, theclockautomatically exitssettingsmode.

Note-timezone
• The DCF signal can be received in many places, however it does not always correspond to the CET applicable in Germany. You should therefore remember to take into account the time difference in countries with different time zones.
- Moscow,forexample,is3hoursaheadofGermany.Setthe timetothetimezone+3.Theclockwillthenautomatically setitself3hoursaheadofthetimereceivedfromtheDCF signalorthetimesetmanually.
6.5 Maximum and minimum temperature and humidity values
• The basestation automatically store the maximum and minimum temperature values in the outdoor and indoor areas.
- Repeatedlypress the button(D)toswitchfromthecurrent temperaturetothemaximumtemperature(MAX)andthento theminimumtemperature(MIN).
- Themaximumandminimumtemperaturesaredisplayedfor 5seconds.
- Whilethemaximumandminimumvaluesaredisplayed,youcan alsoresetthesebypassingandholdingthe button(D). --.-°C and --% briefly appear for the temperature and ambient humidity.Thenthecurrenttemperatureandambienthumidity aredisplayedagainautomatically.
6.6 Alarm forthemaximum and minimum temperature and humidity values
- Pressandholdthe button(C)togotoalarmsettingmode.
- Thetemperaturedisplayflashesforaround10seconds.Pressing thearrowkeys (D)or(E)allowsyoutofirstsetthe maximumvalue(HI)andthentheminimumvalue(LO).Toscroll rapidlythroughthevalues,holdthearrowkeydownuntilthe desiredvalueisreached.
- Bypassingthe @ button(C)again,youcanselectthe respectivevalue.
• Thesequenceisasfollows:
Maximumoutdoortemperature→Minimumoutdoor temperature→
Maximumoutdoorhumidity→Minimumoutdoorhumidity
→Maximumindoortemperature→Minimumindoor
temperature→Maximumindoorhumidity→Minimumindoor humidity
- Oncea maximum value is reached, the HI warnings symbol flashes next to the corresponding value on the display. Once a minimum value is reached, the LO warnings symbol flashes. A5-second alarmalsosound every minute.
- Todeactivatethealarm, either the ambient conditions must change or the set values must be modified.
6.7Weatherforecast
- Usingchangesinatmosphericairpressureandthestoreddata, thebasestationcanmakepredictionsregardingtheweather forecastforthenext12to24hours.
Note-weatherforecast
During the first few hours of operation, the weather forecast is not possible due to missing data that is only stored during operation.
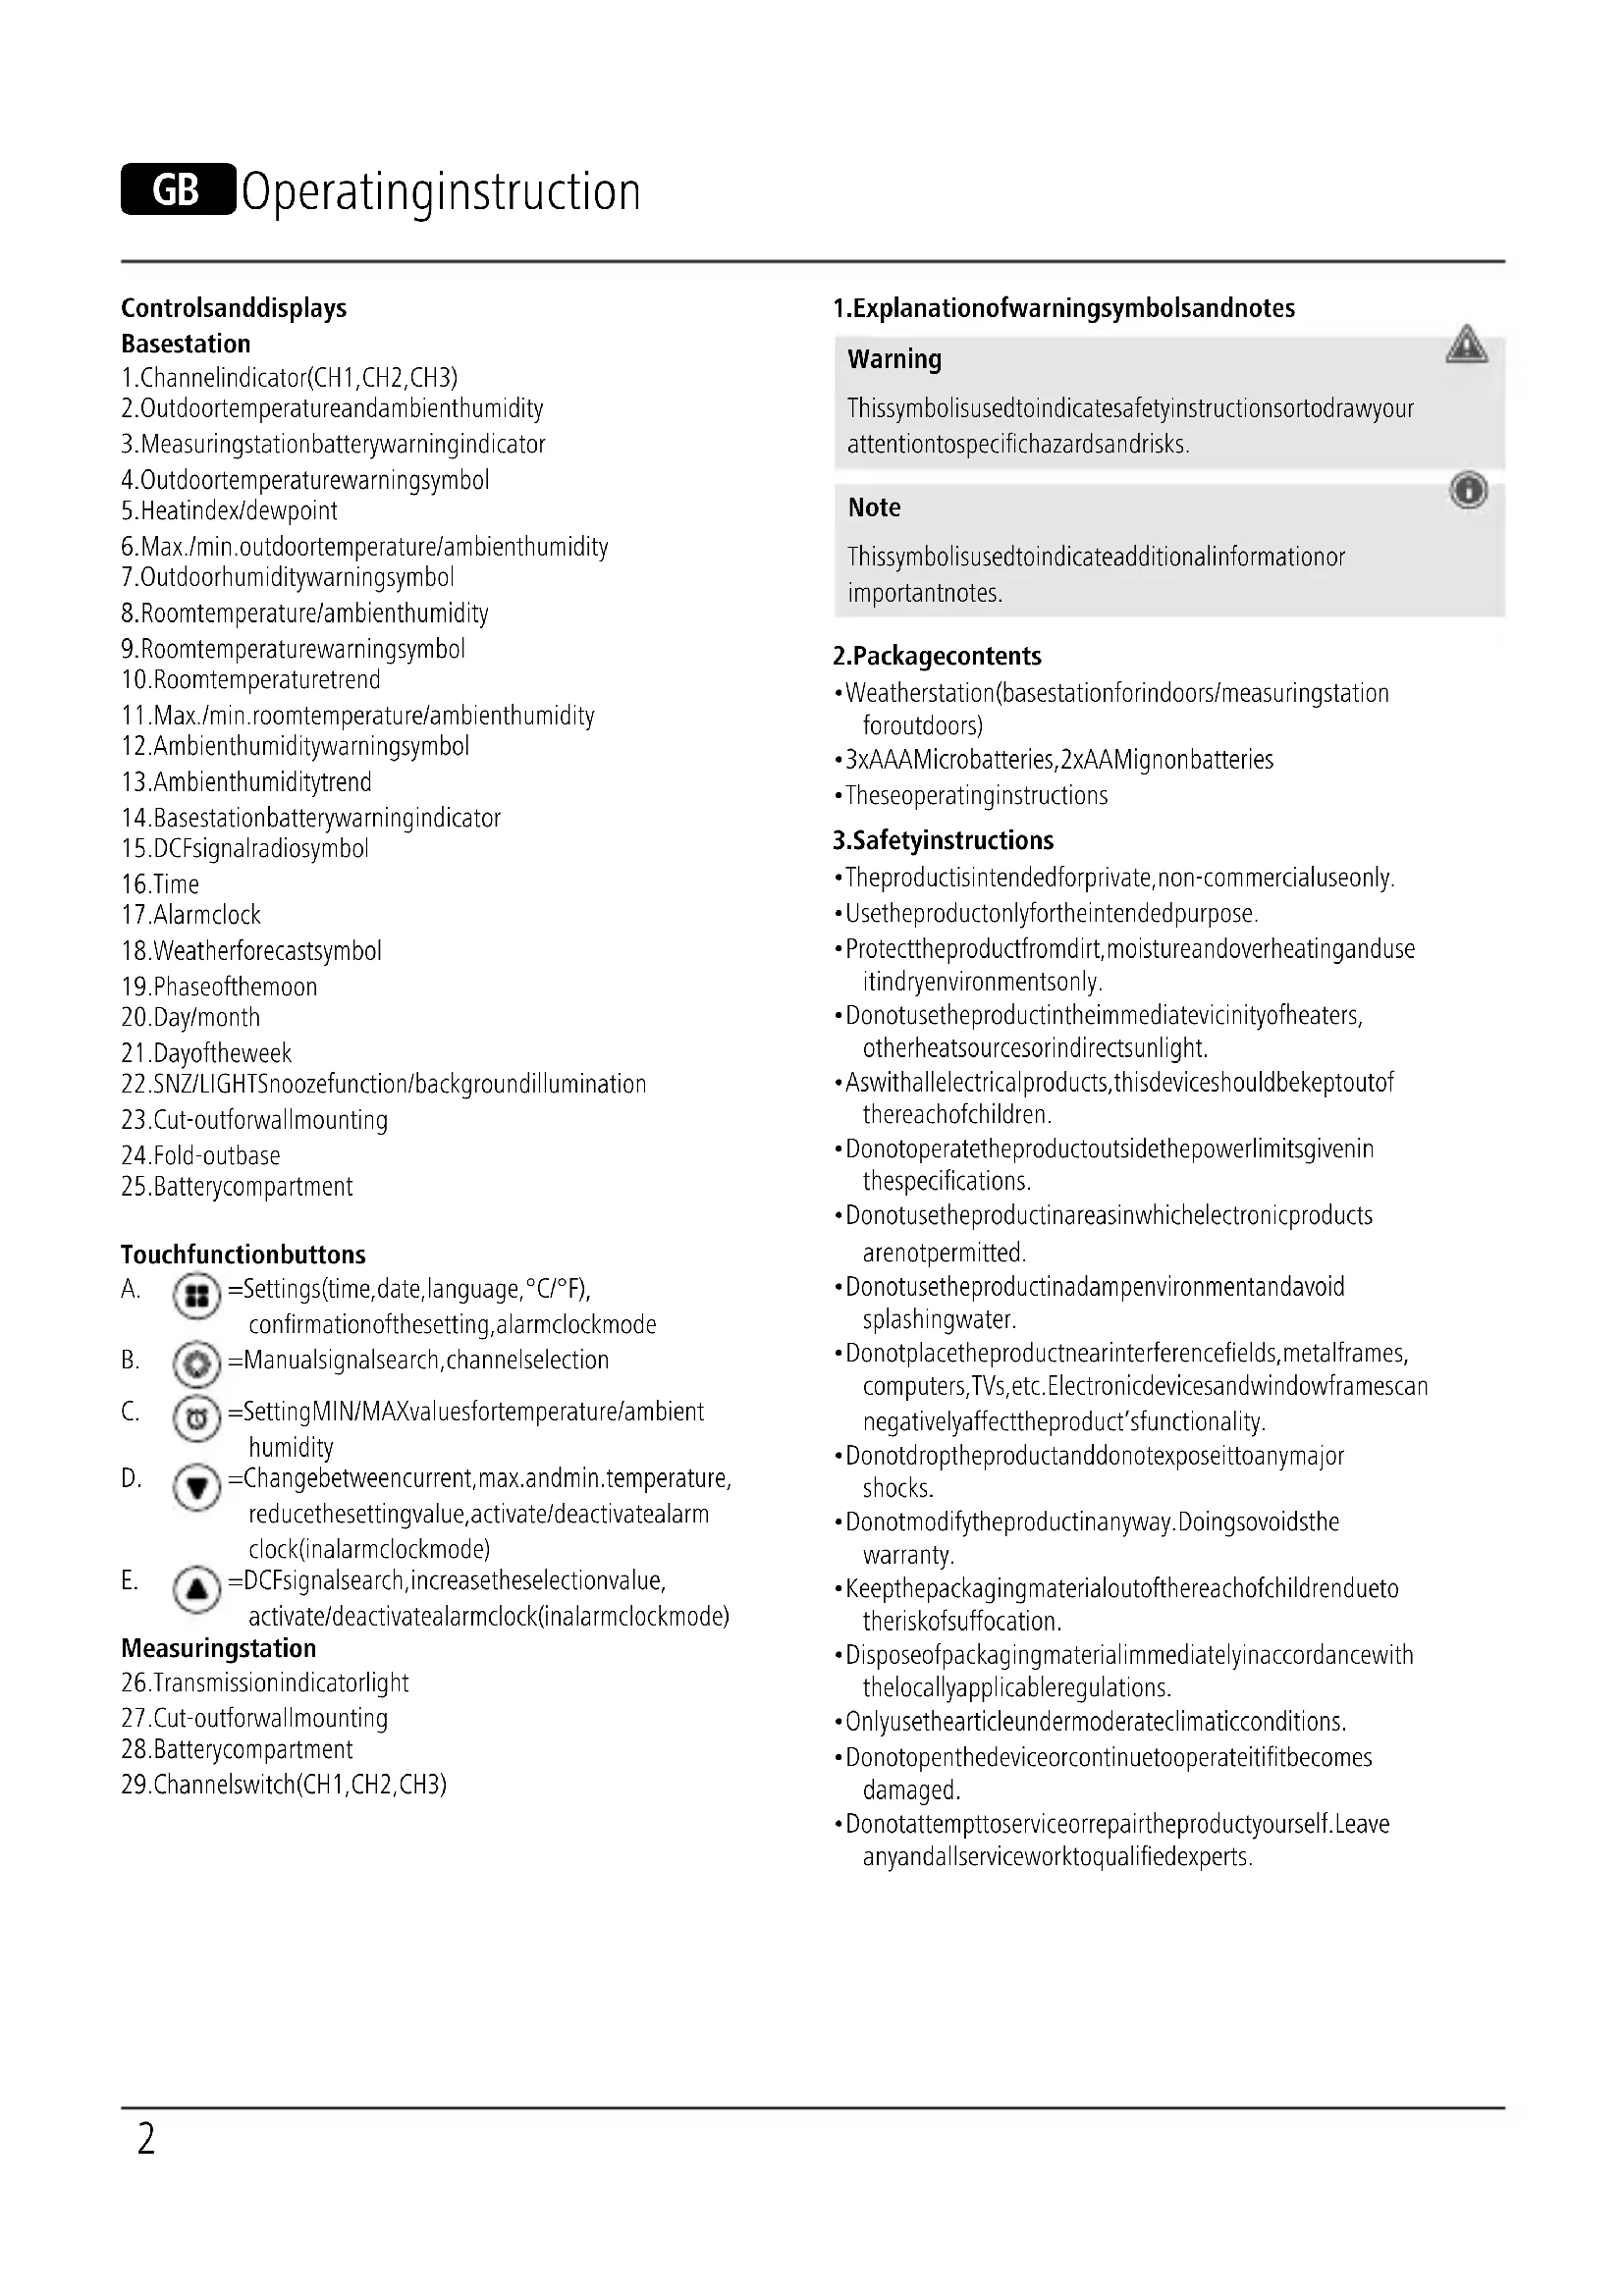
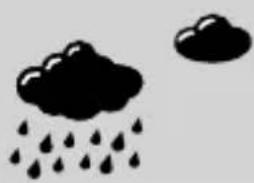
- The weather station indicates the development of the weather over the next 12 to 24 hours using the following weather symbols.
| IconWeather | |
 | Sunny |
 | Slightlycloudy |
 | Overcast |
 | Rainy |
 | Snowfall |
6.8 Temperature and ambient humidity trend
Note

In the first hour of operation, the trend display is not possible due to missing data that is only stored during operation.
Note

Allmeasuredvaluesaresubjecttoacertainmeasurement tolerance.
The weather station gives at trend for the outdoor temperature/humidity and indoor temperature/humidity of how the values will probably develop over them next few hours.
| DisplayTrend | |
 | Rising |
 | Constant |
 | Falling |
6.9 Heatindex(perceivedtemperature)
• Theheatindexisavaluethatisgivenintheunitoftemperature. Thisvaluedescribestheperceivedtemperaturebasedonthe measuredoutdoortemperatureand, mostimportantly,the relativeoutdoorhumidity.
- If the temperature is below 26.7°C, the heat index displays the current measured values.
- If the temperature is above 26.7°C, the weather station displays the perceived temperature in "HEAT" mode, which is measured using the outdoor humidity and outdoor temperature.
- Todothis, press the ▲ button(E) once, the display shows "HEAT"(5) and below the perceived temperature.
- Thedisplaychangesbacktothecurrentdisplayoftemperature andhumidityafter10seconds.
6.10 Dewpoint
- Inadditiontohumidity, the dewpoint is another parameter for characterising the watervapour content of the air. It indicates at what temperature the watervapour in the air would condense. If air is allowed to cool slowly, condensation while eventually occurs. Sowater droplets form grass and others surfaces are wetted with dewdrops, mist is formed. The temperature that prevails at the time of the onset of condensation is the dewpoint.
- Ifthedewpointtemperatureexceedsabout 16^ , theweather is considered humid. Ifthetemperaturesare below the dew point, some of the watervapourin the air condenses intowater and precipitates, forexample, in the form of dewormist. At very cold temperatures, the liquefied watervapoursolidifies directly intofrostorice flowers.
- Pressthe button(E)twice, the display shows "DEW"(5) and below it the dewpoint temperature.
- Thedisplaychangesbacktothecurrentdisplayoftemperature andhumidityafter10seconds.
6.11 Phasesofthemoon
Thebasestationshowsyouthecurrentphaseofthemoon(19)by meansofthefollowingsymbols:
| IconPhaseofthemoon | |
 | Newmoon |
 | Halfmoonwaxing |
 | Halfmoon |
 | Fullmoonwaxing |
 | Fullmoon |
 | Fullmoonwaning |
 | Halfmoon |
 | Halfmoonwaning |
6.12Alarmclock
Settingthealarm
- Brieflypressthe button(A)toswitchtoalarmclockmode. Under "DAY", "AL" is now shown in the display.
- Pressandholdthe button(A)foraround3seconds.The hourdisplaystartstoflash.
- Pressthe (D)or(E)rowkeytoselectthehourof thealarmtimeandconfirmtheselectionbypressingthe button(A).
- Theminutedisplaystartstoflash.Repeattheprocedureforthe minutesofthealarmtime.
- Confirmtheselectionbypressingthe button(A).Thealarm timeisnowsavedandthealarmisautomaticallyactive.The alarmsymbol appearsinthedisplay.
Deactivating/activatingthealarm
- Firstbrieflypressthe mode. button(A)toswitchtoalarmclock
• Thealarmcannowbedeactivatedoractivatedbypassingthe (D)or(E)arrowkey.Ifthesymbolappearsnextto thetime,thealarmisactive.
Note-Snoozefunction
During the alarmsignal, presstheSNZ/LIGHTbutton(22) to activatethesnoozefunction. The alarmsignal is interrupted for 5 minutes and then triggered again.

6.13Backlight
Note-Backlight
PresstheSNZ/LIGHTbutton(22)toilluminatethedisplayfor around10seconds.

7. Careandmaintenance
- Onlycleanthisproductusingalint-free,slightlydampclothand donotuseanyharshcleaners.
- Ensure that now waterisable to enter the product.
8. Warrantydisclaimer
HamaGmbH&CoKGassumesnoliabilityandprovidesno warrantyfordamageresultingfromimproperinstallation/mounting, improperuseoftheproductorfromfailuretoobservetheoperating instructionsand/orsafetynotes.
9.Technicaldata
| Weatherstation | |
| PowersupplyBasestation | 4.5V3xAAAMicrobatteries |
| PowersupplyMeasuringstation | 3.0V2xAAbatteries |
| MeasuringrangeTemperature | Indoor:-10°C-+50°C/+14°F-+122°FOutdoor:-40°C-+70°C/-40°F-+158°F |
| Measuringrangeambienthumidity | 20%-95% |
| Max.numberofmeasuringstations | 3 |
| RangeApprox.30m(outdoors) | |
10. Declaration of conformity
CE HamaGmbH&CoKGherebydeclaresthattheradio equipmenttype[00186421]isincompliancewith Directive2014/53/EU.ThefulltextoftheEU
declarationofconformitycanbefoundonthefollowingwebsite: www.hama.com->00186421->Downloads.
| Frequencyband(s)433.92MHz | |
| Maximumradiofrequency | 0.2mW |
| Powertransmitted |
natural_image
Simple black-and-white illustration of a cloud with stars and raindrops (no text or symbols)Schneefall
| Frequencyband(s)433.92MHz | |
| Maximumradio-frequency powertransmitted | 0.2mW |
| Frequencyband(s)433,92MHz | |
| Maximumradio-frequency powertransmitted | 0,2mW |
Elementidicomandoeindicatori
Stazionebase
natural_image
Simple illustration of black clouds and stars on a gray background (no text or symbols)Neve
natural_image
Simple black-and-white illustration of a cloud with stars and raindrops (no text or symbols)Hóesés
| Frequencyband(s)433,92MHz | |
| Maximumradio-frequency powertransmitted | 0.2mW |
natural_image
Simple illustration of black clouds and stars on a gray background (no text or symbols)Снегопад
6.8Тенденцияизменениятемпературыивлажности воздуха
Указание

86652Monheim/Germany
Service&Support
www.hama.com
+499091502-0
D | GB
CE

RaccoltaCarta
All listed brands are trademark of the corresponding companies. Errors and mission excepted, and subject to technical changes. Our general terms of delivery and payment are applied.


- Explanationofwarningsymbolsandnotes
- Warning
- Note
- 2.Packagecontents
- Safetyinstructions
- Warning-Batteries
- Commissioning
- Inserting the batteries
- Measuringstation
- Basestation
- 4.2Changingbatteries
- Installation
- Note-Installation
- Basestation
- Measuringstation
- 6.Operation
- Connectiontothemeasuringstation
- Note-faultytransmissionofthemeasured values
- Channelselection/Additionaloutdoorsensors
- Basic setting and manual settings
- AutomaticsettingaccordingtotheDCFsignal
- Note-settingthetime
- Manual setting of the time, date and units
- Note-timezone
- Maximum and minimum temperature and humidity values
- Alarm forthemaximum and minimum temperature and humidity values
- 6.7Weatherforecast
- Note-weatherforecast
- Temperature and ambient humidity trend
- Heatindex(perceivedtemperature)
- Dewpoint
- Phasesofthemoon
- 6.12Alarmclock
- Settingthealarm
- Deactivating/activatingthealarm
- Note-Snoozefunction
- 6.13Backlight
- Note-Backlight
- Careandmaintenance
- Warrantydisclaimer
- Declaration of conformity
- Elementidicomandoeindicatori
- Stazionebase
- 6.8Тенденцияизменениятемпературыивлажности воздуха
- Указание
- 86652Monheim/Germany
- Service&Support
Brand : HAMA
Model : Full Touch 186421
Category : Weather Station