
Black Line Plus 186418 - Weather Station HAMA - Free user manual and instructions
Find the device manual for free Black Line Plus 186418 HAMA in PDF.
| Product type | Indoor/outdoor weather station |
| Brand | Hama |
| Model | Black Line Plus 186418 |
| Base station power supply | 4.5 V (3 LR6/AA batteries) or 5 V / 0.5 A mains adapter |
| Outdoor sensor power supply | 3.0 V (2 LR03/AA batteries) |
| Indoor temperature measurement range | 0°C to +50°C |
| Outdoor temperature measurement range | -20°C to +60°C |
| Humidity measurement range | 20% to 95% |
| Barometer | 850 hPa to 1050 hPa |
| Pressure history display | 12 hours |
| Weather forecast | 12 to 24 h (icons: sunny, cloudy, rainy, snowy) |
| Lunar phases | 8 phases displayed |
| Dew point and heat index | Yes |
| Frost alarm | Yes (between +1°C and -1°C) |
| Mold risk | 4 levels (0, LOW, MED, HI) |
| Alarm function | Two alarms with snooze |
| Radio-controlled DCF clock | Yes, automatic adjustment |
| Maximum number of outdoor sensors | 3 |
| Radio range | ≤ 50 m in open field |
| Frequency | 433 MHz |
| Dimensions (estimated) | 150 x 100 x 30 mm |
| Weight (estimated) | 300 g |
| Maintenance | Clean with damp cloth, no harsh detergents |
Frequently Asked Questions - Black Line Plus 186418 HAMA
User questions about Black Line Plus 186418 HAMA
0 question about this device. Answer the ones you know or ask your own.
Ask a new question about this device
Download the instructions for your Weather Station in PDF format for free! Find your manual Black Line Plus 186418 - HAMA and take your electronic device back in hand. On this page are published all the documents necessary for the use of your device. Black Line Plus 186418 by HAMA.
USER MANUAL Black Line Plus 186418 HAMA
OperatingInstructions
Bedienungsanleitung
Moded'emploi
Instruccionesdeuso
Gebruiksaanwijzing
Istruzioniperl'uso
Instrukcjaobsługi
Használatiútmutató
Manualdeutilizare
Návodk p oužití
Návodnapoužitie
Manualdeinstruções
Bruksanvisning
GB Operatinginstruction
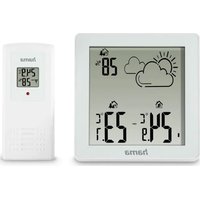
ControlsandDisplays
| 1 | Day | |
| 2 | M | o n t h |
| 3 | D | ayoftheweek |
| 4 | M | oonphase |
| 5 | A | larmsymbols(displayedwhenalarmisactive) |
| 6 | 1 | 2-houratmosphericpressure history |
| 7 | D | CFsignalradiosymbol |
| 8 | S | ummertime |
| 9 | O | utdoorsensorradiosymbol |
10Atmosphericpressure
11 Atmospheric pressure trend
12Outdoorsensorradiochanneldisplay
13Outdoortemperature t rend
14Outdoormouldrisk
15Outdoortemperature
16DEW—d ewpoint
17HEAT - h eatindex
18Displayforlowbatterylevelinoutdoorsensor
19Outdoorhumiditytrend
20Displayofmax./min.outdoortemperature / humidity
21 Outdoorhumidity
22Frostdisplay
23Weatherforecastsymbol
24Roomhumiditytrend
25 Low battery level display for the base station
26Roomhumidity
27Displayofmax./min.roomtemperature/h u m i d i t y
28Roomtemperature
29Indoormouldrisk
30Roomtemperature t rend
31Time
A 9/4 key = settings / confirms the setting
Bkey MAX/MIN/+ = increasesthecurrentsetvalue/recalls the savedmaximum/minimumvalues(MAX/MIN)
C -/→ key= R eductioninthecurrentsettingvalue / A ctivation/ D eactivationofmanualDCFradio signalreception/ M ouldriskdisplay
Dkey= activates/deactivatesthealarm
Ekey= anualsearchfortheoutdoorsensor signal/ c hannelselection
FSNOOZE/LIGHTbutton= temporarilyinterrupts thealarm/ a ctivatesthebacklight
G 5 -Vpowersupplyconnection
H B atterycompartment
l B a s e
J R ecessforwallmounting
Thankyouforchoosinga H amaproduct.
Takeyourtimeandreadthefollowinginstructionsand informationcompletely. P leasekeeptheseinstructions in a safe place for future reference. If you sell the device, pleasepasstheseoperatinginstructionsontothenew owner.
1. ExplanationofWarningSymbolsandNotes
Riskofelectricshock

This symbol indicates product parts energized with a dangerous voltage of sufficient magnitude to constitute a risk of electric shock.
Warning

This symbol is used to indicate safety instructions to draw your attention to specific hazards and risks.
Note

This symbol is used to indicate additional information or important notes.
2.PackageContents
- Weather station (base station for indoors / outdoor sensorforoutdoors)
• 2 A A b atteriesfortheoutdoorsensor - Powersupplyunit
• Theseoperatinginstructions
3. SafetyNotes
- Theproductisintendedforprivate,non-commercial useonly.
- Usetheproductforitsintendedpurposeonly.
- Protect the product from dirt, moisture and overheating, and only use it in dry environment.
- Donotusetheproductintheimmediatevicinity of heatersorotherheatsourcesorindirectsunlight.
- Keep this product, as all electrical products, out of the reach of children!
- Usetheitemonlyinmoderateclimaticconditions.
- Donotoperatetheproductoutsidethepowerlimits giveninthespecifications.
- Do not use the product in areas where the use of electronic devices is not permitted.
- Donotusetheproductinmoistenvironmentsandavoid splashes.
- Donotplacetheproductnearinterferencefields, metal frames, computers, TVs, etc. Electronicdevices and windowframescannegativelyaffecttheproduct's functionality
- Donotdropheproductanddonotexposeittoany majorshocks.
- Do not modify the product in any way. Doing so voids the warranty.
- Keepthepackagingmaterialoutofthereachof childrenduetotheriskofsuffocation.
- Disposeofpackagingmaterialimmediatelyaccordingto locallyapplicableregulations.
- Lay all cables so that they do not pose a tripping hazard.
- Donotbendorcrushthecable.
Riskofelectricshock
- Donotopenthedeviceorcontinuetooperateitifit becomesdamaged.
- Donotusetheproductifthe AC adapter, the adapter cable or the mains cable are damaged.

Riskofelectricshock

- Donotattempttoserviceorrepairtheproduct yourself. Leave any and all service work to qualified experts.
Warning-Batteries

- Wheninsertingbatteries, notethecorrectpolarity(+ and-m markings)andinsertthebatteriesaccordingly. Failure to do so could result in the batteries leaking orexploding.
- Onlyusebatteries(orrechargeablebatteries)that matchthespecifiedtype.
- Before you insert the batteries, clean the battery contactsandthepolarcontacts.
- Donotallowchildrentochangebatterieswithout supervision.
- Donotmixoldandnewbatteriesorbatteriesofa differenttypeormake.
- Removethebatteriesfromproductsthatare n o t beingusedforanextendedperiod(unlessthesare beingkeptreadyforanemergency).
- Donotshort-circuitbatteries.
- Donotchargebatteries.
- Donotthrowbatteriesinafire.
- Keepbatteriesoutofthereachofchildren.
- Neveropen, damageorswallowbatteriesorallow themtoentertheenvironment. They can contain toxic, environmentally harmful heavymetals.
- Immediately remove and dispose of dead batteries from the product.
- Avoidstoring, chargingorusingthedeviceinextreme temperaturesandextremelylowatmosphericpressure (forexample,athighaltitudes).
4. Getting Started
Note
Pleaseremember, d uringcommissioning, toalways insertthebatteriesintotheoutdoorsensorfirstand thenintothebasestation.

4.1 Insertbatteries/ c onnectpowersupply
Outdoorsensor
- Removethescreenprotectorfromthedisplay.
- Openthebatterycompartmentandremovethecontact breaker.
- Thenclosethebatterycompartmentcover.
Basestation
Warning
- Connect the product only to a socket that has been approvedforthedevice.Thesocketmustbeinstalled closetotheproductandmustbeeasilyaccessible.
- When using a multi-socket power strip, make sure that the sumpower draw of all the connected devices does not exceed its maximum through put rating.
-
If you will not be using the product for a long period of time, disconnectitfrommainspower.
-
Removethescreenprotectorfromthedisplay.
- Connectthepowersupplyunittothepowersupplyunit connectionsocket(G)onthebackofthebasestation.
- Connecttheweatherstation'spowersupplyunittoa correctlyinstalledmainssocket.
- Alternatively, open the battery compartment (H), insert threeAAbatterieswiththecorrectpolarityandclose thebatterycompartmentcover.

Note
If the batteries are inserted correctly and you connect the powersupply unit to theestation, the basestation will automatically switch to the external powersupply.

4.2Replacingthebatteries
Note- R eplacingthebatteries
- Be aware that, after every battery change on the outdoorsensororbasestation, the stationswillneed toberesynchronised.
- Todothis, removethebatteriesfromtheotherstation andthenreinsertthem,orchangethemasrequired.

Outdoorsensor
- Ifthesymbol(18)appears,replace2AA batteriesintheoutdoorsensorwith2 newbatteries.
- Openthebatterycompartment, removeandproperly disposeofthedeadbatteriesandinsert2 n ewAA batterieswiththecorrectpolarity. T henclosethebattery compartmentcover.
Basestation
- Whenthesymbol(25)appears, replacethethreeAA batteriesforthebasestationwiththreenewones.
- Openthebatterycompartment(H), remove and properly dispose of the depleted batteries and insert threenew AA batteries with the correct polarity. Then close the battery compartment cover.
5. Installation
Note-Installation
- Werecommendinitiallypositioningthebasestation andoutdoorsensoratthepreferredsetuplocations withoutassemblingthemandcarryingoutallthe settings - as described in 6. Operation - first.
- Onlyinstallthestationsoncetheappropriatesettings havebeenmadeanda's tablewirelessconnectionis established.

Note
• Therangeoftheradiotransmissionbetween the outdoorsensorandthebasestationisupto50min unobstructedareas.
- Before installation, ensure that wireless transmission will not be disrupted by interference or obstacles like buildings, trees, vehicles, high-voltagelines, etc.
- Before the final installation, ensure that there is sufficient reception between the intended installation locations.
- When assembling the outdoor sensor, take care to ensure it is positioned so that it is protected from direct sunlight and rain.
- The international standard height for measuring air temperature is 1.25 m (4 ft) above ground.

Warning
- Buyspecialorsuitableinstallationmaterialfroma specialiseddealerforwall-mounting.
- Ensure that no faulty or damaged parts are installed.
- Neverapplyforceduringinstallation. This could damage the product.
- Before installation, ensure that the chosen wall is suitable for the weight to be mounted, and makes sure that there are no electrical wires, water, gas or other lines at the installationsite on the wall.
- Donotmounttheproductabovelocationswhere personsmightlinger.

5.1 Basestation
- Usethebase(I)topositionthebasestationona level surface.
- Alternatively, you can install the base station on a wall usingtheopening(J) o n t heback.
5.20utdoorsensor
- You can also set the outdoor sensor up on an even surfaceoutdoors.
- Were recommend mounting the outdoors sensor securely and firmly on an outdoor wall.
• Install an anchor, screw, nail, etc. in the wall of your choice. - Hangtheoutdoorsensorontoitusingthecut-out provided.
6.Operation
Note- Input
- Holdthebutton(B)orthebutton(C)to/- selectthevaluesfaster.

6.1 Connection to the outdoor sensor
• After the batteries are inserted, the base station automaticallysearchesfora c onnectiontotheoutdoor sensorandcarriesouttheinitialsetuproutine.
Note
- Initialsetuptakesapproximately3 m inutes.
- During the connection attempt, theradiosignal on the outdoorsensor(9)flashes.
- Donotpressanybuttonsduringsetup. Otherwise, valuesmaynotbetransmittedcorrectlyandthereisa riskofvalueerrorsandinaccuracies.
- Thesetupprocessiscompletedwhentheindoor andoutdoormeasurementdata(15/21/26/28)is displayed.
- Ifnosignalisreceivedfromtheoutdoorsensorona repeatedbasis,pressandholdthekey(B)forapprox. 3 secondstostartthemanualsearchforthesignal.

Note— Faultytransferofmeasured values

- In some cases, interference caused by a WiFi network, computer, T Vetc.,forexample,maycausethe transmissionofmeasurementvaluesbetweenthe basestationandtheoutdoorsensortofail.
- Inthiscase, you must resynchronisethestations by briefly removing the batteries from both stations and reinserting them.
- If the measured values are not transferred again once thebatteriesare inserted, replacethebatterieswith newones.
- If necessary, select a new location for the base station inordertoavoidpossibleinterferenceinthefuture.
6.2 Channelselection/ A additionaloutdoorsensors
Note

- You can install two further outdoor sensors in addition to the outdoors sensors supplied. Whending so, ensure the same channel setting on the base station and each outdoors sensor.
- Suitableoutdoorsensorscanbefoundat www.hama.com
- Pressthe key(E)r epeatedlytosetthesamechannel asontheoutdoorsensorinquestion.Channel1,2or 3 i s d is played.
- If the symbolisdisplayed, the weather station will automatically switch the displayed channel every five seconds.
6.3 Basic and manual settings
AutomaticsettingusingtheDCFsignal
- Afterswitchingonthebasestationforthefirsttimeand successfullytransferringdatabetweenthebasestation andoutdoorsensor, t heclockautomaticallystartsthe searchfortheDCFsignal.Theradiosymbol(7)flashes duringthesearchprocess.
| Display | SearchingfortheDCF signal |
| Displayflashing | Active |
| Displayedcontinuously | Successful- signalisbeing received |
| NodisplayInactive |
- If the station still does not receive a signal, press and holdthebutton(C)forapprox.3 s econdstostart themanualsearchfortheDCFsignal. Thewireless symbol(7)willstarttoflash.
Note- Timesettings

- The search process takes about 7 minutes. If the search fails, itendsandisrepeatedatthenextclockhour.
- In the meantime you can, however, set the time and the datemanually.
- TheclockautomaticallycontinuestosearchfortheDCF signalona dailybasis(between1:00a.m.and5:00 a.m.). If the signal is received successfully, then manually settmeanddateare o verwritten.
- Pressandholdthe -/→ button(C)againfor approximately3 s econdstostopthemanualsearch.

Note- Summertime
Theclockautomaticallyswitchestosummertime.S(8)appearsonthedisplayaslongassummertimeis activated.
(Manual Cuba)settings
- Pressandholdthebutton(A)forapproximately3 secondstomakethefollowingsettingsoneafterthe other:
• Year -
Monthanddatedisplay
• Month
• Day
• Hour -
Minute
• 12-/24-hformat
• Timezone -
°Cand°Fdisplay
• Language
• hPa a ndinHgdisplay -
Toselecttheindividualvalues, press the /+ button(B) orthebutton(C), and confirm each selection by pressing the button(A).
- Pressthebutton(A)immediatelytoadopttheset valuedisplayedandskipahead.
- If you donot make an entry for 20 seconds, Settings mode is exited automatically.
Note- Timezone

•The DCF signal can be received over long distances, but always transmit the current Central European Time in Germany. Make sure you account for the time difference in countries with another time zone.
- If you are in Moscow, the time is 3 hours later than in Germany. This mean that you should set + 3 for the timezone. The clock then automatically set the time to 3 hours after the DCF signal received or relative to them manually set time.
Note- Dayoftheweek

You can choose from German(GER), English(ENG), French(FRE), Italian(ITA), Spanish(SPA), Dutch(DUT) and Danish(DAN) forth the day of the week display.
Alarm
- You cansettwoseparatealarmtimes,
and. - Pressthebutton(A)todisplaythealarmtime.
- Pressandholdthebutton(A)forapprox.3 seconds tosetthesignaltimeofthealarmdisplayed.Thehours displaybeginstoflash.
-
Pressthebutton(B)orthebutton(C)toselect thehourforthealarmtimeandconfirmyourselection bypassingthebutton(A).Theminutesdisplay beginstoflash.
-
Repeat the processtosettheminutes for the alarm time.
- Repeat this process for these second alarm time.
- If you donot make an entry for 20 seconds, Settings mode is exited automatically.
- If the alarmist riggered, the alarmsymbol will beg into flash and an alarm will sound.
- Pressanybutton(excepttheSNOOZE/LIGHT button(F))tostopthealarm. Otherwise, it will stop automatically after 2 minutes.
• The alarmdoesnotneedtobereactivated. It will trigger again at the target alarm time 24 hours later.
Enabling/disablingthealarm
- Toselectandactivateordeactivatetheappropriate alarm, pressthe button(D)repeatedlytoselect or. A n a ctivealarmisdisplayedbythealarmsymbol or. Whenanactivealarmisdeactivated, the correspondingalarmsymbolor disappears.
- Whenthealarmistriggered, theactivealarmsymbol (5) beginstoflashandanalarmsounds. Pressany button(excepttheSNOOZE/LIGHTsensor(F)) tostop thealarm. Otherwise, it will stop automatically after 2 minutes.
Note- S noozefunction

- Whilethealarmsignalissounding, press the SNOOZE/LIGHTbutton(F)toactivatethesnooze function. Thealarmsignalwillstopfor5 m inutes, afterwhichitwillsoundagain.
- Pressanybutton(excepttheSNOOZE/LIGHTbutton(F))tostopthesnoozefunctionandthealarm.
6.4Weatherforecast
- Based on changes in the atmospheric pressure and the datasaved, the basestation is a letomakew eather forecasts for then next 12 to 24 hours.

Note— W eatherforecast
The weather forecast function is not available during the first few hours of operation because it requires data that is collected during operation.
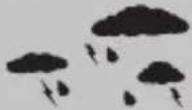
The weather stations show sthetrend of the weather for then next 8 h ours using the following weathers symbols:

| SymbolWeather | |
 | Sunny |
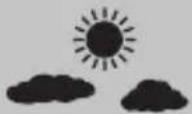 | Slightlycloudy |
 | Cloudy |
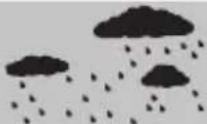 | Rainy |
 | Veryrainy |
 | Snowfall |
 | Heavysnow |
6.5 Temperature, humidity and atmospheric pressure trends
Note

The trend displays are not available during the first few hoursofoperationbecausetheyrequire d atathatis collectedduringoperation.
Note

All measurement values are subject to a certain amount of measurementerror.
The weather station indicates a trend as to how the values fortheoutdoortemperature/humidity(15/21),room temperature/humidity(28/26)andatmosphericpressure (10)are likelytodevelopothenextfewhours.
| DisplayTrend | |
| ▲ | Increasing |
| ▶ | Constant |
| ▼ | Decreasing |
Airpressure record
- The air pressure recorded in the last 12 hours is displayed(6).
6.6 Maximum and minimum temperature and humidity values
- Thebasestationautomaticallystoresthemaximumand minimumoutdoor/indoortemperature a ndhumidity values.
- Repeatedlypressthe 12 button(B)briefly to switch between the current temperature and humidity, minimum temperature and humidity(MIN) and maximum temperature and humidity(MAX).
- Pressandholdthe /+ button(B)forapprox.3 seconds toresetthestoredmaximumandminimumvalues.
6.7 Moonphases
Thebasestationdisplaysthecurrentmoonphase(4) usingthefollowingsymbols:
| Display(4)Moonphase | |
 | Newmoon |
 | Waxingcrescent |
 | Half-full |
 | Waxinggibbous |
 | Fullmoon |
 | Waninggibbous |
 | Half-full |
 | Waningcrescent |
6.8 Dewpoint
- Toviewthecurrentdewpointtemperature, pressthe -/→ button(C) until DEWappearsintheoutdoordata display.
- LL.Lisdisplayedifthedewpointisbelow0°C, and HH.Hisdisplayedifthedewpointisabove60°C.
- Thedisplayautomaticallyswitchesbacktothecurrent temperature a ndhumiditydisplay.
- The relationship between temperature and relative humidity is expressed through the dewpoint: Ifairis continuously cooled and absolute humidity remains the same, relative humidity increases up to 100%. Ifair cools further, the excess water vapour is precipitated as droplets.
6.9 Heatindex
- The heat index is a value specified in the unit of temperature. This valued describes how hot it feels based on themeasured outdoor temperature and, above all, relative outdoor humidity.
- If the temperature is below 26.7 degrees, the heat index showsthecurrentlymeasuredvalues.
- If the temperature is above 26.7°C, the weather station inHEAT m odedisplaystheapparenttemperature;thisis calculatedbytakingintoaccounttheoutdoorhumidity andoutdoortemperature.
6.10Frostalarm
- Thesnowflakesymbol ! (22)flashesiftheoutdoor temperature is b between+1and-1°C.
- Thesnowflakesymbol(22)remainsdisplayedifthe outdoortemperature is below-1.1°C.
6.11 Mouldrisk
- The weather station has a display that allows the risk of mouldtobemeasured and presented with four different values.
- Press - / (C) to briefly display the mould risk for indoors insteadofthedate.
- The following values can be displayed: 0 = No risk of mould, LOW = Low risk of mould, MED = Increased riskofmould(upto56digits), HI = Highriskofmould (measurementvalueupto160digits).
- Afterpressingthekey(C)again,themeasuredrisk ofmouldforoutdoorsisdisplayedabovetheoutdoor temperature.
- Pressthekey(G)onelasttimetoviewthedaysof theweekagainandtoresettheweatherstationtoDEW mode.Ifyoudonotsubsequentlypressthebutton, themoulddisplaywillautomaticallydisappearaftera shorttime.
6.12Backlight
- If you press the SNOOZE/LIGHT button (F), the display will light up.
- Duringbatteryoperation, the display is illuminated for approximately 10 seconds.
Note— P ermanentbacklight
Permanentbacklightmodeisonlypossiblewhenthe basestationispluggedintomainspower.

7. Care and Maintenance
Note
Disconnect the device from the powers supply before cleaning for it is not going to be used for a long period of time.

- Only clean this product with a slightly damp, lint-free clothanddonotuseaggressivecleaningagents.
- Make sure that water does not get into the product.
8.WarrantyDisclaimer
Hama GmbH & Co KG assumes no liability and provides no warrantyfordamageresultingfromimproperinstallation/mounting, improperuseoftheproductorfromfailuretoobservetheoperatinginstructionsand/orsafetynotes.
9.TechnicalData
| Specificationsinaccordancewith Regulation(EU)2019/1782 | |
| Manufacturer's nameortrademark,commercialregistrationnumberandaddress | Hama,HRA12159,DresdnerStr.9,86653Monheim |
| Modelidentifier | HX075-0500500-AG-001 |
| Inputvoltage100-240V | |
| InputACfrequency50/60Hz | |
| Outputvoltage/Outputcurrent/Outputpower | 5.0V D C/0.5A/2.5W |
| Averageactiveefficiency73.6% | |
| Efficiencyatlowload(10%)60.4% | |
| No-loadpowerconsumption0.04W | |
| Basestation | Outdoorsensor | |
| Powersupply | 4.5V3 x A A batteriesPowersupply unit:IN:100-240V ~ 50/60HzOUT: 5 .0V,0.5A | 3.0V2 x A A b a t t e r i |
| Measuringrange Temperature (°C)Humidity | 0°C- + 50°C/32°F- + 122°F20%- 9 5% | -20°C- + 60°C20%- 9 5% |
| Measurement incrementsTemperature Humidity | 0.1°C/0.2°F1% | 0.1°C1% |
| DCFradio-controlledclock | YesNo | |
| HygrometerYes | Y | e |
| ThermometerYes | Y | e |
| Barometer | 850hPa ~ 1050hPa/25.07inHg~30.97inHg | No |
| AlarmfunctionYesNo | ||
| Max.numberof outdoorsensors | 3 | |
| Range | ≤50m | |
10. DeclarationofConformity
CE Hereby, Hama GmbH & Co KG declares that the radioequipmenttype[00186418]isin compliancewithDirective2014/53/EU. Thefull
textoftheEUdeclarationofconformityisavailableatthe followinginternetaddress:
www.hama.com->00186418->Downloads.
| Frequencyband(s)433MHz | |
| Maximumradio-frequencypower transmitted | 0.222mW |
S
S
Activering/deactiveringwekker
natural_image
Simple illustration of snowfall with cloud shapes and stars (no text or symbols)Quedadeneveintensa
natural_image
Simple illustration of raindrops falling and snowflakes (no text or symbols)Сильныйснегопад
86652Monheim/Germany
Service& Support

www.hama.com

+499091502-0
D
GB
All listed brands are trademarks of the corresponding companies. Errors and omissions excepted, and subject to technical changes. Our general terms of delivery and payment are applied.


- GB Operatinginstruction
- ExplanationofWarningSymbolsandNotes
- Riskofelectricshock
- Warning
- Note
- 2.PackageContents
- SafetyNotes
- Warning-Batteries
- Getting Started
- Insertbatteries/ c onnectpowersupply
- Outdoorsensor
- Basestation
- 4.2Replacingthebatteries
- Note- R eplacingthebatteries
- Installation
- Note-Installation
- Basestation
- 5.20utdoorsensor
- 6.Operation
- Note- Input
- Connection to the outdoor sensor
- Note— Faultytransferofmeasured values
- Channelselection/ A additionaloutdoorsensors
- Basic and manual settings
- AutomaticsettingusingtheDCFsignal
- Note- Timesettings
- Note- Summertime
- (Manual Cuba)settings
- Note- Timezone
- Note- Dayoftheweek
- Alarm
- Enabling/disablingthealarm
- Note- S noozefunction
- 6.4Weatherforecast
- Note— W eatherforecast
- Temperature, humidity and atmospheric pressure trends
- Airpressure record
- Maximum and minimum temperature and humidity values
- Moonphases
- Dewpoint
- Heatindex
- 6.10Frostalarm
- Mouldrisk
- 6.12Backlight
- Note— P ermanentbacklight
- Care and Maintenance
- 8.WarrantyDisclaimer
- 9.TechnicalData
- DeclarationofConformity
- Activering/deactiveringwekker
- 86652Monheim/Germany
- Service& Support
Brand : HAMA
Model : Black Line Plus 186418
Category : Weather Station