OCR 311 - Alarm clock radio OK - Free user manual and instructions
Find the device manual for free OCR 311 OK in PDF.
| Product type | Radio alarm clock |
| Brand | OK |
| Model | OCR 311 |
| Power supply | 230 V, 50 Hz |
| Power consumption (on) | 5 W |
| Power consumption (standby) | ≤ 1 W |
| Backup power | 2 x 1.5 V LR03/AAA batteries (not included) |
| Radio frequency range | 87.5 – 108 MHz (FM) |
| Display | Digital with brightness adjustment (2 levels) |
| Alarms | 2 independent alarms (beep or radio) |
| NAP function | Yes, adjustable to 45, 60, 90 or 120 min |
| Sleep function | Yes, adjustable from 10 to 90 min in 10 min increments |
| Snooze | Yes, 9 minutes |
| Station memory | 20 FM stations |
| Antenna | Wired antenna |
| Protection class | II (double insulation) |
| Care and cleaning | Unplug before cleaning; soft damp cloth and mild detergent; do not immerse |
| Operating temperature | Max. 35 °C |
| Dimensions (approx.) | Approx. 200 x 120 x 80 mm (W x H x D) |
| Weight (approx.) | Approx. 500 g |
Frequently Asked Questions - OCR 311 OK
User questions about OCR 311 OK
0 question about this device. Answer the ones you know or ask your own.
Ask a new question about this device
Download the instructions for your Alarm clock radio in PDF format for free! Find your manual OCR 311 - OK and take your electronic device back in hand. On this page are published all the documents necessary for the use of your device. OCR 311 by OK.
USER MANUAL OCR 311 OK
Thanks for your purchase of an ok. product. Please read this manual carefully and keep it for future reference.
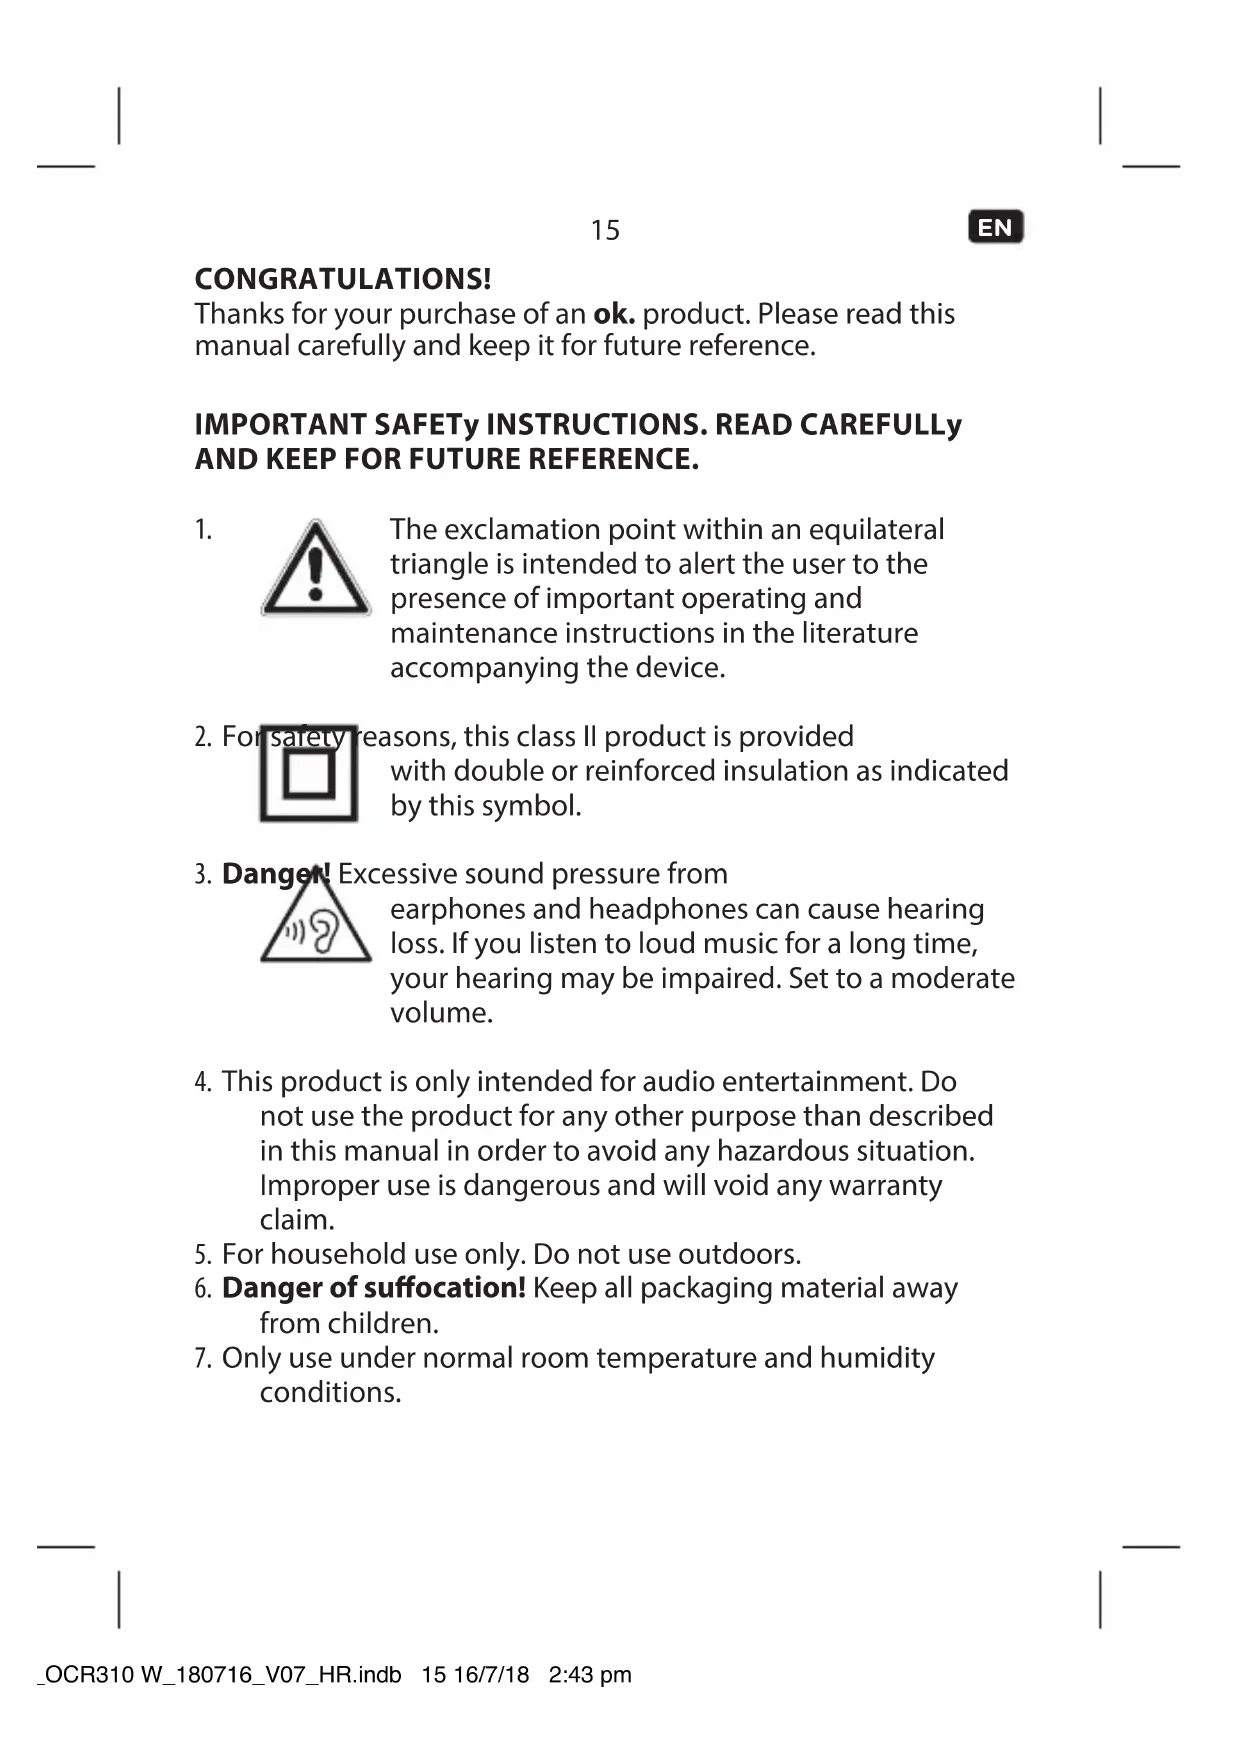
IMPORTANT SAFETY INSTRUCTIONS. READ CAREFULLY AND KEEP FOR FUTURE REFERENCE.
1.

The exclamation point within an equilateral triangle is intended to alert the user to the presence of important operating and maintenance instructions in the literature accompanying the device.
- For safety reasons, this class II product is provided with double or reinforced insulation as indicated by this symbol.
- Danger Excessive sound pressure from

earphones and headphones can cause hearing loss. If you listen to loud music for a long time, your hearing may be impaired. Set to a moderate volume.
- This product is only intended for audio entertainment. Do not use the product for any other purpose than described in this manual in order to avoid any hazardous situation. Improper use is dangerous and will void any warranty claim.
- For household use only. Do not use outdoors.
- Danger of suffocation! Keep all packaging material away from children.
- Only use under normal room temperature and humidity conditions.
EN
16
- The product is only suitable for use at moderate degrees of latitude. Do not use in the tropics or in particularly humid climates.
- Do not move the product from cold into warm places and vice versa. Condensation can cause damage to the product and electrical parts.
- Do not use attachments or accessories other than recommended by the manufacturer or sold with this product. Install in accordance with this user manual.
- Do not install near any heat sources such as radiators, heat registers, stoves or other products (including amplifiers) that produce heat.
- Do not shift or move the product when powered on.
- Do not touch, push or rub the surface of the product with any sharp or hard objects.
- Danger! To reduce the risk of fire or electric shock, do not expose this product to rain or moisture.
- The product shall not be exposed to dripping or splashing and no objects filled with liquids, such as vases, shall be placed on the product.
- Care should be taken so that no objects or liquids enter the enclosure through openings.
-
No naked flame sources, such as lighted candles, should be placed on the product.
-
Refer all servicing to authorised service agent. Do not attempt to repair the product yourself. Servicing is required when the product has been damaged in any way, such as the supply cord or plug are damaged, liquid has been spilled, objects have fallen into the product, the enclosure is damaged, the product has been exposed to rain or moisture, does not operate normally, or has been dropped.
- Before connecting the product to a socket outlet, make sure the voltage indicated on the product corresponds to your local mains.
- If the supply cord is damaged, it must be replaced by the manufacturer or its service agent or similarly qualified person in order to avoid hazard.
- Regularly check if the supply cord, product or extension cable is defective. If found defective, do not put the product into operation. Immediately pull the plug.
- Place the supply cord and, if necessary, an appropriate extension cable in such away that pulling or tripping over it is impossible. Do not allow the supply cord to hang down within easy reach.
- Do not jam, bend or pull the supply cord over sharp edges.
- The power plug is used as the disconnect device; the disconnect device shall remain readily operable. To completely disconnect the power input, disconnect the mains plug.
- The product may not function properly or not react to the operation of any control due to electrostatic discharge. Switch off and disconnect the product; reconnect after a few seconds.
EN
18
- Protect the supply cord from being walked on or pinched particularly at the plug, convenience receptacles and the point where it exits from the product.
- Never pull the plug by the supply cord or with wet hands.
- Disconnect the power plug in case of faults during use, during lightening storms, before cleaning and when not using the product for a longer period of time.
- Danger! Before cleaning, switch the product off and disconnect the power plug from the socket.
- When the product has reached the end of its service life, make it defective by disconnecting the plug from the socket and cutting the cord in two.
- Caution! There is danger of explosion from improper replacement of the batteries. Replace batteries only with the same or equivalent type of battery.
- Always change the entire battery pack. Do not mix old and new batteries, or batteries with different charge state.
- Make sure the batteries are correctly inserted. Observe the polarity (+) plus / (-) negative on the battery and the housing. Improperly inserted batteries can lead to leakage or, in extreme cases, a fire or an explosion.
- Remove used batteries. Remove the batteries if you know that the product will not be used for a longer period of time. Otherwise, the batteries could leak and cause damage.
- Non-rechargeable batteries must not be recharged.
- The connections must not be short-circuited.
-
Remove the batteries from the product before disposal.
-
Never expose batteries to excessive heat (e.g. bright sun, fire), and never throw them into fire. The batteries could explode.
- Keep batteries out of reach of small children. If batteries have been swallowed, seek immediate medical attention.
- If the batteries leak, remove them with a cloth and dispose of them accordingly. Prevent battery acid from coming into contact with skin and eyes. If you do get battery acid in your eyes, flush them thoroughly with lots of water and consult a physician immediately. If battery acid comes into contact with your skin, wash the affected area with lots of water and soap.
- When installing the device, leave sufficient space for ventilation. Do not install in bookcases, built-in cabinets or the like.
- Do not impede ventilation by covering the ventilation openings with items, such as newspapers, table-cloths, curtains, etc. Do not insert any objects.
EN
20
INTENDED USE
This product is intended for audio playback of radio programs. Any other use may result in damage to product or injuries. This product is designed for household use only and not intended for commercial use. Do not use the product if damage is seen. Imtron GmbH accepts no liability whatever for any injuries or damages caused to careless, improper or incorrect use of the product or use of the product for purposes not recommended by the manufacturer.
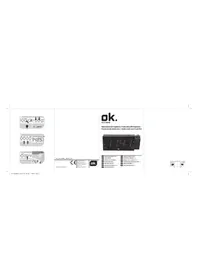
COMPONENTS
A. ON/OFF/NAP switch
B. Button TIME/PRESET
C. Button P-
D. Button P+
E. Button ALARM 1/VOL-
F. Button ALARM 2/VOL+
G. Button HOUR/TUNING-
H. Button MIN/TUNING+
I. Button SLEEP/SNOOZE/ DIM
J. Indicator light FM radio on/off
K. Indicator light Alarm 2 buzzer
L. Indicator light Alarm 2 radio
M. Power cord with plug (not shown)
N. Battery compartment with lid
O. Wire antenna
P. Speaker
Q. Indicator light Alarm 1 radio
R. Indicator light Alarm 1 buzzer
S. Display

BEFORE FIRST TIME USE
Remove the product and accessories carefully from the original packaging. Inspect the delivery contents for completeness and damages. Should the delivery contents be incomplete or damaged, contact your sales outlet immediately.
INSTALLATION AND POWER SUPPLY Installation
1 For optimal reception, extend the antenna fully and adjust it. Connect the power plug to the mains.
Back up battery
Insert batteries to enable the clock continues operating during a possible power failure. After the mains power remains, the correct time will appear on the display.
- Open the battery compartment.
- Insert 2 × 1.5 ~V battery (not included in delivery). Make sure the polarity is correct as indicated.
- Close the battery compartment.
Note:
Display, radio and alarm will not function during back up operation.
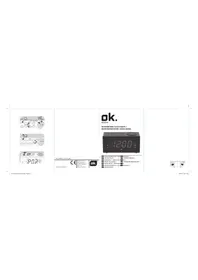
GENERAL SETTINGS
Time setting
The time can be set only if the radio is in off mode (Standby):
- Press the TIME/PRESET button for at least 2 seconds. The time is flashing on the display.
- Set the hours with HOUR button and minutes with MIN button. Confirm the time with TIME/PRESET.
EN
22
Alarm setting
The alarm can be set only if the FM radio is in off mode (Standby):
3
ALARM 1
- Press the ALARM 1/VOL- button and the alarm time will be flashing on the display.
Note: If no settings done within 5 seconds the display will turn off into standby.
- Set the hours with HOUR button and minutes with MIN button.
- Confirm the time with ALARM 1/VOL-.
- Press the ALARM 1/VOL- button to activate or deactivate the alarm.
Below alarm functions are available:
| Press ALARM 1/VOL- | On display |
| 1 x Alarm time | 1 + BUZZER |
| 2 x Alarm 1 + | RADIO |
| 3 x Alarm function de-activated | |
ALARM2
- Press the ALARM 2/VOL+ button and the alarm time 2 will be flashing on the display.
- For setup, switching on/off of ALARM 2 follow the instructions as given for setup of ALARM 1. But instead of pushing ALARM 1/VOL- button push ALARM 2/VOL+ button.
Stop alarm
- Snooze function: Press SNOOZE button to suspend alarm sound for a few minutes. The alarm will start again after approx. 9 minutes. The set alarm mode will remain flashing on the display.
- Press ON/OFF to stop/cancel alarm.
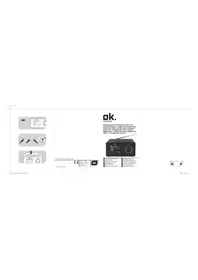
4 NAP function
Set the desired NAP time and the radio will turn on automatically after the preset time.
- When the radio is off, press and hold ON/OFF/NAP button for approximate 3 seconds and the display and FM indicator will flash.
- Press P+ or P- button to set the desired nap time of 45, 60, 90 or 120 minutes.
- Press ON/OFF/NAP button to confirm. Note: If no settings done within 3 seconds the display will turn off into standby.
5 OPERATION
Display backlight setting
With the radio switched off press the SLEEP/SNOZZE/DIM button to adjust (2 brightness level) the display brightness.
Switching on and off
Press the ON/OFF button to turn on the radio. To turn off, press ON/OFF button again.
Volume control
The volume can be easily controlled by pressing the buttons ALARM 1/VOL- or ALARM 2/VOL+. The volume will be shown on display for a moment.
Sleep function
With the radio switched on press the SLEEP/SNOZZE/DIM button shortly to adjust the sleep timer in 10 minutes steps from 90 minutes to OFF.
EN
24
RADIO
Tuning
-
Turn on the radio. Press the buttons TUNING+/- for approx. 2 seconds to search the station with next higher/ lower frequency.
-
For fine tuning, press the TUNING+/- button shortly to change the frequency in steps of ± 0.1 MHz.
Memory preset
20 radio stations can be preset to a program list.
7 1. Select FM radio mode. Set a station by tuning according to chapter Tuning.
2. Press and hold the TIME/PRESET button to start the presetting process. The last preset station "P" will be flashing on the display.
3. Press the P- or + button to select the desired preset station number.
4. Press the TIME/PRESET button again to save the actual station to the desired preset station number.
5. Once the stations are preset, press the TIME/PRESET button to select your desired stations.
CLEANING AND CARE
- Disconnect the product from the power supply before cleaning it. Clean the product with a soft, damp cloth and a mild cleaning agent. Finish by wiping it with a dry cloth. Do not use alcohol, acetone, benzene, scouring cleansers etc. to clean the product. Do not use hard brushes or metal objects.
- Warning! Never immerse electrical parts of the product in water during cleaning or operation. Never hold the product under running water.
- Warning! When cleaning, never use solvents or abrasive materials, hard brushes, metallic or sharp objects. Solvents are harmful to human health and can attack plastic parts, while abrasive cleaning mechanisms and tools may scratch the surface(s).
TROUBLESHOOTING
If there are any problems during operation, please refer to the following table. If problems cannot be solved as indicated under Solution, please contact your manufacturer.
| Problem Possible causes Solution | ||
| Product does not function | • Interrupted power supply | • Check the power supply |
| No Sound • Volume is very low • Adjust | • Just the volume | |
| No radio reception | • Poor radio reception | • Place the product to another place and adjust the antenna again. |

26
SPECIFICATION
Power supply: 230V ,50Hz
Operation power consumption : 5 W
Standby-power consumption: ≤ 1 W
Backup-Batteries operation : 2 x 1.5 V
Tuning-range:87.5-108MHz
Tuning grid:0.1 MHz
Operating temperature : max. 35 °C
Protection class : II
——(Typ LR03/AAA)
DISPOSAL

The crossed-out wheeled bin logo requires the separate collection of waste electric and electronic equipment (WEEE). Electric and electronic equipment may contain dangerous and hazardous substances. Do not dispose of this appliance as unsorted municipal waste. Return it to a designated collection point for the recycling of WEEE. By doing so, you will help to conserve resources and protect the environment. Contact your retailer or local authorities for more information.
Please dispose of batteries in an environmentally friendly manner. Do not put batteries into the household waste. Please use the return and collection systems in your community or contact the dealer where you purchased the product.
DECLARATION OF CONFORMITY
Hereby, [Imtron GmbH] declares that the radio equipment type [OCR 310; OCR 311] is in compliance with Directive 2014/53/EU.
The full text of the EU declaration of conformity is available at the following internet address: