
IVM 60363 H - Vacuum Cleaner Kärcher - Free user manual and instructions
Find the device manual for free IVM 60363 H Kärcher in PDF.
| Product type | Industrial wet/dry vacuum |
| Brand and model | Kärcher IVM 60363 H |
| Dimensions (L x W x H) | 1020 x 680 x 1670 mm |
| Operating weight | 78 kg |
| Power supply | 220-240 V, 50-60 Hz, 1 phase, 3150 W (max 3600 W) |
| Protection class | IPX4 / Class I |
| Tank volume | 60 L |
| Maximum vacuum | 20.4 kPa |
| Max volumetric flow rate (DN70, L=3 m) | 440 m³/h |
| Nominal hose diameter | DN40/50/70 |
| Main filter surface area | 2 m² |
| H14 filter surface area | 3.5 m² |
| Dust class | H according to EN 60335-2-69 |
| Main functions | Dry and wet vacuuming of hazardous dust, industrial use |
| Main filter maintenance | Cleaning by lever (5 movements) or replacement (ref. 9.990-292.0) |
| H14 filter | Replacement (ref. 9.993-006.0) |
| Included accessories | None (hose, nozzle, bags to be ordered separately) |
| Safety | Parking brake, emergency stop, hose connectors |
| Mains cable length | 10 m (H07RN-F 3G1.5 mm²) |
| Storage temperature | -10 to 40 °C |
| Warranty | According to country conditions, defects in material or workmanship |
Frequently Asked Questions - IVM 60363 H Kärcher
User questions about IVM 60363 H Kärcher
0 question about this device. Answer the ones you know or ask your own.
Ask a new question about this device
Download the instructions for your Vacuum Cleaner in PDF format for free! Find your manual IVM 60363 H - Kärcher and take your electronic device back in hand. On this page are published all the documents necessary for the use of your device. IVM 60363 H by Kärcher.
USER MANUAL IVM 60363 H Kärcher
73550 Waldstetten (Germany)
Tel.: +49 7171 94888-0
Fax: +49 7171 94888-528
Waldstetten, 24/04/01
Contents
General instructions 19
Safety information 19
Intended use 20
Environmental protection 20
Accessories and spare parts. 20
Scope of delivery 20
Description of the unit 20
Symbols on the device. 21
Initial startup 21
Operation 22
Transport 26
Storage 26
Care and maintenance. 26
Troubleshooting guide 29
Disposal 29
Warranty. 29
Technical data 29
Declaration of Conformity 30
General instructions
Read these original instructions before using your device for the first time, adhere to the instructions contained therein and store them for later reference or subsequent owners.
- Be sure to read the safety instructions no. 5.956-249.0 prior to the initial startup.
- If the operating instructions and safety instructions are not observed, the device can be damaged and dangers could arise for users and other persons.
- Notify the dealer immediately in the case of shipping damage.
Safety information
Hazard levels
△DANGER
- Indication of an imminent threat of danger that will lead to severe injuries or even death.
△WARNING
- Indication of a potentially dangerous situation that may lead to severe injuries or even death.
CAUTION
- Indication of a potentially dangerous situation that may lead to minor injuries.
ATTENTION
- Indication of a potentially dangerous situation that may lead to damage to property.
General safety instructions
DANGER Only trained personnel are permitted to use the device and the substances for which it is to be used, including the safe procedure for disposing of the vacuumed material. An air exchange rate L must be present in the room when the exhaust gas is returned into the room. To remain within the required limit values, the volume flow of returned air must be no greater than 50% of the fresh air volume (room volume V_Rx air exchange rate L_W ). Without special ventilation measures, the following applies: L_W = 1h^-1 . This device contains dust that is harmful to your health. Emptying and maintenance, including removal of the dust bag, may only be performed by technical specialists wearing suitable personal protective equipment.
- Do not operate the device without the complete filtration system. Observe the applicable safety instructions for the materials being vacuumed.
WARNING · The device must not be used or stored outdoors in wet conditions.
- Apply the parking brake at the steering roller to ensure a secure footing for the device. The device may move uncontrollably if the parking brake is open.
CAUTION In case of longer breaks in operation and after use, switch off the device at the power switches and unplug the mains plug.
Behaviour in the event of an emergency
△DANGER
Risk of injury and damage in the event of a short-circuit or other electrical faults
Danger of electric shock, danger of burns Switch off the device and unplug the mains plug.
Behaviour in case of filter breakage / leakage:
- Switch off the unit immediately.
The unit may not be operated without the fresh water filter.
- Replace the filter.
Intended use
The device is intended for:
- Wet and dry cleaning of floor and wall surfaces
- Extraction of dry, non-flammable, deposited dusts hazardous to health; dust class H according to EN 60335-2-69
- Industrial use.e.g. in storage and production areas
- Commercial use, e.g. in hotels, schools, hospitals, factories, shops, offices, and rental companies.
Any other use constitutes improper use.
The device is not approved for crane loading.
The device is not suitable for connection to a dust-generating machine.
Environmental protection

The packing materials can be recycled. Please dispose of packaging in accordance with the environmental regulations.

Electrical and electronic devices contain valuable, recyclable materials and often components such as batteries,
rechargeable batteries or oil, which - if handled or disposed of incorrectly - can pose a potential danger to human health and the environment. However, these components are required for the correct operation of the device. Devices marked by this symbol are not allowed to be disposed of together with the household rubbish.
Notes on the content materials (REACH)
Current information on content materials can be found at: www.kaercher.de/REACH
Accessories and spare parts
Only use original accessories and original spare parts. They ensure that the appliance will run safely and fault-free.
Information on accessories and spare parts can be found in the Service area at www.kaercher.com.
Please note:
- No accessories are included in the scope of delivery. The accessories must be ordered separately depending on the application.
- The correct function of the device is only guaranteed by the prescribed nominal width of the suction hose (see chapter Technical data).
- Spare parts and accessories are available from your dealer or from your KÄRCHER branch.
Scope of delivery
Check the contents for completeness when unpacking. In the event of shipping damage, please notify your dealer.
Description of the unit
For the illustrations, refer to the graphics page
Illustration A
① Bow handle of the dirt receptacle
② Sealing plug on the dirt receptacle
③Sealing plug on the filter ring
④Filter ring
(5) Lever for the filter cleaning
⑥ Pressure gauge
⑦ Suction turbine power switch
⑧Sealing ring
filter
10Filter vibrator
1Mains cable
Cable hooks
③ Carrying handle
14Suction head
⑤Type plate
Suction head lock
⑰Spacer
18Cable clips
19Push handle
20Dirt receptacle
② Steering roller with parking brake
② Suction pipe holder
23 Spacer lock
② Floor nozzle holder
⑤ Suction hose port on the filter ring
② 6 Suction hose port on the dirt receptacle
⑦ Chassis
Symbols on the device

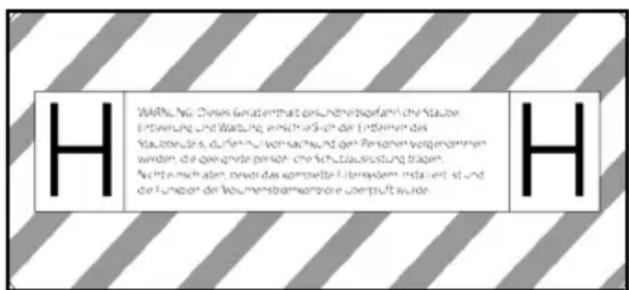
The device is suitable for vacuuming dusts up to dust class H.
WARNING: This device contains dusts that are harmful to your health. Emptying and maintenance, including removal of the dust bag, may only be performed by appropriately trained personnel wearing suitable personal protective equipment. Do not switch on until the entire filter system has been installed and the volume flow control functionality has been checked.
Note
If necessary, remove the sticker in the relevant national language from the enclosed sheet of stickers and stick it onto the unit over the German text.

The maximum vacuum value in relation to the hose cross-section is specified on the label. The actual value can be read on the pressure gauge. For the values applicable to this device, see chapter Reading the minimum volumetric flow. If this value is not reached, the filter must be cleaned (see chapter Dedusting the main filter) or re
placed (see chapter Replacing the main filter). The various different hose cross-sections allow adaptation to the various different connection cross-sections of the accessories.

Dust bag
(Order no. 9.989-606.0)

Safety filter bag
(Order no. 6.904-420.0)
Main filter
(Order no. 9.990-292.0)
H14 filter
(Order no. 9.993-006.0)
Initial startup
△WARNING
Danger from dust that is harmful to your health
Respiratory sicknesses through inhalation of dust.
Do not vacuum without correctly installed filter elements, otherwise a danger to health from increased fine dust emission is present.
ATTENTION
Missing filter element
Damage to the suction motor
Do not vacuum without a filter element.
- Bring the device into the working position.
- Secure the device with the parking brakes.
- Ensure that the suction head is fitted correctly.
- Insert the suction hose (not included in the scope of delivery) into the selected suction connection (see chapter Selecting the suction connection).
- Seal the other suction hose port tightly with the sealing plug (see chapter Closing the suction connection).
-
Check the filling level in the dirt receptacle (see chapter Check the dirt receptacle filling level).
-
Empty the dirt receptacle if necessary (see chapter Emptying the dirt receptacle).
- Depending on the application, insert the dust bag or the safety filter bag before dry vacuuming (see chapter Dry vacuuming)
- Attach the desired accessories (not included in the scope of delivery) to the suction hose.
Selecting the suction connection
The suction hose can be plugged into 2 different suction hose ports depending on the application.
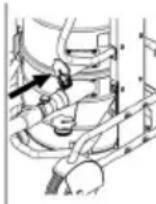
- Suction hose port on the filter ring
-
Dry vacuuming with dust bag: Coarse dust, large quantities of suction material for a short time The dust bag is not included in the scope of delivery and can be ordered separately, order no. 9.989-606.0 (5 pieces).
Wet vacuum cleaning -
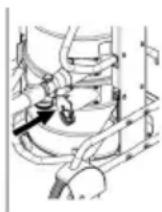
Suction hose port on the dirt receptacle
- Dry vacuuming with a safety filter bag: Fine dust, continuously large amounts of suction material The device is equipped with a dust bag with cable ties, order no. 6.904-420.0 (5 pieces).
Wet vacuum cleaning

Two suction hoses must not be connected to the vacuum cleaner at the same time. One of the suction hose ports must be tightly closed with the sealing plug.
When using the dust bag, the lower suction hose port must be tightly closed.
When using the safety filter bag, the upper suction hose port must be tightly closed.
Closing the suction connection
WARNING
Risk of injury
Damage to the skin, lungs and eyes through fine dust
The suction connection must be closed using the sealing plug after removing the suction hose.
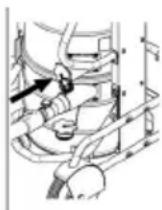
Illustration B
- Insert the sealing plug precisely into the suction connection.
- Push the sealing plug in all the way to the end stop.
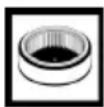
Check the dirt receptacle filling level
The dirt receptacle must be emptied when filled to the lower edge of the suction hose port on the dirt receptacle. The device does not switch off automatically if the maximum filling level is exceeded.
- Check the dirt receptacle filling level regularly.
Operation
WARNING
Danger from dust that is harmful to your health
Respiratory sicknesses through inhalation of dust.
Do not vacuum without correctly installed filter elements, otherwise a danger to health occurs from increased fine dust emission.
ATTENTION
Risk of damage to the suction motor. Never remove the main filter element when vacuuming.
Dry vacuuming
WARNING
Increased dust emission due to improper handling of the suction hose ports
Respiratory diseases from inhalation of dust, malfunction of the device
Do not connect 2 suction hoses to the device at the same time. One of the suction hose ports must be tightly closed with the sealing plug.
Be sure to use the dust bag only in connection with the upper suction hose port, otherwise it will be sucked upwards during the suction process.
The lower suction hose port must be tightly closed when using the dust bag.
The upper suction hose port must be tightly closed when using the safety filter bag.
Note
All types of dust up to dust class H can be vacuumed with this device. The use of a dust collection bag is required by law.
Note
The device is an industrial vacuum cleaner for vacuuming dry, non-flammable dusts.
- Select the suction connection depending on the suction material (see chapter Selecting the suction connection).
- Fit the dust bag or the safety filter bag depending on the selected suction connection (see chapter Fitting the dust bag/safety filter bag).
Switching from wet to dry vacuuming
ATTENTION
Switching from wet to dry vacuuming
Risk of damage to the filter
Do not vacuum dry dust with a wet filter element because this clogs the filter and can make it unusable.
- Allow the wet filter to dry completely or replace it with a dry filter before using the device for dry vacuuming.
- Replace the filter if necessary.
Fitting the dust bag/safety filter bag
- Secure the device with the parking brakes.
Illustration C
- Pull the bow handle up.
The dirt receptacle is unlocked and lowered.
Illustration D
- Pull the dirt receptacle out of the device by the bow handle.
Inserting the dust bag
Illustration E
- Fit the dust bag in the dirt receptacle and carefully position it against the container wall and the container floor.
- Fold the edge of the dust bag over the edge of the dirt receptacle to the outside.
Fitting the safety filter bag Illustration F
- Fit the safety filter bag.
Illustration G
- Fold the edge of the safety filter bag out over the edge of the dirt receptacle.
WARNING
Improper handling when locking the dirt receptacle
Risk of crushing
Under no circumstances should you hold your hands between the dirt receptacle and filter ring or allow them to come close to the lifting mechanism while locking it.
Lock the dirt receptacle by operating the bow handle with both hands.
8. Fit the dirt receptacle and lock it with the bow handle.
Wet vacuum cleaning
△DANGER
Danger from dust that is harmful to your health
Respiratory sicknesses through inhalation of dust.
No dusts harmful to health may be vacu-umed when performing wet vacuum cleaning.
ATTENTION
Risk of damage if the dirt receptacle overflows
The dirt receptacle can fill within a few seconds and overflow when vacuuming large amounts of liquids.
Continuously monitor the filling level.
- Remove the dust bag or the safety filter bag before wet vacuum cleaning (see
chapter Removing the dust bag/ safety filter bag).
Removing the dust bag/ safety filter bag
- Secure the device with the parking brakes.
- Remove the suction hose if necessary.
- Close the suction connection on the dirt receptacle (see chapter Closing the suction connection).
Illustration C
- Pull the bow handle up.
The dirt receptacle is unlocked and lowered.
Illustration D
- Pull the dirt receptacle out of the device by the bow handle.
Removing the dust bag
Illustration H
- Turn up the dust bag.
- Seal the dust bag tightly with the cable tie.
- Remove the dust bag.
- Dispose of the dust bag in accordance with statutory regulations.
Removing the safety filter bag
Illustration I
10.Fold up the safety filter bag.
Illustration J
11.Peel off the protective film.
12.Close the safety filter bag with the self-adhesive flap.
13.Pull the safety filter bag out towards the rear.
Illustration K
- Seal the suction connection opening of the safety filter bag tightly with the cover.
Illustration L
15.Close the safety filter bag tightly with the attached cable tie.
16.Remove the safety filter bag from the dirt receptacle.
17. Clean the interior of the dirt receptacle with a moist cloth.
18.Dispose of the used safety filter bag in dust-tight bag in accordance with statutory regulations.
△WARNING
Improper handling when locking the dirt receptacle
Risk of crushing
Under no circumstances should you hold your hands between the dirt receptacle and filter ring or allow them to come close to the lifting mechanism while locking it.
Lock the dirt receptacle by operating the bow handle with both hands.
19.Fit the dirt receptacle and lock it with the bow handle.
Ending wet vacuum cleaning
WARNING
Improper disposal of waste water
Environmental pollution
Observe the local waste water treatment regulations.
- Dry the filter.
- Clean the dirt receptacle with a moist cloth and dry it off.
Switching on the device
- Plug the mains plug into the socket.
- Switch on the device via the suction turbine power switches.
Note
Always switch the suction turbines on and off one after the other. For the correct function of the pressure gauge for monitoring the minimum volume flow, all suction turbines must be switched on.
- Start the vacuuming process.
Reading the minimum volumetric flow
A pressure gauge showing the vacuum inside the device is mounted on the front of the device. The main filter must be cleaned when the maximum vacuum (see table) is reached (see chapter Dedusting the main filter). This value depends on the device performance and the suction hose used. If the vacuum is not significantly reduced by dedusting, the filter must be replaced (see chapter Replacing the main filter).
ATTENTION
Exceeding the maximum vacuum
Suction loss
If the specified value is exceeded, the air speed in the suction hose drops below 20~m / s . Clean or replace the filter.
| Nominal width of the suction hose | Maximum vacuum |
| DN40 15.70 kPa | (157 mbar) |
| DN50 14.40 kPa | (144 mbar) |
| DN70 10.00 kPa | (100 mbar) |
Dedusting the main filter
The main filter must be cleaned if the pressure gauge shows the maximum vacuum (see chapter Reading the minimum volumetric flow).
- Switch off the device.
- Move the filter cleaning lever back and forth at least 5 times.
Switching off the device
- Switch off the device via the suction turbine power switches.
- Pull out the mains plug.
Each time after use
Emptying the dirt receptacle
The inlet opening or the suction hose are closed.
- Switch on the device via the suction turbine power switches.
- Dedust the main filter (see chapter Dedusting the main filter).
- Switch off the device via the suction turbine power switches.
- Secure the device with the parking brakes.
Illustration C
- Pull the bow handle up. The dirt receptacle is unlocked and lowered.
Illustration D
-
Pull the dirt receptacle out of the device by the bow handle.
-
Empty the dirt receptacle. To do this, remove the dust bag / safety filter bag if necessary (see Removing the dust bag/ safety filter bag).
Note
The dirt receptacle can be lifted by crane at the handle. The maximum load for transport by crane is 50kg
CAUTION
Exceeding the permissible total weight
Risk of injury and damage
Observe the total weight of the dirt receptacle when transporting it by crane.
Do not overload the receptacle.
Observe the valid instructions for crane operation.
WARNING
Improper handling when locking the dirt receptacle
Risk of crushing
Under no circumstances should you hold your hands between the dirt receptacle and filter ring or allow them to come close to the lifting mechanism while locking it.
Lock the dirt receptacle by operating the bow handle with both hands.
8. Fit the dirt receptacle and lock it with the bow handle.
Cleaning the device
WARNING
Improper disposal of waste water
Environmental pollution
Observe the local waste water treatment regulations.
- Vacuum the inside and outside of the device and clean with a moist cloth.
A vacuum cleaner with the same or better classification must be used for vacuuming the device. - If necessary, rinse the accessories (not included in the scope of delivery) with water and dry them.
Storing the device
- Wind the mains cable onto the cable holders.
- Store the device in a dry room and secure it against unauthorised use.
Transport
CAUTION
Failure to observe the weight
Risk of injury and damage
Be aware of the weight of the device during transportation.
- Close both suction connections for dust-free transport (see chapter Closing the suction connection).
- Release the parking brakes and push the device by the push handle.
- Grasp the device by the chassis and the push handle for loading.
- Secure the device against slipping and tipping over when transporting in vehicles.
Storage
CAUTION
Failure to observe the weight
Risk of injury and damage
Be aware of the weight of the device during storage.
- Store the device indoors only.
Care and maintenance
△DANGER
Inadvertently starting up device, touching live components
Risk of injury, electric shock
Switch off the device before performing any work on the device.
Remove the mains plug.
△DANGER
Danger from dust that is harmful to your health
Respiratory sicknesses through inhalation of dust.
Wear a breathing protection mask of class P2 or higher and disposable clothing when performing maintenance work (e.g. filter change).
△DANGER
Inadequate filtration
Respiratory sicknesses through inhalation of dust.
The effectiveness of the filtration of the device can be tested by the test method specified in EN 60 335-2-69 22.AA.201.2. This
test must be carried out at least annually or more frequently if specified in national requirements.
If the test result is negative, repeat the test with a new filter.
△WARNING
Danger from dust that is harmful to your health
Respiratory sicknesses through inhalation of dust.
Safety devices providing hazard protection must be checked for correct safety-related functionality at least annually by the manufacturer or an appropriately instruction person, e.g. absence of leaks, filter damage, functionality of the monitoring devices.
ATTENTION
Care agents containing silicone
These can attach plastic components.
Do not use care agents containing silicone for cleaning.
Dust extraction machines are safety devices for the prevention or elimination of hazards according to the German BGV A1.
-
For servicing performed by the user, the device must be disassembled, cleaned and maintained only to the degree that this is possible without presenting a danger to the maintenance personnel and other persons. Suitable precautionary measures include detoxification before disassembly. Make provisions for local forced ventilation at the location where the device is to be disassembled, for cleaning the maintenance surface and to ensure adequate protection for the personnel.
-
The exterior of the device should be detoxified by vacuuming and wiped clean, or treated with sealant before being removed from the hazardous area. All unit parts must be regarded as contaminated when they are taken from the hazardous area. Suitable measures must be taken to prevent distribution of the dust.
-
All contaminated objects resulting from maintenance and repair work that cannot be satisfactorily cleaned must be correctly disposed of. Such objects must
be disposed of in sealed bags in accordance with the applicable regulations for the disposal of this type of waste.
- The suction hose ports are to be closed using the sealing plugs during transport and maintenance of the device.
- Note that you can carry out simple maintenance and care work yourself.
- Clean the surface of the device and the interior of the container regularly with a moist cloth.
Inspection and maintenance work
Have the device regularly inspected according to the respective national accident prevention regulations. Maintenance work as specified by the manufacturer must be performed by a technically qualified person at the specified regular intervals and in accordance with the applicable regulations and safety requirements. Work on electrical components may only be performed by a qualified electrician. Please contact a KÄRCHER branch office if you have any questions.
Replacing the main filter
△DANGER
Danger from dust that is harmful to your health
Respiratory sicknesses through inhalation of dust.
Accumulated dust must be transported in dust-proof containers. Do not transfer the contents. The dust bag may only be disposed of by qualified staff.
WARNING
Danger from dust that is harmful to your health
Respiratory sicknesses through inhalation of dust.
Do not use the main filter element after removing it from the device.
Permanently installed filters may only be replaced by an expert in a suitable area, e.g. a decontamination station.
- Switch off the device.
- Pull out the mains plug.
- Unlock and remove the suction head.
-
Unlock and remove the spacer.
-
Remove the contaminated star pleated filter.
- Immediately after removing the contaminated star pleated filter from the unit, place it in a bag and seal the bag tightly.
- Dispose of the contaminated star pleated filter according to legal requirements.
- Remove any dirt deposits from the clean air side.
- Check the sealing ring for damage.
10.Insert the new star pleated filter: a Pull the new star pleated filter over the filter vibrator on the spacer such that the vibrating elements are aligned centrally in the filter bags. b Place the spacer with star pleated filter and filter vibrator on the filter ring. c Lock the spacer.
11.Fit and lock the suction head.
Replacing the H filter
- Secure the device with the parking brakes.
- Switch off the device at the power switches.
- Pull out the mains plug.
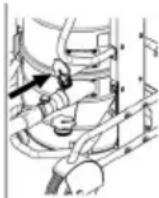
Illustration M
- Unlock and lift the suction head.
- Release the vacuum hose at the suction head and remove the suction head.
- Unscrew the hexagon screw anticlockwise using a suitable tool.
- Remove the seals and the contaminated H-filter from the suction head.
- Immediately after removing the contaminated H-filter from the unit, place it in a bag and seal the bag tightly.
- Dispose of the contaminated H-filter according to legal requirements.
10.Remove any dirt deposits from the clean air side.
11.Fit the new H filter in the reverse order. Make sure that the seals and the vacuum hose are correctly seated. - Apply a suitable agent (e.g. Loctite 243) to the thread of the hexagon screw to prevent unintentional loosening.
- Tighten the hexagon screw clockwise.
14.Fit and lock the suction head.
Replace dust bag
- Secure the device with the parking brakes.
Illustration C
- Pull the bow handle up. The dirt receptacle is unlocked and lowered.
Illustration D
- Pull the dirt receptacle out of the device by the bow handle.
Illustration H
- Turn up the dust bag.
- Seal the dust bag tightly with the cable tie.
- Remove the dust bag.
- Dispose of the dust bag in accordance with statutory regulations.
Illustration E
- Insert the new dust bag in the dirt receptacle and carefully place it against the container wall and the container floor.
- Fold the edge of the dust bag over the edge of the dirt receptacle to the outside.
WARNING
Improper handling when locking the dirt receptacle
Risk of crushing
Under no circumstances should you hold your hands between the dirt receptacle and filter ring or allow them to come close to the lifting mechanism while locking it.
Lock the dirt receptacle by operating the bow handle with both hands.
10.Fit the dirt receptacle and lock it with the bow handle.
Replacing the safety filter bag
△DANGER
Danger from dust that is harmful to your health
Respiratory sicknesses through inhalation of dust.
Accumulated dust must be transported in dust-proof containers. Do not transfer the contents. The dust bag may only be disposed of by qualified staff.
- Secure the device with the parking brakes.
-
Remove the suction hose.
-
Close the suction connection on the dirt receptacle (see chapter Closing the suction connection).
Illustration C
- Pull the bow handle up. The dirt receptacle is unlocked and lowered.
Illustration D
- Pull the dirt receptacle out of the device by the bow handle.
Illustration I
- Fold up the safety filter bag.
Illustration J
- Peel off the protective film.
- Close the safety filter bag with the self-adhesive flap.
- Pull the safety filter bag out towards the rear.
Illustration K
- Seal the suction connection opening of the safety filter bag tightly with the cover.
Illustration L
11.Close the safety filter bag tightly with the attached cable tie.
12.Remove the safety filter bag from the dirt receptacle.
13. Clean the interior of the dirt receptacle with a moist cloth.
14. Dispose of the used safety filter bag in dust-tight bag in accordance with statutory regulations.
Illustration F
15.Fit the new safety filter bag.
Illustration G
16.Fold the edge of the safety filter bag out over the edge of the dirt receptacle.
WARNING
Improper handling when locking the dirt receptacle
Risk of crushing
Under no circumstances should you hold your hands between the dirt receptacle and filter ring or allow them to come close to the lifting mechanism while locking it.
Lock the dirt receptacle by operating the bow handle with both hands.
17.Fit the dirt receptacle and lock it with the bow handle.
Troubleshooting guide
△DANGER
Unintentional start-up of the device / electric shock
Unintentional start-up of the suction motor can cause injuries. Voltage present on electrical parts can cause an electric shock. Switch off the device and unplug the mains plug before performing any work on the device.
Have all checks and work on electrical parts performed by an qualified technician.
Note
The device must be switched off immediately in the event of a malfunction. The malfunction must be eliminated before switching the device on again.
If the malfunction cannot be corrected, the device must be checked by the Customer Service department.
Suction turbine does not start up
- Check the socket and the power supply fuse.
- Check the mains cable and the mains plug of the device.
- Switch the device on.
Suction power decreases
- Close the unsealed suction connection (see chapter Closing the suction connection).
- Remove the blockages from the suction nozzle, the suction pipe or the suction hose.
- Replace the filled dust bag (see chapter Replace dust bag).
- Replace the filled safety filter bag (see chapter Replacing the safety filter bag).
- Check that the suction head and the dirt receptacle are correctly seated.
- Dedust the main filter (see chapter Dedusting the main filter).
- Check the seating of the filter and correct if necessary.
- Replace the main filter (see chapter Replacing the main filter).
Escaping dust when vacuuming
-
Check the seating of the filter and correct if necessary.
-
Dedust the main filter (see chapter Dedusting the main filter).
- Replace the main filter (see chapter Replacing the main filter).
Disposal
At the end of its service life, the device is to be disposed of in accordance with statutory regulations.
Warranty
The warranty conditions issued by our relevant sales company apply in all countries. We shall remedy possible malfunctions on your appliance within the warranty period free of cost, provided that a material or manufacturing flaw is the cause. In a warranty case, please contact your dealer (with the purchase receipt) or the next authorised customer service site. (See overleaf for the address)
Further warranty information (if available) can be found in the service area of your local Kärcher website under "Downloads".
Technical data
Electrical connection
Mains voltage V 220- 240
Phase 1
Power frequency Hz 50-60
Nominal power W 3150
Maximum power W 3600
Protection type IPX4
Protection class
Maximum permissible 0.195+ mains grid impedance j0.122
Dimensions and weights
Typical operating weight kg 78
Length x width x height mm 1020x 680x 1670
Effective main filter area m² 2
Effective H-filter area m² 3.5
Ambient conditions
Storage temperature ^ C -10-40
| Device performance data | |
| Container capacity 160 | |
| Vacuum (with pressure re- kPa 20.4 lief valve) | |
| Max. volume flow with m3/h 440 suction hose DN70, L=3 m | |
| Max. volume flow with m3/h 365 suction hose DN50, L=3 m | |
| Max. volume flow with m3/h 270 suction hose DN40, L=3 m | |
| Max. volume flow with m3/h 415 suction hose DN70, L=5 m | |
| Max. volume flow with m3/h 305 suction hose DN50, L=5 m | |
| Max. volume flow with m3/h 225 suction hose DN40, L=5 m | |
| Suction hose connection DN70 | |
| Nominal width of the suc- tion hose | DN40/ 50/70 |
| Main filter order number 9.990- | 292.0 |
| Main filter order number 9.993- | 006.0 |
| Determined values in acc. with EN 60335-2-69 | |
| Hand-arm vibration value m/s 2 | < 2.5 |
| K uncertainty m/s 2 | 0.2 |
| Sound pressure level LpA dB(A) 79 | |
| Uncertainty KpA dB(A) 2 | |
| Mains cable | |
| Type H07R | N-F 3G1.5 mm2 |
| Part number 6.650- | 035.0 |
| Cable length m | 10 |
- with elements of protection class II arrangement
Subject to technical changes without notice.
Declaration of Conformity
EU Declaration of Conformity
We hereby declare that the machine described below complies with the relevant basic safety and health requirements in the EU Directives, both in its basic design and construction as well as in the version placed in circulation by us. This declaration is invalidated by any changes made to the machine that are not approved by us.
Product: Dry vacuum cleaner
Product: Wet/dry vacuum cleaner
Type: 9.989-xxx
Currently applicable EU Directives
2006/42/EC (+2009/127/EC)
2014/30/EU
2011/65/EU
Harmonised standards used
EN 60335-1
EN 60335-2-69
EN 55014-1:2017 + A11:2020
EN 55014-2: 2015
EN IEC 61000-3-2: 2019
EN 61000-3-3: 2013 + A1: 2019
EN 61000-3-11:2000
EN 62233: 2008
EN IEC 63000:2018
National standards used
The signatories act on behalf of and with the authority of the Executive Board.

T. Wahl
Managing Director

A. Haag
Director R&D
Documentation supervisor:
A. Haag
Kärcher Industrial Vacuuming GmbH
73550 Waldstetten (Germany)
Ph.: +49 7171 94888-0
Fax: +49 7171 94888-528
Waldstetten, 24/04/01
Declaration of Conformity (UK)
We hereby declare that the product described below complies with the relevant provisions of the following UK Regulations, both in its basic design and construction as well as in the version put into circulation by us. This declaration shall cease to be valid if the product is modified without our prior approval.
Product: Dry vacuum cleaner
Product: Wet/dry vacuum cleaner
Type: 9.989-xxx
Currently applicable UK Regulations
S.I. 2008/1597 (as amended)
S.I. 2016/1091 (as amended)
S.I. 2012/3032 (as amended)
Designated standards used
EN 60335-1
EN 60335-2-69
EN 55014-1: 2017 + A11: 2020
EN 55014-2: 2015
EN IEC 61000-3-2: 2019
EN 61000-3-3: 2013 + A1: 2019
EN 61000-3-11: 2000
EN 62233: 2008
EN IEC 63000:2018
National standards used
The signatories act on behalf of and with the authority of the Executive Board.

T. Wahl
Managing Director

A. Haag
Director R&D
Documentation supervisor:
A. Haag
Kärcher Industrial Vacuuming GmbH
73550 Waldstetten (Germany)
Ph.: +49 7171 94888-0
Fax: +49 7171 94888-528
Waldstetten, 24/04/01
Contenu
2006/42/CE (+2009/127/CE)
2014/30/UE
2011/65/UE
73550 Waldstetten (Germany)
Tel.: +49 7171 94888-0
Télécopie: +49 7171 94888528
Waldstetten, 24/04/01
Indice
73550 Waldstetten (Germany)
Tel.: +49 7171 94888-0
Fax: +49 7171 94888-528
Waldstetten, 24/04/01
Indices de contentsos
Avisogenerales. 58
2006/42/CE (+2009/127/CE)
2014/30/UE
2011/65/UE
2006/42/CE (+2009/127/CE)
2014/30/UE
2011/65/UE
2006/42/AT (+2009/127/AT)
2014/30/AB
2011/65/AB
73550 Waldstetten (Germany)
Tel.: +49 7171 94888-0
Faks: +49 7171 94888-528
Waldstetten, 24/04/01
Innehåll
Allman information 109
Sakerhetsinformation 109
Risk for elchock, risk for brannskac
73550 Waldstetten (Germany)
Tfn: +49 7171 94888-0
Fax: +49 7171 94888528
Waldstetten, 24/04/01
Sisälto
Yleisiä ohjeita 120
73550 Waldstetten (Germany)
Sette inn sikkerhetsfilterpose
Figur F
- Sett på sikkerhetsfilterposen.
Figur G
- Brett kanten av sikkerhetsfilterposen ut over kanten av smussbeholderen.
ADVARSEL
Feil fremgangsmåte ved låsing av smussbeholden
Klemfare
Under lasingen ma du aldri holde hendene mellem smussbeholderen og filtringen eler i nærhen av Ioftemekanismen.
Stovutslipp under sugging
- Kontroller filterets feste, og korriger ved behov.
- Rens hovedfilteret (se kapittel Rense hovedfilteret).
- Skift ut hovedfilteret (se kapittel Skiffe hovedfilter).
Avfallshandtering
2006/42/EF (+2009/127/EF)
2014/30/EU
2011/65/EU
Anvendte harmoniserte standarder
EN 60335-1
EN 60335-2-69
EN 55014-1:2017 + A11:2020
EN 55014-2: 2015
EN IEC 61000-3-2: 2019
EN 61000-3-3: 2013 + A1: 2019
EN 61000-3-11:2000
EN 62233: 2008
EN IEC 63000:2018
T. Wahl Managing Director

A. Haag
Director R&D
73550 Waldstetten (Germany)
2006/42/EF (+2009/127/EF)
2014/30/EU
2011/65/EU
73550 Waldstetten (Germany)
Uldised ohutusjuhised
Tüupiline tokaal kg 78
73550 Waldstetten (Germany)
Tel: +49 7171 94888-0
Faks: +49 7171 94888-528
Waldstetten, 24/04/01
Satures

T. Wahl
Managing Director

A. Haag
Director R&D
Pilnvarotais sagatavot dokumentaciju:
A. Haag
Kärcher Industrial Vacuuming GmbH
2006/42/WE (+2009/127/WE)
2014/30/UE
2011/65/UE
Hlavny filter (obj.Č.9.990-292.0)
Filter H14 (obj. c. 9.993-006.0)
Zadevne EU-directive
2006/42/ES (+2009/127/ES)
2014/30/EU
2011/65/EU

T. Wahl
Managing Director

A. Haag
Director R&D
Pooblascena oseba za dokumentacio:
A. Haag
Kärcher Industrial Vacuuming GmbH
Directive UE relevante
2006/42/UE (+2009/127/UE)
2014/30/UE
2011/65/UE
Norme armonizate aplicate
EN 60335-1
EN 60335-2-69
EN 55014-1:2017 + A11:2020
EN 55014-2: 2015
EN IEC 61000-3-2: 2019
EN 61000-3-3: 2013 + A1: 2019
EN 61000-3-11:2000
EN 62233: 2008
EN IEC 63000:2018
Standarde nationale aplicate
Semnatarii actiona zā in numele sī prin imputernicirea conduceriī intrreprinderii.

T. Wahl Managing Director

A.Haag Director R&D
2006/42/EZ (+2009/127/EZ)
2014/30/EU
2011/65/EU
Primijenjene uskladene norme
EN 60335-1
EN 60335-2-69
EN 55014-1: 2017 + A11: 2020
EN 55014-2: 2015
EN IEC 61000-3-2: 2019
EN 61000-3-3: 2013 + A1: 2019
EN 61000-3-11:2000
EN 62233: 2008
EN IEC 63000:2018
Primijenjene nacionalne norme

T. Wahl Managing Director

A. Haag
Director R&D
73550 Waldstetten (Germany)
Tel.: +49 7171 94888-0
Telefaks: +49 7171 94888-528
Waldstetten, 24/04/01
Sadržaj
Opste napomene 277
Sigurnosne napomene 277
Namenska upotreba. 278
2006/42/EZ (+2009/127/EZ)
2014/30/EU
2011/65/EU
Primenjene harmonizovane norme
EN 60335-1
EN 60335-2-69
EN 55014-1:2017 + A11:2020
EN 55014-2: 2015
EN IEC 61000-3-2: 2019
EN 61000-3-3: 2013 + A1: 2019
EN 61000-3-11:2000
EN 62233: 2008
EN IEC 63000:2018
Primenjene nacionalne norme
一
Potpisnici deluju u ime i uz punomoc rukovodstva.

T. Wahl
Managing Director

A. Haag
Director R&D
Lice ovlaśćeno za dokumentaciju:
A. Haag
Kärcher Industrijsko usisavanje GmbH
73550 Waldstetten (Germany)
Tnλ: +49 7171 94888-0
: +49717194888-528
Waldstetten, 24/04/01
Coepejxahne
O6uhe yka3aHn 304
Yka3aHnnoTexHnke6e3onacchoctn.304
IcnoJb3ObaHne no Ha3HaueHnIO .... 305
3aunTa okpykaHoue cpebl 305
PpHaJnEeKHOCTn 3aNaChbIe YacTn 306
KOMnneKT noctabkn 306
OncaHne yctpoiCTBa 306
CnmboJIbHa yCTpoIcTBe 306
BBoD B 3KcPnPyaTaUIO 307
308
TpaHcnpOpTnpoBka 312
XpaHeHne 312
YxoI n TexHnueckoe o6cnyKBaHne. 313
Pomoub npn HncnpaBHOCTx 316
Ytuln3aun 317
TapaHTn. 317
TexHueckne XapaKTepeNCTnKn 317
ДeКлараця O COOTBeTCTBnI CTaHdApTaM EC. 318
06u ne yka3aHnna


IpeepnepBbIM
NcNoJIb3OBAHnEM N3dJIInJy
CneDyET npOHTaTb DaHHOe pyKOBOcCTBO NO 3KcNllyaTaUIN, DeIcTBOBaTb B COOTBeTCTBn C Hm N COxpaHtB ero Inn PocJeDyUoJero IcNoIb3OBAHn IIN CneDyUoJero BnaIeNbua yCTpoiCTBa.
- Ipeed nepBbIM BBODOM B экплуatauHcIeDyET O6a3aTeNbHO O3HaKOMNTbcr C yka3aHnMaMn NO TexHnke 6e3oNaChocTn No 5.956-249.0.
HecobJIOeHne pyKOBoDCTBa no 3KcJIpyatauN yka3aHnNo TexHKe 6e3OanachocTMOKe TpNBecTN K NOBpeXdEHNO yCTPOIcTBaN ONaCHOCTN TpaBMnpoBaHnO npaTopa N dpynx IINU.
- П р и об hapужень TrpaHCnOpTHbIX
новөрөдөн сразу
пронформіровыт ToproBOrO
праздаги.
Yka3aHnI NO TexHnKe 6e3oNaChOCTN
CTeneHb onachoctn
ONACHOCTb
- Yka3aHue omHocumelbHo HenocpeDcmeHNO 2po3aueu onachocmu, komopar npubodum K mxeblm mpaemam unK cmepmu.
△PENEYNPEXDEHNE
- Yka3aHue omHocumelbHO 803MOxHou nomeHuJIbHO onachou cumyaauu, komopra MoXem npueecmu K mJKeIbIM mpaam unu K cmepu.
OCTOPOXHO
- Yka3aHue Ha nomeHuaJIbHO onaChyIO cumyaUIO, Komopar MoXem npueecMu K nOlyeHuIO neKUX mpaM.
BHIMAHNE
- Yka3aHue omHocumelbHo 603MOxHOJ nomeHuaJIbHO onacHO cmyauu, Komopra MoXem noeHb 3a cobou MamepuJIbHbIy uep6.
Ошце указанно Тхнке 6e3opacnoctn
ONACHOCTb · Pa6oma c ycmpoucmbom u beueecmeamu, dny KOMopbIX OHO npedHa3NayeHo, EKnIOUaY 6e3OnacHbI Memod luKbUdaauu co6paHNO Mamepuana, OcyuecmeJnHOMc moIbKO oByeHHbIM nepcoHAnOM. · Ecnu ompabomAHbI 803dyx omBODumc8 nomeueHue, mo 8 daHHOM nOmeueHue doJXHa 6bIm bOecneueHa docmamouHa cmeneHb 803dyxoo6MeHa L. DnA cobIoodeHua mpe6yEmbIX npedeNbHbIX 3NaueHu 6ObemhI NOMOK MOXem cocmaEbnMb
MaKcUmaIbHo 50% om obema cBexe2o
B03dyxa (obem nomeueHna VR
cmeneh b 03dyxoo6MeHa LBM). Be3
npuHmua ocobix MEP no oBecepeHuO
BeHmunauu deucmbeyem npabuno:
L B_m = 1h^-1 . B daHHOM ycmpoucme
haxodumcEpeDna dJa 3OpOBbIb.
Paombi no ydaenHIO nbiu u3
ycmpoucmea umexHuueckoe
obcykueaHue ycmpoucmea,ekloua u
ydaenHe nblnc6bOpHKoe,doJKNbI
ebINHmbcra mOlbKO cneuaanucmau,
umeoumu coomeemcmyouee
3auumhoe chapjKeHue. He
3KcnIyamupoabmb ycmpoucmeo 6e3
noHou cuCmembfunbmpauu.
CobIoDamb npaeuna mexHku
6e3onacHocmu, npumeHembie K
Mamepuanam, noDHexaum obpa6omke.
△PENEYNPEXDEHNE
3anpeuamaemca ucnonb3oabmb unocmaaampbupob noomkpblmHe6om b ycnoobux noobwueneHHouEbnKocmu.ДЯbezonachozoNOJoxeHuaYcmpoucmea 3adeucmboeambcmohyhe mopmo3aHa HapraenloueMpUke.Ppu HeakmueHOM cmohoyHommpMOze Ycmpoucmeo MoxemBeckohmpoIbHo npuum e dbxueHue.
OCTOPOXHO ·Ipu
npodonjxumelbHbix nepebbx e 3Kcnnyamauu u nocne uCnOlb308aHua ebIKIouampbu6op c nomoucbu ebIKIouamena ycmpoucmeu u ebimaeambwmencelbHyUeunky u3 po3emku.
IOBeHeNbeBcIyuee BO3HnKHOBeHnAbapnHOB CNTyaun
ONACHOCTb
Onachocmb mpaemupoeaHua u noBpeKdeHu npu Kopomkom 3ambikaHuu unu dpyzux HenoJaKaX 3JeKmpuK
Onachocmb npaxeHua 3neKmpuueckum mOKOM, onachocmb oko208
BaeapuHou cumyaquu ebiknIOumb ycmpoUcmeo u 38neu umencelHyu buNKy u3 po3emku.
NoBeHeHne B cIyuee noIOMKn/ npoteuKn qnlbTpa:
-
HemeIeHNO BbIKIOuHTb yCTPOINCTBO. YcTPOINCTBO 3aIpeUaETc npOIOJkaTb 3KcNpyATnpOBaTb.
-
3aMeHnTbΦnJIbTp.
IcnoJb30BaHne noHa3NaYeHnIO
UcTPOINCTBO npeHa3HaueHo dIa:
BlaJHoN u cyXoY y6OpKn NOBepxHocTe NOna N CTeH
- YdaneHn cyxoi, HeBocnIaMeHJIOSeiC8, OceJaIOSei Nbln, OnaCHO dJIy 3DOpOBb; KaTeropn PbIIN H corlaacHo cTaHdapTy EN 60335-2-69
- PpOMbIJIeHHoe IcNoJIb3OBaHHe, HApPIMep,B CkJaIcknx IN pON3BOIDCTBeHHbIX NOMEUeHnX
KOMMepueckoro NcNoIb3OBaHnHa npimep,B roCTuHuaX, uKOJax, 6oJIbHucax,pa6pKax,Mara3nHax, opcax n 6Ipo no apeHne HeBHXMOCTn.
IIO6oe dpyroe nCNOJb3OBaHHe cHTaETc
NCNoJIb3OBaHnEM He NO Ha3HaueHnIO.
YCTPOINCTBO He IMeet DOynycka DnA
NORpy3KN KpaHOM.
DaHHoe ycTPOINCTBO He NODxOuNT DnA
NODKIIouHEnK NblJeO6pa3yUoUe
MaUNHe.
3auntata okpykaioe cpebl
YnakoBouHbI MaTePnaJIbI NOdAOTcB TOpuHOn nepepa60Tke. YnakoBky Heo6xOdIMo yTuIN3InpOBAt b 6e3 yUep6a DnA OKpyXaHOSei Cpebl.
3NeKtpnueckne n 3JeKtpoHHbIe yCTpoiCTBa YacTo copejKaT ceHHbIe MaTePnaJIbI, npIrOndHbIe dJa BTOpHuN Opepa6OTKn, n 3aUacTyIO TaKHe KOMNoHEHTbI, KaK 6aTapeN, aKKymyJrTOpbI INn MacNo, KOToPbI e pN He npabNlbHom o6paueHn INn HeHaJNeXaUeYtINn3aCInn IpeDCTaBIAJOT NOTeHuaJIbHyIO ONaCHOCTb
ДлЯ 3дОрOBьИ OKуЖаIOошЕсрды.Тем He MeHHe,ДaHHbIe KOMПОHEHTbl HeO6xOДIMbI ДлЯ ПраВиьHOJ pa6OTbI yCTpoIcTBa.YcTpoIcTBa,O6O3HaueHHBie 3TtM CmBOJOM,3aPpeUSeHO yTINn3InpOBaTb BMeCte C 6bITOBbIMN OTXODAMN.
Yka3aHnno KOMNoHeHTam (REACH)
Для получени akтуалов Информанны O komноентax сM. www.kaercher.de/ REACH
PnHaJJIeXHocTn 3aNaChbIe YacTn
IcnoJb3OBAtB ToJIbKO OpUNHaJIbHbIe npHaJdIeXHoCTN 3aIaChbIe YacTn. TOnbKO OHI rapaHTnpuyOT 6e3OpacHyIO n 6ecpeboHyIO pa6Otu yctpoiCTBa. IJra NOnyehnI INΦopMaIIN O npHaJdIeXHoCTAx I 3aIpaCTx CM. pa3dEIN «CepBnc» Ha caIte www.kaercher.com.
YuHTbIbAtb CneNyUoUee:
-ПинадлnexHQoCTN B OБьeM NOCTaBKN He BXOДЯТ. He06xOДIMbIe B 3aBnCmOcTn OT npednoJaraemoi pa6Otbl -PnHaIeJexHOCTN CJIeDyET 3aKa3bIBaTb OTdEJIbHO.
HaJnEJauee yHKUHnPOBaYcTpoIcTBa rapaHTnpyETcra TOnbKO npedNCAHHbIM HOMHaJIbHbIM dNaMeTpOM BCacbIBaIOuero WJHaHra (cm. rnaBy TexHuYeckue xapakmepucmu).
3aIacHbIe qactn I npHaJneXHOCTN MOxHO nOlyuHTb y dInepa NIN B 0nnnae pmpbl KARCHER.
KOMnJIeKT nOCTaBKn
Ipn pacnakOBke yctpoicTba npOBepntb KOMnJIeKtauu. O nobpeXdHnn npn TpaHCnOpTnpOBKe cJeDyET coo6uHTb CBOeMy dInlepy.
Описане устюкта
PncyHKn CM. Ha cTpaHnucax C pncyHKamn PncyHok A
① Pучka Дпя мсорocборнka
② 3aŋyuška Ha Mycopoc6opHnke
③ 3aŋnyuːka Ha Kɔnlbʊe φɪnɪbɪtpa
ΦHJIbTpOBAHne
⑤ Pbyar oucnTkn qnnbtpa
6MaHometp
⑦Пиборнь ВьIKЛЮЧаTeNB BCaCbIBAIOUeN Typ6HbI
8 NIOHTHIneJIbHOe KOJIbLcO
⑨ΦnJIbTp
⑩ΦильТрацноНьи ВибраTop
11CeTeBOKka6eJb
12 KpOyOK JnKa6eJr
⑬ Pучka дя посяноки
(4)TOnIOBka nblneCocca
⑤ΦирмehнаяТаБлчka
16ΦnKcaTOp rOJOBKn nbJIneCocA
⑰PpoknaOuHoe KOnb4o
(8)Дерхатель ka6eЯ
19Dyro06pa3Ha pyka
20Mycopoc6opHnK
21 NOBOPOTHbIPOINK CO CTOHAHbIM TOPMO3OM
22ДерхаTeNBдЯВсасьВаIOоeТpy6KIN
3ambikaHne npomexkyTOUHO KONba
24 EpkaTeIb HacaIKn IJna nona
25 BcacbBaIOUm NaIpy6ok Ha cnIbTpuyOuem KOJIbUe
26 BcabsbIbAIOUHn NaTppy6OK Ha Mycopoc6OpHNke
⑦ 卞accn
CnMBOJIbI Ha yCTpoiCTBe
YcTpoICTBO npeHa3NaYeHO dIy
BCacbIBaHnRA NBIN Do KnaCCa H.
IPDEUYPEXKDEHNE: B DaHHOM
ycTPOICTBe HaxoINTcR OAnchAra DJI
3DOpOBBy NBIN. OnopoxHeHne N
TexHnueckoe 6cLnyKuBaHne, B TOM YnCNe,
ydaJeHne PbIe6bOpHOro MeShKa, DOJXHo
IpOBoIDTBcR ToIbKO CneUaNtAmN,
HOcAUMN NOxODJaUee 3aunTHoe
chapJKeHne. He BkIOuAtb Do NoJHOi
yCTaHOBKn CNCTeMbI QnIbTPaUNn I
PpOBepKn cyHKcHOpOBaHn KOHtpoJn oBbemHOrO nOToka.
PpumueaHue
Ipu Heo6xodumocmu 63rmb HaKneuKy Ha coomeemcmeyoueM HaCuOHaNbHOM Ra3bke C npunazaemoo Nzucma HaKneeK U HaKneumb ee Ha ycmpoucmeo nobepx meKCma Ha HEmeukom Ra3bike.

DN40
MAX
XX,X kPa/ XX,X mbar
DN50
MAX
XX,KPa/ XX,Xmbar
DN70
MAX
XX,KPa/ XX,Xmbar
Ha haKneKe yka3aHbI 3NaueHnMaKc.
pa3peXeHn OTHOCHTeNbHO NOpEpuHOrO
ceHnna HcNoJIb3yEmoRO BCacbIBaIOUeRo
7IaHra.Tekuue 3NaueHne MoKHo
CHTaTb NO MaHOMeTpY. 3NaueHnA,
DeiCTBNTbHbIe DnJa DAHHoro
yCTPOINCTBa, CM. rnaBy CumbibaHue
MuHmAlbHO2O PACXODa 603dyxa. Ecnn
3NaueHne HIXe DOynCTMOrO, fNltp
Heo6xOJIMO OChCTnTB (CM. rnaBy
OucmKa OCHOBHO2O fUnbmpa) nII
3AmEHtB (CM. rnaBy 3aMeHa OCHOBHO2O
fUnbmpa). Pa3HbIe NOpEpuHbIe ceHnna
BCacbIBaIOUeTo IlaHa TnO3BOJIAOT
aDaANTIpOBaTbcRA K pa3HbIM CeueHnMa
CoedInHeHn KOMPNeKTyIOUx DeTaJeN.

Meuok dIy Mycopa
(Homep 3aka3a 9.989-606.0)

ByepehBbIΦnJIbTp-MeWIOK
(Homep 3aKa3a 6.904-420.0)
TnaBbI qnJIbTp
(HomepДЯЗаказа9.990-292.0)
H14
(HomepДЯЗаказа9.993-006.0)
BbO B 3KcπIpyaTaunio
△PENEYNPEXDEHNE
Onachocmb u3-3a epehou dna 3dopoebnyi
3a6oJIeBaHua dbixameIbHbIX nymeu, 6b138aHHbIe 6bIXaHuEM nbIu.
He 3Kcnnyamupobamb ycmpoucmbo 6e3
funbmpyoozeo 3nemehma, maKaKa e
npomuehOM cnyae cyuecmeyem
onacnoemb dna 3dopob8u u3-3a
yeenueHua bibpocoe MeNKou nblnu.
BHIMAHHE
Omcymcmyouu u pfunbmpyouu 3JeMeHm
PoepeKeHue 3neKmpoDbuzameIb nbinecoca
He ocyuecmeenb y6opky nbinecocom 6e3 pfunbmpyuoeseo 3neMeHma.
- YcTaHOBnTb ycTpOuCTBO B pa6OoHee NOJoxKeHne.
- 3aФИКСИРОВаТь устpoиCTBO C NOMOUITO CTORHOUHOrTO TOPMO3a.
- Y6eIITbcra, yTO rOIOBka nbIneocac yCTaHOBHeHa npabNbHo.
- BCTaBnTb BCacbIbAIOUm NlaHr (He BXODIT B KOMJIeKT NOCTaBKN) B BbIbpaHHbI BCacbIBaIOUm NaTppy6ok (cM. rnaBy BbIbOp ecacbIbaIOueo nampy6ka).
5.ПлOTно 3akpbIbДpyroB BCacbIbAIOUmni NaTpy6OK yNlOThnTeJbHOH npo6KoN (cM.rnaBy 3akpbIbHaHue BCacbIbAIOUe2O nampy6Ka). - Пюовер综合体уювень заолнени в мycopotocборнке (см. глиаву Пюовера уюся заолнени мycopotocборнuka).
- Пи Heo6xOДmOcTn onOpoxHnTb Mycopoc6opHnK (cM. rIaBy OnopoxHeHue mycopoc6opHnka).
- Перед сухоуборкои nbilecocom B 3abucnmoCTN OT npimHeHnaCneDyET BCTaBNTb MeWOKДЯ yTININ3aUNI INI 6bypepHbIΦnIbTp-MeWOK (CM. rIaby Cyxra y6opka)
9.ПодсоeДиHHTьКВсаСыBaIOUSeMy Шлангу_HуЖнуюприиадпexнocть(He BXODNTВKOMПЛeKTNOCTaBKN)
Bb6op BCacbBaIOoero naTpy6ka
B 3aBnCmOCTn OT npImeHHeNBAcBbAIOUuI UHaHr MoKetNoDcoEINHHTbcra K 2 pa3HbIM NaTpy6kam.
- Cuxa Ounchka c MeXKOM dny tyn3aun: Kpynna nblb, kpaTKOBpeMeHHoe nCNOJb3OBAHne dny 60nbux oBemOB BCacbIbAeMOro MaTePnAna MeOK dny tyn3aun He BXoNT B KOMJIeKT NOCTaBKn 3aKa3bIbAEtCra OTdeJbHO, Homep dny 3aka3a9.989-606.0 (5 wTyk). -BnaXnay y6opka
- BcacsbIbaOuHn NaTppy6ok Ha mycopoc6bOpHke Cyxag ouHCTKa c nCnoJIb3OBaHNem 6byepHoro fNtBp-MeUka: MeIKoDInCnepChra Nblb, NOCToHHbIe 6OJIbUHe O6BeMbI BCacsbIbAeMOro MaTePnaJa YcTpoiCTBO OCHaUaETcra 6byepHbIM fNtBp-MeUKOM, KOTOpbI 3aKpbIbAEcR KpbIuKo, Homep dIg 3aka3a 6.904-420.0 (5 wTyK). -BnaJHnay y6opka
He donyckaetc
IODKIOUChE K
IbIeCocy
OHOBpeMeHHo
DBYX BCaCbIBaHOUsx
JHaHRO. OOnn n3
BCaCbIBaHOUsx
NaTpY6KOB DoJIKeH
6bITb IINTHO
3aKpbITbIM C
NOMOuHO IpO6Kn.
Pn
NCNOJB3OBAHN
MeuKa DnA Mycopa
HIXHNI
BCaCbIBaHOUsn
PaTpY6OK DoJIKeH
6bITb IINTHO
3aKpbIT.

Iprn
NcnoJb3OBaHn
MeUka DJa Mycopa
HNKHN
BCacbIBaIOuN
NaTppy6ok DOJIKeH
6bITb PLOTHO
3aKpbIt.
Ipn
NcnoJb3OBaHn
6yepHo
ΦnIbTp-MeUka
BepxHn
BCacbIBaIOUsn
NaTpy6ok DOJKeH
6bITb PLOTHO
3aKpbITbIM.
3aKpbBaHne BcAcbBaIOUeRo naTppy6ka
△PENEYNPEXDEHNE OnachocmbmpaMupoBaHua
NoepexdeHue kOku, neekux u ana3 ecneocmeue 0o3eucmeu MeNKou nbIu Nocne cHmua cacbibaioe2 oJnHa2a bcacbiaouu npmy6ok Heo6xodmo 3akpbmbc nOMoubIO np6ko.
PncyhoB
- TOnHO BCTaBnTb yNIOTHNTeNbHyIO npo6ky BO BCacbBaIOuI naTppy6ok.
- 3aADBHyTb npo6ky do ynpa.
- Pered cyxoy60kOB BnaXhBn IINbTp cIeDyET XopoOIO npocuHTb INN 3aMeHNTb Ha cyxO.
2.Прн Heo6xOДmOCTn 3aMeHHTbФИьТР.
YcTaHOBka MeuKa dJa yTnN3aun/ 6yΦepHoro fNbTp-MeuKa
- 3aФИКСИРОВАТь yCTpoIcTBO C NOMOUIBIO CTORHOUHOrTO TOPMO3a.
PucyHOK C
- Notaryb pyky BBepx. Mycopoc6opnK pa36noknyeTcN onyctntc.
PucyHok D
Cbem 6yepeporo qnIbTp-Meoka Pucynok I
HenpeHaMepeHHbI 3aynck ycmpoucmea, kacaHue mokoeedyux yacmei
OnachocmbmpaemupoeaHua,ydap 3neKmpuueckum mOKOM
Ipeod npoedeHue mpa6om Ha ycmpoucmee 8bIKIOUumycmpoucmo. I3neuwmencelbHyO eunky.
ONACHOCTb
Onachocmb u3-3a epehou dna 3dopoebnyi
3a6oJIeBaHua dbIxamEnbHbIX nymeu, 6bI38aHHbIe 6ObIXaHuEM NbIUN.
Bo epmemexnuecko0o o6cnyxuaHua (Ha npumep, npu 3aMeHe uIbmpa) uCnoB3O8ambpecnupamopKnaccaP2 uu 6onee 6bcok0oKnaccau odHopaa0eyo odexdy.
ONACHOCTb
Inoxa qunbmpauia
3a6oJIeBaHua əbIXaMeIbHbIX nymeu, 8bI3BaHHbIe 8ObIXaHuEM NblU.
Ф�eKmueHocmbФunbmpaquu
ympoucmea Moxem 6bim npoeepena
memodom,yka3aHHbIM E EN 60 335-2-
69 22.AA.201.2.3ma npoeepka doJxHa
npo8oDbcKa KAK MuHUMyM pa3 e zoD uIu
yaue,ecnU 3mo yka3aHO bHaCuOHaNbHbIX
mpe6oBaHuaX.
Ecnpu pe3ybnm mecma ompuameIbHbI, noemopmb mec m c Hoebim qunbmpom.
△PENEYNPEXDEHNE
Onachocmb u3-3a epehou dna 3dopoebnyi
3a6oJIeBaHua 0bIXaMeIbHbIX nymeu, 8b138aHHbIe 8ObIXaHuEM NbIInU.
Oduh pa3 e 2oD npou3bodumenb uu luoc, npowedwee uHcmpykmax, doJxHbl npoepeMb ucnpaehoe
fynkuohupoabaue npedoxpahumeIbHbIX ycmpoucme dny npedomepaueHua
onachocmeu, Hanpumep,
aepMemuHocmb ycmpoUcmba, Hauyue
noepexkdeHu unbmpa,
ФунkuuHupObaHue KOHmpoJIbHbIX ycmpoucme.
BHMHAHNE
Cunukohcodepkaue cpecmea dnyyxoda
Moaym 6bimb noepexdeHbI nnacmuKoBie demaru.
He ucnonb30aamb b dny ouucmku cunukohcodepkaue cpecdmea dny yxoda.
Ipu noaeneHu c6o npubop cneyem He3amednmeIbHO bIKIOuymb. Ipeod NoBmOpHbIM BkIOUeHuEM ycmpoucmea cneyem ycmpaHmb HeucnpaBHoCmb. Ecnn HncnpaBHOCTb He ydaetcay YcTpaHNTb, ycTpoiCTBO Heo6xOdIMO OTnpaBNTb Ha npOBepky B cepBnCHyo cnjx6y.
BcacbIbAIOUaTyp6HHa He pa6oTaET
Cnla BCacbIBaHna ocIa6eBaet
- 3akpbTb HeerpmTeuHbI BCacbBaIOUnn NaTppy6ok (CM. rnaBy 3akpbBaHue BCacbBaIOUeO npmpy6ka).
- YdaJIbTb 3acOpbl N3 HacaKn, BCaCbIbAIOUe Tpy6bl NIN BCaCbIbAIOUeO UJHaHra.
- 3aMeHHTb 3aONHeHHbIM MeWOK dJa yTuJn3aUu (cM. rnaBy YcmaHo6Ka Mewka dJa ymuu3auu).
- 3aMeHnTb 3aNoJIHeHHbI 6ypepHbI ΦnIbTp-MeWok (CM. rIaBy 3aMeHa 6ypepHo2o φunbmp-MeWka).
- Поверпь паBNьHOCь NOcaKIN BCaCbIbAIOSeI ROIOBKN I Mycopoc6OpHnka.
- OuHCTnTb OCHOBHOJ cHJIbTp (CM. rJaBy Oucmka oCHOEHOZO fuIbmpa).
- Поверпь и пи Нeoхдимocтп OTКорректуpoВаТ поаду ФнльТра.
- 3aMeHntb OCHOBHOJ qnIbTp (CM. rnaBy 3aMeHa OCHOBHOZO qunbmpa).
Bo Bpemy y6opkn n3 ycTpoNcTba BBIXOHT nbINb
- Поверпь и пи Heo6xOДМОCTN OTKOPpeKTIpoBaT b NOcAkyФиNbTpA.
- OuHCTnTb OCHOBHOJ cHJIbTp (CM. rJaBy Oucmka oCHOBHOZO fUJbmpa).
- 3aMeHnTb OCHOBHOJ qnIbTp (CM. rnaBy 3aMeHa OCHOBHOZO qunbmpa).
yTnIIN3aun
IIO OKOHuaHIO CPOKa CnyXbI yCTpOInCTBO CneJyET YTNIN3NPOBaT B COOTBETCTBNIC Tpe6oBaHnMn 3aKOHOnaTeJIbCTBa.
TapaHTnA
B kaqdoi ctpaHe DeicTByOT COOTBeTcTBYUOuIe ycIOBnra rapaHTn, YCTaHOBNEHHbIe HaSeI DouepeHne C6bITOBoKOMNaHne. Bo3MOxHbIe HENCpRaBHOCTHN yCTPOJCTBa B TeueHne rapaHTnHO cPoka Mbl yCTpaHЯeM 6ecnPaTHo, ecn npuHa 3aklouaetcB DdeEKTax MaTePnaIOB nIN npOn3BOODCTBeHHOM 6pake. B cnyuae BO3HNKOBeHnI pPeTeH3N B TeueHne rapaHTnHO cPoka npocb6a o6paTaTbcC c YeKOM O NOKyPKe B TOpROByIO
opraHn3aUIO, npOdaBswyo N3deJIne, nIN B 6nnKaiyUo ynoHOMOeHHyO cnyk6y cepBnCHoro o6cnykBaHna. (Apcoc yka3an Ha o6opote) IOnOpHnTeIbHyO IHΦOpMaUIO O rapaHTn (pnp HauuN) MOxHO hAIrTn B obIactn cepBnCHoro o6cnykBaHna Ha MeCTHom Be6-caTe Karcher B pa3dJe «3arpy3kn>.
Data Bbinycka OTo6paXaetcHa 3aBODCKoT Ta6nue B 3aKoInpOBaHHOM BnDE. Pn 3Tom OTdJIbHbIe UΦpbl HMeIOT cNeDuOuee 3NaueHHe::
Приимер: 30190
3 roB BbInycka
0 CTOnEtne BbInycka
1 DecTnIeTne BbInycka
9 BTOPa Unppa Mecaa Bbinycka
0 nepBaIuΦpa MeCya BbInycka
TakIM 06pa3OM, B DaHHOM npHMepe KOD 30190 O3Haay TaTy BbInycka 09/(2)013.
TexHnueckne
XapakTepnCTnKN
3JIeKTpueeckoe NOdKnIouyeHne
TEXHNUeCKNX N3MeHeHNI.
Декларация o COOTBETCTBUN cTaHdapTaM EC
HactoIzum 3aBnreM, yTO KOHcEunna, KOHCTpyKzua I nCNoJIHeHne yKa3aHHoH HNXe MaUNHbI OTBeuAOT
COOTBETCTBYIOUIM OCHOBHbIM
Tpe6obAHm DnpeKtNB EC no
6e3oNaChocTn OxpaHe 3OpOBb. PpN
JIIO6bIX N3MeHeHnX MaunHbI, He
COrIacOBaHHbIX CHaWei KOMnHaHnei, DaHHaJeKnapaunr TepreT CBOIO CNJ
I3dennie: Ibilecoc dny cyxoy6opkn
I3denn: IbIeocnBnaXHOH n cyxOy6opKn
Tun: 9.989-xxx
DeiCTbYIOUne DnpeKTHBbI EC
2006/42/EC (+2009/127/EC)
2014/30/EC
2011/65/EC
BcmokTyBaJIbHnI naTpby60KoHTeHepi DnA CmITT
-Cyxe npnbpanna 3 6byepnHm fIbtp-MiKOM:dpi6Hn nn, nOCTiHNO BeNkA KInbKicTb BCMOKTyBaHO MaTepiany
Pnctpi Ochauen 6yepHm
fIbtp-MiKoM 3 KpuKoIO, No dJa
3aMOBHeHH 6.904-420.0 (5 wTyK).
-BoIore npn6npaHna

He moxha
OdHocHo
nIcklouatn Do
nIIOcoca Da
BCMOKtyBaJIbHi
UHaHr. Odn 3
BCMOKtyBaJIbHnx
natpy6kIB MaE 6yTu
UiNbHO 3akpntn
npo6koJ.
IiD yac
3aCTOCyBaHHn
MiXka DJIa CMIITY
HIXHi
BCMOK TYBaJIbHn
NaTpy6OK NOBHeH
6ytu 11bHo
3akpntn.
IiD yac
3aCTOCyBaHnHa
6ypephoro qinbTpMiuKa BepxHi
BCMOKTyBaJIbHn
nATpy6OK NOBHeH
6ytu 11bHo
3akpntn.
3aKpNBaHnB BCMOKTyBaJIbHOro naTppy6ka
△NONEPEJXEHH
He6e3neka mpaemybaHHa
NookoJHnI uKipu, neeHie ma oueBhacniDOK eNnuey dpi6Ho2 nunyPiCn3HmMBAcmOkmyBaJIbHO2o WnaH2aECMOkMyBaJIbHu nampy6o Heo6xio3akpum npo6koIO.
MaJIIOHOK B
- TOnHO BCTaBHTn npo6ky y BCMOKTyBaJIbHn naTpYbOK.
- 3acyHytn npo6ky do ynpoy.
IpeBipka pIBHЯ 3anOBHeHHa KOHTeHepa dIra cMiTTa
KoJI KOnTeHep IЯ CMiTTa HAnOBHOCbCdo HxKHBOrO KpaIO BCMOKTyBaJIbHOrO NaTpPy6ka Ha KOHTeHepi IJa CMiTTa, Ioro Heo6XiDHO CnOpOxHNTu. PInCTpiI He BmNkAcTbcra ABTomaTuHOb y pa3i nepeBnUeHHa MaKcImaJIbHO rPiBHa 3aNoBHeHHa.
- Perynpho nepeBiprpiPiBeHb 3aONBHeHHKoHTeHepa dJa CmTTT.
Ekcnnyataciia
△NONEPENXEHN
He6e3neka uepe3 wkiDnueu dna 3dopoe' nul
3axoepoehnnauxanbHexnnxie, cnpuuHHeBDuxaHnM nuny. He eknyamyamnpucmpiu 6e3 o6ox fInbmpyeanbHex enemeHmie, ockinbku e iHwomy pa3i icHyE he6e3neka dny 3do08'aype3 36InbweHHra buKud ep6ho2o nuNy. YBARA He6e3neka yepe3 ukuD dp6ho2o nuNy He6e3neka nowkodxeHH neKmpodbuayHa nunoocca. He 3himamu ochobnui fInbmpyouhu enemeHm nd qac npubupanhy.
Cyxe npn6npaHnHa
△NONEPEDXEHN
PiDbuueHu eukud nuy yepe3
He npabunbHe nooOxehn 3
ECMOKyBaHUMu nampy6kamu
3axeopueaHHrauxaHux uJnxie,
cnpuunHe buxaHnM nuy,
He cnpaeHocmi npcmpo10
He ndKIOuaume do npucmpo2
ECMOKMyeAblHi wnaHsu oHOacHo
3 ECMOKyAebHux nampy6k8 MaC
wnbHO 3akpumu np6ko10.
Obo8'3ko8o eukopucmoeyume MiwoK dna
cmimma minbku pa3om i3 cepxhim
ECMOkmyaBnHUM nampy6kom, iHaKue niD
cac npouecy ECMokmyaHHaEH 6yde
ECMOkmyaumc8 b2opy.
Y pa3i bukopucmaHHa Miuka dna cmimna Huxhiu cMOKmyBaHbHu nampy6ok noBuHeh 6bmu uinbHo 3akpumu. Y pa3i bukopucmaHHa 6byepnozo fInbmp-Miuka eepxHiu cMOKmyBaHbHu nampy6ok noBuHeh 6bmu uinbHo 3akpumum.
Bka3ieka
Leu npucpiu moxe bukopucmoeyamucn 36upaHnna nuny ecix munie do knacy nuny H. BuKOpucmaHn my uky dny nun y Heo6xide 32iHO i3 3akOHom.
Bka3ieka
Як помUCNoBu nunococ, npucmpiu npu3HaeHu dny 36upaHcyxOzo He2OpOyOzO nuy.
- Bn6paTn BCMOKTyBaJbHn natpy6ok 3aJIexKHO BiD BCMOKTyBaHOro MaTepiany (mVB. rnaBy Bu6ip BCMOKmyeBnHozo npampy6ka).
- 3anexho BiBn6paHoro BCMOKTyBaJIbHOrO NaTppy6ka BCTaBHTM iWOk dJa CmTTa a6o 6ypepHn iJbTp-MiWOk (DnB. rnaBy BcmaHOBneHnMa uKa dJa cmimra/ 6ypepHozo fInbmp-MiuKa).
Iepexi3 B0lororo npnbpanHa cyxhe
YBAFA
Iepexid 3 60102020 npubpanHa cyxhe
He6e3neKa nowkodxeHna fInbmpa
Jkuo fInbmpybaNbHu enemeHm 02kuu,
He buKOpucmooyamu nuococ dna 36opy cyxoo nny, ockijbku ue moke npu3becmu do mzo, uo fInbmp
3a6'embcra i cmahe HnpuadamHum do buKOpucmaHHa.
- Ipeep cyxim npnbpann m BOIOrn fIbTp cniDIO6pe npocyuHTn a6o 3amHHTn Ha cyxh.
- Y pa3i Heo6xIDHOCTI 3MiHnTn fJIbTp.
BcTaHOBJIeHHa MiIka dJa cMIITra / 6yΦepHoro φiNbTp-MiIka
- 3aФikCyBaTn npncTpI 3a DoNOMOIO CToRHKOBx rAJIbM.
MaJIIOHOK C
2.ПингдуroBypyky. KOnTeHepДЯcmITTЯpo36nOKOByETbcraTaOnyckaetbca.
MaIIOHOK D
- BntaHryTu KOHTeHep dIa CmITTg 3a DyroBy pyKy 3 npNCtpoIO.
BctahOBJIeHHa MiHa Ka dJa CmiTTa MaHIOHOK E
-
BCTaBHTN MiOOK dIy CMITT B KOHTeHep dIy CMITT Ta oBepeXHO npITnCHyTN Do CTiHKn Ta dHa KOHTeHepa.
-
Kpa' miuka dnia cmiTTa neperHyTu Na3OBHi uepe3 kpa' KOHTeHepa.
BcTaHOBJIeHnI 6yΦepHOro fIbTpMiuka
MaJIHOHOK F
- BCTaBnTn 6yΦeρHn φiNbTp-MiUOK.
MaJIIOHOK G
- KpaB 6yΦePHorO φiNbTp-MiUka nepeRhyTn Ha3OBH iYepe3 KpaI KOHTeHepa.
△NONEPENXEHN
Henpaunbhi di nioc 3aKpueaHnKaOHmeuhepa dna cmmra
He6e3neka 3aueemnHn
Iid yac 3akpuabaHry y kOohomy pa3i He mpumamu pyku mix KOhmeuHepom dna Cmimma ma KInbueM fInbmpa ma He iDnocumu ix 6nuzko do ndiMaNbHOzo MexaHi3My.
3aKpumu KOHmeuHep dna cmimma, HamuchyuHa dy2o8y pyky obomapykaMu.
8. BCTaBHTN KOHTeHep dIЯ cMIITI 3aΦikCyBaTn NOrO dYrBOIO pyKoHO.
Bolore npn6npaHn
△HEBE3NEKA
He6e3neka uepe3 wkiidnueu dna 3dopoe' nul
3axoepoueHnnauxaHux uJxie, cnpuuHeni buxaHnM nuny.
Iid yac bozo2o npubapnna 3abopohembcra 3bupamu He6e3neHu du3dope'ny.
YBAGA
He6e3neKa nowKoDkeHnYepe3 nepenOBHeHH pe3epeyapa dJa cmimma
Pe3epeyap dna cmmma moke bymu 3anobHeHu i nepenOBHeHu npomraom deKilbkoX cekyH y pa3i 36upaHnB eenukoI kInbKocmi piDuHu.
NocmiuHO KOhmpoIouamu pieeHb 3aNo6HeHHr.
OuHnHn OCHOBHOro 1bTpTa
KUO MaHometp noka3ye MaKcImaJIbHe
po3prJxehnra (INB. rnaBy 3yumyaHnra
MIHimaIbHO2o pieHa NOMOKy NOimpr),
Heo6XiIDHO OCHNTTN OCHOBHNI pInbTp.
- Bumkhytn npncpti.
2.ПеремICTHTBaxkIbOuHcHnHnФЛьТРaВпepeД-нaЗадпрнанMHi5pa3iB.
BmKHeHH npncTpko
- Bumkhytn npnctpii 3a donomoroBIMNKaiv yCMOKTyBaIbHOI Typ6iHn.
- BntaTn wTeNceBHy BNJky 3 po3eTKN.
He nepebaHmaxkyume KOhmeuHep.
Dompumyumecb yunhux npaeun nioumy KpaHOM.
△NONEPENXEHHA
Henpaunbhi dii nid yac 3akpuehnKaohmeuhepa dna cmimma
He6e3neKa 3aueemnHnH
Iid yac 3akpuabaHry y kOohomy pa3i He mpumamu pyku mix KOhmeuHepom dna Cmimma ma KInbueM qinbmpa ma He iDnocumu ix 6nuzko do ndiMaJIbHOzo mexaHi3My.
3aKpumu KOHmeuHep dna cMimma, Hamuchyewu Ha dy2o8y pyky obomapykaMu.
8. BCTaBHTN KOHTeHep DnA CmITTЯ i 3aΦiKcYBaTN NOrO dYroBOIO pyUKOHO.
OuHHeHH npncTpko
△NONEPEJXEHH
HenpaunbHa ymuIiai er miuHux eod
3a6pydHnHdoBknIJIa
Iompumyeamucb Micueeux npaeun
o6po6ku cmiuHux eo
- OuHCTnTn npicptiN 33OBHi Ta BCEpeDNI Hi 3a DOnOMoTOI INIOOCa Ta npOTepTu Ioro BOJOrOTo raHUpKOHO.
Y pa3i ouhueHn npncTpoH nnlococom cnid BnKOpNCTOBvBaTu TAKn camn npncTpi a6o nnococ BnUoro Knacy.
- 3HЯТи npuJaTЯ (He BXOДNTbdo KOMnJIeKTy nocTaBKN) Ta y pa3i Heo6xIaHocTi npOMnTu BODIo i BNCyUHTN.
36epirannn npncptpo
- O6MOTaTn MepexeBn Ka6eNb HABKOJIO TpImaay Ka6eIIO.
- 36epiratni npncpti y cyxomy npimiuheHHi, BxNBuN 3axoDIBiD HecaHKioHOBAHOrO BkOpNCtAHnR.
TpaHcnpTyBaHHa
OBEPEXHO
HedompumHaBa2u
Hebe3neka mpaemybaHna ma nowkoDxKeHb
Пд уасmpaнспормунь epaxobyeamu easy npucmpoio.
- 3akpntu obnDbv BcMOKtyBaIbHi naTpy6kn IJra TpaHcnpTyBaHHa 6e3 yTBOpEHn nnly (INB. rnaBy 3akpuBaHH BCMOkmyBaJIbHO2O npampy6ka).
- BiDnyctHTn cToHKObi rAJIbMa i nepeCyBaTn npIcTpi 3a pyuKy.
- Ⅲo6 3aBaHTaXHTn npncTpi, TpMaTH noRo 3a waci pyky.
4.ПдчacперевенгТрансортимиЗасбампрстрисдфikcbyBatnВIDKOB3aHHЯТапepeКДаHHя.
36epirannn
OBEPEXHO
HedompumHaBaZu
Hebe3neka mpaMByaHnma nowkoDxehb
Iid yac 36epi2aHn8 epaXoeyamu baa npucmpoio.
- 36epiratn npncpti Tilbky npmiueHHx.
Доглад i texhiчne обслуgroByBaHHЯ
△HEB3NEKA
HehaMucHu 3anyck npucmpoO, domuk do yacmuH, zo npoeodmb eIekmpuHu cmpym
Hebe3neka mpaemybaHn, ypaKeHHeIekmpuHUM cmpymom
Ipeod npoBeDeHnM po6im Ha npucmpoi BumKhymu npucmpiu.
Bumramu umencenbHy bunky.
△HEB3NEKA
He6e3neka uepe3 wkiDnueu dna 3dopoe' nul
3axbopuobaanduxaanbHuX uJnxie, cnpuuHeni bduxaHnM nuny.
B xodi npoBeDeHn mexHicHo20
obcnyoeyeaHn npucmpo (HaPpuKnaD,
zamiHa inbmpy) cnid buKOpucMoyeamu
pecnipamop P2 a6o buozo cmyneha
3axucmy ma odhopa3oBu oja.
△HEBE3NEKA
Nozana φinbmpaia
3axbopoeaHnAUXaBHuX uJxie, cnpuuHHeBDuxaHnM nUy.
EpekmueHicmbiBmpauii npucmpoMOxe bymu nepeepena Memodom,eu3naeHm e EN 60 335-2-
69 22.AA.201.2. Lя поеверka поунна пpoьodumucя уонаймене odun pa3 hapik abo yacmiwe, якculo ce bu3haheho haцiohanbhumu bumozamu.
Kaio pezynbma npeepku HezamueHu, noemopimb 3 HOBUM fInbmpom.
△NONEPEJXEHH
He6e3neka uepe3 wkiidnueu dna 3dopoe' nul
3axbopueaHnauxanbHuX uJxie, cnpuuHeHi bduxaHHm nuny.
IpuHaumHi oduh pa3 Ha pik bupo6nK a60 ocoba, uO npouwna iHcmpykmax, noBuHni nepeBipamu cnpaBHe yHKuioHyBaHHa 3anobixhux npucmpoie dny 3anobizanhn
He6e3neK, HanpuKnaD, ZepMemuHicmb npucmpoio, HareHicmb NowkodKeHb fInbmpa, yHKuoHyBaHHa KOHmpoIbHuX npucmpoie.
YBAGA
3acobu dna dozny, uo micmmb cuiKOH
Moxymb bymu nowkodxehi nnapmukei demani.
He bukopucmooyme dny ouuueHHa 3acobu dny dozny, uO Micmmb cunikoH.
Пиюу noblaьн Maшин e 3axnchmnpictpoMn dny 3anobiraHny ycyHeHHnHe6e3neK 3riDNo 3 npinnscamnpoceciHo'i acouiauii BGV A1.
Дя npOBeHnTexHiUHOro
6cnyroByBaHHKopNCTyBauch,HaCKIbKn
Ce MoXJIbBO, NOBHeH po3i6paTH
PpncTpI, npOBecTN Ioro OOnuHnY i
TexO6cnyroByBaHHn, He NiJaIOuN npN
UbOMy He6e3neCi 6cNyROByUoyn
NepcoHaT Ta iHux Oc6. Do HaneKnx
3axoDIB 6e3neKn HaJekatb
3He3apaxeHHn, npOBeHepeed
po3bupaHHm, MiceBa pRIMycBa
fIbtpyBaJIbHa BeHTnlaucjB Micci
po3bupaHHn pnpctpO, pnp6paHHn
Micra 6cnyroByBaHHn i BiINOBIHN
3axnCT nepcoHaNY.
- Do вдаленя пистою 3 He6e3nehoi 30ни 3OBhiшя NOBepxHЯ пистою NOBHHa 6yTN 3He3apaxKeHa 7JIAxOM OuHSeHHЯ ПИLOCOCOM a6o BVtepTa NaHcTo, a6o obpo6JIeHa yIbHIOUOUM 3acObOM. Yci YactHn IN pистою, вдаленя 3 He6e3nehoi 30Hn, NOBHHi po3rJaATncra Jk 3a6pydHeni. He6xIDHO yXHTN BCix 3axODIB, 506 yHNKHyTN PO3NOBCIOJKeHHЯ ПИЛY.
-Пдчасповедняобслуговьаннaya60pemoHTy npinCTpoU yci 3a6pydHeHi Detani,aki HEMOxNIBO OYNCTNTnHaIeJHIM YINOM,CniD BUNKHyTN.Taki npedMeTMaOTb 6yTN NOMiSeHiY HENPOHNKHMI WIKN Ta yTNIi3OBaHI BiINOBiIDHO Do NIOJoxKeHb IooYoTNIi3aui TAKNX BIXXODIB.
-Пд уac TpaHcnpTyBaHHЯ TaTexHiHOrO obCnyroByBaHHЯ npIcTpOIOBCMOKtyBaJIbHn NaTpy6ok cIiD3akpITn npo6koI.
- 3ayBaXTe, 9o npocTi po60Tu 3 TexHicHoro 6cnyroByBaHHra Ta dOrIy Bu MoKeTe BnKOHyBaTn CaMOCTiHo.
- 3OBHiUSHIO NOBepXHIO npncTroPO Ta BHyTpIiSHIO CTOPOHy KOHTeHepa peryIpaHO IpOTnPaTN BOJOrO raHhipKOIO.
Pobotn 3 nepeBipkn i Texhichoro 06cnyroByBaHHa
Perynepno nepebiprtn npncptpi BIDNOiDHO do HaioHaIbHnx 3aKoHOaBvHx Hopm 3 TexhIK 6e3neKn. Po60tN 3Texo6cnyroByBaHHn NobHHn InpoBDNTscnCneuiaicTOM uepe3 peryarnpHi npomixkN yacy 3riDHO 3 Bka3IBKaMn Bnpo6Hnka 3 DToPMaHHnM uHHNX nOIOKeHb i BnMOr Do 6e3neKn. Po60tN 3 eJekTpocncTeMoIO MoKe npoBOHTn InWe φaxiBeCb-eJekTpNK. Y pa3i BnHnKHeHHn PntAhb 3BepTaTncnDo fii KOMnaii KARCHER.
3aMiHa OCHOBHOI IbTpA
△HEBE3NEKA
He6e3neka uepe3 wkiidnueu dna 3dopoe' nul
3axbopueaHn duxaBHX uJxie,
cnpuunHe i duXaHHm nny.
Haonuenu nul nompi6Ho
mpaHcnpmyam u nluhoepoHukhux KOhmeuhepax. Ipecuanmu nul
3aboponeho. Ymuniaio
nuoyno8nloaBHO2O KOhmeuHepa
do3eONyembcra bukohyeamu minbku
npoiHcmpykmoeaHUM oc6am.
△NONEPENXEHN
He6e3neka uepe3 wkiidnueu dny 3dopoe' nul
3axoepoBaHnAUXaIbHux uJxie, cnpuuHHe buxaHnM nuny. He eukopucmoeyamu ochoHu IbmpyuoyeJeMeHm nicra 3Hammu Oso 3 npucmpoio.
B6ydoBaHi pInbTpN moKytb 6ytn 3amHeH iTilbKn CneuiaNtOM B CneuiaJbHNX MiCyrx
(Ha npnKna,Ha TaK 3BaHnx De3aKTnBauiHnx CTaHcix).
-
Bvmkhytn npncptpi.
-
BntTn wTeNceBHy BNkY 3 po3eTKN.
-
Po36nokyBaTu i 3HrTu rOIOBky nIIOOCoca.
-
Po36nokyBaTn i 3HraTn npomixHe kijbue.
-
BntaTn 3a6pydHeHn CKnaDyactn fiNbTp.
-
BiDpa3y niCn 3HimAnHn 3a6pydHeHOrOCKnAduactoro fIbTpa 3 npucTpoNOKnactn Ioro B naket i uinbHo 3akpntnnaKeT.
-
Ytni3yBaTn 3a6pydHeHnCKJaAcTn φiNbTp BiIDNoBIDHO DO BIMOR 3aKOHOaBCTBa.
-
Buaanu 6pyd Ha cTOpOHi YnCTOro nobitpr.
-
IpeBipuTu yuIbHIOBaJIbHe KINbUe Ha BiDCyTHiCt b NOxKOJKeHHa.
10.BCTaBHTN HOBN CKNaAdyactn fipbtp: a PpOraHyT NCKaAdyactn fipbtp yepe3 Bi6paicHy cncTeMy Ha npomixKHe KInbue TaK, 0o6 Bi6poeIemEnT byn BCTaHOBJIeHi nocepeDHH KINHeHb fipbtpa.
b BcTaHOBnTn npomixKHe KJIbue 3i CKlaAuaCTUm IJbTpOM i Bi6pauiHoi CnCTeMOHO Ha KInbue IJbTpra.
c 3aφikcybaTn npomixHe kijbue.
11.BctaHOBtNi i 3aΦikCyBaTn roJOBky nIIOcOca.
3amHa H-ФiJIbTpTa
- 3aФikCyBaTn npncTpIi 3a DonomoroIO CTOJHKOBUX rAJIbM.
- BmKHyTn npicTpii 3a donomoroBIMKauiB npicTpOIO.
- BntaTn wTeNceBHy BNkY 3 po3eTKN.
MaJIHOHOK M
- Po36nokyBaTn i nHraTn roNoBky nnloococa.
- Bi'edHaTn 7naHr Hn3bKOro TnCKy BiI roJIOBKn NINOOCoca Ta 3HrTu rOJOBky NINOCoca.
-
BiKpyTnI rBnHT 3 WeCTnIrpaHHOIO roNoBkoIO npOTn RoDnHHNKoBOi CTpiIKN BiIOBIDHM iHCTpyMeHTOM.
-
3nTn yuilbHeHH Ta 3a6pydHeHn H- pInbTp 3 roIOBKn nIIOOCoca.
- Bida3y nic7nHaHna3a6pydHeHOro H-phiIbTp3 npncTropo NOKnactn IoroB nakeT i ⅢiNbHO 3akpntn nakeT.
- YtunizyBaTn 3a6pydHeHn H-ΦiNbTp BiINOBiIDHO DO BmOr 3aKOHOdaBCTBa.
10.BuJaIITn 6pyd Ha cTOpOHi YnCTOro NOBITPra.
11.BctaHOBHTN HOBn H-phiIbTp y 3BOPOTHom npraKy.CiikkyBaTn 3a npaBnIbHm nOJKeHHm yuIbHeHb i IHaHra Hn3bKOTo TnCKy.
12.HaheCTn BiDIOBIDHn 3aci6 (Ha npKnaI,Loctite 243)Ha Hapi3b TBnHTa 3 WeCTnIRpaHHO IOJIOBkoIO,IO6 3aNo6iRTn HeHaBMnCHOMy BiDKpyuBaHHIO.
13.3aTMyTu TBNHT 3JeCTnIgpaHHO TOIOBKOIO 3a RoINHHNKOBOIO CTpiIKOIO.
14.BcTaHOBtI i 3aΦikCyBaTn rOIOBky nIIIOcoCa.
3aMiHa MiIka dIa cMIITT
- 3aφikcyBaTn npncptpi 3a donomoroIO CTOJHKOBNX rAJIbM.
MaJIIOHOK C
2.ПiДнЯТи Ду罗Ву рчКу.
KoHTeINHepДлЯ CMITTRApo36nOKOByETbCra Ta ONyCKaE TbCBa.
MaJIIOHOK D
- BntaRhyTu KOHTeHep dIa CMIITra 3a dyroBy pyuKy 3 npncTroIO.
MaJIOnHOK H
4.Пднг Краі мішka Дл CMITT.
5. Μιήνο 3ακρητι Mιωοκ ἀπλ CmīTTa KaβεŋbHoIO CTακKΘΟ.
6. BntaTmMiwokdJa CMiTTJ.
7. Ytni3yBaTu MiOk dJa CmiTTa BiIOBIAHDo YHHNX npnnciB.
MaJIIOHOK E
- BCTaBnTn HOBm MiOk dJa CMIITb KONTeHep dJa CMITTa OBepeXHo npNTnCHyTn Do CTiHKn Ta DHa KOHTeHepa.
- Kpa'miukaДЯсmiTTЯпернуТи Ha3OBHi uepe3 Kpa' KOHTe'Hepa.
△NONEPEJXEHH
Henpaunbhi dii nid yac 3akpuehnna KOHmeuHepa dna cmimma
He6e3neKa 3aueemnHn
Pið yac 3aKpueaHný y JxodHomy pa3i He mpumamu pyku mix KOHmeuHepom dna Cmimma ma KInbεm φinbmpa ma He NiðHocumu iX 6nU3bko do NiðiMaJIbHO2o MexaHi3My.
3aKpumu KOHmeuHep dna cMimma, Hamuchyewu Ha dyOey pyky obomapykaMu.
10.BctaBnT KoHTeHep IJr CmITTj i 3aΦikCyBaTN NOrO DyROBOIO pyKoIO.
3amHa 6yΦepHoro ΦiNbTp-Miuka
HEBE3NEKA
He6e3neka uepe3 wkiidnueu dny 3dopoe' nul
3axbopoubaHnAUXaBHuX uJxie, cnpuuHeHi buxaHnM nuny.
HaKoIuyeHn nn nompi6Ho
mpaHcnpmyBAM u nUOHeNpOHukHX
KOHmeHepax. NpeCunamu nn
3a6OpOnHo. Ymuiiauio
nUOyNo8IOBaJIbHO2O KOHMeUHepa
do3eONMaBcra buKoHyBAMu minbku
npoiHcmpkyMoBaHUM oc6am.
- 3aφikcyBaTn npucptpi 3a donomorOIO CToRHKOBUX rAInbM.
2.3HrTNBCMOKTyBaJIbHNIJUaHr. - 3akpntn BCMOKTyBaIbHn natpy6ok Ha KOHTeHepi dIra CMITTg (DnB. rnaBy 3akpuBaHHa BCMOKmyealbHo2o npmpy6ka).
MaHIOHOK C
4.Пингуpyky. KOnTeHepДЯ CMiTTa po36nOKOByeTbca Ta onyckaetbcra.
MaJIIOHOK D
- BntaHryTu KOHTeHep dJa CmiTTa 3a DyroBy pyKy 3 npNCtpoIO.
MaJIHOHOKI
- BiirHytn kpa i byepnoro pInbTpMiuka.
MaHIOHOK J
- 3HrTn 3axnchny nIbky.
-
3akpnTb6yepnHnΦiNbTp-MiwoK camOKneIOOHaKnadKOIO.
-
IOTaRHyTn 6yΦeρHn ΦiNbTp-MiWoK Ha3aD Ta 3HrTu NOrO.
MaJIIOHOK K
10.卍iNbHO 3aKpNTn BCMOKTyBaJIbHn OTBip 6yΦepHoro φiNbTp-MiUka KpiukoHO.
MaJIHOHOK L
11.卍iNbHO 3aKpntu 6yΦepHn ΦiNbTpMiwok 3a DOnOMoTO PO3aWoBaHOI Ka6eNbHOI CTJKKN.
12.BuHraTn 6yepHn fIbTp-MiOk 3 KOHTeHepa dJa CmITTa.
13.OuHCTnKoHTeHepIa CMITycepeHNi BONoROIO raHupkoio.
14.Ytni3yBaTn 6byepHnIiNbTp-MiOKB NIIHOHeNpOHKHomy 3aKpNTOMy nakeTi BiIOBIDNO Do 3aKOHOaBHNX NOLOXKeHb.
MaJIIOHOK F
15.BCTaBHTN HOBNI 6yΦePHN ΦiNbTpMiWOK.
MaJIIOHOK G
16.KpaB 6yepHoro 6iNbTp-Miuka neperHyTu Ha3OBHi Chepe3 KpaI KOHTeHepa.
△NONEPENKEHNA
Henpaunbhi dii ndac 3akpuahnna KOhmeuHepa dner cmimma
He6e3neKa 3aueemnHn
Iid yac 3akpuabaHn y kOohomy pa3i He mpumamu pyku mix KOhmeuHepom dna Cmimma ma KInbueM fInbmpa ma He iDnocumu ix 6lu3bko do nidiMaNbHOzo MexaHi3My.
3aKpumu KOHmeuHep dna cMimma, Hamuchyewu Ha dyoey pyky obomapykaMu.
17.BctaBNTN KOHTeHep dJa cMIITI 3aΦiKcYBaTn Ioro DyROBOI pyKoHO.
Дономora в pa3i HeçпразвhoeТeн
△HEB3NEKA
Hehaemuchu 3anyck npucmpoio / ydap eIekmpuHUM cmpyMom Hehaemuchu 3anyck ycMOKmyBaJIbHO2O dbuyna moKe npu3ecmu do mpaMByaHHa. Hanpya Ha eIekmpuHux demanjx moKe npueecmu do ydapy eIekmpuHUM cmpyMom.
Ipeod npoBeDeHnAm 6yOb-kaux poBim Ha npucmpoi eumkhymu npucmpiu i eumra mu wmencenbHy buKy 3 po3emku.
Yci nepebipku ma povomu 3
eNeKmpuHmu yacMuHaMu npunaDy
MaIomb eukohyeamucq faxieem.
Bka3ieka
Y pa3i buHkHeHnHa HecnpaBHoCmi npucmpiu cnid HeaauHO bumkhymu. Ipeod noemopHum buKOpucmaHnMa cnid ycHymu HecnpaBHiCmb.
Ko noKdoKeHH He MoXHa yCyHyTu, Heo6xIDNo nepeBipuTn npucTpui y cepBicHi cnyk6i.
YcMoKtYaBaJIbHa Typ6iHa He npaIoo
BidnoBidiHi DnpeKtNB EC
2006/42/EG (+2009/127/EG)
2014/30/EC
2011/65/EC
3acTocobvBahi rapMOhi3Obahi CTaHdapTu
EN 60335-1
EN 60335-2-69
EN 55014-1:2017 + A11:2020
EN 55014-2: 2015
EN IEC 61000-3-2: 2019
EN 61000-3-3: 2013 + A1: 2019
EN 61000-3-11:2000
EN 62233: 2008
EN IEC 63000:2018
3acTocOByBaHI HaIioHaJIbHi CtaHdapTn
Oco6n, 90 HxKye nIaNcaJncra, dIOtb 3a DOpUeHnM i 3a DoBipeHicTHO KepiBnTBA.

T. Wahl
Managing Director

A. Haag
Director R&D
Ocoba, BiINOBiIaNbHa 3a BeeHnA DOkymeHTaui:
A. Far (A. Haag)
Kärcher Industrial Vacuuming GmbH
M. BaJIbIaIbIaIbIaIbIaIbIaIbIaIbIaIbIaIbIaIbIaIbIaIbIaIbIaIbIaIbIaIbIaIbIaIbIaIbIaIbIaIbIaIbIaIbIaIbIaIbIaIbIa
Ma3MyHbI
Kannbl Hycaynap 333
Kayinci3ik HycKaynapbl 333
MaKcaTbHa cHKeC KOJaHy. 334
KopwaFaH opTaHbI Kopfay 334
KyaJ-Ka6bIKTap MeH KocanKbl
6eep 335
XeTkiIm XnblHTbIfbl 335
KypblfblHbIH CnNaTTMaacbl 335
KypblfbldaftaHaap 335
PaiandaHya 6epy 336
PaiandaHny 337
TacbImaJay 341
CaKay 341
Kytim XeHe TexHnKaIbIK KbI3MeT Kepcety 341
Akaynap Kezihderi KEmek 344
Ytuln3aunay 345
Keninik. 345
TexHnKaJIbIK MaFJyMaTTap. 345
EO cTaNdapTapbHa cAkectiri
TypaIbI deKnapaun 346
XaannbI HycKaynap
#
KypblfblnnaJaIaHa6ac 6ypbH,ocblTynHyca
HvCKayIbIKTbI OKbIn, OJ BoNbIHwa opeKeTeiH3 XHe KeinipeK naJaIaIaHy yWiH Hemece KeNeci NeIep yWIn caKTan KObIHbI3.
Anraaw pet icke kocnac 6ypbH, No5.956-249.0 kayinci3ik xehiHderi HcaynbIKneh TaHbICbn WbIFbHbI3.
- Пайдалану кeнideri ocbl HcayIbIKTbI JxHe Kayinci3dk KehiHderi HcayIbIKTbI yCTaH6ay KypblfbiHbIH 3aKbIMdaJybiHa KHe KypblfblapMeH xHe coI opTaDa Kymbc icTeiTih TynfaIapDbIH KapaKaTTaHybHa eKeJyIMykH.
TacbImaJay Ke3iHne 3aKbIMdaJFaH KaFdaJa Depey DnIepre Xa6apNaHbI3.
Kayinci3dk HycKaynapbI
Kayin deHreInepi
KAYIN
- Aybip japaakammaHyra Hemece eJImze anapbn cofambih mikeneu kayin 6oubiHwa Hcyckay.
△ECKEPTY
- Ayibip japaqammahyra Hemece eJIMee anapbin corybi MymkH Kayinmi Xaraa 6oubihwa HcyKay.
△A6AJIAHbI3
- Kehin japaakammahyra anapbin corybl bikmuman kayinmi kardau boibhwa HycKay.
HA3AP AYdAPbIHbI
- Mamepuanobik 3uHra anapbin corybl bikmuman kayinmi kardau boBuHwa HycKay.
TexHnKaIbIK Kayinci3dk 6oBbIHwa XaJIbI HycKaynapbl
KAYIN KypbIFbIHbIXeHOraH apHaIraH 3ammapbI naudanany, coH iwiHde Xa3bIraH MamepuandapdbI KOObIH Kayinci3deHdpin2e H npouedypanapbIH mek 6nikmi KbI3MemKepepO IH KemeImeH KOIO.
- Ezeep 6oJmeDezi eHdeJzEH aya kaumapbInca, 6oJmeDe L aya anMacydbIH
Jemkiikmi MeuopepneMeci 6onybI KepeK. Kaemmi wekmi MAndepoi opbIHday ywiH KaumapblambiH KeNem aftbHbIHn Meuopei m3a aya Kelemini 50%-bHaH (6eJIme KeNem i V_R x aya anmacy MeuopepneMeci Lw) acnybi KepeK. KEndemyoih aphauiwaapanapbHcbI3 KOndaHbIaNdbI: L_W = 1 car1. ByI KypblfbiDa 3uHdbI waH bap. Bocamy XHe mexHukanbiKbI3Mem Kepcemy BoBuHwa JxMbICmapdbI, OHbIH iwiHde waH xuHaBliWmapdbI aIbIn macmayo muicmi KopraHbIC KypandaPbIH Kuemin MaMaHDap raHa Kypzie anaDbI.
- KypbIbIbI moIbIK cy3aIney xyueciHci3 naDanaHa6bI3. -EhdelemIH mamepuandapra kambicmbi KOndaHbIambIH kayinci3dkmexHukacbIH epexepein caKmaHbI3.
ECKEPTY · KypblfblbI bInraNobI
Kepde awbIK ayada kondaHb3 HeMece
caKaMaHaB13. · KypblfbHbH Kayinci3
OpHaJnacybl ywiH 6arbImaybiu
WbIrbpwblkKa mpaK meKeziUmepiH
KOubHb13. Typak meKeziui awbIK bonraH
Ke3De Kypblfbl 6aKblaycb13 Ko3raNybl
MymkiH.
ABAHJIAHbI3 · Kymbcke3Hidezi y3aKa yaKbimmbIK y3inic ke3iHde icmeH wbIFapbIHbI 3 XHe KypblfBih b axbipamkbiu map apkbInbI eWipin, Kyam awacbIH axbipambIHbI3.
TeHeJe KaFdaJ Ke3iHderi MiHe3-KyIbIK
KAYIN
Kbicka myubikmany Hemece 6aca
3nekmpnik akaynapbi ke3iHdezi
Japaam any xhe 3akbimdahy kayni
3nekmp mo2bIHbIH cory kayni, kyin kany
Kayni
KypblrblbI eWipin, Kyam awacblH
Keiideh aXbipambbl3.
Cy3ri 6y3bIraH kafdaJa apeket ety/ arbin KeTy:
- KypbIbHbI Depey oWipiH3. KypbIbI eHdi XyMbIC icTeMeyi MymKiH.
2.Cy3riHi aybictbpbl3.
MaKcaTbIHa cənkec KoJIdaHy
KypbIINfblMbIHApFa apHaJIFaH:
- EdeH meH ka6bipra 6eTepin DbIMKbln XHe KypraK Ta3aay
Kypfak, xah6aTbH, 3nHdbI waH weriHdiinepiH waHcopfbIwneH ta3anay; EN 60335-2-69 6oBbIHwa H waH KlacbI - ΘHePKcInTik naiDaIaHy, MbICaJIbI,caKtay XeH eHdipy aMakTapbIHda
KOMMepuIbIK,MbICaJIbI,KOHaKyIepe, MeKTenTep,emXaHaIap,fa6pNkaIap, DyKeHdep,KeHcEneP MeH JaIra aIbIHfAHmApaTTapda naJaIaHy.
Ke3 KeIreH 6aca naIdaIaHy dypbic emec 6oIbIn Ta6blnadbl.
Kypblfbl KpaHMeH Tneyre pyKcat 6epinmereh.
Kypblfbl waH wblapaTbH MaunHaIapra Kocblnyfa JkapamCbl3.
Kopwa fah opta hbi Kopfay

OpaybIu MaTePnaJIapbIH yTnIIN3aunayra 6oJaIbI.
OpaybIHTapDbI KOpShaFaH optaraKayinci3 TypDe yTnInn3aunnaHbI3.

3JIeKTpIik XHe 3JIeKTpOHNbIK 6yHbIMdapDbIH KypaMbIHda KaTe KOJaHy Hemece yTINn3aunay
HETKeciHe aam DeHcayIbIbHa JxHe KOpwaFAn opTaFa Kayin TeHdipy bIKTmAn, KyHbI KaIta eHdeJMeI MaTePnAanap XHe 6atapeJnap, aKKymyJTopnap HEmeMa cNkTbI 6eJKeKTep Kni Ke3deci. Aana, ataMbIi 6oJWeKTep 6yIMdbI TnicIHwe naJaIahy ywiH kaxet 6oJaDbI. OcbI TaHbAmen 6eJIrInHreH KypblfblapdbI yKokbcTapbImeH bipre Tacayra 6oJMaNbI.
Kypamdafl 3aTTap 6oHwa Hycaynap (REACH)
BvHbIMHbIH KypaMbIHdafbI 3aTap TypaJIbI COHfbl MJIImeTTepDi MbHa MeKeHxai 6oHbIHwa Tabyra 6oJaBli: www.kaercher.de/REACH
KypaJ-Ka6dIbIKTap MeH KocajkbI 6eJIWeKTeP
Tek TynHcKaIbKepeK-JapaK Hemece KocanKbI 6eJIWeKTePdi NaJaIaHaHbIHbI3, ce6eBi ON KypaIdbH Kayinci XaHe anaTcbI3 JyMbIC icTeYiHe KeiIddik BoJaDbI. KepeK-JapaKTap MeN KocanKbI 6eJIWeKTeP TypaIb Iaknapat www.kaercher.com Be6caIbTHda KOJXeTIMDi. Eckenpy:
- KeTki3y KInbIHTbIFbHa eUkaHdai KepeK-XapakTap kipMeiDi. KepeK-XapaKaTapra KOndaHy caNaCbHa 6aJNaHbICTbl 6eNeK TancbIpbic 6epy KepeK.
KypbIbIbIHdypbcXyMbIC icTeyiHe HOMHaIbI dnaMeTpipap copy 7aHricimeh faha (TexHuKaJIbIK MaFlyMammap TapaybIH KapaHbI3) KeniNdkbepei.
KocalkbI 6eIweKTepe MeH KepeK-kaPaTapdbI dInepDeH HeMece KARCHER pfnnabHaH anyFa 6oJaB1.
Xetki3iJIM XNbIHTbIFbl
Kypblfbl KanTaMaCbIH aWkaH Ke3de XnHaKTbIH TOIbIKTbIFbIH TEKcepIn aJIbIHbI3. TacbImaJday Ke3iHne 3aKbIMdap TUREH KaFdaJa, dINpePiH3re xa6apLnacblbI3.
KypbIINFbIHbIH CNnataMaCbl
CypetTepdi cypetTepi 6ap 6eTTen KapaHbI3 Cypet A
① KOKbIC KOHTeHepiHH TyTKacbl
② KOKbIC KOHTeHepiHDeI TbIfbl3daFbIu TblfblH
③ Cy3ri caKHaCbIHdafbl TbIfbl3dafbll TblfblH
4Cy3ri caKnHaCbI
⑤ Cy3riHi Ta3aJay niHTiperi
6MaHOMeTp
⑦ KypbIINfbIHbI aybICTbIPbIN-KOCKblw copy Typ6nHaCbl
8TbIfbl3daftbluCaKHa
9Cy3ri
10Cy3riwaaiKaftbIwbl
(1)Keni kaβeni
⑫Ka6eJIbIik iINMeK
13 KbIbXbityfapaHanfah can
④ CopaTbH 6acbl
(5)3aybIT TaKTaIaCbI
16 CopatbH 6acbHbH iJnMeri
17ApaJIbIK caKINHa
18Ka6eBdi yCTafti
19HTepyTyTKacbl
20KoKbIC KOHTeHepi
21 ToKtaTbIeTeKeriWi 6ap aHaJMaJIbI DeHReIeK
22 Copfblw TYtIK yCTaftblwbl
23 TecemecaknHaHbI KJbInTay
24 EdeHre apHaJfAH canTama yCTaFbIu
25 Cy3ri caknHaCbHdafb copy Tetiri
26 KOkblc KOHTeHepiHderi copy Tetiri
27山accn
KypbIINfblidafbI TaH6aJap
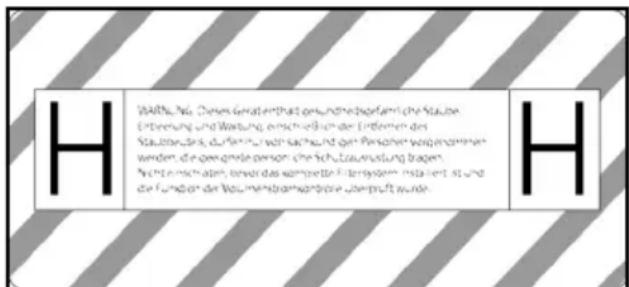
Kypblfbl H shan knacbHa deiH shaHdbl copyfa japaMdbI.
ECKEPTY: Byn Kypblfblda 3HdbI
waHap 6ap. Bocatyblx He TexHKaNbIK
KbImET KepeTydi, coHbH iHHe waH
Dop6acbln AnydbI Tek Tnicti Xeke KopFaHbIC
KypanlnapbH KnetIH Ky3bipettTI Tyfapanap
Xy3ere acbipybl Kepek. Bykin cy3ri Jyneci
OpHaTbInFaHwa XeHe KeJemDi aFbH
petteriwiH fHyHKcNcbl TeKcepiReHwe
KocnaHbI3.
Hycay
Kaxem 6oNca, Koca 6eipinzeH xancbipMa napaftbHaH muicmi ynmmbk mindezi XancbipMaHbI aIbIn macmaHbI3 XaHe OHbl Kypblfbdarbl Hemic MmHiH ycmHe XabicMbipblB13.
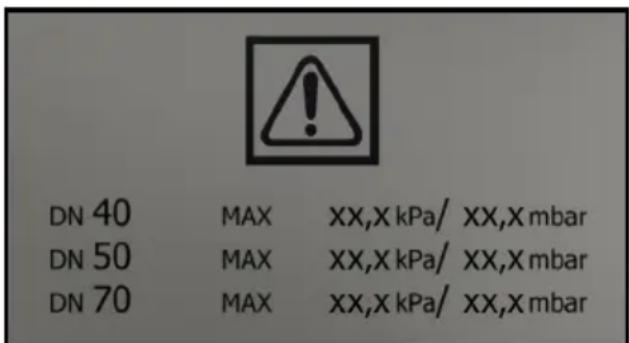
Xancbipma napafbI naJaHaHbIrfaH copy
UJahriHH KJIeHeH KIMacbHa apHaJfAH
MaKcImaJbI TeMeH KbICbIMHbIH MHepeIH
KepeTei. AFBIMdaFbIMeH MaHOmeTpdeH
OKyfa 6oJaDbI. OcbI KypblfBa
KOJdaHbIJaTBiH mHepeDi EH a3 KeJeM
WbIFbIHbIH OKbIHbI3 TapaybiHaH KaPaHbI3.
Erep MAnOcbI MaHHen TEmeH TyCc, cy3rHi
Ta3aJAY ( Hezizci cy3ziHi ma3aJaNbI3
TapayBH KapaHbI3) Hemece ayBICTbpy
Kepek ( Cy3zinepdi aybcmbpbHB3
TapayBH KapaHbI3). Copy UJahricHH
aPTypNI KIMaJapBI Kepek-JkapAKTapDbIH
aPTypNI KocblbIM KIMaJapBHa
BeimDeNyIHe MymkInDik bepdi.

KoJere XapaTyra apHaJIraH cOmKe (TancbIpbic N9.989-606.0)

Kayinciik cy3ri naketi (Tancbipbc No6.904-420.0)

Heri3ri cy3ri (Tancbipbc Ng 9.990-292.0)

H14 cy3rici (Tancbipbc Ng 9.993-006.0)
PaiandaHya6epy
ECKEPTY
3uaHbI waHbIHah mybHdaHaN kayin
WahobJxmydaH mybHdaumbH mbHbIC any konodapbHBn aypynapbl.
Cy3zi 3neMeHHmci3 wAHcopfbiWmbi copMaHb3.,aumnece ycaK waH
wbirapbHdbnapbHBn KebeioHe
6aunhaBcMbI dehcaYbIKKa kayin mHeDi.
HA3AP AYdAPbIHbI
Cy3ai 3JemeHmi KOK
Copy ko3fammkblubihbIH 3aKbIMdaHybl Cy3zI anemeHmhc13 wahcopfbumbcopMaHbI3.
- KypblfblHbI Kymblc KyiHe KeNTipiH3.
- KypbIINfbIHbI TOKTaTKblw TexeriUThepimeH 6ekiTHi3.
- CopaTBH 6actbIH dypbic 6ekitireHHe K03 XeTKi3iHi3.
- CopyШлачи (ЖИнайка кірмени) TaHДаЛган copy KOCbIbIMbIHa caJIbIHbI3 (Copy KOCbIbIMbIH maHdaHbI3 TapaybIh KapaHbI3).
- BaKa copy TeTirIH TbIfbl3daFbIb TblfbiHMeH MbIKtan Ka6blHbI3 (Copy K6bipbIH Ka6blHbI3 TapaybIH KapaHbI3).
- KoKbIC KOHTeHepiHderi TOnTbIpy DeHreIH TeKcepH3 (KOkbIC KOHeuHepHIn moMbipy deHaeuiH meKcepH3 TapaybIH KapaHbI3).
- KaXeT 6oJCa, KOKbIC KOHTeHepiH 6ocatbIHbI3; (KOkbIC KOHmeuHepiH 6ocambIHbI3TapaybIH KapaHbI3).
- KypraK etin copy aIbIHda, KOJaHyra 6aIIaHbICTbI KOkbICKa apHaJIraH KaNTbl HeMece KopFaHbIC cy3ri Ka6bIH caJIbIHbI3 (KypraK copy TapaybIH KapaHbI3)
- KaKeTTi KepeK-JapaKTapDbI (XnHaKa Ka KipMei) copy wnaHricHe 6ekTiHi3.
Copy kocbIbIMbIH TaHdaHbI3
KoIaHy TpyiHe KapaH copy wHaHricin 2 Typni copy TeTirHe Kocyfa 60laDbI.
Czy3ri caknHaCbHdaFbI copy Tetiri -Kokbicka apHaJFaH Ka6bl 6ap Kypfak WaHcopfbI: A3 yaKbIT iwiHderi copy MaTePnaJIbIHbH KeN MeJIwepi, KeIemDi waH Kokbicka apHaJFaH KaNTbl XeTKi3y KeIemHe KipMeiDi XeHE oFaH 6OJIeK TanCbIPbIC 6epyre 6oJaBbl, TanCbIPbIC No9.989-606.0 (5 daHa). -blralfbl copy
KoKbIC KOHTeHepiHderi copy Tetiri -Kayinci3dk cy3ri nakeTi 6ap Kypfak WaHCOPfbli:Y3dkci3 KeI MmIweperi copy MaTePnAblHbIH KEN MOnIwepi,ycaK waH
Kypblfbl Tblfb13dafbli KaKnafbl 6ap
KopfaHbIC cy3ri Ka6bImeH
Xa6dbkTaNfAH, Tancbipbc N6.904-420.0 (5 daHa).
-blnfandb copy
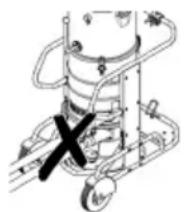
UHaHcopfbluKa 6ip yaKbTTa eKi copfbIu TYTik Kocblmaybl Mymkn. Copy Tetiri TbIFbl3daftbl TbIFblHMehMbIKTaJ XabIybl KepeK.
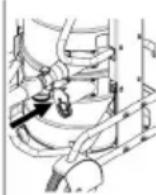
Kokbicka apHaJfah
Kan naJaHaHaFah
Ke3Je TEmHri copy
Tetiri MbIKtan
Xa6blNybl Kepek.
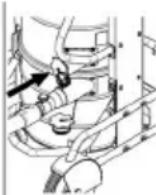
Kokbicka apHaJfah
Kan naJaHaHaFah
Ke3Je Kofapfbl copy
TeTiri MbIKtan
Xa6blnybl Kepek.
Copy ky6bipbIH xa6bIHbI3
△ECKEPTY
Kapakam any kayni
TepiH, eKneHJxHe Ke30IH yCaK WaHHbH ocepH 3aKbIMdAhybl
Copy wnaHmbi anbim macmaHaHH Keuih copy KocblmbiH mbifbi3aftiU mbifbHMeh Ka6y KepeK.
CypeT B
- TbIfbl3daftblTbIfblHdbI copy wlnaHriciHe dən caNbHbI3.
- Tbifbl3daflbIu TbifbIHdbIMYMkHirihwe nTepiHi3.
KoKbIc KOHTeHepiH ToTbIpy DeHreIH TeKcepHi3
KoKbIC KOHTeHepiHderi copy TeTiri TEmHri XnEirHe DeinH ToTfAH Ke3De, OHbl 6ocaty Kepek. MaKcImaJNbI ToTbIpy DeHreInHe H acBn KeTce, KypblNfbl ABTomaTTbl Typde eWneNi.
1. KoKbIC KOHTeINHepiHderi TOJtbypy DeHreinH KyneJI TypDe TEKcepH3.
PaiandaHny
△ECKEPTY
3uHaHbHaH mybHdaFaH Kayin
UHaHobj KymydaH mybIHdaumbIH mbIHbIC any konolapbIHbIH aypnapbl.
Eki cy3zi ənemehmihci3 waHcopfbIumbl copMaHbI3.əumnece ycaK waH wbIFapbIHbINapbIHbIH Ke6eioiHe baunahbcmbI dehcaybnkka Kayin mHe
HA3AP AYdAPbIHbI
YcaKaWahHbIH eHy Kayni
Copy K03faImKbIWBiHbIH 3aKbIMdAh Kyni.
LHaH copy Ke3iHde He2i3zi cy3zi 3nEmehmiH ewkawah uewneHi3.
Kypfak copy
△ECKEPTY
Copfbiu memikmepdi dypbic ycmamay caandapbIHah 6oJFaH waH wbIFapbIHdbIaPbIHbIH Ke6eoi
UaHobj JmydaH mybHdaumbIH, KypbInrBHBnA kaynapbHaH 6oJamblm bHbc any KOJadapbHbH apynapbl
KypbInrBfa 6ip yaKbImma 2 copy
wnaHnepin KocnaHbI3. Copy memia
mbIfbI3dArblmblfbiHMeH Mbikman
XabinybKepeK.
Koiora apHaIraH kAnmbImek ycmiHci copy canmamacbImeH 6ipze
naoanaHraHbIbI3Fa Ke3 KemKi3iHi3, aumnce waH copy Ke3iHde on Kofapkapa copblnabI.
KoBbicka apHanfah Kan naudanaHrah Ke3de memehzi copy memizi Mbikman Xabinybl Kepek.
KoBicka apHaHraH Kan naudanaHraH Ke3de XorapbI copy memiei Mblkman Ka6binybi KepeK.
Hycay
Bny KpypbIINfbIHbIH KMezimeH wAHHBiH 6apblk mypnepi H mwaH knacbHa deuiH xuHayra bola. WAn XuHaumbH Kanmbi naudanhy 3aH boBHwa manan eminedi.
Hycay
KypblfblHbI KypraK, XaHaumbih waHobl copyra apHaflraH eHepKecinmik waHcopfbiw pemHde kondahyra 6onaDbI.
- CopbIaTbIH MaTePnaIra Ka paN copy KocblbIMbIH TaHdaHbI3 (Copy KocblbIMbIH maHaHbI3 TapaybIH kaPaHbI3).
- TaHdaIraH copy KocblmbiHa 6aIIaHbICTbI KOkbiCA apHaIraH KaNTbI Hemece KopfAHbc CY3rI Ka6bIH caJIbIHbI3 (KoKbICKa apHaIraH KaImbl/KopfAHbc cy3zI Ka6bIH caJIbIHbI3 TapaybIH KapaHbI3).
blrfaanahan KypraK wahcopfblioka ayblicbiHbl3
HA3AP AYДAPbIHbI bInran ma3anaydaH KypraK ma3anayra aybicy
Cy3aHin 3aKbIMdaHy Kayni bInraDbI cy3aI aNemehmi 6oNa, KypraK waHdbI copMaHbI3, eumKeHi 6yN cy3aHI 6imen macmaDbI XeHe JapamcbI3 emedi.
- Kypfak wahcopfbIwka bilraIbI cy3riHi KOJaHaP aIbIHda XaKcbIaN kypfaTbIHbI3 Hemece OHbl Kypfak cy3ire aybICTbIPbIHbI3.
- KaXeT 6oNca, cy3riHi e3reptiHiz.
Kokbicka apHaIraH KaNTbl/KopFaHbIC cy3ri Ka6bIH caNbIHbI3
- KypbIINfBihI TOKTaTKblw TeXeriwTepeImeH 6ekitH3. Cyper C
- TyTkahbI Xofapbl Kapa TApTbIHb3. KoKbc KOHeHepiHi KyJIbI aWbINbIn, TeMeHre Kapa TyceDi.
Cyper D
- TyTKa apKbIbI KOkbIC KOHTeHepiH KypblfbiDaH sbIFapbiHbI3.
Kokbicka apHaJfah KaNTbI caNbIHbI3 CypET E
- KOKbICKa apHaJIFaH KaIITbI KOKbIC KOHTeINHe CaIbIHbI3 XaHE OHbl KOHTeINHe Ka6bIPrAcbl MeH Tyn XaFbIHa MYKnAT KOIBHbI3.
- KOKbIC KOHTeHepi apKbIbI KOkbicKa apHaIFaH KaNTbIH, WeTHe Kapai 6ypaHbI3.
KopraHbIC cy3ri ka6bIH opHaTbIHbI3 Cypet F
- Kopfahbic cy3ri Ka6bIH 6eKiTiH3.
Cyper G
- KoKbIC KOHTeHepi apKbIbI KOpFaHbIC cy3ri Ka6bIHbIH weTHe 6ypaHbI3.
ECKEPTY KOKbc KOHmeuHepin Kybnimay 6apbcihda dypbcMn 6epmey
Kbcblnkany kayni 6ap
Kynblmay Ke3iHde eWkaWah KOJIbIHb3dbI
KOKbc KOHmeuHepi MeH cy3zi caKuHa
apacbiHa KOUMaHb3 Hemece Kemepy
MexAHU3MIne XaKbIHdAmnaHb13.
TymKaHbI eKi KOImeH bAckApy apKblbl
KOKbc KOHmeuHepi 6ekimiHi3.
- KoKbIC KOHTeHepiH caJIbI, TyTKaMeH 6ekTiHi3.
blrfaIbI copy
KAYIN 3uHbIwaHbIHah mybIHdaFaH Kayin WHaHbI KymydaH mybIHdaumbIH mbIHbc any konadapbIHbIH aypnapbl. bInraDb copy Ke3iHe 3uHbI wa H KuHaJMaUdbI.
HA3AP AYdAPbIHbI
KoKbc KOhmeHepinH moBn Kemy
caJadapbHaH 60fAan 3aKbIMdaHy Kayni Cyubikmbk KeI Mneupe de ciHemh 60nc, KOKbc KOhmeHepi bipHewe cekyH diHde
monbipbln, monbln Kemyi MyMKIn.
TOnMbipy deHaeuih yHemi meKcepin
omblpbl3.
- bɪnfaɪnbɪ copy aʌndbɪnda KOKbɪcka
apHaɪnfaH kaɪntbɪ Hemece KOpfəhbc iC cy3rɪ
ka6bɪn aɪbɪn Tactaɪbɪʒ (Kokbɪcka
apHaɪnfaH kaɪnmbɪ/Kopfəhbc iC cy3eɪ Ka6bɪn
aɪbɪn macməhɪ 3 TapaybɪN kapaHbɪʒ).
Kokbicka apHaIraH KaNTbl/KopFaHbIC cy3ri Ka6bIn anbln TacTaHbl3
- KypbIINfbIHbI TOKTaTKblw texeriUThepimEn 6ekiTih3.
- KaKeT 6oNca, copy uHaHriciH aIbIn TaCTaHbI3.
- KoKbIC KOHTeHepiHderi copy KocblmbIH Xa6biHbI3 (Copy Ky6biPbIH Xa6biHbI3 TapaybIH KapaHbI3).
Cypet C
- TyTkHaHbI Kofapbl Kaapan TapTbIHbI3. KoKbc KOHeHepiHi KylnbI aWbInBn, TEmHe Kapai TyceDi.
Cypet D
- TyTka apKbIbI KOKbc KOHTeHepiH KypbIrfbIdaH WbIFapbIHbI3.
Kedere xapaTyra apHaIraH cemKeHi aIbIHbI3 Cypet H
- KoBbIcKa apHaIFaH KaNTbI XoFapbl TapTbIHbI3.
- KoKbIcKa apHaJIFaH KaNTbI Ka6eJIb 6eIaTpIacbl KEmerImeH MbIKtan Ka6blHbl3.
- KoBbicka apHaIfah KaNTbI WbIfapbIHb3.
- KapfbIbIK epexeJepre caikec KOKbICKa apHaJIraH KaNTbI TaCTaHbI3.
Kayinci3dk cy3ri naketih anbIn TaCTaHbl3
Cyper I
10.KopraHbIc cy3ri Ka6bIH Xofapbl TapTbIHbI3.
Cyper J
11.Kopfahbc nIeHkacbIn aJIbIn TaCTaHbI3.
12.KopraHbIC cy3ri Ka6bIH e3diirHeH Xa6bIcTaBH 6aCTbIPMaMeH Xa6bIHbI3.
13.KopraHbIC cy3ri Ka6bIH apTKa KapaTapTbIHbl3.
CypeT K
14.KopraHbIC cy3ri Ka6bIHbI copy KOCblbIMbIHbIH CaHbINaybIH TbIfbI3dayblW KaKnaKneH MblKTan Ka6bIHbI3.
Cyper L
15.Kopfahbic cy3ri ka6bl 6ekitirreh Ka6enb 6eNTapTnacbImeH MbIKtan Xa6bIHbI3.
16.KopraHbIC cy3ri Ka6bl KOkbIC KOHTeINHePiHe anbIn TaTaHbI3.
17.KoKbIc KOHTeHepiN DbIMKbI IN 乌6epeKeNeT a3aNaHbI3.
18.KopraHbIC cy3ri Ka6bIH 3aHdbI epexeJepre caikec shaH etKi36eYrIn KaanBikKa TaCTaHbI3.
ECKEPTY
KoKbIC KOHmeuHepiN KyJbInmay 6apbcihda dypbic mH bepmey
Kbicbnkany kayni 6ap
Kynbnmay Ke3iHde ewkaWah KOblHb3dbI
KOKbc KOHeuHepi MeH cy32i caKuHa
apacbHa KouMaHb13 Hemece Kemepy
MexaHu3MHe JKaBHDamnAhn3.
TymKaHbI eKi KOImeH bAcKApy apKbInbI
KOKbc KOHeuHepi 6ekimih3.
19.KoKbIC KOHTeHepiH caIbIn, TyTKaMeH 6ekitih3.
blnfaanblicopydbiaaKaTahbl3
△ECKEPTY
ArbHdbI cynapdbI dypbic eMec kadeze yapamy
KopwaarH opmaHbIH naemahybl AfbHdbI cylapdbI mazapmy bouhwa kepziniikmi epexenepe di caKaMaHbI3.
- Cy3riHi KypFaTbHbI3.
- KoKbIC KOHTeHepiH DblIMKbIJ Wy6epeKeNeh Ta3aJaan, KypFaTbIHbI3.
KypbIrfbHbI Kocy
- AshaHbI po3eTKaFa caJIbIHbI3.
- Copy Typ6nHaCbI KypblfBcBihKOCKblTapbIH naJaHbIN KypblfBihKOCbIHbI3.
Hycay
Opkawah copy myp6uHaIapbIH bipiHeH coH bipiH Kocbln, eWipin omblpbl3. MaHomemempdiH en a3 KeJeM wblfbHbH xHe dypbic kymblc icmeyih 6aKbIay ywiH 6apblk copy myp6uHaIapbl Kocylbl 6onyblKepeK.
3. Wanh copy npouecin 6aactaHbI3.
EH a3 KeJem WbIFbIHbH OKbIHbl3
KypblfblbH aJdbIHfbI XaftbHda copy
BakyymbH KepceTeiH MaHOMetp
opHaTbIFAH. MakcImaJIbI Tepic KbICbIMfa
(keCTeHI kapaHbI3) JeTce, Heri3ri cy3rHi
Ta3anay Kepek (Hez3zi cy3zhi
ma3aHaHbI3TapaybIH kapaHbI3). Byn mH
KypblfblbH OhIMdiJIiriHe XHe
naJaHaHaBIFAH copy WJHaHriciHe
6aJHaHbICTbl. Tepic KbICbIM Ta3anay
apKbIbl aITapNbIKTaI TeMeHdEmec,
cy3rHi aybICTbpy KaKeT (Cy3aInepdi
aybICMbIPbIHbI3 TapaybIH KapaHbI3).
HA3AP AYdAPbIHbI
MakcumaIbI mepic kbicbIMbIHaH acbln kemiHi3
CopydbH xoraIybl Kepcemineen MmHHeH acbIn kemce, aya Xbindamdbfb1 20 m/c meMeH mycedi. Cy3aHI ma3aHaHb13 Hemece aybcmbpbHb13.
| Copy Номинальды си | Мakсималды тepic КьсьIMы |
| DN40 | 15,70 кпа (157 мбap) |
| DN50 | 14,40 кпа (144 мбap) |
| DN70 | 10,00 кпa (100 мбap) |
Heri3ri cy3rHi Ta3aJahbI3
MaHOMeTpIe MaKcImaJIbI Tepic KbICbIM KepcTeInce (EH a3 KeJEM WbIfbIHbIH OKbIHbI3 TapaybIH KapaHbI3), Heri3ri cy3riHi Ta3aJAY KepeK.
- KypblfblHbI eWipiHi3.
- Cy3riHi Ta3anay TyTkacbH KEMiHne 5 pet aIra XeHe apTKa XblNkblTbHbI3.
KypbIrfbHbI eWipy
- Copy Tpy6nHaCbI KypblfBICbIHbIH KockblTapbIH naJaDaHaHbIN KypblfBihbI eWipiHi3.
- AhaHbI cybIpbn aJbIHb3.
Op6ip Ta3aaydAn KeiH
KoKbIc KOHTeHepiH 6OcaTbIHbI3
Kipic caHbIay Hemece copy TyTiri Ka6bIK.
- Copy Typ6nHaCbI KypblfBcHbIH KockblTapbIH naJaHaHbIN KypblfBcHbIKocbIHbI3.
- Heri3ri cy3riHi Ta3aHaHbI3 (Hezi3zi cy32iHi ma3aHaHbI3 TapaybIH KapaHbI3).
- Copy Typ6nHaCbI KypblfbcHbIH KockblTapbIH naJaHaHbIN KypblfBihbI eWipiHi3.
- KypbIrfbIHb TOKTaTKblw texeriWtepimeH 6ekTiHi3.
Cyper C
- TyTkHaHbI KofapbI Kapai TapTbIHb3. KoKbIC KOHTeINHePiH KyJIbI aWbIN, TEmHe Kapai TyceDi.
Cyper D
- TyTKa apKbIbI KOkbIC KOHTeHepiH KypblfbiDaH sbIFapbiHbI3.
- KOKbIC KOHTeHepiN 6ocatbIbI3. KaKet 6oJcA, KOKbICKa apHaJIraH KaNTbl/ KopfAHbIC cy3rI Ka6bIH anbIN TAcTaHbI3 ( KoKbICKa apHaJIraH KanMbI/KopfAHbIC cy3zI Ka6bIH anbIN macmaHbI3 TapaybIH KapaHbI3).
Hycay
KoKbIC KOHmeuHepiH mymka apKbIbl Kemepye 6oIaDbI. KpaHdapdbI macbImandaayra apHaIraH MaKCumandbl naDaIbI Kyk:50Ke.
△ABAHJIAHbI3
PyKcam eminzeH kannbI caJMaKmaH acbin kemy
Kapaqam any xhe KypbIrfiHbI 3aKbIMday kayni
KpaHMeH macbImaIay Ke3iHde KOkbic KOhmeuHepiH jannbl caJamarbiH ecepiHi3.
KohmeuHepoi wamadah mbic kYkmeMeHi3.
KpaHapra Kambicmbi KOndaHbicmafbI epexenepi caKaMaHbI3.
△ECKEPTY
KoKbIC KOHmeuHepiN KynbInmay 6apbcihda dypbic mH 6epmey
Kbcbnnkany kayni 6ap
Kynbimay Ke3iHde ewkaWah KOJIbIHbI3dbI KOKbc KOHmeuHepi MeH cy32i caKuHa apacbHa KOUMaHbI3 Hemece Kemepy MexaHu3MiHe JAKbIHdAmnaHbI3.
TymkaHbI eKi KOJImeH 6aCkApy apKbIbI KOKbIC KOHmeUHePiN 6ekimih3.
- KoKbIC KOHTeHepiH caIbIn, TyTKaMeH 6ekTiHi3.
KypbInfbHb Ta3aHaHbI3
△ECKEPTY
ArbHdbcynapdbdypbic eMec kadeze jkapamy
KopwaraH opmaHbIH naMaHybl ArbHbI cynapbI ma3apmy 6oBuHwa Jepaikmi epexenepei caKaMaHbI3.
- Backa shaHcopfblH HeMece bInrAIny6epeK KEmerimEn ShaHCopfbIHTbIH iWIn XHe cbPTbIH Ta3anay. KypblfblHbI ShaHCopfbIwnen CopraH Ke3de KlaaccnФkaunrcbI 6ipDei HeMece KaKcbIpaK ShaHCopfbIHTbI naDanaHbIHbI3.
- KaKeT 6oNca, KepeK-kaPaKaTapDbI (KHaKa KipMeiDi) cyMeH ShaBIn, KypTaTbIHbI3.
Kypblfblhbl caTay
- Xeni Ka6eniH Ka6enbep yCTaBbIbHa opaHb3.
- KypblfblHbI KypfaK 6eJMeJe caKaHbI3 XHe OHbl pyKCaTcbI3 NaJaHaHydaH KopraHbl3.
TacbImaJnday
△ABAHJIAHbI3
CaMaKmbiH caKaMaJMaBbI
Kapakam any XaHe KypbINFbIHbI 3aKbIMday Kayni
TacbImaJoad Ke3iHde KypbIINfbIHbIH caJamfbiEeKepeH3.
- ⅢaHdbI 6oJbIpMaJ TaCbImaJdayDbI KaMTamacbI3 eTy yuH eKi copy KocblmbiHaJa Ja Ka6blbI3 (Copy Ky6bipbIH Ka6blbI3 TapaybH KapaHbI3).
- Typak TeXeriIeTepiH 6ocatbIHbI3 XaHe KypblfblHbI NTepy TyTKacbHa 6acblbI3.
- Waccn MeH nTepy TTKacbIHan YCTay apKblbl KypblfblHbl KYKTehi3.
- Kənik kypaIapbIHda TaCbIMaIaHfAHda, KypbIrfbIHbI cbIPbI-NkBIFyDaH KopFaHbI3.
CaKPay
△ABAHJIAHbI3
CaMaKmbiH caKmaJMybI
KapaKaam any KHe KypbINFbIHbI
3aKbIMday Kayni
TacbImaJoad Ke3iHde KypblfbiHbIH caJamfbIH eckepiHi3.
- KypblfblHbI TEK yi iwiHde caKaTahbI3.
Kytim XeHe TexHnKaJIbIK KbI3MeT KepceTy
KAYIN
KypbIrfbl KepHeyni 6eJweKmepzemuin, Ke3deucok icke Kocbnadbl
Kapakam any kayni, mok cory
KypbIINfbIda KymbIC Xacamac 6ypbIH KypbINfbHbI eWipiHi3.
Keninik umekepdi po3emkaadn wibrapbn anbIHbI3.
KAYIN
3uHaDbI waHbHaH mybHdaRaH kayin
UHaHobj KmydaH mybIHdaummbIH mbIHbc any konadapbIHbH aypnapbl.
TexHukanbIK Kbi3Mem Kepcemy
KymbicmapbIH Kyp2i3y Ke3iHde
(MbicaJIb, MbicJIb: Cy3aHI aybcmbipy) P2
Hemece odaH Kofapbl ommezimEn demany
MaackacBH JHe 6ip pemmk KuimDi KuiHi3.
KAYIN
Hawap cy3ainey
UaHobj kmydaH mybHdaumbH mbHbIC any konodapbHbIH aypnapbl.
KypbInfbHbH cy3iney muimOinizi EN 60 335-2-69 22.AA.201.2
KepceminzeHdeu cbiHay odiimeh mekepiyi MymkH. Byn cbiHay eep on ymmbik mananmapda KepceminzeH 6oIca, Kem deeHde Xbl caubH hemec eodaH xui omki3inyi kepek.
Eeep cbHay hemuxekci mepic bonca, cbHayobI kHa meic cy32i apKbIbI KaumanaHbI3.
ECKEPTY
3uHdbi waHbHaH mybIHdaFaH Kayin
UHaHobj KymydaH mybIHdaumbIH mbIHbIC any konolapbIHbIH aypnapbl.
Kayinmepoi andbiH-any ywiH kayinc3diK KypblfbnapbXbInbHa keMihde 6ip pem eHdpuyi Hemece OKbIMbInraH adam onapdbH Kayinc3diKke Kambcmbi MHCi3 YHKUaIapbIH, MbICaNb, KypblfbiHbIH mbIF3dbfbIH, cy32iHIN 3aKbIMdaHyBH, backapy KypblfbnapbIHbIH Kb13MemiH (meK uah Knacbl M XaHe H) meKcepin ombipyI KepeK. MbicNbl: KypblfbiHbIH mbIF3dbfbl, cy32iHIN 3aKbIMdaHybl, backapy KypblfbnapbIHbIH Kb13Memi.
HA3AP AYdAPbIHbl
Kypambihda cunukoh 6ap kymim Kypandapbl
3uHbI waHbIHah mybIHdaFaH kayin
Wahobj KymydaH mybIHdaumbIH mbIHbc
any konolapbIHbIH aypnapbl.
Nauda 60nFaH waHbI waH omKi36eumH KOHmeuHepnepde macbImaIay KepeK. Tonmbipyra pyKcam emimMeudi. WaH KUHaUMbIH KOHmeuHepdi OKbIMbINFaH KbIMemKepe RaHa JaKmbipa anadbl.
ECKEPTY
3uaHbI waHbIHan mybIHdaFaH kayin
WahbI KymydaH mybIHaumbIH mbIHbc
any konladaHbIH aypnapbl.
Heizai cyz1 zneMeHmin KypbInrbdah
anbIM macmaHaHHaH keiH
naudanaHaB13.
TypaKbI opHaTbIJaH cy3riJepi TeK
KoNaJIbI JepNepDe opHaTyFa 6OaNbI,
MbICaJIbI,3aNAJCbI3dAHDbIPy CTaHcIJaApbl
Den aTaJIaTBiH MAMHdApMeH
aybICTbIPbIJaBl.
- KypbInfblHbI eWipiHi3.
- AshaHbI cybIpbn aJbIHbl3.
- Copy 6acbH KyIbInTaH aWbIn, aJIbHbI3.
- Teceme caKHHacbIH KYNbIITaH aMbIn, anbIHbI3.
- JIacTaHraH XyIbI3Wa 6yKTeIreH cy3riHi anbln TaCTaHbI3.
- Kypan dan JacTaHraH XyIbI3wa 6yKTeIreH cy3riHi anbIn TactaHaHHa H KeiH OHbl KaIWBkKa caIbIn, KaIWBkTbIMbIKTan Xa6bIHbI3.
- JIacTaHFaH XyJNbI3Wb6yKTeIReH cy3rHi 3aH TaIaNTapbHa cOKeC TAcTaHbI3.
- Ta3a aya 6eNirihderi nactaHraH jepdi Ta3aJaHaB13.
- TbIfbI3daBbIcKaHHaHbIH 3aKbIMdAnybiH TeKcepHi3.
- KaHa KyIbI3wa 6yKTeJIreH cy3riHi caIbIHbI3.
a KyIbI3wa 6yKTeJreH cy3rHi TeCeMe CaKHaDaIbI cy3ri WaiKaIbIuTbIH, YCTiHeH TapTBiHbI3, COHda WaiKay 3JeMeHTTepi cy3ri KaNTaIapbIbIH, optacbHa Kapa TpaJaHaDbI.
b KynDbI3wa 6yKTeJreH cy3rici 6ap Teceme caKINacbHa JxHe cy3ri caKINacbHa cy3ri WaKaFbIHTbl caJIbIHbI3.
c Teceme caKHaHbI 6eKiTiHi3.
11.CopaTbIH 6acbH opHaTy XeHe 6ekiTy.
H cy3ricih aybICTbipbIHbl3
- KypbIINfblHbI TOKTaTKblw TeXeriwTepeImeH 6ekiTih3.
- KypblfblHbIH KockblHTapblH naJaIaNbIN KypblfblHbI eWipiHi3.
- AshaHbI cybIpbn aJbIHbI3.
Cyper M
- Copy 6acbH KJyNbInTaH aWbIn, KeTepeiH3.
- Copy 6acbHdaFbI BaKyymDbIK JlnaHrTbI 6ocatbln, anblHbI3.
- Cαηkec kypaIbIH KEmerimeH aNTbIbypbIbTIb 6ypaHaHbI cafTtiiHe KapcbI 6ypan aNbIHbI3.
- Copy 6acbHaH TbIfbI3daybIITapDbI XeHe IactaHaH H-cy3riHi aJbIn TactaHbI3.
- KypaandaH nactaHraH H cy3rHi aIbIn TaCTaFaHHaH KeiIH OHbI KaIWBikKa caIbIn, KaIWBIKTbI MbIKtan Ja6bIHbI3.
- JIacTaHraH H cy3riciH 3aH TaIaNTapbHa CəIkeC TAcTaHbI3.
10.Ta3aaya6eJirHderi nactaHraH xepdi Ta3aHaHbI3.
11.KaHa H cy3ricin Kepi peTneH caIbIHbI3. Tblfbl3dayblIHTap MeH BaKyyMdbIK UJnAHrTbIH dypbIC opHaTbINfahbIHa K03 XeTKi3iH3.
12.Antb6ypbIb6paHdaHbIH 6acbHa cKeC KpaIbI KObIHbI3 (MbIcIbI, MbIcIbI: KeHHeTTen Ancipey 6oImac ywiH Loctite 243) KonDaHbIHbI3.
13.AntbIbpybIbIbIbIbIbIbIbIbIbIbIbIbIbIbIbIbIbIbIbIbIbIbIbIbIbIbIbIbIbIbIbIbIbIbIbIbIbIbIbIbIbIbIbIbIbIbIbIbIbIbIMeH6ekITiHi3.
14.CopaTbH 6acbH opHaTy XaHe 6eKiTy.
Kokbicka apHaJIFaH KaNTbI caJIbIHbI3
- KypblfblHbI TOKTaTkblu TeXerilTepimeH 6ekTiHi3.
Cyper C
- TyTkahbI Kofapbl Kaap TApTbHb3. KoKbc KOHTeHepiH Kyllnb aWbIn, TeMeHre Kaap TYceDi.
Cyper D
- TyTKa apKbIbI KOkbIC KOHTeHepiH KypblfblDaH Wblfapblb3.
Cyper H
- KoBbicka apHaIraH kaNTbIXorapbl TapTbIHbl3.
- KOKbicka apHaJIraH KaNTbI Ka6eNb 6eJIapTnacbl KeMeIImeH MbIKtan Ka6bIHbI3.
- KoBbicka apHaJIFaH KaNTbI WbIFapbIHbI3.
- KapfbIbIK epexeepre cənkec KOKbICKa apHaJIFaH KaNTbI TaCTaHbI3.
CypeT E
- KaHa KObIcKa apHaJIraH KaNTbI KOKbIC KOHTeHepHe caJIbIHbI3 XaHE OHbl KOHTeHep Ka6bIPrAcbl MeH TYn XaFbIHa MYKnT KObIHbI3.
- KoKbIC KOHTeHepi apKbIbI KOkbicka apHaJIFaH KaNTbIH WeTIHe Kapa 6ypaHbI3.
ECKEPTY
KoKbc KOHmeuHepiN KyNbImmay 6apbcihda dypbic mH 6epmey
Kbcblnbl Kany Kayni 6ap
Kynbnmay Ke3iHde eukawah KOnbHbI30bl
KOKbc KOHeuHepi MeH cy32i cakuHa
apacbHa KoMaHbI3 HeMece Kemepy
MexaHu3MHe KaBHDamnaHbI3.
TymkaHbI eKi KOJImeH 6aCkApy apKbIINbl KOKbIC KOHmeUHePiH 6ekimih3.
10.KoKbIC KOHTeHepiH caIbIn, TyTKaMeH 6ekitih3.
Kopfahbic cy3ri ka6bIH opHaTbIHbI3 KAYIN
3uaHbIwaHbIHah mybIHdaFaH Kayin
UaHbI xmydaH mybIHdaumbIH mbIHbc
any konolapbIHbIH aypnapbl.
Nauda 60nfaH waHbI waH emKi36eumih KOHmeuHepnepde macbImaJday KepeK.
Tonmbipyra pykcam emimmeoi. WaH KUHaumbIH KOHeuHepdi OKbImbIraH KbI3Memkep rHa naKmbipa anaabi.
- KypblfblHbI TOKTaTkbIw texeriWtepimeH 6ekiTih3.
- Copy wJahriciH aJbIn TactaHbI3.
- KoKbIC KOHTeHepiHderi copy KocblmbIH Ka6bIHbI3 (Copy Ky6bipbIH Ka6bIHbI3TapaybIH KapaHbI3).
Cypet C
- TyTkahbI XOFapbl KapaTapTbIHb3. KoKbc KOHTeHepiHi KyJIbI aWbIbIN, TEmHe Kapa TYceDi.
Cyper D
- TyTKa apKbIbI KOkbIc KOHTeHepiH KypblfblDaH WbIFapblHbI3.
Cyper I
- KopraHbIc cy3ri Ka6bIH Xorapbl TapTbIHbI3.
Cyper J
- Kopfahbc nneHkacbH aIbIn TaCTaHbI3.
- Koprahbic cy3ri ka6bIH 03diirHeH Ka6bIcaTbIH 6aCtBIPMaMeH Ka6bIHbI3.
- KopraHbIC cy3ri Ka6bIH apTKa KapaTapTbIHbI3.
Cyper K
10.KopraHbIC cy3ri Ka6bIHbI copy KocblmbiHbIH CaHbIaybIH Tblfbl3daybiW KaKnaKneH MblKTan Ka6bIHbI3.
Cyper L
11.KopraHbIC cy3ri Ka6bl 6ekitirreH Ka6enb 6entapTnacbImeH MbIKtan Xa6biHbI3.
12.KopraHbIC cy3ri Ka6bl KOkbIC KOHTeHepiHeH anbT tacTaHbI3.
13.KoKbIC KOHTeHepiH DbIMKbIJI Wy6epeKeNeh Ta3aHaHbI3.
14.KopraHbIC cy3ri Ka6bIH 3aHdbI epexenepre caikec IaH etKi36eTIN KaIWBIKKa TaCTaHbI3.
Cyper F
15.KaHa KOpFaHbIc cy3ri Ka6bIH 6eKiTiH3.
Cyper G
16.KoKbIC KOHTeHepi apKbIbI KOpFaHbIC cy3ri Ka6bIbIH WeTIHe 6ypaHbI3.
△ECKEPTY
KoKbIC KOHmeuHepiN KyIbnmay 6apbcihda dypbic mH bepmey
Kbicbnkany Kayni 6ap
Kynbnmay Ke3iHde eWkaaHa KOnbHb3dbI
KOKbc KOHmeuHepi MeH cy3a caKUna
apacbHa KoMaHb13 Hemece Kemepy
MexaHu3MHe XaKbHdAmnHaB13.
TymKaHbEki KOnMeH bAcKApy apKbInbI
KOKbc KOHmeuHepi 6ekimhi3.
17.KoKbIC KOHTeHepiH caIbIn, TyTKaMeH 6ekITiHi3.
Akaynap Ke3iHderi KemeK
KAYIN
Kypblrfbihk Ke3deucok icke Kocblnybl/moK cofybl
Copy Ko3faanmkbIWBbIH Ke3deucok icKe Kocblnybl Japakamka aKenyi MymKiH. 3neKmp bIikmepiHdezi KepHey 3neKmp mo2bIHbIH cOBybHa aKenyi MymKiH. Kypblrblda KaHdau da bip Kymbic Xacamac bypbH, OHbl eWipin, Kyam awacbln albIHbI3. BapnbIK meKcepynepe MeH 3neKmp 6bnikmepiHdezi KymbICmapdbl MaMaH KypaizciH.
Hycay
Akaynbik mybHdaarH kardauda KypbInfbHb XbIaDam mypde oWipy KepeK. Kauma icke Kocap aandbIHda aKaaybIK KOubinybI KepeK.
Akay KoiBImaHaH 60Jca, WauHcOpfblWtbl cepBnCTIK KbI3MeTTe TeKcepy Kepek.
CopaTbIH Typ6Ha XyMbIC icTeMeiDi
- KyaT Ke3iHiH po3eTkacbIH XHe caKTaHdbIpfbIwblbIH TeKcepiH3.
- KypblfbldaflkeJI ka6eni MeH Kyat aWacbIH Tekcepy.
- KypblfblHbI KOcbHbI3.
Copy Kyyi a3aIbI
- KjIbInTaH aWbInFaH Copy KocblmbiH Ka6bHb3 (Copy Ky6bpBH Ka6biHb3 TapaybH kapaHb3).
- CopaTbIH KeITe Ky6bIpDbIH, copy Typ6nHaHbIH HeMece WnaHriH 6iTeNyIepin XOIO.
- Tontbipbnfah KOKbc KOHTeHepiH aybictbipHB13 ( KoKbicka apHaIraH KaImbI caNbIHb3TapaybiH KapaHb13).
- Tontbipbnfahn Koprahbic cy3ri Ka6bIH aybictbipbHbI3 ( KopraHbc cy32i Ka6bIH ophambHbI3TapaybIH KapaHbI3).
- Copy 6acbI MeH KOKbc KOHTeHepiHiDypbc opHaJaackaHdbIfbIH TeKcepiHi3.
- Heri3ri cy3riHi Ta3anaHb13 (He2i3zi cy32iHi ma3anaHb13 TapaybH KapaHb13).
- Cy3ri opHbIH Tekcepin, KaXeT 6oJca Ty3eTIi3.
- Heri3ri cy3riHi aybIcTbIPbIHbI3 ( Cy3aIepdi aybICMbIPbIHbI3 TapaybIH kapaHbI3).
Ta3anay Ke3iHde wAHhbIH wbIfybl
- Cy3ri opHbIH Tekcepin, kaxet 6onca Ty3eTIi3.
- Heri3ri cy3rihi Ta3anaHb13 (Hei3ci cy32iHi ma3anaHb13 TapaybH KapaHb13).
- Heri3ri cy3riHi aybICTbIPbHbI3 ( Cy32inepdi aybcmbipbIHbI3 TapaybiH kappaHbI3).
yTnIIN3aCnIay
Kypblfbln naJaIaHy Mep3iMaKaTaNFaHHaN KeiH 3aHbI epExeIepre cAKeC Kdere Jkapaty KepeK.
Kenildk
Ope ende jekpriikti dinctpn6bIOTnpap 6epren KeiinikwapTTapbl KOndaHbIaIbI. BynbIMda MaTePnAldbIK Hemece eHdipictik akaynap aHbIKTaIraH JafdaJa, bIKTImaI akaynapbl Keiinik Mep3imi iwiHne akbcI3 XeHneMl3.Keiinik Mep3imHe Hapa3blkTApBih3 6oJca, 6yibIMdbI caTKah cayda MekeMecHe Hemece XaKbIHdaFbl OkinETTI KbI3MeT Kepcety opHbHa Tsy6ipTeKTI Kepcetin xa6apnaCbIbI3. (MekeHkaibMbI3 apTkbl 6eTte) KeninikTypaBl KoCbIMsa aKnapaTbI (6ap 6oJca) jekpriikti Karcher Be6-caNTbHbN «KyKteynep» 6enimHderi KbI3Met Kepcety 6enimHnde Ta6yfa 6oJadbl.
OHyI KepceTINREH Typ KecTeiHne WpHaHn.
Keke caHapdbin MarbHacbl Keneciee 60naDbI:
MbicaJIb:30190
3 Hdpinre Xblblb
0 电HdpinreHracbpy
1 OHdpinreH OHkbIdbIK
9 OndipinreH aibihbH ekihui caHbI
0 ΘHdpipireh aibihb6ipiw caHb
COhBIMeH 6yI MbICaIJa 30190 KoDbI 09/(2)013 eHdiipinre H KyH 6iNipei.
TexHnKaIbIK MaFJyMaTTap
KoIaHbIaTbIH 6ipi3eHdipinre H cTaHapTTap
EN 60335-1
EN 60335-2-69
EN 55014-1:2017 + A11:2020
EN 55014-2: 2015
EN IEC 61000-3-2: 2019
EN 61000-3-3: 2013 + A1: 2019
EN 61000-3-11: 2000
EN 62233: 2008
EN IEC 63000:2018
KoIaHbIaTbIH yIITbIK CTaHdapTTap
TomeHne KOJ KOnfHaHdap KOMnHaHna 6ackapMacbIHbIH aTbIHaH XHe TaIcblpMacbl BoBbHwa opeKeT eteDi.

T. Wahl
Managing Director

A. Haag
Director R&D
KykaattamaHbI Kypri3eTih yekineTTi Tynfa: A. Faar
Kärcher Industrial Vacuuming GmbH
Pobeprt-Bow-ITpace 4-8
73550 Waldstetten (Германя)
Ten.: +49 7171 94888-0
ΦaKc: +49 7171 94888-528
Waldstetten, 24/04/01
CbDbpxaHne
O6uynka3aHnna 347
Yka3aHna 3a 6e3oNaChocT 347
YnoTpe6a no npedHa3NaueHne 348
3aunTa Ha OKoJHaTa cpe Da 348
PpHaIeXHocTn np3epBn Yactn. 348
KomnneKHa DocTaBkata 349
OncanHe Ha ypeHa 349
CIMBOJIIN Bbpxy ypea. 349
Пуckeнвекпобаця 350
Ecknoatauia 351
TpaHcnpOpTaPe 355
CbxaHHe 355
TpIka n npIpbXka 355
Pomou npn noBpeu 359
I3xBbPJIaHe 359
TapaHcIa 360
TexHHueckn daHHN 360
ДeКларацnia 3a cBoTBeTCTBnE Ha EC 361
06и yka3aHn


Ppei nIbPBOTo I3nOJ3BaHe Ha BaunypeI npoTeTe
HaCTOaTO OpINHaJIHO pBKOBOcTBO 3a EKcNlOaTaun, DeIcTBaIe CbOTBeTHo Iro 3ana3eTe 3a No-Kbcha yNoTppeBa IIIN 3a CNeDBAuNcO6CTBeHnK.
I36op Ha I3BOD 3a BCMyKBaHe
B 3aBnCmOcT OT npJIoXeHneTo CMyKaTeJIHnIrMapKyuMоZe Da 6bIe BKIOUeH B 2 pa3JIuHn BCMyKaTeJIHn HaKpaHnka.
BcmykataeHnakpaHnKHa
fntbphna npcTeH
-Cyxo noucTBaHe c xapTneHa
TopbUka 3a OTnadb:py6n
npaxOBe, kpaTkoCPOHOrJeMn
KoIueCTBa 3acMyKaH MaTePnA
TopbUkaT a 3a OTnadb: He e
BKIOUeHa B KOMNKeTA Ha DoCTaBkata
mMOke Da ce nopbya DOnbHHTeHNo,
kataIOxKeH No 9.989-606.0 (56po).
-Mokpo nouCTBaHe
BcmykataeHnakpaHnKa Hape3epBoapa 3a OTnabu -Cyxo nouchTaHe c o6e3oNaCTeHa cnIbPha Top6uKa: FInn npax, NOCTOraHHo KOJIueCTBO 3acMyKaH MaTePnaI
YpeIbTe o6OpyIbAH c 06e3oNaCHTeJIHa
fIITbPHa TOP6uKa Cbc 3aTbApIc ce
kanaK, KaTaoXeH N6.904-420.0
(5 6poJ).
-Mokpo nouictBaHe
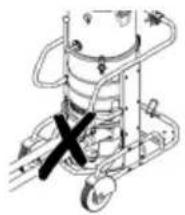
KbM
npaxocmykaKaTa
He Tp6Ba Da ce
CBbp3BaT
eHOBpeMeHHO DBa
CMyKaTeJIHn
Mapkya.
BcmykateJIHHaHakpaHnK Tp6Ba Da ce 3aTBOpn
IIbTHO Cbc
3aTbapJauTa Tana.
Korato ce n3noJ3Ba
XapTneHaTa
Top6nUka 3a
OTnAdbu, DOnHnT
BCMyKaTeJIeH
HaKpaHnK Tp6Ba
Da e PJIbTHO
3aTBOpEn.
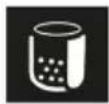
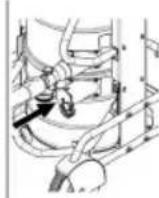
Korato ce n3noJ3Ba
Obe3oNacnteHa
ΦnIbph
Top6uKa, TropHnT
BCMyKaTeHeh
HaKpaHnK Tp6Ba
Da e PJIbTHO
3aTbOpeH.
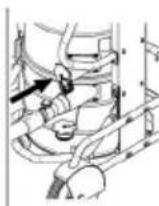
3aTbapЯHe Ha n3BODa 3a BcMyKBaHe
△ПЕДУПЕЖDEHNE
Onachocm om HapaHrahe
Yepejdahe Ha koxama,benume dpoboe u ouime nopadu fun npax Cneu3eaxdahe Ha cmykameHnma Mapkyu 3a ecmykahe mpa6ba da ce 3am6opu cbc 3am6apraama mana.
ΦnrypaB
- NocTaBeTe 3aTbApraTata Tana B n3Boda 3a BCMyKBaHe.
- BkapaTe 3aTbapraTata Tana dokpaJ.
Пюверka Ha HNBOTo Ha HaNbIbAHeHa pe3epBoapa 3a OTnaIbU
Ako pe3epBoapbT 3a OTnabu e HAnbIHeH Do DOnHnPa b6 Ha BCMyKaTeHNHaKpaHnK Ha pe3epBoapa 3a OTnadbU, ToT Tp8Ba Da ce n3npa3HN. YpeBt He ce n3KnIOyBa aBTOMaTHUHO npi
IpeBnBaHe Ha MaKcMaJHOTO HNBO Ha HanbJIbaHe.
- Поверяваite peIDOBHNO HIBOTO Ha HanbIbAHe Ha pe3epBoapa 3a OTnadTu.
Ekncnnoatazaia
△PENEYNPEXKDEHNE Onachocm nopadu onaceh 3a 3dpae mo npax
3a6oJbHa Ha duXamEnHume nmuua npadu 6duwahe Ha npax. He u3eBpuBaume u3cmykaHemo 6e3 dbama fummbpu enemehma, mbu kamo e npomueh cnuyau eb3HuKea onachocm 3a 3dpabemo npadu u3nyckaHemo Ha zonemu konuuecmba fun npax.
BHIMAHHE Onachocm npadu HaeIu3aHe Ha uH npax
Onachocm om noepeha cmykamnHnomop.
Ipu u3cmykehaHmo Hukoza He ceaJume 2naehura fumtbpeh enemehm.
Cyxo nouchTbaHe
PPEyPExEHNe NouueHa emucra Ha npax nopadu HenpaunHo 6opabeHe c ECmykameHume HkpaHuu
PecnupamopHu 3a6oJeaHua nopadu eduwahe Ha npax, Heu3npa6Hocm Ha ypeda
He c6bp38aume eohoepeMeHNO 2 cmykanenHu Mapkya KbM ypda.
Bcmykamenhurnm hakpaunuk mpr6ba da ce 3ameopu nIbMnO cbc 3ameapuaama mana.
He 3a6pa8aime da u3non3eame mop6ukama 3a omnaobu camo e cbyemaHue c 2OpHra BCMykameHnakpaHuk, e npomueeh cnyuau ma ue 6bde 3acmykaHa H2ope no epeme Ha npoueca Ha u3cMykeaHe.
Kozamo u3non3bame xapmuehama
mop6uka 3a omnaobu, donnua m
ecmykameneH naKpaunukmp8ea da e
nIbmo 3ambopeH.
Kozamo u3non3bame oBe3onacumelnHa
fumpbna mop6uka, zopHua m
ecmykameenHaKpaHukmpa6ba da e nnbmo 3ameopeh.
yKa3aHue
C mo3u ypeo Mozam da ce u3cMyKeam Ecu4ku eudoe npax do Kna c H 3a npaaueHcm H. N3noJ3BaHem o Ha mop6u4ka 3a cb6upaHe Ha npaxa ce npenopb4ea cb2nacHO 3aKoHa.
yKa3aHue
B kauecmeomo cu Ha npaxocmykaoka 3a npomuunenaHa ynompe6a ypeobm e noxdxodau, 3a u3cMyKeaHe Ha cyxu, He3anaumu npaxoBe.
- 36epeTe 3BOD 3a BcMyKBaHe B 3aBnCmOCT OT 3aCMyKaHnMaTePnAJI (BnxTe rnaBa 36Op Ha u36oD 3a BCMyKbaHe).
- B 3aBnCmOcT OT n36paHnI N3BOd 3a BCMyKBaHe NOCTaBeTe TOp6uKcTa 3a OTnAdbzI INI N Oe3oNacITeHNHaT a FInTbPNa TOp6uYKa (BnX InaBa Nocma8rHe Ha mop6uYka 3a omnaDbu / o6e3oNacumEnHama fUInMbPha mop6uYka).
IpeBkIIOUbaHe OT MOKpo KbM cyxo NOuNCTBaHe
BHUMAHNE
Ipe6KIOU8aHe om MOKpo Ha cyxo noUcM8aHe
Puck om noepeda Ha qunmbpa
Ipu mokbp fummbp He u3cmykaume cyx npax, mbu kamo moi nojenea no
qunmbpa u moke da zo HanpaBu Hezodeh 3a ynompe6a.
- Празуnotpe6a 3a cyxo nouchTbaHe octabete MOKPnФИТьр ДИЗCBXHe do6pe nIIN rO cMeHete cbc cyx.
2.Пи Heo6xOДMOCCTMeHeTeФЛТьpa.
IocTaBraHe Ha Top6nUka 3a OTnaDbu/ oBe3OpacnteHnHaT a HnITbPHa Top6nUka
1.Obe3onaceTe ypeDa cbc 3actOnoprauNTe cnpaquKn.
Φnrypa C
2.ДрьнHeTe ДрьЖКаТа Harope. Pe3epBoaApbT 3a OTnaDbuN ce De6nOKupa n cnycka.
Φnrypa D
3.Издрпайт eа дьжкata pe3epBoapa 3a OTпадьи OT урда.
IocTaBHe Ha Top6nUka 3a OTnaDbuΦnrgpa E
- NocTaBeTe Top6nUkKaTa 3a OTnAbuB V pe3epBoapa 3a OTnAbuN IN BHNMaTeJHo RaIacTe KbM CTeHaTa I DbHOTo Ha pe3epBoapa.
- 3aKpeTe KpaHa TOp6nUkata 3a OTNaDbuHaBbH Bbpxypb6a Ha pe3epBoapa 3a OTNaDbuHa
IocTbRHe Ha 06e3oNacnteHnHa ΦnITbPHa Top6uKa Φnrypa F
- NocTaBete oBe3oNaCnTeHHaTa cnIITbPHa TOp6uKa.
Dnrypa G
- 3aKpeneTe KpaHa Obe3OpacnteJIHaTa cnIbPHa TOp6nUka HABbH Bbpxy Pb6a Ha pe3epBoapa 3a OTnaDbu.
△PENEYNPEXDEHNE
Henpaunho 6opaeene npu 6nokupahe Ha pe3epoapa 3a omnaobtu
Onachocm om npumuckahe
No epeMe Ha 6IokupaHemo E Hukakbe cnyau He dpbXme pbueme cu Mejdy pe3epoapa 3a omnaDbu u npbcmeHa Ha fumpbpa, Humo zu nocmaeume 6bluzocm do noeduaaama MexaHuka. BloKupaume pe3epoapa 3a omnaDbu npocpedcmbo 3adeucmbaHe Ha dpbXkama c dee pbue.
8. NocTaBete pe3epBoapa 3a otnaDbuN I ro 6IoknpaTte c npbKkata.
Mokpo nouchTbaHe
ONACHOCT
Onachocm npadu onaceh 3a 3dpaeemo npax
3a6oJeaHua Ha duXamEnHume nbmuua npadu eduwehe Ha npax.
Ipu Mokpo noucmebahe He mpa6ea da ce u3cmykeam onachu 3a 3dpaeemo npaxoe.
BHIMAHHE
Onachocm om noepea nopadu npelueaHe Ha pe3epeoapa 3a omnaabu
Ipu noemaHe Ha 2oJemu KOnuYeemea meuHocm pe3ep6oapbM 3a omnaBtu
MOKe da ce HaNbIHHu 3a HraKoJIKO cekyHou u da npenee.
HenpeKbchamo npoeepraume Hueomo Ha HanbIbaHe.
- Прдн мokpo поиствае OTCTpaHete Top6nKkata 3a OTпадьци Илн obe3oNacNTeJIHaTа ФиNTbPHa Top6nUka (ВИЖ ГЛава Сбалeme mop6uKama 3a omnaDbu/ obe3oNacumelHama ФиMuMbPha mop6uKa).
CbaJeTe Top6nKaTa 3a OTnaDbun / o6e3onacntenHaT a HnTbPHa Top6nKa
1.Obe3onacete ypeda cbc 3actOnopraunTe cnnpaKn.
2.Пи HeobxOIMoCT cBaIeTe CMyKaTeJIHnA MapKyu.
3. CbpxTe n3BOda 3a BCMyKBaHe KbM pe3epBoapa 3a OTnaDbuN (BnK rnaBa 3ameapnHa Ha u3eOda 3a ecMyKbaHe).
Φnrypa C
4.Дрьн electeдрькkaT haRope. Pe3epBoaapbT 3a OTnaDbuN ce De6nokupa n cnycka.
Фигра D
5.ИЗдьрnaite 3a Дрьжкata pe3epBoapa 3a OTпадьи OTуpeда.
OTcTpaHЯBaHe Ha Top6nUka 3a otnaDbu Fngypa H
- Повдигн electopбичкata 3a OTnaDbuN.
- 3aTbOpTe PnBTHO TOp6nUkata 3a OTnAdbuC Ka6eHnHaTa Bpb3Ka.
8.ИЗвадеТорбичкагаЗа OTпадьи.
9.ИЗXBpIeTe TOp6nUkKaTa 3a Cb6npaHe KaTO OTnAdbK CbIacHO 3aKOHOBnTe pa3npoeD6n.
OTCTpaHЯBaHe Ha oBe30nacnteJIHaTa ΦHITbPHa TOp6N4ka
Фигура I
10.Повдигнеле obeэоасnteнhaТа ФИNTьрнa Top6чka.
Φnrgpa J
11.ОлeneTe 3auntHToToФолNo.
12.3aTbOpTe 06e3oNaCTenHaTa
ФИТьрнТop6nчкacbC
camO3aJIeNBAucaTa ce KOpda.
13.N3TeIeTe Ha3aD o6e3OpacnteHnHaTa 0nTbPHa TOp6nUka.
Φurypa K
14.Пьтно 3aTbOpeTe OTbopa Ha n3BODa 3a BCMyKBaHe Ha obe3oNaCtEnHaTa ФиntlbpHa TOp6nUka Cbc 3aTbapraunie ce KaNAk.
Φιγρα L
15.3aTbOpTe NlThO 06e3OnacntenHaTa ΦnITbPna TOp6uKa c NoCTaBeHaTa Ka6eHnA Bp3Ka.
16.ИЗВаДeTe obE3OЯncIteHnHaTa
ФиNTьрнa Top6ичka OT pe3epBoapa 3a
OTпадьцn.
17.Почисте pe3epBoapa 3a otnaDbucn c BlnaxHa KbPna.
18.N3xBpIeTe o6e3oNacntenHaTaΦnITbPNa TOp6uYKa B HEnpOnyckaUa npax 3aTBopeHa TOp6a, KaKTo e OINsacoHb 3aKOHOBnTe pa3npoe6n.
△PENEYNPEXDEHNE
HenpaBunHo 6opaeHe npu 6nokupaHe Ha pe3epoapa 3a omnaDbu
Onachocm om npumuckahe
No epeme Ha 6lokupaHemo 6 Hukakbe cnyau He dpbXme pbueme cu Mejdy pe3epboapa 3a omnaobu u npbcmena Ha fumbpa, Humo 2u nocmaeme 6nuzocm do noeduaawama mexaHuka. Blokupaume pe3epboapa 3a omnaobu npocpedcmoe 3adeucmbane Ha dpbkama c dee pbue.
19.ПocTaBete pe3epBoapa 3a OTnaDbuN I ro 6IoknpaIte c dpbKkata.
CnnpaHe Ha MOKpoTo NOuchTbaHe
△PENEYNPEXDEHNE
HenpaBunHo u3XeBpIaHe Ha omnaadHu bodu
3aMbpcraeHa oKoIhama cpeda
Cb6nlodaaume mecHume npednucnua 3a o6pa6omka Ha omnaadHu bdu.
- Pocyuete pfntbpa.
2.Почистеpeзервогаразаotпадьс CBlaжнавьрnaИгоюдсушete.
BknuBaHe Ha ypeDa
- Bключete Мржовя сеньсь в Контakta.
- Bключete урета ot пркьсвачиTe Ha BCMykaTeJIHaTa Typ6nHa.
yKa3aHue
BuHaZu EKnIOueBaUme u u3KIOueAumcEcmYkamEnHume mypbHu edHa cneOpya. 3a da MoKe MaHomembpm da cneDu npabunHO MUHMaJIHua obEmen nomok, EcuKu EcmYkamEnHu mypbHumpra6ba da ca EknIOueHu.
3. 3aNoUHeTe IpoUeCa Ha N3cMyKBaHe.
OTyntaHe Ha MInHmajnna ObeMeH NOTOK
Ha npedhaTcpaHa Ha ypeDa e MOHTnpaH MaHometbP, KOITo NOKa3Ba BAKyMa Ha 3acMyKbaHe BbTpE B ypeDa. Ppi DOCTnraHe Ha MaKcImaJIHHa BAKyUm (BIX Ta6JIucaTa), OCHOBnrt FInIbTpR6Ba Da ce NoUncTn (BIX rnaBa IOnucMbHe Ha OCHOBnru FUnmbp). Ta3n cToiHOCT 3aBnCn OT MoUHOCTTa Ha ypeDa n OT IN3NoJ3BaHnry CMyKaTeJeH Mapky. Ako BAkyMbT He Ce HAMJIIN 3NaHTeJIHO Upe3 NOUcTBAHeTO, FInIbTpBT Tpr6Ba Da 6bDe IOdMeHen (BIX rnaBa 3AmHa Ha OCHOBnru FUnmbp).
BHUMAHNE
Ipeuwahe Ha MaKcumHuaBkyuM
HaMaJIeAHe Ha cUlamHa u3cMyKeaHe
Ipu npEwuabaHe Ha 3adadeHama
cmouHocm ckopocma Ha eb3dyxa cnada
no20 m/s. POnucmeme unu noDmeHeme
funmbpa.
HenpaBunHo u3XeBpIaHe Ha omnaadHu bodu
3aMbpcBaHe Ha okolHama cpeda
Cb6nlodaaume MecmHume npednucnua 3a o6pa6omka Ha omnaadHu bodu.
1.Почистеуpeда OTBbTpEиOTBbH nocpeIcTBOMn3CMyKBaHeиn3TpPbBaHe cВлajKaHa Kbpna.
Ipn n3cmykBaHe Ha ypeDa Tp6Ba Da ce H3noJ3Ba npaxocmyKaUka CbC cbUaTa IINn no-dO6pa KnaCnФnKaun.
- Пи hyжда n3пнakhte пинадлесхноCTа (He e BKNIOUcheHa B КOMПЛЕKTa Ha ДОCTaBKaTa) c BOda n пODсушete.
CbxpaHHe Ha ypeDa
- HabnTe MpeKOBna 3axpaHBaa KabeI OKoNo DbPkaa 3a Ka6eJa.
- CbXpaHЯBaIe ypeDa B cyxo NOMeUeHne Iro NODcHpyPeTe cpeUy HeOpPaBOMOSeHo N03BaHe.
TpaHcnpTnpahe
△PENEPA3JNBOCT
Hecb6noidabaheHa meanomo
Onachocm om HapaHraHua u nopedu Ppu mpaHcnpmuhe c6nlodaaume meJnomo Ha ypeda.
- 3a 6e3npaHNO TpaHcnpTupaHe 3aTBOpTe N DbTa N3BOda 3a BCMyKBaHe (BnK rnaBa 3aMeapAHe Ha u360da 3a BCMyKbaHe).
- Ocbo6oJeTe 3actonoprauHte cnnpaunn n36ytaute ypeHa Ha nnb3raaata cko6a.
- 3a TOBapeHe 3axBaHete ypeDa 3a XoIOBaTa YacT n 3a PJIb3raUaTa cKOba.
- Пи Транспортуране В певозни средства осигуравайу урда сршу Излбзва и пeoобщаhe.
CbXpaHHeHne
△PENEIA3JIHBOCT
Hecb6noidabaheHa meanomo
Onachocm om HapaHaaHua u noBpeDu Ppu cbxpanHeuemo eemaume nod EHumaHue meJnomo Ha ypeDa.
- CbXpaHЯBaIte ypeDa cAmo BbB BbTpEshN NOMEueHnA.
PnJka n pOdApbJka
ONACHOCT
HenpehamepeHo cmapmuu yped, KOHmKm c npoeJdau muok yacmu
Onachocm om HapaHyaHe, mokoe ydap
IpeDu pa6omu no ypeDa 20
U3KlNoyBaume.
H3obpnaume uencena.
ONACHOCT
Onachocm nopadu onaceh 3a 3dpaaemo npax
3a6oJraHua Ha duXamenHume nIbmuza nopadu eduwahe Ha npax.
Ipu pa6omu no nooopbXkama (Ha np. cMaHa Ha qunmbp) Hoceme pecnupamop P2 unu om no-uecok knac, u obnekno 3a eDnokpamHa ynompe6a.
ONACHOCT
Jouwa qunmpauua
3a6oJraHua Ha duXamEnHume nIbmuza nopadu eDuwahe Ha npax.
EfekmueHocmma Ha fummpupaama
fynkuaHa ypea moke da ce npoepu
ype3 mecmobu Memod, kakmo e onucan E EN 60 335-2-69 22.AA.201.2. Ta3u npoeperka mpa6ba da ce u3bpuwa HauManko eedhjx zoouho uIu no-yecmO, aKO moea e ycmaHOe HauUOnHnU
U3UCKaHua.
Ako pezymambom u3numehaHem o ompuameneH, mecmbme noBmapc c Hoe qunmbp.
△PENEYNPEXDEHNE
Onachocm nopadu onaceh 3a 3dpaeemo npax
3abonraHna ha duxamenhme nbmuana npadu eduwbahe ha npax.
C ueI npedombpaambahe Ha onachocmu npedn3hume ycmpoucmea mpr6ea haMaMKo eedhXk 2oduusho da ce npoepebam om npou3boudumela unu om uHcmpykmupaHO luue 8be 6pb3ka c mxhomo be3onacHo yHKcuOHupaHe, Hap. xepMemuHocm Ha ypeDa, noepeda Ha fumbpa, yHKuaHa KOHpmnHume ycmpoucmea.
BHIMAHNE
Cbdpkau cuukoh npenapamu 3a noopbkka
IpaMmacobume yacmu mozam da 6bdam nopedehu.
3a noucmeahemo He u3non3baume cbbpxau cunukoh npenapamu 3a noodpbkka.
OTctpaHЯBaUnte npax Maunn ca npedna3n npncno6leHna 3a npedotBpTaBaHe nIb OTcpaHЯBaHe Ha onachoctn no cmscbna Ha BGV A1.
3a noDpBxka OT cTpaHa Ha nOtpe6nteYpeDbT Tpr6Ba Da ce pa3rno6Ba, NouCTBa H NOdIbpxka, DOKoIKOTO TOBa e Bb3MOxHO Da Ce N3BbpHn, 6e3 Da Bb3HNKBA ONaCHOCT 3a nepcoHaJa No NOdpBxxKaTa N dpyn IInua. PoDxoJusTe npedna3Hm MepKn BKNOyBaT OTCpaHЯBaHe Ha OTPoBte nped Pa3rno6BaHeto, MepKn 3a fNITpnpaHe Ha npHydnteHHTO OTcPaHЯBaHe Ha OTPoBte Ha MCTOTO, Ha KOeTo ce pa3rno6Ba ypeDbT,
NouchTbaHe Ha NOBbpxHOCTnTe 3a NoDpBXka N NOxOJa7a 3aunTa Ha nepcoHa7a.
- OTPOBNTe OT BbHsHnTe Yactn Ha ypeDa Tp6Ba Da ce OTCpaHbAT No MeToDa Ha N3cMyKBaHe N 36bpCbaHe Do cyxo, NN Da ce TpeTnpaT C yNtBTHrauCpeDCTBa, PpeDi Da ce N3HeCat OT onaChata oBnact. Bcnckn qactn Ha ypeDa Tp6Ba Da ce pa3rIeJdAe KaTO 3ambpceHi, KOraTo Ce N3HeCat OT onaChata oBnact. Tp6Ba Da 6bDat PpeDnptn NODxOJaMepKn 3a PpeDnTbPaTaBAhe Ha pa3npbCKBaHe Ha npaxa.
- Пи повьдане на Deинocntte no noДрьжka n peMOHT Tpr6Ba da ce H3XBpIaT BCnUKN 3aMbpcEH пpeДмETN, KOnTO He Morat Da 6bDaT NouchTeHn 3aIOBOJNTeJIHO. TaKnBA пpeДмETn Tpr6Ba DA ce OTcTaHЯВAT B HEnPONyCKJIbN Top6N, B CbOTBETCTBne C BaIIuHNITE pa3NopeD6N 3a OTCTpaHЯBaHe Ha TAKnBA OTnaIbCuN.
- Пи Транспортуаре И подрьжka на ураза BCMyKaTeHnITE HaKpaHnCt TrЯбВа Дa 6bДaT 3aTBOpEHn CbC 3aTBapRЯшte Tann.
- Имайтейпесьд, чу можete за
иЗВьршВаTe самоctятелно постту
deйнoctи по подрьжкata и
обслухванeto.
2.ПоунстваitepeIDOBHO NOBbpxHOCTTa Ha ypeda N BbTpEwHaTa CTpaHa Ha pe3epBoapa c BnaXHa KbPna.
KoHTpOJIHn DeiHOcTn I DeiHOcTn IO NOdApbJka
Bb3laarTe n3BbPwBaHeto Ha peoOBHa
HNCNEKnra Ha ypeDa CbflacHo
CbOTBeHTHe NaUHOaHNn PpeDncaHna
Ha 3aKOHOdaTeNa 3a PpeDToBpaTBAHe Ha
3NoJOnyKn. DeHocTne NO noNdoPbXkata
Tp6Ba Da ce N3BbPWBat OT KOMnTeHTHO
LIue Ha paBNn INTEpBaJIOn OT BpeMe IN
CbflacHO yka3aHnraTa Ha npOu3BOdnteJ,
Pn KoETO Tp6Ba Da ce CnA3BaT
CbIeCTByBaUnTe PpeDncaHna IN
m3nCKBaHna 3a 6e3OpacHOCT. DeHocTne
no eNeKtpo06OpyDbAHeTO MoRa DA 6bDaT
I3BbPWBaHc cMo OT eJKeKTpOExHNK. Ipn Bbnpocn, MoJ, o6pbuaTe ce KbM fuiinaHa KARCHER.
3amHa Ha OCHOBnI
ONACHOCT
Onachocm nopadu onaceh 3a 3dpabemo npax
3a6oJraHua Ha duXamenHume nmuu a nopadu eduwahe Ha npax.
O6pa3y6aunm ce npax mpe6ba da ce mpaHcnpmupa b HnnpOnycka u npax KOHmeuHepu. PpecunbeHemo He e pa3peweHo. Pe3epeoapb m 3a cb6upaHe Ha npax mpe6ba da ce u3X6bpna camo om UHcmpykmupaHu luca.
△PENEYNPEXDEHNE
Onachocm nopadu onaceh 3a 3dpae mo npax
3a6oJbHaHnHa duXamEnHume nmuua npadu bduwahe Ha npax.
He u3non3baume noBue 2naBnua
fummbpeH enemehm cneu 38aXdaHemo my om ypea.
IocToHHo MOHTnpaHnTe fHnTpN Tp8Ba Da ce CMeHrT CaMO B IOxOJaU 3OHn, HApP. TaKa HapeeHnTe De3aKTNbAUHOHNCTaHcUN, OT KBaJIuΦnUpaHNo JInCe.
1.ИЗкlioуete урEDA.
2.ИЗваде Teцencena.
3.ДeблokираиTeиCBaIeTe BCMyKaTeJIHaTa ГаBa.
4.Дeблokираite n cBaIeTe MeKdINHnna npbCTeH.
5.ИЗвадеTe 3Be3ДоОбразнЯ плоськ HaftbHaTФиNTbp.
6. BeDHara cIeI n3BaJdaHeto OT ypeJa noCTaBeTe 3AmbpcEHnI 3Be3DOO6pa3EH nnocbK HaBHaT fNITbP B Top6uKa I 3aTBOpTe Top6uKaTa NNbTHo.
7.И3xbpnte 3Be3do06pa3HnI INOCbK HaBHaT ΦNITbP B CbOTBETCTBnE CbC 3aKOHOBNTe N3NCKBaHnI.
8. OTCpaHete OTnabuNTe OTKbM CTpHaTAta 3a YnCT Bb3dYx.
9. Побереунгеляпьстеняповеди.
10.ПocTaBTe HOBn3Be3Doo6pa3eH nnoCbK HaBHaT qnITbP:
a N3terIeTe 3Be3do06pa3Hnra nnocbKa HaTbHaT PnITbp HAd TpbCKaHa HaPnITbpa OT MeKdHHnra npbCTeH TaKa, Ye eJeMeHTnte Ha TpbCKaHa da Ca HarnaceHn ceHTpaNHO B rHe3daTa Ha PnITbpa.
b NocTaBeTe MeKdHnHnI npbCTeH Cbc 3Be3D0O6pa3HnI PIOcBk HaTbHaT φnITbp I TpbckaHa Ha φnITbpa Bbpxy npbCTeHa Ha φnITbpa.
c BlnokupaTe MeKdHHn npbCTeH.
11.Пoctabeteиблokupaite BCMyKaTeJHaTa rJaBa.
CmHa Ha H-ΦnTbpa
1.Obe3onacete ypeda cbc 3actonopraaunte cnnpaquKn.
2.ИЗключete урEDA ot п配电ьсаунTe ha ypeDA.
3.ИЗва́дete усенься.
Φurypa M
4.ДeблokpaIteи NOBdHHeTe BCMyKaTeJHaTa TnaBa.
5. Pa3xna6eTe BaKyumnHa MapKyu Ha BCMyKaTeJHaTa rJaBa n 3BaJeTe BCMyKaTeJHaTa rJaBa.
6. 3aBbptTe WeCTOCTeHHNBAHHT o6paTHo Ha yacOBHKOBaTa CTpeJIka C NOxODIu IHCTpymeHT.
7.ИЗВаДeTe yПьТHeHЯТa n 3aMbpeHnH-ФиNTbpa ot BCMyKaTeHHaT a rnaBa.
8. BeDHara cIeI n3BaXdAHeTo OT ypeDaNoCTaBete 3AmbpcHnH H-ΦnITbp BTop6nUka n 3aTbOpTe TOp6nUkata NJIbTHO.
9.ИЗXBpIeTe 3aMbpeHЯ H-ФиNTbрВ CBOTBETCTBNE CbC 3aKOHOBITE N3NCKBaHЯ.
10.OTcTaPaHeTe OTnAbuNTe OTKbM CTpaHaTa 3a YnCT Bb3dYx.
11.Пoctabete HOBnH-ФnITbP B O6paTeH peД. YBepTe ce, Ye yNtBTHeHnra T n BaKyyMHnT MapKyu npIyraT npaBnHNo.
12.Cpeu HnpeHaMepeHpa3Xla6BaHe HaheCeTe NOxOJaIcpeCTBO (HaNP. Loctite 243) Bbpxy pe36aTa Ha WeCTOCTeHHNBAHT.
13.3akpenete 8ecToCTeHHnBnHT no yacOBHnKOBaTa CTeJIka.
14.ПocTaBeteиблOKирайтЕ BCMyKaTeJHaTагпаВa.
CmHa Ha Top6nUka 3a OTnaDbu
1.Obe3onacete ypeda cbc 3actOnopraaunTe cnnpaquKn.
Φnrypa C
2.Дрьн HeТдржkaTа Harope. Pe3epBoapbT 3a OTnaDbuN ce De6nokupa n cnyca.
Φnrypa D
3.ИЗдьрnaite 3a ДрьжkaTa pe3epBoapa 3a OTпадьи OT уpeДa.
Hypa H
- Повдигнелу Торбуньката 3a OTnaДьи.
- 3aTbOpTe nIbTHo TOp6nUkata 3a OTnAbuC Ka6eHnHaTa Bpb3Ka.
6.ИЗва对接 Topбичкata 3a OTпадьц.
7.ИЗXBpIeTe TOp6nUkKaTa 3a Cb6npaHe KaTO OTNaIbK CbIaCHO 3aKOHOBnTe pa3npoPeIbN.
Φnrypa E
- Пoctabete HObata TOp6nUka 3a OTnadbU B pe3epBOapa 3a OTnadbU IN BHIMATEJIHOЯHaIacTe KbM CTeHaTaN DbHOTO Ha pe3epBOapa.
- 3aKpeTe KpaHa TOp6nUkata 3a OTnAdbuHaBbH Bbpxypb6a Ha pe3epBoapa 3a OTnAdbu.
△PPEUYPEXJEHNE Henpaunho6opaehe npu 6nokupaHe Ha pe3epoapa 3a omnaobu
Onachocm om npumuckaHe
No epeme Ha 6nokupaHemo e Hukakbe
cnyau He dpbxme pbueme cu Mekjdy
pe3epeoapa 3a omnaobu u npbcmeHa Ha
fummbpa, Humo zu nocmaeaime e
6lu3ocm do noeduzawama mexanuka.
Bnokupaume pe3epeoapa 3a omnaobu
nocpedcmeom 3adeucmeane Ha
dpbkkama c dee pbue.
10.Пocтавеpe3epBoapa 3a OTnaDbuNi I ro 6IoknapaTe cdpkKaTa.
CmHa Ha oBe3OpacnteJHaTa 0nTbPNa TOp6uKa
ONACHOCT
Onachocm nopadu onaceh 3a 3dpabemo npax
3a6oJIeBaHua Ha duXamEnHume nbmuua nopadu eduwehe Ha npax.
O6pa3yeaunm ce npax mpe6ba da ce mpaHcnpmupa b He npponycka u npax konmeuhepu. Ppecunbehmo he e pa3peweHo. Pe3epeoapb m 3a cb6upaHe Ha npax mpe6ba da ce u3x6bpna camo om unhcmpykmpaHu luca.
1.Obe3oNaCeTe ypeDa cbc 3actonopraBauNTe cnnpaKn.
2. OTCpaHeTe cmykaTeHnHa Mapkyu.
3. CbpxTe n3BOda 3a BCMyKBaHe KbM pe3epBoapa 3a OTnAdbuN (BxK rnaBa 3amEapnHa Ha u36Oda 3a EcmyK8aHe).
Φnrypa C
4.Дрьн HeТдржkaTа Harope. Pe3epBoaApT 3a OToNaDbuN ce De6nOKupa n cnycka.
Φnrypa D
5.ИЗдьрnaite 3a ДрьжkaTa pe3epBoapa 3a OTпадьи OT урEDA.
Фигра I
- Повдигн electe obezonacntenhaT a nIITbPHa TOp6nUka.
Фигура J
- OtneneTe 3aunTHoTo fOJIno.
- 3aTbopeTe o6e3onacntenHaTaΦnITbPNa TOp6nUka CbCcamo3aJenBaaata Ce Kopda.
9.ИЗтелпетанбд оБeзопаситENHаТФИNTbPHa TOp6uKa.
ΦuRypaK
10.IIbTHo 3aTBOpTe OTBopa Ha n3BOda 3a BcMyKBaHe Ha oBe3OpacNTeHnHaTa 6nnTbPHa TOp6nUka Cbc 3aTBapraunie ce KaNaK.
Φnrypa L
11.3aTbOpTe NtBTHO 06e3oNaCTeHnHaTa ΦnITbPHa TOp6uKa C nocTaBeHaTa Ka6eHnA Bp3Ka.
12.ИЗВаДeTe o6e3ОпаСиТЕнHaTа ΦИЛТьРнA Top6Ичka OТ pe3ePBoapa 3a OTnAДьцI.
13.ПочистеpeзервогаразOTпадьс CBлжнкьрna.
14.N3xBpIeTe o6e3oNacntenHaTa ⅡnTTbPHa TOp6u7ka B HEnponycka7a npax 3aTBopeHa TOp6a, KaKTo e OINscaHO B 3aKOHOBIne pa3nopeD6n.
Фигура F
15.ПocTaBete HOBaTa Obe3OpaCHTeJIHa ФИNTbPHa TOp6nUka.
Фигура G
16.3aKpeneTe KpaHa oBe3OpacnteHnHaTa HJIbPHa TOp6uKa HaBbH BbpxUpb6a Ha pe3epBoapa 3a OTnAbu.
△PENEYNPEXDEHNE
HenpaBunho 6opabeHe npu 6IokupaHe Ha pe3epoapa 3a omnaDbu
Onachocm on npumuckahe
No epeme Ha 6nokupaHemo b Hukakbe cnuyau He dpbXme pbueme cu mekdy pe3epboapa 3a omnaabu u npbcmeHa ha fummbpa, Humo zu nocmaaume 6 6nuzocm do noeduaaama mexahuka. 6nokupaume pe3epboapa 3a omnaabu npocpedcmeom 3adeucmeane Ha dpbkkama c dee pue.
17.ПoctabeTe pe3epBoapa 3a OTnabuNi I ro 6IokupaTe c dpbKkata.
POMOUs Pn IOBpeN
ONACHOCT
HenpehamepeHo cpaobmaHe Ha ypeDa/EneKmpuuecku ydap
HenpeHaMepeHomo cpa6omeaHe Ha cmyKamEnHnMOMOp MoKe da npuHu HapaHaeHua. HanpexeHuemo no eNeKmpueeCKu KOMNoHmU MoKe da doeede do mokoe yap.
Ipeu ckaepu paobu no ypea 20 u3Knoubaume u u3eaKaune me uencena.
Bb3naaume u38bpwbaHemo Ha ecuyku npoepku u paobm no enekmpuecku yacmu Ha cneuaanucm.
yKa3aHue
Ako hacmbtu nopeda, ypeobm mpa6ba da ce u3knou He3abaeNo. Ppedu noemopno nycaHe eeknloamaucu mr6ba da ce omcmpahu nopepada.
Ako noBpeaTa He MoKe Da 6bDe OTCTpaHeHa, yPeIbT Tp8Ba Da 6bDe npOBepen OT cepBn3a.
BcmykaTeHnHaTa Typ6nHa He pa6oTu
I3JIIN3aHe Ha npax npn 3acMyKBaHe
- Пювере ТОLOжени.To Ha ФиNTьразИ рпн HeобхODIMOCT Г кориграйт.
2.Почисте осовьня ситbp(Bnx rnaBa NocmeaHe Ha ochoehua pfumtp).
3.Поdmehete OCHOBnЯФNTbP(BNX rnaBa 3amHa Ha OCHOHnAФunmbp).
N3XBbPJIaHe
B kpaHa ekCnIooatauOnHnnJxNBOTypebT Tp6Ba Da ce OCTpaHra KaTo OTNaDbK B CbOTBETCTBNE Cbc 3aKOHOBITE pa3npope6n.
TapaHcna
BbB BcKa DbPkaBa ca BaIiDnH
n3daJeHnTe OT HaIaNna OToPi3npan
InCTpn6yTop rapaHOnHH yCIOBnA.
EBeHTyaJIHn NOBpeNi Ha BaIaNna UpeI uce
OTCTpaHIM B pAMKITE Ha rapaHcUOnHHnA
cPoK 6e3pNaTHO, aKO ce Kacae 3a DeΦeKT B
MaTEpHaJIte NII INPOIN3BOJCTBEH DeΦeKT.
B cnyaH Na PpeJaRBAHe Ha npaBO Ha
rapaHcNna, ce o6bpHeTe KbM BaIaNna
InCTpn6yTop nII NkM Hau-6IIN3KnA
OTOpN3npaH CepBn3, KaTO npeIcTaNtE
kacOBaTa 6eJIeKkA.
(Adpec, Bx. 3aHaTa cTpaHa)
DoIbJIHnTeJIHa rapaHcUOnHHa
IHΦopMaun (ako IMa TaKaBa) MoKeTe da
HaMepeNTe B cTpaHnUata „CepBn3“ Ha
MeCTHnY Ye6caIT Ha Karcher B pa3deI
„N3TeTgIaHe".
TexHnueckn daHHN
| Ельектуеско CBыр3Ванe | |
| МөгөвоHaпөгөнe V 220-240 | |
| Фаза ~ 1 | |
| МөгөваЧecтota Hz 50-60 | |
| HOMиналha мошноct W 3150 | |
| Мakсималha мошноct W 3600 | |
| Тил зашита IPX4 | |
| Клас зашита I* | |
| Мakсимално Довустim Ω 0.195+мөгөв Nompeнданc j0.122 | |
| Размери и Тergla | |
| Тилочно собстveho Тergло кg 78 | |
| Дылжина xшиroduчina xmm 1020 xBИСочина 680 x1670 | |
| Ефektivna пioц ha m² 2OCHOBня Фильtp | |
| Ефektivna пioц ha H- m² 3,5Фильтba | |
| Условnia Ha 3aobikakalpaata cpeda | |
| Temпepатура ha °C -10-40сыхсане |
73550 Waldstetten (Germany)
TeN.: +49 7171 94888-0
ΦaKc: +49 7171 94888-528
BanduTeH,24/04/01
目录
一般提示 361
安全说明 362
按规定使用 362
环境保护 362
配件和备件 362
供货范围 362
设备说明 363
设备上的标志 363
投入使用 363
运行 364
运输 367
存放 367
保养和维护 367
故障帮助 369
废弃处理 369
质量保证 369
技术数据 370
欧盟一致性声明 371
一般提示
T. Wahl
Managing Director

A. Haag
Director R&D
文档全权代表:
A. 海牙
Kärcher Industrial Vacuuming GmbH
pglao sS S fJn JalU jI jS S 14
aiglaJpK>U Lg jL
a1 > | a0| a_0 = 1
JdsJU JdJdJ.15
an > an - 1 an - 1 < an
a> a> 10 U
JU
L g / / gg > J设
gUJJbS
gj gj jla/1 aol>9 2wgl/ agl> jy dya U
Joo//e/1gJ//aJ/
gub c uL LILcIwglI a gl> Jaa
.olc//jaoo lc bdo//
a aaglglwgl> p.17
aol
JLJU
aagaiiai jglgglgjglg
oljulogacla
oJgJH J8
p>1, mssllg 9 g a20
yIbuaJI H 9
.
.10
J.11
Jkuu auiu gajll gbrgssd
wssssssssssssssssssssssssssssssssssssssssssssssssssssssssssssssssssssssssssssssssssssssssssssssssssssssssssssssssssssssssssssssssssssss
JLKJIUI (Loctite 243. JIJI JIJI JLc)
.
Jololj 13
.
.14
Jn nn nnnnnnnnnnnnnnnnnnnnnnnnnnnnnnnnnnnnnnnnnnnnnnnnnnnnnnnnnnnnnnnnnnnnnnnnnnnnnnnnnnnnnnnnnnnnnnnnnnnnnnn
JUULKoPdawjLol
a>la|0g6
JU aolcJ1 Joo 2
.
an > an - 1 · a_n - 1
pdswlyjglJUo zIomegaIg>
aolcljao
a>la|0gH
JU JJI 14.
blj jol jol jol jol jol jol jol jol jol jol jol jol jol jol jol jol jol jol jol jol jol jol jol jol jol jol jol jol jol jol jol jol jol jol jol jol jol jol jol jol jol jol jol jol jol jol
OS = 2OS S_ OBC = 2OS
Jlal jol no Jal 16.
gU L 7
a:glJ
an > a1 + a_2
J8.
gl>lc aLiagw g Lwgl a gl>
a|11 a0j 9g
a>g 10
1
Jg Jgl
jUjUJbS
g/1d//a>g<1wgl/4gl>
Jae//clw/ gR//a//
Jb c 1111111111
aolc//jaoo lcbeia//
Jaa, gacg jcLwgl a gl> 10
.aoLcJl
J
S_ = 12 · CD · AB = 12 × CD × AB = CD.
a2014, 16, 16, a2015, b2
jllglw/wwy
Ujgl aogla oIg> 1gai/ jai
a gl oal jg U. aiei oJcI gau
10000000000000000000000000000
a2d14jiojic a2u,bx
jllglw/wwuulsso jol
oo aIJI/12, uui/ jilal/ uic pizui U
j z > 1
U|JkssyRjlllU
JlJI JJ Lc aawlaalllbll
a aaiuulg glll allj lba
- j z 1 <
2..sWJl - a|ljg
4..
5.. - j k ≥ j c
p>1 y sSJI g 80s
aigai lalbail
- 8..
9. 2g > g,p .
.
Jd10
a
a>abwgl aeljlc wjjl j
jlll jg> aaii jgljll ola
a: sgo 2wgo aabwgll aal>glb
.2wJrJ aE Jc wJrJ jJg
abwgl aal>Jnolu c
alolig bawll wJwSj 9.11
H jaleJI Jdawl
1111 1
jglj2jlao jlc jlgjjlqR.
3..s,
Ma2 > 1,2 a2
a2g 10aJ4.
Jjg lll wI Jc g 5.
.
yoljwsc wssll
.aaoloo1olxwUaclll
Jj.7
.
- a/bi jaiJI bil) 1sJrJrJrJrJrJrJrJrJrJrJrJrJrJrJrJrJrJrJrJrJrJrJrJrJrJrJrJrJrJrJrJrJrJrJrJrJrJrJrJrJrJrJrJrJrJrJrJrJrJrJ
JU U 100000000000000000000000000000000000000000000000000000000000
JcU aolcljao>w5.
1g2e>glwglgl>
Da>la|o
p12wJgJUo zLwglag> w6. aolcJU
aIj, p, u, pU. gU gL > 7.
Jbalee Jdals
Ulaill no alixil Jus 1jul) jUl pJ .(uU U
J
J 11 p/12 w/ g/14 g>
50 glaJy JaiI ic saa/la
aui
4gaaa//K//jgljgl>
U U U U U U U
a>1/la>1//jg//olc/jo
.4e9j, pJxwJ aill xic bLwlll
gl/1jaa jbui
a9j/1j jaij aaleia// aJlu// ggll ocly
2x - 6 = 2 + 2k ,
Lwglg>Jdsic Joljll Joljll
jUjUJbS
g/1jla//a>g2wgl/ajgl> 1u U Jaa//c//a//
gcbc lldy 1gl a g> Jaa
aolcljaoo lcbeai
aolcll golgIggl> 8
jgljll 1
aall oal ool no pulll
a//
oJol oJol aJleal alal jolll olcl Jc
0g JdJUJU 1
JgBaaJgB
Jbawolpduwul jgblbaow sic
Jia 1
sgoo algaosu) laolalabw2.
U1pJl|lg>gclJL(JwJl
jgeJ
1...JaaJI
2..
#
aaiy jia jia jia jia jia
.aaI I J2
pIxwly jgeJU o zIomegaIg> w5.
. aolcll jao
JzJzJzJz
Ha>la|o
U J 16.
1a1y j0j 7.
p_S > 0 J ≤ m
J 18.
gU LpJlIeJ 9
.
JU J
laoloo
U U U 10
Jaa>la|oo
.aaJgJgJgJgJ1.11
12
.
.13
k = | la| d_02mol
jil6 aolll bawll alog aixglcl.14
.1b2eJyLg>Li loUl
a1 > | a2| a_0 < 0
JcJIaIbIyIeK>LyIooUulIgS JcJI.15
aagJol
LulUI aagol no noIulU wJl.16
awlaaJ>lllUuUa gl> aBp.17
.
\rho gla o s S f jolUj dS u 18
.aa[g]pK>U[laJ
jgl> jg sic jbll lolll
gUjUJbS
gjglal>gl>gl>
JaaI cIwJgJIaJI Joo
gubcduLidcIwglIag>Jaa
.1olvJ Jaoo lc bdo
JaaaglglgUg>ps.9.19
.aoLdJ
Jlll
aall aal ool no pulw/ m c alill
a//
oio aIooaI aIooIgllolcIoo
DAE = 90^
.
2
l_g( g - 1) = h
Jus Jus
a>la|ooE
- a|b
gaggljLg aai g,
a.glaia
- l >
J 1 Jggl
JUJI J
a|a|0rF
6..UUI
a>la|ooG
- a|b > a
JU
Lwglg>Jc ic JbIJI Jolll
gU;U|U|
gjullaol>glwglgl>
Joo//g/1aJ/
gubc uL LILcIwgl a gl Jaa
aolc//jaoo lc beo/
8.
. aol
bJl bawll
jI/ gIw/ uuy wuI I 00 Jol
jio jie / baw jgUcbjIbaw/ xic
a > 1
4
IiIiI IeIg iia jaiil,
JLJUw/1c JIa 16 Llu// 1c9
Jw icg jgi 0s
jglgwh
la/la/ a>
- ∃a d
Jalil) aollwll wro gI al
lalil no alitgusu
.(jloU
Jj
1..UUI
.0gjU xic bawl gbs Jj2.
jul) 1LwUla gl> bawll alog jlel .3
(1a/ aIog gllc/ JdJl
a>la o96
JcU aolcljao 14.
g 2 g
an > an - 1 ,b_n <
#
j
Jl jI/ gluW/ uuy Jua// s> oJol/ jgeJL aBg
g/1 mai jge2/1 baw oogb jog U 05/2w pIzwiU pK>U baw// aog gllc/ 2 11
U| Ulaill no pIuill uS pIauiw/ puc no 5t Ucl bawll uIg aIgl IbaWII aOg g O. baWl qLac sli
yLalll no pIill mss poow loic L>laawll bawll aogj glc/
gllc/ u, lolU c w o u s p iwi Ioc .pL>u aglo// bai// aog J slwJ
aJU1gla>baawSajgjI//i0pI
a b> Jg U 2
J 9 aLg
gluc
pks>bybawll aog
oJw oJxWl
. pH> U|
us5 p1xixi
a
.
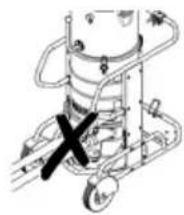
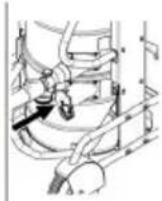
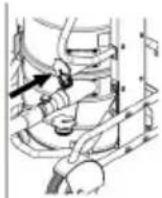
us5 p12xui xi
UJ UU JU
.05>1. aolal
14.11 aH Juaa/
y1x1
J
baui auiu auii auius jge// li 2la Jleuw/ al laI uC a9I// ouc
(bai//alogj/laillbail)
usw,0jai//abllalogw2.
bll)JUULWgJyLJI//JALI
uS/laillnolzli//JALI (JloUl
JJI JIJIJIJIJIJIJIJIJIJIJIJIJIJIJIJIJIJIJIJIJIJIJIJIJIJIJIJIJIJIJIJIJIJIJIJIJIJIJIJIJIJIJIJIJIJIJIJIJIJIJIJIJIJIJIJIJIJIJIJIJIJIJIJIJIJIJIJIJIJIJIJIJIJIJIJIJIJIJIJIJIJIJIJIJIJIJIJIJIJIJIJIJIJIJIJIJIJIJIJIJIJ
4
JJIbIJIJIJIJIJIJIJIJIJIJIJIJIJIJIJIJIJIJIJIJIJIJIJIJIJIJIJIJIJIJIJIJIJIJIJIJIJIJIJIJIJIJIJIJIJIJIJIJIJIJIJIJIJIJIJIJIJIJIJIJIJIJIJIJIJIJIJIJIJIJIJIJIJIJIJIJIJIJIJIJIJIJIJIJIJIJIJIJIJIJIJIJIJIJIJIJIJIJIJIJIJ
.1J>J, aJxW|g, aJxJ JJI JJJ JxJ x2
wS/1nJU 1uU
.1U 2Ko pLxwly jgJl y a1 C a>la| ogo
.1U aolcJl Jao wD
.la+ g zIomega U ag> r P D a>la| ogo
pIiJyjLgJUo zIwglag> wB. aolcJI J
i 12 a loUJb
laa//uunn nn nnnn nn nnnn nn nnnn nn nnnn nn nnnn nn nnnn nn nnnn nn nnnn nn nnnn nn nnnn nn nnnn nn nnnn nn nnnn nn nnnn nn nnnn nn nnnn nn nnnn nn nnnn nn nnnn nn nnnn nn nnnn nn nnnn nn nnnn nn nnnn nn nnnn nn nannn nn nnnn nn nnnn nn nnnn nn nnnn nn nnnn nn nnnn nn nnnn nn nnnn nn nnnn nn nnnn nn nnnn nn nnnn nn nnnn nn nnnn nn nnnn nn nnnn nn nnnn nn
- 1234567890123456789012345678901234567890123456789012345678901234567890123456789012345678901234567890123456789
1..bawJl
2..a|gJl
IgUa gl> Jo sGoo a>gl
JaiJ aJawll aJgJ JI gU U aJg> Jo pJ 1U .JgJy j, JgU U aJg> Jc bauuU uU JgJ xic Jlalj JgJbui. Jall sGwai
1..
J
- aaioll 100
a2alljiojicaii
J 1
Ug jalll siaic U5 29 g3 kawll pai U
aaii / 10lej/ oJy j yu y 20 Jb5 d2w .aa
4
a#/1 clauu2// JgJwJb
baiuill 1200 cki b
iic jlljllc ailljI lalbo pU .baJl
J
JwJ
aIbgl aUy gala/lljly pJ J1
g9 a#Jg aa#J// Ia#la// a#g no a#lia//
jglll jlaJIJI
ii 12 aalljiojieaui
jI /gluiu/ uuy uai//s>0 jol
U/9 jile// aic g>9 0g baw/u pe U .aue// ciauw// llew/ oJj w
4
2gao 1
baill 20
aJ1Jiaic 9y baiuU
jul) oJzall bawll alog (JwralI .(baW// alog w>1 JaoJI
p>1sU 100
alog gllc/ JaaJbil) pK>Ul oslw .baW
gU U g> JJSSGoo
ag>Jo sguo a>01 Jaaill jbiil)
jI) .gUgUl agl> gJgU pJ ,uUl pJ |1.7
.(gUgU/ a.g>
J 88.
aollll wssg jlll lal (jll lal lal) pdlwul
Jwralgoo Jga
baaill alog j
Jbawl pgsj Jds|Ss y 1wU
wJll aal> Jc bawll aag
Jn
sgo no oos os jzjLc:laill
oaa 1
Sgoo Jgaaa aag aalil no alll
jra Jaaio Jauu aulb saag Jwrall
.(5)9.989606.0.
bJl bawll
LwUa>Jc bawu aog
Joo
Jolaljow oos jos pclj:olU
100
pRggoJolUjwroSbjo jgeJI
.(5)6.904420.0
bJl bawll

DN 40
MAX
XX,X kPa/ XX,X mbar
DN 50
MAX XX,KPa/ XX,X mbar
1...JaaJIgogIcJlaJIbwoI
2..JbU 100 p12wU JgJyI y
-
二,二,二,二,二,二,二,二,二,二,二,二,二,二,二,二,二,二,二,二,二,二,二,二,二,二,二,二,二,二,二,二,二,二
-
ci g x ,ai G x ,b
wJg Jc aJl aJll oJ g Jsay .p2iWALI 1j 1c jBw Jll pJll Jc EUbU .baJI
d( x,y) = | - k| | x| + | y|
jdlal aabwagaaaJl Jgogll pJ13]
alaiwgl
Jauu
glal
JUJIJIJIJIJIJIJIJIJIJIJIJIJIJIJIJIJIJIJIJIJIJIJIJIJIJIJIJIJIJIJIJIJIJIJIJIJIJIJIJIJIJIJIJIJIJIJIJIJIJIJIJIJIJIJIJIJIJIJIJIJIJIJIJIJIJIJIJIJIJIJIJIJIJIJIJIJIJIJIJIJIJIJIJIJIJIJIJIJIJIJIJIJIJIJIJIJIJIJIJIJ
clawll aeggdo bawll ggbjal aeilall aoejell
llg jalaiall aiojglgballaaoe
.
Jc mS
(9.989606.0 100

- (6) ( 6.904420 : )

J
(9.990292.0.1
H14 2J
(9.993006.0.1J)
jgljll jlao1go
JgAa>do Jb1, JLswU1 a>la! oJgA
L>Uuag> LcK>UoAsw ②
J 10
julll aal ④
jdll 5
al 6
1 ⑦
k > U ( a + b) ⑧
jld ⑨
jz ⑩
JSS
JooJoo ③
J ④
16
abwgaal> ⑦
JUJI Jol> ⑧
J ⑨
zIomegaUaGb> ②
aaloojoojgajll a>gill Uc ①
Iaewll oJgwoLo Jol> ②
abwgl aaljol alwg ②3
Uul uuaaogJol> 24
25
LwUa>Jc bawl a@g 26
OCLlI J. ⑦
jgljll jc jgrrll

WALING. Chetos Gnatnntahts, aenrnoeafane the stauae.
In WANG, Jue WANG, perrnnnne ar nrrnnnns of
Hua,duan,ur vamnun,nd en Pienen wengnennnwnn er egeyraner crrn Schauzoung drage.
Acrn anmte devor das qemmett liregmo nistir et und
de kuoher hao mrennanae oerepuit wudre.

.HjJJIa>JbJlIbawwiojLJI
llj l j 1a aalg g g u c u U
U
U J
UJ
UJ
UJ
UJ
UJ
·dJI
jIaIgIaIaIgIaIaIaIg
.ooal Uzalgl kallg
Ug> Ug|g|g|g|g|g|g|g|g|g|g|g|g|g|g|g|g|g|g|g|g|g|g|g|g|g|g|g|g|g|g|g|g|g|g|g|g|g|g|g|g|g|g|g|g|g|g|g|g|g|g
a91Jj j[>J Jua x 2gauo u
JlJI JIJIJIJIJIJIJIJIJIJIJIJIJIJIJIJIJIJIJIJIJIJIJIJIJIJIJIJIJIJIJIJIJIJIJIJIJIJIJIJIJIJIJIJIJIJIJIJIJIJIJIJIJIJIJIJIJIJIJIJIJIJIJIJIJIJIJIJIJIJIJIJIJIJIJIJIJIJIJIJIJIJIJIJIJIJIJIJIJIJIJIJIJIJIJIJIJIJIJIJIJIJ
aui

ooLcU alIg aefjll aodssall slgall
dolalalalal
auiI Ic bol; a, b;

Jc aagjUg aLgU Ojge U
gixi lo lIg jg wll oal al aag slgo
aalalalalalalalalalalalalal
JySaaOoIe oogba Jkaw d g jgj
Jcku Jolal all> auiIg nnLull
U U. aibb oJgau Ieio JaiI I gI 2>0
oJgJjI JjJgJgJgJgJgO
aJooalIooJoluljgU aalw
.ajaiJJI UlaJUg oJorJ
) )
gall jagall J> aJlllogaleal
gag aalosill laxdally aolll logleall
www.kaercher.com gJ
.
1 lo oclr
Jkss aall 1
http://www.kaercher.com/dealersearch

2-2-HC-A5-GS-awx2508


