
HL 18 BL - Heat gun METABO - Free user manual and instructions
Find the device manual for free HL 18 BL METABO in PDF.
| Product type | Cordless fan heater (gas) |
| Brand | Metabo |
| Model | HL 18 BL |
| Power supply | Li-Ion 18 V battery + gas (butane/propane) |
| Compatible battery | CAS (Cordless Alliance System): 2.0 Ah, 4.0 Ah, 5.2 Ah, 5.5 Ah |
| Gas type | Butane, propane or propane-butane mixture |
| Max nominal heating power | Not specified (estimated: 10-30 kW) |
| Max gas consumption | Not specified (estimated: 0.2-0.8 kg/h) |
| Air flow | Not specified (estimated: 200-500 m³/h) |
| Weight (with smallest battery) | Not specified (estimated: 4-6 kg) |
| Dimensions (L x W x H) | Not specified |
| Main functions | Heating and drying of large well-ventilated spaces (≥280 m³, ≥700 cm² opening) |
| Power adjustment | Progressive via dial (gas supply) |
| Safety | Pressure regulator, gas valve, leak protection button, automatic shut-off in case of flame failure |
| Maintenance and cleaning | External cleaning with damp/dry cloth; dust vacuuming; monthly inspection of hose and connections |
| Spare parts and repairability | Repairs by certified gas installer; original Metabo parts; lists available on www.metabo.com |
| Storage temperature | 5 °C to 30 °C, frost-free and dry |
| General information | Professional use only (not domestic); do not use in basements; observe safety distances (≥2 m) |
Frequently Asked Questions - HL 18 BL METABO
User questions about HL 18 BL METABO
0 question about this device. Answer the ones you know or ask your own.
Ask a new question about this device
Download the instructions for your Heat gun in PDF format for free! Find your manual HL 18 BL - METABO and take your electronic device back in hand. On this page are published all the documents necessary for the use of your device. HL 18 BL by METABO.
USER MANUAL HL 18 BL METABO
natural_image
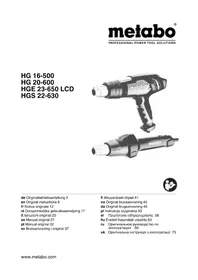
Exterior view of a metabo heat exchanger device (no signage or text on body)
Original instructions
1. Declaration of Conformity
We declare and accept sole responsibility for ensuring: these cordless gas heaters (with gas connection) identified by their type and serial number *1) conform to all relevant provisions of the directives *2) and standards *3). Stated body *4), Technical documents for *5) - see page 3.
For UK only:
UK We as manufacturer and authorized person to CA compile the technical file, see *5) on page 3, hereby declare under sole responsibility that these cordless gas heaters (with gas connection), identified by type and serial number *1) on page 3, fulfill all relevant provisions of following UK Regulations S.I. 2018/389, S.I. 2016/1101, S.I. 2016/1091, S.I. 2012/3032 and Designated Standards *3) on page 3. Approved Body acc. to S.I. 2018*389: No.:0558-22 Kiwa Gastec, Kiwa House, Malvem View Business Park, Stella Way, Bishops Cleeve, Cheltenham, Gloucestershire GL52 7DQ, United Kingdom
2. Specified Conditions of Use
The cordless gas heater (with gas connection) is intended exclusively for the heating and drying of large and well-ventilated interior rooms, marquees etc.
Well-ventilated rooms must have aeration and ventilation openings of at least 700 cm^2 . The room must be at least 280 m^3 and larger.
The device is not intended for domestic use (use in residential buildings).
Any other use or any modification of the device is considered as not intended, harbours a considerable risk of accident and is therefore prohibited.
In the case of commercial use, it is important that you also observe all extensive requirements for operation and in particular the gas connection.
For use in public buildings, refer to national regulations.
Observe the country-specific regulations.
The cordless gas heater must not be operated in basements or below ground level.
The user bears sole responsibility for any damage caused by inappropriate use.
Generally accepted accident prevention regulations and the enclosed safety information must be observed.
3. General safety instructions

For your own protection and for the protection of your power tool, pay attention to all parts of the text that are marked with this symbol!

WARNING – Read the operating instructions to reduce the risk of injury.

WARNING – Read all safety warnings, instructions, illustrations and
specifications provided with this power tool.
Failure to follow all instructions listed below may result in electric shock, fire and/or serious injury.
Keep all safety instructions and information for future reference.
Always include these documents when passing on your power tool.
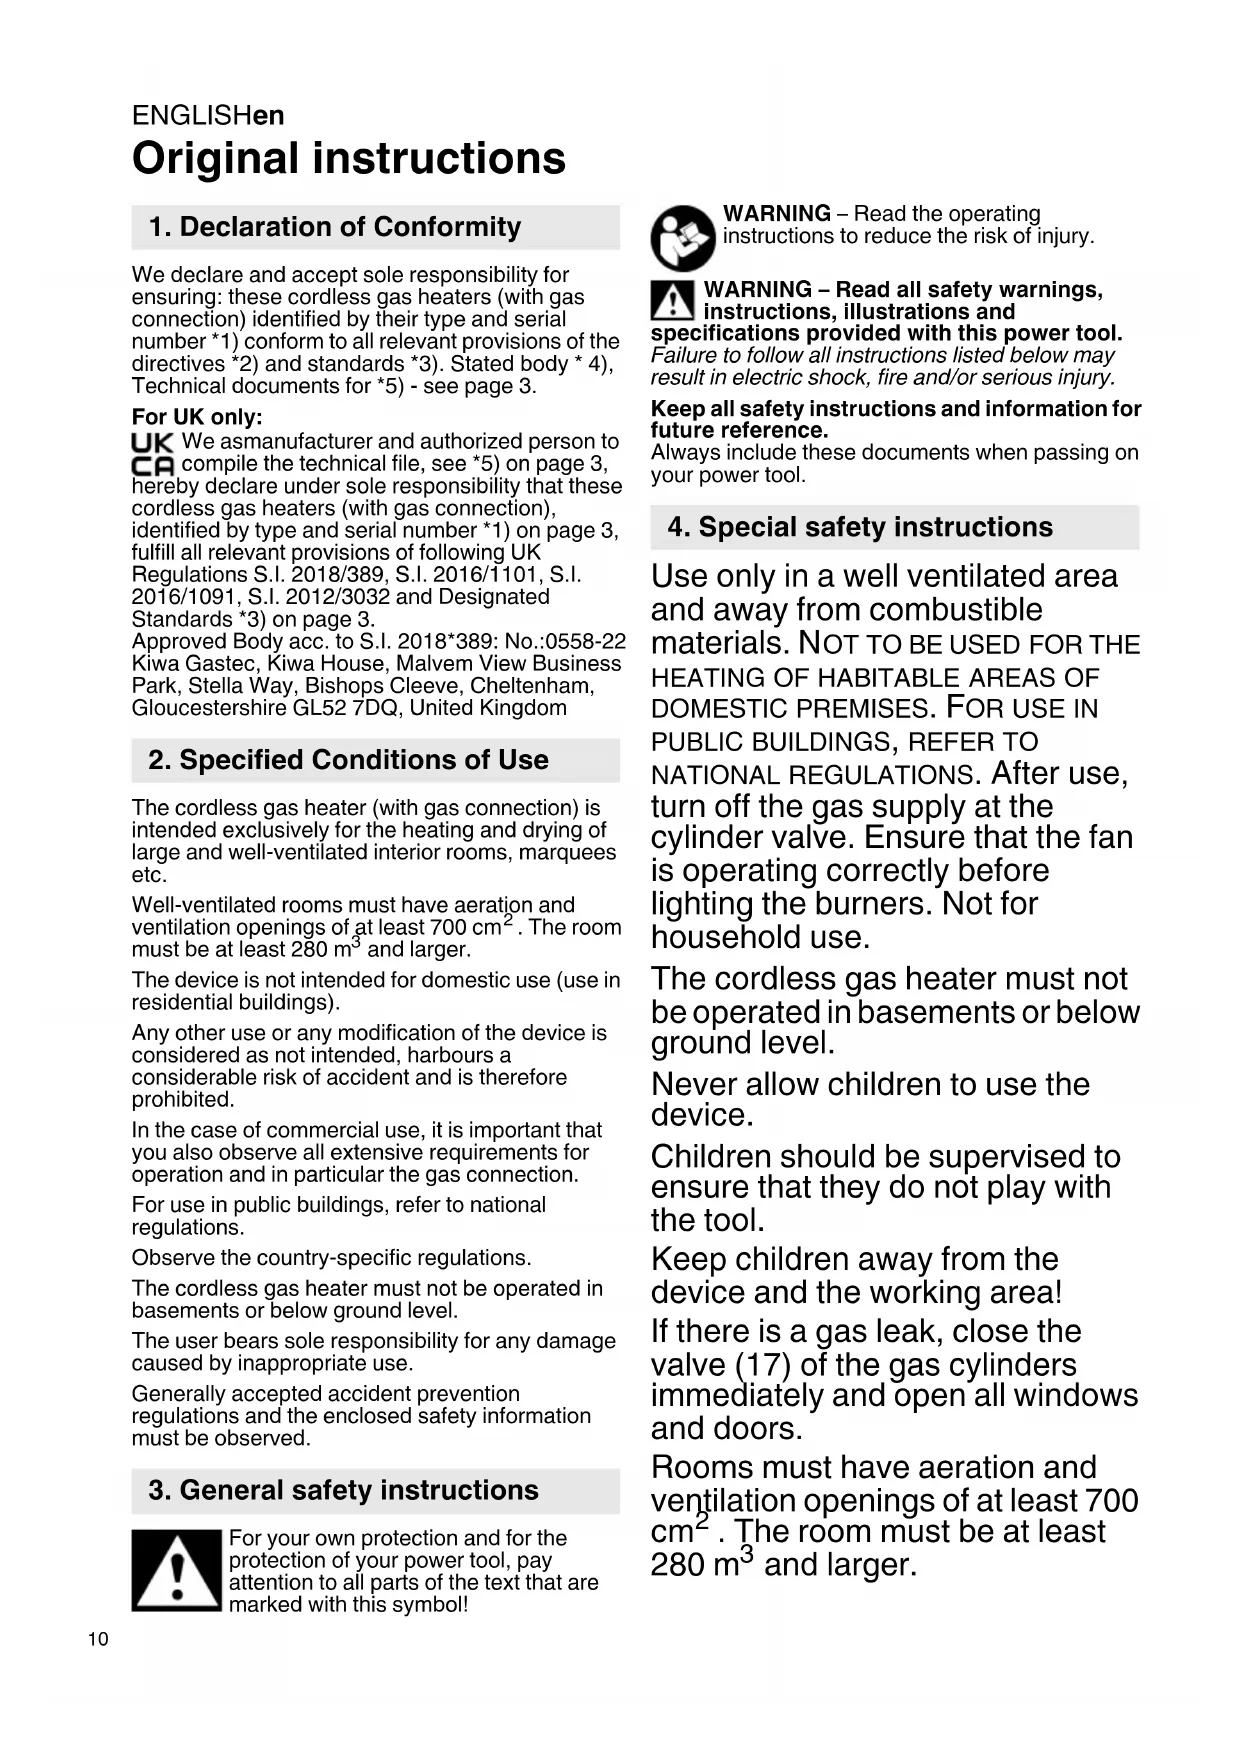
4. Special safety instructions
Use only in a well ventilated area and away from combustible materials. NOT TO BE USED FOR THE HEATING OF HABITABLE AREAS OF DOMESTIC PREMISES. FOR USE IN PUBLIC BUILDINGS, REFER TO NATIONAL REGULATIONS. After use, turn off the gas supply at the cylinder valve. Ensure that the fan is operating correctly before lighting the burners. Not for household use.
The cordless gas heater must not be operated in basements or below ground level.
Never allow children to use the device.
Children should be supervised to ensure that they do not play with the tool.
Keep children away from the device and the working area!
If there is a gas leak, close the valve (17) of the gas cylinders immediately and open all windows and doors.
Rooms must have aeration and ventilation openings of at least 700 cm ^2 . The room must be at least 280 m ^3 and larger.
The cordless gas heater must not be operated in basements or below ground level.
Never place the gas cylinder in front of the gas heater fan during operation. Fire hazard!

Attention, hot parts!
Whenever you leave the device, close the cylinder valve and secure the device against unauthorised operation. Never leave the ready for operation device or when it is already in operation without supervision.
Air outlet and/air intake openings must not be reduced in size or blocked and must always be freely accessible. Never cover the device to avoid overheating.
Operate the device on a flat, non-inclined, non-combustible and stable surface.
When operating several devices, a minimum distance of 2 metres must be maintained.
Do not set up the device near walls, flammable materials and ignition sources. Maintain a safe distance of at least 2 metres around the device.
Do not use in potentially explosive atmospheres where substances such as flammable liquids, gases and especially paint and dust mist is present.
People and animals must not stand directly in front of the device, since the escaping air can be extremely hot.
Make sure that no flammable objects can get in contact with the device, especially the device
openings, due to wind or other environmental influences.
If you smell gas, do not turn on or off any lights, do not operate other electrical switches, use a telephone, radio telephone or cell phone in the hazardous zone. Do not use any open flames and do not smoke. Immediately close the valve of the gas cylinder. Immediately vent the room.
Remove the battery pack, close the valve of the gas cylinder, let the device cool, before any adjustments, conversions, servicing or cleaning are performed.
Never try to repair the device yourself. Do not open. Contact a specialist, see chapter on repairs.
Inspect the gas hose for damage, cracks or porosity. Check fittings for damage. If necessary, do not continue use and have repairs carried out.
Protect battery packs from water and moisture!
Do not expose battery packs to fire!
Do not use faulty or deformed battery packs!
Do not open battery packs!
Do not touch or short circuit battery pack contacts!

A slightly acidic, flammable fluid may leak from defective Li-Ion battery packs!

If battery fluid leaks out and comes into contact with your skin, rinse immediately with ity of water. If battery fluid leaks and comes into contact with eyes, wash them with clean
ENGLISHen
water and seek medical attention immediately!
If the machine is defective, remove the battery pack from the machine and close the valve of the gas cylinder.
Transport of Li-Ion battery packs:
The shipping of Li-Ion battery packs is subject to laws related to the carriage of hazardous goods (UN 3480 and UN 3481). Inform yourself of the currently valid specifications when shipping Li-Ion battery packs. If necessary, consult your freight forwarder. Certified packaging is available from Metabo.
Only send the battery pack if the housing is intact and no fluid is leaking. Remove the battery pack from the machine for sending. Prevent the contacts from short-circuiting (e.g. by protecting them with adhesive tape).
5. Overview
See page 2.
Note: Illustrations are examples. The parts shown may vary from country to country.
1 Air intake grille
2 Handle
3 Housing
4 Air outlet
5 Connection thread (for gas hose)
6 On/off switch
7 Ignition button
8 Thumbwheel (stepless adjustment of gas supply / heat output)
9 Machine base
10 Bracket for gas hose
11 Gas hose
12 Gas valve button
13 Battery pack release button
14 Capacity indicator button *
15 Capacity and signal indicator *
16 Battery pack *
17 Valve of the gas cylinder *
18 Thread of the gas cylinder *
19 Gas cylinder adapter (if required) *
20 Union nut
21 Pressure regulator
22 Gas leakage protection button
23 Pressure regulator thread
24 Thread of the gas hose
* depending on the model / features
6. Initial Operation
6.1 Connect, change the gas cylinder

Observe safety instructions. See also chapter 3. and 4.

Do not operate without pressure regulator (21).
Required parts
- Not included in the scope of delivery: Commercially available gas cylinder (5 or 11 kg, max. 13 kg). Open-ended spanner. Suitable, approved leak detection spray or foaming agent
- Included:
Pressure regulator (21), gas hose (11), if necessary gas cylinder adapter (19) (for different countries).
Connection (see fig. page 2)
(If in doubt contact a qualified specialist)
-
Screw the thread of the gas hose (11) onto the gas connection thread (5) and tighten using an open-ended spanner (AF 17).
-
Check if the thread (18) of the gas cylinder fits the thread of the pressure regulator (21). If required:
Screw the suitable gas cylinder adapter (19) onto the thread (18) of the gas cylinder (in anticlockwise direction) and tighten using an open-ended spanner (AF 17).
-
Screw the union nut (20) of the pressure regulator onto the thread (18) of the gas cylinder (or the gas cylinder adapter (19)) by hand (in anti-clockwise direction) and tighten by hand. Do not use any tools - the seal can get damaged and the tightness is then no longer guaranteed.
-
Screw the thread (24) of the gas hose onto the pressure regulator thread (23) (in anti-clockwise direction) and tighten using an open-ended spanner (AF 17). While doing so, hold a second open-ended spanner against the spanner flats of the pressure regulator (21) provided for this purpose to prevent the pressure regulator from turning and thus any inadmissible transmission of force.
-
Check all connections for leaks under operating pressure! See chapter 7.1. (leak test)
Replacing the gas cylinder

Be careful when replacing the gas cylinder!
Also observe the safety instructions in
chapters 3. and 4..

Switch off the device, remove the battery pack
and allow the device to cool thoroughly. Fire
hazard!

Leave a new gas cylinder upright for at least 1
hour before replacing it.
Replace the gas cylinder only in a well-ventilated room or outdoors, away from open flames (candles, cigarettes, other devices with open flames).
- Close the valve (17) of the gas cylinder.
- Unscrew the union nut (20) of the pressure regulator (clockwise) and remove the pressure regulator (21) from the gas cylinder.
- Put a protective cap onto the thread (18) of the gas cylinder.
- Connect a new gas cylinder (as described in chapter 6.1).
After connecting the new gas cylinder and before putting it back into operation, it is essential to carry out the leak test: see chapter 7.1.
6.2 Battery pack
Charge the battery pack (16) before use.
Recharge the battery pack if performance diminishes.
Instructions on charging the battery pack can be found in the operating instructions of the Metabo charger.
In case of Li-Ion battery packs with capacity and signal display (15) (equipment-specific):
- Press the button (14); the LEDs indicate the charge (15) level.
- The battery pack is almost empty and must be recharged if one LED is flashing.
Removing and inserting the battery pack

Remove the battery pack when not in use.
Remove: Press the battery pack release button (13) and remove battery pack (16).
To insert: Slide the battery pack (16) in until it engages.
7. Use
7.1 Commissioning

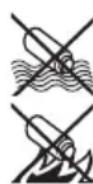
Use and store the gas cylinders only in an upright position.
Note:
- Before use (especially after a long period of inactivity), check the parts supplying gas for blockages caused by insects or similar. Blocked gas pipes can cause a dangerous flashback.
- Inspect the gas hose for damage, cracks or porosity. Check fittings for damage. If necessary, do not continue use and have repairs carried out.
- Do not put the device into operation until you have checked the tightness of the has hose and its connections: see chapter7.1. (leak test).
- If there is a gas leak, close the valve (17) of the gas cylinders immediately and open all windows and doors.
- Position the gas cylinder in such a way that the gas hose is not under tension and does not touch any hot spots on the device.
Leak test
To carry out the leak test, use leak detection spray and spray all screw connections you made while the gas cylinder valve is open and the pressure regulator is connected. If there is a leak, bubbles will form at this point. In this case, close the cylinder valve immediately and retighten the screw connections. Subsequently repeat the leak test. If the leak persists after several attempts, contact a qualified specialist.
Switching on the device
Danger! Danger of burns. When switching on the device, always stand to the side or behind it and never in front of the air outlet (17).
Do not move the device while it is in operation. The gas heater fan becomes hot. Risk of burns. Do not touch, do not cover.
Keep away from open fire. Never try to light the device with a flame.
- Inserting the battery pack (16).
- Open the valve (17) of the gas cylinder.
- Press the gas leakage protection button (22).
- Switch on the fan at the on/off switch (5). Check that the fan is running (behind the air intake grille (1)) and that air is being blown out at the air inlet (4). Let the fan run for at least 30 seconds and then...
- press the gas valve button (12) and keep it pressed. Also press the ignition button (7) (on the other side of the device). If required, press the ignition button (7) several times, while keeping the gas valve button (12) pressed. After the ignition, press and hold the gas valve button (12) for another 10 seconds.
If the device does not stay lit after releasing the gas valve button (12): Let the fan run for at least 1 more minute until all the gas has been blown out before attempting to reignite.
- Set the desired heat output (gas supply) steplessly at the thumbwheel (8).
Note:
- If ignition is difficult or erratic, check the air flow before restarting the device. The fan must be working. The air intake grille (1) and air outlet opening (4) must not be covered.
- Ice (frost) can form on the gas cylinder during prolonged, extreme use. In this case, connect a new or larger gas cylinder to the device.
7.2 Decommissioning
Switching off the device
- Close the valve (17) of the gas cylinder.
- Allow the fan to continue running for at least 2 minutes to cool the device, then press the on/off switch (6) (turn off the fan).
- Remove battery pack (16).
- Unscrew the pressure regulator (21) from the gas cylinder.
ENGLISHen
8. Cleaning

Prior to all cleaning and maintenance work: Close the valve (17) of the gas cylinder, remove the battery pack and let the device cool down.
Wipe the housing with a slightly damp or dry cloth.
Remove the dust with an all-purpose vacuum cleaner.
9. Maintenance

Prior to all cleaning and maintenance work: Close the valve (17) of the gas cylinder, remove the battery pack and let the device cool down.
Check at least once a month and when the gas cylinder is replaced:
- Inspect the gas hose for damage, cracks or porosity. Check fittings for damage. If necessary, do not continue use and have repairs carried out.
- The date of manufacture is printed on the pressure regulator and gas hose. Have them replaced at the latest 10 years after manufacture.
- After longer periods of inactivity, maintenance or servicing work, a functional check of the entire device with a leak test of all gas-supplying connections as well as an electrical safety test in accordance with VDE 0701 must be carried out.

Maintenance work and repairs must be carried out by an approved gas fitter!
10. Troubleshooting
Fan does not run:
- Charge the battery pack.
Gas does not flow:
• Gas cylinder closed - open valve (17)
• Gas cylinder empty - replace
- Keep the gas valve button (12) pressed for longer when switching on.
Flame dies during operation:
- Charge the battery pack.
• Gas cylinder empty - replace - Keep the gas valve button (12) pressed for longer when switching on.
- Protect from wind and draughts.
11. Storage

Observe storage conditions.
- Keep out of the reach of children.
- Store the device in a cool location free from frost.
- The ideal storage temperature is between 5^ C and 30^ C.
- Do not store the gas cylinder indoors, below ground level or in unventilated areas.
- Protect the valve of the gas cylinder with valve protection caps or lock nuts.
- Always store gas cylinders (even when empty) upright.
12. Accessories
Use only original Metabo or CAS (Cordless Alliance System) battery packs and accessories.
Use only accessories that fulfil the requirements and specifications listed in these operating instructions.
A Chargers: SC 30, ASC 55, etc.
B Battery packs:
LiHD: 4.0 Ah 625367000
LiHD: 5.5 Ah 625368000
Li-Ion: 2.0 Ah 625596000
Li-Ion: 4.0 Ah 625591000
Li-Ion: 5.2 Ah 625592000 etc.
For a complete range of accessories, see www.metabo.com or the catalogue.
13. Repairs

Repairs to the device must only be carried out by an approved gas fitter.
Only original Metabo spare parts should be used.
Contact your local Metabo representative if you have Metabo power tools requiring repairs. For addresses see www.metabo.com.
You can download a list of spare parts from www.metabo.com.
14. Environmental Protection
Observe national regulations on environmentally compatible disposal and on the recycling of disused machines, packaging and accessories.
Battery packs may not be disposed of with regular waste. Return faulty or used battery packs to your Metabo dealer!
Do not allow battery packs to come into contact with water!

Only for EU countries: never dispose of power tools in your household waste!
According to European Directive 2012/19/EU
on Waste from Electric and Electronic Equipment and implementation in national law, used power tools must be collected separately and recycled in an environmentally-friendly manner.
Discharge the battery pack in the power tool before disposal. Prevent the contacts from short-circuiting (e.g. by protecting them with adhesive tape).
15. Technical Specifications
Explanatory notes on the specifications on page 3. Subject to change in accordance with technical progress.
U = Voltage of battery pack
G_type = g a s u s e d
P_max = max. nominal heat output
T_max = max. flame temperature
T_PMax= max. heating output
V = a i r v o l u m e f l o w
GC = gas consumption
GC_max=max. gas consumption
Cat = category
p = operating pressure
d = nozzle diameter
m = Weight with smallest battery pack
Permissible gas: butane or propane or propane-butane mixture
= direct current
The technical specifications quoted are subject to tolerances (in compliance with the relevant valid standards).
FRANÇAISfr
Notice originale
Attention, parties chaudes.
B Batteries: LiHD : ....4,0 Ah .... 625367000
Transport van Li-ion-occupacks:
6 Interruptor on/off
LiHD: 4,0 Ah....625367000
LiHD:....5,5 Ah....625368000
Li-jon: 2,0 Ah.625596000
Li-jon: 4,0 Ah.625591000
Li-jon: 5,2 Ah....625592000 osv.
Vårt kompletta tillbehörssortiment hittar du på www.metabo.com eller i katalogen.
13. Reparation

5 Kobling (for gasslange)
6 A v - / p å b r y t e r
7 Tenningsknapp
8 Justeringsratt (trinnløs innstilling av gasstilførselen / varmeeffekten)
9 Apparatfot
10 Holder for gasslange
11 Gasslange
12 Gassventilknapp
LiHD:5.5 Ah625368000
Li-Ion: 2,0 Ah.625596000
Li-Ion: 4,0 Ah.625591000
Li-Ion: 5.2 Ah 625592000
itd.


- Original instructions
- Declaration of Conformity
- For UK only:
- Specified Conditions of Use
- General safety instructions
- Special safety instructions
- ENGLISHen
- Transport of Li-Ion battery packs:
- Overview
- Initial Operation
- Connect, change the gas cylinder
- Required parts
- Connection (see fig. page 2)
- (If in doubt contact a qualified specialist)
- Replacing the gas cylinder
- Battery pack
- Removing and inserting the battery pack
- Use
- Commissioning
- Note:
- Leak test
- Switching on the device
- Decommissioning
- Switching off the device
- Cleaning
- Maintenance
- Troubleshooting
- Fan does not run:
- Gas does not flow:
- Flame dies during operation:
- Storage
- Accessories
- Repairs
- Environmental Protection
- Technical Specifications
- FRANÇAISfr
- Notice originale
- Transport van Li-ion-occupacks:
- Reparation
Brand : METABO
Model : HL 18 BL
Category : Heat gun