IAN 285681 - Fitness Equipment CRIVIT - Free user manual and instructions
Find the device manual for free IAN 285681 CRIVIT in PDF.
| Brand | Crivit |
| Model (IAN reference) | IAN 285681, article number 398292 |
| Product type | Arm and leg exercise device |
| Dimensions (L × W × H) | Approx. 43.5 × 42.6 × 32.3 cm |
| Weight | Approx. 5.0 kg |
| Maximum user weight | 120 kg |
| Power supply | 1 x 1.5 V AAA battery (LR03) included |
| Protection class | III |
| Device class | H/C (domestic use, accuracy C – not suitable for therapeutic training) |
| Main functions | Arm and leg training, adjustable resistance (screw), integrated display |
| Display | Two lines: speed (km/h) on top; functions below (TIME, ODO, RPM, DIST, CAL, SCAN) selectable via button |
| Adjustable resistance | Resistance screw: + to increase, - to decrease |
| Non-slip fixation | Suction cups (smooth surface recommended) |
| Safety | Max weight 120 kg, do not use for therapy, clearance zone of 0.6 m, do not use by children without supervision |
| Maintenance and cleaning | Clean with a damp cloth and mild detergent; do not allow moisture to enter the display; store in a dry place |
| Wear parts | Training band (if more resistance, the article must be replaced) |
| Warranty period | 3 years from date of purchase |
| Customer service | SPEQ GmbH, Tannbachstr. 10, 73635 Steinenberg, Germany; hotline 00800 3077999; email service@speq.de |
| Package contents | Device, 1 small foot, 1 large foot, 2 pedals with straps, 4 screws, 4 washers, 1 hex key, 1 wrench, 1 battery compartment opening mechanism, 1 battery (AAA), instruction manual |
| Manufacturing date | 03/2022 (example) |
Frequently Asked Questions - IAN 285681 CRIVIT
User questions about IAN 285681 CRIVIT
0 question about this device. Answer the ones you know or ask your own.
Ask a new question about this device
Download the instructions for your Fitness Equipment in PDF format for free! Find your manual IAN 285681 - CRIVIT and take your electronic device back in hand. On this page are published all the documents necessary for the use of your device. IAN 285681 by CRIVIT.
USER MANUAL IAN 285681 CRIVIT
| Intended use 22 | |
| Explanation of symbols 22 | |
| Scope of delivery / accessories 23 | |
| Parts description / parts list 23 | |
| Technical information 23 | |
| Safety instructions 24 | |
| Assembly 26 | |
| Assembling the feet and pedals 26 | |
| Adjusting the pedal straps 27 | |
| Operation 27 | |
| Reducing/increasing the resistance 27 | |
| Notes on suction cup attachment 27 | |
| Replacing the battery | 27 |
| Training tips | 28 |
| Application | 28 |
| Leg training | 28 |
| Arm training | 28 |
| Display indication function | 29 |
| Reset values to zero | 29 |
| Troubleshooting | 29 |
| Maintenance / Cleaning / Storage | 29 |
| Notes on disposal | 30 |
| Declaration of conformity | 31 |
| Notes on warranty and service handling | 31 |
Inhaltsverzeichnis
Read the instructions for use carefully
Dear customer!
We are pleased that you have chosen our high-quality products, which are strictly produced and certified according to current valid safety standards.
Familiarise yourself with the product before use. Read the instruction manual and the safety information carefully. Only use this product as described and for the indicated areas of use. Please store this manual safely. Please hand over all the documentation when passing this product to third parties.
Intended use
The product is not intended for commercial use. The product allows you to exercise your arms and legs; equipped with a resistance screw to increase and maintain mobility. An integrated display shows the training progress.
Explanation of symbols
The following symbols and signal words are used in these operating instructions, on the product or on the packaging.

This signal symbol indicates a hazard with a moderate risk level which, if not avoided, may result in death or serious injury.

Declaration of conformity (see "Declaration of conformity" chapter): Productsmarked with this symbol comply with all applicable Community regulations for the European Economic Area.

Observe operating instructions

Protection class III. The display is supplied with low voltage via a battery.

DC voltage
Equipment class H/C:
Class H: The product is intended for use in the home.
Class C: The training data shown in the display corresponds to low accuracy.

Maximum user weight: The product is designed for persons with a maximum body weight of 120kg .

Date of manufacture (month/year)

The "Tested Safety" seal (GS mark) certifies that a tested product meets the requirements of the German Product Safety Act. The GS mark indicates that the safety and health of persons are not endangered when used as intended or in a foreseeable manner.
Scope of delivery / accessories (Fig. A)
Parts description / parts list
1 x arm and leg trainer with resistance screw and display, includes 1 x battery (1,5V LRO3, AAA) [1]
1 x foot, small [2]
1 x foot, large [3]
2 x pedals [4] with straps [5] and easy adjusting system
4 x screw [7]
4 x washer [8]
1 x allen key [9]
1 x spanner [10]
1 x battery compartment opener [11]
1 x instructions for use
Technical information
Model: SP-MB-020
article number: 398292
Dimension: approx. 43,5× 42,6× 32,3cm (L× B× H)
Weight: approx.. 5,0 kg
max.user weight: 120kg
Date of manufacture (month/year): 03/2022
Battery power supply: 1,5V AAA (LRO3)
Equipment class: HC (for use in private households, accuracy C)/ not suitable for therapeutic training; speed-independent training device.
Protection class: III
Safety instructions

Risk of injury!
Carefully read the instructions for use and be sure to keep them in a safe place! You may be injured if the product is handled improperly.
- The product is not suitable for therapeutic purposes.
- Sit relaxed and upright with a straight back during the exercises.
- Note that improper or excessive training may cause damage to health.
- Place the product on a horizontal, level and smooth surface, e.g. tiles, to ensure optimal, secure hold of the suction cups. Avoid delicate surfaces as they may be damaged.
- Check all parts for tight fit and wear before each use. If the product no longer has any pedalling resistance, the drive wheel is worn and the product must be replaced.
- There must be a free area of approx. 0.6 ~m around the training area (Fig. J and K).
- Cleaning and user maintenance must not be carried out by children without supervision.
- The product is designed for one person. Never allow more than one person to train on the product at the same time.
- Always wear appropriate clothing and footwear, such as training shoes, when exercising. Do not wear loose clothing that might get caught or trapped during exercise.
- Do not use the product if it is damaged. Have defective parts replaced and do not use the product until it has been repaired.
- Make sure that nobody can be injured by protruding parts during and after the training session.
- Do not remove any original parts and do not make any improper modifications at this device
- The device must be checked periodically for visible defects.

Danger to life!
- Never leave children unattended with the packaging material. There is a risk of suffocation.
- The product is not a toy! Make sure that people, especially children, do not stand on or pull themselves up on the item. The product may fall over.
Children are not allowed to play with the device. - The product is not designed to bear the full weight.
- This product may be used by children aged 14 and above and by persons with reduced physical, sensory or mental abilities or lack of experience and knowledge if they are supervised and instructed in safe use and understand the resulting hazards.
- Consult your doctor before you start using the product or if you feel unwell.

Risk of injury!
- Do not stand on the product with your full body weight. It must only be used as described in the instructions for use.
- Make sure the item is properly stable before using it!
- Check the product for damage or wear before each use. Replace damaged or worn parts of the item immediately, otherwise the function and safety will be impaired.
- The product must only be used for the intended purpose.
- After use, do not touch the metal parts of the product (especially the pedal arms) as they heat up during use

Battery warnings!
Improper use may lead to explosions or burns from leaking battery acid.
- Remove the batteries from the battery compartment when they are used up or if you will not be using the item for a long time.
-
Do not use different battery types, brands, new and used batteries with each other or with different capacities as they may leak and cause damage.
-
Check the polarity (+ and -) when inserting the battery.
- Replace all batteries at the same time and dispose of old batteries properly.
- Warning! Batteries must not be charged or reactivated by other means, disassembled, thrown into fire or short-circuited.
- Always keep batteries out of the reach of children.
- Do not use rechargeable batteries!
- If necessary, clean the battery and device contacts before inserting the batteries.
- Do not expose batteries to extreme conditions (e.g. radiators or direct sunlight). Otherwise there is an increased risk of leakage.
- Batteries can be life-threatening if swallowed. So keep batteries out of the reach of small children. If a battery has been swallowed, you must seek medical attention immediately.
- Danger! Handle a damaged or leaking battery with extreme care and dispose of it properly immediately. Wear gloves.
- If you come into contact with battery acid, wash the area with soap and water. If battery acid gets into your eye, rinse it out with water and seek medical attention immediately!
- The connection terminals must not be short-circuited.
Assembly
Assembling the feet (Fig. B)
- Remove the packaging material.
- Turn the product over so that the bottom side is facing up.
- Screw the small stand [2] to the product using two screws [7] and washers [8] using the allen key [9].
Note: The small stand must be mounted at the front where the resistance screw [1a] and the display [1b] are located.
- Screw the large stand [3] to the product using two screws and two washers.
Assembling the pedals (Fig. C)
When mounting the pedals, make sure that the right pedal is mounted on the right pedal arm and the left pedal is mounted on the left pedal arm. For orientation, the letter R is marked on the right pedal and the letter L is marked on the left pedal and the left pedal arm.
Note: Turn the pedal arm upwards to make it easier to mount the pedals.
- Place the product on its feet.
- Insert the threaded end into the threaded hole of the pedal arm.
- Hold the respective pedal in the thread of the pedal arm with one hand and use the spanner to tighten the pedals to the pedal arm with the other hand.
Attention! Tighten the right pedal clockwise and the left pedal anticlockwise.
Adjusting the pedal straps (Fig. D)
The pedal straps [5] are pre-assembled. You have the option to adjust the straps in several widths.
- Loosen the twist lock [6] on the pedal end by turning it to the left.
- Adjust the pedal straps [5] by sliding them up or down to obtain the desired width.
- Fix the setting by turning the twist lock [6] to the right.
Operation
Reducing/increasing resistance (Fig. E)
Place the product in front of you and turn the resistance screw [1a] to the right to increase resistance and to the left to decrease resistance.
Note: On the resistance screw there are the signs + and - for adjusting the resistance.
The ^+ represents resistance increase and the - resistance decrease.
Notes on suction cup attachment (Fig. 1)
Choose a smooth surface, such as tiles, that is free of dust and grease. Avoid delicate surfaces as they may be damaged.
Lightly moisten the suction cups before pressing them on. To loosen the suction cups, proceed as follows: Pull up the hooks [1f] on the front suction cups.
Lift the product slightly. Loosen the rear suction cups one after the other by pulling on the hooks [1f].
Replacing the battery
ATTENTION! Observe the following instructions to avoid mechanical and electrical damage. After battery replacement, training data will be lost.

Danger!
A battery is included in the product.
If the battery no longer works, you can replace it.
-
Lift up the top of the display [1b] with the battery compartment opener [11] and carefully remove it (Fig. F). The battery is located on the back of the display
-
Carefully remove the empty battery from the battery receptacle [1c] and replace it with a new battery.
Note: Make sure the positive/negative poles of the battery are the right way round and correctly inserted. The battery must be completely inside the battery receptacle.
Attention! Check that the sensor [1d] is correctly seated in the sensor holder [1e] (Fig. H). If necessary, insert the sensor into the sensor holder.
Insert the lower edge of the display into the article and carefully press the display in (Fig. F).
Note: Make sure that the button is facing downwards when inserting it.
Training tips
- Contact your doctor before using the product.
As soon as you feel unwell during the work-out, stop exercising. - Start training slowly and increase the intensity as needed.
We recommend exercising legs and arms for 30 minutes each per day. - Wear comfortable clothing when using the product. However, make sure that the trouser legs or sleeves are not too wide, as they might get caught in the pedals.
- Do light stretching exercises before each use and start with slow and easy movements. Increase gradually until you reach the desired speed.
Gradually increase the resistance. - Stop the application by reducing the pace.
Application
Place the product in front of you for training. Start with a light workout at low resistance. To do this, loosen the resistance screw. The tighter the resistance screw is turned, the harder the pedals are to turn. Warm up before each workout by doing stretching and warm-up exercises. After each workout you should relax.
Leg training (Fig. J)
- Place the product in front of you on a flat, stable and smooth floor and sit upright on a chair with your back straight in front of the product..
Note: Make sure that the chair is stable and comfortable.
2. Put your feet on the pedals. The pedal strap should run over your foot.
3. Perform movements with your legs as if you would ride a bicycle.
4. You can do the exercise both forwards and backwards.
Arm training (Fig. K)
- Place the product in front of you on a flat, stable and smooth surface (e.g. at the height of a table) and sit upright on a chair with your back straight.
- Place the palm of your hand on the pedals so that the pedal strap runs over your hand.
- Perform movements with your arms as if you would ride a bicycle.
- You can do the exercise both forwards and backwards.
Display indication function
The display comprises two display lines with different modes. The upper line shows you the speed (km / h) and the following functions can be displayed in the lower line by pressing the button:
- TIME: In this mode, the duration of your current workout is displayed in minutes and seconds.
- ODO: In this mode, the overall distance (km) since the battery was inserted is displayed.
- RPM: In this mode, the pedal rotation per minute is displayed.
- DIST: In this mode the distance travelled since beginning of the workout is displayed in kilometres.
CAL: This mode displays your calories burned during the current workout. - SCAN: In this mode, the different display modes are shown alternately.
Note: The calorie consumption is only an approximate guide.
Note: When not in use, the display automatically switches off after approx. four minutes
Reset values to zero
Press and hold the button for approx. four seconds to reset the value to 0.
Troubleshooting
Error
Display does not show any measurements despite pedal movement.
Possible cause
Sensor is not seated correctly in the sensor holder.
Solution
Check that the sensor is correctly seated if the display does not show anything despite pedal movement (Fig. H).
- As with changing the battery, open the display and carefully remove it.
- Carefully insert the sensor into the sensor holder if it is not correctly located in the sensor holder.
- Reassemble the display in the product and make sure that the button of the display is facing downwards.
Maintenance / Cleaning / Storage
Clean the product using a damp cloth and mild detergent.
Attention! Do not allow moisture to penetrate the display.
Store the product in a dry place. Parts subject to wear: If the product no longer has any pedalling resistance, the drive belt is worn. The product must be replaced.
Notes on disposal
Disposing of the packaging
Sort and dispose of the packaging according to type. Put cardboard and boxes with the waste paper, plastic films with the recyclables collection.
Disposing of the product
-
The product must be disposed of through an authorised waste disposal company or a municipal waste disposal facility in accordance with the laws and regulations in force in your country. (Applicable in the European Union and other European states with systems for the separate collection of recyclables).
-
Return the device to a recycling center. The plastic and metal parts used and metal parts can be separated by type and recycled. Ask your local waste disposal company or our service center about this.
-
We will dispose of your defective, returned devices free of charge.
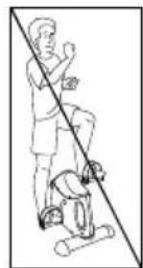
Waste equipment must not be disposed of as household waste!
If the product can no longer be used, every user is required by law to dispose of the device separately from household waste, e.g. at a collection point in their community/borough. This ensures that waste equipment is recycled in a professional manner and that negative environmental impacts are avoided. For this reason, electrical equipment is marked with the symbol shown. We will dispose of your defective, returned devices free of charge. Please contact our Service Center.
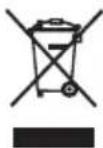
Batteries and rechargeable batteries must not be disposed of as household waste
As a consumer, you are required by law to return all batteries and rechargeable batteries, regardless of whether they contain harmful substances* or not, at a collection point in your local authority / district or in retail to ensure that they can be disposed of in an environmentally friendly way.
Batteries and rechargeable batteries which are not permanently mounted in the device must be removed and disposed of separately before disposal. Turn in batteries and rechargeable batteries at your collection point in a discharged state only! Ask your local waste disposal company or our service center about this.
*marked with: Cd = cadmium, Hg = mercury, Pb = lead
Declaration of conformity
The EU declaration of conformity can be requested from the following address: SPEQ GmbH, Tannbachstraße 10, 73635 Steinenberg/GERMANY
You can find the complete declaration of conformity at www.speq.de/konformitaetserklaerung
Testing institute
TÜV SÜD Product Service GmbH, Ridlerstr. 65, 80339 München, GERMANY
ID: 0123
You can find the complete declaration of conformity at www.speq.de/konformitaetserklaerung
Notes on warranty and service handling
Dear customer,
The product was produced with great care and under continuous quality control. Speq GmbH gives private end customers a three-year guarantee on this product from the date of purchase (guarantee period) in accordance with the following provisions.
Warranty conditions
The warranty period starts from the date of purchase. Please keep the original receipt in a safe place. This is required as proof of purchase. If a material or manufacturing defect occurs within three years from the date of purchase of this product, we will - at our option - repair or replace the product for you free of charge or refund the purchase price. This warranty service requires that within the three-year period, the defective device and the proof of purchase (receipt) are submitted and briefly described in writing what the defect is and when it occurred.
If the defect is covered by our warranty, you will receive the repaired or a new product back. Repair or replacement of the product does not start a new warranty period.
Warranty period and statutory claims for defects
The warranty period is not extended by the warranty. This also applies to replaced and repaired parts. Any damage and defects already present at the time of purchase must be reported immediately after unpacking. Repairs required after the expiration of the warranty period are subject to a charge.
Warranty scope
The device was carefully produced according to strict quality guidelines and conscientiously tested before delivery. Warranty coverage applies to defects in materials or workmanship. This warranty does not cover product parts that are subject to normal wear and tear and can therefore be considered wear parts or for damage to fragile parts, e.g. switches, batteries or that are made of glass.
This warranty is void if the product is damaged, improperly used or maintained. For proper use of the product, all the instructions given in the operating manual must be strictly observed. Uses and actions advised against or warned against in the operating instructions must be avoided at all costs.
The product is intended for private use only and not for commercial use.
Abusive and improper handling, use of force and interventions not carried out by our authorized service branch will void the warranty.
Handling in case of warranty
In order to ensure a quick processing of your request, please follow the following instructions:
- For all inquiries, please have the receipt and item number (IAN 398292_2110) ready as proof of purchase
- Please refer to the type plate on the product, an engraving on the product, the title page of your manual (bottom left) or the sticker on the back or bottom of the product for the article number.
- If functional errors or other defects occur, first contact the service department named below by telephone or e-mail.
If the product is found to be defective, you can send it free of charge to the service address provided by you, enclosing the receipt and stating what the defect is and when it occurred.
On www.lidl-service.com you can download these and many more manuals, product videos and installation software. This QR code will take you directly to the Lidl service page (www.lidl-service.com) and by entering the item number (IAN) 398292_2110 you can open your user manual.

Manufacturer service address:
SPEQ GmbH
Tannbachstr. 10
73635 Steinenberg/Germany
Email: service@speq.de
Service-Hotline: 00800 30 777 999
(toll free)
Please call us before sending the
product
8:00 h - 17:00 h
ARM AND LEG TRAINER
Model: SP-MB-020
Brand: Crivit
Allgemeines
73635 Steinenberg/Germany
Email: service@speq.de
Service-Hotline: 00800 3077999
(kostenfrei)
Chere cliente, cher client!
Chere cliente, cher client,
Pedalen monteren (afb. C)
Beentraining (afb. J)
Armtraining (afb. K)
73635 Steinenberg/Germany
E-mail: service@speq.de
Servicehotline: 00800 3077999
(yes)
73635 Steinenberg/Germany
E-mail: service@speq.de
Linka servisu: 00800 30 777 999
(bezplatne)
Pred odoslanim nas Telefonicky
kontaktujite
8:00-17:00
ROTOPÉD
Model: SP-MB-020
Značka: Crivit
Generalidades
73635 Steinenberg/Germany
73635 Steinenberg/Germany
E-mail: service@speq.de
Teža: priblžno 5,0 kg
73635 Steinenberg/Germany
E-posta: service@speq.de
Otvorena telefonska linija servisa:
0080030777999
(besplatno)
Greutate: cca. 5,0 kg
Knac C:ДаннITE Ha TpeHnpoBkata, NOKa3aHn Ha dncnpe, OTROBaprT Ha HnCKa ToHOCr;

MaKcImaHNo noJe3Ho TerI: PpOdyKTbT e npoeKtnpaH 3a Iuca C MaKcImaHNo TeleecHO terIoo 120 kr.

IataHa npOn3BOdCTBO (Meceu/roDnHa)

ПechаТьТ „пpoВерена 6e3ОпаСоHOC" (Mapкировka GS) уdOcTObеряВа, ч ТECTВан пpoДуКТ OTROВаря НИЗСКВанЯта Н ИмСКУ 3aКOH 3a 6e3ОпаСоHOCТ Ha пpoДуКТиTe. 3HaKBJ GS noka3Ba, ч рпу уnotpe6a по прEDнaЗнaye"Hne ИлNo прEdВиДиM NaUnH 6e3ОпаСоHOCТТа и 3Дравeto Ha хораТа He ca 3acTpapSeHn.
06xbat Ha doctabkata / npHaJneXHOCTN
Yka3aHna 3a 6e3oNaCHOCT

Onachoct ot hapaHyahe!
JIeKo NOBdHrHeTe apTnKyJa. OcBo6OJeTe nocJeDoBaTeJHo 3aHnTe BeHny3n KaTo DbPNaTe 3a KyKaTa (1f).
CmHa Ha 6aTepeyra
BHIMAHNE! Cna3BaIte cIeIHnte IHCtpyKcII, 3a da n36erHete MexaHnUHH n eJIeKTpNueCKn nobpeDN. CJeI cMraHa daHHnte 3a TpeHnpOBkata ce ry6yT.

Onachoct!
B apTnkyla nMa 6aTepeyra.
Ako 6atepna Ta Bue He pa6oTu, MoKeTe da a cMeHnte.
-
Повдиггетогрнатачаснспя [1b] синструмента зотваряну otdeлеленeto 3aбатери [11]иВиимателно ro n3baideTe (ФИR.F+ФИR.G).БаатерятacceHamimaHa3aHata cTpaHa HaДСпя.
-
OTeTaHeTe pa3peHata 6aTePnBnMaTeIHO OT dbpXaHa Ha 6aTePra [1c] nЯ cMeHete C HOba 6aTePn (fur. H).
Yka3aHne: O6bPHeTe BHMaHne Ha pIIOc/MnHyc nOJIocHTe Ha 6aTePnTa Hn npabNtHO tnoCTaBHe. BaTePnTa Tp6Ba Da ce Hamnpa HanbJHo B dApXaHa Ha 6aTePnTa.
BhmuHne! KoHTpOIpaIte, cEH3OpBT (1d) da cTOn npaBnIHo B dbpKauHa ceH3Opa (1e) (fur. H). Pn Heo6xOIMocT BkapaTe cEH3Opa B dbpKauHa ceH3Opa. BkapaTe doHNr p6 Ha dinCpIe B apTKyJa N BHMaTeJIHO HatNCHeTe DnCpIe HaBbTppe (fur. F).
Yka3aHne: YBepeTe ce, ye npi nocTaBHe 6yToHbT COHy HADONY.
Инструкции за Трени.
Cbpxkece cBaunjlekap, npdi da n3noJ3BaTe apTKyJa.
- Beñhara ñom ce noúybcTbaTe 3JIe NO BpeMe Ha TpeHInpOBA, cnpeTe TpeHInpOBAkaTa.
3aOnuHHe Ta TpeHnpaTe 6abHo n yBeJIuHte INHTeH3NBHOCTTa, aKe e Heo6xOdmo.
Hne npenopbUbame,Ha den da TpeHnpaTe camo 30 MmHyTu KpaKa n pBuce.
Hocete ydo6Ho oIeKnO npn n3noJ3BaHe Ha apTKyJa. Ho BnMaBaTe KpaQOnTe nn npkabte Da He ca TBbpDe 1npOKn, Tb' KaTO MORaT Da ce 3aKaayat B neJaNTe.
- PpaBete Iekn ynpaxHeHna 3a pa3TgAhe npedn Bcra k a ynoTpe6a n 3anOHTe c 6abHn Iekn DmXeHna. NocTeenHNO yBeNnUaBaIte, DOkato DoCTnHete JeHaHata CKOpOCT.
- NocTeeHHO yBeJIuYeTe cBnpoTnBHeHneTo.
- 3aBbPwete yNtpe6ata, kato HamaJNTe TEMNOTO.
Ynotpe6a
Ioctabete apTnkya 3a TpeHnpOBka nped ce6e cn. 3anOunHeTe C neKa TpeHnpOBka c Jeko cbnpOTnBneHne. 3a ceNTa pa3BnITE cbnpOTnBtENHn BnHT. KOnkOTO no-CTerHaT e CbnpOTnBtENHnT BnHT, TOnKOBa nO-tpyDnHO e Da ce 3aBbPTrT peJaNte. PpeDi BCraKa TpeHnpOBka 3arpaBaTe, KaTO npabTe ynpaxKHeHna 3a pa3TgAHe n 3arpaBaHe. Cnei BcKa TpeHnpOBka Tp6Ba Da ce OTnyChete.
TpeHnpobka Ha kpaKaTa ( nr J)
- NocTaBeTe apTnKyIa nped c6e cn Ha paBEn, CtaBnJIeH, rnaDbK nOJ n CeDHeTe n3npaBEN Ha cToI nped Hero C n3npaBEn rp6b.
Yka3aHHe: BnMaBaIte, cToJIbT da e cTa6nJIeH n yDo6eH.
- NocTaBete Kpaka cn Ha neJaHa. PnHbT Ha neJaHa Tpr6Ba da ce HAMpa Ha, Baunr KpaK.
- "KapaTe" KoneNo c KpaKaTa.
- Moxete da TpeHnpate KaKTo HAnpe, Taka n Ha3aI.
TpeHnpOBka ha pbcete (pnr. K)
- NocTaBeTe apTnkyIa nped ce6e cn Bbpy paBHa, CTaBnHa n rnaJa NOBbpxHocT (HaNPmEp Ha BnCOuNHa Ha Macata) i CeDHeTe N3PpABeH Ha CToJ C N3PpABeH rp6.
- NocTabete dnaHTa cn Bbpxy neana Taka, Ye pHrt Ha neJaada e HAd pbKaTa BN.
- "KapaiTe" koIeNo c pIeTe.
- Moxe Ta TpeHnpaTe KaKTo HAnpe, Taka N Ha3aI.
Диспел ha noka3aHnraTa
IincpnpeT ce cbctOn OT DBypeoB Incpnei C pa3JnHn peKmN. B rOpHnpeBn ce NOKa3Ba ckopocTta (KM/), a B DoJHnpeD qpe3 HaTnCKaHe Ha 6yToHa Morat da ce NOKaXaT cNeHNTE fYHKUIN:
- TIME: B TO3N peXIM pOdbJxHcTtHa TeKyUaTa BN TpeHnPoBka Ce Noka3Ba BV MInHyTu IN cekyHdN.
- ODO: B To3n peKIM ce noka3Ba o6IoTO pa3CToHne (KM), OTkaKTo e 6nla noCTaBeHa 6aTePnIyTa.
- RPM: B To3n peKIM Bn Ce noka3BaT o6OpOTnTe Ha neJaB MmHyTa.
- DIST: B TO3n peXIM ige BVIndTe n3MnHaTOTO pa3CTOJHne B KINOMetpn OT HaJaIOTo Ha ynpaxHeHneTo.
- CAL: To3n peKIM Bn Ce noka3BaT n3pa3XoDbAHnTe KaJOpHn B TeKyuTa TpeHnpOBka.
-SCAN:BTo3nPexIMCe noka3BaT nocneIOBaTeHNO pa3JIuHnTepexIMHaIucnJe.
Yka3aHne: N3pa3XoDbaHeTo Ha KaIopnE cAmO npNbIINTeJIHa opNeHTnpOBbUHa CTOnHOCT.
Yka3aHHe: Pn Hn3PON3BaHe DnCnIeT aBtOMaTHUHO Ce N3KJIIOvBa CneD OKOJIO YeTIpy MInHyTN.
HynipaneHa cToHocHTte
HaTnckaIte Okono YeTnpn cekyni 6yToHa 3a da doCTnHete Do CToHocT O.
Остразноан ha rpeшka t a
Henn3npaBnOCT
IINcIIeT He NOKa3Ba N3MepBaHe BbIpeKn DBNXeHneTo Ha NeJaJIte.
Bb3MoXHa npnUHa
CeH3OpbT He e nocTaBeH npaBnHOB dIbpxaHa ceH3Opa.
PeweHne
IpoBepTe daHn ceH3OpbTe nocTaBeH npaBnHNO, aKo DnCnJIeT He NOKa3Ba HnIo Bbnpekn DnJxKeHneTo Ha neJaNa (ФИR. H).
- KaKTo npi cMaHaTa Ha 6aTepeTAtOBopeTe nCnIe N BHNMaTeJHo I3BaTeTe.
- BhimateJHO noCTaBeTe ceH3Opa B dbpxkaHa Ha ceH3Opa, aKO ToJ He e nocTaBeH npabINHO B dbpxkaHa cEH3Opa.
- Пocтавete диспеля образно в.apтукуна, кato ce ybernte, ye 6ytohbyнТ ha dincпеля coчниадoly.
73635 Steinenberg/Germany
Email: service@speq.de
Service-Hotline: 00800 30 777 999
(δωρεΔv)
Papakaouε va nponyeitai