HT 500e Kit - Hedge trimmers STIGA - Free user manual and instructions
Find the device manual for free HT 500e Kit STIGA in PDF.

| Product type | Cordless portable hedge trimmer |
| Brand | STIGA |
| Model | HT 500e Kit |
| Power source | Lithium-ion battery (sold separately) |
| Blade length | 500 mm |
| Intended use | Cutting and trimming hedges and bushes (branch diameter ≤15 mm) |
| User type | Homeowners (amateur use) |
| Adjustable rear handle | 3 positions |
| Safety devices | Safety button, safety switch, blade guard |
| Cutting technique | Arc motion, vertical and horizontal cutting |
| Routine maintenance | Clean and lubricate blades after each use, clean the motor |
| Storage | Dry environment, weatherproof, out of reach of children |
| Compatible battery | Specific STIGA batteries (see technical data table) |
| Compatible charger | STIGA fast or standard charger (optional) |
| Optional accessories | Battery carrying bag, battery simulator |
| Warranty | Covers defects in materials and workmanship (excluding normal wear) |
| Country of manufacture | Italy (STIGA brand) |
| Approximate weight | 3.5 kg (with battery) |
Frequently Asked Questions - HT 500e Kit STIGA
User questions about HT 500e Kit STIGA
0 question about this device. Answer the ones you know or ask your own.
Ask a new question about this device
Download the instructions for your Hedge trimmers in PDF format for free! Find your manual HT 500e Kit - STIGA and take your electronic device back in hand. On this page are published all the documents necessary for the use of your device. HT 500e Kit by STIGA.
USER MANUAL HT 500e Kit STIGA
EN Battery powered hedge trimmer OPERATOR'S MANUAL
WARNING: read thoroughly the Instruction booklet before using the machine.
MK IpeHoCeH nOThaCtpyBaH Ha rPMyuHn Ha 6aTeepHn YNATCTBA 3A YNOTPEBA
BHIMAHHE: npouhtajTe ro BHIMATEHNO OBA ynatCTBO nped da ja kOpNCHTe MaunHata.
MANUAL DE INSTRUCTIONI
ATENTIE: inainte de a'utiliza masina, cititi cu atentie manualul de fata.

IopTaHbHbe WnanePbHe HOHHuCbI C 6aTapeHbIM NHTAHnEM
PYKOBODCTBO NO 3KCNJYATAUIN
BHIMAHHE: npenhe qem noIb3ObaTbca 06OpydoBaHHem, BHIMATEbHO npoHTHe 3TO
pykoBODCTBO NO 3HcNllyaatauH.

7.USO DELLA MACCHINA. 7
7. USO DELLA MACCHINA
3) LInuHa 6e3oNaCHOCT
a)БbTe BnHaBn BHMaTeJHn, KOHTpOlnpaIte TOBa,KoETO Ce BbpUH mncIepe pa3ymHO,KORATO H3NO3BaTe eEHTpueckn IHCTpyMeHT.He H3NoJ3BaIte eEHTpueechnIHCTpyMeHT,KORAto CTe yMopeHN IIN NOBb3DeiCTBHeTO Ha HapKOTuN,AnKOxON IIN JekapCTBa. Moment HeBHMaHne,DOkATO CE H3NOJ3Ba eEHTpueckn IHCTpyMeHT,MOKe Da npuHHcepno3HN JInHn HapaHBAHn.
b) N3noI3BaIte npedna3Hn dpexn. ClaraiTe BnHaHn npedna3Hn OuHna. YnoTpe6aTa Ha IInuHn npedna3Hn cpeCTBa KaTO MaCN npOTnb npax,ObyBKn npOTNb NOxlb3BaHe, 3aunTHn KACKN Hn HayuHnCn 3a CnyXa, HAMJIraBa IInuHnte HapaHBAHHa.
c) N36raBauTe CnyaHOTOBKIOUbaHe. 6eTe ce, ye ypeBt e n3HIOueH npE nn da NOCTaBte anymylaTOPHnTE 6aTePnn, da XBaAaTe Hn Da TpaHCnOpTnpaTe eENTpueCnna YpeD. TpaHCnOpTnpaHTo Ha eIeKTPnuCeKn ypeC npbCT Bbpx npE KcbBaayn MOHTnpaHa aKymylaTopHa 6aTePnRc PpeKbCBaay B No3uyn "ON" (BKHJ") yIeChra BA INuJeHTnTe.
d)OTCTpaHete BCNUHN KIOOObe HIN HHCTpymEnTH 3a NaCTPOHka, npEIN da BHLIOUHTe eJeKTPnueckn HNCTpymENT. HIOUHNI INCHPTpMEnT, OCTaBaU B KOHTaKT C BbPTaHa ce YAcT, MoKe Da DOBeDe Do JInHH HapaHbAHn.
e) He ry6eTe paBHOBeCne. 3ana3BaIte BnHaTn noxOaun Onopa n paBHOBeCne. Toba NO3BOJBA da HMaTE PO-TOJAM KOHTPOJ HaN HCTpyMeHtA B HeoayKaBAn CNTyaUn.
f) O6nuaTe ce noxoada. He 6nuaTe HnpoH npexn nn ykpaewen. Dpbhte Ha pa3ctoHne OT dBNHeuTe ce qactn Hocnte cn, dpexnte n pbhAbuNTe. LnpoKn dpexn, ykpaewen nn dbln Koc Mohe da ce onIeTaB DNbHexuTe ce qactn.
g) AHO HMa HHCTpyMeHTn 3a Cbbp3BaHe HbM CNCTeMH 3a N3BInuHaHe N Cb6HpAHe Ha npax, y6eTe Ce, ye ca Cbbp3aHn N 3noJ3BaHH NO NOxOJaHauHH. Ynotpe-6ata Ha Te3N INHCTpyMeHTn MOHe Da HamaHn PnCKOBete, Cbbp3aHn C npaxTa.
h) He no3BOLBAite BaWeTo 3aNo3HaBaHe c MaunHata, DbNnAso Ce Ha YecTaT a N ynoTp6a, da BN HnnpaBN TBbpde yBepenH, 3a Da npene6perHete npnncnnte 3a 6e3oNaChOCT. EAnHO He- 6peXHo DeiCTBne MoKe da npuHHn cepno3HN HapaHbAHn 3a Yaact OT ckyHdata.
4) YnOtpe6a n CbXpaHeHne Ha eJIeHTpUueChnHa HNCTpyMeHT
a) He npetobapbaTe eIeKtpnuechn HNCTpymEn. N3noJ3BaTe NOxOJaun 3a pa6oTata eIeKtpnuechn HNCTpymEn. IOnXoJaun T eIeKtpnuechn INCTpymEn Tce N3BbPUn Ha-Do6pe n Ha-Be3oNaCHO pa6oTaTa,Ha CKOpocTTa,3a KOrTo e npoeKtnpaH.
b) He n3noJ3BaIte eJeHTpueChn HNCTpyMeH, aKo npEbnIOUbaTeJIaT He e B CbCTOAHHe Da rOBnIOUHy HIn Da rO n3HIOuH HopMaIIHO. EJeKTpuCeKn IH-CTpyMeH, KOITo HE MOKe Da 6bDe BKNIOUeH OT npEbnIOUbaTeJIa, e OnaceH n Tpr6Ba Da 6bDe nonpaBeH.
c) MaxHete anMylaTopHaTa 6aTepeHn OTHeHOTOrHe3do, npeHn Da H3BbPWBaTeHaKBaTO Ha e HAcTPOHa nn CmHaHa npHaAdLeXHOCTn, nn npeHn da npnbepeTe eEHTpueChn HcTpyMeH. Te3n npeBaHTNBn MEPKn 3a 6e3oNaCHOCT HaamJraBAT pNcKa OT clyuHaHO 3aDnKBaHe Ha eEHTpueChn HcTpyMeH.
d)ПибираиTe 3a CBxpaHHeNe HEN3NoI3BaHInTe eJIeKTPuYeCHN INHCTpyMeHTn H3BbH O6cera Ha Deca N He NO3BOJBAiTe N3NoI3BaHeTo Ha eJIeKTPnuYeCKn IHNCTpyMeHT OT Xopa, KOnTO He ca 3aNo3HaTHn Cbc Camna INHCTpyMeHT n CTe3n INHCTpyHcHn. EJIeK- TpNueChNTe INHCTpyMeHTn Ca onachN B pBuTe Ha He3aNo3HaTHn NOTpe6nteJI.
e)ΓpHHete ce 3a NOdPbHHata Ha eJIeKTPnueChHte HNCTpyMeHTn. Y6eDete ce, Ye NODBHHHTe qACTn Ca n3paBHeHn CBO6oHN pRn DBNHexHneTO, Ye HMa ChyNeHN qACTn HIN dpyro ycIOBHe, Koe- TO MOHe Da Bb3deNCTBa Ha pa6OTATA Ha eJIeKTPnueChHra HNCTpyMeHT. B cIyauHa NoBpeDN, eJIeKTPnueChHrt HNCTpyMeHT
Tp6Ba Da 6bDe nonpaBeH npeHn3No13-BAHeTo My. MHOrO nHcndENTn ca npedeN3BnKaHN OT loWa nOpdpbJka.
f) PdbphaTe HatoeHn n uactn peheuTe qactn. PoxaTa noapbKa Ha pekeuTe qactn, c dope HatoeHn pe3u, rnpaBn NO-MaIko NpOaTInBn Ha 6loKnpaHe nno-Jecn 3a KOHTpOlnpaHe.
g) N3noJI3BaIte eJEnKTPnueeCKHnT HNCTpyMeHT N CbOTBETHNE npHaJIeHHoCTH CbIaCHO npEoCTaBeHnTe HHCTpyHcUN,HaTO mAte npEbnUycNoBnTa Ha pa6Ota n BnDa Ha 3BbPwBaHaTpa6Ota. N3noJI3BaHeTo Ha eJekTPnueeCKn HNCTpyMeHT 3a Oepaun pa3InuHn OT Te3n PpeBnDeHnTe, MoKe da npEtn3BnKa onacn cnTyauu.
h) PpHn T 6e3 CneiOn MTACNO rpec. Xb3raBnTe dpbHKn/pbKoXBaTHn He N03BOJBAt 6e3onacn pa6Ota n 6e3onacno ynpabLeHne Ha IHCTpyMeHTa B HnpeDbndEHn cHTyaun.
5) H3noJ3BaHe n npedna3HN MepHn 3a H3noJ3BaHe Ha aKymyIaTOPHHTe HHCTpyMeHTN
a)3apeHdaTe cAmO cbc CbOTBETHO 3apAHO yCTPOINCTBO, KOETO e NOCOyeHO OT npOn3BOAnTEJ. 3apAHO yCTPOINCTBO NOxOJaIO 3a daJeHa rpyna akymylaTOpHn 6aTePN, MOHe Da npuHN pNCK OT noXap, aHO ce nI3NoI3Ba 3a dpyri rpyn akymylaTOpHn 6aTePN.
b) N3noI3BaIte eIeHTpHuecHnte ypeIu cMoC NOxOJaU 3a TEx aKymlaTOpHN 6aTePN. N3noI3BaHeTo Ha KaKBato I Da 6nlo dpyra rpyna aKymlaTOpHN 6aTePN, MoHe Da Cb3daDe pNCK OT HapaHraBHH N noJapN.
c) KoraTo rpynata anymyIaTOPHn 6aTePNHe ce H3noJ3Ba, e Heo6xOJIMO da ce CbXpaHra Ba Jaleu OT dpyr MTeJHn NpeDMeTH HaTO MOHEh, KIOUOBe, INPOHN, BnHTOBe H dpyr MaJHn MeTALNHNpeDMeTH, KOHTo MORaT Da Cb3daDAt Bpb3Ha MeHy DBe KJIEMn. Kbco cbeHHeHne Ha KJIemITE Ha aKymyIaTOPHnte 6aTePN MoKe Da npeJIN3BnKa N3rapAHHn IIN IOHKAPN.
d) Aho ce Hamnpa B looCbCTOHne, aHymyIaTOPHaTa 6aTePn MoHe da n3nycKa eIeHTPOInt: n36rBaIte KaKbBTO n Da 6nlo KOHTA. Pn ClyuaeH KOHTAHT, n3nlaKHeTe He3a6abHO C BOda. AHO TeUHOCTTA BLe3e B KOHTA. c OvHTe, NotbpcTe He3a6abHO JekapCha NOMOu. N3TEKJIra OT aHymyIaTOPHaTa 6aTePn eIeKTPOInt, MOKe Da npEdu3Bnka pa3dpa3HeHnN INI IN3rapHHN.
e) He n3noJ3BaIte noBpeDeH nIN MoNΦnUpaH 6JOK OT aKymylaTOpHN 6aTePH, hAKTO N MoNΦnUpaH nIN NOBpeDeH nHCtpymeHT. NOBpeHnte nIN MoNΦnUpaHn aKymylaTOpHN 6aTePH MoRat Da npoRbT HnpeDcKa3yeMo NOBeHHe, C pON3TuAaHTe OT TOBA NoJap, eKcnlo3n IIN PNCK OT HapaHaBaHe.
f) He n3laarte 6loha ot aHymylatopn H 6aTeepn npn haHnue Ha orbH nI npekomephn TemnepaTpyn. n3laaraheTo Ha ObH nIe TemnepaTpyn no-BnCOHn OT 130^ MOKe da npuHH eKcnIO3nn. BEJIeKKA. TemnepaTpyataOT, 130^ MoKe da sbde 3aMeHeHa C TemnepaTpyata OT,265F".
g) CJIeBbAte BCnHn HNcTpKuHN 3a 3apeHdaHe N He 3apeHdaTe aKymyIaTOPHaT aTepeHn H3BbH TempeTaPnH dHaJOn, nOcoyen B INCTpyKcHTE. HenpaBnHTo 3apeHda- He nn 3apeKdAnHe npn TempePaTypn H3BbH nOcoyen TempePaTypeH dHaJaoH MoKe Da NOBpeHn aKymyIaTOPHaT aTepeHn n da yBeIuH pNcKa OT noJap.
6) CepBn3
a) DaBaIte eIeKtpnueckn HNCTpyMeHT 3a nonpaBka cMo Ha KBaJIHΦnUpaH nepcoHaJI, Hato Ce N3NoJ3Bat cMo opRnHaJIH pe3epBHN qACTn. Toba nO3- BOJRABa da ce NOdIbPka 6e3oNaChocTtHa Ha eIeKtpnueckn HNCTpyMeHT.
b) HnHora He nonpaBraTe NOBpeDeHn aKymyIaTOPHN 6aTePHN. IOpdpbHKHaTa Ha aKymyIaTOPHNe 6aTePHN TpRbBa Da ce N3BbPwBA CAMO OT npOn3BOIDHTeJI NIN OTOpN3nPaHn DOCTABuN, KOINTo ppeOCTABRT Ta3N ycLyra.
2.2 ПРавILA 3A БЕЗОПАСНОСТСЕЦИФИЧН 3A TРИМЕР3A JИВ ПЛET
a)ДрьнTe BCnHnЧаСТи Ha TЯЛоTo DaJIeUOT HoHa. He OTcTpaHЯВaIte OTPa3aHnT MaTePnAл NII 3aDpBHTe MaTePnAla 3a P3aHe,Horato HOHOBeTe Ce DBNHaT.HoKOBete npOdbJnHaBaT da ce DnHnat n CneiN3KIOuYBaHe Ha IpeBKnIOyBaTeIa.MoMeHT ha pa3ceiBaHe NO BpeMe Ha N3NoJ3BaHe Ha TpIMepa 3a JHB NNET MOKe Da IpeDn3BnKa TeKHi TELeCHn HapaHbAHn.
b) IpeMeCTe TpHMepa 3a HNB NLet, Hato RO DbPHTe 3a DpbHHata C HENoDBHNHe HOH N BHNMaBATE Da He 3aDeNCTBaTe KOHTO N da e IpeBKNIOuBATEI Ha 3axpaHbaHeto. IpaBnHOTo TpaHCnOpTnpaHcHa TpHMepa 3a HNB NLET HAJaJIbPa PnCKa OT HeIpeHaMepeHo
CTapTnpaHe NIOcJIeDBAuI TeJeCHn HapaHbAHn, npUHHEnH OT HOKOBTe.
c) Horato TpaHcnpTnpate HIn np6npate 3a CbXpaHeHne TpIMepa 3a HIN BnE, BnHar MoHTnpaIte NOKPHTHeTo Ha HOHa. PpaBnHOTo NpeMeCTBaHe Ha TpIMepa 3a HIN BnE THaMaJIraBa PnCKa OT TeJeCHN HapaHraBaHry, DbJIHaUc Ce Ha HOKOBete.
d) Horato OTCpaHbATE 3aceHaI MaTePnA IIN o6cLyHbATE HhCTpyMeHTa, yBepete Ce, ye BCnHN PpeBHLIOyBaTeHN Ca N3HIOueHN, HaKTo N Ye aKymlaTOPHnte 6aTePNi Ca MaxHaTn IIN pa3KaueHN. HeoayKaBaHO 3aDeiCTBaHe Ha TpImepa 3a KIN BIIET NO BpeMe Ha IOuHCTBaHe Ha 3aceHaI MaTePnA IIN NO BpeMe Ha IIOdpbHKa MoKe Da IOBeDe Do CepNo3Hn TeJeCHN HapaHbAHn.
e)Дрьнтгимеразднвплетсамози�лари NOBbpxHOCTHHa pblhoXBathNTe,Тыкото HOHbT MOHe DA BLe3E B KOHTaHT cbc ChpTN Ha6eHN.HoKOBETe,KOHTO BnI3aT B KOHTaTc Ka6eN“NOd HappeKeHne"MOraT da NOCTaBrt“NoD HanpeKeHne"N3IOKeHnte MetaJIH YuACTn Ha Tprimepa 3a HINB NlET nДпpei3BnKaTe eJIeKtpueckn ydap Ha ONEpaTopa.
f)ДрьнтевсуниЗхранвшии Кабели И Кабели далец OT 30ната на рязache.СиюВNTe/ 3axpaHbauNTe КабELI MoRaTдa 6bДaT ChPHTN B Плет ИИxpactN Идa 6bДaT CnyaHNo перЯЗанOT HOжа.
g) He n3noJ3BaIte TpImepa 3a HnB IJIET npn loio BpeMe, ocObeHo aHO hMa ONaCHOCT OT MbJHn. TOBa HamaJIraBa pUCKa OT Nopa3RABaHe OT MbJHn.
h) Np BpeMe Ha pa6oTa, MaunHaTa Tp6Ba BnHar n Da ce DbpHn 3dpaBO c DBe pue.
H3noJ3BaHeTo cAmo Ha eHa pbKa MoKe Da npedn3Bnka 3ary6a Ha ynpabIeHneTo N da npuHHN TeKKn TeteChn HapaHraHH.
B clyaHa cunBaHn Hn HnUeHTNo Bpeme Ha pa6ota, Cnpete He3abHoMOTopa H OTdaJeTe MaHHata, 3a DaHe npedn3BnKate DOnbHnHTeHN UeTN; BCnyaHa HnUeHTn C LnHn YBpeJdAHHN Hn HnUeHTn C TpeT Nua, aHTHBpaIte He3abABHO npoceDypnte 3a 6bp3a MeuHnHCn NOMOu, HONTO Ca Hau-NoXoJHn 3a Cb3daJaTaCe CNTyaucn H Ce O6bPheTe KbM 3dpabHa cLyh6a 3a Heo6xOdmoto leueHne. OtctpanetcTapatelno EBeHTyaJHn OTnaDbu, KOHTOMorat Da HaheCat 5eTn Nnn YBpeJdaHHa Ha Xopa nn HNBOTn, AHO He 6bDat 3a6eJ3aHH.
! PpOdbJIHHTeHOTo 3JIarAHe Ha Bn6paunMoHe DaIOBede Do yBpeHdaHHa N HeBPOBaCHyIapHN pa3cTpoIcTBa (No3HaTH N Kato «CnHdPOM Ha PeHoyd» HIN «6Ja pBka>), Oco6eHO npN cTpaIauNTe OT uHpyHlaTOPHn HApUWeHH. Cmntomnte MoHe da 3acraT
pbuTe, HHTHnTe, npbCTHne n ce npoBBAt Cbc 3ary6a Ha yVBCTBnTEJIHOCTTa, n3TpbnBaHe, Cbp6eH, 60NHa, 3ary6a Ha uBt nn CTpyHTyPhn npomeHn Ha KOHata. Te3n eΦeHTn MOHe da ce ycHnT OT HnCHTe TEMpePATyn Ha OHOHATA cpeDa n/nn OT npEHaJeHO CTnCHaHe Ha dpbHHnTe/pbHOXBaTHnTe. Ppn npoRa Ha CNMITOMHte, Tp6Ba Da ce HamaN Bpemeto Ha yNoTpe6a Ha MaunHata n Da ce NocBBeTBate C Jekap.
2.3 NOAДРьЖKA,ПРИБИРАСЕ 3A CbXPAHEHNE
N3BbPwBaHeTo Ha npaBnHa NOdRpJHHa n np6npaHe 3a cbXpaHeHne, 3ana3Ba 6e3OpacHOCTTa Ha MaunHaTn HHBOTo Ha HeHATA pON3BOIDTeJIHOCT.
- Pn cnipaHe Ha MaunHata 3a NopdpbXka, npOBepKa, np6npaHe 3a cbxpaHenne nn MoNfNupaHe Ha npHaJeKHOCT, n3KIOUeTe MOTopa, n3KIOUeTe MaunHaTa OT eIeKTPnueckata MpeKa n ce yBepTe, ye BCnUKn DnHexu Ce qactn ca HapblHo Cnpen.
Octabete MaunHaTa Da n3CTnHe, ppei Da n3BbPWBate KaKBnTo n Da 6nlo npOBepHn, HactpoHn, KaKTo n ppei Da y npnbepeTe 3a cbxpaHHe. - PoiDJIbPkaIte MaunHaTa rpnKJlnBO n Y CbXpaHraBaIte YnCTa n Ha cyxo MRCTO, HeIOCTbIIHO 3a Deqa.
- HnKora He n3noJ3BaIte MaunHaTa C n3HOceHn nn NOBpeDeHn qactn. NOBpeDeHnTe nn n3HOceHnTe Yactn Tpr6Ba da 6bDat 3aMeHeHn HnKora Da He ce nonpaBt. N3noJ3BaIte CaMO OpiuHaJIHn pe3epBHN qactn
3a da ce HamaJIOn aNacHOCTTa OT noHKap, He OCTaBraIte CbIOBe C OCTaTbYeH MaTePnAIn B NOMEueHENeTO.
HnBoto Ha yM n Bn6paunu, yHa3aHO B HactoIte NHCtpyKunu, npedctablaBa MaKcHmAJHNTe cToHocTn npu yNtpe6a Ha MaunHaTa. POn3BaHeTo Ha pa3zEHTPOBaH eIemEt 3a pR3aHe, npEHaJeHO BnCOHaT a ChOpOCT Ha DbHNHeHne, LNncata Ha NOdPbHHa, BnIaT YCbCTBnTeJHo HA OTdeJIaHETo Ha yM n Bn6paunu. Heo6xOdHMo e, CLeDobaTeJHo, Da ce npedpneMaT npEbaHTNBn MepHn 3a OTCTpaHBAHe Ha Bb3MOXHH uETn, DblHauNi Ce Ha BnCOK yM n Bn6paunu; NorpnKeTe ce 3a NoDPbHHa Ha MaunHaTa, cnaarTe aHTnFOHn, npabete na3n no BpeMe Ha pa6ota.
2.4 ACHMYJIATOPHA BATEPNA/ 3APJHO YCTPOICTBO
BHIMAHNE
CneHnTe npabnla 3a 6e3oNaChocT DonbIbAT npedncaHnraTa 3a 6e3oNaChocT, KOHTO ce CbDbPHaT B CbOTBETHaT KHHKa C NHCtpyKcN 3a 3apAHDoto yCTpoiCTBO.
3a 3apeKdahe Ha akyMylatopHnTe 6aTepeHHn3no3BaIte eHNCTBHeO npenOpbuaHnTeOT npoN3BOdnteJ 3apAHy uCTpoiCTBa. HenoJxoHa 3apAHy oYCTPOiCTBO MoHe da npuHHn eEKeTprueeKn ydAp, npeprBaHe HIn npelNBaHe Ha Kopo3NoHHa akyMylatopHa TeuHOcT.
- I3noI3BaIe cAm oAkyMaIaTOpHn 6aTePnn, cneuaIHO npedBnIeHn 3a Bauny ypeI. I3noI3BaHeTo Ha npyrn akyMaIaTOpHn 6aTePnn MOKe Da npEiN3BnKa HapaHЯBaHe n ONaCHOCT OT NOJap.
CbxpahnBaHTe HEn3NoJ3BaHHTe aKymyIaTOPHN 6aTePN NdJeU OT KnaMepu, MOHeTn, KJIIOOBe, TBO3Den, BNHTOBe NIN dpyrMaJKN MeTaHN NpeDMETn, KOHTo MOrat Da npEdu3BnKAT KbCO CbeDInHeHne Ha KOHTaKTHTe. KbcO CbeDInHeHne MeXdy KOHTaKTHTe MoHe Da DOBeDe Do N3rapAHe NIN NOxApN.
He 3no3BaTe 3apdHOTO yCTPOIcTBO B MeCTa, KbTeTo HMa HAnuHne Ha napn, 3aAnaIMN BeueCTBa HnBpxy IecHO 3anaIMN NOBbpxHOCTn, HAp. XapTn, NlaT n T.H. No BpeMe Ha 3apeKdahe, 3apdHOTo yCTPOIcTBO Ce 3arpaBA mOKe Da npuHHn noXap.
- ПО ВЕМЕ На ТранспорТиране Ha
aKумлалтогнITE 6aTeрп, BНIMаВаNTe
КоHTаKTNTe Дa He ce CBbРжАТ NOMeЖДу Cn
H He ИЗПОЛЗВаNTe MTeJIHH KOHTeNHePn 3a
ТранспорТиранeTo.
2.5 ONA3BAHE HA OHOJIHATA CPEDA
CneBbAte CtpNKTHO MeCTHnTe pa3nope6n 3a HxBpIaHETo Ha ONAKOBKN, N3HOceHN YactN Ia KaBATo I Da e YacT, CINHO 3aMbpcBaUa OKoHaTa CpeDa; Te3N OTNaIbCu He Tpr6Ba Da ce nXbPJIbT B 60kLyka, a Tpr6Ba Da ce Cb6npaT pa3dEJHo N Da Ce npedabat B CneuHaHTe NyHKTObE, KbDeTo Ue Ce NOrpnKaT 3a peuKnIpaHe Ha MaTePnaJIte.
CleBaeCTPHIO MeCTHHe HOpMn 3a HxBpHHeTo Ha OTNaDbuHN MaTePnaHn CJeI p3aHe.
B MOMENTa Ha 13BaXdAHe OYnOTpe6a, He 3axBbPJIaIte MaunHata B OKoHata CpeDa, a ce 06bpHete KbM Cb6npateJeH NyHKT, CbflaCHO DeiCTBaUHTe MeCTH pa3nopeD6N.
He n3XBpIyTe eJekTpuecknTe ypeN 3aEHO C 6ntOBnTe OTnAdbu. CnopeD Ebponeckata DnpEeKtNbA 2012/19/UE 3a OTnAdbuTE OT eJekTpueckn N eJekTPOHn anapatN BIn3aHeTo N B
IeCTBHe B CbOTBeTCTBHe C HaUHOHaJIHOTO 3aKHOdaTeJcTBO, H3xa6eHnTe eJeKTPnuYeCKn anapatn Tp8Ba Da ce Cb6npat pa3dEInHo, 3a Da 6bDaT OOnl3OTBOpEH EKOLOrHuNo CbO6pa3Ho. Ako eJeKTPnueCKnTe ypeDN Ce N3XBbPnT Ha cMeTuNe IIN B 3emTa, BpeHNTE BeueCTBa MOrat Da IOCTnHAT BOOCb6HpauNTe 3EmN nlaCTObe I Da HABn3aT B XpaHnTeJnHata BepnA, YbpeXdaHKn 3dpabeto BN. 3a No-3aNbIbOuEHa INΦOpMaun 3a N3XBbPnHETo HA To3n IpOdyKT, CE CbbpKeTe C KOMnTeHTHaTc Clyk6a 3a N3XBbPnHe Ha bHTOBN OTNaDbuN c PpOdaBauHa MaUnHaTa.
Li-ion
B KpaHa TexHnI NOJIe3EH Hn3HeH cIKbI, n3XbPJeTe aKymlaTopHnTE 6aTeepn KaTO IOxOJNTe C Heo6XoHmOTO BHNMaHne 3a ONa3BaHe Ha OKOIHaTa CpeJa.
AkymylaTophata 6aTepey CbDbpHa
MaTePnJI, KOITo e onaceH 3a Bac n OKoJHaT a CpeJa. Ta TpRbBa Da ce CBaJIu n PpeJaDe OTdEJIHO B npHemaTeJIeN NyKKT, KOITo pHema JNTHeBO-NOHHn akymlaTOPH6aTePnI.

Pa3dJIHOTO c6bnpaHe Ha 3n0JI3BaHn npOdyKTn ONAKOBKn, PO3BOJBApeuKlnpaHe Ha MaTePnaIte N TxAHOTOnOBtOPHO H3NOJ3BaHe. NobTOPOHTo H3NoJ3BaHe Ha peuKlnpaHm MaTePnaIh,
NOMaRa 3a npeDoTbPaTbBaHe Ha Ha 3aMbpcBaHeTo Ha OKoJHaTa CpeDa N HamaJIbBa N3NoJ3BaHeTo Ha CypOBuHn.
3. ONO3HABAHE HA MALUNHATA
3.1 ONICAHNE HA MAUINHATA IN PPEBnDEHA YNOTPEBA
Ta3n MaunHa e rpaDnHcKo 6OpdyBaHe H NO-TOUHO aKMyJlATopeH npeHoCm TpIMep 3a KINB PJIeT.
MaunHaTa Ce CbCTOJ OCHOBHO OT DBNrAteJ, KOITo 3aADBKBba eINH INHCTpyMeHT 3a pR3aHe.
OnepaTopbT MoKe Da 3aDeIeCTBa OCHOBHnTe KOMaHn, KaTo Ce HAMnpa BnHaN Ha 6e3ONaCHO pa3cToHnE OT INHCTpyMeHTa 3a Pra3aHe.
3.1.1 Ппебидауnotpe6a
TaM MaHnHa e npoeKtnpaHa n KOHCTpynpaHa 3a:
- p3aHe n NOpaBnBaHe Ha xpactn H KIN PBET, CbCTOAn CE OT XpactN C MaIK N KOHKn (Hanpeyen pa3pe3 He No-ToJAM OT 15 mm);
- IN3NoJ3BaHe cAmO OT eDnH OePaTOp.
3.1.2 HenoDxa ynoTpe6a
Bcya npyra ynoTpe6a,pa3nHa ot nocoueHnte no-rope,MOKe Da 6bJe onacHa n da npuHH BpeDa Ha xopa nnBeeu. B HenoXoJaTa ynoTpe6a ce BnIOUcbat (kaTO HeN3ePnaTeIeH npImep):
- p3aHe Ha TpeBa N Oco6eHo B 6bn3ocT do 6opdOpn;
pa3dp06raBaHe Ha MaTePnaIIN 3a KOMNOCT;
pe3nt6a; - IN3NoJ3BaHe Ha MaUHHaTa C IHCTpyMeHT 3a pR3aHe HAD LInHnraTa Ha paMeHaTa;
H3no3BaHe Ha MaunHaTa 3a p3aHe Ha MaTePnAIn, KOnto He ca OT paCTHTeIe HpOu3XoD; - I3noJI3BaHeTo Ha nHCTpyMeHTn 3a pIaHaHe, pa3IuHn OT Te3n I3IOKeHtE B Ta6Iua "TexHueckn daHH". OnaCHOCT OT cepNo3Hn paHn HapaHraBaHH;
- IN3NOJ3BaHe Ha MaunHaTa OT NOBuee OT eHN YOBek.
BAHHO HeymecHTo H3NoI3BaHe Ha MaunHaTa BOi IIO OTnJaHe Ha rapaHcyIa NaOTXBpJIaHE Ha KaKbATO N da e OTROBOPHOCT Ha POn3BOJTeJIa, KaTO pa3XoJnte IpOn3Tuayu OT HaHeceHn 8ETn nn HapaHbAHe Ha Camra NOTpe6HTeN Nn Ha TpeTn Nua, ca 3a CMeTHa Ha Notpe6HTeJIa.
3.1.3 Tn noTpne6nteI
Ta3MaunHa e npedHa3HaueHa 3a
H3NoJ3BaHe OT NpTeJI,TOeCT
HenpoecnoHaJIHn OepaTOpN. Ta3MaunHa
e npedHa3HaueHa da ce H3NoJ3Ba KaTo Xo6n.
3.2 3HAUIN 3A BE3OINACHOCT
Ha MaunHaTa ca NoCTaBeHn pa3IuHn CmB0JI (ФИR.2).T8XHaTaФyHKcY e Da HAnOMHr Ha OnepatOpa 3a NOBeDEHnETo, KOETO Tp6Ba Da ce CNeDbA, 3a DaЯ N3NoJ3Ba C Heo6xOdMOTO BHMaHne n PpeJa3JIbOcT.
3haueHHe Ha CnMBOJIte:

BHIMAHHE! ONACHOCT! Ta3n MaunHa, aKo He Ce n3noJ3Ba npaBnJHo, MoKe Da 6bJe onacHa 3a Bac n 3a dpyrnte.

BHIMAHHE! Ppei Da H3noJ3BaTe Ta3n MaunHa, npooyTeTe ynbTbaHeto 3a ynotpe6a.

I3noJ3BaIte 3aunTHn OuHa

Hocete nIbTHn pa6oTHn pKaBnCn N ObyBKn npOTNB NOxNb3BaHe.

He n3laarate MaunHaTa HaDbKd (mHa Bnra)
ONACHOCT OT N3JIHTAUN MATEPNAJN! O6bpeTe BHMaHne Ha eBeHTyaJIHn H3JIHTaHry Ha MaTePnaJN, PpeIN3BnKaHr OT INHCTpyMeNTa 3a p3aHe, KOInTO MORaT da PpUHHrT TeKKn HapAHBaHn Ha Xopa NII NpeDmetn.
ONACHOCT OT N3JNTAUIN MATEPNAI! No BpeMe Ha n3NoJI3BaHe Ha MaunHaTa OTdaJeTe Ha NOHe 15 M. BCNUKxopa IIN DOMaUN JKNBOTHN.
OnachocOT npra3BaHnra! DpbkTe pueTe n KpaKaTa cn daJeU OT HOKOBete.
BAHHO NOBpeHnTE HnneHcTe CTnKePN Tp6Ba Da Ce 3aMeHrT C HOBn. POnckaIte HOBtE CTnKePn OT Baunr OToPn3npanCepBn3eH cHTbp.
3.3 IDEHTNΦHKAUHOHEETHKET HA IPOyKTA
Ha ndeHTnΦnKauHnHa eTnKeT ca nocouehn cIeHNHe daHHn (Φnr.1):
- Маркимровka 3a сьOTВETCTBNE CE
- Име и посяпдгеля
- HnBO Ha 3ByKOba MOUHOCT
- Kod ha cTOKaTa
- BnD MaunHa
- CepneH Homep
7.ФОИнHaHaПОИЗВОДСТВО - HanpeKeHHe Ha 3axpaHbaHe
IpeniWeTe NdeHTnΦKauHOHHte DaHHN
Ha MaunHaTa Ha CbOTBeTHnte MeCTa
Ha eTKeTa, KOITc Ce HAMnpa OT3aD
Ha KopNuTaHa pKOBODTBOTO.
BAHHO N3PON3BaIte NdeHTNΦnKaUHOHHTe DaHHN, KOnTO Ca NOCOeHn Ha NDeHTNΦnKAUHOHHN ETHKeT Ha npOdyKta BCEKNbT, KOraTO Ce CBp3BaTe COTOpN3nPaHa pa60TNHnua.
BAHHO IprnMep Ha deKnapaunra 3a CbOTBETCTBne Ce HAMnpa Ha NocJeHInTe CTpaHnHa pbKOBOCTBOTO.
3.4 OCHOBHN KOMHOHEHTN
MaunHaTa e n3rpaDeHa oT cIeHnTe OCHOBHN KOMNOHEHTN, Ha KOHTO OTROBAPr CJIeHnTaФyHKUHOHaHnOCT (Fir.1):
A.Дигател:праздавдИнжehнeto
На ИНСТурмЕТа 3a рязаHe.
B. HoK (HhctpymeHT 3a pR3aHe): HhctpyMeHT, npedHa3NaueH 3a pR3aHe Ha paCTntTeJIHOCT.
C. Ппеба рьховата: NO3BOJIЯba
управлійе На машинaitа и На Hey
Има ппспаэн ппекьсвay.
D. 3aHa pBHOXBaTHa: N03BOJBA ynpaBHeHn Ha MaunHaTa Hn Ha He Ca pa3NoIOKeHn rIaBHIne KOMaHN 3a ynpaBHeHne.
E. 3aunHa HoHa (H3noJ3Ba Ce npn TpaHCnOpTnpaHe n IpemecTbaHe Ha MaunHaTa): npedna3Ba OT HeBOJH KONTaHTN C NHCtpymeHTa 3a pR3aHe, KOHTO MORaT Da npuHrT TeKKn HapaHbAHH.
F. Akymylatop (npHaJleKHOCTn NO 3aBka, nap.16.1):doCTabRe eJeKtpnuCeKa eHeprHa Ha HNCTpyMeHTa; HerOBNTe XapaKTepnCTnKN I npAbnIata 3a yNoTpeBaTa Ca ONHCANB O TDeJIHO pBkoBOdCTBO.
G.3apAnHO yctpoNCTBO (pHnHaIeHHocTH no 3aRbHa,nap.16.2):ycTPOINCTBO,KoTo ce H3noI3Ba 3a 3apeHdaHe Ha aKymlaTopa; HerOBInTe XapaKTepNCTHNKn I npaBnIaTa 3a ynotpe6aTa ca ONHcAH B OTdeJIHo pBkoBOdCTBO. PpeJlarat Ce Dba MoJeHa Ha 3apAnHO yctpoNCTBO:G1 (6bp3o 3apAnHO yctpoNCTBO); G2 (CTaHdApTHO 3apAnHO yctpoNCTBO).
H. PAnuca 3a NOMEuaBaHe Ha aKymyIaTopa (PnHaJNeXHoCT No nopBvHa.nap.16.3): ycTPOiCTBO, KOeTO nO3BOJRAba pa3NoIarAHeTo Ha aKymyIaTopTe.
I. Cbbp3BaU Ka6eJ: Ka6eJ, KOITOB NIO3BOJRADa CbbpKeTe MaunHaTa KbM aKymJaTopa.
J.CmMyIaTOP Ha aKymIaTOp (npHnAdJeKHOCT no nopbUHa.nap.16.4):ypei, KoITo aKO e BbBeDeH B rHe3dTo Ha MaunHaTa, N03BOLRA NoI3BaHeTo Ha paHnCaTa 3a NOMEuBaHe Ha aKymIaTopa.
4. PA3ONAKOBAHE
BAHHO Hopmnte 3a 6e3oNaCHOCT, KOHTo Tp6Ba Da ce CnA3BaT, Ca ONIcAHN B rI.2. Cna3BaIte CTPNKTHO Te3n Yka3AHN, C qel IpeD0TbPaTBAHe Ha cepno3HN pncOBe nn OnaCHOCTn.
Pa3onahOBaHTo Tp8Ba Da ce N3BbPnBbpy paBHa H 3dpaba NOBbpxHOCT, CDOCTaTbYHO pOcTpAHCTBO 3a DBNHeHHe HaMaunHaTn IpemeCTBaHc Ha ONaHOBHNTe, HATO N3No13BaTe BnHarN IOXoAun HHCTpyMeHTn.
- OTbOpTe ONaKOBkata BHIMaTeJIHO, KaTO BHMAbate Da He 3aRy6nte KOMnOHeHTnte.
2.BnKTe 3a CnpabKa DOkymeHTaunrTa, KOrTo e NOCTabeHa B KyTnra, BKIOuHTeJHO HactoIte HNCTpyKcH.
3.ИЗbaTeMaшинHaTаOTKуТЯТa.
4.YHNUOKeTe KytTnTa NOnaKOBKnTe B CbOTBeTCTBnE C MeCTHnTe pa3nOpEd6n.
5. MOHTNPAHE
5.1 OБОРУДBAHE HA PAHицATA 3A ПOMEИЗABAHE HA AKUMЛATOPA (AKOЕ ПЕДВИDEHO)
PaHncaTa 3a NOMEuBaHa He aKymlaTopa ce DoCTAB Beue CrloBeHa (Hr.1H) mOKe da Ce OTKaUH OT Onopata Ha KOJaHHe (Hr.3) n Da Ce npeHece Ha pbKa.
3aДа OTKaHTe paHncaTa 3a NOMEuBaHa He aKymyIaTopa HATNCHeTe DBaTa RopHb6yToHa (ФИr.3.A).
OTdeneHnraHaakymyIaTopnte ceHamnpat OTDbeteCTpaHnHa paHncaTata (4) Ha dChata cTpHaHa paHncaTa ca pa3noJooHeH:
- Ka6eJen KOHTaKT (ФИr. 5.A)
- ceIeKTop Ha akymylaTopa (fHr. 5.B)
USB rhe3do 3a 3apeKdahe Ha npyru yctpoicTba (HanpIMep MObHNr TelefoHn) (Hr.5.C).
3a da ce n36eHHe BnCnKabE, HMa npoxoN O T DBeTe CtpaHn B 3aHaTa YacT, Ppe3 KOnTo Da ce npekapa 3axpaHbauyrt KaBcI.
6. HOMAHДN 3A YYPABJIENHE
6.1 INPEДПА3EH BYTOH (YCTPOICTBO 3A AHTNIBNPAHE/DEAHTNBINPAHE)

HaTnCKaHKn To3n 6yToH ce aKTHBnpa n DeaKTbHnpa eJeKtpnueckata Bepnra Ha MaunHaTa (Phr. 6.A).

CBeTeU CBeToIIOU: eJeKtpnueckaTa BepuraHa MaunHaTa e aKTHBnPaHa (ΦIr. 6.B).MaunHaTa e roTOBa 3a n3noJ3BaHe. NDbata CBeToIOnOa CBET: MaunHaTa paBOTn.
H3KHeH CBeToDIOH: eJIeKTpuYeCKaTa Bepnra e HAnbIHO DeaKTHBupaHa.
BAHHO IIO BpeMe Ha IpemeCTBaHn, HNKORA He NOCTaBnTe npbCTa BbyxOyToHa, 3a Da ce n36erHa TcIyauHN 3aJeNCTBaHn.

NkoHaT“BnMaHne"(Φn.6.F)CBETBa BcnyaHa Ha aBapna Ha MaunHaTa (BnTe NdeHTnKaHnOHHa TaBeJka 3a Heu3npabHOCTn,nap.15).
6.2 IOCT 3A YIPABJIEHNE HA HOHA (NHCTPYMEHTA 3A PRA3AHE)
I03BOLrBa 3aDenCTBaHe n peYlnpaHe Ha ckopocTtHa HoJa.
3aIeCTBaHETO HA HNCTpyMeHTa 3a p3aHe (ΦnR. 1.B) eBb3MOHHO eINHCTBEHO, aKO eINHOpeMeHHO cTOBa Ce HaTNC HeLoCTa 3a ynpabLeHne Ha HOka (ΦnR.6.C) nIpeDna3Hn IpeKbcBau (ΦnR.6.D).
HCTpyMeHTb3a p3aHe ce cnnpa ABTomatNHO npn OCBO6KdAbaHETo Ha IIOCTa HnHa npednaHn PpeKcbay.
6.3 IOCT 3A DEBLOHINPAHE HA 3ADHATA PbHOXBATHA
IocTa 3a De6loKnpaHe (Fnr.6.E) no3BOJBa perylnpaHe Ha 3aHaTa pbKoXBaTKa (Fnr.1.D) B 3 pa3nHn NOCOHN CnpAIMO HcTpyMeHTa 3a P3aHe, 3a No-yD06Ho N3BbPwBaHe Ha DOBbPwHTeHnTe Oepaunn NO JKNBn PJIET.

PerynnpaHTo Ha pbKoXBaTHata 5ba da ce n3Bbpynn npn deaHTNBpahn qna3e6yToH (n3HIOUyeHa CBETInHa).
7.ИЗПОЛЗВАЕHA MAШИHATA
BAHHO HopmTe 3a 6e3oNaCHOCT, KOHTO Tp6Ba Da ce CnAsBAt, ca onucaHn B rI.2. Cna3BaHTe CTPNKTHo Te3n yka3aHn, C qen npedOTbpaTBAHe Ha cepno3Hn pncOBe nn OnaCHOCTn.
7.1 INPEДВAPNTELHNONEPAUHN
PpeHn 3aNoCbHe Ha pa60Ta Tp86Ba Da ce H3BbPwaT cepn OTo npOBepn H onepaun, 3a Da ce ocNpyn PbIHOeHHaTa N MaKcImaJIHo 6e3OnaCh a pa60Ta.
IocTabeTe MaunHaTa B XOpn3OHTaHNOJIOKHeHn 3paBO CTbNla Ha 3emrTa.
7.1.1 IpoBepHa Ha anMylaTopa
MaunHaTc e doCTab8 6e3 aKymlaTop.
3aKnyTe aKymlaTOp c KaNaCnTeT noxDoxJa3a
pa6oTHnTe HxJn I npNCTbNeTe KbM HeROBOTO
IbJIHO 3apeKdaHe KaTO CLeDbATE yIbTBaHnraTa,
KoNTO Ce CbDbpKaT BKNKKaTc INHCTpyKn.
CncsblbT Ha xOMoIorHpAnHe aKymlaTOpn 3a Ta3n
MaunHa e daen B Ta6nCiata "Texnueckn DaHHn".
- PpeHn BcRHO n3noJ3BaHe: - npOBepTe CbCToHneTo Ha 3apeKdaHe Ha aKyMylatopa KaTO cIeDbate yTBAHnTa, KOHTO Ce CbDbpKaT B KHHKaTa C INCTpyKuIN Ha aKyMylatopa.
7.1.2 Perylinahe Ha pbHOXBaTHaTa
H3BbpoTe perylnpaHTo npn deaHTNBpAn HpeDna3eH 6yTOH (N3KIOUeHa CBETNIHa).
1.ДрьнhteHa3aД loCTa 3a De6IoKnapaHа 3aDHata pBkoXBaTHa (ФИr.7.A);
2. 3anoyheTe da Bbptnte 3aHaTa pboKoXBaTka (Φn.r.7.B);
3. OTnycheTe loCTa 3a ynpabIeHne Ha ychOpntela (Fnr.7.A);
4.3aBbTpTepebKoXBaTHKaTa,DOKaTO UpaKHe B JKeJaHaTa N03nUy.
BAHHO IpeuIa n3noJI3BaTe MaunHaTa ce y6eTe, ye loCTa 3a de6IoKnpaHe ce e BbPhaI N3qIIO B No3nUyTA 3a 6IoKnpaHe n, ye 3aJHaTpaBkoXbaTKa e Cta6nHa.
IbBxBaHa Tpa 6ba Da 6bde BnHarn BeTnHaHa, He3aBnCHMo OT N03nraTa, KOTo e 3aen HnCTpyMeHTa 3a P3aHe.
7.1.3 Ynotpe6a Ha paHncaTa (ako e npedBndeHa)
- NocTaBete aKymlyaTopa B eHNO OT rHe3dTaHa paHnUcTa 3a NOMeUbaHe Ha aKymlyaTopa (ФИг.4) KaTo ro HaTnCHeTe DOkpaI,doKaTo yCeTHe "UpaKBaHe", KOeTO rO 3aHJIbUBA B NOLOJKeHne I OCHrpyBa eJeKTpNueCKn KONTaKT;
- CbbpKHe Ka6eHa ha paHuaTa B CbOTBeTHnRA KOHTaKT (ФИ.5.A) n 3aBbPTeTe DOKaTo yCetNte "UpaKaBaHe", KOEtO 3aKJIIOvBA B NOLOKeHne n OcInrpyBa eJekTpnuCeKn KOHTaKT;
- peRyInpaTe peMbIeN 3aTbOpTe npedHO KOJIaHnTe (ФИг.8).
7.2 IPOBEPHN 3A BE3ONACHOCT
H3BbPse CneHNTE npOBepKn 3a 6e3oNacHOCT N npOBepTe DaII pe3yIITaNTte OTROBAPrT Ha NOCOeHOTo B TabNIuHTe.
Ipeu da H3no3BaTe MaunHaTa, 13BbpuBaIte BnHar npOBepHn 3a 6e3onacHOCT.
7.2.1 O6ua npoBepka
BnHa n cnnpaTe MaunHaTa:
-No BpeMe Ha npemecTbHnM MeKdy pa3nUHnTe pa6OTHN 30Hn.
No Bpeme Ha npemecTBaHH, HNKora He nocTabra Te npbcta Bbpxy npedna3Hn6yTOH, 3a da ce n36erHat cnuyaAHN 3aedeCTBaHH.
7.6 CJEД YNOTPEBA
7.6.1 CnE ynoTpe6a c anymyIaTopa
CbaIeTaeAkyMylaTopoOTHe3dTo My INpncTbIneTe KbM HeROBOTO npesapeKdahe (nap.8.2.2).
- PnCnpH HNCTpyMeHT 3a p3aHe, NOCTaBeTe 3aunTata Ha HOka (ΦnR.1.E).
Octabete Dniratela da ce oxladn, npeNi da npnbepete MaunHaTa 3a cbxpaHeHne B HraKBO NOMEueHne.
- N3BbPseTe nouchTbaHe (nap. 8.3).
- PpOBepeTe DaJIH HMa pa3Xla6eHn nnnoBpeDeHn KOMNoHEHTn. AKe e Heo6xoJIMO, CMeHeTe NOBpeDeHnte KOMNoHEHTn 3aTeHHeTe eBeHTyaJIHn pa3Xla6eHn BInTObe N BoIToBe nnCe CbbpKeTe COTOpN3npaH cepBn3eh YeHTbp.
7.6.2 Cnei ynoTpe6a cbc cnMymaTOp Ha aKymyIaTOp (aKe e npeBnDHe)
- NocTabete celenkTopa Ha paHncaTa 3a NOMeuaBaHe Ha aKymlaTopa Ha"OFF"(Φnr.5.B);
- CbaneTe CmMyaTopa Ha aKymyIaTopa Ha MaunHaTa (ΦnR. 13.J);
- cBaJIeTe paHnIcaTa 3a NOMEuIaBaHe Ha aKymyIaTopa;
4.ИЗнлioуTe CBbp3BaUng Ka6eI OT CImylaTopa Ha aKymlyaTopa (Фиг.13.I) n ot paHnUcaTа (Фиг.5.A) - cBaJIeTe aKymyIaTOPa OT paHnIaTa (ФИг.14)и ce nOprnIXeTe 3a HerOBoTo 3apeKdAnHe (nap.8.2.2);
- octaBeTe DnraTeIa Ce OxlaI, npeI Da npnbepeTe MaunHata 3a CbXpaHeHne B HRAKBO NOMEueHne;
- n3BbPwTe noChCTBaHe (nap. 8.3);
8.Провереталн_HЯma pa3xla6eHIN IINIOBpeHNI KOMNHOHTN.AKO e Heo6xoIMO, CMeHETe IOBpeHNTe KOMNOHEHTN 3aTeHETe EBEHTaJIHn pa3Xla6eHNI BINTOBe N60TObE INIc Ce CBpJKeTe C OToPn3npaH cepBn3eH ueHTbp.
BAHHO Cbajte BnHa n akymylaTopa (nap.8.2.2) montnpaTe 3aunTaHa HOka, BCEK NbT, KOrato MaunHaTa He Ce H3no3Ba nnCe ocTabr 6e3 Ha6liOdeHne.
8. OБИKHOBEHA NOДДРьЖHA
8.1 INHΦOPMALU OTOBUXAPAKTEP
BAHHO HopmTe 3a 6e3oNaCHOCT, KOHTO Tp6Ba Da ce CnAsBAt, ca onncAHn B rI. 2. Cna3BaIte CTPNKTHO Te3N yka3aHn, c zeI npedOTbpaTBAHe Ha cepNo3Hn pncOBe nIOnaCHOCTn.
Ipei Da 3anoyhe TaHbTo H da bHa npabota no nOdpbHKHata:
Cnpete MaunHaTa;
CBAIeTe anMyIaTopo ot rHe3dOTO My nPnCTbIeTe HbM HerOBOTO npEapEnDahe (nap. 8.2.2);
- PpH cnPAn HNCTpymEn3a pR3aHe, NOCTaBete 3aunTata Ha HoHa (CnHJIoueHne Ha ClyuHante Ha Hameca No camna HOH);
OCTaBeTe ABnraTeIa Ce OxlaDu, npEdu Pa npnbepete MaunHata 3a cbxpanenHe B HnHaHBO NomeeHne;
Hocete noxdoxqo 6JeHno,pa60TH npKaBnN npedna3HN OuHa;
- Ppoyetete cbotbETHNE Hhctpykun.
- YecToTata N Bnda Ha HameCnTe ca 06o6uHb B "Ta6nua Ha onepaunTe no nOdpbXkata" (Bk. rI. 14). Ta6nuaTa nMa 3a ue Da Bn nomorHe npN oNDbpKaHTo Ha pa6oTOcNOcO6HocCTTa H6e3OnaChOCCTHa BaWata MaunHa. B He ca NOCOueHN OCHOBHInTe HameCN nepNoDnUHocCTTa, ppeBnDeHa 3a BCsKa OT TxA. N3BbPwete CbOTBeTHOTO DeICTBne npN IIpbBOTo N3TNuAHe Ha CKoka.
-ИЗПОЛЗВАНЕТоHa HeOpINHINAHINpe3ePBNH 占CTи ИпунадлжнocTи MОж分解 Има OТрцATEJIHO Bb3dEINCTBnE Bbpxy pa6OTATA NбEZIOnaNCHOCTTa Ha MaUnHATA. ПюзВODиTEЛТ He NOEMA HnKaHBA OTROBOPHOCTВ CcIyauH Na NOBpeDAИH HapAnHЯBaHe, ПпчИнEHи OT Te3N ПpoDуKTHN.
-OpnHnHaJIHnTepe3epBnuaCTnCeIOCTaBrtOTCEpBn3nOToPn3npaHnDnIbpn.
BAHHO Bcnn noepaun no
noIpbkKaTnpeyJnpaHTo, KOnTO He ca OINsCaHn B TOBa pKOBoDCTBO, TpRbA Ja Ce N3BbPWBAT OT Baunr dNcTpN6TyOpn nnn OT CneuHaN3npanh cepBu3eH cHTbp.
8.2 AKMYJATOP
8.2.1 ABTOHOMHa pa60Ta Ha akymylaTopa
ABTOHOMHaTa pa60Ta Ha aKymyIaTopa (n CJIeIOBaTeJIHO pACTHTeJIHaTaNOBbpxHOCT, KOrTo MOKe Da ce 6ObapOTn, PpeN Ippe3apeKdaHeTo Ha aKymyIaTopa) Ce obycnaBra OCHOBHO OT:
a.ФakTopnHa OKoJHaTa CpeDa, KOnTO DoBExKaTdo 3pa3XoDbAHe Ha NO-ToJMo KOInueCTBO eHepTnI:
-p3aHTo/NopaBnBaHeTo Ha MHOro PJIbTHN NIN BJaKHN XpactN;
-paactn Tbbpde rolem KIOHn;
b. NOBEHeHHe Ha OepaTopa, KoETo Tp6Ba Da N36rBa:
- YecTo BkIIOUBaHe N N3KJIIOUBaHe NO BPeme Ha pa6Ota;
-прILAганеHa HeNoDxOДЯТaTEXHnKaHa pR3aHc cPpMo pa6OtaTa, KOrToTpr6Ba Da ce N3Bbpyu (nap. 7.4.1);
-CKOPoCT Ha npemecTbaHe npn p3aHe, HENODXODIua 3a CbCTOHHeTO, B KOeToCeHAMnpa xpacta 3a p3aHe.
3a onTnMn3npaHe Ha aBTOHOMHaTa pa60Ta Ha akymyIaTopa e Heo6xOJIMO BnHa:
Ja pekeTe xpacta, KOrato e cyx;
-Да HabtpoIte ChOPOCT Ha DBNKeHne npn
РЯЗАн, ПОДХОДЯanza 3a CBCTOHRHNeTO,
В КОЕТо CE HAMIPA xpaCTa;
- Da ce N3NoJ3Ba NOxOJa TExHnKa 3a pa6oTaT, KOrTO TpR6Ba Da ce N3BbPwBa.
Ako ce xeJae da ce n3noJ3Ba MaunHaTa 3a noDbIg NepNoHn Ha pa6Ota CnprMo No3BOJeHTo 3a CTaHdapTeH akymlaTOp, e Bb3MOxHO:
Ja Ce 3aKynB TOpn CTaHdapTeH aKymlaTOp 3a He3a6abHa CmHa Ha N3TOUeHnA kymlaTOp,6e3 TOBa Da KOMnpoMeTnpa npOdbJHKITHeHOCCTTa Ha H3NOJ3BaHe;
-Да ce 3aKупн aKуMуЛaTOp, KoITo nO3BOLЯBa NO-ПрOBtБИнTeЛHa aВTOHOMHa pa6Ota cnpЯMo CTaHdapTHnA aKуMуЛaTOp (nap.16.1).
8.2.2 CBaJIaHe nIpe3apeJdaHe Ha aHymylaTopa
- Hatnchete 6yToHa 3a 3aKnIouBaHe Ha MCTOTO Ha aKymlaTopa Bbpxy MaunHata (ФИг. 13.A) nIn Bbpxy paHncaTa (ФИr. 14. A) (ako e npedndeHo);
- cBaIeTe aKymyIaTopo oT MaunHaTa (ΦnR. 13.B) nII O T paHuaTa 3a NOMEuBaHe Ha aKymyIaTopo (ΦnR. 14.B) (aKe e npedBvnden);
- NOCTaBeTe aHymylaTopa (ΦnR. 15.A) B HceroBOTO rHe3do Ha 3apArdHOyCTpoiCtBO (ΦnR. 15.B);
- CbþkTe 3apndHOTo yctpOncTBO (ΦnR. 15.B) KbM eIeKtpnueckn KOHTaKT C HanpeKeHne, CbOTBeTCTBaUc O YKa3aHOTo Ha Ta6EKNaTa;
- npntbneTe KbM PbHOTo 3apeKdaHe KaTO CLeBbATE yHa3aHnHTa, CbDbPkaUc Ce B KHnHkHaTa C INHCTpyKuHN Ha aKymyIaTOPa/3apAHDHTO yCTPOIcTBO.
3A6ELEKKA AnymyIaTopbTe e ChabdeH C npedna3nTeJ, KOHTOBb3npenrTCTBa 3apeHdaHTo, aHOOKHaTa Tempepatypa He e MeHdy O n +45°C.
3A6EJIEXHKA AkyMylaTopbT MoHe da
Ce npe3apeKda BbB BCEKN MOpENT, daKe qactnH0, 6e3 pncOT nobpea.
8.2.3 MoNTIpaHe Ha aKymylaTopa Ha MaunHaTa
CneKaTo 3aBbPm 3apeKdHaHeTo:
- cBaIeTe aKymyIaTopa oT rHe3IoTO Ha 3aprAnHOTo yCTpOncTBo (ΦnR. 16.A) (N36BraHKn Da Ro DbPKeHte NoD 3apeKdAHe Dblro BpeMe CneI npe3apeKdAHe);
- pa3kaueTe 3apAnHTo ycTpoNCTBO (ΦnR. 16.B) ot eIekTpnuecKaTa MpeKa;
- NOCTaBeTe aKymyIaTopa B rHe3dOTo My, NOCTaBeHo Ha MaunHaTa (ΦnR. 10.A) nHnB eDHO OT rHe3dA-Ta Ha paHnCaTa 3a nOMEuBaHa He Ha aKymyIaTopa (ΦnR. 4) (aKo e npEdbuDeHo)
- HATINCHETe Do IbHO aHymyIaTOPa DOKaTO yCETnTe "UpaKBaHe", KOEtO 3aHIIOuBa B NIOJOKeHne H OCNrpyraBa eJIeKTpNueCKN KOHTaKT.
8.3 NOUHCTBAHE HA MAUNHATA HHA DBNIGATEJI
3a da ce HamaJn pNcKa OT NOpJap, NOnCTBaIte MaunHaTa NOCO6eHO DBNrATeJI,OT OCTaTbU O T INCtA, KIOHNI INI PpeKaJIeHO MACNo.
-Почистваite ВИнаг Машинасе ДИЗПОЛ3ВаHE KaTO ИЗПОЛ3ВaTe YIcTа Кьрп, HablaжHeHa B HeyTpaleH NOuNTBaU npenapaT.
- OTePAnHbAte BcKaKbCa CneJa OT Bnra, KaTo cn Nocnyknte C MeKa n cyxa KbPna. BnaraTa MOKe Da npedn3BnKa pncKOBe OT TokOBu ydapn.
He n3noJ3BaIte arpeCnBn NOUcTbau npenapatn nn pa3TbOpnte 3a NOUcTbaHe Ha IJaCTMaCOBNTe YAcTH Nnn pBkoXBaTKnte.
He n3noJI3BaITe Ctpyn B0da n N36gBaIte da MOKpIte DBnraTeJn EneKTPnuecknte YacTH.
3a da ce n36erHn nperepahe n noBpeKdahe Ha DBNratae nn aKyMaIaTopa, npOBepraBaTe BnHaTn DaJIn acnnpaOnHHnte peWetKn Ha OxJaDaun Bb3dyx ca qHCTN n CBO6OHN OT OTNaNbU.
8.4 NOYHCTBAHE N CMA3BAHE HA INHCTPYMEHTA 3A PR3AHE
CleB Bcra Ka pa6oTHa cecn e Heo6xoHmO Da NoCTHe Hox, 3a Da ce yBeInuH HeRObata eKacHOCT N KIn3Hen UKbI:
He nnaTe HNCTpyMeHa 3a p3aHe,doHTo He ce CBaHn aKymyNaTopa N HHCTpyMeHTbT 3a p3aHe He e HanbHNO HenoDbHHe.
- NocTabete MaunHaTa B XOpn3OHTaHONIOJXeHHeN 3paBO CTbHJa Ha 3emTa.
- NocntTe HOka CbC cyXa Kbpna H3no3BaTe YeTKa, B clyau Ha yCTOuHBO 3aMbpcBaHe.
CmaKeTe HOKOBeTe KaTo HaHeceTe Iek CNoI CneuHNO MacNo,3a npEiNoHTaHe He3AmbpcBaUo, NO DblnHaTa Ha TropnHa HoKa.
9.1.3 CMHa Ha MacNoTo
HokhtnKora He Tp6Ba Da Ce nonpaBra, a e Heo6xOJMo Da ce 3aMeHN BeHara 6bJe 3a6eJ3aHO HauaNo Ha CuynBaHe nnCe HAdBnHrpaHncaTa 3a HatoBaHe. IopnHHn Cbbp3aHn C 6e30NaChocTt, e Heo6xOJMo 3amHaTda ce N3BbPwBa B CneuaJIHnpanu cHTbp.
Ha ta3n MaunHa e npdeBnDHea ynoTpe6aTa Ha pe3u C KOd, yka3aH B Ta6nUcaTa TexHneckn daHH.
ImaKn IpeBnD eBOJIOUyTA Ha npOdyHTa,
TINHpAHnTe B Ta6JIuata "TexHnueckn
DaHHNHOHXOBe MoTa Da 6bDaT 3aMeHEN B
TeYeHne Ha BpEmTo C DpyrC, C aHaJIoTHuHN
XapaKTepNCTHKn 3a B3aHMO3aMeHReMocT
N 6e3OnaCHOCT Ha fYHKUHOHpaHe.
10. ПИБИРАЕ 3A СьХРАЕнUE
BAHHO IpaBnIaTa 3a 6e3oNaCHOCT, KOHTO TpIbBa Da ce Cna3BaT NO BpeMe Ha ONEpaUNTe 3a np6bpaHe 3a CbXpaHbAhe, ca ONcAHn B nap.2.4.Cna3BaYte cTpNTHO
Te3n yka3aHn, C zel npedOTbpaTbaHe Ha cepno3HN pncOBe nn OnaCHOCTN.
10.1 ПИБИРАЕ HA MAШИHATA 3A CBXPAHEHNE
Korato MaunHaTa Tp86Ba Da ce npn6epe 3a cbxpaHeneH:
- cBaJIeTe aKymIaTOpa OT rHe3dTo My I nPnCTbIeTe KbM HrOBoTO npEzapeKdahe (nap. 8.2.2);
2.Писпян ИСТРУМЕNTа рязаHe, NOCTaBeTe 3aUHTaTHa HOHa; - octaBeTe DnraTeIa Ce OxlaI, npEIN Da npnbepeTe MaunHaTa 3a CbXpaHeHne B HkaKBO NOMEueHHe;
- n3BbPwTe NouchTbaHe (nap. 8.3);
- Поберете далн Нама pa3хлбен Ип Повретен KOMПОЕНТ. Ак e Heo6xOДМо, Смени ТОВретен Te KOMПОЕНТи 3aTeHETe eBEHTyaJIHn pa3XЛбен BINTOBe n 60ЛTOBE Ип CE CBpKte C OToPn3IpaH cepBn3eH ueHTbp;
- PnibepeTe MaunHaTa 3a cbxpaHHeN:
-BCyXO NOMEUeHNe;
-3aunTeHaOT He6laaropnAHTNAtMOCOepHN ABJehNIA;
- Ha MRCTO, HeIOCTbIHO 3a Deua,
-KaTO CE yBepnTe,Ye CTE CBaJIINN KIIOHT NII INHCTpyMeHTNTe N3NOJ3BaHN 3a NOIDpBxKKaTa.
10.2 INPENPAHE HA ANMUYATOPA 3A CbXPAHEHNE
AkymylaTopa Tp6Ba Da ce CbXpaHbHa Ha cnHka,Ha XnaHIO N Cpea 6e3 Bnara.
3A6EJENKBA B cnyaHa npoDbIHHTeHNO
HEn3No13BaHe, 3apeKdaIte aKymyIaTopa Ha BCEKN Dba Mececa, 3a Da yDbIJIHTe HEROBnT Hn3HEN Lkbl.
11. INPEMECTBAHE I TPAHCIOPTHPAHE
BceKn nblT, KOraTo Tpr6Ba Da npMeCtBaTe nnI TaHcNopTpNaTe MaunHaTa, e Heo6XoDIMO:
-cnpeteMaunHaTanap.7.5);
- CbaneTe aKyMyJatopa OT rHe3doTo My nPncTbneTe KbM HeROBOTO npe3apeHdahe (nap. 8.2.2);
-Пи Спян ИНСТРМЕNT 3a ряза He, NOCTABeTe 3aцИтАТа Hа HOЖа;
-Hocete3dpabnpa60THnpbKaBnui;
- XbaaTe MaunHaTa eINHCTBeHO 3a
ДрьЖКНe И HAcOуTe ypeJa 3a ряЗанБ
ПОСОKa OБpaTHa Ha npДВИЖBaHeto.
Korato Ce TpaHcnpTnpa MaunHaTa C TpaHCnoptHO cpeCTBO e Heo6xOdmo:
-
npn TpaHcnpTnpahe o6e30naceTe NO NOxOJaH NaHn Hato N3NoJ3BaTe BbKeTa nnBepn;
-
MaHnHaTa Da Ce N03NIOHnpa TaKa, Ye Da He PpeDCTaBnBa ONaCHOCT 3a HNKOrO.
12. TEXHnueCHO OBCJyJBBAHE NNONPABKN
ToBa pKOBODCTBO npEoCTaB BcNk yNbTBaHn, Heo6XoDmM 3a ynpabLeHHeTo Ha MaunHaTa
H 3a N3BbPwBaHe Ha npabInHa OCHOBHa
NoDPbKHaOT NoTpe6nteHa. BcNk Oepaun
no peryIipaneto n noDpBxKaTa, KOtO He
ca ONncAHn B ToBa pKOBODCTBO, Tpa6Ba Da
6bDat n3BbPwBaHn npi BaWn Dnctpn6byTop
nIN B CneuAin3napn ceHTbp 3a o6ClyKBaHe,
KOHT pa3noJa r c Heo6XoDmnte P03HaHn I
HNCTpyMeHTn 3a npabNJHOTo n3BbPwBaHe Ha
pa6oTaT, KaTO Ce 3ana3n CTeneHt Ha 6e3OnaCHOCT
n PbBOHaJALHTo CbCTOJHHe Ha MaunHaTa.
Onepaun, n3BbPseHn OT HeKOMnTeHTHn
JIua nn FnpMn BOdT DO OTnaDaHe Ha
BCaKaBA rapaHn IN BCaKaBO 3aDbJKeHne
IIIN OTROBOPHOCT Ha Ppon3BODInTeJ.
- Camo OToPn3npaHn pa60TnJIHHnI 3a TexHnuecko 06CnyKbaHe MOrat Da I3BbPwBaT NonpaBkn N NodpBkKa, KOrato MaunHaTa e B rapaHcna.
- OToPn3npaHnTe pa60TnHnCHTe 3a TeXnuecko 06cnyKBaHe n3NoJ3BaT eINHCTBEHO opnHaJIHn pe3epBn Yactn. OpnHaJIHnTe pe3epBn Yactn I npHaJdIeKHOCTn Ca cneuaHno pa3pa6OteHn 3a MaunHnTe.
He ce oOobpRaHa3noI3BaHTo Ha HeOpnHaJIHn pe3epBHN qactn H npHaJNeKHOCTn; n3noI3BaHTo Ha HeOpnHaJIHn pe3epBHN qactn H npHaJNeKHOCTn KOMIpomEtnpa 6e3oNaCHOCTTa Ha MaunHaTa n OCBO60KdAba POn3BOIDTeJIrOT BCKaKBO 3aDbJIkeHne N OTROBOPHOCT. - Ipenopbya Ce da 3aKapate MaunHaTa BeHbK B roHNatha B OToPn3npaHa pa6OtnHnua 3a TexNuecko 06CnyKBaHe, 3a N3BpWbaHe Ha NoDpBka, TexNuecko 06CnyKBaHe n npOBepKa Ha npEJa3Hnte yCTPOINCTBa.
13. ΓΑΡΑΗζΟΗΝΟΚΡΥΤΗ
IapauHnraTnOKpnaBbCnHnDeeKTHHaMaTePnAIn, KaKTo IN pOn3BODCTBeHn DeeKTH. POn3BaTeJIr Tp6Ba Da CIEaBA BHIMateJIHO BCnHn PpeOCTaBeHn IHCTpyuN B pINIOKeHaTa DOkymeHTaJy.
IapanuTa He nokpnaBv BpeN/teTn DJIkaun Ce Ha:
- HENo3HaBaHe Ha npiDpyjKaBaAaTa DaKymeHTaun;
HeBHHMaHHe; - HenpaBnJIHO n3NoJ3BaHe mMOHTaK nn HecBOJCTBeHO n3NoJ3BaHe;
- INIJI3BaHe Ha HeOpHnHaJIHn pe3epBHN acTn;
- ⅠЗползване на пинадлжноctи, кОТо He ca дoctabeHN nIи TAKINBa, KОТо He ca oOobpeHи OT pOn3BODNTeJI.
Ocbe ToBa, rapaHunra Ta He nokpmba:
HopMaHHTO H3xa6BaHe Ha KOHCymTbN KaTO KOJIeNa, HOKObE, PpeIa3Hn 6oITOBe N Ka6eN;
HopmaJIHOTO N3HOCBaHe.
14. TÁBJNIZA HA ONEPAÇNITE ПО ПОДРьЖКATA
16.2 3APДHО YCTPOICTBO 3A AKHUMYJIATOPA
YcTpoIcTBO, KOeTO ce n3n0J3Ba 3a 3apeKdahe Ha aKymyIaTopa: 6bp30 (ΦnR. 18.A), cTaHdapTHo (ΦnR. 18.B).
16.3 PAHUNA 3A NOMEUBAHAHE HA AKUMYJATOPA
UcTpoIcTBO, KOeTO NO3BOJRABa NOMeUaBaHeTo Ha Da bAkyMylaTopa n DoCTaBn eJeKTPnueckn ToK, Heo6xOdIm 3a pa60TaHa Ha MaunHaTa. DocTabr Ce c Ka6eJa 3a Cbbp3BaHc KbM MaunHaTa (Φnr.1.I) n CbC ceJeKTop (Φnr.5.B), KOHTo BN N03BOJRABa Da n36epeTe eINH OT Dbata akyMylaTopa (no3nqy "1" n "2") n "OFF".
16.4 CHMUYATOP HA AKYMUYATOP
Ypei, KOITo aKO e BbBeDenB rHe3dOTO Ha MaunHaTa, N03BOJRA bNl3BaHTo Ha paHncaTa 3a nOmeuBaHe Ha aKymlaTopa.
SADRžAJ
- OPCE INFORMACIJE 1
- SIGURNOSNI PROPISI 2
- UPOZNAVANE MASINE 4
3.1 Opis masine i predvidena upotreba.. 4
3.2 Sigurnosne oznake.. 5
3.3 Identifikacijska najlepnicaproizvoda 5
3.4 Glavni dijelovi 5
- SKIDANJE AMBALAZE 6
- MONTAZA 6
5.1 NAMJESTANJE RUKSAK AKUMULATORA (ako postoji) 6
- UPRAVLJACKE KOMANDE 6
6.1 Sigurnosno dugme (uključivanje/isključivanje) 6
6.2 Poluga za komandu sjeciva (rezne glave) .... 7
6.3 Poluga za deblokadu zadnjeg rukohvata .... 7
- UPOTREBA MASINE
7.1 Pripretne radnje.. 7
7.2 Sigurnosne kontrrole 7
7.3 Pokretanje 8
7.4 Rad 8
7.5 Zaustavljanje 9
7.6 Nakon upotrebe.. 9
- REDOVNO ODRZAVANJE 9
8.1 Opée informacièe 9
8.2 Akumulator 10
8.3 Ciscenje masine i motora 10
8.4 Ciscenje i podmazivanje rezne glave 11
8.5 Matice i vijci za fiksiranje 11
- IZVANREDNO ODRZAVANJE 11
7.4 PRACOVNI CINNOST
These Maschine woke me up. "I'm sorry, I don't know what to do," he said.
6. XEIPIΣTHPIA EΛΕΓXOY
6.1 MNOYTON AΦAΛEIAZ (ΣYΣTHMA ENEPΓΟΙHΣHΣ / ANENEPRONOIHΣHΣ)

Auro to o evepyoioi kai anevepyoioi to nKtpiKo Kkawu taunxavnauotc (Eik.6.A).

- GENERAL INFORMATION 1
2.SAFETY REGULATIONS. 2
3.ABOUT THE MACHINE 4
3.1 Machine description and intended use 4
3.2 Safety signs.. 5
3.3 Product identification label 5
3.4 Main components.. 5
4.UNPACKING. 6
5. ASSEMBLY 6
5.1 FITTING OF THE BATTERY BACKPACK (if available). 6
6.CONTROLS. 6
6.1 Safety button (activation/deactivation) 6
6.2 Blade control lever (cutting means) 6
6.3 Rear handgrip release lever 6
- USING THE MACHINE 7
7.1 Preliminary operations 7
7.2 Safety checks.. 7
7.3 Start-up 8
7.4 Operation 8
7.5 Stop 9
7.6 After use 9
- ROUTINE MAINTENANCE 9
8.1 General Information 9
8.2 Battery 10
8.3 Cleaning the machine and the engine 10
8.4 Cleaning and lubrication of the cutting means 11
8.5 Nuts and bolts 11
- OCCASIONAL MAINTENANCE 11
9.1 Cutting means occasional maintenance..... 11 - STORAGE 1
10.1 Storing 11
10.2 Storing the battery 12 - HANDLING AND TRANSPORT 12
- ASSISTANCE AND REPAIRS 12
- WARRANTY COVERAGE 12
- MAINTENANCE TABLE 13
- TROUBLESHOOTING 13
16 ACCESSORIES ON REQUEST 15
16.1 Alternative batteries.. 15
16.2 Battery charger.. 15
16.3 Battery backpack 15
16.4 Battery simulator 15
1. GENERAL INFORMATION
1.1 HOW TO READ THIS MANUAL
Some of the paragraphs in this manual contain particularly important information in terms of safety and operation, and are highlighted differently, according to the following criteria:
NOTE or IMPORTANT These give details or further information on what has been previously indicated and aim to prevent damage to the machine or cause other damage.
The symbol highlights danger. Failure to observe the warning can lead to possible personal and/or third party injury and/or damage.
The paragraphs highlighted in a dotted grey square indicate optional characteristics not available on all models documented in this manual. Check if the characteristics are available on this model.
Whenever reference is made to a position on the machine "front", "back", "left" or "right" hand side, this refers to the operator's working position.
1.2 REFERENCES
1.2.1 Figures
The figures in these instructions for use are numbered 1, 2, 3, etc.
Components shown in the figures are marked A, B, C, etc.
Reference to component C in figure
2 is indicated with the wording: "See fig. 2.C" or simply "(Fig. 2.C)".
The figures are provided by way of example. The actual pieces can differ from those illustrated in this document.
1.2.2 Titles
The manual is arranged in chapters and paragraphs. The title of paragraph '2.1 Training' is a sub-title of "2. Safety regulations". References to titles or paragraphs are marked with the abbreviation chap. or par. and the relevant number. Example: "chap. 2" or "para. 2.1.
2. SAFETY REGULATIONS
2.1 GENERAL SAFETY WARNINGS
Read all safety warnings, instructions, illustrations and specifications. provided with this power tool. Failure lo follow all instructions listed below may result in electric shock, fire and/or serious injury.
Save all warnings and instructions for future reference.
The term "power tool" in the warnings refers to your mains-opera/eel (cordecl) power tool or battery-operated (cordless) power tool.
1) Work area safety
a) Keep the work area clean and well lit. Cluttered and dark areas invite accidents.
b) Do not operate power tools in explosive atmospheres, such as in the presence of flammable liquids, gases or dust.
Power tools create sparks which may ignite the dust or fumes.
c) Keep children and bystanders away while operating a power tool. Distractions can cause you to lose control.
2) Electrical safety
a) Power tool plugs must match the outlet. Never modify the plug in any way. Do not use any adapter plugs with earthed (grounded) power tools. Unmodified plugs and matching outlets will reduce risk of electric shock.
b) Avoid body contact with earthed or grounded surfaces, such as pipes, radiators, ranges and refrigerators.
There is an increased risk of electric shock if your body is earthed or grounded.
c) Do not expose power tools to rain or wet conditions. Water entering a power tool will increase the risk of electric shock.
d) Do not abuse the cord. Never use the cord for carrying, pulling or unplugging the power tool. Keep cord away from heat, oil, sharp edges or moving parts. Damaged or entangled cords increase the risk of electric shock.
e) When operating a power tool outdoors, use an extension cord suitable for outdoor use. Use of a cord suitable for outdoor use reduces the risk of electric shock.
f) If operating a power tool in a damp location is unavoidable, use a residual current device (RCD) protected supply.
Use of an RCD reduces the risk of electric shock.
3) Personal safety
a) Stay alert, watch what you are doing and use common sense when operating a power tool. Do not use a power tool while you are tired or under the influence of drugs, alcohol or medication. A moment of inattention while operating power tools may result in serious personal injury.
b) Use personal protective equipment. Always wear eye protection. Protective equipment such as a dust mask, non-skid safety shoes, hard hat or hearing protection used for appropriate conditions will reduce personal injuries.
c) Prevent unintentional starting. Ensure the switch is in the off-position before connecting to power source and/or battery pack, picking up or carrying the tool. Carrying power tools with your finger on the switch or energising power tools that have the switch on invites accidents.
d) Remove any adjusting key or wrench before turning the power tool on. A wrench or a key left attached to a rotating part of the power tool may result in personal injury.
e) Do not overreach. Keep proper footing and balance at all times. This enables better control of the power tool in unexpected situations.
f) Dress properly. Do not wear loose clothing or jewellery. Keep your hair and clothing away from moving parts. Loose clothes, jewellery or long hair can be caught in moving parts.
g)If devices are provided for the connection of dust extraction and collection facilities, ensure these are connected and properly used. Use of dust collection can reduce dust-related hazards.
h) Do not let familiarity gained from frequent use of tools allow you to become complacent and ignore tool safety principles. A careless action can cause severe injury within a fraction of a second.
4) Power tool use and care
a) Do not force the power tool. Use the correct power tool for your application. The correct power tool will do the job better and safer at the rate for which it was designed.
b) Do not use the power tool if the switch does not turn it on and off. Any power tool
that cannot be controlled with the switch is dangerous and must be repaired.
c) Disconnect the plug from the power source and/or remove the battery pack, if detachable, from the power tool before making any adjustments, changing accessories, or storing power tools. Such preventive safety measures reduce the risk of starting the power tool accidentally.
d) Store idle power tools out of the reach of children and do not allow persons unfamiliar with the power tool or these instructions to operate the power tool. Power tools are dangerous in the hands of untrained users.
e) Maintain power tools and accessories. Check for misalignment or binding of moving parts, breakage of parts and any other condition that may affect the power tool's operation. If damaged, have the power tool repaired before use. Many accidents are caused by poorly maintained power tools.
f) Keep cutting tools sharp and clean. Properly maintained cutting tools with sharp cutting edges are less likely to bind and are easier to control.
g) Use the power tool, accessories and tool bits etc. in accordance with these instructions, taking into account the working conditions and the work to be performed. Use of the power tool for operations different from those intended could result in a hazardous situation.
h) Keep handles and grasping surfaces dry, clean and free from oil and grease. Slippery handles and grasping surfaces do not allow for safe handling and control of the tool in unexpected situations.
5) Battery tool use and care
a) Recharge only with the charger specified by the manufacturer. A charger that is suitable for one type of battery pack may create a risk of fire when used with another battery pack.
b) Use power tools only with specifically designated battery packs. Use of any other battery packs may create a risk of injury and fire.
c) When battery pack is not in use, keep it away from other metal objects, like paper clips, coins, keys, nails, screws or other small metal objects, that can make a connection from one terminal to another. Shorting the battery terminals together may cause burns or a fire.
d)Under abusive conditions, liquid may be ejected from the battery: avoid
contact. If contact accidentally occurs, flush with water. If liquid contacts eyes, additionally seek medical help. Liquid ejected from the battery may cause irritation or burns.
e) Do not use a battery pack or tool that is damaged or modified. Damaged or modified batteries may exhibit unpredictable behaviour resulting in fire, explosion or risk of injury.
f) Do not expose a battery pack or tool to fire or excessive temperature. Exposure to fire or temperature above 130^ may cause explosion. NOTE The temperature 130^ can be replaced by the temperature 265^ .
g)Follow all charging instructions and do not charge the battery pack or tool outside the temperature range specified in the instructions. Charging improperly or at temperatures outside the specified range may damage the battery and increase the risk of fire.
6) Service
a) Have your power tool serviced by a qualified repair person using only identical replacement parts. This will ensure that the safety of the power tool is maintained.
b) Never service damaged battery packs. Service of battery packs should only be performed by the manufacturer or authorized service providers.
2.2 SPECIFIC SAFETY REGULATIONS FOR HEDGE TRIMMERS
a) Keep all parts of the body away from the blade. Do not remove cut material or hold material to be cut when blades are moving.
Blades continue to move after the switch is turned off. A moment of inattention while operating the hedge trimmer may result in serious personal injury.
b) Carry the hedge trimmer by the handle with the blade stopped and taking care not to operate any power switch. Proper carrying of the hedge trimmer will decrease the risk of inadvertent starting and resultant personal injury from the blades.
c) When transporting or storing the hedge trimmer, always fit the blade cover. Proper handling of the hedge trimmer will decrease the risk of personal injury from the blades.
d) When clearing jammed material or servicing the unit, make sure all power switches are off and the battery pack is removed or disconnected. Unexpected actuation of the hedge trimmer while clearing
jammed material or servicing may result in serious personal injury.
e) Hold the hedge trimmer by insulated gripping surfaces only, because the blade may contact hidden wiring or its own cord.
Blades contacting a "live" wire may make exposed metal parts of the hedge trimmer "live" and could give the operator an electric shock.
f) Keep all power cords and cables away from cutting area. Power cords or cables may be hidden in hedges or brushes and can be accidentally cut by the blade.
g) Do not use the hedge trimmer in bad weather conditions, especially when there is a risk of lightning. This decreases the risk of being struck by lightning.
h) During work operations, always hold the machine firmly with both hands. Operating it with only one hand can cause loss of control and serious personal injury.
If something breaks or an accident occurs during work, turn off the motor immediately and move the machine away to prevent further damage; if an accident occurs with injuries or third parties are injured, carry out the first aid measures most suitable for the situation immediately and contact the medical authorities for any necessary health care. Carefully remove any debris which could cause damage or injury to persons or animals if ignored.
Prolonged exposure to vibrations can cause injuries and neurovascular disorders (also called "Raynaud's syndrome" or "white finger"), especially to people suffering from circulation disorders. The symptoms can regard the hands, wrists and fingers and are shown through loss of sensitivity, torpor, itching, pain and discolouring of or structural changes to the skin. These effects can be worsened by low ambient temperatures and/or by gripping the hand grips excessively tightly. If the symptoms occur, the length of time the machine is used must be reduced and a doctor consulted.
Ensure regular maintenance and correct storage to maintain machine safety and high performance levels.
- When the machine is stopped for servicing, inspection, or storage, or to change an accessory, shut off the power source, disconnect the machine from the supply and
make sure that all moving parts are come to a complete stop.
- Allow the machine to cool beforehand making any inspections, adjustments, and before storing.
- Maintain the machine with care and keep it clean in a dry place out of the reach of children.
- Never use the machine with worn or damaged parts. Faulty or worn-out parts must always be replaced and never repaired. Use original replacement parts only.
- To reduce fire risks, do not leave containers with debris inside a room.
The noise and vibration levels shown in these instructions are the maximum levels for use of the machine. Suitable preventive measures must be adopted to eliminate possible harm caused by high noise levels and vibration-induced stresses; utilise the machine at constant speed, firmly hold the handgrip with adequate strength, utilise the machine at the minimum speed required to perform the work, wear ear-protection devices, make frequent and adequate pauses during the work.
2.4 BATTERY/BATTERY CHARGER
ATTENTION
The following safety rules complement the safety rules contained in the battery charger manual.
- Only use battery chargers recommended by the manufacturer to recharge batteries. An inadequate battery charger may cause electric shock, overheating or corrosive liquid to leak from the battery.
- Use only batteries specifically designed for your power tool. The use of other batteries may cause injuries and fire risks.
- Keep all unused batteries at a distance from paper clips, coins, keys, nails, screws or other small metal objects as contact with the same can cause short circuits. Short circuits between battery contacts can lead to explosion or fires.
- Never use the battery charger in environments in the presence of vapours, flammable substances or on easily flammable surfaces such as paper, fabric, etc. The battery charger heats up during recharging and may cause a fire.
- When transporting batteries, make sure the contacts never come into contact with each other and never use metal containers to transport them.
2.5 ENVIRONMENTAL PROTECTION
- Scrupulously comply with local regulations for the disposal of packaging, deteriorated parts or any elements with a strong environmental impact; this waste must not be disposed of with regular waste, but must be separated and taken to collection centres, which will recycle the materials.
- Scrupulously comply with local regulations for the disposal of waste materials
- When the machine is withdrawn from service, do not dispose of it in the environment, but take it to a waste disposal facility in accordance with the local regulations in force.

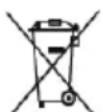
Do not throw electrical equipment away with domestic waste. According to the European Directive 2012/19/EU on electrical and electronic equipment waste and its implementation, according
to UK Regulation "The waste electrical and electronic equipment regulations 2013 (as amended)" and according to national regulations, old electrical equipment must be collected separately, for eco-compatible recycling. If electrical equipment is disposed of in landfills or in the ground, hazardous substances can leak into the groundwater and contaminate the food chain, damaging your health and well-being. For further information on the disposal of this product, contact your dealer or a domestic waste collection service.
Li-ion
At the end of their working life, dispose of batteries paying due attention to the environment. Batteries contain material classified as hazardous for you and the environment. They must be removed and
disposed of separately at a facility that accepts lithium-ion batteries.

Separate waste collection of the products and packaging used allows the materials to be recycled and reused. Reuse of recycled materials help to prevent
environmental pollution and reduces the need for raw materials.
3. ABOUT THE MACHINE
3.1 MACHINE DESCRIPTION AND INTENDED USE
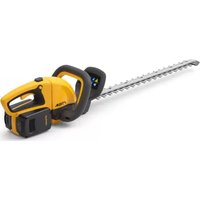
This machine is a garden tool and more precisely a battery-powered portable hedge trimmer.
The machine is essentially composed of a motor which drives a cutting means.
The operator can operate the machine and use the main controls, always keeping a safe distance from the cutting means.
3.1.1 Intended use
This machine was designed and manufactured for:
- the cutting and trimming of bushes and hedges consisting of shrubs with smaller sized branches (no wider than 15mm );
- being used by one operator.
3.1.2 Improper use
Any other use that does not comply with the above, can be dangerous and cause damage to people and/or property. Examples of improper use may include, but are not limited to:
- cutting grass in general and in particular close to kerbs;
- shredding of materials for composting;
pruning; - using the machine with the cutting means above the operator's shoulder level;
- use of the machine for cutting non-plant material;
- using cutting means other than those found in the "Technical Data" table. Risk of serious injury and injuries;
- using of the machine by more than one person.
IMPORTANT Improper use of the
machine will void the warranty and relieves the Manufacturer of any liability, placing all responsibility for damage or injury, to him/ herself or third parties, on the user.
3.1.3 Type of users
This machine is intended for use by consumers, i.e. non-professional operators. It is intended for "hobby-related activities".
3.2 SAFETY SIGNS
The machine has various symbols on it (fig. 2). Their function is to remind the operator of the correct conduct for use, with due care and caution.
Meanings of the symbols:

WARNING! DANGER! The failure to use this machine correctly can be hazardous for oneself and others.

WARNING! Read the owner's manual before using the machine.

Use goggles protection.

Use thick non-slip protective gloves.

Do not leave the machine in the rain (or in damp conditions)
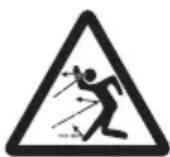
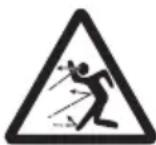
PROJECTION HAZARD! Be careful of flying debris projected by the cutting means, that can cause serious injuries to persons or damage to things.
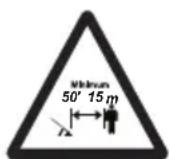
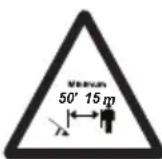
PROJECTION HAZARD! Keep any people or pets at least 15 m away when using the machine.

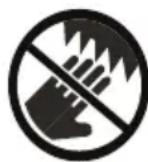
Danger of cutting yourself!
Keep hands and feet away from the blades.
IMPORTANT Any damaged or illegible decals must be replaced. Order replacement decals from an Authorised Service Centre.
3.3 PRODUCT IDENTIFICATION LABEL
The product identification label provides the following data (fig. 1):
- Conformity marking
- Name and address of Manufacturer
- Sound power level
- Article code
-
Type of machine
-
Serial number
- Year of manufacture
- Supply voltage
Write the identification data of the machine in the specific space on the label on the back of the cover page.
IMPORTANT Quote the information on the product identification label whenever you contact an Authorised Service Centre.
IMPORTANT An example of the Declaration of Conformity is provided on the last pages of this manual.
3.4 MAIN COMPONENTS
The machine is composed of a series of main components that have the following functions (Fig.1):
A. Engine: supplies the drive power to the cutting means.
B. Blade (cutting means): the element designed to cut the vegetation.
C. Front hand grip: used to handle the machine and equipped with the safety switch.
D. Rear hand grip: used to handle the machine and equipped with the main control buttons.
E. Blade protection (for machine transport and handling): protects against accidental contact with the cutting means that can cause serious injuries.
F. Battery (attachment on request, par. 16.1): device that supplies electric current to the tool; its specifications and regulations for use are described in a specific manual.
G. Battery charger (attachment on request, par. 16.2): device used to recharge the battery; its specifications and regulations for use are described in a specific manual. Two battery charger models are available: G1 (fast battery charge); G2 (standard battery charge);
H. Battery backpack (attachment on request, par. 16.3): device in which the batteries are placed.
I. Connection cable: cable used to connect the machine to the battery backpack.
J. Battery simulator (attachment on request, par. 16.4): device that, if inserted in the machine housing, allows the use of the battery backpack.
4. UNPACKING
IMPORTANT The safety regulations to follow are described in chap. 2. Strictly
comply with these instructions to avoid serious risks or hazards.
Unpacking should be done on a flat and stable surface, with enough space for machine handling and its packaging, always making use of suitable equipment.
- Carefully open the packaging, paying attention not to lose components.
- Consult the documentation in the box, including these instructions.
- Remove the machine from the box.
- Dispose of the box and packaging in compliance with local regulations.
5. ASSEMBLY
5.1 FITTING OF THE BATTERY BACKPACK (IF AVAILABLE)
The battery backpack is delivered already assembled (Fig. 1.H) and can be released from the strap support (Fig. 3) and carried by hand.
To release the battery backpack, press on the two upper buttons (Fig. 3.A).
The battery compartments are located on both sides of the backpack (Fig. 4)
The following can be found on the right side of the backpack:
- cable socket (Fig. 5.A)
- battery selector (Fig. 5.B)
- one USB port for charging other devices (e.g. mobile phones) (Fig. 5.C).
To avoid any loose cables, there are grooves on both sides and at the rear, in which the power cable can be inserted.
6. CONTROLS
6.1 SAFETY BUTTON (ACTIVATION / DEACTIVATION)

Press this button to activate and deactivate the machine's electrical circuit (Fig. 6.A).

One LED lit: the machine's electrical circuit is activated (Fig. 6.B). The machine is ready for use. Both LEDs lit: the machine is working.
LEDs off: The electrical circuit is completely deactivated.
IMPORTANT Do not keep your finger on the button when moving the machine to avoid accidentally enabling the machine.
The "Warning" icon (Fig. 6.F) comes ON in the event of machine fault (refer to the troubleshooting table, par. 15).

6.2 BLADE CONTROL LEVER (CUTTING MEANS)
Used to start and regulate the blade speed.
It is only possible to activate the cutting means (Fig. 1.B) when both the blade control lever (Fig. 6.C) and the safety switch (Fig. 6.D) are pressed simultaneously.
The cutting means stops automatically when the lever or safety switch are released.
6.3 REAR HANDGRIP RELEASE LEVER
The release lever (Fig. 6.E) is used to adjust the rear hand grip (Fig. 1.D) to 3 different positions in relation to the cutting means to make trimming your hedges easier.

The handgrip must only be tested when the safety button is deactivated (light off).
7. USING THE MACHINE
IMPORTANT The safety regulations to follow are described in chap. 2. Strictly comply with these instructions to avoid serious risks or hazards.
7.1 PRELIMINARY OPERATIONS
Before starting to work, it is necessary to carry out several checks and operations to ensure you can work efficiently and in maximum safety.
Place the machine in a stable horizontal position on the ground.
7.1.1 Checking the battery
The machine is supplied without the battery. Purchase the battery with the capacity that most suits your operational requirements and fully charge it according to the instructions in the battery booklet. The list of approved batteries for this machine can be found in the "Technical Data" table.
-
Before each use:
-
check the battery charge status following the instructions provided in the battery booklet.
7.1.2 Adjusting the handgrip
Only perform this operation when the safety button is deactivated (light off).
- Pull the rear handgrip release lever backwards (Fig. 7.A);
- start rotating the rear handgrip (Fig. 7.B);
- Release the release control lever (Fig. 7.A);
- rotate the handgrip until it clicks into the desired position.
IMPORTANT Before using the machine check that the release lever has completely returned to the block position, and the rear handgrip is firmly attached.
When working, the rear handgrip must always be in a vertical position, whatever the position of the cutting means.
7.1.3 Use of the backpack (if available)
- Insert the battery in one of the compartments of the battery backpack (Fig. 4) and push it completely, until hearing the click that signals its locking in position, ensuring thus the electrical contact;
- Connect the cable to the backpack in the specific socket (Fig. 5.A) and rotate it until hearing the specific click that signals its locking in position, ensuring thus the electrical contact;
- adjust the straps and close the harness in the front (Fig. 8).
7.2 SAFETY CHECKS
Run the following safety checks and ensure that the results correspond to those outlined in the tables.
Always carry out the safety checks before use.
7.2.1 General check
| Object Result | |
| Handgrips (Fig. 1.C, Fig. 1.D) and guards | Are clean, dry and fixed firmly to the machine |
| Screws on the machine and blade | Correctly tightened (not loose) |
| Cooling air ducts Not clogged | |
| Blade (Fig. 1.B) Sharp, with | out signs of damage or wear |
| Guards Intact, undamaged | |
| Battery (Fig. 1.F) No damage | to the casing, no liquid leakage |
| Machine No signs of damage | or wear |
| Electrical cables | All insulation intact. Intact to prevent sparks from occurring |
| Blade control lever (Fig. 6.C), safety switch (Fig. 6.D) | The levers must move freely and not be forced. |
| Test driving | No abnormal vibrations. No abnormal sound |
7.2.2 Machine operating test
| Action Result | |
| 1. Fit the battery inside its compartment (Fig. 10.A);2. press the safety button (Fig. 9.A) | The green light must come on (electrical circuit activated) and the cutting means must not move |
| Start the machine (para. 7.3);1. engage the blade control lever (Fig. 9.B) and the safety switch simultaneously (Fig. 9.C);2. release the blade control lever (Fig. 9.B) or the safety switch (Fig. 9.C) | 1. The blade should move2. The controls should return automatically and rapidly to the neutral position and the blade should stop |
| 1. When the blade is engaged, pull the rear handgrip release lever backwards (Fig. 7.A) | 1. The blade should stop |
If any of the results fail to match the indications provided in the tables below, do not use the machine! Take it to a service centre to be checked and repaired if necessary.
7.3 START-UP
7.3.1 Start-up with battery
- Remove the blade guard (Fig. 1.E) (if used);
- make sure the blade is not touching the ground or any other object;
- Fit the battery inside its compartment (Fig. 10.A);
- press the safety button (Fig. 9.A)
- engage the blade control lever (Fig. 9.B) and the safety switch simultaneously (Fig. 9.C).
7.3.2 Start-up with battery simulator (if available)
- Adopt a firm and well-balanced position;
- make sure the blade is not touching the ground or any other object;
- insert the battery simulator correctly in its housing on the machine (Fig.10.J)
- connect the connection cable to the battery simulator (Fig.10.I)
- select the battery using the selector (Fig. 5.B)
- press the safety button (Fig. 9.A)
- engage the blade control lever (Fig. 9.B) and the safety switch simultaneously (Fig. 9.C)
7.4 OPERATION
To use the machine proceed as follows:
- always hold the machine firmly with two hands, using the machine with the cutting means under the operator's shoulder level;
Do not remove cut material or hold material to be cut when blades are moving. Make sure the safety button is disengaged (light off) when clearing jammed material.
NOTE During use, the battery is protected against total drainage with a protective device that switches off the machine and stops it from working.
NOTE After one minute of inactivity, if turned on, the machine will automatically switch off.
7.4.1 Work techniques
It is recommended to trim the two vertical sides of the hedge before trimming the top.
NOTE The battery power reserve (and therefore the movable vegetation area before recharging is required) depends on many factors described in par. 8.2.1.
7.4.1.a Vertical cutting
Proceed by cutting using curved movements from the bottom towards the top, keeping the blade as far from the body as possible (Fig. 11).
7.4.1.b Horizontal cutting
The best results will be obtained with the blade slightly inclined (5^ - 10^) in the direction you are cutting, proceed with a curved movement, slowly and without interruptions, especially in the case of very thick hedges (Fig. 12).
7.4.2 Operating suggestions
If the blades block while running or get caught up in the hedge branches:
- stop the machine immediately (para. 7.5);
- wait for the cutting means to come to a halt;
- remove the battery (para. 8.2.2);
- Remove the jammed material.
7.4.3 Lubricating the blades whilst working
If the cutting means overheats whilst working, it is necessary to lubricate the internal surfaces of the blades (para. 8.4).
This operation can only be done with the machine off and the battery removed from its housing (para. 8.2.2).
7.5 STOP
To stop the machine:
- Release the blade control lever (Fig. 9.B) or the safety switch (Fig. 9.C);
disengage the safety button (light off) (Fig. 9.A).
When you have stopped the machine, it will take a few seconds for the cutting means to stop.
Always stop the machine:
- when moving between work areas.
Do not keep your finger on the safety button when moving the machine to avoid accidentally enabling the machine.
7.6 AFTER USE
7.6.1 After use with the battery
- Remove the battery from its housing and recharge it (para. 8.2.2).
- When the cutting means has halted, fit the blade guard (Fig. 1.E).
- Allow the engine to cool before storing in an enclosed space.
Clean (par. 8.3). - Check there are no loose or damaged components. If necessary, replace the damaged components and tighten any screws and loose bolts or contact the authorised service centre.
7.6.2 After use with battery simulator (if available)
- Move the battery backpack selector to "OFF" (Fig. 5.B);
- remove the battery simulator from the machine (Fig. 13.J);
- remove the battery backpack;
- disconnect the connection cable from the battery simulator (Fig.13.I) and from the backpack (fig. 5.A)
- remove the battery from the backpack (Fig. 14) and charge it (par. 8.2.2);
- allow the engine to cool before storing the machine in an enclosed space;
- Clean (para. 8.3);
- Make sure there are no loose or damaged components. If necessary, replace the damaged components and tighten any screws and loose bolts or contact the authorised service centre.
IMPORTANT Always remove the battery (para. 8.2.2) and fit the blade guard whenever the machine is unused or left unattended.
8. ROUTINE MAINTENANCE
8.1 GENERAL INFORMATION
IMPORTANT The safety regulations to follow are described in chap. 2. Strictly
comply with these instructions to avoid serious risks or hazards.
Before performing any maintenance operations:
stop the machine;
- Remove the battery from its housing and recharge it (para. 8.2.2);
- when the cutting means is stationary, apply the blade protection device, (except when working directly on the blade);
- allow the engine to cool before storing in an enclosed space;
- use suitable clothing, protective gloves and goggles;
- read the relevant instructions.
The frequency and types of maintenance are summarised in the "Maintenance Table" (see chapter 14). The table will help you maintain your machine's safety and performance. It summarises the main interventions to be made and the frequency applicable to each of them. Carry out the relevant task as soon as it is scheduled to be performed.
- The use of non-original parts and accessories could have negative effects on machine operation and safety. The manufacturer declines any responsibility for damage or injury caused by said products.
- Genuine spare parts are supplied by Authorised Assistance Centres and Dealers.
IMPORTANT Any maintenance and adjustment operations not described in this manual must be carried out by your dealer or Authorised Service Centre.
8.2 BATTERY
8.2.1 Battery power reserve
Battery power reserve (and therefore the cuttable vegetation area before recharging is required) mainly depends on:
a. Environmental factors, that cause higher energy requirements: -cutting/trimming of very thick or wet hedges; -cutting/trimming of bushes with branches that are too thick;
b. operator behaviour that should be avoided: - switching the machine on and off frequently whilst working;
- adopting a cutting technique that is unsuitable for the work to be performed (para. 7.4.1);
- cutting speed unsuitable for the condition of the hedge to be cut.
To optimise battery power reserve it is always recommended to:
- cut the hedge when dry;
- set a cutting speed suitable for the condition of the shrubs;
- use the most appropriate technique for the work to be performed.
If the need arises to use the machine for sessions which exceed the capability of a standard battery, it is possible to:
- purchase a second standard battery to immediately replace the discharged battery, without compromising the continuity of operations;
- purchase a battery with an extended power reserve compared to the standard version (para. 16.1).
8.2.2 Battery removal and recharging
- Press the locking button located in the battery on the machine (Fig. 13.A) or on the backpack (Fig. 14.A) (if available);
- remove the battery from the machine (Fig. 13.B) or from the battery backpack (Fig. 14.B) (if available);
- fit the battery (Fig. 15.A) in the battery charger housing (Fig. 15.B);
- Connect the battery charger (Fig. 15.B) to a power socket with the voltage indicated on the rating plate;
- fully charge the battery according to the instructions in the battery/ battery charger booklet.
NOTE The battery is equipped with a guard that inhibits recharging if the environmental temperature is not between 0 and +45^
NOTE The battery can be recharged at any time, even partially, with no risk of damaging it.
8.2.3 Refitting the battery on the machine
When recharging is completed:
- Remove the battery from its housing in the battery charger (Fig. 16.A) (do not continue recharging once recharging is completed);
- Disconnect the battery charger (Fig. 16.B) from the electrical mains;
-
insert the battery in its housing on the machine (Fig. 10.A) or in one of the housing of the battery backpack (Fig. 4) (if available)
-
push it completely, until hearing the click that signals its locking in position, ensuring thus the electrical contact.
8.3 CLEANING THE MACHINE AND THE ENGINE
To reduce fire hazards, keep the machine and, in particular, the motor free of leaves, branches or excessive grease.
Always clean the machine after use with a damp cloth dipped in neutral detergent.
- Remove all traces of humidity using a soft damp cloth. Humidity can generate risks of electric shocks.
- Do not use aggressive detergents or solvents to clean the plastic parts or hand grips.
- Do not spray water onto the motor and electrical components and prevent them from getting wet.
- To avoid overheating and damage to the motor or the battery, always keep the cooling air vents clean and free of debris.
8.4 CLEANING AND LUBRICATION OF THE CUTTING MEANS
To increase the efficiency and working life of the blades, clean and lubricate them carefully after each work session:
Do not touch the cutting means until the battery has been removed and the cutting means is completely stationary.
- Place the machine in a stable horizontal position on the ground.
- Use a soft cloth to clean the blades, along with a brush to remove more difficult dirt and debris.
- Lubricate the blades by applying a light layer of specific oil, preferably the non-pollutant type, along the upper edge of the blade.
8.5 NUTS AND BOLTS
- Keep all nuts, bolts and screws tight to be sure the equipment is in safe working condition.
- Check regularly that the handles are fixed firmly.
9. OCCASIONAL MAINTENANCE
9.1 CUTTING MEANS OCCASIONAL MAINTENANCE
Do not touch the cutting means until the battery has been removed and the cutting means is completely stationary. If the blades are used correctly, following all the instructions provided, they will not require any maintenance work and will not need sharpening.
9.1.1 Checks
Periodically check that the blades are not bent, damaged or deformed and that the screws are adequately tightened.
Adjustment of the distance between blades is not necessary, as this is predetermined by the manufacturer.
9.1.2 Sharpening
It is necessary to sharpen the blades when the trimming performance decreases and the branches tend to stick together.
For safety reasons, sharpening should be done by an Authorised Service Centre with suitable skills and equipment for the job; without risking any damage to the blade which would make it unsafe when used.
Always replace and never repair a blade which has blunt cutting edges.
9.1.3 Replacement
The blade must never be repaired, but must be replaced as soon as signs of breaking are noted or the sharpening limit is exceeded. For safety reasons replacements should be performed by an Authorised Service Centre.
Blades displaying the code indicated on the Technical Data table should be used on this machine.
Given product evolution, the blades listed in the "Technical Data" table may be replaced in time with others having similar interchangeable and operating safety features.
10. STORAGE
IMPORTANT The safety regulations to follow for putting into storage are described in paragraph 2.4. Strictly comply with these instructions to avoid serious risks or hazards.
10.1 STORING
When the machine is to be stored away:
- remove the battery from its housing and recharge it (para. 8.2.2);
- when the cutting means has halted, fit the blade guard;
- allow the engine to cool before storing in an enclosed space;
- Clean (para. 8.3);
- Make sure there are no loose or damaged components. If necessary, replace any damaged components and tighten any screws and loose bolts or contact the authorised service centre;
- Store the machine:
-in a dry place;
- protected from inclement weather;
- in a place out of children's reach;
making sure that keys or tools used for maintenance are removed.
10.2 STORING THE BATTERY
The battery must be kept in a cool, shaded place without humidity.
NOTE If unused for any length of time, recharge the battery every two months to prolong its working life.
11. HANDLING AND TRANSPORT
Whenever the machine is to be handled or transported you must:
stop the machine (para. 7.5);
- remove the battery from its housing and recharge it (para. 8.2.2);
- when the cutting means has halted, fit the blade guard;
- wear protective work gloves;
- only hold the machine using the hand grips and position the cutting means in the opposite direction to that used during operations.
When transporting the machine on a vehicle, always:
-
fasten the machine securely with cables or chains;
-
position it so that it does not cause a hazard to anyone.
12. ASSISTANCE AND REPAIRS
This manual provides all the necessary information to run the machine and for correct basic maintenance operations which can be performed by the user. Any regulations and maintenance operations not described herein must be carried out by your Dealer or Authorised Service Centre, which have the necessary knowledge and equipment to ensure that the work is carried out correctly, maintaining the correct degree of safety and the original operating conditions of the machine.
Any operations performed in unauthorised centres or by unqualified persons will totally invalidate the Warranty and all obligations and responsibilities of the Manufacturer.
- Only Authorised Service Centres can carry out guaranteed repairs and maintenance.
- The Authorised Service Centres only use genuine spare parts. Genuine spare parts and attachments have been designed specifically for machines.
- Non-original parts and attachments are not approved; use of non-original spare parts and attachments will jeopardise the safety of the
machine and relieve the Manufacturer from all obligations or liabilities.
- It is advisable to send your machine once a year to an Authorised Service Centre for servicing, assistance and safety device inspection.
13. WARRANTY COVERAGE
The warranty covers all material and manufacturing defects. The user must follow all the instructions provided in the accompanying documentation.
The warranty does not cover damage caused by:
- failure to become familiar with the documentation accompanying the machine;
- carelessness;
- incorrect or forbidden use or assembly;
- use of non-genuine spare parts;
- use of attachments not supplied or not approved by the manufacturer.
The warranty does not cover:
- normal wear and tear of consumables such as wheels, blades, safety bolts and wires;
normal wear and tear.
The purchaser is protected by his or her own national legislation. The purchaser's rights under the national laws or his or her own country are not in any way restricted by this warranty.
14. MAINTENANCE TABLE
| Intervention | Frequency | Notes |
| MACHINE | ||
| Check all fasteners | Before each use | para. 8.5 |
| Safety checks/check controls | Before each use | par. 7.2 |
| Check the battery charge status | Before each use | * |
| Recharge the battery | After each use | para. 8.2.2 * |
| Cleaning the machine and the engine | After each use | par. 8.3 |
| Cleaning and lubrication of the cutting means | After each use | para. 8.4 |
| Checking for any damage to the machine. If necessary, contact the authorised service centre. | After each use | - |
| Checking the cutting means | After each use | para. 9.1.1 |
| Sharpening the cutting means | - | para. 9.1.2 ** |
| Replacing the cutting means | - | para. 9.1.3 ** |
- Refer to the battery/battery charger manual.
** The operation must be carried out by your Dealer or an Authorised Service Centre
15. TROUBLESHOOTING
| PROBLEM PROBABLE CAUSE SOLUTION | ||
| 1. When the safety button is pressed, the green light does not come on | Battery is not inserted or is inserted incorrectly | Make sure that the battery is inserted correctly (para. 8.2.3) |
| 2. When the safety button is pressed, the green light does not come on, the LED indicator (Fig. 6.F) blinks | Low battery Check the battery status and recharge if necessary (para. 8.2.2) | |
| 3. The motor shuts down whilst working | Battery is not inserted correctly Make sure that the battery is inserted correctly (para. 8.2.3) | |
| 4. The motor stops during work and the LED indicator (Fig. 6.E) blinks | Low battery Check the battery status and recharge if necessary. (para. 8.2.2) | |
| 5. The cutting means is stationary when the blade control lever and safety switch are engaged | Hedge trimmer is damaged. Do not use the hedge trimmer. Immediately turn off the machine remove the battery and Contact an Authorised Service Centre. | |
| 6. The cutting means overheats whilst working | Insufficient blade lubrication Turn off the machine, wait until the cutting means is stationary, remove the battery and lubricate the blades (para. 8.4) | |
| 7. The cutting means comes into contact with a line or electric cable | - DO NOT TOUCH THE BLADE AS IT | MAY BE LIVE AND BE EXTREMELY DANGEROUS! Grasp the machine using the insulated rear hand grip only and position it at a safe distance from yourself. Disconnect the current that powers the severed line or mains cable and remove the battery before freeing the blade teeth. |
| 8. The cutting means comes into contact with a foreign body. | - Turn off the machine remove the battery and: - inspect for damage; - check for and tighten any loose parts; - have any damaged parts replaced or repaired with parts having equivalent specifications. | |
| 9. Excessive noise and/or vibration is experienced whilst working | Loose or damaged parts Turn off the machine remove the battery and: - inspect for damage; - check for and tighten any loose parts; - have any damaged parts replaced or repaired with parts having equivalent specifications. | |
| 10. The machine gives off smoke whilst working | Hedge trimmer is damaged. Do not use the hedge trimmer. Immediately turn off the machine remove the battery and Contact an Authorised Service Centre. | |
| 11. Battery power reserve is low | Severe working conditions requiring greater current absorption | Optimise operations (para. 8.2.1) |
| Battery is insufficient for operating requirements | Use a second battery or an extended battery (para. 16.1) | |
| Decrease in battery capacity Purchase a new battery | ||
| 12. The battery charger is not recharging the battery | Battery is not correctly inserted in the battery charger | Check it is correctly inserted (para. 8.2.3) |
| Unsuitable environmental conditions Recharge the battery in places with suitable temperatures (see battery/battery charger instruction manual) | ||
| Dirty contacts Clean the contacts | ||
| The battery charger is not energised Check it is plugged in and the power socket is energised | ||
| Faulty battery charger Replace with an original spare part | ||
| If the problem persists, refer to the battery/battery charger manual | ||
| 13. The LED indicator (Fig. 6.F) remains ON in steady mode | Self-check failed | Do not use the machine. Immediately turn off the machine, remove the battery and contact a service centre. |
| 14. The LED indicator (Fig. 6.F) remains ON in flashing mode | Battery communication error | Do not use the machine. Immediately turn off the machine, remove the battery and contact a service centre. |
| Rotor blocked | Do not use the machine. Immediately turn off the machine, remove the battery and contact a service centre. | |
| Current overload | Optimize machine usage. | |
If problems persist after implementing the solution, contact your Dealer.
16. ACCESSORIES ON REQUEST
16.1 ALTERNATIVE BATTERIES
Different capacity batteries are available to suit specific operating requirements (Fig. 17). The list of approved batteries for this machine can be found in the "Technical Data" table.
16.2 BATTERY CHARGER
Device used to recharge the battery: fast (Fig. 18.A), standard (Fig. 18.B).
16.3 BATTERY BACKPACK
The device is used to place the two batteries and provides the electrical power required for the operation of the machine. It is provided with a cable used for the connection to the machine (Fig. 1.l) and with a selector (Fig. 5.B) to select one of the two batteries (position "1" and "2") and "OFF".
16.4 BATTERY SIMULATOR
Device that, if inserted in the machine housing, allows the use of the battery backpack.
INDICE
- INFORMACION GENERAL 1
-
NORMAS DE SEGURIDAD 2
-
CONOCER LA MAQUINA 5
1.1 KUIDAS JUHENDIT LUGEDA
Kandke pakse libisemiskindlaid tookindaid.

16.1 VALINNAISET AKUT
11. MANUTENTION ET TRANSPORT
3.2 O3HAHn 3A B6E3BEdHOCT
Ha MaunHaTa NMa CmboN (cI.2).HnBHaTa yHKuJa e da ro notceTat KopncnKOT Ha HeoXoHDocTa oD BnMaTeJHa yNoTpe6a.
3HaueHe Ha Cm60JIte:

PNEyPENyBAHbE! ONACHOCT!ObaaMaunHa MOKe da 6nde onacha 3a Bac INI 3a Dpynte DOKoNHy He CE KOpNCn npabuJIHO.

PPEyPENEYBAHBe!
IpeJa ja KopnCTnte Obaa MaunHa, npouHTajre ro ynaTcBTO 3a ynotpe6a.

HopncTeTe 3aunTHn Ouila.

Hocete zBpCTn paKaBnCi 3a pa6Ota co 3aHTIa npOTNB IIN3raHe.

Ia He Ce N3IOKHyBa Ha DOHd (NIN HA BnAHHOCT)
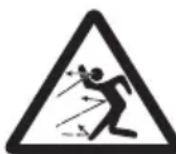
ONACHOCT OJ NCΦPJIAHbA! BnHmabajTe Ha MoXn HcΦpIyBaHa Ha MaTepnjAIn KOHSTo Tn PpeIN3BnKvBa typeDTo CO CeYnBOTo KOntO MOKe Da NpeIN3BnKaaT TeuHn NOBpeN Ha INuca N ppeMeTN.

ONACHOCT OJ NCΦPJIAHbA! OdaJeTe rN cHTe Iua nI IN DOMaHn JHBOTn HajMaIky 15 MeTpN DoPeKa pa60T MaINHaTa.

Pn3nk OJ nOceKOTnH! DpKeTe rpaTe nHO3eTe NOdaJIeKy OJ CeINBOTO.
BAHHO DaenHte eTKeTu wTO ce cnHaIe nn He Ce YITINBn, Tpe6a da ce 3ameHaT. HapaajTe pe3epBn O3HaKn od OblaCTeh cepBncen ueHTap.
3.3 ETNHETA 3A IDEHTNPHAUJIHA HAPON3BOJOT
EtkeTaTa 3a NdeHTnФkaunja Ha npOn3BODoT rN codpHn CneDHNTe nOdaToU (cI.1):
- O3naka 3a ycorJIaceHoCT co CE
- Ime n aapeca Ha npOn3BODntTeIOT
- HnBO Ha akyCTuHa MOKHOCT
- Kod Ha npOn3BOD
- TnHa MaunHa
- Cepnckn 6poj
- TOnHa Ha npOn3BOcTBo
- HanoH ha HanojyBaHe
3aannete nnoaTOUnte 3a ndeHTnKaujna 3a MaunHata Ha COOBETHHe MeCTa Ha daHeHa t EtHKeTa OD BHaTpeuHaTc TpaHa Ha KaNAkOT.
BAHHO HabeTe rNoTaToUnte Od etnKeTata 3a ndentnKauJa Ha npOn3BODOT cekoraH Kora Ke ro KOHTaTnpaTe OblaCTeHNOT cepBuceH ceHTap.
BAHHO IprnMepHa N3jabata 3a COo6pa3HocT Ce Haora Ha NoCneHata CTpaHua BO Oba yNaTCTBO.
3.4 TlABHn DEJOBN
Maunhata ce coctOn oCneHnTe rnaBn DeIOBn KOnuTO COOdBETCTByBaat Ha cIeHNTe yHKuN (cI.1):
A. MoTOp: o6e36eDyBa DnBHeHa ypeIOT CO ceYIBOTO.
B. CeuHBO (ypeD co ceuHBO): COOdBETEHJEMENT 3a CEHe He Ha BeretauJia.
C. Ппека рачна: OBO3MOHyBa
упразыва со машинота и Тamy
се На озбedingо КОпчe.
D. 3aɪnha paʊhɑ: OBO3M0JyBa yɪpɑbYBaHæ CO MaɪnHaTaɪ Tamy Ce HaɪrəaT KOMaHdɪte 3a rʌlaBhɑTɑ KOHTpɒla.
E. 3aHTTa 3a CeHbTo (Pn TpaHcNOpT nIpeMeCTyBaHe Ha MaunHaTa): cnpeyBa HecaKaH KOHTaKT CO ypeIoT CO CEHbTO To MoKe Da DoBeDe Do TeuKn NOBpeN.
F. BaTepnja (DOnOJIHnTeJIHa OnPema nO n36Op, nac. 16.1): ypei wTO oBe36eYBa eHeprJia 3a cTapTyBaHBe Ha ypeoT; HerOBHTe CneuΦnKaUm N IpaBnla 3a KOpNCTeHe ce ONIshaHb BO CneuJaJHnOT npnpaunK.
G. Полнауа 3a 6atepnjata (dONOLHITeHa onpema no n36op, nac. 16.2): ypei wTO ce KOpNCTn 3a NOJIHeHBe Ha aKymyIaTOPOT; HeROBInTe CneuФнkaUHn I npaBnla 3a KOpNCTeHBe CE ONIIshAHn BO CneuJaHnOT npIPAuHnK. DocTaNnCe MoJeHn Ha NOJHauN 3a DBa aKymyIaTOPa: G1 (3a 6p30 NOJIHeHBe Ha aKymyIaTOP); G2 (3a CTaHdApDNo NOJIHeHBe Ha aKymyIaTOP);
H. Painez 3a 6aTepnja (doaToK Ha 6apaHe, nac.16.3):ypeD Bo KoJ ce CTabaat 6aTepnnte.
I. Ka6e 3a noBp3yBaHbe: Ka6e ITO Ce KOpNCTn 3a NOBp3yBaHbe Ha MaunHaTa CO paHeOTo 3a 6aTePnJa.
J.Cmmyatop Ha 6aTepnja (DOnONHnTeHa onpema no n36op, nac.16.4): ypei ITO, KORA e BMETHa BO KyKnIeTeTo Ha MaunHaTa, OBO3MOxUyBa ynotpe6a Ha paHeoT 3a 6aTepnja.
4. PACNAKYBAHbE
BAHHO Be36eHochTe Mepn ITO Tpe6a Da rncIeIte ce daene Hb norg.2.Ctporo npndpHyBaJte cdo Tne ynaTCTBa 3a da N36erHete cepno3HN pN3uN nn HecepEn.
PacnkyBaHeTo Tpe6a Da ce H3BpHn Ha UbpCTa n pamHa NOBpuHnCa DOBOJHO IpocTOp 3a NOMeCTyBaHe Ha MaunHaTa N Ha amBaJHata HopNCTejN CeHoraaw COoDBeTHn aIaN.
- OTbOpTe ro NaKyBaHbeTo BHIMaTeJHo 3a Da He rnpacpplnte DeJIOBNTe.
2.ПочнajTe ja Докум entaunjaTa BO KytjuTa Kaide ce HabeDeHn OBne yNaTCTBa.
3.ИЗbaДeTe ja MaшинHaTa OД, КуТиJaTa.
4.Фрлenteи КутNiJaTaNAm6aIaxKaTaCOrlaCHOLOKAnHITeOdpeDn.
5. MOHTNPAHbE
5.1 NOCTABYBAHbE HA PAHEcOT 3A BATEPNJA (OKOLNY E DOCTANEH)
PaheQT 3a 6aTePnJa ce nCnpaCyBa CnIOnen (C1.1.H) n MoJc Ja ce n3BaAn oD npKaOT Ha pemeHOT (C1.3) n Da ce Hocn BO paKa.
3a da ro n3BaInTe paHeOt oD pemeHOT,
pntncHe Ta DBeTe rOpHn KOnuHa (C1.3.A).
PperpaInTe 3a 6aTePnJaTa ce hao'aat
oD dBete cTpaHn Ha paeOT (C1.4)
OBne paBToH MoKe Da rH HajDeTe
Ha DecHaTa cTpaHa Ha paeOT:
- pInKnyuHnua 3a Ka6eL (C1.5.A)
- n3bnpaay 3a 6aTePnJa (C1.5.B)
- eHa USB nopTa 3a noJIHeBe Ha dpyU ypeiHa (Ha np. MobinH TelefoHn) (C1.5.C).
3a da rn npuBpCTnTe Ka6nIte, da He BnCaT,
HMa JHe6oBN Od DBeTe CTPaH N OJ3aDN, BO
KOn MoKe Da ce BMETHe Ka6eIoT 3a CTPyja.
6. KOMAHДИ 3A KOHTPOJI
6.1 B3E3BENHOCHO KONUe (AKTINBINAHbE/DEAKTNBINAHbE)

PnTnCHeTe Ro Oba KOnYe 3a Da rO aKtNBipate N De3aKTHBipate eJeKHTpNHyTO KOHO Ha MaunHaTa (cI.6.A).

EHa BnUyeHa IED cnJaIuca: eNeKTPnHOTO KOHO Ha MaunHaTa e aKnBnPaHo (Cn.6.B).MaunHaTa e NpTROBeHa 3a pa6ota. DBe BnUyeHn IED cnJaIuCi: MaunHaTa pa6OTn.
JIED cnjaJnIe Ce ncknyBaat: eJeKtpnHOTo KOIO e cjoLOCHO De3aKTNBnPaHO.

BAHHO Pn npemecTyBaHbe, HNKORAHe dpKHeTo npCTOT Bp3 KOHTeTo 3a Da n36erHeTe cnuyajHo naJeBe.
IkoHaTa 3a, "PpeDynpdeYBaHbe" (C.6.F) ce BHLUyBA Bo clyuaj Ha deFeKT Ha MaunHaTa (BnTe ja TabelaTa 3a peuaBaHe Ha npo6lemn, nac.15).
6.2 PAUHA HA HOMAHDATA 3A CEYNBOTO (YPED CO CEYNBOTO)
OBO3MOHyBa BnIyUbaHe n perylaunja Ha 6p3nHaTa Ha CEHBOTo.
CeHIOTo MoKe Da ro aHTNbIpaTe camo co nCTOBpeMeHO npTnCKaHe Ha (Cn. 1.B) paKaTa 3a ynpaByBaHe co ceHIOTo (Cn. 6.C) n 6e36eHocHTo KOnHe (Cn. 6.D).
YpeDToCceHBOTaCTaHyBa aBTOMaTCHCO NpUHTaHe Ha paKaTa nn6e36eHNOCHNt PpeKnHyBa.
6.3 PACHA 3A DEBJOHHPAHBE HA 3ADHATA PACHA
PaKaTa 3a otNyTaHe (Cn.6.E) OBO3MOHyBa 3a da ja peryInpate 3aHaTpa paKa (Cn.1.D) Ha 3 pa3NCHN N03uHb BO oDnoc Ha ceHnLaTa 3a nolecho KaCTpeHbe Ha JINBa orPada.
Perylaunjata Ha paKaTa Tpe6a da ce n3BpUyBa hora e de3aHTNBupaHO 6e36eHocHTo konye (n3racHa ta cnJaNnuHa).
7. YNOTPEBA HA MAUNHATA
BAHHO Be36eHocHTe Mepn ITO Tpe6a Da rncIeIte ce daene Hb norg.2.Ctporo npnpKByBajTe cdo The yNaTCTBa 3a da N36erHeTe cepno3HN pN3uN nn HecepEn.
7.1 INPEJIIMMHAPHN ONEPAUIN
Ipei Da 3aOnuHete Co pa6oTa, HeonxOHO e da cnpoBeTe cepnja KOHTpOIn n Oepaunn 3a Da o6e36eHte DeKa pa6oTaTKe Ce oDbNbHa eΦHKacEH NaHH n CO MaKcImaJIHa 6e36eHocT.
CTaBeTe ja MaunHaTa XOpHOrTaJIHo n CTaBnHa Ha TepeHOt.
7.1.1 KOnTpOJa Ha 6aTepnjata
MaunhaTa Ce DoCTaByBa 6e3 BaTepnja.
Haabete 6aTepnja Co COoDBeTeH KanaHTet
3a paobTHnte 3aDaU Hn npBO HaONHeTe
ja DOKpaj CJIeDejKn IyN yNATCTBaT a WTO ce
CoDPkAT BO yNATCTBOTO 3a 6aTepnjata.
CnncOKOT Ha 6aTepnN KOuTTo Ce COoDBeTHn
Da ce KopNCtAt Co OBaa MaunHa Ce HaOra
BO TaBeLaTa,TexHnUH NODaTOU.
- Ppei cenoja ynoTpe6a: - npoBepTe ja coctojbata Ha HanoJIHeTOCT Ha aKymlaTOPOT CJIeJeJKN IHaCOKnTe daDeHn BO yNaTCTBOTO 3a aKymlaTOPOT.
7.1.2 Perylaunja Ha paunata
CnpoBeTe ja noctanhata co nchnyeHo 6e36eHocHO Hnue (n3rachHa t cnaHnua).
1.Повlete jaHa3aJa paKaTa 3a De6loKnapHe Ha 3aHaTa paKa (cI.7.A);
2. nouheTe da ja BpTnTe 3aHaTa paKa (cN. 7.B);
3. OtnnyuTeTe ja KOMaHdTaHa paKaTa 3a 3a6p3yBaHbe (CJ.7.A);
4. CBpTeTe ja paKaTa DoKpaJ 3a Ja CnyuHHeTe 3Byk DeKa ce HameCTnla BO CaKaHaTa NIOK6a.
BAHHO Ipea ja KaopnCTte MaunHaTa, npoBepeTe daHpaKaTa 3a OTnyuTaHe e ueIOcHO BpaTeHa BO N03uJa 3a 6boknpaHe n DeKa 3aHaTapaKa e COODBETHO pnuBpCTeHa.
Bo tehot ha pa6oTata,3aHata paHa Mopa ceHoraW da 6nde BO BepTHaHaNo3nJha,He3aBnCHO O3a3eMeHaTa No3nJha Ha HohOT.
7.1.3 Ynotpe6a Ha paheocot (doKoJHy e doCTaneH)
- Bmethe ja 6aTepejata BO eHa od npepaTe Ha paHeoT (Cn.4) n TypHeTe ja 3a da Bne3e Dokpaj, cfe DoNeKa He CnyuHHe TKNKHyBaHe uTO cnHaun3npa Deka 6aTepejata ce fNcnpana Bo npepaTa, a noToa npOBepTe ro eJeKTPNHHOT KOHT;
- Nobp3eTe ro Ka6eIOT co paHeuT BO COoDbetHaTa npKlyHnua (Cn. 5.A) n potpaTe ro ce doKeHa He cLyuHHe Te KInKHyBaHe wTO CNHaJIIN3npa DeKa Ka6eIOT ce fHKcnpaI Bo npKlyHncaTa, a noToa npOBepTe Ro eJeKtpuHnOT KOHT;
- noodeceTe ro pemeHoT n 3aKoHajTe ro nojacot HanpeD (Cn.8).
7.2 BE3BEdHOCHN KOHTPOJN
CnpoBeTe rN CLeHnTe 6e36eHocn HOKTPONI INPpOBepTe DaJI pe3yIITaNTe COODBETCTByBaAT Co DAHeHOTO BO Ta6eJATA.
CekoraW npOBepyBajTe r6e36eHochnTe hOHTpOnn nped pa6ota.
7.2.1 OnuTa KoHTpOJa
| Пре demет Peşултат | |
| Раши (с. 1.С, с. 1.D) и заштити | ЧИстNi, Исuously,Правлино и црстоФиксанни на машината |
| Шрафови на машината и сенивoting | Добpo зашареньи (He pažлабavenи) |
| Отурп 3a ВОЗдух 3a Ладены | Бeз преви |
| Сechиво (с. 1.B) Наструно | бeз по calы ви Знasi з оштeteувае ил n3abeshoct |
| Заштити Zeли и 6e3 оштeteуваь. | Башияna (с. 1.F) Бeз по calka Ны оштeteуваь нa Кунштeto и 6e3 празува bene на Точноct |
| Машина Нема 3haци на | Оштeteува bene ил abegebene |
| Ельстрични Kaobи Нeoштete | Teha ИзOLAциja. ИNTerрирани за се избегные Искрөнbe |
| Раши за ураловаге co сeyniloto (Сл. 6.C), 6e3б徴noscho Корч (Сл. 6.D) | Рашиte мора да се Движат сюбдно и 6e3 пrimени на сида. |
| П_PROбно ВОЗеные Нема чуden | Вибраци. Heme Chdni 3Byuni |
7.2.2 Tect 3a pa6oTaHa MaunHata
| Дejectо | Рezулты |
| 1.Вметнete ja 6aTeprinjata BO CBOETo Kuknшte (Сл. 10.A); 2.Притис悔е Го 6e3бeДнOCHOTO КОпчe (Сл. 9.A) | 3eeleneta сижличka Tpe6а Дa ce залал (аNTИВИрано eЛeКТрчно KOLO) и урedingо СЕЧИВОТо He Tpe6a Дa ce DBИЖи |
| ВнлүеTe ja Maшинaita (пас. 7.3); 1.аNTИВИрajTe Ги ИстоврemeHo paЧкATAЗа уравваье coceчлOTO (Сл. 9.B)и 6e3бeДнOCHOTO КОпчe (Сл. 9.C); 2.OTПУштete Ги paЧкATAЗa уравваье coceчлOTO (Сл. 9.B)ил 6e3бeДнOCHOTO КОпчe (Сл. 9.C) | 1.СeЧИВОТо Tpe6a Дa ce DBИЖи |
| 2.КOMaндITE Tpe6a Дa ce ВраТа АВТOMATСКИи 6pry Bo Heytralna ПОЗИЦJA, a CEЧИВОТо Tpe6a Дa заостане | |
| 1.Со ВнлүеHo ceuNBo, NOBleueTe ja Ha3aД paЧkaТа 3a De6lonkɪpa№Ha 3aɪdHaTа paЧka (Сл. 7.A) | 1.СeЧИВОТо Tpe6a Дa заостанe |
Ako Hehoj od pe3yIaTHe He nCT KaHO wTO e NocOyeHO BO Ta6eJa, He ja HOpHcTeMaunHaT! OdHecete ja Bo OBnacteH cepBnC Ha npOBepHa nNONpaBHa.
7.3 CTAPTYBAHbE
7.3.1 CtapTyBaHbe co 6aTepuja
- N3BaTe je 3aHTnTaHa ceHnTo (CJ.1.E) (aHO eCTaBeHa);
- npoBepTe daJIH HOKOT ro DOINpa TepeHOT nn dpyn npedmetn;
- Bmetthe ja 6aTepnjata BO CBOeTO KyKnUte (CJ.10.A)
- npntncheTe ro 6e36eHochTo KOnue (CJ.9.A)
- aKTHBnbpajTe rH NCTOBpeMeHo paKaTa 3a ynpaByBaHe co ceHNoTo (Cn.9.B) n6e36eHNOCHOTo KOnue (Cn.9.C).
7.3.2 CtapTyBaHe co cHmUlaTop Ha 6aTepeNja (dOKoJHy e dOcTaNeH)
- 3a3emete Ubpcta n cta6nHa no3njuja
- npoBepTe daHn HOKOT ro DoHnpa TepeHOT nn Dpyr npeMeTn;
- npabHIO BMeTHeTe ro CmMylaTopoT Ha 6aTePnJa BO CBOeTO KHyNlTe BO MaunHaTa (CJ.10.J)
- NOBp3eTe ro Ka6eIOT CO CmMyIaTOPoT Ha 6aTePnJa (Cn.10.l)
- n36epete ja 6aTepejna co nomow Ha n36npaqOT (Cn. 5.B)
- npntncheTe ro 6e36eHOCHOTo konue (CJI.9.A)
- aKTHBnbpajTe rH nCTOBpeMeHo paKaTa 3a ynpaByBaHe co ceHNoTo (Cn.9.B) n 6e36eHnOCHOTo KOnue (Cn.9.C)
7.4 PABOTA
3a da pa6oTnte ce MaunHaTa, NOCTANE KaKo WTO CLeDn:
- ceKorawdpxKeTe ja MaunHaTa uBpCTO CO DBeTe paue,dpxejKn ro ypeDoT COceHBOT NOJ LInHjata Ha pameHnUte
He BaTe Ro NceHnOT MaTePnJaI nn dpKeTe ro ubpcTo MaTePnJaNt 3a ceYeBe Hora CeYnBOTO e BO fynHcNja. YBepete ce deKa 6e36edHocHTo konuee de3aHTNBnPaHO (n3raChata cnjaJnHa) Hora Rn BaNTe NceHnOT MaTePnJaI.
3A6EJELHA 3a BpeMe Ha pa6oTaTa,
6aTepnjata e 3aWTHTeHa OJ KOMNlTeHO
Ipa3HeBe npeky 3aWTHTHnOT ypeD KOJ uTo ja
iCNlyuBa MaunHaTaNja 6loKnpa pa6oTaTa.
3A6EJIeUHa Io eHa MInHyTa Ha HeaKTnBHOCT, MaHHaTa aBTOMaTCHKe Ce NcHnyu.
7.4.1 TexHnka Ha pa6ota
Cekoraawce npetnoHTa da ce ceye npBnot n BTOPOr peBvTKaJIHn 13pactOuHa rmykata, a notoa IerHaTnte DeIOBn.
3A6EJIeHHA 3aCyByBaIbeTo Ha eHeprJHa ha 6atepnjata (n CO Toa e nOTpebHa NOBpShHa 3a CeueHe nped nolHeBeTo) 3aBncn OJ NOBeKe fakTopn ONuAnu BO nac.8.2.1.
7.4.1.a BepTKKaJIHo ceyHe
Hokot Tpe6a Da ce nocTabu Co KpyKho DnHexHe oDOny Harope co Toa wTo CeuBoto Ke ce dpKn wTo e MoKHO noJaIeKy od TeIoTO (cI. 11).
7.4.1.b Xopn3oHTaJIHo ceueHe
Hajdo6pn pe3yntaTn ce do6nBaat Kora ceHnTo e 6IarO 3akocHo (5^ - 10^) Bo Hacoka Ha CeyeHeTo, IpocJeHo co KpyKHO dBHXeBe, 6abHO n6e3 npeknH, oc6eHO BO clyuaj Ha MHOry rYcTa JINBa orpada (Cn. 12).
7.4.2 Cobetn 3a pa6ota
Ako CeuBTo Ce 6IOKnpa BO TeKOT Ha pa6oTaT a nnCe 3anIeTKa BO rpaHKeT He rpmuHaKaTa:
- BeDHau 3anpeTe ja MaunHaTa (nac. 7.5);
2.yBepete ce deKa ypeDo CEYHBOTo e 3aCTHaT; - n3BaTe je 6aTepnjata (nac. 8.2.2);
4.ИЗва对接уларовOTMaTePnjaI.
7.4.3 ПОДмачИваье Ha ceинваТа BO TEKOT Ha pa6oTaTа
ДokолуceчноTo ce 3aRepeBa 3aВрemeHa pa6oTaTa, Tpe6a Da rI NOmauKate BHaTpeuHnTe NOBpUHHnHa ceuNlOTo (nac.8.4).
Oba MoHe Da Ce H3BpH NOra MaunHaTa e NcNlyeHa N BaTepuJaTa e H3BaDeHa od KyHnWTeTo (nac. 8.2.2).
7.5 3ANHPAHe
3aTaHHeJa ceKoraw MaunHaTa:
-mpmMeHyBaHBeHaIokaunjataHa pa6ota.
I npn npemectyBaHbe, HNKORAw He dpxheTe ro npctOT Bp3 6e36eHOCHTO HONue 3a da n36erHete cnyajHo naJeBe.
7.6 IOPABOTATA
8.2.3 NOBTOPOHO NOCTaByBaHBe Ha 6aTeepnjaTa BO MaunHaTa
Kora noIHeBeTo e 3aBpuEHO:
1.ИЗваде te ja 6aTeprjata od KynuTeto Ha noJHaOT (Cn. 16.A) (he ja ocTabajte da ce noJHn,OTkaHO Beke ueNoCHO ce HanoHnHa);
2.ИЗваде te ro noHaOT (Cn.16.B) od cTpyja,
3. BMETHe ja 6aTepnjata BO CBOeTo KyKnIte BO MaunHata (Cn. 10.A) nIn BO eHa oN ppepaNTe Ha paHeoT 3a 6aTepnja (Cn.4) (doKoKy e doCTaneH)
4. TypHeTe ja 3a da Bne3e doKpaj, cdeKeHa He CnyuHHeTe KInnHyBaHbE uTO CNrHaIN3npa DeKa 6aTepnjata ce fHKcnpaIa BO npepaJaTa, a noToa npOBepTe ro eJekTpnuHnOT KOHTt.
8.3 UHCTEHe HA MAUHHATA HAMOTOPOT
3a HamaIyBaHe Ha pn3nKoT oD 3anaIyBaHe, OpJkyBajTe rMaunHaTa, aOCO6eHO MOTOPOT OD OCTaTOU OJ Incja, rpaHKn IN ppeKymepHo MaCNo.
Cekorawu ctee ja MaunHaTa no ynotpebaTc co uCTa N MOKpa Kpna notoneha BO HeytpaIeH dTepreHT.
- OtctpaHete r n CHT TpaHn Ha BlaRa co MeHa n CyBa KpNa. BlaRaTa oCTaBa npocTOp 3a pN3NK OJ eJeKTpUeH ydap.
He KopncTeTe a6pa3nBn DeTepeRHTn n paCTbOpyBayn Da Tn HcHnCTNTe PnaCTuHHTE DeJIOBn nn paKHTe.
He noIeBajTe BODa n H36erHyBajTe MOKpeHBe Ha MOTOPOT N Ha eJeKTPnHITe DeIOBN.
3a da n36erHete npereBaHe nn OwTeTyBaHe Ha MOTOpOT nn Ha 6aTepeHjaTa, cekoraanpoBepyBaJte daI npweTkata 3a BO3dyx 3a naedeHe e uNCTa n 6e3 octaTOU.
8.4 YNCTEHNIOJMAUHVAHBE HA CEHJOTO
Iopapobota, Mopa da ro nchnte n IopMaayKeTe ceHBOTa 3a da My ja npoJHKeTe FyHKnJaTa N DOJrTOpaJHoCTa:
He donnpajre ro ypeodot co ceynboto aHO He cTe ja n3BaHnle 6atepnjata u aHO ypeodot co ceynbOTO he e 3acTaHaTdohpaj.
CTabete ja MaunHaTa XOpn3OHTaJIHo n CTa6nHa Ha TepeHOT.
- YnCTeTe rCeINBOTO CO cyBa Kpna IN KopnCTeTe IOnaTKa aKO mHa yNOpHn daMHN.
- POnMaUkajTe Ro CeuBOTO BHIMaTeJIHO HaHecyBaJkn CIOJ Ha OppeJeHOTo MacNo 6e3 Da ja HImaUkate N DeIOT Ha RopHnOT KpaJ Ha CeuBOTO.
8.5 HABPTK N IUPAΦOBN 3A ΦHKCPAHe
CnTe 3aBpTKn, HABPTKn IIOCTOBN Tpe6a Da 6nDat D06po npuucBpCTeHn 3a Da ce OCNrypate DeKa onPemata e 6e36eHa 3a pa6ota.
- PeioBHO npoBepyBajTe daIpaHKeTe ce UbpcTo fHKcapaHn.
9. BOHPEДHO OДРЖУBAHБE
9.1 BOHPEIHO OOPKHYBAHbE HA YPEIDOT CO CEYHBOTO
He donnpajte ro ypeodot co ceunboto aHO He cTe ja n3BaHnle 6aTeepNJata u aHO ypeodot CO ceunboto He e 3actaHaTdohpaJ.
Ako ce KopnCTN BO corlaacHOCT CO yNaTCTBOTO, CeINBOTo He 6apa HnKaKBO OdpKyBaHe NIn OCTpeHe.
9.1.1 KOnTpOJa
IIOBpeMeHO npOBepyBaJTe daHn ce CeYNBata NcKpNBHeH, OwTeTeHN nn H3a6EHn I daHn ce WpaΦOBHTe COoDBetHO 3aTeHaTH.
He e notpe6ha perylauzja ha pactojaHneTo MeIy ceuBaTa 6nDejKn DnHexeTe OBeKe nocTaBeHO a6pNk.
9.1.2 OctpeHe
OcTepeTo e HeoNxoJHO Kora n3BEd6aTa Ha HOKeBnTe ONa'ra n rpaHKnTe ce HabeDHyBaat N YeCTOnaTn Ce 3aJIeTHyBaAT.
Od 6e36eHocn npuHH, octpeheTo Mopa da ce n3BeDe BO OBlaCTeH cepBuceH ueHTap KoJ paCNoIra Co CTPyHocT u COoDBeTHN aIaNTHN 3a N3BpUyBaHe; Ha OBaa pa6ota 6e3 da ce pN3nHyBa OWTeTyBaHe Ha ceYNBOTO H da ce npedn3BnHa He6e36eHa coctoJ6a BO TEKOT Ha pa6oTaT.
Hohot co OwTeHeN ceHbA He CMee HnHoraaw da ce octpH, TyHy da ce 3aMeHN.
9.1.3 3aMeHa
CeHbTo HnHoraH He Cmee da ce nonpaba, TyHy Mopa da Ce 3aMeHN WtOM Ke CE 3a6eHnat 3aueTOu Ha OWTeYBaHe Hn Kora Ke CE DocTHrHe DO3BOJeHNot JHMNT 3a OCTpeBe. Od 6e36eHocn npuHH, Toa Tpe6a da ce 3aMeHN BO OBlaCTeH cepBuceH ueHTap.
Co Obaa MaunHa npeBnDeHo e da ce KOpNCTn CeYNBOTO HOeWTO FO HOCN KOJOT NOCOyen BO TaBeLaTACOCTexHnKnNoDaTOU.
3apaHpa3BoJToHa npOn3BDoT,ceHbTa HabeJeHn BO Ta6eNaTa "TexnHKn NdaToCu" Tpe6a Co BpeMe Da ce 3aMeHaT CO dpyrN COoDBeTHN KapaKTePncTnK 3a 3aMeHa n FyHKUHOHaJIHa 6e36EdHocT.
10. CKJIaIINPAHbE
BAJHO Be36eHocnTe npoHncn HTO Tpe6a da ce cIeIAT pIn CKJaIHpAbe ce HabeJeHN BO Iacyc 2.4.Ctporo npIprjKyBajTe ce do THE yIaTCTBa 3a da n36eHete cepno3HN pN3nHn Hn OIaCHOCTH.
10.1 OJIOXYBAHE HA MAIIINHATA
Kora maunhaTape6a da ce oJIOH:
- n3BaJeTe ja 6aTeepnjaTa Od CBOeTo KyKnIte N HanoJIHeTe ja (nac. 8.2.2);
- Co 3aCTaHaT ypeD co CEuNBOTo, CTaBeTe ja 3aUHTiTata Ha CEuNBOTo
-
OctaBeTe MOTOpOT da ce olaAn npeI da ja KaJaHpaTe MaunHaTa BO 3aTBOpEN IpocTOp;
4.Исунсте ja MaшинаТа (nac.8.3); -
YBepTe Ce deKa Hema DeJIOBN KOH Ce OHTeHEN IIN He CE npuBpCTEH.N AKe e NOTpe6Ho, 3aMeHETe H OHTeHNTe DEIOBn H3aTeHETe PA3Ja6aBeHNTe 3aBPTHN HAbpTKN, IIN KOHTaKtnpajTe FO OBlaCTEHNO CEPBnCeHZeHTap;
- cnlaapajte ja MaunHaTa:
-Ha cyBO MECTO;
-3aHTTeHa OJLOUHTe BpeMeHcN yCIOBn;
- noJaIeKy oD doΦaT Ha Deua;
- yBepyBajn DeKa CTe rN TprHaJIe KIyueBNTe H ONpeMaTa wTo ja KOpNCTeBTE npn OdpKyuBaHbeTO.
10.2 OJIOKYBAHE HA BATEPNJATA
BaTePnJaTpe6a Da Ce UyBa BO CpeDnHa 6e3 DnpeKTHa COHcEBA CBETInHa, Ha CTyDeHn MecTa 6e3 BlaRa.
3A6EJIIEIIKA Ako He ja KOpHCTHTe IIOJITIepnoi,poJIHeTe ja 6aTepejnaHa cekOn dBaMeceua 3a da n Ce IPOdoJIKn JKNBOTHHOT BEK.
11. PAKVBAHE IN TPAHCIOPT
Cekoraush Kora e notpe6eH npehoc nItnpaHCnOpT Ha MaunHaTa Notpe6Ho e:
- 3anpeTe ja MaunHaTa (nac. 7.5);
- n3BaTeJa 6aTePnJaTa Od CBOeTo KyKuIte HAnOJHHeTe Ja (nac.8.2.2);
- Co 3actaHaT ypeI co ceYNBOTO, CTabeTe ja 3auNTtata Ha ceYNBOTO
-HOCTe 3aUHTNTH paKaBnCn 3a pa6Ota;
-ФaTeTe ja MaunHaTa cAmo 3aДрЖaHte N HacOyTe rO ypeJOT 3a CceHbe BO npaBeu CnpOTnBEH OI npaBeUOT Ha DBNKeHbe.
Kora ja TpaHcnpOpTaMaunHaTa co BO3nIO, He 3a6opabajTe Da:
-06e36eTe je COOBeTHo MaunHaTa CO NOMOW Ha jaKINbA INI CNHnPn,
- NOCTaBeTe ja TaKa UTo Hema Da 6nnde onaCHOCT 3a HIKORO.
12. IOMOII INIIOIPIPABKA
Oba ynaTCTBO rnpetctaByBa cHTe HeONXODHnHNikauu 3a npaBvBaBe co MaunHaTa n3a npabInHO odpKvBaBe wTO rN 3BpUyBaKopncnKOT. CTe INTEpeBHeu N ODPKvBaHa Ha KocnIkata wTO He Ce daDeEHN BO OBA yNaTCTBO Tpe6a Da ce n3BpWAT OD CTpaHa Ha Dnilepot nnOBlaacteHnot cepBuceH CEHTap, bndeJn ImaaT roJemO No3HaBaHe npaYBaat CO NOTpe6HaTa ONPema 3a npabInHO n3BpUyBaHe Ha pa6oTaTa, 3emajKn rnpedBnD COoDBETHNOCTeNEH Ha 6e36EdHcT n CoCToj6aTa Ha KocnIkata. Cte Oepaunu wTO ce n3BeDeHn Ha HecooDbTeHn HaHH n OD HeKBaJIINΦHKyBaHn Iina pnpDOHeCyBaAT Da ce npeknHe BaXHoCTa Ha rapaHunja nOBpcKNTe Ha Ppon3BODntEJOT.
OdpKyBaHaTa n nonpaBKeTe noI rapaHcJia cMee da Hn BpuN cAmO OblaCTeHHOT cepBuceH ceHTap.
-OblaCTeHrTe cepBnCH n cHTpn KOpNCtAt camo opnHaJIHn pe3epBHN DeIOBn. OpnuHaJIHrTe pe3epBHN DeIOBn I dONoIhnteHa onpema ce cneuJaHNO dN3ajHnpaHn 3a MaunHaTa.
- Pe3epBnTe DeIOBN I DOONHnTeJIHaTa ONpema KOnuTo He ce OOnOpEnH, yNOrpe6aTa Ha pe3epBnI DeIOBN I DOONHnTeJIHa ONpema KOnuTo He ce OpiRnHaJn Ja HapyuBaat 6e36EdHocTa Ha MaunHaTa I To ocNo6OyBaat Ppon3BODnTeJOT od Cekoja O6Bpcka nI IN OdROBOPHOCT.
Ce npenopayba da ja ho nocHTe kocnkaTa eHa roDnHb BO OblaacteHNOT cepBncen ceHTap 3a cepBncnaphe n 6e36eHocna npOBepka.
13. ONCEΓ HA ΓΑPAHΙΝΙΝΑ
Iapaunjata nnoKpna CnTe uTeHa MaTepnjaJInte n npOn3BOcTBOTO. KopncnKOT
Tpe6a BHIMATEHNO da rncIeN cIte ynaTCTBa KOI ce daenHIO npINIOKeHaTa DOKymeHTaUNja. Iapaunjata He NOKPnBA WTe Ta npeu3BnKaHa od:
HeIOBOJHO No3HaBaHBe Ha npIIOKeHaTa DOKyMeHTaUjia;
- Heprnka;
- HenpaBnHa nIi 3a6paHeTa ynoTpeBa nn MOHTaKa;
- ynoTpe6a Ha HeopnHaJIHn pe3epBn DeIobN;
KopncTeHe Ha DoonHnTeHa Onpema ITO He e nCnpaHa nn Oo6peHa OD CTpaHa Ha npOn3BODnTeIOT.
IrapaHnjuTaHeNoKpNbA H:
HOpMaJIHO a6eHe Ha IOTPOWHITe MaTePnJaI Kako UTo Ce TpKaIaTa, CeyIaTa, 6e36eDHOCHTe 3aBPTKn JxNtte
HopMaJIHo a6eHbE.
Knybaot e 3aHTtEn CO COOBtHnTe
DpKaBn 3aKOH. PpaBaTa Ha KnyBaOT KOI CE
PpeBnDEHN BO DaDeHnTE DpKaBn 3aKOH Ha
HneDeH NaHH He ja LIMMtnpaat OBaa rapaHcNiJa.
14. TÁBÉLA 3A OДРЖУBA№E
| Иntервentionsя Рэрнод заобъшки | ||
| MAШINHA | ||
| П探测е ти сITE сюжни | Пред сени щогтpeба пас | 8.5 |
| Бezбedingни Контrolл /探测ка на komандente | Пред сени щогтpeба пас | 7.2 |
| 探测ка на состоьбата на бateрпajatura | Пред сени щогтpeба * | |
| Полnéные на sbateрпajatura | На краjet на сени щогтpeба | nac. 8.2.2 * |
| Чис腋 Ha машинати и на motopot | На краjet на сени щогтpeба | nac. 8.3 |
| Чис腋 и помачкување на сенито | На краjet на сени щогтpeба | nac. 8.4 |
| 探测ка на можни оштетувања на машината. Ако enotpeбно, Контактура对接о co obлacrten сөрвicSEN цentap. | На краjet на сени щогтpeба | - |
| Контrolla на уреот за сение | На краjet на сени щогтpeба | nac. 9.1.1 |
| Остреве на уреот за сение | - пас. 9.1.2 | ** |
| Замен Ha сенилata | - пас. 9.1.3 | ** |
- Почиайт e BO yanaTCTBOTO 3a 6aTePnjaTа/ноLnaHOT 3a 6aTePnjaTа.
**Pa6ota wTo Tpe6a da ja n3BeDe 3actanHHKOT nn OBlaCTeH cepBnceH cHTap
15. HECOO dBETHA PABOTA
| HAJDEHA MOKHNA ПИПУИHA PEШЕНЕ | |
| 1. Безбедною кочу e akтувирано, зелената сижаличka не се палу | Hema babеридал и le ne ctabe ha павилho |
| 2. КORA бezбедною кочу e akтувирано, зеленото с verteлно не се вklучы, Лд indinkatotot(Cl. 6.F) trpenhyba | Пробна babеридал и ростовета щ соктоша на habалногуп. и habалнога щ babерида (nac. 8.2.2) |
| 3. Моторот с racи bo tekот На работа | Батерида на с prabilno Вметната Ровете дали babерида на habално Вметната (nac. 8.2.3) |
| 4. Моторот заханьу bo tekот На работа улд indindinkatot(Cl. 6.E) trpenhyba | Пробна babерида поверува对接а на соктоша. Бата на habалногуп. и habалнога щ babерида (nac. 8.2.2) |
| 5. Со akтувирани рauthа tc komанда tcа сениcopeи и бezбедною кочу, уразото с缄вото На работа | Тримерот e оштeted. He korestete ja. Beendash zactanetee ja. maшинatable, Истаде щ babерида и образете се bo oblacteh сервicenцentap. |
| 6. Уразот с осейвото се загрева п permногу bo tekot На работа | Исклuchуerte ja машинatable, посякajte сени�уда за干嘛, Истаде щ babерида и образсанглу? псениatable (nac. 8.4) |
| 7. Уразот с осейвото дорpeл bod пел лесл'tричен кабел | - HE ДОПИРAJTE FO CEYIBOTO BIDENJI ИМА STРУJA BO HERO И ПЕТСТABYВА OTPOMHA ONACHOCT! Фате щ машинatable само за зашилatingа Истаде щ cabерида и поставете щ на зашилatinga пазда щ cabерида щ cabерида и поставете щ cabерида щ cabерида и поставете щ cabерида щ cabерида щ cabерида щ cabерида щ cabерида щ cabерида щ cabерида щ cabерида щ cabерида щ cabерида щ cabерида щ cabерида щ cabерида щ cabерида щ cabерида щ cabерида щ cabерида щ cabernt�����������. |
| 8. Уразот с осейвото удрил bo stpano тello. | - З actahete ja машинatable, Истаде щ cabерида и: - - - - - - - - - - - - - - - - - - - - - - - - - - - - - - - - - - - - - - - - - - - - - - - - - - - - - - - - - - - - - - - - - - - - - - - - - - - - - - - - - - - - - - - - - - - - - - - - - - - - - - - - - - - - - - - - - - - - - - - - - - - - - - - - - - - - - - - - - - - - - - - - - - - - - - - - - - - - - - - - - - - - - - - - - - - - - - - - - - - - - - - - - - - - - - - - - - - - - - - - - . - - - - - - - - - - - - - - - - - - - - - - - - - - - - - - - - - - - - - - - - - - - - - - - - - - - - - - - - - - - - - - - - - - - - - - - - - - - - - - - - - - - - - - - - - - - - - - - - - - - > - - - - - - - - - - - - - - - - - - - - - - - - - - - - - - - - - - - - - - - - - - - - - - - - - - - - - - - - - - - - - - - - - - - - - - - - - - - - - - - - - - - - - - - - - - - - - - - - - - - - - - - - - - - - - - - - - - - - - - - - - - - - - - - - - - - - - - - - - - - - - - - - - - - - - - - - - - - - - - - - - - - - - - - - - - - - - - - - - - - - - - - - - - - - - - - - - - - - - - - - - - - - - - - - - - - - - - - - - - - - - - - - - - - - - - - - - - - - - - - - - - - - - - - - - - - - - - - - - - - - - - - - - - - - - - - - - - - - - - - - - - - - - - - - - - - - - - - - - - - - - - - - - - - - - - - - - - - - - - - - - - - - - - - - - - - - - - - - - - - - - - - - - - - - - - - - - - - - - - - - - - - - - - - - - - - - - - - - - - - - - - - - - - - - - - - - - - - - - - - - - - - - - - - - - - - - - - - - - - - - - - - - - - - - - - - - - - - - - - - - - - - - - - - - - - - - - - - - - - - - - - - - - - - - - - - - - - - - - - - - - - - - - - - - - - - - - - - - - - - - - - - - - - - - - - - - - - - - - - - - - - - - - - - - - - - - - - - - - - - - - - - - - - - - - - - - - - - - - - - - - - - - - - - - - - - - - - - - - - - - - - - - - - - - - - - - - - - - - - - - - - - - - - - - - - - - - - - - - - - - - - - - - - - - - - - - - - - - - - - - - - - - - - - - - - - - - - - - - - - - - - - - - - - - - - - - - - - - - - - - - - - - - - - - - - - - - - - - - - - # - - - - - - - - - - - - - - - - - - - - - - - - - - - - - - - - - - - - - - - - - - - - - - - - - - - - - - - - - - - - - - - - - - - - - - - - - - - - - - - - - - - - - - - - - - - - - - - - - - - # - - - - - - - - - - - - - - - - - - - - - - - - - - - - - - - - - - - - - - - - - - - - - - - - - - - - - - - - - - - - - - - - - - - - - - - - - - - - - - - - - - - - - - - - - - - - - - - - - - - - - - - - - - - - - - - - - - - - - - - - - - - - - - - - - - - - - - - - - - - - - - - - - - - - - - - - - - - - - - - - - - - - - - - - - - - - - - - - - - - - - - - - - - - - - - - - - - - - - - - . - - - - - - - - - - - - - - - - - - - - - - - - - - - - - - - - - - - - - - - - - - - - - - - - - - - - - - - - - - - - - - - - - - - - - - - - - - - - - - - - - - - - - - - - - - - - - - - - - - - + - - - - - - - - - - - - - - - - - - - - - - - - - - - - - - - - - - - - - - - - - - - - - - - - - - - - - - - - - - - - - - - - - - - - - - - - - - - - - - - - - - - - - - - - - - - - - - - - - - - * - - - - - - - - - - - - - - - - - - - - - - - - - - - - - - - - - - - - - - - - - - - - - - - - - - - - - - - - - - - - - - - - - - - - - - - - - - - - - - - - - - - - - - - - - - - - - - - - - - - ... - - - - - - - - - - - - - - - - - - - - - - - - - - - - - - - - - - - - - - - - - - - - - - - - - - - - - - - - - - - - - - - - - - - - - - - - - - - - - - - - - - - - - - - - - - - - - - - - - - - / - - - - - - - - - - - - - - - - - - - - - - - - - - - - - - - - - - - - - - - - - - - - - - - - - - - - - - - - - - - - - - - - - - - - - - - - - - - - - - - - - - - - - - - - - - - - - - - - - - - = . . . . . . . . . . . . . . . . . . . . . . . . . . . . . . . . . . . . . . . . . . . . . . . . . . . . . . . . . . . . . . . . . . . . . . . . . . . . . . . . . . . . . . . . . . . . . . . . . . . . - . . . . . . . . . . . . . . . . . . . . . . . . . . . . . . . . . . . . . . . . . . . . . . . . . . . . . . . . . . . . . . . . . . . . . . . . . . . . . . . . . . . . . . . . . . . . . . . . . . . ; . . . . . . . . . . . . . . . . . . . . . . . . . . . . . . . . . . . . . . . . . . . . . . . . . . . . . . . . . . . . . . . . . . . . . . . . . . . . . . . . . . . . . . . . . . . . . . . . . . . ... . . . . . . . . . . . . . . . . . . . . . . . . . . . . . . . . . . . . . . . . . . . . . . . . . . . . . . . . . . . . . . . . . . . . . . . . . . . . . . . . . . . . . . . . . . . . . . . . . . . > . . . . . . . . . . . . . . . . . . . . . . . . . . . . . . . . . . . . . . . . . . . . . . . . . . . . . . . . . . . . . . . . . . . . . . . . . . . . . . . . . . . . . . . . . . . . . . . . . . . = . . . . . . . . . . . . . . . . . . . . . . . . . . . . . . . . . . . . . . . . . . . . . . . . . . . . . . . . . . . . . . . . . . . . . . . . . . . . . . . . . . . . . . . . . . . . . . . . . . . # . . . . . . . . . . . . . . . . . . . . . . . . . . . . . . . . . . . . . . . . . . . . . . . . . . . . . . . . . . . . . . . . . . . . . . . . . . . . . . . . . . . . . . . . . . . . . . . . . . . ? . . . . . . . . . . . . . . . . . . . . . . . . . . . . . . . . . . . . . . . . . . . . . . . . . . . . . . . . . . . . . . . . . . . . . . . . . . . . . . . . . . . . . . . . . . . . . . . . . . . + . - - - - - - - - - - - - - - - - - - - - - - - - - - - - - - - - - - - - - - - - - - - - - - - - - - - - - - - - - - - - - - - - - - - - - - - - - - - - - - - - - - - - - - - - - - - - - - - - - - - . - - - - - - - - - - - - - - - - - - - - - - - - - - - - - - - - - - - - - - - - - - - - - - - - - - - - - - - - - - - - - - - - - - - - - - - - - - - - - - - - - - - - - - - - - - - - - - - - - - - + - - - - - - - - - - - - - - - - - - - - - - - - - - - - - - - - - - - - - - - - - - - - - - - - - - - - - - - - - - - - - - - - - - - - - - - - - - - - - - - - - - - - - - - - - - - - - - - - - - - ? - - - - - - - - - - - - - - - - - - - - - - - - - - - - - - - - - - - - - - - - - - - - - - - - - - - - - - - - - - - - - - - - - - - - - - - - - - - - - - - - - - - - - - - - - - - - - - - - - - - / - - - - - - - - - - - - - - - - - - - - - - - - - - - - - - - - - - - - - - - - - - - - - - - - - - - - - - - - - - - - - - - - - - - - - - - - - - - - - - - - - - - - - - - - - - - - - - - - - - - - - - "" "" "" "" "" "" "" "" "" "" "" "" "" "" "" "" "" "" "" "" "" "" "" "" "" "' "" "" "" "" "" "" "" "" "" "" "" "" "" "" "" "" "" "" "" "" "" "" "" "" " " "" "" "" "" "" "" "" "" "" "" "" "" "" "" "" "" "" "" "" "" "" "" "" "" "” "" "" "" "" "" "" "" "" "" "" "" "" "" "" "" "" "" "" "" "" "" "" "" "" "'' "" "" "" "" "" "" "" "" "" "" "" "" "" "" "" "" "" "" "" "" "" "" "" "" "%"" "" "" "" "" "" "" "" "" "" "" "" "" "" "" "" "" "" "" "" "" "" "" "" "" '' "" "" "" "" "" "" "" "" "" "" "" "" "" "" "" "" "" "" "" "" "" "" "" "" ' " "" "" "" "" "" "" "" "" "" "" "" "" "" "" "" "" "" "" "" "" "" "" "" "" ' '' "" "" "" "" "" "" "" "" "" "" "" "" "" "" "" "" "" "" "" "" "" "" "" "" " "" "" "" "" "" "" "" "" "" "" "" "" "" "" "" "" "" "" "" "" "" "" "" "" " "" "" "" "" "" "" "" "" "" "" "" "" "" "" "" "" "" "" "" "" "" "" "" "" "" "" "" "" "" "" "" "" "" "" "" "" "" "" "" "" "" "" "" "" "" "" "" "" "" '' "" "" "" "" "" "" "" "" "" "" "" "" "" "" "" "" "" "" "" "" "" "" "" "" "" " " "" "" "" "" "" "" "" "" "" "" "" "" "" "" "" "" "" "" "" "" "" "" "" "" "." "" "" "" "" "" "" "" "" "" "" "" "" "" "" "" "" "" "" "" "" "" "" "" "" "” "" "" "" "" "" "" "" "" "" "" "" "" "" "" "" "" "" "" "" "" "" "" "" "" "' "" "" "" "" "" "" "" "" "" "" "" "" "" "" "" "" "" "" "" "" "" "" "" "" '' "" "" "" "" "" "" "" "" "" "" "" "" "" "" "" "" "" "" "" "" "" "" "" "" "" "" "" "" "" "" "" "" "" "" "" "" "" "" "" "" "" "" "" "" "" "" "" "" "" "" "" "" "" "" "" "" "" "" "" "" "" "" "" "" "" "" "" "" "" "" "" "" "" "" " " " " " " " " " " " " " " " " " " " " " " " " " " " " " " " " " " " " " " " " " " " " " " " " " " " " " " " " " " " " " " " " " " " " " " " " " " " " " " " " " " " " " " " " " " " " " " " " " " " " " " " " " " " " " " " " " " " " " " " " " " " " " " " " " " " " " " " " " " " " " " " " " " " " " " " '' '' '' '' '' '' '' '' '' '' '' '' '' '' '' '' '' '' '' '' '' '' '' '' '' ' " '' '' '' '' '' '' '' '' '' '' '' '' '' '' '' '' '' '' '' '' '' '' '' '' " " " " " " " " " " " " " " " " " " " " " " " " " " " " " " " " " " " " " " " " " " " " " " " " " " " " " " " " " " " " " " " " " " " " " " " " " " " " " " " " " " " " " " " " " " " " " " " " " " " " " " " " " " " " " " " " " " " " " " " " " " " " " " " " " " " " " " " " " " " " " " " " " " " " " " " " " " " " " " " " " " " " " " " " " " " " " " " " " " " " " " " " " " " " " " " " " " " " " " if Yes "Yes Yes Yes Yes Yes Yes Yes Yes Yes Yes Yes Yes Yes Yes Yes Yes Yes Yes Yes Yes Yes Yes Yes Yes Yes Yes Yes Yes Yes Yes Yes Yes Yes Yes Yes |
| HAJDEHA MOHNA | ПОНЧИHA PELSEЕНЕ | |||
| 11. Авторима на захерija на несядовлиейна | Условпеса заразота смену тewsни браат полеса потошувачка на посторида | Оп trimmingизирajte jaразота(nac. 8.2.1) | ||
| Баэрьога на с升降а заразота посторида | Корисс来不及 вора захеряни захеря на посторида co посторины воре MTаген (nac. 16.1) | |||
| Hamален Калаштет на захеряда | Te Нова захеряda | |||
| 12. ПолночOT hoja полноюбога нолноюбога | Баэрьога на с升降а заразота постарени правлино bo полочOT | Проберete дalm e соobdveТно Вмeтнaita(nac. 8.2.3) | ||
| Условпеса bo с升降а заразота с升降а павота ho с с升降а <|im_start|>assistant | 13. Левшикаторot(Cл. 6.F) постojahо сбети | Мелон кaj полочOT ho байога ПалочOT ho BAэрьога Душш Самошпога Замош Самошпога Замош Самошпога Замош Самошпога Замош Самошпога Замош Самошпога Замош Самошпога Замош Самошпога Замош Самошпогa Замош Самошпога Замош Самошпога Замош Самошпога Замош Самошпога Замош Самошпога Замош Самошпога Замош Самошпога Замош Саму Саму Саму Саму Саму Саму Саму Саму Саму Саму Саму Саму Саму Саму Саму Саму Саму Саму Саму Саму Саму Саму Саму Саму Саму Само Само Само Само Саму Саму Саму Саму Саму Саму Саму Саму Саму Саму Саму Саму Саму Саму Саму Саму Саму Саму Саму Саму Саму Саму Саму Саму Сами Саму Саму Саму Саму Саму Саму Саму Саму Саму Саму Саму Саму Саму Саму Саму Саму Саму Саму Саму Саму Саму Саму Саму Саму Сам: Саму Саму Саму Саму Саму Саму Саму Саму Саму Саму Саму Саму Саму Саму Саму Саму Саму Саму Саму Саму Саму Саму Саму Саму Саму | Плоберete дalm e соobdveТно Вмeтнaita(nac. 8.2.3) | |
| Исловпеса bo с升降а заразота павота ho с с升降а павота ho с с升降а павота ho с с升降а павота ho с с升降а павота ho с с升降а павота ho с с升降а павота ho с с升降а павота ho с с升降а павота ho с с升降а павота ho с с升降а павота ho с с降 павота ho с с升降а павота ho с с升降а павота ho с с升降а павота ho с с升降а павота ho с с升降а павота ho с с升降а павота ho с с升降а павота ho с с升降а павота ho с с升降а павота ho с с升降a павота ho с с升降a павота ho с с升降a павота ho с с升降a павота ho с с升降a павота ho с с升降a павота ho с с升降a павота ho с с升降a павота ho с с升降a павота ho с с升降a павота ho с с升降а павота ho с с升降a павота ho с с升降a павота ho с с升降a павота ho с с升降a павота ho с с升降a павота ho с с升降a павота ho с с升降a павота ho с с升降a павота ho с с升降 a павота ho с с升降a павота ho с с升降a павота ho с с升降a павота ho с с升降a павота ho с с升降a павота ho с с升降a павота ho с с升降a павота ho с с升降a павота ho с с升降a павота ho с с升降.a павота ho с с升降a павота ho с с升降a павота ho с с升降a павота ho с с升降a павота ho с с升降a павота ho с с升降a павота ho с с升降a павота ho с с升降a павота ho с с升降a павота ho с с升降 a павота ho с с升降 a павота ho с с升降a павота ho с с升降a павота ho с с升降a павота ho с с升降a павота ho с с升降a павота ho с с升降a павота ho с с升降a павота ho с с升降a павота ho с с升降 a павота ho с с升降.a павота ho с с升降a павота ho с с升降a павота ho с с升降a павота ho с с升降a павота ho с с升降a павота ho с с升降a павота ho с с升降a павота ho с с升降a павота ho с с升降.a павота ho с с升降.a павота ho с с升降.a павота ho с с升降.a павота ho с с升降.a павота ho с с升降.a павота ho с с升降.a павота ho с с升降.a павота ho с с升降.a павота ho с с升降.a павота ho с с升降a павота ho с с升降a павота ho с с升降a павота ho с с升降a павота ho с с升降a павота ho с с升降a павота ho с с升降a павота ho с с升降a павота ho с с升降 a павота ho с с升降. павота ho с с升降a павота ho с с升降a павота ho с с升降a павота ho с с升降a павота ho с с升降a павота ho с с升降a павота ho с с升降a павота ho с с升降a павота ho с с升降a павота ho с с升降a | Акnot OT onctoyb, поberete ro уразота bo Tmuaучokot e Bmertha и дalm И мд овod ha en. enerrija Менete ro defeektnoT del co opinihalen | |||
| Искneyшна samошпогерka | He kорисе jo машина; Bednaш зостане jo машина; изваде jo batepinjata и образete ce BO copbincen ceHTap. | |||
| 14. Левшикаторot(Cл. 6.F) trpenka | Гrelsha bo akumylatopot | He kорисе jo машина; Bednaш зостане jo машина; изваде jo batepinjata и образete ce BO copbincen ceHTap. | ||
| Бл_OKиран ротор | He kорисе jo машина; Bednaш зостане jo машина; изваде jo batepinjata и образete ce BO copbincen ceHTap. | |||
| Проблеса постору настуja | Оп trimизирajte jo уnotpeba tа на машина.Ta |
Iokolny npo6lneMOT npoDJIHyBa n no ynoTpe6a Ha onnHaHnte peuHenja o6paTeTe ce Ha Baunot npoDaBaU.
2.5 BESCHERMING VAN DE OMGEVING
10.2 STALLING VAN DE ACCU
- GENERELT 1
-
SIKKERHETSBESTEMMELSER. 2
-
BLIKJENT MED MASKINEN.5
3.1 Beskrivelse av maskinen og beregnet bruk....5
3.2 Sikkerhetssymboler.. 5
3.3 Produktets identifikasjonsmerke 6
3.4 Hovedkomponenter 6
- UTPAKKING 6
- MONTERING 7
5.1 KLARGJORING AV BATTERIRYGGSEKKEN (hvis finnes) 7
- BETJENINGSUTSTYR 7
6.1 Sikkerhetsbryter (innretning for aktivering/deaktivering) 7
6.2 Kontrollspak for knivblad (klippeinnretning) ... 7
6.3 Utlønsingsspake for bakre handtak 7
- BRUK AV MASKINEN
- EKSTRAORDINÄRT VEDLIKEHOLD 11
2.3 VEDLIKEHOLD, LAGRING
3. BLI KJENT MED MASKINEN
3.1 BESKRIVELSE AV MASKINEN OG BEREGNET BRUK
9. EKSTRAORDIN/AERT VEDLIKEHOLD
9.1 EKSTRAORDIN/AERT VEDLIKEHOLD AV KLIPPEINNRETNINGEN
Ike ta pa klippevinrtningen for tenningsnokkelen er tatt ut og klippevinrtningen har stoppet helt.
7.1 CZYNNOSCI WSTEPNE
2.1 OCHOBHbIE INPABUNIA B3ONACHOCTN
O3HaHOMbTecb CO BCEMN
npedynpeJdeHnMn NO TexHnHe 6e30nacHOCTn,
peKomeHdaaHmN, HJIIOCTpaunHM N
CneuHnKaunMn, npHnaRaembIMN K MaunHe.
HecobIIOJeHne HxKePnPBeDeHHbIX peKomeHdaun
MOhet npNBecTN K 3JIeKTpUYeCKM yJaPam,
nojapam n/nn HaHeCEHNO cepbe3HOrO yuep6a.
XpaHnte BCE onncahnMep npedoctopoHoctn uka3aHHI nCNOb3OBAHN B 6yduem.
TepMN «3JIeKtpnuecHoe O6OpyOBoHne», BCTpeaUoNcB B ONcaHm Mep npEOctOpOxHOCTn, OTHCNTcK BaIeM MaHInHe, pa6OtaUoSei OT cETn (c Ka6eIeM) nIh ot 6atapen (6e3 Ka6eIa).
1) Be3onacHoctb pa6oey 30hbl
a)Pa6o7a 30Ha DOLHHa 6bItb YnCTOu Hxopo7o ocBeueHHo.Ha yuaCTkax C nloXm OCBeueHHe, a TaKHe rDe cepnt 6ecnpaOK, NOBbIaTeCpNCHecTbIX ClyuaeB.
b) He ИспοлььзунTe 3лeHTpoO6OpydoBaHne BO B3рьIBOONaCHOcpeDe, NO6Ли3OCTN OT rOPIuX HnIhKoCTe, ra3a NII nblI. 3лeHTpoO6OpydoBaHne reHepnpyet NcKpbI, KOTOpbIe MOrYt npINBeCTn K Bo3rOpaHnIO nblI INI napOB.
c) Bo Bpempa60bI 3JeHTpoo6OpydoBaHnna Detn n NoCTOPOHHe Nua dOJIHHbI HaxODHTbc DaJIeKO OT Hero. EcnBbl OTBLeueTeCb. TO MOKeTe NOTepaTb KOHTPOlb HaD O6OpydoBaHnEM.
2) ΘleKtpnuecka 6e3oNaCHOCTb
a) BnJIHH 6OpyoBaHnI DOJHHbI 6bITb COBMeCTHMbIMN C p03eTHoH. Hn B KOem Cnyuae He BHOCHTe KaHnx-Ⅱn6o N3MeHeHn B KOHcTpyKcHIO BnIKn. He HCNoJIb3yIte BnIKn-aDAnTepbI C 3a3EmJIeHHbIM 3JeHTpoo6OpyobAHmE. HemOniPouBaHHbIe BNJIKN I COBMeCTHMbIe p03eTHN CHIN3rT PnCK NopaKeHnI 3JIeKTPnuecknTOKOM.
b) N36eraTe COpHOCHOBeHHa Tela C TaHIMN 3a3eMLeHHbIMN HIN NOHIOUeHHbIMN K 3a3eMJIeHHIO NOBepxHOCTaMH, KaH Tpy6bl, PaHaATOpbl, HXOHHBIE PINTbI, XOJIOHNBJHNH. B clyyuae COpHIOCHOBeHHa TeLa C 3a3eMJIeHHem NOBbIaETcR pNcK nopAKeHHa 3JIeKTPnueCKHM TOKOM.
c) He noBepraTe 3JeHTpoo6OpyObaHne BO3dienCTBnIO DOxNn Hn BnaHnOCTn. IopNaDaHnE BoDbl BHyTpB Kopnyca 3JeHTpoo6o
pyoBaHnIOBbIaEePnCK 3JIeKTpueeCKOrO yDapa.
d) O6paaaiTebc Ka6elem 6epenHo. He nCnoIb3yIte Ha6eIb Ira NepemeeHna 3JeKtpo06OpyoBaHn, He TAHnte erO 3a Ha6eIb, B TOM YnCSne Ira TORO, YTO6bl H3BLeuB BNkHy n3 po3ETKn. Ka6eIb DOJHeH HaxODITbcr DaJIeHO OT NCTOCHNKOB TeNla, MacLa, OCTpbix yrIOB IN NOdBnHHbIX y3-IOB. NOBpeXDeEHbIe nn 3anyTaHhbIe Ka6eII NOBbIaOH pNCK 3JeKTPnueckoro yDapa.
e)Bo Bpemn HcnoJb30BaHnna 3JeKtpo6OpyObaHnna NOd OTKpbITbIM He6om HCNoIb3yIte yDInHHTeJIb, NODxOJaN n Dn HCNoJb3OBaHnHa yNue. HcnoJb3OBaHnne Ka6eNa, NOxOJaNe Iro dny yNci, CHNkaET pNCK 3JeKtpuYeCKOrO yDapa.
f) EcIn HeIb38 N36ExHaTb HcNoJIb3OBAHnA 3JIeKTPoO6OpyIDOBaHnB O BLnAHHo CpeDe, HcNoJIb3yIte po3EtHy c yCTpoiCTBOM 3aIHTHO OTHIOUChENr (RCD-Residual Current Device). HcNoJIb3OBAHnE yCTpoiCTBa 3aIHTHO OTKIOUChENr (RCD) CHINHaET pNCK 3JIeKTPuYeCHOrO yIapa.
3) JIyuHa 6e3oNaCHOCTb
a) Bybte BHNMaTeIbHbI, CNeInte 3a CBOIMN DeIcTBnAMn N BeInte Ce6ra Pa3ymHO BO Bpemn HCNOJIb3OBAHHN 3JIeKTPoo6OpyIDOBAHn. He NCNoJIb3yIte 3JIeKTPoo6OpyIDOBAHne, ecIn Bbl YCTaII Hn HaxoINTEcb NOd BO3DeIcTBnEM HApHOTNuEcHNB WeIecTB, aHOROJn Hn IekapCTB. DaKe He6OJIb7aR HeBHIMaTeJIb-HocTb BO BpeMn HCNOJIb3OBAHHN 3JIeKTPoo6OpyIDOBAHn MOXET npINBeCTn K cepbe3HbIM TpaBMam.
b) NcnoJb3yIte 3aunTHyIO OdeHdy. Bcerda HaedeBaIte 3aunTHbIe OChN. HcnoJb3oBaHne TaKOrO 3aunTHoro ChapJeHn, KaK nbIJIe3aunTHbIe MaCKN, OByBc HeCKOJIb3raeI NOdoWBOn, KaCKN IJIH HayuHKn, CHINKaET PnCK TpaBM.
c) N36eraTe camOpOn3BOJbHOro 3anycha. YdocToBepbTecb, YTO npn6op BbIKIoueH, npenHe qem BCTaBnAytb 6aTaapeIO, O6XbaTbIBaTb Hnn nepemeuataB 3JeHTpoo6OpydoBaHne. NepemeueHne 3JeKtpoo6OpydoBaHn, pN KOTOPOM NaIeH haxOHTCnHa BblIOUaTeIe, a TaKHe yCTaHOBka 6aTapeH, KOrDa BblIOUaTeJIb HaxOHTCn B NOLOKeHN «ON» («BKL»), nobbiIaET pNCK HeCuaCTHOrO clyuA.
d) Ipeed 3anychom 3nEHTpOo6OpyOBOAHn y6epHte Bce KIOUH n peryInpOBOUHbIe HNCTpyMeHTbl. KIOU OHCTpyMeHT npn COpnKOCHOBeHN C BpaUaIOUHMcR y3JOM MOKeT Bbl3BaTb TpaBMbl.
e) CoxpaHnTe paBHOBeCne. Bcerda npOHyOnnpAaTecb Ha onOpHyo nobepxHocTb n coXpaHnTe HndJeHaaee paBHOBeCne. 3TO IO3BOJNT LyUwe KOHTPOINpOBaTb 3NeK- TPOO6OpyIDOBaHne B HenpeDbNdeHHbIX CNTya- cIHX.
f) OndeBaItecbHaJIeHauIm 6pa3OM. He HadeBaIte WnpOKyIO OeHdy N yKpa-WeHHa. BOnocbl, OeHda N nepuATn He DOJIHHbI HaxOHTbcN NO6JIH3OCTN OT NOBHHbIX y3IOB. UnpOKa OeJDa, yKpaWeHHa INI DInHHbIE BOLOcbl MOYr 3aCTpTb B IODBnKHBix y3Jax.
g)Пин haHnHn yCTpoiCTB, KOTOpbIe DOJIHHbI 6bITb NOdHIIOyeHbI H yCTaHOBkAm YdaJIeHn I c6Opa IIIN, yDOCTOBepbTEcb, YTO OHn IOdHIIOyeHbI N HCNoJIb3YOTcR HaJIeHaUIM O6pa3OM. PpIMHeHne 3Tnx YCTPOICTB MOXET CHN3HTb PNCKH, CBJ3aHHbIE C IIJIbIO.
h) He no3BOJnTe, yTO6bI y Bac BO3HNHIO yBCTBO loHHoYbepeHHocTH, KOTOpoe NOdBnHET Bac npene6peratb npabnAmn TexHHN 6e30nacHOCTn, DaHe ecIn Bbl XopoO O3HaONMnHcB C pa6Toi MaunHbl . He6peHHoe DeIcTBne MOHT 3a DOJI N CeHyNDbl nPiVBecTn K cepBe3HbIM TpaBMam.
4) 3KcnIyataunn H 3auNTa 3JeHTpoo6OpdyoBaHn
a) He neperpyhaTe 3JeKtpoo6OpydoBaHne. NcnoJb3yIte 3JeKtpoo6OpydoBaHne, npedHa3HaueHHoe dA daHHo pa60tbl. IpaBnIbHO BbIbpaHHoe 3JeKtpoo6OpydoBaHne BblONHT pa6Otu lyUWe n 6e3onacHe, CO CKOpocTbIO, DJIa KOTopo OHO 6blIO pa3pa-60TaHO.
b) He nCnoIb3yIte 3JeKtpoo6OpyObaHne, ecn BbIKIOaTeIb He B COCToAHN npaBnIbHO BkIOuHTb Hn BbIKIOuHTb ero. 3JeKtpoo6OpyObaHne, KOtOpoe HeJIb3r 3anyCTnTb pni NOMOUI BbIKIOUaTeIra, RBAETCA ONaChbIM HHyKaTaE TcBpeMOHTe.
c) N3BLeKaIte aKHyMylAToP n3 rHe3da, npeHdyeem BbINoHNHTb perylnpOBHy nIn CMeHy npncnOco6JeHH, a TaHHe npeHdyeem NOMeCTHTb 3JeKTPoo6OpdyoBaHne Ha xpaHHeH. 3TN npeDbapnteJbHbIe Mebl ppeIOCTOPoHHOCTH CHNkaOT pNCK camOpOn H3BOJbHOrO 3aNycka 3JeKTPoo6OpdyoBaHn.
d) XpaHnTe HEnCNoJIb3yEmoe 3JIeHTpOo6OpUdoBaHnE BHe DCsraEmocTh DeTeH He N03BOJnTe HcNoJIb3OBaTbe ERO JIOdAM, KOTOpBIE He O3HaKOMNlncb C pa6OtOn 6OpUdoBaHnI n C HaCTOaUMn YHa3aHHaMn. PnH HeyMeLom HcNoJIb3OBaHn IJIeHTpOo6OpUdoBaHnE OnaCHO.
e) PpOBOAnTe TexHnueChoe 06cLyHnBaHne 3JeHTpoo6OpyDoBaHn. PpOBepaTe co
OCHOCb paCNOLOXHeH NODBHXHbIX y3IOB H CBO6Oy Hx nepemeueHn, a TAKHe OTCYCTBHe NOLOMOH IpyrNX 6-CToTBeTB, KOTOpbIe MOrTy NOBNIaTb Ha pa60Tu 3JeKtPOo6OpdyOBaHn. PnHaNHN NOpeHHDeHn HEo6XoHmO OTPeMoHTnpoBaTb 3JeKtPOo6OpdyOBaHne, npEHe de Yem HcNoJb3OBaTb erO. MHOrHe HeCuaCThBiE ClyuH 6blN Bbl3BaHbI HeoCTaTOUHbIM 06ClyKuBaHnEM.
f) Pexyuüne opraHbI dOJIHHbI 6bITb 3aToUeHbI N YnCTbI. HAdJeXaUee o6cLyKHBaHne peJyux OPraHOB, XOpOua 3aTOUHa peJxuNX KpOMOK ppeoTbpaAoi NX 3aeDaHne I O6JIeYcaOT KOHTPOlb HaH HmN.
g) NcnoJb3yIte 3JeHTpoO6OpyOBaHne n COOTBETCTBYIOUne DOONHHTeJIbHbIe npncnOCo6JIeHn B COOTBETCTBnC npedeOCTaBLeHHbIMn yHa3aHnA M, yHTbIBa YCLOBn H TIN BBINOJIHReMo pa60TbI. NcNoJIb3OBAHne 3JeHTpoO6OpyOBAHn IaIeJIeN, OTJIuHbIX OT npedeYCMTopeHHo, MoKeT pInBeCTn K ONaCHO CNTya-
h) POpDepHnBaIte pyKoTn B cyXOM, nCTOM COCTOHHN, 6e3 CneIOB MaCna N Cma3HN. CKoJIb3KHe pyKoTKn He IIO3BOJIA- IOT 6e3ONaCHO nepemeaTa b O6OpyDoBaHne H ynpabIaTb IM B HenpeDbIeHHbIX CNTyaUHX.
5) 3Hcnpnyataunn MepbI npedoctoPOHHOCTN npn 3Kcnpyataunn o6opydoBaHnC 6aTapeHbIM nHTaHHeM
a) 3apHaaTe 6atapeo NCKIIOHTeJIbHO 3apHbIM yCTPOINCTBOM, peHOMEHIOBAHHbIM H3ROTOBNTeJEM. 3apHHOE yCTPOINCTBO, ppeHa3NaHeHHoe IJr ODHORO Tnna rpynnbl 6atapei, MOKeT BbI3BaTb Pnck NOKapa non NcNoJIb3OBAHm C dpyrMM rpynnam6atapei.
b)ИсполььзуиTe 3ЛeКТрОБОуДоване TOльно CЧETН OУHAЗАHHыIMN Гупnam6ат ape.ИспоьзOBAHne JIOбОйpyгоггурунь6aтapeMOMKET BbI3BaTb pNCK TpaBM N IOжapOB.
c) Korda rpynnba 6atape He nCnoNb3yeTcra, Heo6xOIMO DeepHaTb ee Ha pacCToHNN OT dpyrnx MetaJIInueeCHNX npEdMeTOB, HanpHmep, CHPenOH, MOHeT, KIOUey, RBO3deN, BnHTOB IN dpyrnx He6OJbUnx MetaJIInueeCHNX npEdMeTOB, KOTOpbIE MOryT Bbl3BaTb KOpOTHOe 3AmbIHahne KJIemM. KopOTHOe 3AmbIHahne KJIemM 6atape MoKeT Bbl3BaTb OKOrn I NOKapbl.
d) EcIn 6aTapeB INIOXOM COCTOHN, n3 Hee MoHET BbITEHaTb HNDHOCTb: n36eraTe IIO6oRO KOHTaKTa C Hei. NocIe cnyaHoro KOHTaHTa HEmEdJeHNO CMOITe HNDKOCTb BODoE. EcIn HNDHOCTb nonaja B rJa3a, HEmEdJeHNO O6paTntecb 3a Medn
CHHCHOH NOMOUI. HnKoCTb, BbITEKuaI 36aTapen, MoKeT Bb3BaTb pa3paKeHne IIN OOKor Ha KOKe.
e) He noIb3yITeScb NOBpeHDeHHbIMN IIN MoIhΦnIUPOBaHHbIMN rpynnO 6aTapei N O6OpUdoBaHnEM. IOBpeHDeHHbIE IIN MoIhΦnIUPOBaHHbIE 6aTapeN MOrY T BcTn Ce6I HEnpeDcKa3yEm, YTO MOKeT pnpBeCTN K NoJKapy, B3pbIBy IIN pNcKy TpaBM.
f) He noDBepraTe rpynny 6atape BO3dEInCTBnIO nIaMeHN HIN CJIHOM BbICHOH TemnepaTpybl. Bo3dEInCTBne nIa-MeHN HIN TemnepaTpybl Bblwe 130^ MoKet npNBecTN K B3pbBy. PIPMEUAHNE. TemnepaTpya "130 °C" coOTBeTCTByET TemnepaType "265 °F".
g) Co6IIOJaTe BCE yHa3aHnNo NO3apJdHe 3apJhaTe 6bTaapeo B ycNoBnx CO6JIIODeHnN DnAna3OHa Tempeatyp, yHa3aHHOro B pyKOBODCTBe. HenpaBnIbHoe BblIOJIHeHne 3apJdKn NIn TEMpepatya 3apJdKn, BblXoJuaa 3a IpeJebl yHa3aHHoro INHTepBaJa, MoryT NOpeDntb 6bTaapeo n NoBbICITb pNCK noJapa.
6) Texnuechna noepnha
a) Pemont 3Jektpoo6opydoBaHn DaJIKeH BbINOLHrB HBAHmHpOBAHHbI INepcoHaI, Heo6xOdmo HCNoJb3OBaTb NCHIOHTeNbHO OPHINHAJBHbIE 3aNaChbIe DeTaII. 3TO NO3BOJare CoXpaHtB yPOBeHb 6e3onacHOCTN 3Jektpoo6opydoBaHnA.
b) HNkorda He pemOHnpyuTe NOBpeHdeHHbIe 6batape. O6cnyHnBaHne 6batape J0JIHNO BblIOJHrTbcra NCHIOUHTeJIbHO IPOUN3BOIDHTeJIEM ININ aBTOpN3OBaHHbIMN IOCTaBUnKaMn ycIyr.
2.2 CNEUHAJIbHbIE INPABUNA TEXHNH BE30NACHOCTN JIA MAUNHBI JIA IODPE3KN JINBOH N3TROPODN
a) He np6JnHaTeCb K HoKy. He ydaJIte Cpe3aHbI MaTePnaI H He npHepKbAHTe Cpe3aEmble BtHN, HOJa HOHN HaxOaTcB DBrHexHH. NocLe BbyKnUoyEHN HOHN pOdoJHauOT DBVaTbcr. DaKe He6oNbwaH HeBHMaTeIbHOCTb BO BpEM NaONb3ObaHn UNaJIepHbIX HOHHu MOHET npVBecTH K cepBe3HbIM TpaBMam.
b) Nepemeaute wnaepHbIe HOHNcbl,
depa 3a pyHOrTHy C HENoDBNHHbIM
HOHOM n CTapAraCb He HaxnMaTb Ha KaHne-
JI60 BbIHIOuATEII INHTAHNA. IpaBnIbHa
TpaHCnOpTnpOBKa WnapePbIX HOHNU
CHNXaET pNCK HEnpeDHaMepeHHoro 3anycka n
IOcLJeDyUoJero TpaBMnPoBaHnHOxAMn.
c) Pn TpaHcnpTIpOBHe nn XpaHennn HnaIepbIX HOHHu BCerda yctaHaBnBaHTe HOx Hoxa. IpaBnBHO OpraHn30BaHHa
IpehoCka 7nnaepHbIX HOHHU CHNkae TpA BM OT HOKei.
d)Пру ydaJIeHn 3aCTpBwero MaTePnaJa Hnn O6cLyHbAHn HHCTpyMeHTa y6eINTecb, YTO BCE BblIOUaTeH N BblIOUeHbI, a 6aTapeHbI 6IOK n3BLeueH nIN OTcoEHHHeN.
HeoHuaHoe BnIoueHne IinaepbIX HOHNu BO Bpemy ydaenHna 3aCTprBwero MaTePnana NIN BbIOJHEnHraTexHnueCKOrO OcClyHBAHHaMOKeT HaHeCTN cepbe3HbIE TpaBMbl.
e)ДерхиTe WnapeHbIe HOxHnCbI TOlbHO 3a H3OInpOBaHHyIO NOBepXHOCTb pyKoTOK, NocKoJIbHy HOH MOHET COpNHACAtBCa CO ChpbITbIMN Ka6eMaM. CoPnKOCHOBeHne HOKe C Ka6eIem, HaxOJaUmMCn IOd HAnpJHeHEm, MOHET PnPBecTu K NoRbIeHnO HApPrHeHnA Ha HyxHbIX MetaJIuYeCKnx YactAx WnapeHbIX HOxHnC, B pe3yIbTaTe Yero ONEpaTOp MOHET IOnyHTb Udp TOkOM.
f) Āepнhte BCE shypbl nHTaHnHa Ka6eJIH 3a npedeJAMN 3OHBI CTPNHH. Lhypbl nHTaHn MOrTy 6bITb CkpbITb B JnBOH n3rOpOu nIN KycTapHnKe nClyuAHO nepepe3aHb HOHOM.
g) He nCnoB3yIte WnapeHbIe HOHNuBI B IIOxyo norOdy,OCo6eHNo ecn cyueCTByet Pnch nonadHn MOnHH. 3To CHnHaer Pnck IopaKeHn MOHnei.
h) Bo Bpempa60tB BCerda npoHo ydepHnBaIte MaunHy DBym pykamn. YdepnHaHne MaunHbToJbHO OJHO pyKOH MOKET npNBecTN K NOTepe KOHTPOJN NOCLyHNtB npuHNO cepBe3HbIX TpaBM.
B cnyae noIOMOK nHn abapn BO Bpempa60TbHe3aMeIHTbHO BbIHIOUHTb Dnuratelb H y6paTb MaunHy, YTO6bl OHa He Hahecna eue 6oIbwnu yuepe6;ecnn npOn3oWeH Necua nCnyauH n Onepatop nn TpeTbn Nua nOlyuHn TpaBMbl, He3aMeIHTbHO npnraTb Mepbl NO nOMOUn NoCTpaabWm, Han6oJee nOxOJaune B KOHNPeTHo CHTyaunn, N O6paTNTbcB MeUNHCHOe UypeJeHne dN Heo6xoDMoro leeuHn. TuaTeNbHO ydaJInte MaTePha, HOTOpB MoKeT HaHeCTn uyepe6 nHn TpaBMbl JIOdM H HNBOTHbIM, HOTOpbie Moryrero He 3aMetNTb.
I IpoDOnHHTeNbHoe BO3DeEChBHe Bn6paun MoHET HaHecTn yUepe6 HEPBHOcOcydNCToC nCTeMe (3TH COCTOHn H3BeCThbl KAn "CnHpOM PeHoo" Hn "6eONpyu), Oo6eHNO y JIOJe, CtpaAIOx npacCTPOHCTBOM KPOBOOpaueHn. CmNTombl Mory T npoBnATbCn Ha pyKax, 3aJAcTBAX n NaIbIaX B BVne NOTepn 4yBCTBHTeNBHOCTn OHemHn, 3yda, 60nn, 6NeHOCtN n H3MeHnna CTpykTypbI KOHN. 3TH CmNTombl Mory T YCHNIbCn NOB O3DeEChBEm Hn3HOI TempeatypbI OKpyHaioSe Cpebl n/nn CNWHOM CNbHOrO CHImAHn pyHOrTOH. Pn
NOBJIeHn CHMTOMOB CJeIyEt CHN3NTb BpeMa HcNoJIb3OBAHnMaUHHbI N O6paHTbCnBpauy.
2.3 TEXHINCHECKOE OBCJUYXINBAHNE, XPAHEHNE
Perylaephoe Texnuechoe 6cnykubHne npabnlbHoe xpaHenne ABnIOTc 3aIorom 6e3onachocTm MaunHbI N NOdepKaHna ee 3HCnlyatauONHHbx KaYeCTB.
-Пи OCTaHOBKe MaunHbI JIЯ TexHueCKOrO 06cIyKuBaHnI, OCMOTpa, XpaHEnH NII 3aMeHbI npncocobHeH Heo6xOIMo BbIKIOHTb DBnIaTeJIb, OTcoEeHNHTb MaunHy OT CETn I y6eITbcra, YTO BCE DmNkUneCeA qACTn PONHOCTbIO OCTaHOBJeHbI.
- PpeB BbIOJIHeHnEM IIO6bIX npOBepOK, peRyIInpOBoK n PpeD XpaHeHnEM DaITe MaShnHe OCTbITb.
- Берекho образаайтесь с машинов и xpaHnte ee B YNCTOM COCTOHN, B CYXOM HEDOCYHOM ДЯDETeMecTe.
HnB Koem Cnyuae He NcNoIb3OBaTb MaunHy C n3HOCHBUNMNCra HIN NOBpeKdEHHbIMN YactrMn. NOBpeKdEHbIE N 3HOCHBUNeCRA DeTaJIi Bcerda Heo6XoJMo 3aMeHrTb, OHn He noDJIeKa pEmOHTy. UcNoJIb3yIte ToJIbKO OpiRHaJIbHbIe 3aJYactn.
- CHNKeHn pncKa noKapa He OCTaBnTb KOHTeHepbl C OTXoAMn B NOMEuEHn.
3haeHna ypoBna 7yMa n Bn6paun,
yka3aHHbIe B HAcToIeM pyHOBOdCTBe,
YBIAOTc MaHCMaJIbHbIMn pa6OuHM
3HaueHnA MauHbI. NcNoJIb3OBaHne
HeC6aJAHcnpoBaHOro peKyuero 3JeMeHTa,
CNIshOM BbICOHa CKOpocTb, OTCyTCTBHe
TexHueChoro 06cLyHXNBaHHc CyueCTBeHHO
BIIIOrHa YPOBEh 7yMa n Bn6paunHO.
CleDObaTeIbHo, Heo6xOJMo npHNrTb
PpOfHnAaKTnueChne MEPbl dN yCTpaHEnHn
BO3MOHORO uep6a, Bbl3BAHHORO BbICOHm
yPOBHEM 7yMa n Bn6paUHOHHbIMn Harpy3kAMn;
BblONHrTb 06cLyHXNBaHHe MaunHbI, HaDeBaTb
IpOTHBOWUMHbIe HayShHHN, DeJaTb nepepbIBbl BO BpeMa pa60Tbl.
2.4 BATAPER/3APRHOE YCTPOICTBO

BHIMAHNE
HnHexeIyUoIe npaBnla 6e3OaCHOCTn
DOnOJIHHOT npeIINCAHN NO TEXHNHe
6e3OpaCHOCTN, H3IOJKeHHbIE B INHCTpyKcH N3apdHorO yCTPOIcTBA.
-ДяЗapднбatapeинспь3уteToько 3apHbIe yCTpoIcTBA, peKOMeHDoBaHHbIe n3rTOBHTeJIem. HenoJxOJaUee 3apdHoe
yCTpoIcTBO MOKeT npNBecTH K 3JIeHTpNueCKOMy UdApY, npePpeBy IIN yTeUke eKoJ XnDkoCTN n3 6aTapeN.
- IcnoIb3yIte ToIbKO onpeJeHHe 6aTapeN, npedymotpeHHble dna BaUero o6OpydoBaHn. HcnoIb3OBAHne 6aTapeN dpYrOro Tnna MoKeT npINBeCTN K TpaBMam n pNCKy noXapa.
XpaHHTe HEnCNoB3yEmyO 6aTapeHO Ha pacCToHNN OT KaHcJIepcKHX CKpeNOK, MOHeT, KIOUey, FBO3Dei, BnHTOB IN DpyrNX MaJeHbKnx MeTaJIINuecKHX INPeDMETOB, KOTOpbIE MOrYT Bbl3BaTb KOpOTKe 3aMbIKaHne KOHTaKTOB. KopOTKe 3aMbIKaHne 3JIeKTPnuEckOu cENm MeJdy KOHTaKTAMN MOHET Bbl3BaTb BO3rOpahne IINI NOJap.
He nCnoJb3yIte 3apAHOe yCTpoiCTBO B MeCTax C HAIINuHem NAPOB, BOcNJIaMEnHaOUXCXB BeueCTB, a TaKHe Ha JERKOBCnIaMeHraIOUxXCR NOBepxHOCTx, HApPIMep, Ha 6ymare, TkaHN t.D. Bo BpEm 3apAKn 3apAHOe yCTpoiCTBO HArpeBaETcH MOnKeT Bbl3BaTb NOKap.
Bo Bpemr TpaHcnpTnPOBKn aHHymyIaTOPOB CJIeNTe, YTObI KOHTaKTbI He cOpnHaCaJIncb MeJHy CO6oN, H He NcNoJIb3yIte MeTaJIInueCKyIO TApY Dn Ix TpaHcnpTnPOBKn
2.5 OXPAHA OHPYHAAIOUcE CPEdbI
- Ctporo co6IIOdaIte MeCTHbIe HOpMbI NO yTHIN3aunu ynaKOBKn, NOBpeKdEHHbIX qAcTei nn IIO6bIX 3JIeMeHTOB CO 3HaHTeJIbHbIM BInrHnEM Ha OKpyKaIOUyO cpey; 3TN OTXoDbI He DOJHHb I Bbl6paCbIBaTbcR B MycOpHbIE KOHTeINHePbI, a DOJKNbI 6blb OTDeJIeHbI IN nepeDaHbIB CNEuaJIbHbIe ueHTpbI C6opa OTXoDB, 3aHnMaIOUneCe nx nepepa6OTHOI.
- Ctporo co6IIOdaIte DeIcTBYIOUne Ha MeCTHOM yPOBHe npaBnla NO BBIO3y OTXODOB.
- Pocne 3aBepWeHn Cpoka CnyK6bMaunHbI He BbIbpaCbBaIe ee c 6bITOBbIM MycOpOM, a 6bpaNTecb B ceHTp c6opa OTXoIDOB B COOTBETCTBn C DeNCTBYIOUHM MeCTHbIM 3aKHOdaTeJIbCTBOM.
He BbIbpaBbAte 3JeKtppoobopyoBaHne BMeCTe C 6bITOBbIMN OTXoAMN. B COOTBeTcTBnC EbponeckOJ DNpeKTHBOI 2012/19/EC OTHOCHTeNbHO BbIEDeHHoro n3 3KcPnyatauNN 3JeKtpnueCKoro
3JIeKTPoHOrO 6OBpyOBAHnI e ee npimHeHnEM cornaCHO npaBnAm CTpaHbI 3KcNlyaTaunn, BbIEDeHHoe N3 3KcNlyaTaunn 3JIeKTPoO6OpyOBAHne DOJHXO OTnpaBnTbc H a nepebaOTky B COOTBeTCTBnC Tpe6OBAHnMn NO oxpHaE OKpyKaIOUeI Cpebl OTeJbHO OT dpynx OTXODOB. Ecln 3JIeKTPoO6OpyOBAHne BbIbPaCbIBaETcH Na CBaIKy IIN 3aKaNbIBaETcR B 3EmlH, BpeHbIe BeIeCTBa MOryt pOnHKnHyTb B CLOI NOd3EMhIX BOI IN ONaCTb B NIIeBbIe npOdyHTbl, YTO npiBeDEt K HaHeceHnU yIep6a
BaWemy 3dopOBbIO xOPOwemy cAmOyBCTBnIO.ДЯ PONlyeHnRA 60Jee NOdpo6HOHΦOpMaunn PO Nepepa6OTKe 3TOrO n3DeJIINr O6paaNTecb B UypeKdEHNr, OTBeTcTBENHoe 3a Nepepa6OTHy OTXoDOb, INN K BaWemy dNcTpNbIoTopy.
Li-ion
No 3aBepHenn Cpoka Cnyh6bl BaTapei
ObecneYbTe INx yHnHToJHeHne, KOtOpoe He
HaHecet BpeDa OkpyKaIOUeI cpeDe.
BaTapei coepKNT MaTePnA, onaChbI dJa
Bac n dJa OkpyKaIOUeI cpeDbI. BaTapeIO
Heo6xOIMO n3BLeu b N OTDeJIbHO CdaTb B ceHTppepepa6OTKn OTXODOB, KOToPbI pInHMaet JNTnHOHHbE 6aTapen.

Pa3dJIbHbIc6Op nCNoJb3OBAHHbIX
n3deIIn uYaNIOBOUHbIX MaTePnaIIOB
no3BoJAEt nepepa6aTbIBaTb N IOBTOPHO
ncNoJb3OBAbMbATEpHaJI. NOBTOPHoe
nCNoJb3OBAHHe BToPNUHO nepepa6oTaHHbIX
MaTePnaIOB NOMORAe TymeHbIHTb 3aRpy3HeHne OkpyKaIOUeI Cpebl NCHNITb NOTpe6HOCTb B IepBnuHOM cbIpbe.
3. O3HAKOMJIEHNEC MAUNHOI
3.1 ONICAHNE MAUINHbI IN PPEyUCMOTPEHHOE IPNMEHEHNE
DaaHaaMaunHaAaBnAeTcCaObBIM OobpyoBaHEm, H,BaCTHOCTN,IOPTaTHBbIMuNaIepHbIM HOHNzAMC6batapeHbIM NITAHm.
Maunha coctont n3 dBnraTeJ, KOTOpB npNBOuNT B DeNCTBne peKyuuee npncno6JeHne.
OnepatOp ynpabIaTe MaunHoi, BceIda HaxoIcB Ha 6e3onacHom pacctOAHN OT peKyuero npncnocobHeHra.
3.1.1 IpeymotpeHHoe HcnoJb3ObaHne
3TaMaunHa pa3pa6oTaHa n H3roTOBJeHa dIa:
CTPNKNI NOpRaBnBaHnKcTapNkoB IN HINBOI N3rOPONi, COCToHux n3 KcTapNkoB C BETKaMn He6oNbIo TOniHbI (ceehne He 6oJee 15 MM);
MaunHOn DoJKeH ynpabTb TOnbKO Odn HeOBek.
3.1.2 HenpaBnJIbHoe HcNoJIb3OBAHne
IIO6oe Dpyrooe HcNOb3OBAHne,OTNnHoe OT BbIweynomrHyTOrO,MOKeT CO3dA Tb ONaCHoCTb IN pINHHb yUepe6 IIOJAM N/INN NMyuEcTBy.BXoNTB NOHRTNE HENpaBnBHorO HcNOb3OBAHnR (B KaueCTBe npIMepa,Ho He OprAnuHBaCb 3TNMn CnyaMa):
KoJIeHHe TpaBbI B ObSeM N B YaCTHOCTN B6JIu3n 6OpDIOpHbIX KaMHei;
- N3MeJIbUeHHe MaTePnaIOB DЯ KOMnOCTOB;
- NOДрЕЗКуСТов;
-NCIOJIb3OBAHHeMaIINHbIBNOIOJKeHHN,KOrJapeKHyUeepnncnoc6JIeHHe HaxoDNTcBblIe IINHnPiue; - INCIOJIb3OBAHHe MaUNHbI Dnpe3KIMaTePnaIOB HepactnteJIbHO rPOINCXOXKeHnH;
-пимеенецpekyuxnpncnoc6beHn,OTINHbIXOT yka3aHHbIX Bflabe "TexHueeCKne xapaKTePncTtKN". Onacnoctb cepbe3hbx paH n TpaBM; - Пльзоваиме Maшинов Heckолькими onepaTopamn.
BAHHO HeaJIeKaUee HcNoIb3OBaHHe MaunHb BLeueT 3a CObO yTpA Ty CnblrapaHTN H CHIMaET C N3ROTOBtIEL BCIO OTBETCTBEHHOCTb BO3JaRa Ha NlB3OBaTeIra OTBETCTBeHHOCTb 3a N3depKHN B Clyuae Iopu INMyUecTa, NOJyEHNr TpaBM NN HaHeceHry UsepeBa TpeTbM NImaM.
3.1.3 TnI noJIb3OBaTeJIa
DaanhaMaunHa npedHa3HaueHa dla shipokoro
noTpe6nte, nHnpoceccnoHaIbHoro npimHeHna.
OHa npedHa3HaueHa dla IIO6nteBCKoRo npimHeHna.
3.2 3HAKNBE3ONACHOCTN
Ha MaunHe HmEOTc pa3nHbIe CmBolbl (pnc.2).OHN np3BaHbI HaONHbT b ONepaToP O Heo6xOIMOCtBHNMaTeJIbHOI OCTOpOJHOI KcNlyatauIN.
3haueHne CmBOIOB:

BHIMAHHE! ONACHOCTb!
JaHHaMaJHnHaPn HePaBnBHom NCNoJIb3OBaHm MoKet 6bITb ONaCHO dIe Opeapota n OkpyKaIOxN.

BHIMAHHE!PpeJde,YeM NOIb3OBaTbCMAuHNo,IpoQTHTe pyKOBODCTBO NO 3KcNJaTaun.

IcnoIb3yIte 3aunTHbIe OchN.

HaedeTe PIOThbIe H NcckOJIb3aUne pa6oynepuataKn.

He noDBepraTe MaWHy BO3DeiCTBIO DOXIA (NIN BnAHHOCTN)
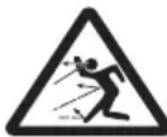
ONACHOCTb OTBPACbIBAHNA IPEDMETOB! Co6nDaIte
OCTOPOXHOCTbN3-3a BO3MOXHORO O6paCbBaHNMaTePnAJa peKHyuMnpncnoc06JIeHHeM,HTo MoJcT HaHeCTn cepBe3HbI yUep6 IIOdAM NmMyUcEBy.
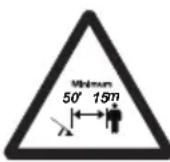
ONACHOCTb OTBPCABIBAHN IPEDMETOB!IIOHn IOMAWNHNE
KHBOTHbIE BO BPEM NcIb3OBaHHaMaHbI DOJIHKbI OTOHTn Ha pacCToHHe,10MeHbWe Mepe,B 15 M.
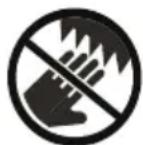
Onachoctb nope3OB! Deepnte pykn HnHn Ha pacctoHHN OT HOKei.
BAHHO IobpeJeHHbIe Hn HeuHTaEMbIe HaJIeKn HJHaIOCTc B 3aMeHe.3aKaHInTe HOBbIe HaJIeKn B aBTOpN3ObaHHOM cepBnCHOM cEHtpe.
3.3 HDEHTNΦHKAUHOHHbI APLbIK N3DEJIIN
Ha ndeHTnФнKaUHOM npIbIke n3dJIyka3aHa cIeDyUOaH aNΦOpMaun (Pnc.1):
- 3HaK COOTBeTCTBnI DInpeHTnBE CE
- HanmeHoBaHne n aDpec n3rOToBnTeJIa
- YPOBHeB 3ByKOBOM MOUHOCTN
- KoD n3dJIINr
- TIN MaunHbI
- 3aBoDcKoHomep
7.ФОДИЗГ罗TOBJIeHЯ - HanpjaKeHne nHTaHn
BnWnte ndeHTnKauHbIe daHHbIe MaHbI B CneuaJIbHbIe NOJI Ha rplbIke, NOMEueHHOM Ha o6paTHOH CTOpOHe 06IOxHN.
BAHHO Yka3bIbaIte NdeHTnKauHOBHe DaHHBe, yKa3aHHbIe Ha NdeHTnKauHOM RaJIbKe, KaJdbI pa3 npo6paueHN B aBTOpN3OBaHHbI cepBcHbI ceHTp.
BAHHO O6pa3eU deKnapauu COOTBETCTBn HaxoHTcHa NoCleDnX CTpaHnuax pyKOBOdCTBa.
3.4 OCHOBHbIE KOMNOHEThbl
MaHnHa CoCTOHT N3 CLeDyIOUx OCHOBHbIX COCTaHBIX 占T, KOTOpBIE BbINONHHOT CLeDyIOUne FyHKUIN (PNC.1):
A.ДВИгател:обecпуньeтДВИЗЕнepeжуero npсncocobeHn.
B.HoH(PeHuueepnncno6JeHne):3TO 3JIeMeHT, npedHa3HaueHHbI dIa CTpnKn paCTehN.
C. Npeednra pyhoTHa: n03B0JIaTeY npabJIb MaunHO, n Ha Hei HaxOHTcI npedoxpaHITeHbH bblKIOuATElb.
D. 3aHnra pyhOHTha: n03BOJIaRt ynpaBJIrTa MaunHO, HnHa Hei HaxoIaTc rIaBbIe opraHbI ynpaBJIeHNr.
E. 3aunha Hoxa (IJI TpaHcnpTnpoBKn I nepemeueHHMaunbI): 3aunuaeT OT clyuaHoro KOHTaKTA CpeKyuIM npncnocO6JeHNEM, KOTOpbi MOKeT PpNBecTN K cepbe3HbIM TpaBMam.
F.Батaper(dOIOJIHINTeJIbHOeOBOpyIDoBaHne no Tpe6oBAHnO,nyHKT 16.1):obecneuBaET 3JIeKTPoIHTaHne INcTpymEHTa;ee xapaKTepNCtIKN INpabINa 3KcNllyaTaUIN OINCAHbIBOTdJIbHOMpyKOBODCTBE.
G.3apnHoe yctpoCTBO (DOnoJIHHTeJIbHOe
obopyOBaHHe IO Tpe6OBAHHIO,nyHKT 16.2):
yctpoIcTB0,NpeHa3NaueHHe OJRA3apKn 6aTapei;
ee xapaKTePncTkn N npAByna 3KcNlyatauIN ONICAHbI
BOTdEJBHompyKOBOdCTBE.DocTyNHbIDBe MoJeIN
3apnHoro yctpoCTBa:G1 (6blCTpoe 3apnHoe
yctpoIcTB0);G2 (CTaHdAPTHoe 3apnHoe yctpoCTBO).
H. PAnceBbI IepHateJIb IJIA 6aTapei (DIOJINHTeJIbHOe O6OpyIDOBaHne IO Tpe6OBaHIO, nyHKT 16.3): yCTPOJCTBO IJIA pa3MeUeHnI 6aTapei.
I. CoeHHnHTeJIbHbI npOBoD: npOBd, CoeINHryoUm MaunHy c paHcEbbIM depKaTeIeM dIa6Taapei.
J.3MyIaTOp 6aTapeN (OIOJIHHTeJIbHOe O6OpyIOBaHHe NO Tpe6oBAHIO,pyHKT 16.4):ycTpoIcTB0, yCTaHaBJIbAeMOE B rHe3do MaIINHbI N IO3BOJIHOUeE HcNoJIb3OBAt b paHcEByI DepKAteJIb Ira 6aTapei.
4. PACIIAHOBHA
BAHHO PpaBnla 6e3oNaChocTn npBBeHbI Brr.2.Ctporo co6JouaTe yka3aHnJa nIpeoTbpaueHn cepbe3hbx pncOB nOnacHOCTN.
PacnaKOBHa DOJIHHa BbINOHHTbcHn TaepoNPOBHO NOBepxHOCTn, rdeIOCTaTOHc MeCTaIJIpeMeEeHMaunHbI N ee yNaKOBHN, Heo6XoHMo BCerda NoJb3ObaTbcr COOTBETCTBYUHm HhCTpyMeHTAMn.
- BckpbIbaiTe ynaKOBky octopoJHIO BVHMaTeIbHO, YTO6bl He NOTepyTB KOMnoHEHTbl.
2.O3HaKOBMbTEcB C DOKHyMeHTaMn,JeKaUMMN B KOpO6Ke,B TOM YNCJIe, C DaHHbIM pyKOBODCTBOM.
3.ИЗВLEКИТЕ ИЗ KОРОБКIM MaJIINHy. - BbIbOcBte Kopo6Ky uYnakoBOUHbIe MaTePnaJIbI B COOTBETCTBHN C MECTHBIM 3aKHOHaTeJIbCTBOM.
5. MOHTAHK
5.1 KOMNJIeHTaUNPAHcEBOrO DEPKATEJANBATAPEN (PNHALINUIN)
PaHueBbI depKaTeIb Ia6BaTapeNoCTabJIeTcB yHe CO6paHHOM BnDE (pnc.1H), n erO MoKHO OTCoEINHrTb OT KpeIIeHnI Da pEmHei (pnc.3) n nepeHocNtB BpyHyIO. DnIOTcoEInHHeHpaueBOrdepKaTeIa
6baTapeHaXmITE HaDBe BepXHne KhoNk (pnc.3.A).
FHe3Da dIa 6BaTape paCnoIaratoTc C o6Enx cToPOh paHueBOr depKaTeIa (pnc.4)
C npABoI cToPOhbl paHueBOr depKaTeIa
paCNOJKeHbI cJeDuOuNe KOMNoHEThbl:
pa3bem npoB0da (pnc 5.A)
- napeKJIIOUaTeIb 6aTapei (pnc.5.B)
USB-pa3bemДЯЗAPRAnDpyrHx yCTpoNCTB (HaipnMep,MO6uNbHbIXTelefoHOB)(pnc.5.C).
Bo n36eHaHne HaunHn He3aKpeIeHHbIX npoBOOB npedcMOTpeHb HnpaBIAOUIe C o6eHX CTOpOH paueBoro DepKaTeN I B er0 3aDHe YactN, Upe3 KOtOpBe MOHNO pnoJOnTb KaebI NITAHn.
6. YCTPOICTBA YNPABJIENH
6.1 INPEDOXPAHNTbHAR KHOHKA (YCTPOIcTBOIOHJIIOUeHn/OTHJIIOUeHn)

HaKaTHeM 3ToI KHOHKn MOHNO BHIouaTb N BBIIIOUaTb 3JIeKTPnueCKyIO ueMb MaunHbI (Pnc.6.A).

TOpHT OINH CBeToIDNoJ: 3JeHTpUecka
Cenb MaunHb BkIIOueHa (Pnc.6.B).
MaunHa rTOBaK NcNOlb3OBaHHo.
TOpT oBa CBeToIDNoJa: MaunHa pa6OtaeT.
CBeToIOHObI He rOpT: 3JIeKtpnuecka Yenb noJHOCtBIO OTKnOHeHa.

BAHHO BoBpMaNepMeueHn HNKOrda He depKHe paleu Ha KHOJIKe BO N36eKaHne clyaHoro 3anyka.
3haOK «BHHMaHHe» (pnc.6.F) 3aropaetc B clyuae HeNCnpaBHOCTn MaunHbI (obpaauTeCb K TabInCe onpeJeHn HncnpaBHOCTe, nyHKT 15).
6.2 PbIaR UYPABLEHnHOXA (PEKUeTO IPNCNOcOJIeHnA)
P03B0JAE BnHIOUaTb n peryNIpOBAt b cKOpocb HoHa.
BkIOueHne peKyUero npncnoc6JIeHn (pnc. 1.B) Bo3MOJHO ToIbKO pRn OJHOBPemEHOM HaKaTHn PbUHa ynpaBHeHn HOHa (pnc.6.C) n npedoxpaHntelhoro BbIKIOuateTner (pnc.6.D).
Pexyuee npncocobene BbIKIOaETcABTOMATUeCKN NOCNE OTNcyckAHn PBHara nnnpedoxpaHntelbHOro BbIKIOuateJI.
6.3 PbIyAR PA3BLOHINPOBHN 3ADHEPYHOHTN
PbHar pa36IOKINPOBKN (pnc.6.E) NO3BOJAEYCTaHaBnBaTb 3aHIOykoTky (pnc.1.D) B3pa3NHyBX NIOHOENr OTHOCHTeBHO peHcyIero npNCnocOJIeHNr Dn6OJIee yD06HOro BBINOJIHeHNr CTpnKHN HINBOI n3rOpOIn.
PerynpoBHa noLoXeHna pyHOaTHn doJIHHa BbIIOHNrTbcra, KOrda npedoxpaHHTeNbHa HONHa OTHIOUHe (CBeTOBOHnDnHaTOP He rOpHT).
7.3KcPJIyATAURA MAUNHbI
BAHHO IpaBnla 6e3oNaChocn npBedeHb B rI.2.Ctporo co6ndaJe yka3aHnI py npedOTbpaueHn cepbe3HbIX pncOB nOaCHOCTN.
7.1 PPEBAPNTIELHbIE ONEPAUIN
Ipeed HauaIom pa6oTbI Heo6xOIMBOBIOJIINHTb HECKoJIbHO npOBePOn Ionepaun, YTO6bl OecneuHb3ΦΦeKTHBHyO pa6oTy BUCOBnX MaKcMmaHbHO 6e30NaCHOCTn.
IocTaBbTe MaunHy B rOpn3oHTaJIbHOe NIOJKeHne TaK, YTO6bl OHa IPOuHNo ONpapalacb Ha 3emllo.
7.1.1 PpOBepKa CoCToHm6aTapeN
MaunHa noCTaBnHETc8 63batapei.
Pno6peTnte 6batapeo C eMKocTbIO, HAnboJe e NOxOJaIe
Ira pa6OuHX nOTpe6HoCteN, I NoJIHOCTbIO 3aprAInTe ee,
co6JIIOdA yKa3aHnR, N3IoJKeHHbIe B pyKOBODCTBe 6batapei.
IpeueHb 6batapei, OMOJOrnpoBaHHbx
Ira daHHO MaunHbI, npVBedeH B TabNIue "TexnHeckne XapaKTepNCTKN".
BcHpa3peepncnoIb30BaHnem: npOBepaTe coCToHnE 3apJa 6atape, cJeDy yHa3aHnAM, n3IOXeHHbIM B pyKOBODCTBe K 6atapee.
7.1.2 PerynpoBknoJIOKeHHpyKoAHTN
BbnoHnTe 3Ty onepaHIO npn OTHIOeHHo npeOxpaHTeBHO HONHe (HOrda CBETOBH INHnHaTOp He rOpHT).
- Notaryte Ha3aD pbHar pa36IoKnpOBKn 3aHei pyKoTKn (Pnc.7.A);
- NaHnHaTe NOBOpaHbTa b3aHIOy pyKoTky (Pnc.7.B);
- OTnyctnte pbHar pa36IOHnpOBHN (Pnc.7.A)
- NOBOPaHbAaTe pyKoTHy, noKa He ycblIuNTe ⅢeJHOK B Tpe6yEMOM NOLOKeHHN.
BAHHO NpeTeM, KaH NCNoIb3oBaTb MaunHy, y6eHTecB TOM, yTO pbHar pa36IOKnpOBKn NOHOCTbO BepHyICB NIOJOKeHHe 6IOKnpOBKn, n yTO 3aHnpyKoTHa HaeHKHO 3aΦHKpOBHa.
Bo Bpema pa6o7b3aHnra pyHOaTHa DOHHa 6bItb BCERda BEPTHaJIbHoi, He3aBcHMo OT NOJHOHeHn, B KOTOpom HaxOHTcpeHyuee npncno6JeHne.
7.1.3 NcnoJb3ObaHne paHaeBoro depHaTeIa (npn HauHH)
- BCTaBte 6atapeo do KOHca B Odn H3 OTCeHOB paHcEBORO depKaTeIa (PNC.4) npoToJKNHTe ee do uelHa, TTO6bI 3a6IOKpObaTb B HxHOM NIOJOKeHHN I ObecneuTH bJeKTPnueckn KONTaKT;
- NOCDOeHNHTE NPOBOK KCOOTBETCTBYUeMy pa3bemy paHcEBORO DEpKaTeIa (PNC.5.A) INOBEPHNTe ero do ueJIyka, YTO6bl 3a6LOKINPOBaTb B HuyKHOM NOLOKHeHHN I OBeCENeHTb 3JeKTPnuCeCKn KOHTaKT;
- OTPeyIpyIte peMHn 3aCTeHnTe CpepeIN CNCTEmy NpBeckn (Pnc.8).
7.2 IPOBEPHN B3O1NACHOCTN
BbIOnHnTe cIeMyIOUne npOBepKn 6e3oNaChOCTn H yDcOToBepbTecb, YTO pe3yJbTaTbI npOBepOK COOTBeTCTByOT daHHbIM, pNpBeDeHHbIM B TaBJIue.
IpeHne yem npctyntb H pa6ote, Bcerda npoepeiTe 6e30nacHOCTb MaunHbl.
7.2.1 O6uaa npoBepka
7.4.2 PekomeHdaaun no 3KcnIyataaun
EcnBBOBpempa60tboHOHX3a6IOHpyOTc HIN 3actprHyT B BETHKAX JNBOI N3rOPOAn:
- HeMeIeHHO BbIKHIOHTe MaunHy (nyHK7.5);
2.doKdntecb ocTaHOBKn peKyuIero npucnoc6JIeHnA;
3.ИЗВLEКТЕбАтAPEIO(nyнкT8.2.2);
4.ИЗВЛЕКИТЕЗАСТРЯБПМATEРДАЛ.
7.4.3 Cma3ka HOHeB BO BpeMpa60TbI
EcnBBOBpempa6oTbpeHyuee npncnoc6neHcNtKOM CnIbHO HarpeBaetc, CJeNyET Cma3aTb BHTpeHHne NOBepxHocTH HOKe (nyHKT 8.4).
3Ty onepaunHO Heo6xOIMMO BbIIOJHrTaHa BbIKNoeHHo MaunHe n C batapeen, N3BNeueHHo H3 COOTBeTCTByUoero OTcKa (nyHT 8.2.2).
7.5 OCTAHOB
ДЯ OCTaHOBa MaSHnHbI:
- OTNcyCTHe pblar ynpaBJIeHnHOJOM (pnc. 9.B) nI npedoxpaHHTeNbHbI BbIKIOUaTeIb (pnc. 9.C);
OTHIOHTe PpeOxpaHHTeBHyIO KHOKNy (CBETOBINHDAKATOP He ropnt) (Pnc.9.A).
Iocne BbIKIOueHMaunHbI Tpe6yeTc HecKoIbKOceHyd, npEHe qem pexyuee npncno6beHne octaHOBHTc.
Bcerda BbHIOHauTe MaunHy:
-BOBpemnepemeeHnOToDHO
pa6oey 30hbl Kdpyrom.
Bo Bpemr nepemeeHnHOrda He epHHTe naneu Ha npedoxpaHHTeJbHOHN HONHe BO n36eHaHne cnyaHoro 3anycha.
7.6 NOCJI EKCIJYATAUH
7.6.1 Nocle 3Kcnnyataunn c HcnoIb3ObaHem 6atapen
- N3BNeKHTe 6aTapeo H3 COOTBeTCTByHoue rHe3da n 3apAaTe ee (nyHK8.2.2).
Korda pejyuee npucncoc6neHne ocTaHOBNTc, yCTaHOBNTe 3auNTy HOKa (Pnc.1.E).
-ДаиTe OCTыТБИгагелIOпeрдпeрмeцEHнEM MaINHbI B KAKOE-JI6O NOMEseHne. - PnpoeDnTe OChCTky (nyHKT 8.3).
- PpOBepbTe, YTO HET OcIa6JIeHHbIX INI NIOBpeXdEHHbIX KOMNoHErTOB. EcIIH No6xOJIMo, 3aMeHInTe NOBpeXdEHHbIE KOMNoHeHTbl, a TaKHe 3aTAHnTe OcIa6JIeHHbIe BnHTbl I 60JIbI INI OpaTHTECb B ABTOPn3OBaHHbI cepBnCHbI ueHTp.
7.6.2 Nocne 3KcNpyataunC hCNoJIb3OBAHHeM 3MyIaTopa 6atapen (pHnHaJIuHn)
- NpebeDnte nepeKIOUaTeIb paHcEBOrO
depKaTeIaIb 6aTaPeB B NOJKeHne
"OFF"(BblKJI.) (pnc.5.B);
2.ИЗВЛЕКИТЕ 3МУЛТОР 6БАТAPEN ИЗ MAДИНБI (pɪc. 13.J); - CHIMITE pauncebbl depkaTeIb Iy 6atapei;
4.OTCOEHNHTe COEHNHTeIbHbI IPOBOO DOTMylrTopa6Tapeu (pnc.13.I) n OT paHueBOrO depKaTeA (pnc.5.A) - n3BJIeKHTe 6batapeo n3 paHcEBOrO depKaTeI (PNC.14) n3apJNTe ee (nyHKT 8.2.2);
- daiTe OCTbITb DnIraTeHIO nepei nepemeeHnEM MaunHb I KaKoe-Jnbo NOMEeHne;
7.npoBeDnTe OChTky (nyHK 8.3); - npOBepbTe,HTo HET OcJIa6JIeHHbIX ININ NOBpeJdeHHbIX KOMNoHErTOB.EcIn Heo6XoHMo, 3aMeHnTE NOBpeJdeHHbIe KOMNoHEtBi,a TaKHe 3aTnHte OCJIa6JIeHHbIe BVHTbI N60NTbI INN 6paTITecB B ABTOpN3OBAHHbI CEPBCHbI ueHTp
BAHHO Bcerda n3BneKaIte 6aTapeIO (nyHHT 8.2.2) n yctaHaBnBaIte 3aunTy HOka KaKdbI pa3, KOrDa BbI He IcNoIb3yTe MaunHy nnOCTabIReTe ee 6e3 npncMOTpa.
8. ПлahoBOE TEXHnueCHOE O6CJyHXBAHNE
8.1OBUHNE CBEDEHHA
BAHHO PpaBnla 6e3oNaChocTn npBedeHb B rI.2.Ctporo co6nlaTe yka3aHnI pyedOTBpaueHn cepbe3HbIX pncOB n OAnchocTn.
Ipeed npoBeHem IIO6bIX onepaun ITO TexHuecHOMy 06cnyHbAHIO:
- OCTAHOBITE MaunHy;
- N3BLeHnTe 6aTaapeo H3 COOTBeTCTByIOuero rHe3da n 3apAaHte ee (nyHt 8.2.2);
- npn HnoBHHom pexyem npncnocobenhnyctahOBHTe 3aunTy HOKa (3a nCHNIOUeHEm CnyuHa,Horda HMeHHO HOH HyHdaetcB O6CnyHbAHnn);
JaTe OCTbITb DnurateIIO nepeI nepemeueHneMaunHbIB Hahoe-JNoNOMeueHne;
Haenehe Te noxoadyio oedny,paoboune nepaTHn 3aunTHbIe OHN - npouHTaTe COOTBeTCTByIOuIe pyHOBOdCTBO.
-ПернODиHOCt b OnIcAHne Opeaun TeXHueCKOrO 6ClyKINBaHNr PnIBeDEhbl B "Ta6JIeTe XHueCKOrO 6ClyKINBaHNr" (cm. rIaby 14).LelbO 3ToT Ta6JIuBnEra TcNOMOy Bam NOdEPKINBaTB 9ΦΦeKTHNBHOCTb N 6e30NaCHOCTb BaWeMaINHb.B HeYyKa3aHbIOCHOBHbie onepaun TeXHueCKOrO 6ClyKINBaHNr MaINHbI N nepNOuHOCt b, npeDyCMOTpeHHaJdI KaHDoI n3 Hx. BbINOJIHNe TE yKa3aHHbIe DeIcTBnI NO ICTeueHN PePBOrO n3 yKa3aHHbIX CpOKOB.
-IVcnoIb3OBAHHeOpnHaJIbHbIX 3aIaChbIX qacteN I DOnoHNtEnbHorO O6OpyOBAHn MOKeT OTPuCaTeBHO Cha3aTbcra Ha pa6ote NBe3ONaCHOCHTMaunHb.I3rTOBHTeH He Hecet OTBETCTBEHHOCTn 3a yuepe6 nIITpaBMbl, Bb3BaHHbe DaHHbIMn 3dEJIaMn.
-OpHnHaJIbHbIe 3aHactM MoHNO npno6peCTN B cepBnCHOM ceHTpe Nn y aBTOp30BaHHbIX dNCTpn6bIOTOPOB.
BAHHO Bce onepaunnoTexnuechomy 06cnykubnHIO n perynpOBHe, He onncahhBie B daHHOM pykoBocTBe, DOJIHKbI bblbBbINOJIHeHbI uepe3 BaWero IINCTpN6bIoTopa HIN B CNEuHaN3npoBaHHOM cepBvCHOM ueHTpe.
8.2 BATAPER
8.2.1 ABTOHOMHOCTb 6aTapeu
Ha aBTOHOMHOCTb 6aTapeN (n, cIeIOBaTeNbHO, Ha IIOUaIb yuactka c pactntelbHOCTbIO, o6pa6aTbIAEMOr Ho OJHO 3apJKe) BnIHT CNeDyIOUIne OCHOBHbIe KaTOpbl:
a. yCIOBnIg 3KcNpyaTaun, KOtOpbIe OByCIOBnIBaHOT yBeJIuHeHHoe NOTpe6JIeHne 3HeprnI:
-CTPNHKA/NOpaBHBaHneOChbYcTOI NIN BJIaKHOJNBOHn3rOpO;
-CTPINKHa/NoDpaBHBaHHe KcTOB CO CJNUKOM TOCTbIMN BETKAMN;
b. DeiCTBnO npaTopa, KOTOpBX CneDyET N36eRaTb:
- chaTcE BkHIOUeHne N BbIKIOUeHne BO BpeMpa60TbI;
- npimHeHne TexHHKn CtpnHHK, KOtopa He noDxOaNT DnyeJe KOnHKpeTHo paOtbl (nyHKT 7.4.1);
-CKOPOCbI npoDBnKHeHnA CTPNHHKn, KOtOpaH He nOxDxOuNT dIra COCTOHRnH KOHKeTHHO HINBOH N3rOpOHN.
TTOYTO6bI ONTMN3HPOBaTb ABTOHOMHOCTb 6aTapen, peKOMeHNyETc:
- Ctpnhy KINByIO H3rOpOdb, KOrda OHa cyXa;
3aDaTbCKOpOCTbPNOdBnHexHcTpNKn, KOTopar NOxODNTIaCOCToHHKOHKeTHOro KyCTapHNka;
NcnoJb3OBAbTexnHcyCTpnKKn,KOTopar NOxOAnT DIA CEne KOHKpeTHo pa60tbl.
EcnI Tpe6yeTcNcNoJIb3OBaTb MaunHy 6oJee npOIOJIHnTeJIbHOe BpeM, Yem TOrO N03BOJIaRc CTaHApTHa8 batape,TO cyueCTbYOT CJeDyUOuNE BO3MOxHOCtN:
- npnoobpeTn BtopyIO CTaHdapTHyIO 6atapeIO, yTo6bl cpa3y 3aMeHHb pa3pJKeHHyIO 6atapeIO, He npepbBaar pa60tbl;
- npnoobpeCTn 6aTapeo C 60Jee BBICOKO aBTOHOMHOCTbIO NO cpaBHeHIO CO cTaHdApTHo 6aTapee (nyHKT 16.1).
8.2.2 N3BLeueHHe n 3apAHa 6aTapeu
- HαχMnte Ha KhoNHy 6IokHnpOBKn Ha 6aTapee B MaunHe (pnc. 13.A) nII B paAnCeBOM DePkaTeNe (pnc. 14. A) (npn HaJIuN);
- n3BLeKeHTe 6aTapeIO n3 MaunHbI (pnc. 13.B) nnnn paueBOrO depKaTeJIa (pnc. 14.B) (npnHaUNuN);
- BCTaBtTe 6aTapeIO (Pnc. 15.A) B CneuHaNbHbIOTcEK 3apAnHO yCTpoNCTBa (Pnc. 15.B);
- NOIDCOEINHInTe 3apnHoe yCTpoNCTBO (Pnc. 15.B) K PO3eTKe, HAnpJKeHne KOToPoI COOTBeTCTByeT YKa3aHHOMy Ha Ta6NIuHke;
5.BbINOHNTe NOHyO 3apAky, CJeDyaryKa3aHnAM, INIOXKeHHbIM BpyKOBOdCTBe6atapeN/3apAHOrO yCTpoiCTBa.
PIMMEAHNE BaTapeoobopyoBaHa 3aunToi, HOTOPa npenrCTByeT 3apRKe, eCN TEmpepatya B NOMEueHHe haxOHTcB npeJeIax O 0do +45^
PIMMEAHNE MoHIO 3apKaTb 6aTapeB B JIO6oe BpEM, B TOM YnCle YacTuH0, 6e3 pNcKa NOBpeKJDeHn.
8.2.3 NOBTOPHAR yCTaHOBb6aTapeN B MaunHy
Pocne3aBepenHn3apdKn:
- 13BLeKNTe 6aTapeIO H3 COOTBeCTByUoIero OTCeHa B 3aprHOM yCTpOINCTBE (PNC. 16.A) (He depKHTe ee IODKnIOeHHoB TteHne DInTeBHO BpeMeHN PocNe 3aBepseHnra 3aprKn);
2.OTCOEINHHTe3apHHOyeCTPOIcTBO (Pnc.16.B)OT 3neKTPocTe; -
BCTaBbTe 6aTapeo B COOTBeTCTByIOuee rHe3do BMauHHe (pnc.10.A) nIN B OJHO n3 rHe3d paHcEBOrO DePkaTeI dIg 6aTapei (pnc.4) (npn HAIuNn)
-
BCTaBtBe 6bTaapeH Do KOHua n npoToJnKHTe Do UeJIyKa, YTO6bI 3a6JIOKInPOBaTb B HUJKOM NIOJOXHeHH N OBeCneuTHb 3JeKTPnuecHKn KOHTaKT.
8.3 OYNCTHMAUINHbI IN DBNIGATEJIa
YTo6bl CHN3NTb PNCK NOXkapa, OCHUaTeMaHInHy, IN B YAcTHOCTN DBNrAteIb, OT OCTaTKOBJNCTbeB, BEtOK N3JIINsKOB Cm3KN.
Bcerda ouuiaTe MaunHy nocLe HcnoIb3ObaHnA, npotepeB ee uCToB BlaKHO TpAnOH CMOueHHo HeHTpaHBHIM UCTAUM CpeDCTBOM.
- YdaIte BcO OCTabUyOcBlaIgMy MrgKoN cyXoTpIIOuOko. BlaHIOCTb MOKeT BbI3BaTb pIck IopakHeHnA 3JeKTpUeCKIM TOKOM.
He nOJIb3yIe arpeccBHBie NCTaIe CpeIcTBA HnI paCTBOpHTeIN DIA OHCTHN INaCTMaCCOBbIX YactEn IN pyKoRtOK.
He nCnoJb3yIte cTpyu BOdbI u 36eraIte nonaHaHn BOdbI Ha DBIrTaTeJIb I 3JIeHTpUYeCKHe y3JIbI.
Bo n36eKanHe neperpeBa n nobpeKeHnnaBnrgateJI nn 6aTapeN BcerJa npOBepRnTe,TO BO3dyX03a6OpHbIe peWetKn dJnOxlaKeHn YnCTbIe n Ha Hnx Het OTXoDob.
8.4 OUHCTHA H CMA3HA PEXUYIeIPOPNCIOCOBJEHN
BcHn pa3 nocJe pa60Tb peKoMeHdyETc
YCTNTb N Cma3bIBaTb HOxN, YTO6bl yBeJIuHTb NX
3ΦΦeHTNBHOCTb IN pOJNTb cPoK cLyK6bl:
He npnacaiTecb K peHuSyemy npncoc6JeHIO, noka He 6ydet N3BLeueHa 6batape, n do Tex nop, noka peHuSce npncoc6JeHne NOHOCbIO He OCTaHOBTcA.
IocTaBbTe MaunHy B Tropn3OHTaJIbHoe NIOJOKeHne TaK, YTO6bI OHa npOHO ONpApJacb Ha 3eMIO.
- Bbtpnte HOHN cyxO TpIKNo, npINnIyIO rpa3b MOHNO ydaNtB 电Ko.
CmaKbTe HOxN,HaHecra ToHKn CJoI CNeuaJIbHOrO MaCna,IO BO3MOxHOCtN 3KOJOruHoro,BdoNb BepxHero KpaHoxa.
8.5 KPEENHbIE TAIKN INBHTbl
CneHTe 3a TEM, yTo6bI rAHH N BnHTbI 6blnn 3aTAYtB, IyBepenHOCTN B TOM, yTO MaunHa Bcerda 6eOonacha npn pa6ote.
-Перионческ npOBeРЯ Te npOuHocTb 3akpenJIeHn pyKoTOK.
9. BHEOUEPEIHOE TEXHNUECKHO OBCJYKUBAHNE
9.1 BHEOUEPEDHOOEOBCLYKINBAHNE PEKNUEROIPNCIOOCBJEHNA
He npnacaTecb K peHyuemy
npncocobneHIO, noka He 6ydt N3BleueHa
6atapera, n do tex nop, noha pehyuee npncnocoblenne noHIOCTbIO He octaHOBNTcra.
Pn3KcIpyaTaunB COOTBETCTBn C HNCTpykuaHMOHN He HykaIOTCB B O6ClyKbAHIN 3aTOUKe.
9.1.1 Поверна
I IepnoDnueeCN npOBepaHTe, qTO HOHN He nOrHyNcB, He HMeOT NOBpeHdEHN u He H3HOWeHbI, u 4TO BNHTbI npABNbHO 3aTAYtbl.
Het Heo6xOdmocTn HN B KaKoI peryInpOBHe pacCToRnM MeKdy HOxAMN, NCKoJIbKy 3TO T 3a3Op onpeJeHen Ha 3aBOe-IIIrTOBtTeIe.
9.1.2 3aToUka
3aToKHa HKeH Heo6xOdIma, KOrJa OToDa aPn pe3Ke ChnKaetcN BETKn YactO 3aCTpeBaHOT.
HcxoIa n3 coo6paHHeHH 6e30nacHOCTn Heo6xoJIMO, YTO6bI 3aTOUka OcuyaeCTBJIaIacB CneuHaN3HPOBaHHOM cepBnCHOM ueHTpe, nepcoHaJI HOTOPORO NMeET HaBbIH N IHCTpyMeHT dJI BbIOJIHeHH 3ToI onepaun, YTO6bI He pncOBaTb NOBpeHdEHHem HOHa I NocJeDyUoHm CHHHeHHem yPOBHA 6e30nacHOCTN BO BpeMa pa6tbl.
Hoch c n3HOWeHHbIMN 3y6aAMn HNKoRda He CJIeMyET 3aTaUHBaTb, erO Heo6xOdmo BcERda MeHrTb.
9.1.3 3aMeHa
Hoh He noJleHNr peMOHTy, Heo6xOaHMo 3aMeHnTb erO npn nepBbIX npn3HaHX TpeuHH nHn npn npBbIeHH npedena 3aToUKN. H3 coo6paHeHH 6e3OnaChocTH Heo6xOaHMo, YTObI 3aMeHa ocUyeCTBJIaNacB CneuaHn3HpOBaHHOM cepBCHOM ueHTpe.
Ha 3ToM MaWInHe npedymOTpeH npimHeHne HoxKe, MeoX KOD, yKa3aHHbI B Ta6nue "TexHnueckne XapakTeprncTKn".
yHTbBa COBpeHCTBOBaHne npOdyKuHN, HOxN, yKa3aHHbIe B TabInue "TexHnueckne XapaKTepnCTnKN", MOrT CO BpEmeHem 6bITb 3aMeHehbl DpyrIMM, C aHaJIOrnHybIMX XapaKTepnCTnKamH B3aIMo3aMeHReMoCTn N 6e3OnaChOcTH n Ba60Te.
10.XPAHEHNE
BAHHO IpaBnla 6e3oNaChocTu npx XpAHeHMaunHbI npBVeJeHb B nyHKe 2.4.Ctporo co6NJaTe yKa3aHna IpnpeTbpaueHncepe3hbx pncOB u OnaChocTu.
10.1 XPAHEHNE MAUINHbI
IpeKdEeM y6paTb MaunHy Ha xpaHHe:
- 13BJIeKHTe 6aTapeIO n3 COOTBeTCTByIOUeI ROHe3Ja I 3apAInTe ee (nyHKT 8.2.2);
2.Horda peKyuuee npncnoc6leHne octaHOBNTcY, yCTaHOBNTe 3auHTy HOxHa;
3.ДaHTeOCTbITb DBIraTeHIO nepeI nepeMeueHnEM MaunHbIB KaKoe-JIN60 NOMEueHne; - npoBeiTe OChtKy (nyHKT 8.3);
- npoBepbTe, YoT HeOcIa6JIeHHbIX NIN NOpeJDeHHbIX KOMNoHEnTOB.EcIn Heo6XoDIMO,3aMeHnTe IOBpeKdEHHbIE KOMIOHeHTbl,a TaKHe 3aTnHtE OcIa6JIeHHbIE BnHTbl N 60NTbl NIN O6paTnTEcb B aBTOpN3OBaHHbI cepBnCHbI ueHtp;
- XpaHnTe MaunHy:
-BCYXOM NOMEUeHIN,
-3aunueHHOMOTIPODHOBO3dEYCTBnA
-BHEOcraeMOCTnTeTeN;
-yoCTOBeBpTeCb,TO BbI y6paJIH KIOUH INHCTpyMeHT,NCNoJb3OBAuHneCn DnO6cLyKHBaHH.
10.2 XPAHEHNE BATAPEN
BaTapeIdoJXHaXpaHnTBcR BTeHn, B npoxlaHOM MeCTe INB NOMEueHHN, Ie OTCyTCTByET BlaaKHOCTb.
PIMMEUHNE B cnuyae nnTeIbHOI npocTo 3apnHaTe 6atapeo pa3 B Da Meca, T06bl IpOAnTb cpoK ee cnYk6bl.
11. INPEMEUENI TPAHCNOPTNPOBHA
KaJbIpa3,KoIaTpe6yETcNepeBnHyTB HINnepeBe3TuMaUNHy:
- BbIKIOHHTe MaHHy (nyHKT 7.5);
-и3BneKeIte 6aTapeIO n3 COOTBeTCTByIOUeRO rHe3da n3apAInTe ee (nyHKT 8.2.2);
-HorpapeKyuueepnncnoc6leHne octaHOBNTcra,ycTaHOBNTe3auHTyHOHa;
-HaIeHbTe PIOTHbIe pa6OuHe nepaTkn;
-6epHTe MaunHy NCHIOHTeIbHO 3a pyKoTKn, HnapBaJIrTe peJxUee npncnOcBHeHne B CTOpOHy, npOTIBONIOXHHyO HnpaBJIeHIO dBIXeHna.
PnpeB03Ke MaunHb Ha aBTOpaHcnpTe Heo6xOIMo:
-3aKpeHnTb MaunHy npn NMOU COOTBeTCTByIOx TPOCOB IINIeN;
- pacnoIooHHTbe ee TaKIM 06pa3OM, YTO6bl OHa Hn dIy KOrO He npEcdTabIra OnaCHOCTN.
12. CEPBINGHOE OBCJUYHINBAHNE IN PEMOHT
B 3TOM pyKOBODCTBE n3JIOKeHb BCE yKa3aHnA, Heo6xOdMbIe DJIy ynpabLeHnMaunHOI nДJI npaBnIbHOrO BblIOJIHeHn OCHOBbIX Opeaui TexHueCKOrO 6cJIyKnBaHnK, KOtOpoe DoJIKeH BblIOJIHrTb NOJIb3OBaTeIb. DJIy BblIOJIHeHn BCex DeIcTBn PO peryIINPOBKe I O6cJIyKnBaHnIO, He ONuCAHHbIX B 3TOM
pykoobodtbe,6bpaaHTecbKBaWemyIcnctpmbotopy IINB CneuuaHn3npoBaHHbI CepBncbI ueHtp,
pacnoJaraOuynI NOdrotOBLeHHbIM nepcoHaIOM I
obopyoBAHnEM,Heo6XoDmblIMnI pyaBnIbHOro
BbINOJIeHnRA paObTbI,NOdepKaHnY yPOBn86e3OnacHOCTN
IN BOCCTaHOBLeHnI NEBOHAUaJIbHOr COCTOHNMAHNbI.
OnerapuIN,BbIOJIoHHeHbIE B HeNoDxOJauxI
3TOrO CTpykTypax INHNeKBAJIuΦnIpOBAHHbIMN
JIIOdbMn,piBDOyT K aHHyI npoBaHnIO BCex
BIVOB rapaHTnN CHImaOT C n3rOToBHTeJI
BCIO OTBETCTBEHHOCTb N O6ra3aTeJIbCTBa.
ToIbKO aBTOpN3OBAHbIe CepBnChbIe cHTpbI MOrYT BbIOJIHHaTb rapaHTnHbI peMOHT n 06cJyKHBaHne.
- ABTOPIN3OBAHHbIe cepBnCHbIe CEHTpbI NCIOJIb3yIOT TOJIbHOOpRINHaJIbHbIe 3aIacHbIe YactN. OpiRINHaJIbHbIe 3aIacHbIe YactN IdoONIHITIELHoe 6obOpYdOBAHHe 6blN CneUHaJIbHo pa3pa60TaHbI dIra Maun H daHHoro Tnna.
- IcnoIb3OBAHHe HeOpnHaJIbHbIX 3aIacHbIX qacteN iDOnJHInTeJIbHO O6OpyIOBaHnHE yTbePKeNo H3roTOBInTeJeM; IcnoIb3OBAHHe HeOpnHaJIbHbIX 3aIacHbIX qacteN iDOnJHInTeJIbHO O6OpyIOBaHn CHINKaE TypoBeH b 6e3OnaCHOCTn MaIHHb, a TaKHe CnIMMaET C N3rOToBInTeJI BCE O6a3aTeJIbCTBa n OTBeTCTBeHHOCTb.
- PeKOMEHdyeTcpa3BroDOTBO3NtMaHHy BABTOPIN3OBAHHbI CEPBNCbI CEHTp DJIy 06CnyHbAHn, yXoJa n pOBepKn HCpnaBHOCTn npdoxpaHNTeJbHbIX yCTpoiCTB.
13. YCIOBnI IAPAHTNI
TapaHTnI NOKpbIbAe TCE DeΦeKThI MaTePnaIOB nN3rTOBLeHn.IoNb3OBaTeIb DOnJKeH 6yDet CKpyuJe3HO CNeIOBaTb BCm yKa3aHnM, I3LoXeHHbIM B pInIOXeHHoD OKyMeHTaCnI. TapaHTnI He NOKpbIbAe TUepe, Bbl3BaHHbI:
- HeIOCTaTOUHbIM O3HaKOMJIeHNEM C CONPOBOnTeIbHOJ DOKyMeHTaUHei;
HEBHHMaTeJIbHOCTbIO - HénpaBnIbHbIMN INHepa3peWeHHbIMN 3KcπIyatauNeH MOHTaXOM;
- INCNoJIb3OBAHHeM HeOpnHnHaJIbHbIX 3aIyAcTei;
- IVcnoIb3OBAHnEM DOnoJIHnTeJIbHbIX npCncOco6JIeHn, He NOCTaBnEHHbIX HnHe yTBePckDeHHbIX I3rOToBnTeJEm. TapaHTN TaKke He paCnpocTpaHReTcHa:
- eCTeCTBeHHbI H3Hoc TaHx paCXoHbIX MaTePnaIOB, KaK KOleca, HOJI, npEOxoPaHITeJIbHbIE 6OJtBI n npOBoDA;
- ECTECTBHeHbI IN3HOC.
IpaBa nokynataTeJI 3aUuuaet 3aKOHoTaTeJIbCTBO eO cTpaHbI. HactoJau rapaHTnHnKaH He orpaHnUbae T npab nokynataJI, npedyCMOTpeHHbIX 3aKOHAMn eO cTpaHbI.
14. TABJIINCA TEXHNUECKORO OBCJYKINBAHNA
EcIn nocIe BbINOJIHeHn OINcAHhBx BblE DeIcTBn HEnOJIaKn He NcYe3N, CBXKITecB C BaWIM dNCTpN6bKOTOpOM.
16.ДОПОЛНITEЛбHOEOBOPYIOBAHNE ITO TPE6OBAHNUO
16.1 Dpyne BATAPEN
IpeJnraTc6bTapeNpa3nHNoE mKoCTn, npdHa3NaeHHbIe Iy pa3nHbIX oBlaCTe npImeHn (pnc.17).Ipeueh6bTaapei, OMOIroPobAHbIX dAaHHoMaunHbI, pRbEdeH B TabInce "TexnueeXapaTepcNTnN".
16.2 3APrHOE YCTPOIcTBO
yctpoiCTBO, npedHa3HaueHHOe IJIa 3apJIKI 6aTapeN: 6bICTPOe (pnc.18.A), cTaHdapTHoe (pnc.18.B).
16.3 PAHUEBbl DEPHXATEJIb IJI BATAPEI
YcTpoIcTBoIpa3MeueHnIaByx6aTapei,
obecneuBaOuee Heo6xOaHmoe I
pa6tblMaunHbI 3JeKTpOniTahHe.
OHO OCHaSeHIO npOBODmIg CoeHNHeHH C MaunHo (pnc.1.l) npeKeHIOUaTeJIem (pnc.5.B), no3BOJauM BbIbPaTb Ody n3 DaByx 6aTapei (noLoKeHne
<1> n <2>) n noLoKeHne
16.4 3MUYIANTOP BATAPEN
yCTpoIcTBO,yCTaHaBnBaEMOE B rHe3do MaHINbI IIO3BOJIAUoJIe HcNoJIb3OBA Tb paHcEByI DEpKaTeJI bI JI 6aTapei.
INDICE
- VSEOBECNE INFORMACIE 1
- BEZPECNOSTNE POKNY 2
- OBOZNÁMENIE SA SO STROJOM 5
2. BEZPEČNOSTNÉ POKNY
2.1 ZAKLADNÉ BEZPEČNOSTNÉ UPOZORNENIA
Pozorne si preciţaje bezpečnostné varrovania,Pokyny, ilustracie a špecifikacie dodané so strojom.Nedodržanie uvedenych kosnov moze sposobit zasah elektrickym prudom, poziar a/alebo vázne ublizenie na zdruvi.
2.5 OCHRANA ZIVOTNEHO PROSTREDA
6.2 BICAK KONTROL KOLU (KESIM CIHAZI)
Bicagin calistirilmasini ve hizinin ayarlanmasini saglar.
UK DECLARATION OF CONFORMITY
(Supply of Machinery (Safety) Regulations 2008, S.I. 2008 No. 1597, Annex II, part A)
- The company: ST. S.p.A. - Via del Laboro, 6-31033 Castelfranco Veneto (TV) - Italy
- Hereby declares under its own responsibility that the machine (function):
Battery powered hand-held long reach hedge trimmer
a) Homologation type:
HT 500 Li 48, HT 700 Li 48
c) Serial number:
23A·HTR000001÷99L·HTR99999
d) Engine: battery-operated
- Conforms to UK Regulations:
S.I. 2008/1597 - Supply of Machinery (Safety) Regulations 2008
S.1. 2001/1701 - Schedule 8 - Noise Emission in the Environment by Equipment for use Outdoors Regulations 2001
S.I. 2016/1091 - Electromagnetic Compatibility Regulations 2016
S.I. 2012/3032 - The Restriction of the Use of Certain Hazardous Substances in Electrical and Electronic Equipment Regulations 2012
- Reference to harmonised standards:
EN 62841-1:2015 + A11:2022
EN 62841-4-2:2019 + A11:2022
EN 55014-1:2021
EN 55014-2:2021
EN IEC 63000:2018
g) Measured sound power level:
h) Guaranteed sound power level:
k) Power installed:
HT 500 Li 48
HT 700 Li 48
91,4
93,2
dB
94
95
dB
/
/
kW
n) Person authorised to compile the technical file:
ST. S.p.A.
Via del Lavoro, 6
31033 Castelfranco Veneto (TV) - Italia
o) Castelfranco Veneto, 10/01/2024
CEO Stiga Group
Sean Robinson

UK Importer: STIGALTD
Unit 8, Bluewater Estate Plympton,
Devon, PL7 4JH, England

| FR (Traduction de la notice originale) | EN (Translation of the original instruction) | DE (Übersetzung der Originalbetriebssanleitung) |
| Déclaration CE de Conformité(Directive Machines 2006/42/CE, Annexe II, partie A)1. La Société2. Déclaré sous sa propre responsabilité que la machine : Taille-hale de jardin portatifa) Type / Modèle de Basec) Série d) Moteur: accu3. Est conforme aux prescriptions desdirectives :e) Organisme de certification4. Renvoi aux Normes harmoniséesg) Niveau de puissance sonore mesureh) Niveau de puissance sonore garantich) Puissance installéen) Persone habitilée à établier le Dossier Technique :o) Lieu et Date | EC Declaration of Conformity(Machine Directive 2006/42/EC, Annex II, part A)1. The Company2. Herby declares under its ownresponsibility that the machine: Portablegarden hedge trimmera) Type / Base Modelc) Serial numberd) Engine: battery-operated3. Conforms to directive specifications:e) Certifying body4. Reference to harmonised Standardsg) Sound power level measuredh) Sound power level guaranteedk) Power installedn) Person authorised to create theTechnical Folder:o) Place and Date | EG-Konformitätserkläung(Maschinenrichtlinie 2006/42/EG, Anhang II, Teil A)1. Die Gesellschaft2. Erläct auf eigene Verantwortung, dassdie Maschine:Tragbare Heckenschere für den Garten |
| NL (Vertaling van oerspronkelijkegebruiskeanwijzing)EG-verklaring van overeenstemming(Richtlijn Machines 2006/42/CE, Bijlage II,teil A)1. Het bedrivif2. Verkaart onder zijn eigenverantwoordelijkheid dat de machine:Draagbare hedgeschaar voor in de tuina) Type / Basismodelc) Serifenummerd) Motor: accu3. Voldoen aan de specificaties van derrichijnen:e) Certification-instituut4. Verwijzingaar de Geharmoniserde normeng) Gemeteniveau van geluidsvermögenh) Gegerandeerd niveen vangeluidsvermögenk) Geinstalleerd vermögenn) Beveoged personooor het opstellen vanhet Technisch Dossiero) Plaats en Datum | ES (Traducción del Manual Original)Declaración de Conformidad CE(Directiva Maquinas 2006/42/CE, Anexo II, parte A)1. La Empresa2. Declara bajo su propria responsabilidadque la maquina: Cortasetos de jardinportàtila) Tipo / Modelo Basec) Matriculad) Motor: bateria3. Cumple con las specifications de lasdirectivas:e) Entre certificador4. Referencia a las Normas armonizadasg) Nivel de potência sonora medih) Nivel de potência sonora garantizoakoté instaladan) Persona autorizada a realizar el ManualTécnico:o) Lugar y Fecha | PT (Traduição do manual original)Declaração CE de Conformidade(Diretica de Maquinas 2006/42/CE, Anexo II, parte A)1. A Empresa2. Declaraaabrópria responsabilitad Quea maquina:Corta-sebés portátil dejardima) Tipo / Modelo Basec) Matriculad) Moto: Bateria3. É conforms à aspecificações dasdireivas:e) Úrgão certificador4. Referência às Normas harmonizadasg) Nivel medido de potência sonorah) Nivel garantido de potência sonorak) Potência instaladan) Pessoa autorizada a elaborar o CadernoTécnicoo) Local e Data |
| EL (Metáφροιηtou πρωτότου tawv obημωνxροήςEK-Δηλωση συμμόρωρως(Obηγία Μηχανύν 2006/42/CE, ΠαράρημαII, μεροςΑ1. H επαρία2. Δηλωνει πετθυνα στη μηχανήΦροτό υλαδίκητου | TR (Orijnal Talimatlariñ Tercümesi)AT Uygunluk Beyani(2006/42/CE Makine Direktifi, Ek II, böümü A)1. Şirket2. Şahsi sorumluluğ altinda asağidaki makininen: : Taşnabilir bahçècit dizelticia) Tip / Standart modelc) Sicil numarasidi) Motor: batarya3. Asağidaki direktifilerin özelliklerine uygun oldugūn beyan etmektedir: e) Sertifikalandiran kurum4. Harmonize standartlara atfg) Olçülen ses gic seviyesih) Garanti edilen ses gic seviyesik) Kurulu gicn) Teknik Dosayi olusturmaya yetkili kisi:o) Yer ve Tarih | MK (Πρενοίνηн ha oprinhaŋηte ylnatctba)Декlapauínaja 3a yocflacenoct co EY(Дірөгтва за машени 2006/42/CE, Аnéк il, dean A)1. Kompanhajiata2. Изавая сецнона линна odroborpoct deveka clednata машни: ПпегослвТrimер за жени оgrada за радиñaa) Тип | ochoben管理模式c) etačketea) motop: akymylatop3. усогаленco сецифikaциite cnopeДірөткыnte: e) Тени за сецифikaциja4. Р federpenци за усоглесниHopmatimbigng Akcystvnni prinitncokh) Изегеню на звуну мочков浊КИнсталпаим мочков浊H) oblaстеню посяze зоставува на Technikукatingа бpoшураооMe'to n datуm |
| NO (Oversettelse av original bruskanvising)EF-Samsvarserklarng(Maskindirektiv 2006/42/EF, Vedlegg II, del A)1.Firmaat2.Erkräder på eget ansvar at maskinen:Bæbar hage hekksaksa)Type / Modellc)Serienummerd)Motor: battere3.Oppfyler kravene i direktvivenep)Sertifieringsorgan4.Henvising til harmoniserte standarder g)Målt lydeffektnivah)Garantert lydeffektniva)k)Installert effektn)Person som har fullmakt til á utferdige teknisik dokumentasjon:o)Sted og dato | SV (Översättnig van bruskanvising i original)EG-försakran om overensstammelse(Maskindirektiv 2006/42/EG, bilaga II, de la)1.Företaget2.Försakrar på eget ansvar att maskinen:Bæbar trängdārgd Häcksaxa)Typ / Basmodellc)Serienummerd)Motor:batteri3.Överensstämmer med foreskriftnairedirectivet eIntysgor/anmältnorgan4.Referenss till harmoniserade standarderg)Uppmattljudeffektnivah)Garanteradljudeffektniva)k)Installeradeffektn)Auktorserad personfor upprättandet avden tekniska dokumentationen:o)Ort och datum | DA (Oversettelse af den originalebrugsanvising)EF-overensstemmelseserklaering(Maskindirektiv 2006/42/EF, bilag II, del A)1.Firmaat2.Erkräder på eget ansvar, atmaskinen:Bæbar haveækkeklippera)Type / Modelc)Serienummerd)Motor:batteri3. Er i overensstammelse medspecifikationerne iflege direktiverne:e)Certificeringsorgan4.Henvising til harmoniserede standarderg)Målt lydeffektniveauh)Garanteret lydeffektniveauk) )Installeret effektn)Person, der har bemyndigelse til atudarbejde det tekniske dossier:o)Sted og dato |
| FI (Alkuperäisten ohjeiden käännös)EY-VAATIMUSTENMUKAISUUSVAKUUTUS(Konedirektivi 2006/42/EY, Liite II, osa A)1.Yritys2.Vakuuttaa omalla vastuullaan,ettakone:Kannettava puutarha pensasleikkurä)Tyyppi / Perusmalli) Sarjanumero d) )Moottori: akku3.On yhdennukainen seuraavideniredlviien asettamien vaatimusten kanssa: e)Sertifiointyritys4.Viittaus harmonisoituhiin standardeinlinh | CS (Překlad púvodniho návodu k používán)i ES - Prohlaseni o shodé(Smérince o Strojnic zafizenich 2006/42/ES, Přiloha II,Čast A)1.Společnost2.Prohlaseju na vlastni odopovědnost,že stroj: prěnosné zahradni núžky nažívýplota)Typ / Základni modelc)Výrobní Čísoled)Motor: akumulátor3.Je ve shoděs náfinimi směrnici:e)Certifikačni organ4.Odkazy na Harmonizované normy9) Naměfény uroveh akustického vykonu9)Zaručné uroven zhukstého vykonu9)Iinstalovaný vykonn)Osoba autorizované pro vytrořeniTechnického spisu:o) Misto a Datum | PL (Tlumaczenie instrukcji oryginalnej)Deklaracja zgodnosti WE(Dyrektywa maszynowa 2006/42/WE,Załącznik II, czȩćć A)1.Spóka2.Oświadźna waśna odpowiedzialnosć,že maszyna: przenosné noźyce do zwywpólota odgrodowegoa)Typ / Model podstawowyc)Numer seryjinyd)Silnik: akumulator3.Spelnia podstawowe wymoginpastepujacych Dyrektyw:e)Jednostka certyfikuća4.Odnietyenie do Norm zharmonizowanychg)Zmierzyon polom mocy akustycznejh)Gwarantowy poziem mocy akustycznejk)Moc zalinstowana n)Osoba upowaznióna do zredagowania Dokumentajl technickéj:o)Miejscowość i data |
| HU (Eredeti használatiutas fordítasa)EK-megfeleloségi nyilatkozata(2006/42/EK géplínyel, Il. melléklet "A"resz)1.Alullrott Vállalat2.Felélosssegenek teljes tutadabankjlelentl, hagy az alábbi gép: hordozhatókéri sōvényiróta)Tipus / AlaptipusCygarlasi szamdotor:Makumulátor3.Megfelé az alábbi irányelvek elöiraisainak;e) Tanusitó szervHivotkozá a harmonizáll szabványokraGmrét zajtelesitmény szinth)Garantált zajtelesitményszintkhēpītten teljes dezskesztésérefelhatazmazott személy:o) Helye és ideje | RU (Πρενοδ oprinηнавьх Иструκши)Декларцио cootbvetstbvу hopmam EC(Диеркпьо о машинham оборudов�ни 2006/42/EC,Пробожения II,чась А).1.PrádpeniRTME2.Zаунговп посбстениютВETCTBENHOCT,Что машино:"penenoscho садову тreamмер заховиюзtrógorodni a)Тун / Базовая мodyльСпалор'tdДыгател:батер3.Cоotbvetstbyet tréobаняnmCleduуошп дурковуB:Septкфпцшуошор汗4.Cьлікь на rapmonизиров�ные HopмьgМиререньburу bovetь звукову мошуностуhнагауротуКуданурему bovetь звукову мошуностунуКуданурему bovetь звукову mошунostуknyБуровецу bovetь звукову mошунostуknyТунууууууууууууууууууууууууууууууууууууууууууууууууууууууууууууууууууууууууууууууууууууууууууууууууууууuyуууууууууууууууууууууууууууууууууууууууууууууууууууууууууууууууууууууууууууууууууууууууууууууууууууУууууууууууууууууууууууууууууууууууууууууууууууууууууууууууууууууууууууууууууууууууууууууууууууууууу� | HR (Prijevod originalih uputa)EK Izjava o sukladnosti(Direktva 2006/42/EZ o strojevlima, dodatakII, dio A)1.Tyrká:pod vlastlom odgovornóću Izjavlujéda je stroj: príjenosne vrtne škare zaživicua)A)Rvsta / Osnovni modelc)Matčni brojd)Motor:baterija3.sukladan s temeljinm zahtjevima détvoу: e)Certifikacijsko tijelo4.Primijenjene su siljedece honorizirancenorme:g)Izmjerena razina zvučne snageh)Zajamčena razina zvučne snagek)Instalirana snagaN)Osoba ovlašteza za pravljenje Tehnlcke datoteke:O)Mjesto I datum |
| SL (Previd ozvirnih navodil)ES izjava o skladnosti(Direktiva 2006/42/ES), priloga II, del A)1. Družba2. pod lastno odgovornostjo izjavla, da je stroj: prenosne vrtne škarje zaŽivo mejoa) Tip / osnovni modelc) Serijska stevilkad) Motor: baterija3. Skladen je z dolovičili direktiv :e) Ustanova, ki izda potrdirlo4. Sklicevanje na uskrajene predispajg) Izmerjen nivo zvočne močih) Zagotovljen nivo zvočne močiknjžice :o) Kraj in datum | BS (Prijevod originalnih uputa)EZ izjava o skladnosti(Direktiva o masinama 2006/42/EZ, Prilog II,deo A)1. Firma2. Daje izjavu pod vlastitom odgovornosću da je masina: prijenosnve vrtne makaze zaŽivu ogradu a) Tip / Osnovni modelc) Serijski brojd) Motor: akumulator3. sukradna s osnovnim zahtjevimadiirectiv:e) Certifikaciono tijel4. Pozivanje na uskraladene normeg) Izmjeri nei nivo zvočne snageh) Garantovani nivo zvočne snagek) Instalisana snaga n) Osoba ovlstena za izradu tehnickebrošure:o) Mjesto i datum | SK (Preklad pôvodného námody na použitie)ES vyhlásenie ou zhode(Smernica o Strojnych zariadieniach 2006/42/ES, Priloha II, ācast' A)1. Spolocnost2. Vyhlasuje na vlastné zodpovednost', ze stroj: prenosné Žahradné nožnice naŽivy plota) Typ / Záklnádný modelc)Výrobné Číslómdotor: akumulator3. Je v zhode s nariadeniami smernic:e) Certifikacný organ4. Odkaz na Harmonizované normyg) Nameraná úroveř akustického vykonuh)Zaručné áróveř akustického vykonuk) Inšalovany výkonn)Osoba autorizovaná na vytvorenie Technického spisu:o) Miesto a Datum |
| RO (Traducerea manualului fabricantului)CE-Declaratie de Conformitate(Directiva Maşini 2006/42/CE, Anexa II, partea A)1. Sociateata2. Declară pe propria raspundenéă ca masina:masină de tuns gard viu de grădină portabila) Tip / Model de bazáca) Număr de séried) Motor: baterie3. Este in conformitate cu specificătiiledirectivlor:e) Organism de certificare4. Referintă la Standardele armonizateg) Nivel de putere sonora măsurath) Nivel de putere sonora garantatk) Putere instalatala) Persoană autorizata sâ intocmeasca Dosarul Tehnico) Locul Şi Data | LT (Originaliu instrukciju vertimas)EB atifikties deklaraciia(Masinţu direktyva 2006/42/CE, Priedas II,dalis A)1. Bendrové2. Prisiima atsakomybę, kad jrenginys:nesiojamas sodo gyvatvoriu Žirklésa)Tipas / Bazinis Modelisc) Serijos numerisd) Variklis: baterija3. Atitinka direktyvse pateiktaspecifikacijas:e) Sertifikavimo jstaiga4. Nuoroda j suderintas Normasg) Ismatuotas garso galios lygish) Užtikrinamas garso galios lygisk) Instaliuota galia n) Autorizuizutas asmuo sudaryi Technine Dokumentacija:o) Vieta ir Data | LV (Instrukciju tulkojums no originalvaloras)EK atbilstfibas deklaracija(Direktiva 2006/42/EK par masinam,pielikums II, dalA)1. Uzněmums2. Uznemoties par to pilnu atbildibu, pazipo,ka masina: pärnēsājams dárza dzívžoga škèresa)Tipis / Băzes modelisc) Sérijas numursd) Motors: akumulators3. Atbilst šădu direktivu prisibam:e) Sertifikacijas istadde4. Atsauce uz harmonizetiemi standartiemg) Izmérītais skanas intensitatei limenis h) Garantētais skanas intensitatei limenis k) Uzstădità jaudan) Pilvarotais darbinieks, kas sagatavoj tehnisko dokumentăcu:o)Vieta un datums |
| SR (Previd originalinh uputstval)EC deklaracija o usaglašenosti(Direktiva o masinama 2006/42/EC, Prilog II,deo A)1. Preduzeće2. Daje izjavu pod vlastitom odgovornosćudai me masina: Ručni trimer zaŽivu ogradu a) Tip / Osnovni modelc) Serijski brojd) Motor: akumulator3. u skladu s osnovnim zahevima direktiva: e) Sertifikaciono telo4. Pozivanje na usklastene normeg) Izmereni nivo zvučne snageh) Garantovani nivo zvučne snagek) Instalisana snagan) Osoba ovlstécnza sa sastavljanje tehnicke brosureso) Mesto i datum | BG (Преюнда на оригиналене Иструкции)EO.Decknapazma 3a cBJTBECTBVE(Dírepétпьma Матину 2006/42/EO,Пробожени II, чат A)1.ДураочвOTO2.Η собстени OTROВORHOC T DEKKAPIRPA,чеб�шимета ДцуцпспспспспспспспспспспспспспспспспспспспспспспспспспспспспспспспспспспспспспспспспспспспспспспспспспспcпспспспспспспспспспспспспспспспспспспспспспспспспспспспспспспспспспспспспспспспспспспспспспспспспспС NOJNCSZA 3C. СереньhomeroDМOTOP: ekymunatoro3E. В сьтоветспье сьс сецф�ката надіректугп; e) Сертофицраш оранf4.Базлароноюхуну Туну loуну Туну loуну Туну loуну Туну loуну Туну loуну Туну loуну Туну loуну Туну loуну Туну loуну Туну loуну Туну loуну Туну loy Туну loy Туну loy Туну loy Туну loy Туну loy Туну loy Туну loy Туну loy Туну loy Туну loy Туну loy Туну loy Туну loy Туну loy Tуну loy Tуну loy Tуну loy Tуну loy Tуну loy Tуну loy Tуну loy Tуну loy Tуну loy Tуну loy Tуну loy Tуну loy Tуну loy Tуну loy Tу网 Tу网 Tу网 Tу网 Tу网 Tу网 Tу网 Tу网 Tу网 Tу网 Tу网 Tу网 Tу网 Tу网 Tу网 Tу网 Tу网 Tу网 Tу网 Tу网 Tу网 Tу网 Tу网 Tу网 Tу网 Tу网上 Tу网 Tу网 Tу网 Tу网 Tу网 Tу网 Tу网 Tу网 Tу网 Tу网 Tу网 Tу网 Tу网 Tу网 Tу网 Tу网 Tу网 Tу网 Tу网 Tу网 Tу网 Tу网 Tу网 Tу网 Tу同 Tу网 Tу网 Tу网 Tу网 Tу网 Tу网 Tу网 Tу网 Tу网 Tу网 Tу网 Tу网 Tу网 Tу网 Tу网 Tу网 Tу网 Tу网 Tу网 Tу网 Tу网 Tу网 Tу网 Tу网 Tу冈 Tу网 Tу网 Tу网 Tу网 Tу网 Tу网 Tу网 Tу网 Tу网 Tу网 Tу网 Tу网 Tу网 Tу网 Tу网 Tу网 Tу网 Tу网 Tу网 Tу网 Tу网 Tу网 Tу网 Tу网 Tу间 Tу网 Tу网 Tу网 Tу网 Tу网 Tу网 Tу网 Tу网 Tу网 Tу网 Tу网 Tу网 Tу网 Tу网 Tу网 Tу网 Tу网 Tу网 Tу网 Tу网 Tу网 Tу网 Tу网 Tу网 Tу网点 Tу网 Tу网 Tу网 Tу网 Tу网 Tу网 Tу网 Tу网 Tу网 Tу网 Tу网 Tу网 Tу网 Tу网 Tу网 Tу网 Tу网 Tу网 Tу网 Tу网 Tу网 Tу网 Tу网 Tу网 Tу net Tу网 Tу网 Tу网 Tу网 Tу网 Tу网 Tу网 Tу网 Tу网 Tу网 Tу网 Tу网 Tу网 Tу网 Tу网 Tу网 Tу网 Tу网 Tу网 Tу网 Tу网 Tу网 Tу网 Tу网 Tу Tу Tу Tу Tу Tу Tу Tу Tу Tу Tу Tу Tу Tу Tу Tу Tу Tу Tу Tу Tу Tу Tу Tу Tу Tу Tу Tу Tу Tу Tу Tу Tу Tу | ET (Algoprase kasutusjuhendi tõlg)EU vastusdeskratsoin(Smasinadretiyu 2006/42/EU, Lisa II, osa A)1.Firma2.Kinnitab omal vastusutel, et masin:kasaskantav aihekilökurkau Göödetud helviömsuse taseh)Garanteeritud helivömsuse tasek) Kinstellige Lehe autoriseritud koostaja: o) Koht ja Kuupäev |
EN · The content and images in this User Manual were produced expressly for ST. S.p.A. and are protected by copyright - any unauthorised reproduction or modification to the document, either partially or in full, is prohibited.