
AD 1185 - Radio ADLER - Free user manual and instructions
Find the device manual for free AD 1185 ADLER in PDF.
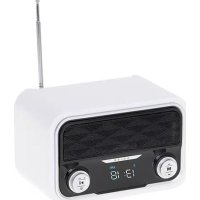



| Product Type | Multi-function portable radio |
| Brand | Adler |
| Model | AD 1185 |
| Output power | 6 W |
| Power supply | DC 5 V 0.6 A (via USB-C port or mains adapter) |
| Bluetooth version | 4.0 |
| Supported file formats | MP3 |
| Playback modes | FM, Bluetooth, AUX, USB, SD card |
| Available ports | AUX 3.5 mm input, USB-A, SD card reader |
| Screen type | Digital display with indicators |
| Rechargeable battery | Yes (charging and low battery indicator) |
| Automatic FM station search | Yes |
| Station memory | Via automatic search only |
| Time setting | Yes (in FM mode) |
| Dimensions (approx) | Approximately 20 x 10 x 5 cm |
| Weight (approx) | Approximately 300 g |
| Maintenance | Wipe with a dry cloth; do not use water or chemicals |
| Safety | Do not expose to water or heat; keep out of reach of children without supervision |
| Repairability | Any repairs should be carried out by a qualified professional |
Frequently Asked Questions - AD 1185 ADLER
User questions about AD 1185 ADLER
0 question about this device. Answer the ones you know or ask your own.
Ask a new question about this device
Download the instructions for your Radio in PDF format for free! Find your manual AD 1185 - ADLER and take your electronic device back in hand. On this page are published all the documents necessary for the use of your device. AD 1185 by ADLER.
USER MANUAL AD 1185 ADLER
SAFETY CONDITIONS IMPORTANT INSTRUCTIONS ON SAFETY OF USE PLEASE READ CAREFULLY AND KEEP FOR FUTURE REFERENCE
The warranty conditions are different, if the device is used for commercial purpose.
- Before using the product please read carefully and always comply with the following instructions. The manufacturer is not responsible for any damages due to any misuse.
- The product is only to be used indoors. Do not use the product for any purpose that is not compatible with its application.
- The applicable voltage is 5V 0.6A. For safety reasons it is not appropriate to connect multiple devices to one power outlet.
- Please be cautious when using around children. Do not let the children to play with the product. Do not let children or people who do not know the device to use it without supervision.
- WARNING: This device may be used by children over 8 years of age and persons with reduced physical, sensory or mental capabilities, or persons without experience or knowledge of the device, only under the supervision of a person responsible for their safety, or if they were instructed on the safe use of the device and are aware of the dangers associated with its operation. Children should not play with the device. Cleaning and maintenance of the device should not be carried out by children, unless they are over 8 years of age and these activities are carried out under supervision.
- Never put the power cable, the plug or the whole device into the water. Never expose the product to the atmospheric conditions such as direct sun light or rain, etc.. Never use the product in humid conditions.
- Never use the product with a damaged power cable or if it was dropped or damaged in any other way or if it does not work properly. Do not try to repair the defected product yourself because it can lead to electric shock. Always turn the damaged device to a professional service location in order to repair it. All the repairs can be done only by authorized service professionals. The repair that was done incorrectly can cause hazardous situations for the user. 8.Never put the product on or close to the hot or warm surfaces or the kitchen appliances like the electric oven or gas burner. 9.Never use the product close to combustibles.
- Do not let cord hang over edge of counter or touch hot surfaces.
- Never leave the product connected to the power source without supervision. Even when use is interrupted for a short time, turn it off from the network, unplug the power.
- In order to provide additional protection, it is recommended to install residue current device (RCD) in the power circuit, with residual current rating not more than 30mA . Contact professional electrician in this matter.
- Avoid getting the device wet.
- The device may only be wiped with a dry cloth. Do not use water or cleaning fluids.
- The device should be kept in a dry room.
Device Description:
- Play/Pause button/ Volume/ Power Button 2. Mode/next track/previous track button 3. AUX input/Reset switch
- USB input port 5. SD card input port 6. Micro USB charging port
- Charging Indicator / Pairing indicator
Button Functions.
- Play/Pause button/ Volume/ Power Button:
a. In Bluetooth mode:
Short press - play/pause
Long Press - Turn on/off
Turn right - Volume Up
Turn left - Volume Down
b. In AUX mode
Short press - play/pause
Long Press - Turn on/off
Turn right - Volume Up
Turn left - Volume Down
c. In USB playback mode
Short press - play/pause
Long Press - Turn on/off
Turn right - Volume Up
Turn left - Volume Down
d. In SD card playback mode
Short press - play/pause
Long Press - Turn on/off
Turn right - Volume Up
Turn left - Volume Down
- Mode/Next track/previous track button
a. In Bluetooth mode:
Short press - Change mode BT/USB/SD/FM/AUX mode. In time setting mode: Switch between Hour and Minutes
Turn right - Next track. Time up
Turn left - Previous track. Time down
b. In AUX mode
Short press - Change mode BT/USB/SD/FM/AUX mode, In time setting mode: Switch between Hour and Minutes
Long Press - Enter time change mode.
c. In USB playback mode
Short press - Change mode BT/USB/SD/FM/AUX mode, In time setting mode: Switch between Hour and Minutes
Long Press - Enter time change mode
Turn right - Next track. Time up
Turn left - Previous track. Time down
d. In SD card playback mode
Short press - Change mode BT/USB/SD/FM/AUX mode, In time setting mode: Switch between Hour and Minutes
Long Press - Enter time change mode.
Turn right - Next track. Time up
Turn left - Previous track. Time down
Device Functions:
- FM Mode.
Short press the Mode button (2) until FM mode is selected.
For automatic search and program allotment, long press the Mode button (2). The device will start to scan the FM range and assign all found radio signals to programs.
To choose the previously assigned program, turn the Mode knob (2) right for the next program and left for the previous program.
The device has no manual station saving function. Only automatic search can save the station.
- Bluetooth mode
Short press the Mode button (2) until Bluetooth mode is selected.
The device will start in pairing mode.
The Bluetooth icon on the display will start blinking/flashing.
Find the "AD 1185" device on your phone/computer/tablet.
Press pair.
After a "DING" sound, the device is now paired. The Bluetooth icon will stay lit during the connection, showing it is connected.
The device supports Bluetooth V4.0.
- AUX mode:
Connect your external device to the AD 1185 via the AUX port.
Short press the Mode Button (2) until AUX mode is selected.
Now you can play music from your external device.
All controls can be done from the external device.
Only the AD 1185 volume level can be controlled from the AD 1185 using the Play/Pause knob (1).
- USB mode
Insert a USB flash drive formatted in FAT32 format into the USB port (4) at the back of the device.
The device should detect the newly inserted USB flash drive and start playing the first track on the device.
Please note that the AD 1185 supports only MP3 format files.
- SD card mode.
Insert an SD card formatted in FAT32 format into the SD port (5) at the back of the device.
The device should detect the newly inserted SD card and start playing the first track on the device.
Please note that the AD 1185 supports only MP3 format files.
- Changing port.
On the display's upper right corner, a battery charge state indicator is shown.
When full it shows the battery state as still not blinking
When low. Also, the device will signal the "Battery Low" signal. And the battery symbol will start to blink.
To charge the device insert a micro USB cable into the charging port (6) connected to a 5V 1A power source to start charging the device.
- Charging / Pairing indicator
The device has 2 icon colors at the indicator
Blue light flashing shows that the device is pairing
Blue light is stable and lit. The device is connected to another device via Bluetooth.
Red stable light. The device is charging.
Troubleshooting:
Problem: Device is not connecting via Bluetooth, the device is not showing on the list.
Solution: Make sure the AD 1185 is set on Bluetooth mode and is not connected to another device. Please check the back of AD 1185 if the indicator light (7) is blinking or is stable in blue color. If it's stable, The device is connected to another device. If its blinking and searching peach check if your phone/computer/device is compatible with Bluetooth version 4.0.
Problem: The device does not start in USB/SD mode.
Solution: Please make sure the USB device is working on another USB reader. If yes then please check if the file format is set to FAT 32. If not then please re-format the USB/SD device to FAT32 format. If the device is still not reading please check if the files on the USB/SD are in Mp3 format.
Technical specification:
Output Power: 6W
Input power: DC 5V 0.6A
Bluetooth Version: 4.0.
File support: Mp3
Battery: 1800 mAh 3.7V
Battery Type: Lithium.
Loud Speaker: 2x5W
Max Power: 20W
FM:87,5-108MHz
CE Declaration can be found: https://adler.com.pl/dane/CE/ADLER/ad_1185.pdf
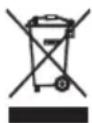
To protect your environment: please separate carton boxes and plastic bags and dispose them in corresponding waste bins. Used appliance should be delivered to the dedicated collecting points due to hazardous components, which may effect the environment. Do not dispose this appliance in the common waste bin.
GERMAN
Short press - play / pause
Short press - play / pause
Long press - turn on / off
Short press - play / pause
Long press - Turn on / off
Short press - play / pause
Technical specifications:
Battery: 1800 mAh 3.7 V
Bluetooth version: 4.0.
When you press and hold (2) the Bluetooth mode will not be selected.
The device will enter pairing mode.
The Bluetooth icon on the screen will start flashing.
Find the device "AD 1185" on your phone / computer / tablet.
Press it.
After the "DING" sound, the device is paired. The Bluetooth icon will remain lit for a short time to indicate it is connected. The device supports Bluetooth V4.0.
3. AUX mode:
Connect your audio device to the AD 1185 via the AUX port.
When you press and hold (2) the AUX mode will not be selected.
Now you can play music from your audio device.
The control unit can be set from the device's menu.
Only the playback/pause button (1) can control the volume of the sound from 1185 to 1185.
- USB mode
Insert a USB flash drive formatted in FAT32 into the USB port (4) on the back of the device.
The device should detect the inserted USB flash drive and start playing the first song from the device.
Note that the 1185 supports only files with MP3 format.
- SD card mode.
Insert an SD card formatted in FAT32 into the SD port (5) on the back of the device.
The device should detect the inserted SD card and start playing the first song from the device.
Note that the 1185 supports only files with MP3 format.
On the upper right corner, the indicator for the battery charging status is displayed.
When it is full, the battery status is shown as full, and the indicator is steady.
When it is low, the device will signal the "low battery" status, and the battery symbol will start blinking.
To charge the device, insert the micro USB cable into the charging port (6) connected to a power source of 5V 1A to start charging the device.
7. Charging/status indicator
UpeDOT mma 2 60n co NKOH Ha INHdkaTopoT
TpennKaHBeTo Ha cnHOTo CBETIO NOKaXyBa Deka ypeDTo ce cnapyBa
CnHaTa CBeTnHa e cTa6nHa n OCBtneHa. YpeIoTe nOBp3aH Ha npy ypeI npeky Bluetooth.
LpBHeO cTabnHcBETNo. YpeoT ce noHn.
CmeHa Ha npo6IeMn:
Ipo6Jem: UpeoT He ce noBp3yBa npeky Bluetooth, ypeoT He ce npikayyBa Ha cncokot.
PeHHe: OcnIpyTe Ce deKa AD 1185 e nocTaBEN Ha peXIM Bluteoth n He e noBp3aH co npy rype. IpOBepeTe ro 3aHnOt den Ha AD
1185 ako INHnKaTOpCKTo CBeTNo (7) TpeNka Hn e cTa6nHb Bo cnHa 6oja. Ako e cTa6nHb. YpeDTo nOBp3aH co npy rypeA. Ako
TpeKaTe npe6apyBate, npOBepe Taan Baunot TeJeOH / KOMnJyTeP / ypeE e KOMnatuBnEn Co Bep3nJaTa 4.0 Ha Bluetooth.
Ipo6Jem: YpeoT He 3anoHyBa BO pexKIM USB / SD.
PeHHe:Be MoJIme, npOBepTe dAni USB-ypeoT paOToHa Ipyr USB-HTaU. Ako Da, toraI npOBepTe daNn foOpMaTOT Ha daToTeKaTa e noCTaBEn Ha FAT 32. Ako He, toraW Be MOInme npenpaTe ro USB / SD ypeoT Bo foOpMaT FAT32. Ako ypeoT ce yuTe He uTAt, npOBepTe daJIn daToTeKIne Ha USB / SD ce BO foOpMaT Mp3.
TexnukcneuФkaunja:
N3ne3Ha MOKHOCT:6W
Bne3Ha MoKHOCT: DC 5V 0,6A
Bluetooth Bep3nja: 4.0.
Maximum power: 20W
FM:87.5-108MHz
Declaration of CE conformity can be found at: https://adler.com.pl/dane/CE/ADLER/ad_1185.pdf
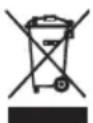
It is used for sorting waste. Cardboard packaging can be recycled. Plastic bags (PE) should be disposed of in a plastic container. Used equipment should be sold at a suitable collection point, because hazardous substances contained in the equipment may be a threat to the environment. Electrical equipment should be sold to a person who will enable its reuse and use. If the equipment contains batteries, they should be removed and specially disposed of at a collection point.
(CZ)CZECH
SAFETY CONDITIONS IMPORTANT INSTRUCTIONS FOR SAFETY OF USE READ CAREFULLY KEEP FOR FUTURE REFERENCE Warranty conditions are different if the device is used for commercial purposes.
2. Mode button / Next track / previous track
A. In Bluetooth mode:
The Bluetooth symbol on the device will start flashing.
Find the device AD 1185 on your phone / computer / tablet.
Press pair
After the sound signal "DINH" the device is connected. The Bluetooth symbol will be lit during operation, indicating that it is connected.
The device supports Bluetooth V4.0.
- AUX mode:
Connect an external device to AD 1185 via the AUX port.
Briefly press the MODE button (2) until the AUX mode is selected.
Now you can play music from an external device.
All control can be performed from the external device.
With AD 1185, you can only control the volume level of AD 1185 using the Play / Pause knob (1).
- USB mode
Insert a USB drive formatted in FAT32 into the USB port (4) on the rear panel of the device.
The device should detect the newly inserted USB drive and start playing the first track on the device.
Note that AD 1185 supports only FAT32 formats.
- SD card mode.
Insert an SD card formatted in FAT32 into the SD slot (5) on the rear panel of the device.
The device should detect the newly inserted SD card and start playing the first track on the device.
Note that AD 1185 supports only FAT32 formats.
- Changing the track.
In the upper right corner of the display, the battery charge indicator is shown.
When it is low, it indicates that the battery status is still not charging.
The device has a low battery indicator. The battery is low.
To charge the device, insert the micro USB cable into the charging port (6), connected to a 5 V, 1 A power source, to start charging the device.
7. Charge/connection indicator.
The device has 2 indicator light colors.
Blue light means the device is on.
Blue light steady or blinking. The device is connected to another device via Bluetooth.
Red light blinking. The device is charging.
Troubleshooting:
Problem: The device does not connect via Bluetooth, the device is not displayed in the list.
Solution: Make sure the AD 1185 is in Bluetooth mode and is not connected to another device. Check the AD
1185, if the indicator (7) is blinking or glowing blue. If it is steady, the device is connected to another device. If it
is searching, check if your phone / computer / device is compatible with Bluetooth version 4.0.
Problem: The device does not start in USB / SD mode.
Solution: Make sure the USB device works with another USB device. If yes, check if the format is FAT 32. If not, reformat the USB/SD device to FAT32. If the device still does not read, check if the USB / SD files are in MP3 format.
Output power: 6 W
Power supply: DC 0.6A
Bluetooth version: 4.0.
Supported formats: MP3
Battery: 1800mAh 3.7V
Battery type: Lithium
Speaker power: 2x5W
Maximum power: 20W
FM: 87.5-108MHz
CE declaration can be found at: https://adler.com.pl/dane/CE/ADLER/ad_1185.pdf

Care for the environment. Please dispose of the cardboard packaging in the paper recycling. Plastic bags (PE) should be disposed of in the recycling container for plastics. The used device should be handed over to the appropriate collection point, as its components may pose a threat to the environment. The electrical device should be handed over in such a way as to enable its reuse and recycling. If the device contains batteries, they should be removed and handed over to the appropriate collection point. Do not dispose of the device in the household waste container!
- Play/Pause Mode / Next track / previous track
a. In Bluetooth mode:
Short press - Change mode BT / USB / SD / FM / AUX In time setting mode: Switch between hour and minutes
Warning: the device is intended for commercial use.
- Before using the product, please read carefully and follow the instructions below. The manufacturer is not responsible for any damage caused by improper use. 2. The product must be used only for its intended purpose. Do not use the product for any purpose that is not consistent with its intended use.
- Applied voltage 5V, 0.6A. For safety reasons, it is necessary to disconnect the device from the power outlet before cleaning.
- Be careful when using near children. Do not allow children to play with the product. Do not allow children or persons who are not familiar with the device to use it without supervision.
- WARNING: This device can be used by children aged 8 years and above and persons with reduced physical, sensory or mental capabilities or lack of experience and knowledge if they have been given supervision or instruction concerning use of the appliance in a safe way and understand the hazards involved. Children shall not play with the appliance. Cleaning and user maintenance shall not be made by children unless they are older than 8 and supervised.
- Never immerse the device, cable, or plug in water. Never
Long press - switch to previous track.
C. Short press - switch to next track.
Short press - switch mode BT / USB / SD / FM / AUX. In radio mode: preset MIX and repeat
Long press - enter clock setting mode
Turn right - next track. Time +
Turn left - previous track. Time -
D. In SD card playback mode
Short press - switch mode BT / USB / SD / FM / AUX. In radio mode: preset MIX and repeat
Long press - enter clock setting mode.
Connect the audio cable to the AUX input (2) if no AUX input is available.
Now you can play music from your external device.
All control can be performed from the external device.
Using the Play/Pause button (1) you can only control the volume level from AD 1185 to AD 1185.
- USB mode
Insert a USB flash drive formatted in FAT32 into the USB port (4) on the rear panel of the device.
The device will automatically detect the inserted USB flash drive and start playing the first track on the device.
Note that the AD 1185 only supports MP3 format files.
- SD card mode.
Insert an SD card formatted in FAT32 into the SD slot (5) on the rear panel of the device.
The device will automatically detect the inserted SD card and start playing the first track on the device.
Note that the AD 1185 only supports MP3 format files.
6.3 Changing the port.
In the upper right corner of the display, there is a battery status indicator.
When the battery is fully charged, it shows that the battery is in good condition.
Power bank. Also, the device has a low battery indicator. The battery symbol is near the display.
To charge the device, insert the micro USB cable into the charging port (6) and connect it to a 5V 1A power source, then the device will start charging.
- Charging/discharging indicator
The device has 2 color indicators on the indicator
A steady blue light indicates that the device is working properly
A steady blue light. The device is connected to another device via Bluetooth.
A steady red light. The device is charging.
Troubleshooting
Problem: The device does not turn on via Bluetooth, the device is not detected in the list.
Solution: Make sure that the AD 1185 is in pairing mode and is not connected to another device. Turn the
AD 1185 over, so that the indicator (7) shows a steady blue light. Set it up. Connect the device to another device. If it still does not work, check if your phone / computer / device is compatible with Bluetooth version 4.0.
Problem: The device does not start in USB / SD mode.
Solution: Make sure that the USB device works on another USB port. If so, then check that the drive is formatted in FAT 32 format. If not, then reformat the USB / SD device to FAT32 format. If the device still does not read it, check that the USB / SD drive is in MP3 format.
Technical specifications:
Output power: 6W
Battery capacity: 5 V, 0.6 A
Bluetooth version: 4.0.
Supported files: MP3
Battery: 3.7 V, 1800 mAh
Battery type: Lithium
Speaker power: 2x5 W
Maximum power: 20 W
FM: 87.5-108 MHz
CE declaration can be found at: https://adler.com.pl/dane/CE/ADLER/ad_1185.pdf
In the interest of environmental protection.
Please dispose of the cardboard packaging in the waste paper collection. Plastic parts (PE) should be thrown into the plastic waste container. The device should be disposed of at the appropriate collection point, because the device contains hazardous components that may pose a threat to the environment. Electrical devices should be returned so as to avoid their reuse. If the device has batteries, they should be removed and handed over to the appropriate point.
1.
AUX
USB
Therefore, the area of triangle OBC is 1/2 * BO * CD = 1/2 * CD * 5.
1
SD
1
1.
Bt/USB/SD/FM/AUX
AUX
Bt/USB/SD/FM/AUX
1234567890
USB
Bt/USB/SD/FM/AUX
1234567890
SD
Bt/USB/SD/FM/AUX
Therefore a1 = 2, b1 = -2
- FM.
(2) FM.
SAFETY
IMPORTANT SAFETY INSTRUCTIONS FOR USE
Please read carefully and keep for future reference.
The warranty conditions differ if the device is used for commercial purposes.
- Before using the product, please read the following instructions carefully and follow them. The manufacturer is not responsible for any damage resulting from improper use.
- The product should only be used indoors. Do not use the product for any purposes that are not compatible with its intended use.
- The power supply is 5V 0.6A. For safety reasons, it is not suitable to connect multiple devices to a single contact.
- Please be careful when using near children. Do not allow children to play with the product. Do not allow children or adults who are not familiar with the device to use it without supervision.
- WARNING: This device can be used by children aged 8 years and above and by persons with reduced physical, sensory or mental capabilities or lack of experience and knowledge, provided they have been given supervision or instruction concerning use of the device in a safe way and understand the hazards involved. Children shall not play with the device. Cleaning and user maintenance shall not be made by children unless they are older than 8 and supervised.
Do not expose the product to rain or moisture. 6. Never place the product near flammable liquids or gases. Never expose the product to atmospheric conditions such as direct sunlight, dust, or wind. Never use the product in humid conditions. 7. Never use the product with a damaged power cord or if it has been dropped or damaged in any way, or if it does not work properly. Do not attempt to repair the defective product yourself, as this may lead to electric shock. Always contact a professional service center with the damaged device for proper repair. All repairs should only be performed by qualified service personnel. Improper repair may lead to dangerous situations for the user. 8. Never place the product on or near hot surfaces or heat sources, such as electric heaters or gas stoves. 9. Never use the product near flammable materials. 10. Do not leave the device on a soft surface or near a heat source. 11. Never leave the product connected to the power source unattended. When not in use for a short period, unplug it from the outlet and disconnect the power. 12. For additional protection, it is recommended to install a residual current device (RCD) in the electrical circuit with a rated residual current not exceeding 30 mA. Consult a professional electrician on this matter. 13. Keep the device dry. 14. The device should only be cleaned with a dry cloth. Do not use water or cleaning agents. 15. The device should be stored in a dry place.
DESCRIPTION OF THE DEVICE
- 1. Playback/Pause/Sound power button 2. Previous/Next track button 3. AUX input/Charging connector 4. USB input port 5. SD card slot 6. Micro USB charging port 7. Charging indicator/Connection indicator
Functions of the buttons.
- Playback/Pause/Sound power button:
a. In Bluetooth mode:
Short press - Playback/Pause
Long press - Power on/off
Turn right - Increase volume
Turn left - Decrease volume
- In radio mode:
Short press - Playback/Pause
Long press - Power on/off
Turn right - Increase volume
Turn left - Decrease volume
B. In USB playback mode
Short press - play/pause
Long press - on/off
Turn right - volume up
Turn left - volume down
C. In SD card playback mode
Short press - play/pause
Long press - on/off
Turn right - volume up
Turn left - volume down
- Button for mode/previous song/next song
a. In Bluetooth mode:
Short press - switch between BT/USB/SD/FM/AUX modes, in time setting mode: switch between hours and minutes
Turn right - next song. Increase time
Turn left - previous song. Decrease time
6. QUICK PRESS
Short press - switching between modes: USB/SD/FM/AUX mode, time setting mode: switching between hours and minutes
MINUTES
Long press - entering the mode for setting the time.
B. In USB playback mode
Short press - switching between modes: BT/USB/SD/FM/AUX mode, in time setting mode: switching between hours and minutes
Long press - entering the mode for setting the time
Rotary knob right - next track. Increase time
Rotary knob left - previous track. Decrease time
C. In SD card playback mode
Short press - switching between modes: BT/USB/SD/FM/AUX mode, in time setting mode: switching between hours and minutes
Long press - entering the mode for setting the time.
Rotary knob right - next track. Increase time
Rotary knob left - previous track. Decrease time
Functions of the device:
Press and hold the Mode button (2) until you select FM mode.
For automatic search and distribution of programs, press and hold the Mode button (2). The device will start scanning the FM range and will automatically save all found radio stations to programs.
To select a previously set program, press the Mode button (2) briefly for the previous one, and briefly for the next program.
The device has a unique feature for playing stations. Only the automatic search can store stations.
- Bluetooth mode
Press and hold the Mode button (2) until you select Bluetooth mode.
The device will start in pairing mode.
The Bluetooth icon on the display will start to flash.
Find the device "AD 1185" on your phone/computer/tablet.
Press the pairing button on your device.
The device will be paired. The Bluetooth icon will stay lit during the connection, which shows that it is connected.
The device supports Bluetooth V4.0.
3. AUX mode:
Connect your external device to the AD 1185 via the AUX port.
Briefly press the button (2) until the AUX mode is selected.
Now you can play music from the external device.
Playback control can be performed from the external device.
Only the volume of the AD 1185 can be controlled from the AD 1185 via the play/pause button (1).
- USB mode
Insert a USB flash drive, formatted in FAT32, into the USB port (4) on the back of the device.
The device should power on with the USB device inserted and start playing the first song on the device. Note: The AD 1185 supports only files in MP3 format.
- SD card mode.
Insert an SD card, formatted in FAT32, into the SD port (5) on the back of the device.
The device should power on with the newly inserted SD card and start playing the first song on the device. Note: The AD 1185 supports only files in MP3 format.
- Power indicator.
In the top right corner of the display, the battery status indicator is shown.
When it is full, the battery status light remains on.
When it is low, the device will beep along with a signal that the battery is low. The battery light starts flashing.
To charge the device, insert a micro USB cable into the charging port (6), connected to a 5V 1A power source, to start charging the device.

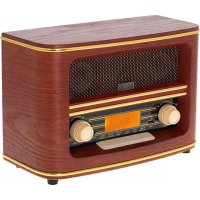
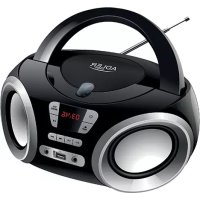
Brand : ADLER
Model : AD 1185
Category : Radio