AD 1187 - Radio ADLER - Free user manual and instructions
Find the device manual for free AD 1187 ADLER in PDF.
| Brand | Adler |
| Model | AD 1187 |
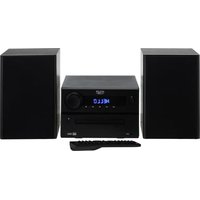
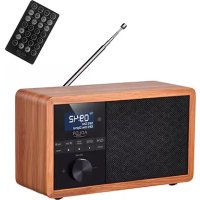
| Product Type | Clock radio with Bluetooth, USB, AUX |
| Power Supply | 230 V ~ 50 Hz (power adapter included) |
| FM Frequency Range | 87,5 - 108,0 MHz |
| Bluetooth Version | 5.0 |
| Speaker Power | 2 x 5 W |
| Ports | USB, AUX-In, Headphone jack (3.5 mm) |
| Antenna | Telescopic antenna |
| Clock Functions | 12/24 hour display, alarm, sleep timer |
| USB Playback Modes | Normal, repeat one, repeat all |
| FM Station Memory | 30 presets |
| Maintenance | Wipe with a dry cloth, do not use water or liquid cleaner |
| Safety | Do not immerse, do not expose to moisture, unplug during prolonged absence |
| Dimensions (approx.) | Not specified in the manual, estimated: 25 x 15 x 10 cm |
| Weight (approx.) | Not specified, estimated: 1.5 kg |
| Warranty | According to commercial or domestic conditions |
Frequently Asked Questions - AD 1187 ADLER
User questions about AD 1187 ADLER
0 question about this device. Answer the ones you know or ask your own.
Ask a new question about this device
Download the instructions for your Radio in PDF format for free! Find your manual AD 1187 - ADLER and take your electronic device back in hand. On this page are published all the documents necessary for the use of your device. AD 1187 by ADLER.
USER MANUAL AD 1187 ADLER
AD 1187
SAFETY CONDITIONS IMPORTANT INSTRUCTIONS ON SAFETY OF USE PLEASE READ CAREFULLY AND KEEP FOR FUTURE REFERENCE
The warranty conditions are different, if the device is used for commercial purpose.
- Before using the product please read carefully and always comply with the following instructions. The manufacturer is not responsible for any damages due to any misuse.
- The product is only to be used indoors. Do not use the product for any purpose that is not compatible with its application.
- The applicable voltage is 230V, \~50Hz. For safety reasons it is not appropriate to connect multiple devices to one power outlet.
- Please be cautious when using around children. Do not let the children to play with the product. Do not let children or people who do not know the device to use it without supervision.
5.WARNING: This device may be used by children over 8 years of age and persons with reduced physical, sensory or mental capabilities, or persons without experience or knowledge of the device, only under the supervision of a person responsible for their safety, or if they were instructed on the safe use of the device and are aware of the dangers associated with its operation. Children should not play with the device. Cleaning and maintenance of the device should not be carried out by children, unless they are over 8 years of age and these activities are carried out under supervision. - After you are finished using the product always remember to gently remove the plug from the power outlet holding the outlet with your hand. Never pull the power cable!!!
- Never put the power cable, the plug or the whole device into the water. Never expose the product to the atmospheric conditions such as direct sun light or rain, etc.. Never use the product in humid conditions.
- Periodically check the power cable condition. If the power cable is damaged the product should be turned to a professional service location to be replaced in order to avoid hazardous situations.
- Never use the product with a damaged power cable or if it was dropped or damaged in any other way or if it does not work properly. Do not try to repair the defected product yourself because it can lead to electric shock. Always turn the damaged device to a professional service location in order to repair it. All the repairs can be done only by authorized service professionals. The repair that was done incorrectly can cause hazardous situations for the user.
- Never put the product on or close to the hot or warm surfaces or the kitchen appliances like the electric oven or gas burner.
- Never use the product close to combustibles.
- Do not let cord hang over edge of counter or touch hot surfaces.
- Never leave the product connected to the power source without supervision. Even when use is interrupted for a short time, turn it off from the network, unplug the power.
- In order to provide additional protection, it is recommended to install residue current
device (RCD) in the power circuit, with residual current rating not more than 30 mA. Contact professional electrician in this matter.
- Avoid getting the device wet.
- The device may only be wiped with a dry cloth. Do not use water or cleaning fluids.
- The device should be kept in a dry room.
Device description:
FRONT:
- TONE +/- 2. USB Port 3. PLAY / PAUSE / ASM / PAIR
- PREVIOUS / TUNE- 5. NEXT / TUNE+ 6. CLK-SET / MEM
-
VOLUME +/-
-
ALARM / MEM-UP 8. MODE / STANDBY 9. PHONES
BACK:
- Telescopic aerial 12. AUX-IN 13. DC 9V Input
SETTING UP
Connect the power adapter to the mains power and the power jack on the back of the radio (DC 9V).
Fully extend the radio aerial in a vertical position to obtain the maximum signal strength.
When the power is connected, the defaulted clock 00:00 will be displayed on the LCD Screen. Long press the MODE / STANDBY (8) button to activate the unit. (This process may take a few minutes depends on different signal strength and working environment.)
The clock is defaulted to 0:00
The alarm is defaulted to 0:00 and off
GETTING STARTED
Time Set Up
Switch the radio on by pressing the MODE / STANDBY (8) button once.
Press and hold the CLK-SET / MEM (6) button to enter into clock set.
To set clock display format , press PRÉVIOUS / TUNE-(4) or NEXT / TUNE+(5) to choose between 12/24 Hour.
To set clock , press PREVIOUS / TUNE-(4) or NEXT / TUNE+(5) to adjust clock by 01 minute and 01 hour.
Each step needs to be confirmed by pressing the CLK-SET / MEM (6) button
Alarm Set Up
Switch the radio on by pressing the MODE / STANDBY (8) button once.
Press and hold the ALARM / MEM-UP (7) button to enter into alarm set.
To set time, press PREVIOUS / TUNE-(4) or NEXT / TUNE+(5) to adjust clock by 01 minute and 01 hour to confirm press the ALARM / MEM-UP (7).
To set mode, press PREVIOUS / TUNE-(4) or NEXT / TUNE+(5) to select outputs from Buzzer, Tuner, USB.
Each step needs to be confirmed by pressing the ALARM / MEM-UP (7) button.
The clock symbol will be displayed on the LCD screen after it is successfully set.
Alarm wake up
When it wakes up to TUNER, the radio will play FM program.
When it wakes up to BUZZER, Beep Tone (1) rings.
When alarm rings, you can press any button to stop the ring.
If you want to terminate the alarm, press and hold the ALARM / MEM-UP (7) button, the clock symbol is gone.
SLEEP OPERATION
Under any working mode, long press ALARM / MEM-UP (7) button to enter SLEEP mode, SLEEP mode is defaulted off and "10" will be displayed on the LCD screen. Press ALARM / MEM-UP (7) button repeatedly to set sleep timer among 10 min, 20 min, 30 min, 40 min, 50 min, 60 min, 70 min, 80 min and 90 min, stop when you are on the timer you wish to set, the "sleep timer" will be stored automatically.
SLEEP symbol will be displayed on the LCD screen after it is successfully set.
NOTE: Store information in your device
To turn off the device, use the MODE / STANDBY (8) function (holding the button). In this way, you will retain the time settings and time will be visible under MODE / STANDBY (8) mode. When using device from MODE / STANDBY (8) (holding the button), the set information is retained. If you turn off the device in the standard way (power off), you need to re-set the values such as time.
FM OPERATION
-
Press the MODE / STANDBY (8) button repeatedly until the LCD screen shows FM.
-
To scan stations manually, short press PREVIOUS / TUNE-(4) or NEXT / TUNE+(5) to adjust stations by 0.05MHz until you get your favorite station.
Long press PREVIOUS / TUNE-(4) or NEXT / TUNE+(5) to activate auto scan. If the station signal is available, scan will stop automatically and the radio will play this station, repeat this operation if it is not on the program you would like to listen.
- To auto scan stations, long press PLAY / PAUSE / STOP / ASM / PAIR (3) button, it will activate a full station searching. The stations scanned will be stored automatically when the scanning is completed.
- To store a station, you must first tune to the station you wish to set as a preset. Then press the PLAY/ PAUSE / STOP / ASM / PAIR (3) button to activate storing function, "Pxx" will be displayed on the LCD screen, and the number "xx" will flash. Press PREVIOUS / TUNE -(4) or NEXT / TUNE+(5) to scroll through the numbered preset locations (P01-30), press the PLAY/ PAUSE / STOP / ASM / PAIR (3) button to store the station, frequency will be displayed on the LCD screen. 30 stations can be stored in total. To tune to a saved/preset FM station, press the ALARM / MEM-UP (7) button to scroll through the stations. Stop when you see the station you would like to listen. The radio will begin to play.
- Rotate VOLUME (10) knob to adjust the VOLUME (10).
- Rotate TONE (1) knob to adjust high (treble) and low (bass) frequency range.
BLUETOOTH OPERATION
- Press the MODE / STANDBY (8) button repeatedly until the LCD screen shows BT, you will hear an activation sound from the unit.
- Turn on the Bluetooth function of your audio devices, search for AD 1187 and PAIR (3).
- Once your device is successfully PAIR (3)ed with the unit, you will hear a confirmation sound from the unit.
- Play and stream music from your audio devices to the unit.
- Press the PLAY/ PAUSE / STOP / ASM / PAIR (3) button to choose play or pause , you can also do it via your audio device.
- Press the PREVIOUS / TUNE -(4) to play previous song and NEXT / TUNE+(5) to play next song or do it via your audio device in the normal way.
- Rotate VOLUME (10) knob to adjust the VOLUME (10).
- Rotate TONE (1) knob to adjust high (treble) and low (bass) frequency range.
USB OPERATION
- Press the MODE / STANDBY (8) button repeatedly until the LCD screen shows USB.
- Insert your USB into the USB port (2) and the unit will read the USB automatically.
- The unit will play music from your USB.
- Press the PLAY/ PAUSE / STOP / ASM / PAIR (3) button to choose play or pause.
- Press the PREVIOUS / TUNE-(4) to play previous song and NEXT / TUNE+(5) to play next song.
- Press the CLK-SET / MEM (6) to choose play modes: normal, single repeat, all repeat.
- Rotate VOLUME (10) knob to adjust the VOLUME (10).
- Rotate TONE (1) knob to adjust high (treble) and low (bass) frequency range.
AUX-IN (12) OPERATION
- Press the MODE / STANDBY (8) button repeatedly until the LCD screen shows AUX.
- Plug the AUX-IN (12) cable into the AUX-IN (12) jack at the back of the radio. It will play the music from your external audio devices.
- Rotate VOLUME (10) knob to adjust VOLUME.
- Rotate TONE (1) knob to adjust high (treble) and low (bass) frequency range.
HEADPHONE OPERATION
- Connect the headphone lead into the PHONES (9) Jack in the front of the radio and listen to radio privately.
- Rotate VOLUME (10) knob to adjust VOLUME (10).
SPECIFICATIONS:
Radio Frequency range: FM: 87.5 - 108.0 MHz
Power Source: 230V \~ 50Hz
Bluetooth version: 5.0
Speaker power: 2x 5W
Hereby, Adler Sp. z o.o., Ordona 2a, 01-237 Warsaw, Poland declares that the radio equipment type radio AD1187 is in compliance with Directive 2014/53/EU. The full text of the EU declaration of conformity is available at the following internet address: https://adler.com.pl/dane/CE/ad_1187.pdf
To protect your environment: please separate carton boxes and plastic bags and dispose them in corresponding waste bins. Used appliance should be delivered to the dedicated collecting points due to hazarsous components, which may effect the environment. Do not dispose this appliance in the common waste bin.
DEUTSCH
FONCTIONNEMENT S LEEP
-
CLK-SET / MEM
-
TELEFOONS
TERUG:
1 1 . Telescopische antenne
12.AUX-IN
- DC 9V-ingang
S INSTELLEN
3.Drej VOLUME (10) knappen for at justere VOLUME.
BEEP Tone (1). Despite being BUZZER [Yiren]
natural_image
Symbol of a trash bin crossed with a diagonal line, no text or numbers present4: =9,0 V 5: 1,0 A 6: 9 W
7: 81,34 % 8: N/A 9: 0,06 W
GB DE FR
1: Model identifier
2: Input voltage
3: Input AC frequency
4: Output voltage
5: Output current
6:Output power
7: Average active efficiency
8:Efficiency at low load (10 %)
9: No-load power consumption
1: Modellkennung
2: Eingangsspannung
1: identificator model
natural_image
Front view of a large industrial fan with visible blades and mounting base (no text or symbols)Velocity Fan CR 7306
natural_image
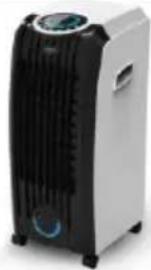
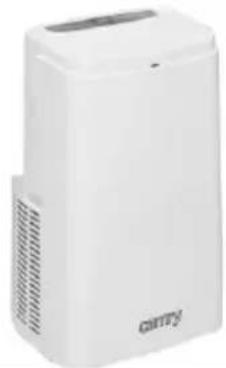
Exterior view of a white and black air conditioner unit with control panel (no visible text or symbols)Air Cooler CR 7905
natural_image
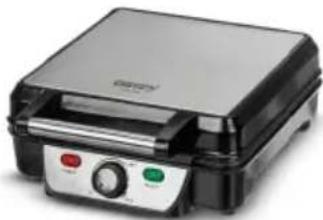
Exterior view of a modern stainless steel grating with control buttons (no visible text or symbols)Waffle maker CR 3025
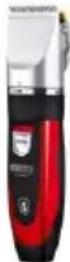
Hair Clipper
CR 2821
natural_image
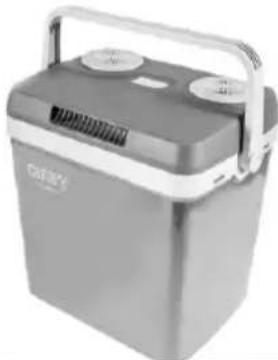
Exterior view of a gray portable battery with a handle and ventilation slots (no visible text or symbols)Portable Cooler CR 93

natural_image
Close-up of a pair of small electric fans with ventilation grille and handle (no visible text or symbols)Lint remover CR 9606

natural_image
Close-up of a blender with clear glass interior and orange fruit being filled (no visible text or symbols)Blender CR 4058

natural_image
Folded beige fabric with a small digital thermometer placed on top (no text or symbols visible)Electric Blanket CR 7407

natural_image
Electric iron with green and black casing (no visible text or symbols)Travel Iron CR 5024

natural_image
Glass kettle with blue liquid and black handle, no visible text or symbolsElectric Kettle CR 1239
natural_image
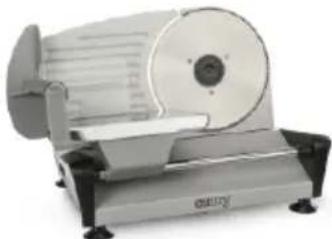
Exterior view of a modern office building (no signage)Food Slicer CR 4702
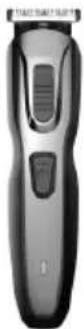
Trimmer CR 2921

natural_image
Black cylindrical device with silver casing and red square label (no visible text or symbols)Bluetooth Speaker CR 1170

natural_image
Glass water heater with blue liquid inside, no visible text or symbolsKettle with temp. control CR 1289

natural_image
Close-up of a black hair styling iron with threaded bristles (no text or symbols visible)Hair styler set CR 2024

natural_image
Black and gold hair dryer with a black handle and golden grille (no visible text or symbols)Hair Dryer CR 2255
www.camryhome.eu
camry
Premium

natural_image
Exterior view of a beige iron iron with a handle and spout (no text or symbols visible)Steam iron CR 5018

natural_image
White ceramic coffee maker with a black handle and circular button (no visible text or symbols)Milk Frother CR 4464
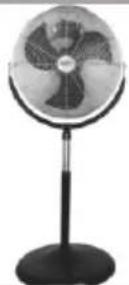
Stand Fan
CR 7306

natural_image
Black and white photo of a modern kettle with textured surface and handle (no visible text or symbols)Electric Kettle CR 1169
natural_image
White industrial air purifier unit with ventilation grilles and a small screen (no visible text or symbols)Air conditioner CR 7907
natural_image
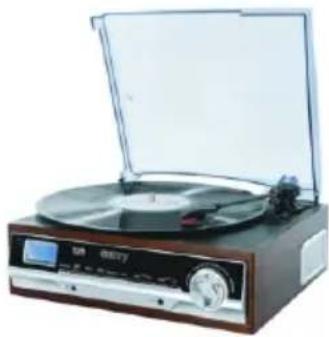
Vintage gramophone with open lid and wooden base (no visible text or symbols)Turntable CR 1113
natural_image
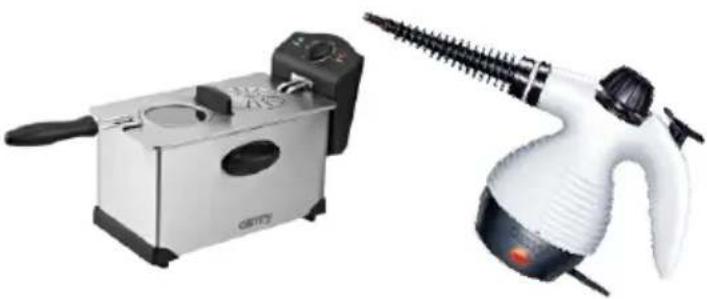
Two household appliances: a white and black electric stove with a side dish and a stainless steel fryer (no visible text or symbols)Deep Fryer 3L
CR 4909
Steam Cleaner
CR 7021

natural_image
White and black plastic blender with handle, no visible text or symbolsPopcorn maker CR 4458

natural_image
White and brown chocolate-flavor coffee maker with a multi-tiered cake on top (no visible text or symbols)Chocolate Fountain CR 4457

natural_image
Black industrial vacuum cleaner with coiled hose and handle (no visible text or symbols)Ash Vacuum 25L 1200W CR 7030
natural_image
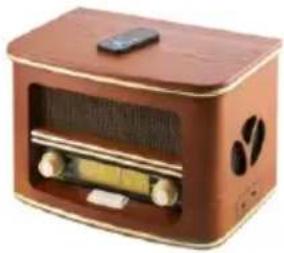
Vintage-style radio device with brown casing and gold buttons, no visible text or symbolsRetro radio CR 1109

natural_image
Close-up of a black and gold iron iron with visible steam iron (no text or symbols)Steam Iron CR 5029

natural_image
Exterior view of a modern rice cooker with digital display and control panel (no visible text or symbols)Pressure cooker CR 6409

natural_image
White and black cooking pot with digital display (no visible text or symbols)Slow Cooker CR 6410

natural_image
Product photo of a black vacuum cleaner with attached mechanical components (no visible text or symbols)Super silent vacuum cleaner CR 7037
www.camryhome.eu