
HCG71320X - Range hood BEKO - Free user manual and instructions
Find the device manual for free HCG71320X BEKO in PDF.
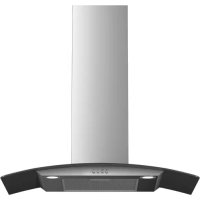



| Product Type | Range Hood |
| Brand | Beko |
| Model | HCG71320X |
| Usage | External extraction or internal recirculation |
| Dimensions (W x D x H) | 600 x 500 x 200 mm (approx) |
| Net weight | Approximately 8 kg |
| Power supply | 220-240 V ~ 50 Hz |
| Motor power | 150 W (estimated) |
| Number of speeds | 4 (0-4) |
| Lighting | Halogen 12V - 20W max, type G4 |
| Grease filter | Washable metal, monthly cleaning |
| Charcoal filter | Washable or non-washable depending on version |
| Minimum distance from cooktop | 50 cm (electric), 65 cm (gas) |
| Air outlet diameter | 150 mm (estimated) |
| Noise level | 55 dB (estimated) |
| Material | Stainless steel |
| Control type | Push buttons |
| Maintenance | Monthly cleaning of filters with mild detergent |
| Safety | Unplug before maintenance, do not use without grid |
Frequently Asked Questions - HCG71320X BEKO
User questions about HCG71320X BEKO
0 question about this device. Answer the ones you know or ask your own.
Ask a new question about this device
Download the instructions for your Range hood in PDF format for free! Find your manual HCG71320X - BEKO and take your electronic device back in hand. On this page are published all the documents necessary for the use of your device. HCG71320X by BEKO.
USER MANUAL HCG71320X BEKO
EN - Instruction on mounting and use
| symbol | state | |
| 4/1 | on/off level 1 | |
| 2 | level 2 | |
| 3 | level 3 | |
| lamp | ||
Maintenance
EN - Instruction on mounting and use
Closely follow the instructions set out in this manual. All responsibility for any eventual inconveniences, damages, or fires caused by not complying with the instructions in this manual is declined. The hood is conceived for the suction of cooking fumes and steam and is destined only for domestic use.
The hood can look different from that illustrated in the drawings in this booklet. The instructions for use, maintenance, and installation, however, remain the same.
It is important to conserve this booklet for consultation at any moment. In the case of sale, cession, or move, make sure it is together with the product. Read the instructions carefully: there is important information about installation, use, and safety. Do not carry out electrical or mechanical variations on the product or on the discharge conduits. Before proceeding with the installation of the appliance, verify that there are no damaged components. Otherwise, contact your dealer and do not proceed with the installation.
Note: the elements marked with the symbol (*) are optional accessories supplied only with some models or elements to purchase, not supplied.

Caution
WARNING! Do not connect the appliance to the mains until the installation is fully complete.
Before any cleaning or maintenance operation, disconnect the hood from the mains by removing the plug or disconnecting the mains electrical supply.
Always wear work gloves for all installation and maintenance operations.
The appliance is not intended for use by children or persons with impaired physical, sensorial, or mental faculties, or if lacking in experience or knowledge, unless they are under supervision or have been trained in the use of the appliance by a person responsible for their safety.
This appliance is designed to be operated by adults. Children should be monitored to ensure that they do not play with the appliance. This appliance is designed to be operated by adults. Children should not be allowed to tamper with the controls or play with the appliance.
Never use the hood without effectively mounted grating!
The hood must NEVER be used as a support surface unless specifically indicated. The premises where the appliance is installed must be sufficiently ventilated when the kitchen hood is used together with other gas combustion devices or other fuels. The ducting system for this appliance must not be connected to any existing ventilation system which is being used for any other purpose such as discharging exhaust fumes from appliances burning gas or other fuels.
The flaming of foods beneath the hood itself is severely prohibited.
The use of exposed flames is detrimental to the filters and may cause a fire risk, and must therefore be avoided in all circumstances.
Any frying must be done with care in order to make sure that the oil does not overheat and ignite.
Accessible parts of the hood may become hot when used with cooking appliance.
With regards to the technical and safety measures to be adopted for fume discharging it is important to closely follow the regulations provided by the local authorities.
The hood must be regularly cleaned on both the inside and outside (AT LEAST ONCE A MONTH).
This must be completed in accordance with the maintenance instructions provided in this manual. Failure to follow the instructions provided in this user guide regarding the cleaning of the hood and filters will lead to the risk of fires.
Do not use or leave the hood without the lamp correctly mounted due to the possible risk of electric shocks.
We will not accept any responsibility for any faults, damage or fires caused to the appliance as a result of the non-observation of the instructions included in this manual.
This appliance is marked according to the European directive 2002/96/EC on Waste Electrical and Electronic Equipment (WEEE). By ensuring this product is disposed of correctly, you will help prevent potential negative consequences for the environment and human health, which could otherwise be caused by inappropriate waste handling of this product.

The symbol on the product, or on the documents accompanying the product, indicates that this appliance may not be treated as household waste. Instead it should be taken to the appropriate collection point for the recycling of electrical and electronic equipment. Disposal must be carried out in accordance with local environmental regulations for waste disposal.
For further detailed information regarding the process, collection and recycling of this product, please contact the appropriate department of your local authorities or the local department for household waste or the shop where you purchased this product.
Appliance designed, tested and manufactured according to:
- Safety: EN/IEC 60335-1; EN/IEC 60335-2-31, EN/IEC 62233. Performance: EN/IEC 61591; ISO 5167-1; ISO 5167-3; ISO 5168; EN/IEC 60704-1; EN/IEC 60704-2-13; ISO 3741; EN 50564; IEC 62301.
- EMC: EN 55014-1; CISPR 14-1; EN 55014-2; CISPR 14-2; EN/IEC 61000-3-2; EN/IEC 61000-3-3. Suggestions for a correct use in order to reduce the environmental impact: Switch ON the hood at minimum speed when you start cooking and keep it running for a few minutes after cooking is finished. Increase the speed only in case of large amount of smoke and vapour and use boost speed(s) only in extreme situations. Replace the charcoal filter(s) when necessary to maintain a good odour reduction efficiency. Clean the grease filter(s) when necessary to maintain a good grease filter efficiency. Use the maximum diameter of the ducting system
indicated in this manual to optimize efficiency and minimize noise.
Additional Installation Specifications:
Use only the fixing screws supplied with the product for installation or, if not supplied, purchase the correct screws type.
Use the correct length for the screws which are identified in the Installation Guide.
In case of doubt, consult an authorised service assistance centre or similar qualified person.
WARNING! Failure to install the screws or fixing device in accordance with these instructions may result in electrical hazards.
Use
The hood is designed to be used either for exhausting or filter version.

Ducting version
In this case the fumes are conveyed outside of the building by means of a special pipe connected with the connection ring located on top of the hood.
Attention! The exhausting pipe is not supplied and must be purchased apart.
Diameter of the exhausting pipe must be equal to that of the connection ring.
In the horizontal runs the exhausting pipe must be slightly slanted (about 10°) and directed upwards to vent the air easily from the room to the outside.
Attention! If the hood is supplied with active charcoal filter, then it must be removed.
Connect the hood and discharge holes on the walls with a diameter equivalent to the air outlet (connection flange).
Using the tubes and discharge holes on walls with smaller dimensions will cause a diminution of the suction performance and a drastic increase in noise.
Any responsibility in the matter is therefore declined.
! Use a duct of the minimum indispensable length. ! Use a duct with as few elbows as possible (maximum elbow angle: 90°). ! Avoid drastic changes in the duct cross-section. ! Use a duct as smooth as possible inside. ! The duct must be made of certified material.

Filter version
One active charcoal filter is needed for this and can be obtained from your usual retailer.
The filter removes the grease and smells from the extracted air before sending it back into the room through the upper outlet grid.
The models with no suction motor only operate in ducting mode, and must be connected to an external suction device (not supplied).
The connecting instructions are supplied with the peripheral suction unit.
Installation
The minimum distance between the supporting surface for the cooking equipment on the hob and the lowest part of the range hood must be not less than 50 cm from electric cookers and 65 cm from gas or mixed cookers.
If the instructions for installation for the gas hob specify a greater distance, this must be adhered to.

Electrical connection
The mains power supply must correspond to the rating indicated on the plate situated inside the hood. If provided with a plug, connect the hood to a socket in compliance with current regulations and positioned in an accessible area, after installation. If it is not fitted with a plug (direct mains connection) or if the plug is not located in an accessible area, after installation, apply a double pole switch in accordance with standards which assures the complete disconnection of the mains under conditions relating to over-current category III, in accordance with installation instructions.
Warning! Before re-connecting the hood circuit to the mains supply and checking the efficient function, always check that the mains cable is correctly assembled.
The hood is provided with a special power cable; if the cable is damaged, request a new one from Technical Service.
Mounting
Before beginning installation:
- Check that the product purchased is of a suitable size for the chosen installation area.
- Remove the charcoal (*) filter(s) if supplied (see also relative paragraph). This/these is/are to be mounted only if you want to use the hood in the filtering version.
- Check (for transport reasons) that there is no other supplied material inside the hood (e.g. packets with screws (*), guarantees (*), etc.), eventually removing them and keeping them.
- If possible, disconnect and move freestanding or slide-in range from cabinet opening to provide easier access to rear wall/ceiling. Otherwise put a thick, protective covering over countertop, cooktop or range to protect from damage and debris. Select a flat surface for assembling the unit. Cover that surface with a protective covering and place all canopy hood parts and hardware in it.
- In addition check whether near the installation area of the hood (in the area accessible also with the hood mounted) an electric socket is available and it is possible to connect a fumes discharge device to the outside (only suction version).
- Carry out all the masonry work necessary (e.g. installation of an electric socket and/or a hole for the passage of the discharge tube).
Expansion wall plugs are provided to secure the hood to most types of walls/ceilings. However, a qualified technician must verify suitability of the materials in accordance with the type of wall/ceiling. The wall/ceiling must be strong enough to take the weight of the hood. Do not tile, grout or silicone this appliance to the wall. Surface mounting only.
Operation
Use the high suction speed in cases of concentrated kitchen vapours. It is recommended that the cooker hood suction is switched on for 5 minutes prior to cooking and to leave in operation during cooking and for another 15 minutes approximately after terminating cooking.
Display Symbols
| symbol | state | |
| 1/1 | on/off level 1 | |
| 2 | level 2 | |
| 3 | level 3 | |
| lamp | ||
Maintenance
ATTENTION! Before performing any maintenance operation, isolate the hood from the electrical supply by switching off at the connector and removing the connector fuse.
Or if the appliance has been connected through a plug and socket, then the plug must be removed from the socket.
Cleaning
The cooker hood should be cleaned regularly (at least with the same frequency with which you carry out maintenance of the fat filters) internally and externally. Clean using the cloth dampened with neutral liquid detergent. Do not use abrasive products. DO NOT USE ALCOHOL!
WARNING: Failure to carry out the basic cleaning recommendations of the cooker hood and replacement of the filters may cause fire risks.
Therefore, we recommend observing these instructions.
The manufacturer declines all responsibility for any damage to the motor or any fire damage linked to inappropriate maintenance or failure to observe the above safety recommendations.
Grease filter
Fig. 14-32
Traps cooking grease particles.
This must be cleaned once a month (or when the filter saturation indication system - if envisaged on the model in possession - indicates this necessity) using non aggressive detergents, either by hand or in the dishwasher, which must be set to a low temperature and a short cycle.
When washed in a dishwasher, the grease filter may discolour slightly, but this does not affect its filtering capacity.
To remove the grease filter, pull the spring release handle.
Charcoal filter (filter version only)
Fig. 31
It absorbs unpleasant odours caused by cooking.
The activated charcoal filter can be one of these types:
- Washable activated charcoal filter.
- Non-washable activated charcoal filter.
Washable activated charcoal filter
The charcoal filter can be washed once every two months using hot water and a suitable detergent, or in a dishwasher at 65°C (if the dishwasher is used, select the full cycle function and leave dishes out).
Eliminate excess water without damaging the filter, then remove the mattress located inside the plastic frame and put it in the oven for 10 minutes at 100°C to dry completely. Replace the mattress every 3 years and when the cloth is damaged.
Non-washable activated charcoal filter
The saturation of the charcoal filter occurs after more or less prolonged use, depending on the type of cooking and the regularity of cleaning of the grease filter.
In any case it is necessary to replace the cartridge at least every four months.
The charcoal filter may NOT be washed or regenerated.
Assembly
Hook the charcoal filter at the back on the metal tongue of the hood first, then on the front with the two knobs.
Disassembly
Remove the charcoal filter by turning the knobs fixing it to the hood by 90°.
Replacing lamps
Fig. 33
Disconnect the appliance from the electricity.
Warning! Prior to touching the light bulbs ensure they are cooled down.
Replace the old light bulb with the one of the same type as specified in the feature label or near the light lamp on the hood.
- Using a flat head screwdriver or equivalent tool, carefully pry loose the light cover.
- Remove the damaged light and replace with a new 12 Volt, 20 Watt (Maximum) halogen light made for a G-4 base SUITABLE FOR USE IN OPEN LUMINAIRES. Follow package directions and do not touch new light with bare hands.
- Reinstall the light cover. (it will snap shut).
If the lights do not work, make sure that the lamps are fitted properly into their housings before you call for technical assistance.
| symbol | state | |
| ①/1 | on/off level 1 | |
| 2 | level 2 | |
| 3 | level 3 | |
| lamp | ||
Maintenance
| symbol | state | |
| #/1 | on/off level 1 | |
| 2 | level 2 | |
| 3 | level 3 | |
| lamp | ||
Maintenance
| symbol | state | |
| #/1 | on/off level 1 | |
| 2 | level 2 | |
| 3 | level 3 | |
| lamp | ||
Maintenance
| symbol | state | |
| 1/1 | on/off level 1 | |
| 2 | level 2 | |
| 3 | level 3 | |
| lamp | ||
Maintenance
| symbol | state | |
| 1/1 | on/off level 1 | |
| 2 | level 2 | |
| 3 | level 3 | |
| lamp | ||
Maintenance
| symbol | state | |
| 1/1 | on/off level 1 | |
| 2 | level 2 | |
| 3 | level 3 | |
| lamp | ||
Maintenance
WARNING! Before any maintenance work, disconnect the hood from the electrical supply by turning off the switch and deactivating the safety circuit breaker. If the appliance is connected to the mains via a plug, disconnect the plug from the socket.
Cleaning
The waste container should be cleaned both internally and externally (at least once a year or when the waste container is replaced). Before cleaning, empty the waste container. Avoid using aggressive cleaning agents. DO NOT USE ALCOHOL!
WARNING: Failure to comply with the cleaning rules for the waste container and the replacement of the filters may cause fire hazards. For this reason, we recommend that you follow all the instructions in this manual.
The manufacturer assumes no liability for damages caused by fire resulting from improper maintenance or from failure to comply with the safety instructions in this manual.
Filter for oils and fats
FIG. 14-32
Compare the filters that come with the appliance.
The filter should be cleaned once a month (or when the filter saturation indicator system - if provided on the model you have purchased - shows this need), with a non-abrasive detergent, either by hand or in the dishwasher at a temperature set to a short cycle. Washing the filter for oils and fats in the dishwasher may cause slight discoloration, but this does not affect the filtering properties.
To remove the filter for oils and fats, pull the release handle.
| symbol | state | |
| 1/1 | on/off level 1 | |
| 2 | level 2 | |
| 3 | level 3 | |
| lamp | ||
Maintenance
DO NOT USE ALCOHOL!
| symbol | state | |
| #/1 | on/off level 1 | |
| 2 | level 2 | |
| 3 | level 3 | |
| lamp | ||
Maintenance
| symbol | state | |
| #/1 | on/off level 1 | |
| 2 | level 2 | |
| 3 | level 3 | |
| lamp | ||
Maintenance
| symbol | state | |
| 1/1 | on/off level 1 | |
| 2 | level 2 | |
| 3 | level 3 | |
| lamp | ||
Maintenance
| symbol | state | |
| #/1 | on/off level 1 | |
| 2 | level 2 | |
| 3 | level 3 | |
| lamp | ||
Maintenance
| symbol | state | |
| 1/1 | on/off level 1 | |
| 2 | level 2 | |
| 3 | level 3 | |
| lamp | ||
Maintenance
| symbol | state | |
| #/1 | on/off level 1 | |
| 2 | level 2 | |
| 3 | level 3 | |
| lamp | ||
Maintenance
Before any cleaning or maintenance operation, disconnect the hood from the electrical mains by removing the plug from the socket or switching off the main switch of the apartment.
Cleaning
| symbol | state | |
| 1/1 | on/off level 1 | |
| 2 | level 2 | |
| 3 | level 3 | |
| lamp | ||
Maintenance
Do not leave the hood without properly installed lamps! Danger of electric shock!
No responsibility is accepted for any malfunction, damage, or injury caused by failure to follow the instructions in this manual.
This device complies with the requirements of:
- European Directive 2002/96/EC
- Waste Electrical and Electronic Equipment (WEEE).
Make sure that this device is recycled after its disposal. You will contribute to the protection of the environment and your health.
The symbol on the product or on its packaging indicates that this product must not be treated as household waste, but must be handed over to a designated collection point for the recycling of electrical and electronic equipment. Follow local regulations for waste disposal. For more detailed information on the disposal, collection, and recycling of this product, please contact your local authorities, the household waste collection service, or the store where you purchased this device.
The device is designed, tested, and manufactured in accordance with:
- Safety: EN/IEC 60335-1; EN/IEC 60335-2-31, EN/IEC 62233.
- Performance characteristics: EN/IEC 61591; ISO 5167-1; ISO 5167-3; ISO 5168; EN/IEC 60704-1; EN/IEC 60704-2-13; ISO 3741; EN 50564; IEC 62301.
- EMC - Electromagnetic compatibility: EN 55014-1; CISPR 14-1; EN 55014-2; CISPR 14-2; EN/IEC 61000-3-2; EN/IEC 61000-3-3.
Instructions for correct use, to achieve the effect on the environment: Turn on (ON) the aspirator at minimum speed when you start cooking and leave it to run for a few minutes after turning off the cooking. Increase the speed only in case of large quantities of food and use the speed increase only in extreme situations. Replace the filters with active carbon when necessary to maintain good efficiency of the hood. Install the filters for grease when necessary to maintain good efficiency of the grease filter. Use the maximum diameter of the air exhaust system, as indicated in this manual for optimizing efficiency and reducing noise.
WARNING! Failure to follow the mounting screws or the fixing mechanisms in accordance with these instructions may lead to risk of electric shock.
Use
The aspirator has a specific purpose: it sucks and exhausts the hood air, while simultaneously purifying it.

Aspirating version
The air is exhausted outside through an exhaust pipe connected to the connecting flange.
The exhaust pipe diameter must correspond to the connecting flange diameter.
WARNING! The exhaust pipe is not included with the aspirator and must be purchased separately.
In the horizontal part, the pipe must be slightly inclined upwards (about 10°) to facilitate the exhaust of air outside.
If the aspirator is equipped with a filter and active carbon, the pipes must be removed.
Connect the aspirator to the exhaust pipe and follow the instructions. The pipe diameter must correspond to the connecting flange diameter for air exhaust.
Connecting to an exhaust pipe with a smaller diameter reduces the suction capacity and significantly increases noise during operation.
In these cases, the manufacturer assumes no responsibility.
Use a pipe of the necessary length.
Use a pipe with as few bends as possible (maximum bend angle: 90°).
He pomme la poussière du tuyau!
Use the pipe with the smoothest possible inner surface.
The materials from which the pipes are made must comply with the standards in force.

Filter version
Aspirators are designed to be used only in the version with an activated carbon filter at the base of the hood. To use the aspirator in this version, you must install the additional filter system at the base of the hood.
The models without an aspirator motor are intended for use only in the aspirated version. They must be connected to a peripheral aspirating unit, which is purchased separately.
Instructions for connection are provided with the peripheral aspirating unit.
Installation
The minimum distance between the surface on which the cooking vessels are placed and the lower part of the kitchen aspirator must be no less than 50 cm in the case of electric cookers and no less than 65 cm in the case of gas or combined cookers.
If the instructions for the gas cooker specify a greater distance, this must be respected.

Electrical connection
The voltage in the mains must correspond to the voltage specified on the data plate of the aspirator, placed on its inner side. If the aspirator is fitted with a plug, connect it to a socket that complies with the standards in force, placed in an accessible position. If it is not fitted with a plug (direct connection to the mains), or if the socket is not in an accessible position, use a two-pole switch that complies with the standards, ensuring that the mains can be disconnected from the appliance with a contact opening of at least 3 mm, in accordance with the installation rules.
Warning! Before reconnecting the aspirator to the mains and checking that it functions correctly, check that the cable is installed as it should be.
The aspirators are supplied with a special power cable; in the event that the cable is damaged, contact the after-sales service to obtain a new one.
Installation
Installation instructions:
Make sure that the product purchased from you matches the dimensions of the chosen installation location.
Remove the filter/filters with active carbon (if the model you purchased is equipped with such). To do this, follow the operations in the relevant paragraph. Install the filters again only if you intend to use the aspirator in the filtering version.
Make sure that during transport, no foreign objects have entered the inside of the aspirator, such as screws,
warranty cards, etc.; if you find any, remove them and store them.
If possible, disassemble and move the furniture that is directly close to the place where you intend to install the aspirator. This way you will have better access to the wall or ceiling where it will be installed. Otherwise, be careful not to damage the furniture and all other objects during installation. Choose a flat surface and cover it with suitable material, on which to place the aspirator and its accessories. Make sure that near the place where you intend to install the aspirator there is easy access to an electrical outlet and that it is possible to connect to the exhaust (only for the aspirating version). - Perform all necessary operations, for example: install the electrical contact and/or drill the hole for the passage of the exhaust pipe. The aspirator is equipped with a bracket for fixing, suitable for most walls and ceilings.
For all this, we recommend that you consult a qualified technician to ensure that the supplied accessories are suitable for the wall. The wall, respectively the ceiling, must be sufficiently stable to withstand the load.
Method of use
If a lot of smoke is produced during cooking, switch to the maximum operating mode. It is preferable to turn on the aspirator 5 minutes before you start cooking and leave it running for another 15 minutes after you finish.
Cleaning the surface
| symbol | state | |
| ①/1 | on/off level 1 | |
| 2 | level 2 | |
| 3 | level 3 | |
| lamp | ||
Surface
Warning! Before any operation related to cleaning or surface maintenance, disconnect the aspirator from the electrical outlet, by removing the plug or switching off the main switch of the appliance.
Cleaning
The aspirator must be cleaned frequently (at least as often as you clean the filters), both inside and outside. Use a damp cloth and neutral liquid cleaning agents.
Avoid agents that contain abrasive particles.
Attention! Ne l'utilisez jamais avec de l'eau.
Attention! Ne pas utiliser avant d'avoir lu les instructions pour l'utilisation de l'aspirateur et pour le remplacement des filtres. Suivez strictement les instructions!
Aucune responsabilité n'est acceptée pour les dommages éventuels causés au moteur et les incendies résultant d'une mauvaise utilisation ou du non-respect des présentes instructions.
Filtre à charbon actif
Fig.14-32
Retirez le support de fixation de la pièce en plastique, en le tournant.
Nettoyez-le tous les mois ou lorsque les indicateurs de saturation du filtre s'allument (voir la section démontage, si le modèle est équipé de tels indicateurs).
Utilisez un détergent doux et nettoyez-le à l'eau ou dans une machine à laver, mais à basse température et en cycle court.
Lors du lavage du filtre à charbon actif dans la machine à laver, il est possible qu'il se décolore, mais cela n'affecte en aucun cas sa capacité de filtration.
Pour retirer le filtre à charbon actif, tirez la poignée avec le mécanisme à ressort.
Filtre à charbon actif interne (uniquement pour la version avec filtration)
Fig.31
Fixations supérieures, qui se retirent en tournant.
Il existe deux types de filtres à charbon actif :
- Filtre à charbon actif, qui se lave. Filtre à charbon actif, qui ne se lave pas.
Replace the filter with active carbon
The filter with active carbon is active in the hood for about 6 months depending on the type of cooking and the frequency of use of the appliance. The filter can be washed in the dishwasher at 65°C (perform the washing and rinsing cycles without detergent; in the dishwasher, there should be no other dishes).
Rinse carefully, remove the filter from the plastic frame and place it in the oven for 10 minutes at 100°C to dry completely.
The filter must be replaced every 3 years or when you notice that it is clogged.
Replace the filter with active carbon
The filter with active carbon becomes saturated approximately after 6 months of use, depending on the type of cooking and the frequency of use of the filter.
In any case, it is necessary to replace the filter with active carbon every four months or when the filter saturation indicator shows that it is necessary.
It cannot be reused.
Installation
Fix the filter with active carbon first at the rear side onto the metal base of the hood, and then at the front side with the help of the two cover handles.
Removal
The filter with active carbon is removed by turning the cover handles 90°, which hold it to the hood.
Replacing the lamp
Fig. 33
Disconnect the device from the mains.
Attention! Before replacing the bulbs, make sure they are disconnected.
Replace the damaged lamp with a new one of the same type, as it is specially designed for the hood with the characteristics listed near the lamp itself.
- With the help of a screwdriver or similar tool, remove the cover of the halogen lamp.
- Remove the burnt-out bulb.
Use only cold light bulbs of 12V, maximum 20W-G4, being careful not to touch them with your hands.
- Close the halogen lamp cover (it clicks when closing).
If the bulbs do not light, check that they are installed correctly before contacting a specialist.
| symbol | state | |
| 1/1 | on/off level 1 | |
| 2 | level 2 | |
| 3 | level 3 | |
| lamp | ||
Maintenance
Attention! Before any cleaning or maintenance operation, disconnect the hood from the electrical network by removing the plug or disconnecting the general switch of the dwelling.
Cleaning
The hood must be cleaned frequently (at least as often as the anti-grease filters are cleaned), both inside and outside. For cleaning, use a cloth soaked in neutral liquid detergents. Avoid using abrasive products. DO NOT USE ALCOHOL!
Attention: Failure to follow the hood cleaning and filter replacement rules can lead to potential fire risks. We advise you to closely follow the instructions presented in this manual.
Children or adults should not use the hood if, due to their physical or mental condition, they are not capable of doing so, or if they lack the knowledge and experience necessary for correct and safe operation of the appliance.
Do not leave children unattended so that they do not play with the appliance.
Do not use the hood if the grille is not properly installed!
It is strictly forbidden to use the extractor hood as a support surface, unless this is specifically stated otherwise.
Ensure adequate ventilation of the room when using the extractor hood in the kitchen at the same time as other gas appliances or other appliances.
The air extracted must not be discharged through a flue used for exhausting fumes from appliances burning gas or other fuels.
It is strictly forbidden to cook flambé under the hood, as free flames could damage the filters and become a fire hazard; therefore, refrain from doing so in any case.
Frying in large quantities of oil must be done under constant supervision, keeping in mind that overheated oil can ignite.
When used together with other cooking appliances, the exposed parts of the appliance may become very hot.
Regarding technical measures and safety regulations for the discharge of fumes, strictly follow the rules prescribed by local competent authorities.
Perform periodic cleaning of the hood both inside and outside (at least once a month, following the conditions specifically provided in the maintenance instructions for this appliance).
Failure to follow the instructions for cleaning the hood and for replacing and cleaning the filters may result in a fire hazard.
Do not use or leave the hood without correctly installed lamps, due to the possible risk of electric shock.
We disclaim any liability for malfunctions, damage, or burning of the appliance resulting from failure to follow the instructions provided in this manual.
This product has been marked in accordance with European Directive 2002/96/EC on the disposal of electrical and electronic equipment (WEEE).
By ensuring proper disposal of this product, you will help prevent potential negative consequences for the environment and human health.

The symbol on the product or on its accompanying documentation indicates that this product must not be treated as household waste. Instead, it should be handed over to the appropriate collection point for the recycling of electrical and electronic equipment.
Disposal must be carried out in accordance with local regulations on waste disposal.
For information on the rules for handling such products, their disposal and recycling, please contact local authorities, the waste disposal service, or the store where you purchased this product.
The device has been developed, tested and manufactured in accordance with:
| symbol | state | |
| 1/1 | on/off level 1 | |
| 2 | level 2 | |
| 3 | level 3 | |
| lamp | ||
Care
Warning! Before performing any operation on the appliance or its maintenance, disconnect the plug from the power supply, unplug the plug or turn off the main switch.
Cleaning
The appliance should be cleaned frequently both inside and outside (at least as often as the grease filter is cleaned). For cleaning, use a soft cloth moistened with a neutral liquid detergent. Do not use products containing abrasive materials.
DO NOT USE ALCOHOL!
Warning: Failure to follow the cleaning rules and filter replacement may lead to a risk of fire. Therefore, we recommend following the instructions provided.
We disclaim all liability for possible damage to the engine and fires caused by improper repair or failure to comply with the above warnings.
Grease filters
Fig. 14-32
Retains grease particles coming from cooking.
The filter should be cleaned monthly (or when the saturation indicator on your model, if present, indicates this need) with non-abrasive detergents, by hand or in a dishwasher at a low temperature and in a short cycle.
Washing in a dishwasher may cause some discoloration of the grease filter, but its filtering characteristics remain absolutely unchanged.
To remove the grease filter, pull the spring-loaded handle towards you and remove the filter.
Carbon filter (only for recirculation mode)
Fig. 31
Removing kitchen odors.
The carbon filter can be one of these types:
Rectangular filter. NOT rectangular filter.
Rectangular filter
The carbon filter can be washed every two months in hot water with mild detergents or in the dishwasher at a temperature of 65°C (in the latter case, run a full cycle without dishes inside the dishwasher).
Remove the filter carefully to avoid damaging it, then take the pad out of the plastic frame and hold it in water for 10 minutes at a temperature of 100°C to ensure thorough cleaning.
Replace the pad every 3 years and as soon as it appears damaged.
Non-rectangular filter
Saturation of the carbon filter occurs after a more or less long period of use, depending on the type of cooking and the frequency of cleaning of the grease filters. In any case, replace the cartridges at least every 4 months.
The carbon filter is not washable or regenerable.
Installation
Hang the carbon filter on the rear side of the metal grease filter, then secure the front part with two hands.
Removal
Lamp holders, rotated 90° by the handle, which fix it with a pull.
Replacing the lamps
Fig. 33
Disconnect the device from the power supply.
Warning! Before touching the lamps, make sure they have cooled down.
Replace the damaged lamp with a new one of the same type, as indicated on the label, next to the lamp and the pull.
- Using a flathead screwdriver or similar tool, carefully remove the protective element.
- Replace the burned-out lamp.
Use incandescent lamps of 12 volts, with a maximum power of 20 watts, made for G4 base, suitable for use in open fixtures.
Follow the instructions and do not touch the new lamps with bare hands.
- Close the cover (fastening with the latch).
If the lighting system works, check the correct installation of the lamps in the sockets before contacting the technical support center.
Carefully follow the instructions given in this manual. The manufacturer disclaims all liability for damage, injury, or fire that may occur as a result of using the device contrary to the instructions given in this manual. The device cover is designed for indoor and outdoor use, but it is intended for household use only.
The device cover may have a design that differs from the images in the illustrations of this manual, but in any case, the manual for installation, technical maintenance, and operation remains unchanged.
Important! Keep the instructions so that you can refer to them in the future in case of sale, transfer, or to ensure that the instructions are with the device. Important to read the instructions: they contain important information about installation, use, and safety. It is forbidden to make electrical or mechanical modifications to the device in any way. Before starting the installation of the device, check that all components are not damaged or defective. Otherwise, contact the place of purchase and stop the installation of the device.
Spare parts marked with an asterisk (*) are supplied on special order only for certain models, or in case of need for purchasing parts that were not supplied.

Safety precautions
Warning! Do not connect the device to the power supply until installation is completely finished.
Before performing any cleaning or maintenance operation, disconnect the plug from the power supply, pulling the plug or switching off the main switch of the device.
The device is not intended for use by persons (including children) with reduced physical, sensory or mental capabilities, or lack of experience and knowledge, unless they have been given supervision or instruction concerning use of the device by a person responsible for their safety.
Do not allow children to play with the device.
Do not use the plug if the socket is incorrectly installed. Plug the device without a properly installed socket!
The plug must not be used near surfaces where it is stated in the instructions that it is prohibited.
In case of using the plug together with other devices on gas or other fuels, the device must have sufficient ventilation. In particular, the exhaust must not be directed into the plug channel, if the plug is used near gas or other fuel devices.
It is strictly forbidden to cook food under the hood.
Using an open flame is dangerous for filters and can cause a fire, so it is necessary to avoid its use in any case.
Frying must be done under control to avoid ignition of overheated oil.
Open parts may become very hot when used together with accessories for cooking.
As for the use of technical rules and safety rules for gas devices, it is necessary to strictly follow the standards set by local authorities.
The instructions must be followed carefully, both internally and externally (at least once a year, in any case, follow all instructions described in this manual).
Improper installation and connection of the filter may cause a fire hazard.
Do not use or connect without properly installed lamps due to the possible risk of electric shock.
The manufacturer is not responsible for damage or injuries caused by improper use, neglect, or failure to follow the instructions in this manual.
This product is marked according to the European Directive 2002/96/EC on waste electrical and electronic equipment (WEEE). By ensuring proper disposal of this product, you will help prevent potential negative consequences for the environment and human health, which could otherwise be caused by inappropriate waste handling.

The symbol on the product or on its accompanying documents indicates that this product shall not be treated as household waste. It should be handed over to the applicable collection point for the recycling of electrical and electronic equipment. Disposal must be carried out in accordance with local environmental regulations for waste disposal. For more detailed information about treatment, recovery, and recycling of this product, please contact your local city office, your household waste disposal service, or the shop where you purchased the product.
This product has been designed, tested, and manufactured in accordance with: - Safety: EN/IEC 60335-1; EN/IEC 60335-2-31, EN/IEC 62233. - Performance: EN/IEC 61591; ISO 5167-1; ISO 5167-3; ISO 5168; EN/IEC 60704-1; EN/IEC 60704-2-13; ISO 3741; EN 50564; IEC 62301. EMC: EN 55014-1; CISPR 14-1; EN 55014-2; CISPR 14-2; EN/IEC 61000-3-2; EN/IEC 61000-3-3. For correct operation and to reduce the impact on the environment: switch the hood to the minimum speed before starting to cook, and let it run for a few minutes after cooking has finished.
Increase the speed if there is a large amount of fumes and steam, and use the boost speed in extreme cases. To maintain high efficiency in removing odors, replace the charcoal filter(s) when necessary. To maintain high efficiency of the grease filter, clean the grease filter(s) when necessary. Use the maximum diameter of the ducting system as indicated in the instructions to optimize efficiency and minimize noise.
WARNING! The absence of installation screws and mounting parts in accordance with these instructions may lead to a risk of electric shock.
Use
The hood is designed for use in extraction mode, discharging air outdoors, or in filter mode with recirculation of air.

Extraction mode
Air is discharged outdoors through an exhaust pipe connected to the flange.
The diameter of the exhaust pipe must match the diameter of the connecting ring.
Warning! The exhaust pipe is not supplied and must be purchased separately.
The horizontal section of the exhaust pipe must have a slight slope (at an angle of about 10°) so that the air can be discharged outdoors easily.
If the hood is connected to the exhaust pipe, it must be connected.
Connect the hood to the exhaust pipe and exhaust outlet with the same diameter as the hood outlet (flange).
Using exhaust pipes and outlets with a smaller diameter will lead to reduced efficiency and increased noise levels.
Therefore, we disclaim any liability for the above! Use only short exhaust ducts.
! Use exhaust ducts with the fewest number of bends (maximum bend angle: 90°). Avoid squeezing the exhaust duct. ! Use ducts with a smooth inner surface. ! The material of the exhaust duct must comply with standards.

Recirculation mode
The exhaust air is filtered and deodorized and then returned to the room. To use the hood in this mode, it is necessary to install an additional filter system with activated carbon.
Hoods without a motor block can operate in this mode only if the exhaust air is discharged outside, so they must be connected to an external exhaust system (not included in delivery).
Instructions for connecting to an external exhaust system are provided separately.
Installation
The distance from the lower part of the hood to the cooking surface must be at least 50 cm for electric hobs and 65 cm for gas or combination hobs.
It is necessary to take into account the distances specified in the installation instructions for gas hobs.

Connection to the electrical supply
The voltage in the electrical supply must correspond to the characteristics indicated on the rating plate, which is located inside the hood. If the plug is included in the delivery, connect the hood to a socket that complies with existing standards and is in an accessible location, so that it can be done after installation. If the plug is not included (direct connection to the electrical supply), or the socket is not in an accessible location, also after installation, install a reliable two-pole switch that ensures complete disconnection from the network under overvoltage category III, in full compliance with installation rules.
Attention! Before connecting the hood to the electrical supply again, check the correct operation, and also make sure that the network is properly installed.
Built-in power cable; in case of cable damage, contact the service department.
Installation
Before starting installation:
- Check the dimensions of the supplied product against the chosen installation location. Remove the filter from the duct if present (see also the corresponding section). The filter will be reinstalled if you wish to use the hood in recirculation mode. Check that the inside of the hood is free of objects placed there during transport (e.g., packaging with manuals, etc.); if any, remove and keep them. If possible, move or cover the furniture located in or around the installation area to ensure better access to the ceiling/wall where the hood will be attached. If this is not possible, protect the furniture and other objects with a cloth during installation. Choose a flat surface, cover it with a protective cloth, and place the hood and mounting parts on it. Also check the area around the hood installation zone
(In the zone, accessible also after hood installation) for the presence of a power socket and an exhaust duct opening, if the ducted version was selected (only in ducted mode).
Perform all necessary work (e.g., install the power socket and/or make the exhaust duct opening).
The hood package includes mounting screws designed for most wall/ceiling types. However, it is necessary to consult a qualified technician to verify the suitability of the materials depending on the wall or ceiling type. The wall/ceiling must be sufficiently strong to support the weight of the hood.
Operation
Use intensive speed in case of particularly high concentration of cooking vapors. We recommend turning on the hood 5 minutes before starting to cook and leaving it on for 15 minutes after cooking is finished.
Display
| symbol | state | |
| 1/1 | on/off level 1 | |
| 2 | level 2 | |
| 3 | level 3 | |
| lamp | ||
Delay
Warning! Before any cleaning or maintenance operation, disconnect the hood from the electrical power supply, by unplugging it or switching off the main circuit breaker.
Cleaning
The hood must be cleaned frequently both externally and internally (at least with the same frequency as the filter maintenance for grease retention). For cleaning, use a special cloth dampened with neutral liquid detergent.
Do not use abrasive or corrosive materials.
HE BVKOPNCTOBYNTE CNIPT!
Ybara: He BnKoHaHn npabn qHHeHH i 3aMHN pInbTpIB MOKe npNBecTN Do pn3NkBYHnKHeHH NoXeKi. Tomy peKomeHdyEmo DotpmyBaTncb PnBBeDeHx IHCTpyKcij.
3Himaetbca BcKa BiIIOBIIaJIbHiCTb B 3B'3Ky 3 MOKINBMn yUkoJKeHHMa NDbNryHa I NOXeKaMn, IO BHNKIn BHaCNIIDOK HeBipHO r peMOHTy a6o He BNKOHaHH BUNeONuCAHX nonepedxehb.
ΦiNbTp 3aTpMkn XnpiB
Man. 14-32
3aTpmyc KnpoBi cnoJyehn, 0o BnHkaotb niD yac npiroTyBaHHi.
IobHHe HcCTHTnca Odn pa3 B MicaB (abo KOJI N CNTema iHdkauii nepenOBHeHHaipbTpiB, kUO E y Baui MoDeni, Bkaye Ha daHy Heo6XiHCTb), 3 BnKOpNCtAHHm HEarpeCNBHX MIOuHx 3ac0bB BPuyH aBO B NOcyDOMHOi MaunHi npn Hn3bkii TemnepaTypi I KOPOTKOMy uKnli.
Ipi MNITI B NocydomnIOuH MaunHi MOKe MaN Mice DeKe 3He6apBHeHHa φ Ibtpy,npote Horo φ Ibtpuyi XapaKTePcNTIK 3aIIuAIOTBcH He3MIHHMM.
Дя 3нггдлгдлгдлгдлгдлгдлгдлгдлгдлгдлгдлгдлгдлгдлгдлгдлгдлгдлгдлгдлгдлгдлгдлгдлгдлгдлгдлгдлгдлгдлгдлгдлгдлгдлgдлgдлgдлgдлgдлgдлgдлgдлgдлgдлgдлgдлgдлgдлgдлgдлgдлgдлgдлgдлgдлgдлgдлgдлgдлgдлgдлgдлgдлgдлgдлgдлgдлg ДяI
ByrilbHnΦIbTp (TilbKn B peKmipeunpkyra) Man.31
B6npac HnppncMHI 3anaXkyxHi.
ByrInbHnIΦiNbTp MoKe 6yTu ODNHM i3 LxuTunib:
Byrinalnphiibtp,oo nipnrae MTTIO. ByrilbHn fijbTp, 0o HE iidrae MHTIO.
Byrnbn pInbtp, nIgnae MmTTIO
ByinbHn pInbTp MOKHa MInu KOxHi Dba Micaui B teniin BoDi BiINOBiHNM MIOOHMM 3acobamn, a6o B NocydomnHi Maunhi npn 65°C (B OCTaHHbOMy BNpaKy BuKoHaTI NOBHN uKNMTTg 6e3 nocdy INCepeDNIHOcYDOMNHOI MaUNH).
Open the hood, remove the filter, insert the new filter into the housing, then close the housing and let it run for 10 minutes at a temperature of 100°C to ensure complete drying.
Replace the filter every year and every time the filter is saturated.
The carbon filter is not washable.
Check the carbon filter for saturation after no more than 6 months of use.
Depending on the type of hood and the frequency of filter cleaning, in any case, replace the cartridge at least every 6 months.
It is not washable or reusable.
Installation
First insert the carbon filter with the new side onto the metal grid of the hood, then close the front part with your hands.
Removal
Remove the carbon filter by turning it 90° and pulling it away from the hood.
Replacement lamp - 33
Disconnect the appliance from the power supply.
Warning! Before touching the lamp, make sure it has cooled down.
Replace the lamp with a new one of the same type as indicated on the label, or with a lamp of the same type.
- Remove the protective element using a small screwdriver or similar tool.
- Do not touch the lamp. Use the lamp only with a 12V-20W socket G4, do not touch the lamps with your hands.
- Close the cover (close the shutter).
If the lighting system does not work, check the correct installation of the lamp in the socket, before contacting the technical support center.
| symbol | state | |
| 1/1 | on/off level 1 | |
| 2 | level 2 | |
| 3 | level 3 | |
| lamp | ||
Maintenance
| symbol | state | |
| 4/1 | on/off level 1 | |
| 2 | level 2 | |
| 3 | level 3 | |
| lamp | ||
Cleaning
Warning! Before cleaning the appliance, disconnect it from the power supply. Remove the plug from the socket or turn off the main house electrical switch.
Cleaning
| symbol | state | |
| 1/1 | on/off level 1 | |
| 2 | level 2 | |
| 3 | level 3 | |
| lamp | ||
| symbol | state | |
| 1/1 | on/off level 1 | |
| 2 | level 2 | |
| 3 | level 3 | |
| lamp | ||
Maintenance
Warning! Before any cleaning or maintenance operation, disconnect the kitchen hood from the power supply by removing the plug from the socket or also turning off the general switch of the house or apartment.
Cleaning
The kitchen hood must be cleaned frequently (at least as often as you maintain the grease filter), both inside and outside. For cleaning, use a soft damp cloth and neutral liquid detergents.
Avoid using products that scratch. DO NOT USE ALCOHOL!
Warning: Failure to follow the rules for cleaning the appliance and the rules for replacing filters increases the risk of fire. Therefore, we advise you to follow the instructions provided.
| symbol | state | |
| 1/1 | on/off level 1 | |
| 2 | level 2 | |
| 3 | level 3 | |
| lamp | ||
Maintenance
Warning! Before any cleaning or maintenance, disconnect the electrical supply of the hood, either by pulling the plug out of the socket or by turning off the main switch.
Cleaning
| symbol | state | |
| 4/1 | on/off level 1 | |
| 2 | level 2 | |
| 3 | level 3 | |
| lamp | ||
Maintenance
| symbol | state | |
| 1/1 | on/off level 1 | |
| 2 | level 2 | |
| 3 | level 3 | |
| lamp | ||
Care
12V 20W max G4
sL 1
aiae sio aie g jai gai jai
!
a a
e 1
aaii iio
aie 1
aaiia 1
0le 0j5ai lgl
jgaaa
31-26.
a
iic 1
jS13- 15
- a - b/a + b = c - d/c + d ②
0 1
.
a a a a a a a a a a a a a a a
j 1 j 1 j 1 j 1 j 1 j 1 j 1 j 1 j 1 j 1 j 1 j 1 j 1 j 1 j 1 j 1 j 1 j 1 j 1 j 1 j 1 j 1 j 1 j 1 j 1 j 1 j 1 j 1 j 1 j 1 j 1 j 1 j 1 j 1 j
LabB
gall jiaadai jydi aal
a gill a h
(
28.
gablln 1iilai iis jnn
:Jusu Jusu Jusu Jusu Jusu Jusu Jusu Jusu
Jaiyaiaiai ciis
Jaiyai jay aai ci yj
aaiiaaii aaiii iis
J 1
65 1
aLoLLgJyI yIyI yIyI yIyI y
()
j 13 j
100 10
1
1 3 5 6
ON/OFF .1
ON/OFF.2
1ie jll jll jy"2"jllge bina
1111111111111111
OFF
a.3
4aejull jiee jll jilge bina
1iej
Therefore a1 = 2, a2 = -4
a1
(90°
i1

a
a aal baaal 2000
C
1 1
50j 50 jai 1
aill j 65 65
i 1
1
\ 1\ ,\ 2\ ,\ 3\

1
1j gao jgl jS 13i jlaa a jkall baai bc
∴ b 1 = 3/2,b 2 = - 3/2,b3 = 0
a 1 = 1/2,a 2 = 3/8,b 1 = 1/2,b 2 = 3/8
( 1 + u) + ... + ( π /1 + z) + ( π /1 + 1) > ( 1 + u) u + ... + 8π /1 + z + 1
∴ a 1 = 2,a 2 = - 4
EN/IEC 60335-2-31, EN/IEC 60335-1, EN/IEC 60704-1, EN 50564, EN 50704-2-13, EN 55014, CISPR 14-1, EN 55014-1, EN/IEC 61000-3-3, EN/IEC 61000-3-2, CISPR 14-2


- MAINTENANCE
- EN - INSTRUCTION ON MOUNTING AND USE
- CAUTION
- ADDITIONAL INSTALLATION SPECIFICATIONS
- USE
- DUCTING VERSION
- FILTER VERSION
- INSTALLATION
- ELECTRICAL CONNECTION
- MOUNTING
- BEFORE BEGINNING INSTALLATION
- OPERATION
- CLEANING
- GREASE FILTER
- FIG
- CHARCOAL FILTER (FILTER VERSION ONLY)
- WASHABLE ACTIVATED CHARCOAL FILTER
- NON-WASHABLE ACTIVATED CHARCOAL FILTER
- ASSEMBLY
- DISASSEMBLY
- REPLACING LAMPS
- FILTER FOR OILS AND FATS
- DO NOT USE ALCOHOL
- ASPIRATING VERSION
- INSTALLATION INSTRUCTIONS
- METHOD OF USE
- CLEANING THE SURFACE
- SURFACE
- ATTENTION! NE L'UTILISEZ JAMAIS AVEC DE L'EAU
- FILTRE À CHARBON ACTIF
- FILTRE À CHARBON ACTIF INTERNE (UNIQUEMENT POUR LA VERSION AVEC FILTRATION)
- REPLACE THE FILTER WITH ACTIVE CARBON
- REMOVAL
- REPLACING THE LAMP
- CARE
- GREASE FILTERS
- CARBON FILTER (ONLY FOR RECIRCULATION MODE)
- RECTANGULAR FILTER
- NON-RECTANGULAR FILTER
- REPLACING THE LAMPS
- SAFETY PRECAUTIONS
- EXTRACTION MODE
- RECIRCULATION MODE
- CONNECTION TO THE ELECTRICAL SUPPLY
- BEFORE STARTING INSTALLATION
- DISPLAY
- DELAY
- HE BVKOPNCTOBYNTE CNIPT
- ΦINBTP 3ATPMKN XNPIB
- MAN
- BYRILBHNΦIBTP (TILBKN B PEKMIPEUNPKYRA) MAN
- BYRNBN PINBTP, NIGNAE MMTTIO
- THE CARBON FILTER IS NOT WASHABLE
- REPLACEMENT LAMP
- C
Brand : BEKO
Model : HCG71320X
Category : Range hood