AD 5051 - Iron ADLER - Free user manual and instructions
Find the device manual for free AD 5051 ADLER in PDF.
| Brand | Adler |
| Model | AD 5051 |
| Product type | Iron |
| Power supply | 230 V ~ 50-60 Hz |
| Power | 2600 W |
| Soleplate | Ceramic soleplate |
| Water tank | With MAX level |
| Ironing functions | Dry ironing, steam ironing, vertical steam, spray, steam shot |
| Anti-drip system | Yes, stops steam if temperature too low |
| Anti-scale system | Built-in filter, use only tap water |
| Auto shut-off | Yes, after 30 s horizontally, 8 min vertically |
| Self-cleaning | Yes, via dedicated switch |
| Temperature indicator | Light: red when heating, green when at temperature |
| Temperature setting | Temperature dial with positions for silk, synthetic, cotton |
| Steam setting | Variable control from 0 to MAX |
| Power cord | 360° swivel, approx. 2 m long |
| Approximate weight | 1.2 kg |
| Maintenance and cleaning | Clean soleplate with damp cloth and vinegar if necessary |
| Safety | Auto shut-off, overheat protection, stable base |
| Usage | Household use only |
Frequently Asked Questions - AD 5051 ADLER
User questions about AD 5051 ADLER
0 question about this device. Answer the ones you know or ask your own.
Ask a new question about this device
Download the instructions for your Iron in PDF format for free! Find your manual AD 5051 - ADLER and take your electronic device back in hand. On this page are published all the documents necessary for the use of your device. AD 5051 by ADLER.
USER MANUAL AD 5051 ADLER
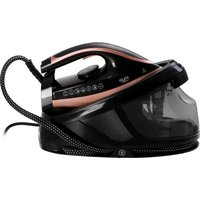
natural_image
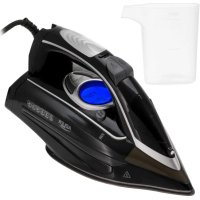
Exterior view of a modern steam iron with control buttons and a brand logo (no text-heavy elements)| AD 5051 | |||||
| EN | User Manual | 3 | PL | Instrukcja obsługi | 101 |
| DE | Bedienungsanleitung | 8 | IT | Manuale d'uso | 107 |
| FR | Mode d'emploi | 15 | SV | Bruksanvisning | 113 |
| ES | Manual de usuario | 22 | BG | Ръководство за употреба | 119 |
| PT | Manual de Instruções | 28 | DA | Brugsanvisning | 126 |
| LT | Naudojimo instrukcija | 34 | SK | Používatel'ská príručka | 131 |
| LV | Lietošanas instrukcija | 40 | BS | Korisnički priručnik | 137 |
| ET | Kasutusjuhend | 46 | MK | Упатство за употреба | 143 |
| HU | Használati útmutató | 51 | HR | Korisnički priručnik | 150 |
| RO | Manual de utilizare | 58 | UK | Керівництво користувача | 155 |
| CS | Návod k použití | 64 | SR | Упутство за употребу | 162 |
| RU | Руководство пользователя | 70 | AR | دليل المستخدم | 168 |
| EL | Еүхειρίδιο хрήσης | 76 | AZ | İstifadəçi təlimatı | 173 |
| NL | Gebruikershandleiding | 83 | SQ | Manuali i përdorimit | 180 |
| SL | Navodila za uporabo | 89 | KA | Общитеğности | 186 |
| FI | Käyttöohje | 95 | |||

User Manual (EN)
GENERAL SAFETY CONDITIONS
IMPORTANT SAFETY INSTRUCTIONS FOR USE
READ CAREFULLY AND KEEP FOR FUTURE REFERENCE
- Before using the device, read the instruction manual and follow the instructions contained therein. The manufacturer is not responsible for damage caused by using the device contrary to its intended use or improper operation.
- The device is for domestic use only. Do not use for other purposes incompatible with its intended use.
- The device should be connected only to a grounded outlet 230V \~ 50-60Hz, in order to increase the safety of use, multiple electrical appliances should not be connected to a single circuit at the same time.
- Be especially careful when using the device when children are around. Do not allow children to play with the appliance do not allow children or people who are not familiar with the appliance to use it.
- WARNING: This equipment may be used by children over 8 years of age and persons with limited physical, sensory or mental ability, or persons without experience or familiarity with the equipment, if it is done under the supervision of a person responsible for their safety or they have been given instructions on the safe use of the equipment and are aware of the dangers associated with its use. Children should not play with the equipment. Cleaning and maintenance of the equipment should not be performed by children unless they are over 8 years of age and these activities are performed under supervision.
- Always remove the plug from the power outlet after use by holding the outlet with your hand. DO NOT pull on the power cord.
- Do not immerse the cord, plug and the entire device in water or other liquid. Do not expose the unit to weather conditions (rain, sun, etc.) or use in high humidity conditions (bathrooms, damp camping houses).
- Periodically check the condition of the power cord. If the power cord is
damaged, it should be replaced by a specialized repair facility to avoid danger.
-
Do not use the device with a damaged power cord or if it has been dropped or damaged in any other way or is not working properly. Do not repair the device yourself, as there is a risk of electrocution. Return a damaged device to a competent service center for inspection or repair. All repairs may be made only by authorized service centers. Improper repair may cause serious danger to the user.
-
Place the appliance on a cool stable, level surface, away from hot kitchen appliances such as an electric stove, gas burner, etc.
-
Do not use the device near flammable materials.
-
The power cord must not hang over the edge of the table or touch hot surfaces.
-
Do not leave the device plugged into an outlet unattended.
-
To provide additional protection, it is advisable to install in the electrical circuit, a residual current device (RCD) with a rated residual current of not more than 30 mA. In this regard, consult a specialist electrician.
-
If it is necessary to use an extension cord, use only one with a grounding pin and suitable for the loaded power, not less than the iron connected to it. Other ("weaker") extension cords may overheat. Arrange the cable so as to avoid accidental pulls or tripping over it.
-
Always, before filling the iron with water or when the iron is not in use, disconnect it from the power supply.
-
Touching the hot foot, contact with hot steam or water risks burns. Be careful when you turn the iron upside down with the foot, as there may still be hot water in the reservoir, even when the iron is unplugged.
-
DO NOT allow the hot iron to come into contact with fabrics or flammable materials for too long.
-
Be careful that the power cord does not come into contact with the hot iron foot. Allow the iron to cool completely before putting it away.
-
If you do not use the iron even for a short time, turn off the steam options.
-
Do not, under any circumstances, iron clothes or materials on people
or animals.
- Never direct the steam onto people or animals.
- Use the iron on a stable level surface and only put it down on such a surface.
- Do not pour water with chemical additives, fragrances or descaling preparations into the tank.
- Do not fill the water tank above the MAX level.
- The power plug must be unplugged from the plug socket before filling the tank with water (for irons with steam humidification and irons with a washer.
- The opening for filling the water tank must not be opened during ironing.
DEVICE DESCRIPTION
A. Washer discharge nozzle
B. Water inlet opening
C. Steam control switch
D. Spray button
E. Steam ejection button
F. Power cord
G. Rotating cable
H. Heating / thermostat indicator light
I. Temperature control knob - thermostat
J. Switch for self-cleaning function
K. Water tank
L. Ceramic foot
Connect the iron - the heating indicator lamp (H) will light up red, which means that the iron plate begins to heat up. When the set temperature is reached, the lamp will turn green. During operation of the iron, the indicator light will change color from red to green and vice versa, which means that the thermosta is maintaining the previously set temperature.
FILLING WITH WATER
- Set the steam control (C) to "0" (= no steam).
- Open the water fill cover
- Fill the water tank, with water to the "MAX" level.
- Close the water tank lid.
PREPARATION:
Sort the laundry to be ironed according to the international symbols on the garment label or, if missing, according to the type of fabric.
Table:
MARKINGS ON LABELS | TYPE OF FABRICSilk - wool | THERMOSTAT CONTROLLow temperature - |
 | Synthetic fiber | Medium temperature - - |
 | Cotton | High temperature - - - - |
 | DO NOT PRAISE |
Note: If the fabric consists of different types of fibers, always choose the lowest ironing temperature of the composition of these fibers. Start ironing clothes that require a low temperature, this reduces the waiting time (the iron needs less time to heat up than to cool down) and eliminates the risk of burning the fabric.
FIRST USE
When using the iron for the first time, you may notice a slight emission of smoke and hear sounds coming from the plastic. This is quite normal and stops after a short time. A small amount of water may remain in a brand-new iron after a routine leak check of the product.
Dry ironing function (no steam)
- Plug the power cord of the appliance into a power outlet
- Turn the temperature control knob (I) to the desired temperature depending on the type of fabric you want to iron. Make sure the steam control switch (C) is in the "0" position.
- When the iron reaches the desired temperature, the heating indicator light (H) will turn green.
- After use, turn the temperature control knob (l) to the "0" position.
- Remove the plug from the power outlet.
WASHER FUNCTION
- Fill the tank with water as described in "Filling with water".
- Press the water spray button (D).
- Note: Regardless of the type of ironing: steam or dry ironing, the spray will always work in any case.
STEAM IRONING FUNCTION
- Fill the tank with water as described in "Filling with water".
- Connect the iron. The heating indicator light (H) will turn red.
- Turn the temperature control knob (I) clockwise to the "MAX" position.
- When the iron reaches the desired temperature, the heating indicator light (H) will turn red.
- Adjust the degree of steaming by moving the steam control switch (C).
- After use, turn the temperature control knob (l) to the "0" position.
- Remove the plug from the power outlet.
- Make sure the water tank is empty after each use.
Note: Do not steam iron synthetic fabrics, nylon, synthetic silk or silk fabrics. Steam can damage the texture of the fabric.
Note: Do not use the steam ironing function on clothes or fabrics worn by people or animals. The temperature is too high.
STEAM EJECTION FUNCTION
This function will be able to provide more steam to remove stubborn creases.
- Set the temperature control knob (I) to MAX, wait until the indicator light (H) turns to green.
- Release the steam by pressing the steam ejection button (E).
- Wait a few minutes and let the steam penetrate the fabric, then release more steam by pressing this button again.
Notes:
- There should be a gap of 3-5 seconds between two presses of the steam ejection button (E) to get the best ironing result.
- Fill the water to the MAX position before using this function.
- To prevent water leakage from the iron foot, do not press the steam ejection button (E) continuously for more than 5 seconds.
VERTICAL STEAM IRONING FUNCTION
The vertical steam ironing system allows you to use the iron to iron vertically. This is especially useful for removing creases from hanging clothes, curtains.
- Fill the tank with water as described in "Filling with water".
- Connect the iron. The heating indicator light (H) will turn red.
- Turn the temperature control knob (I) to the "MAX" position.
- When the iron reaches the desired temperature, the heating indicator light (H) will turn green.
- Hang the clothes on the clothes rack and tighten them with one hand.
- Hold the iron upright with the other hand and press the steam ejection button (E) to iron the clothes. Tap the garment lightly with the iron to remove creases.
- After use, turn the temperature control knob (I) to the "0" position.
- Remove the plug from the power outlet.
- Make sure the water tank is empty after each use.
Note: Do not use the steam ironing function on clothes or fabrics worn by people or animals. The temperature is too high.
SELF-CLEANING FUNCTION
Note: Before starting the self-cleaning procedure, make sure the iron is not plugged in and the steam regulator (C) is in the "0" position.
- Fill the tank with water to "MAX". Do not use vinegar or other descaling liquids in the water tank.
- Connect the iron and set the temperature control knob (I) to the "MAX" position. The heating indicator light (H) will turn red.
- When the heating indicator light turns green (H), disconnect the power.
- Hold the iron in a horizontal position over the sink. Slide and hold the Self-Clean switch (J).
- Steam and boiling water containing salts and minerals will begin to flow out of the holes in the ironing plate, that have accumulated in the steam chamber from previous uses.
- Gently rock the iron back and forth until the water reservoir is empty.
Note: The water flowing out during self-cleaning is very hot. Be very careful that it does not fall on you. - When the water tank is empty, release the self-cleaning button.
- Wait until the iron has cooled completely.
- Wipe the ironing foot with a cold damp cloth.
ANTI-LIMESCALE SYSTEM
A special filter inside the water tank softens the water and prevents scale buildup in the foot. The filter is durable and does not need to be replaced.
- Use only tap water.
- Distilled and demineralized water renders the anti-limescale system ineffective by changing its physicochemical properties.
ANTI-DRIP SYSTEM
The iron is equipped with a drip stop function: the iron automatically stops steaming when the temperature is too low to prevent water from dripping off the iron foot.
Thanks to the anti-drip system, you can perfectly iron even the most delicate fabrics.
AUTO SHUT-OFF SYSTEM
- The electronic safety device will automatically turn off the heating element if the iron has not been moved more than 30 seconds in the horizontal position. If the iron is left in the vertical position, this will happen after 8 minutes.
To indicate that the heating element has been turned off, the heating indicator light (H) will flash, and you will hear a beep. - When you pick up the iron again, the heating indicator light will turn red (H). This means that the iron is heating up again.
AFTER PRESSING:
To prolong the life of the iron, it is recommended to empty the reservoir after ironing as follows:
Unplug the iron from the power outlet. Empty the iron by opening the water tank lid and holding it with the tip facing down. Shake it lightly over the sink, then close the lid. To dry the remaining moisture, turn the iron on again with the thermostat control knob (I) in the MAX position and the steam control switch (C) in the MAX position. Unplug from the power outlet and wait for it to cool down. Clean the iron foot with a dry cloth from traces of moisture.
CLEANING AND MAINTENANCE
Unplug the iron from the power outlet and wait for the iron to cool sufficiently before cleaning.
- Wipe the iron foot with a damp cloth and a non-abrasive (liquid) cleaner.
- If the fiber is stuck to the iron foot, use a damp cloth with vinegar to wipe the iron foot.
- Never use strong acid or alkali to avoid damaging the iron foot.
TECHNICAL SPECIFICATIONS:
Voltage: 230V \~ 50-60Hz
Power: 2600W
Power consumption when off: 0.00W
Note hot surface:
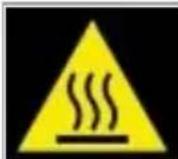
The temperature of the accessible surfaces of the operating device may be high. Do not touch the hot surfaces of the unit
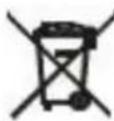
For the sake of the environment. Information about waste electrical and electronic equipment In accordance with Article 13(1) and (2) of the Law of September 11, 2015 on waste electrical and electronic equipment, we inform you about the proper handling of waste electrical and electronic equipment:
-
It is forbidden to place waste electrical and electronic equipment together with other waste - this is confirmed by marking in the form of a "crossed out basket", ordering selective collection of this type of waste.
-
Electrical and electronic equipment may contain hazardous substances, mixtures and components that, when released into the environment, can cause serious danger to the health and life of humans and living organisms. They can lead to numerous health ailments, such as vision, hearing and speech disorders, and can also damage the kidneys, liver and heart, and cause skin diseases. Harmful substances, can also have adverse effects on the respiratory and reproductive systems and lead to cancerous changes. Consumption of plants growing on contaminated soils, and products made from them, can risk the aforementioned health effects.
-
Waste electrical and electronic equipment should be handed over only to authorized collection points, a list of which should be included on each Municipality's website.
-
The household plays an important role, in contributing to the reuse and recovery, including recycling, of waste equipment. It also plays a key role in the waste electrical and electronic equipment management system due to the possibility of direct delivery to authorized collection points and the elimination of undesirable social habits resulting in leaving waste equipment in places not intended for it.
In addition, Donate waste electrical and electronic equipment at the point of delivery. A distributor, when supplying equipment intended for households to a purchaser, is obliged to take back used household equipment free of charge at the place of delivery of such equipment, provided the used equipment is of the same type and performed the same functions as the supplied equipment.
Cardboard packaging and polyethylene (PE) bags should be placed in the appropriate containers for separate collection of municipal waste according to their description. If there are batteries in the equipment, remove them and separately dispose of them at a collection and storage facility.
Do not dispose of the device in the municipal waste container!!!
Service If you wish to purchase spare parts or report any complaints, please contact directly with the seller who issued the receipt.