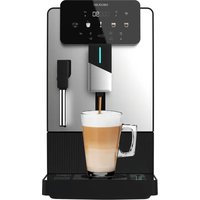
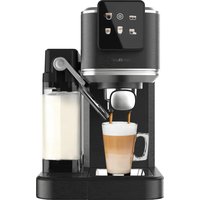
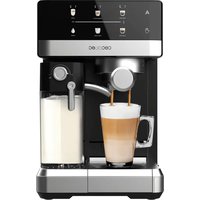
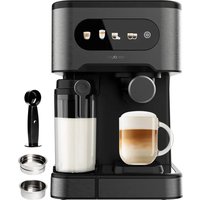
USER MANUAL Cremmaet Lounge CECOTEC
Safety instructions 9
Veigheinsinstrueties 30
Read these instructions thoroughly before using the appliance. Keep this instruction manual for future reference or new users.
- The appliance can be used by people with reduced physical, sensory, or mental capabilities or lack of experience and knowledge if they have been given supervision or instruction concerning use of the appliance in a safe way and understand the hazards involved.
- Always disconnect the appliance from the power supply if it is left unattended and before assembly, disassembly, or cleaning.
- Strictly follow the instructions in this manual to avoid injury or damage to the appliance.
- The appliance is not intended to be used by children. Keep the appliance and its power cable out of the reach of children.
- Cleaning and maintenance tasks should not be carried out by children.
- This appliance can be used by children aged 8 years and above if they have been given supervision or instruction concerning use of the appliance in a safe way and understand the hazards involved. Cleaning and user maintenance should not be carried out by children, unless they are 8 years old or older and supervised. Keep this appliance and its power cable out of reach of children under the age of 8.
- Children must not play with the appliance.
- Check the power cable regularly for visible damage. If the power cable is damaged, it must be replaced by the official Cecotec Technical Support Service or similar qualified personnel to avoid risks.
-
Switch off and unplug the appliance before changing accessories or nearby parts that move during use.
-
This appliance is intended for domestic and similar uses, such as:
staff kitchen areas in shops, offices and other working environments;
farms;
by customers in hotels, motels and other residential settings;
bed and breakfast environments.
- Do not immerse the cable, plug, or any other part of the appliance in water or any other liquid or expose electrical connections to water. Make sure your hands are dry before handling the plug or switching on the appliance.
- The device must not be submerged.
- The coffee machine must not be placed in a cupboard when in use.
- WARNING: do not use the appliance if the surface is cracked
- Cleaning and maintenance tasks should not be carried out by unsupervised children.
- Avoid spillage on the conductor cable.
- The surface of the heating element is subject to residual heat after use.
- In case of misuse, personal injury and/or material damage may occur.
- WARNING: the filling opening must not be opened during operation.
- WARNING: take precautions to avoid spillage of liquids on the cable.
- WARNING: incorrect or improper use can be dangerous for the user and damage the appliance. Use the appliance only for the purposes described in this manual. The surface of the heating element is subject to residual heat after use.
- Always disconnect the appliance from the power supply if
it is left unattended and before assembly, disassembly, or cleaning.
- It is your responsibility to make sure every user is informed about the warnings and precautions stated in this instruction manual. Do not use the appliance for any use other than the one specified in this manual.
- Make sure that the mains voltage matches the voltage stated on the rating label of the appliance and that the wall outlet is earthed.
- Disconnect the appliance from the mains in any of the following circumstances:
A Before filling up the water tank.
B Before removing or installing any of the appliance's parts.
C Before cleaning or maintenance.
D When the appliance is not working properly.
E After using the appliance.
- Empty the water tank when the appliance is not going to be used for some time.
- Make sure the appliance has cooled down completely before removing or installing parts and before cleaning it.
Always use cold water. The use of hot water or other liquids may damage the appliance.
- Use the grinder to grind only coffee beans.
- Do not use caramelised or frozen coffee beans. This appliance can only be used with natural coffee beans.
- Never leave the appliance unattended when it is connected to a mains power supply.
- Do not let the cable protrude over the edge of the table or worktop or come into contact with hot surfaces or sharp edges.
- Place the appliance on a flat, stable surface. Do not use or
place the appliance on a hot or damp surface.
- Do not use the appliance if the drip tray is not properly positioned.
- Do not use the appliance if any of its parts are damaged or if the appliance is not working properly.
- WARNING: this appliance has undergone a quality control before its commercialisation with the aim of ensuring its correct operation. After the quality control testing, the appliance is cleaned thoroughly, therefore, although it is unlikely to occur, there could be rests of water or coffee drops inside it.
INSTRUCTIONS DE SECURITÉ
- Milk powder tank
- Cocoa powder tank
- Keys for opening the panel
- Hot water spout
- Coffee, milk and water spout
- Drip and waste tray
- Double tank for coffee beans
B. Display
- Metallic grille
Fig.2.Coffee machine parts 2
- Coffee beans tank cover
11 Double tank for coffee beans
- Power cable connector
- Drain connector (outside diameter 19.0 ± 1.0 ~mm ): to connect piping
- Water inlet connector (injet pipe on coffee machine with G 3 % thread and connection with G 9 % thread water inlet).
Fig.3.Coffee machine parts 3
- Coupling/Closure for tanks
- Power switch
- Brewing unit
- Descaling hole
- USB connection
Fig. 4. Cappuccinata spout
- Spout of powdered beverages
- Coffee spout
- Milk sprout
- Water spout
Fig. 5. Cappuccinatore parts
Fig. 6. Non-return valve
- Non-return valve body + spring
- Sealing gasket
Fig. 7. Powder mixing system
ENGLISHENGLISH
NOTE:
The graphics in this manual are schematic representations and may not exactly match the device.
2. BEFORE USE
This appliance is packaged in a way as to protect it during transport. Take the appliance out of its box and remove all packaging materials. You can keep the original box and other packaging elements in a safe place to prevent damage to the appliance if you need to transport it in the future. In case the original packaging is disposed of, make sure all packaging materials are recycled accordingly.
- Make sure all parts and components are included and in good conditions. If there is any piece missing or in bad conditions, contact the official Cecotec Technical Support Service immediately.
Box content
Minimum requirements for proper operation:
Room temperature: Above 1^ below 40^
Water quality: Use natural mineral water or filtered water.
Nominal water pressure for automatic water supply: 0.08-0.6 MPa
Nominal operation pressure: 0.9 MPa
3. OPERATION
3.1 Parts description
Coffee machine parts
- Milk powder tank: add milk powder to the tank on the left side.
- Cocoa powder tank: add cocoa powder to the tank on the right side.
- Keys for opening the panel: allow access to the inside of the coffee machine where the milk and cocoa powder mixer, the special key for opening the tanks, the brewing unit, among others, are located.
-
Hot water spout.
-
Drinks spout: coffee, milk, powdered beverage and water.
-
Drip and waste tray: where the drain with a non-return valve is located.
- Double tank for coffee beans: allows you to add two types of coffee beans so that you can select one or the other when making your coffee.
B. 10.1'touch display.
- Metallic grille.
- Coffee beans tank cover
- Double tank for coffee beans: allows you to add two types of coffee beans so that you can select one or the other when making your coffee.
- Power cable connector
- Drain connector (outside diameter 19.0 ± 1.0 ~mm ): to connect piping
- Water inlet connector (inlet pipe on coffee machine with G 3 / 4 thread and connection with G 3 / 4 thread water inlet).
- Coupling/Closure for tanks: by pulling the lock outwards, the tanks for coffee beans, milk and cocoa powder can be removed for cleaning and maintenance.
- Power switch.
- Brewing unit: where coffee extraction takes place.
- Descaling hole.
- USB connection to update images.
The drinks spout is equipped with a device for frothing the milk called Cappuccinatore. It is removed and disassembled as follows:
- Press on the side tabs and pull downwards.
- Pull up the body of the Cappuccinatore which is made of silicone.
- To disassemble all parts, pull down the ribbed covers of the milk spout, then pull down the hard plastic part of the main body.
- Finally, pull up the hard plastic part of the top that is connected to the coffee machine's pipes.
NOTE: the importance of cleanliness in this appliance is key to its proper operation. Continuous cleaning ensures good coffee and milk froth results.
3.2 Using the coffee machine for the first time
- Plug in the coffee machine: Pull out the power cable and connect it to the mains.
- Fill the milk powder tank and the cocoa powder tank.
- Fill the coffee beans tank: Open the tank cover, fill it with coffee beans and put the cover back in place.
NOTE: only fill it with natural roasted coffee beans. Do not use blended or roasted coffee. Do not put any other product into the tank.
- Connect the water inlet to the coffee machine respecting the water pipe diameters.
ENGLISHENGLISH
- Connect a pipe to the water drain. To do this, first remove the rubber plug in the outlet pipe of the drip tray and connect the non-return valve and the spring in the same place by inserting it through the hole on the outside of the drip tray, and place the sealing gasket from the inside of the drip tray on the non-return valve. (Fig. 5 Connection system drip tray - drain)
- Switch on the coffee machine: Press the power switch on the inside of the panel to be opened with the keys. The display will light up and start a process of preparing and starting the coffee machine (Filling water - Checking - Warming up - Quick cleaning) after which you can select the drink, you wish to prepare.
- The machine will ask you to select the language and time zone.
3.3 Switching off the coffee machine
Step 1: press the menu icon at the top left of the display to open the drop-down menu.
Step 2: in this menu, press the Off option.
Step 3: then, follow the steps until the appliance enters standby mode.
NOTE: you can restart the machine from this standby mode by pressing and holding the display for 3 seconds.
Step 4: when the appliance is in standby mode, you can press the switch on the inside of the panel to the off position.
NOTE: do not turn this switch to the off position without following the previous steps. Doing so may damage the coffee machine, as it will not have been drained of water or cleaned properly. WARNING: remember that if you switch it off, you must clean the coffee grounds tank and empty any remaining water from the waste tray.
3.4 Description of main screen
3.4.1 Drinks preparation
The coffee machine features 32 types of drinks. To select one of them, scroll left or right through the existing menus. You can create more drinks if you wish.
NOTE: all drinks are configurable.
3.4.2 Language
By pressing the language icon, located at the top left, just to the left of the menu icon, you can choose from the variety of languages offered by the appliance.
3.4.3.Hot water
If you press the hot cup icon at the bottom left, the appliance will dispense hot water.
3.4.4. Activating the brewing system preheating
If you press the drop icon at the bottom right, the machine will activate the brewing system preheating mode to increase the temperature and improve the result of the drinks.
To access the different menus, you can do so by scrolling the menu from the three-bar icon at the top left of the main screen. Where the selectable drinks are also displayed.
All available menus are explained below:
3.5.1.Complete cleaning
This cleaning shall lost 10 minutes and cannot be stopped once it has started. It consists of a thorough cleaning of the brewing system and the milk system at the same time. When you open the menu, follow the instructions on the display.
NOTE: cleaning is recommended at the end of a full day's use.
Step 1: open the panel, take out the powder mixer and wash and clean it (make sure that the mixing group is dry, otherwise it will lead to powder adsorption) and then replace it.
Step 2: remove and empty the coffee grounds tank, reinstall it and close the panel. Press OK to continue with the next step.
- Step 3: wait a few minutes.
- Step 4: open the ground coffee inlet cover between the coffee bean tanks and insert a cleaning tablet to clean the brewing system. In addition, pour 0.5L of water at 40^ into a container, insert the milk tube and add milk system cleaner. Dissolve it.
- Step 5: in progress, this will take about 6 minutes.
Step 6: after cleaning the container, fill it with 250 ml of water and reinsert the milk tube. Press OK to continue with the next step.
- Step 7: in progress, this will take about 4 minutes.
- Step 8: complete cleaning done. Empty the coffee grounds tank and replace it. Then, press Off to switch off the machine, or press Back to return to the main screen.
3.5.2. Thorough cleaning of the brewing system
The brewing system thorough cleaning is used to clean the brewing unit where coffee extraction takes place. This thorough cleaning is carried out by using descaling tablets. Follow the instructions on the display to confirm the steps.
- The thorough cleaning process is estimated to take 5 minutes and cannot be cancelled once started. Press OK to start.
- Step 1: remove and empty the drip tray and coffee grounds tank. Then, reinstall them.
- Step 2: this may take some minutes.
- Step 3: open the ground coffee inlet cover on the top of the appliance. To do so, press on Push (on the cover itself). Add one cleaning tablet. Place a container at the coffee spout and press Next step.
Step 4: in progress, this will take about 5 minutes.
ENGLISHENGLISH
- Step 5: remove and empty the coffee grounds tank, reinstall it and close the panel. Press OK to continue with the next step.
- Step 6: thorough cleaning of the brewing system done. Press on OK to return.
3.5.3. Thorough cleaning of the milk system
The milk system thorough cleaning is performed to clean the milk system where milk extraction and frothing take place. Follow the instructions on the display to confirm the steps.
The thorough cleaning process is estimated to take 5 minutes and cannot be cancelled once started. Press OK to start.
Step 1: pour 0.5L of lukewarm water at about 40^ into the milk tank; add 1 cleaning tablet and dissolve it thoroughly (about 5 minutes). Then press Next.
- Step 2: in progress, this will take about 3 minutes.
- Step 3: after cleaning the tank, fill it with 250~ml of water. Connect the milk tube and press OK to continue with the next step.
- Step 4: in progress, this will take about 2 minutes.
- Step 5: after this time, the milk system thorough cleaning will be completed. Press OK to return.
3.5.4. Descalging
The decalng process is used to clean the entire piping system of the coffee machine. During normal use the coffee machine accumulates scale deposits due to the hardness of the water. Follow the instructions on the display to confirm the steps.
NOTE: the descending process is estimated to take 35 minutes and cannot be cancelled once started. All steps are described on the display.
- Step 1: remove the drip tray, turn the sealing gasket 90^ clockwise to remove the hose. fit it into the machine's pipe connector, replace the drip tray and press OK to continue with the next step.
Step 2: add 2 L of water in an additional container. odd descaling product in the proportion recommended by the manufacturer, mix and dissolve. Connect the descaling pipe and press OK to continue.
- Step 3: in progress, this will take about 35 minutes.
- Step 4: descending is complete. Reconnect the descending pipe to the machine, reinstall the sealing gasket by turning 90^ counterclockwise and then reinstall the drip tray. Press OK to finish descending.
The following section provides information on the use of the machine:
Total cups: displays the total number of cups and the total for each drink. It can be adjusted by period of time and hours.
- Maintenance records: displays the total cleanings and the total of each drink. Can be adjusted by period of time and hours.
Software version: displays the software version, HMI and model.
Machine information.
3.5.6.Machine settings
NOTE: the password can be changed.
- Drinks settings
After selecting this menu, the machine will display all available drinks settings. After selecting the drink, you want to configure, 3 icons appear at the right of the drink.
The first icon allows you to change the appearance position of the selected drink in the preset drinks list on the main screen. To do this, press the icon of the drink you want to move and press the new drink you want to change the position of.
The second icon allows you to delete the drink you select. You will need to confirm if you want to delete the drink.
- The third icon allows you to configure everything related to the characteristics of the drink itself.
Drink name/English - Change to: this section allows you to rename the selected drink, either in your chosen language or in English.
Image to replace the image. you must insert a USB flash drive at the bottom of the panel.
NOTE: the image to be replaced must respect an image size of 290x290 pixels, maximum 2 MB in size, in PNG format and the file name may only contain numbers and letters.
o Add one of the three icons that appear in the drink to mark it as the most used
o You can hide the drink (the drink will be saved but will not appear in the main menu).
Type of cup to be used: you can configure the individual drinks for different cup sizes.
You will be able to categorise the size of the drink you are configuring.
o Sequence: this section allows you to select the order in which the different drinks appear, such as coffee, hot water, milk, milk froth, pause and cold water. Please note that some drinks, such as the use of milk and water, are incompatible in the order of the sequence of drinks.
For the configuration of the drinks sequence, drag the colour blocks to the desired step in the diamonds just above them.
Steps: this sequence allows you to adjust each parameter for each step. These
ENGLISHENGLISH
parameters are explained below.
- You can test the selected configuration to see if it is to your liking, if so, press Save to save the final drink configuration.
Parameters setting
The meaning of each parameter and the range of values is explained below:
Number of servings: allows you to select how many servings of the selected beverage the appliance will dispense. Values from 1 to 5. Example: if you select 2 for Espresso, when you press Espresso, the appliance will dispense 2 Eseurosos.
Coffee beans (g): number of grams of coffee beans to be ground by the coffee machine. You can select from which tank the coffee beans are to be dispensed. Values from 6-21 g.
- Pre-brewing (s): pre-brewing is the number of seconds in which the coffee extracts its aromas after moistening with hot water. Values from 0 to 10 seconds.
- Coffee (ml): amount of coffee. Values from 10 to 240 mL
Temperature level: temperature at which the coffee is extracted and dispensed. Selectable values between low temp. (85^) mid (90^) and high (95^)
- Pressure mode: with pressure or without pressure.
- Extraction method: It is the strength with which the coffee is extracted, generating stronger flavours the more it is extracted. Selectable values between Standard, Strong and Extra-strong.
Hot milk (s): amount of warm milk dispensed. Values from 0 to 60s.
- Hot milk temperature: level of the temperature at which you want the milk to be dispensed, level 5 being the highest temperature. Values from 1 to 5.
Milk froth (s): amount of frothed milk. Values from 0 to 90s.
- Milk temperature (^) : indicate the temperature of the milk to be used.
NOTE: if you use milk at a higher temperature than the set temperature, the appliance will display an overheating warning.
- Amount of milk froth: amount of air that is introduced into the milk to froth it, being high for more froth. High, medium and low values.
- Milk froth temperature: milk froth temperature being high for higher temperature. High, medium and low values.
Quantity of hot water (ml) amount of hot water. Values between 0 and 480mL
For the soluble ones (coffee powder and milk powder):
Amount of water (ml): amount of water to be mixed with the solubles. Values from 0 to 300ml
Amount of solubles (g): amount of solubles to be mixed with water. Values from 0 to 70 g.
- First water dispensing (ml): first quantity of water to be dispensed without mixing with the solubles. Values from 5 to 50 ml
- Last water dispensing (ml): last quantity of water to be dispensed without mixing with the solubles. Values from 5 to 50mL
Soluble exit rate (9%) : speed at which the soluble dispensing system rotates to dispense more soluble. The higher the percentage, the higher the speed and the more soluble the mixture. Values from 50 to 100%
- Mixing mode with water: whether you want it to be mixed with cold water or not.
- Selection of soluble (coffee powder and milk powder): select the soluble you want to use.
Adjusting the grinding level
Step 1: open the panel with the key. Inside the panel you will find the special key inserted in the side of the panel.
Step 2: pull the closure on the tanks and gently lift the coffee beans tank. You will see a protruding cylinder with a marking on its base ranging from 1 to 9. Being 9 for coarser grinding and 1 for finer grinding.
NOTE: for correct operation, it is recommended to place it between levels 7 and 5.
NOTE: you can also measure the grams of coffee and water to be dispensed separately. Next to each of these parameters you will find a button to measure them. The amount of beverage will be dispensed from the coffee spout and the grams of ground coffee will fall into the grounds tank directly, so you can measure them using a scale. This will allow you to divide and calculate the doses of coffee you wish to set.
- Maintenance
The information about how to clean the brewing system and the milk system, as well as how to descale the appliance, has already been explained. Additionally, as regards maintenance, you should consider the following:
Water drain: used to remove residual water from the inside of the machine. This is useful for transporting the coffee machine without water leakage. The process takes about 1 minute.
NOTE: always empty the appliance when transporting it and/or when it is not going to be used for some time. Do not interrupt this process.
Machine settings
In this section, you will find various settings that you can configure on the machine. These are:
Maintenance settings: the machine automatically cleans its various components from time to time. These times, in addition to other parameters, are the ones that can be configured. You can
ENGLISHENGLISH
modify the preheat button, the brewing system preheat warning and the time for it to appear, sleep cleaning, milk system cleaning, brewing unit cleaning, descending, steamer cleaning, the time for daily cleaning and the number of drinks that can be made until these messages appear again.
Date/Time: you can set the time and date of the coffee machine.
Automatic on/off: you can add (by pressing on the +icon) automatic switch-on and switch-off times.
ECO mode:
ECO mode 1: If no operation is performed on the machine for one hour, the display will dim by 50% and the word "ECO" will appear on the display. If you touch the display, you will exit this mode and you will be able to prepare the drink of your choice.
ECO mode 2: if no operation is performed on the machine for one and a half hours, the display will switch off. Press the Power button on the top right side of the machine to exit this mode and prepare the drink of your choice.
Units: you can set the units for volume and temperature of the coffee machine.
Password: you can change the password used to access the settings.
The appliance has several security levels to prevent other users from changing certain settings.
The password for security level 1 is 1609. Entering this value will only allow you to modify the 'Drinks settings' section in section 3.5.6 'Machine settings'.
The password for security level 2 is 1709, entering this value will only allow you to modify the sections: "Drinks settings", "Maintenance" and "Machine settings" of section 3.5.6 "Machine settings".
The password for security level 3 is '1809, entering this value will only allow you to modify the sections: 'Drinks settings', 'Maintenance', 'Machine settings' of section 3.5.6 'Machine settings' and 'Technical settings'.
NOTE: the appliance allows you to enter the password to access section 3.5 'Menu' or section 3.5.6 'Machine settings'. This can be changed in the 'Control settings' of section 3.5.6 'Machine settings' and 'Technical settings'.
Customised settings: you can customise various aspects of the machine's operation and interface. Some of them are:
Boiler temperature: you can select the temperature at which the coffee will be brewed.
- Technical settings
Grinder calibration: you can adjust the grinding level, thus adjusting the coffee machine to the type of coffee beans being used. If you find coffee residue on the back of the coffee grounds tank, this is because the grinder is not correctly calibrated. To calibrate the grinder you have to grind coffee three times (activate the grinder by pressing Start) and note the quantities that are ground in the three available cells. The coffee will fall directly into the ground's tank, so you can weigh the ground coffee using the grounds tank itself and a scale with the TARE function. The weight will appear on the scale display.
Solubles calibration: you can calibrate the dispensing of solubles (milk and cocoa powder). To calibrate the soluble dispense you must dispense 3 times having selected which soluble tank you wish to calibrate and then press Start. The powders will fall directly into the grounds tank, so that you can weigh the amount ground using the tank itself and a scale with the TARE function. The weight will appear on the scale display.
NOTE. do not forget to clean the red ring before installing the powder mixing system.
Grinding capacity, for further control of the amount of ground coffee, it is possible to apply a factor to increase or decrease the amount of ground coffee. The value displayed will be multiplied by the amount of ground coffee selected. If the number selected is greater than 1, the quantity of ground coffee will be greater than normal; if the number selected is less than 1, the quantity of coffee will be less. Values from 0.7 to 1.3
Water supply calibration: you can calibrate the amount of water used for the different drinks. Select the type of drink you wish to calibrate and follow the steps on the display.
Milk system calibration: you can calibrate the milk system. Follow the steps on the display.
Factory settings: you can reset all settings to factory default.
Business settings: in this window, you can modify different parameters related to the
ENGLISHENGLISH
appearance of the coffee machine. You will be able to upload your own logo, a start-up image, and various images that will be displayed in the background while dispensing coffee or navigating through the menus. The formats are as follows:
-Logo:250x4Bpx(png)
- Start-up and background image (1): 1024x600 px (.png)
Background image (2): 764x500 px (.png)
NOTE: requirements: 2 MB maximum size, in PNG format and the file name can only contain letters and numbers.
Import/Export parameters: if you have purchased several coffee machines and do not wish to update them all one by one, you can export the parameters of the machine that has already been configured onto a USB flash drive and copy them to the other coffee machines. To do so, follow these steps:
- Insert a USB flash drive into the USB port.
NOTE: the USB port is located on the inside of the panel. To the right of the back of the display, you will find a rectangular rubber cap pull it out and to find the USB port.
- Export on the machine that is already configured, the machine parameters.
- Once the process is complete, remove the USB flash drive and insert it into the port of the coffee machine to be configured.
- Access the Parameters Import/Export menu and import the parameters.
Functions settings: In this menu you can activate or deactivate the various functions:
Coffee grounds tank emptying warning.
Empty coffe bean tank warning switched off.
- Warning of lack of powder in the right tank.
- Warning of lack of powder in the left tank.
- Password for the menu (allows to move forward directly to enter the password to the menus).
- Coffee extraction time (s).
-Grinder calibration
Hot water function allows you to activate or deactivate the hot water function on the main screen.
Amount of hot water.Values from 0 to 480 mL
4. CLEANING AND MAINTENANCE
The cleaning of the coffee machine is the most important point on the maintenance of the appliance. A quick daily cleaning of the brewing system is necessary. In addition, after each use of the milk system, it should be given a quick cleaning of the milk system.
After each use, milk forms deposits in the ducts through which it passes, even blocking them. In addition, bad tastes and odours can be generated by the accumulation and degradation of the same.
It is essential for the proper functioning of the milk system and cappuccinatore that the ducts are clean. One of the main causes of milk not being well steamed and frothed is the accumulation of milk in these ducts.
The following daily cleanings are recommended:
Thorough cleaning of the brewing system
- Thorough cleaning of the milk system
The following weekly cleanings are recommended:
- Complete cleaning
- Descalging
4.1 Remove and clean the powder mixing system (Fig. 7)
To extract the powder mixing system:
Step 1: slowly turn the red ring between the brewer frame and the powder system counterclockwise until you feel a slight click.
Step 2: you can then remove this system by pulling it out. Perform a little side-to-side hand play while pulling. In this way it will gradually work its way out.
Step 3: once the milk system is out, lift the silicone lid upwards to separate it from the rigid plastic body.
Step 4: clean all components with warm soapy water until all residues are removed.
Step 5: put everything back in place.
NOTE: when setting up drinks with solubles it is very important that you keep the front and rear water output within the drink's preparation parameters. Removing this small amount of water
ENGLISH ENGLISH
may cause soluble blockage in the powder mixing system and malfunctioning of the machine.
4.2 Maintenance tips
| Note Possible causes Possible solutions | |
| The system has no water | 1. There is no water in the water intake system.2. The water inlet connection is not properly installed.3. The water level detection sensor does not work. | 1. Check the water installation.2. Reinstall the water inlet connection correctly.3. Contact the official Cecotec Technical Support Service. |
| Grounds tank is full | The coffee grounds tank has more grounds than allowed | Remove the drip tray, take out the coffee grounds tank and empty it. |
| Coffee beans tank or powder tank is empty | 1. Coffee beans tank is empty.
2. Coffee beans or soluble powder are stuck together and do not fall out. | 1. Fill the tank with coffee beans or powder as appropriate.
2. Stir the beans or powder until they are loose. |
| The drip tray is not positioned correctly | 1. The drip tray is not positioned correctly.
2. The sensor is damaged.
3. The magnet is lost or damaged. | 1. Position the drip tray correctly.
2. end 3. Contact the official Cecotec Technical Support Service. |
| The drip tray is full | 1. The drip tray is full of dirty water. | 1. Remove the tray and empty it. |
| No water is coming out | 1. The water inlet pipe is blocked.
2. The water inlet is not well positioned.
3. The flow meter is damaged. | 1 - 2. Check and replace the water inlet.
3. Contact the official Cecotec Technical Support Service. |
| No milk comes out | 1. The milk tank is empty.
2. The steam outlet is blocked.
3. The cappuccinatore is blocked. | 1. Fill the milk tank.
2. Start the milk system cleaning function.
3. Disassemble and clean the cappuccinatore or replace it. |
| No milk or cocoa powder comes out | 1. Cocoa powder tank is empty.
2. The soluble mixing system is clogged.
3. The appliance has no water. | 1. Refill the powder tank.
2. Remove and clean the soluble mixing system.
3. Connect the appliance to the water supply. |
ENGLISHENGLISH
| No coffee comes out - Pressure is too high | 1. The filter in the brewing system is blocked.
2. The ground coffee is too fine.
3. The pressing of ground coffee is very high. | 1. Clean the brewing system.
2. Turn the grinding wheel. The higher the number selected, the thicker the coffee.
3. Reduce the level of coffee pressing. |
| It is necessary to carry out a cleaning of the brewing system | When the brewing system needs to be cleaned, the display shows a warning. | Follow the on-screen prompts and perform the cleaning. |
| It is necessary to carry out a cleaning of the milk system | When the milk system needs to be cleaned, the display shows a warning. | Follow the on-screen prompts and perform the cleaning. |
| You need to carry out a complete cleaning | When a complete cleaning needs to be performed, the display shows a warning. | Follow the on-screen prompts and perform the cleaning. |
| It is necessary to carry out a descaling process | When a descaling process is required, a beep will sound. | Follow the on-screen prompts and perform the descaling. |
| Water leakage | There is a water leak inside the coffee machine. | Check and clean the soluble mixing system.
Check all parts of the appliance to confirm that everything is correctly installed. If the problem persists, please contact the official Cecotec Technical Support Service. |
| The machine does not switch on | 1. No power supply.
2. Voltage is not high enough.
3. The coffee machine is not switched on.
4. The PCB is damaged.
5. Main power supply fuse is blown. | 1. Check that the appliance is connected to the mains.
2. Make sure that the voltage is correct.
3. Check that the appliance is switched on.
4 - 5. Contact the official Cecotec Technical Support Service. |
| The heating system has overheated | The temperature is higher than allowed by the appliance. | Restart the appliance, if this does not solve the problem, please contact the official Cecotec Technical Support Service. |
| Room temperature is too low | Room temperature is 0 °C or lower. | Switch the machine back on when the room temperature is between 10 °C and 40 °C. |
| Check the brewing system | 1. The brewing system is not correctly positioned.
2. The brewing system is damaged.
3. The motor of the brewing system is damaged | 1. Press "Check-up".
2. Replace the brewing system.
3. Contact the official Cecotec Technical Support Service. |
| No milk froth, only hot milk The milk system is dirty. | Perform a deep cleaning of the milk system.
Check the tube and the air valve inlet. Clean the air valve. |
ENGLISHENGLISH
6. TECHNICAL SPECIFICATIONS
Product reference: 01796
Product: Cremmaet Lounge
Power: 2900 W
Voltage:220-240V
Frequency:50/60Hz
Water inlet pressure: 80-600 kPa (0.08-0.6MPa)
Nominal pressure: 900kPa (0.9MPa)
Coffee beans tank capacity: 750 g × 2
Milk powder tank capacity: 1000 g
Cocoa powder tank capacity: 1000 g
Technical specifications may change without prior notification to improve product quality.
Made in China | Designed in Spain
7. DISPOSAL OF OLD ELECTRICAL AND ELECTRONIC APPLIANCES

This symbol indicates that, according to the applicable regulations, the product and/or batteries must be disposed of separately from household waste. When this product reaches the end of its shelf life, you should dispose of the cells/batteries/accumulators and take them to a collection point designated by the local authorities.
Consumers must contact their local authorities or retailer for information
concerning the correct disposal of old appliances and/or their batteries.
Compliance with the above guidelines will help protecting the environment.
8. TECHNICAL SUPPORT AND WARRANTY
Cecotec shall be liable to the end user or consumer for any lack of conformity that exists at the time of delivery of the product under the terms, conditions and deadlines established by the applicable regulations.
Repairs should be carried out by qualified personnel.
If at any moment you detect any problem with your product or have any doubt, do not hesitate
to contact the official Cecotec Technical Support Service at 34 963 210 728.
9. Copyright
The intellectual property rights over the texts in this manual belong to CECOTEC INNOVACIONES, S.L. All rights reserved. The contents of this publication may not, in whole or in part, be reproduced, stored in a retrieval system, transmitted or distributed by any means (electronic, mechanical, photocopying, recording or similar) without the prior authorization of CECOTEC INNOVACIONES, S.L.
FRANÇAISFRANÇAIS
1.PIECES ET COMPOSANTS
Img.1.Pieces de la machine a café 1
Productreference:01796
Product: Cremmaet Lounge
Vermogen: 2900 W
Voltage 220-240
Frequenclle:50/60Hz
Watertoevoerdruk:80-600kPa(0,08-0,5MPa)
Nominalderuk:900kPa(0.9MPa)
Capaciteit bonenreservoir 750g x 2
Urun reference:01798
Grun Cremmael Lounge
GUC2900W
Voltaje 220-240
Frekans:50/60 Hz
Su giris basinci:80-600 kPa (0.08-0.5MPa)
Nominal basinc:900kPa(0.9MPa)
H onpaia kae Taapapetpo Ka To Epuoc Tpov Enyehtaipakatw
Aipuc unauo: Taemte va emtace paeceou tmeyevou poaoc ta diavelen mynavri. Tcse o 1 e5. Padoeia: Ecv mtace 2 yia Esperto, oar vamratae Esperto, mynavri oth aeiyei 2 Esperco.
- Kokoi Kaep (g): Paootn a Kokuv Tou pTei va aaleouv ato ty kapeipapa. Mtopeite va emtEe t oia tegaeveh Taiveuogov oi Kokoi Kaep. Tipe c 6-21 g.
- Pno-Eyuan (s): H Pno-Eyuan elvai o apuuc suw deutepoaennuw kata ta otla o kapecexuunie ta apuajraou tmu aynypavon rou tezato vepo. Tuec an0 16wc 10 deutepaaTTA.
- Kaες (ml): Μοσότητα καε. Tιμες πάτο 10 εως 240 ml.
- Eπrde θερμκραλίας: θερμκραλίαση έντολ Εκχιλίζαι κα βγανειος έλεφες. Eπιδεμες τημες μετάμι: Xαμηλ (85°C), μεααλία (90°C) και υμηλ (95°C) θερμκραλία.
Aerouyia mean: ne n np xupic meon
ELexyoc Eekuianc: Eiva nduvun me nyoiaekxuiizetai o kape, ouniuyovac xayupotepes yeoue ooe pnoedotepekuxuiizetai. Emieqicpiets eata: Tumkn, Iaynpk) k Eaepitka Iaynpk).
- Zeotó yáα (s): Nooŋtna θερμou yáaktoç Tnou EKTOEuetai. Tɪŋc aɪə 0 ᵥις 60s.
- Oepokpacia 2eato yalakto; Emiteo ts Oepokpaoiaat any oia 0eare va byei ro yala, me to emiteo 5 va eivai mou uynh epokpacia. Tiecs aro 1 eus 5.
Aappoyaa(s):nooortna appoyaa.Tiuea o 0 euc 90s.
Oepuokpaoia yalaktoC (oC): Avapepere Tn 0epuokpaoia rou yalaktoC tou 0a xponaiomoroei.
EHMEIOE H: EAV XPOIOIOIEI YAA OE UYNAOEPN EEPUOKPcAia an in puOIOeVn, n OUKeun 8a epaivei TPOEOBTOINn UTEPbepuavons.