CHT1850P - Hedge trimmers RYOBI - Free user manual and instructions
Find the device manual for free CHT1850P RYOBI in PDF.
User questions about CHT1850P RYOBI
0 question about this device. Answer the ones you know or ask your own.
Ask a new question about this device
Download the instructions for your Hedge trimmers in PDF format for free! Find your manual CHT1850P - RYOBI and take your electronic device back in hand. On this page are published all the documents necessary for the use of your device. CHT1850P by RYOBI.
USER MANUAL CHT1850P RYOBI
CHARACTERISTIQUES PRODUIT
Moteur 18 V
Batterie* BPP-1817M / BPP-1815M /
BPP-1817MG /
ABP1801/ ABP1802 /
BPL-1815 /
BPL-1820/BPL-1820G
Chargeur* BC-1800/
BC-1800 /
BC-1800M / BC-1815S /
BC-1815SMG /
ACR1800 / BCL-1800 /
BCL-1800G
DESCRIPTION
Fig.1
A. FOURREAU DE PROTECTION DE LA LAME
B. ÉCRAN DE PROTECTION
C. POIGNEE AVANT
D. BOUTON DE DÉVERROUILAGE DE LA GACHETTE
E. POIGNEE ARRIÈRE
F. BATTERIE
G. LAME
H. GACHETTE AVANT
I. GACHETTE PRINCIPALE
Fig. 2
A. BATTERIE
B. LANGUETTES DE VERROUILAGE
Fig. 3
A. POIGNEE AVANT
B. GACHETTE AVANT
C. BOUTON DE DÉVERROUILAGE DE LA GACHETTE
D. GACHETTE
Fig. 6
A. VIS DU CARTER DE LAME
B. COUVERCLE DU CARTER DE LAME
Fig. 7
A. VIS DE FIXATION DE LA LAME
B. PLAQUE D'ASSEMBLAGE
C. RONDELLE-FREIN
D. RONDELLE PLATE
E. PLAQUE DE MAINTIEN
F. BASE DE LA LAME
G. ANSES
H. CAMES
I. BROCHES
Fig. 9
A. DENTS DE LA LAME
B. DENTS CRÉNELEES
Fig. 10
A. FOURREAU DE PROTECTION DE LA LAME
Fig. 11
A. CHARGEUR DE LA BATTERIE
B. VOYANT VERT
C. VOYANT ROUGE
FONCTIONNEMENT
FONCTION DES VOYANTS LUMINEUX DUCHARGEUR
Voir Figure 11.
LES VOYANTS LUMINEUX INDIQUENT L'ETAT DE CHARGE DE LA BATTERIE
REEMPLACEMENT DE LA LAME

AVERTISSEMENT
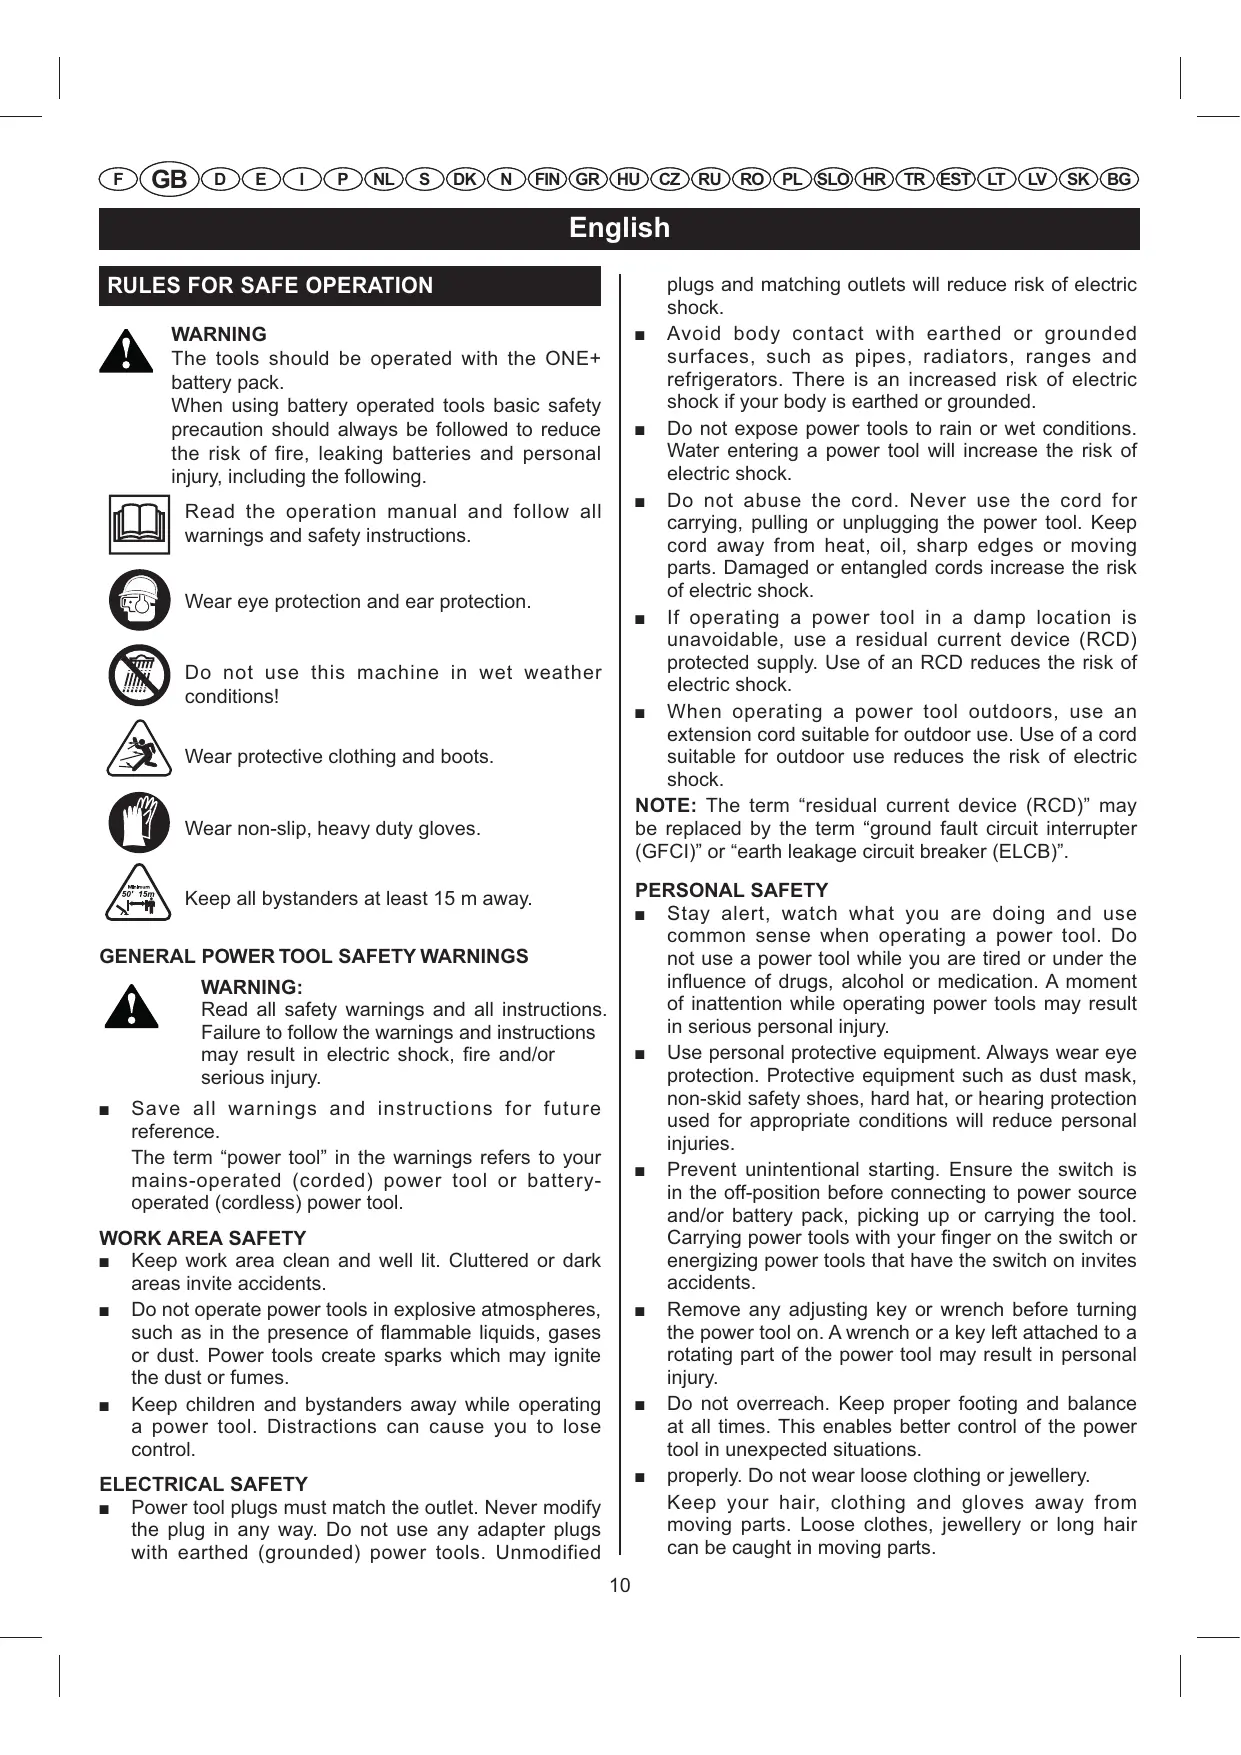
The tools should be operated with the ONE+ battery pack.
When using battery operated tools basic safety precaution should always be followed to reduce the risk of fire, leaking batteries and personal injury, including the following.

Read the operation manual and follow all warnings and safety instructions.

Wear eye protection and ear protection.

Do not use this machine in wet weather conditions!

Wear protective clothing and boots.

Wear non-slip, heavy duty gloves.

Keep all bystanders at least 15 m away.
GENERAL POWER TOOL SAFETY WARNINGS

WARNING:
Read all safety warnings and all instructions.
Failure to follow the warnings and instructions may result in electric shock, fire and/or serious injury.
- Save all warnings and instructions for future reference.
The term "power tool" in the warnings refers to your mains-operated (cored) power tool or battery-operated (cordless) power tool.
WORK AREA SAFETY
- Keep work area clean and well lit. Cluttered or dark areas invite accidents.
- Do not operate power tools in explosive atmospheres, such as in the presence of flammable liquids, gases or dust. Power tools create sparks which may ignite the dust or fumes.
- Keep children and bystanders away while operating a power tool. Distractions can cause you to lose control.
ELECTRICAL SAFETY
Power tool plugs must match the outlet. Never modify the plug in any way. Do not use any adapter plugs with earthed (grounded) power tools. Unmodified
plugs and matching outlets will reduce risk of electric shock.
- Avoid body contact with earthed or grounded surfaces, such as pipes, radiators, ranges and refrigerators. There is an increased risk of electric shock if your body is earthed or grounded.
- Do not expose power tools to rain or wet conditions. Water entering a power tool will increase the risk of electric shock.
- Do not abuse the cord. Never use the cord for carrying, pulling or unplugging the power tool. Keep cord away from heat, oil, sharp edges or moving parts. Damaged or entangled cords increase the risk of electric shock.
If operating a power tool in a damp location is unavoidable, use a residual current device (RCD) protected supply. Use of an RCD reduces the risk of electric shock. - When operating a power tool outdoors, use an extension cord suitable for outdoor use. Use of a cord suitable for outdoor use reduces the risk of electric shock.
NOTE: The term "residual current device (RCD)" may be replaced by the term "ground fault circuit interrupter (GFCI)" or "earth leakage circuit breaker (ELCB)".
PERSONAL SAFETY
- Stay alert, watch what you are doing and use common sense when operating a power tool. Do not use a power tool while you are tired or under the influence of drugs, alcohol or medication. A moment of inattention while operating power tools may result in serious personal injury.
Use personal protective equipment. Always wear eye protection. Protective equipment such as dust mask, non-skid safety shoes, hard hat, or hearing protection used for appropriate conditions will reduce personal injuries.
Prevent unintentional starting. Ensure the switch is in the off-position before connecting to power source and/or battery pack, picking up or carrying the tool. Carrying power tools with your finger on the switch or energizing power tools that have the switch on invites accidents. - Remove any adjusting key or wrench before turning the power tool on. A wrench or a key left attached to a rotating part of the power tool may result in personal injury.
- Do not overreach. Keep proper footing and balance at all times. This enables better control of the power tool in unexpected situations.
properly. Do not wear loose clothing or jewellery. Keep your hair, clothing and gloves away from moving parts. Loose clothes, jewellery or long hair can be caught in moving parts.
English
If devices are provided for the connection of dust extraction and collection facilities, ensure these are connected and properly used. Use of dust collection can reduce dust-related hazards.
POWER TOOL USE AND CARE
- Do not force the power tool. Use the correct power tool for your application. The correct power tool will do the job better and safer at the rate for which it was designed.
- Do not use the power tool if the switch does not turn it on and off. Any power tool that cannot be controlled with the switch is dangerous and must be repaired.
- Disconnect the plug from the power source and/or the battery pack from the power tool before making any adjustments, changing accessories, or storing power tools. Such preventive safety measures reduce the risk of starting the power tool accidentally.
- Store idle power tools out of the reach of children and do not allow persons unfamiliar with the power tool or these instructions to operate the power tool. Power tools are dangerous in the hands of untrained users.
- Maintain power tools. Check for misalignment or binding of moving parts, breakage of parts and any other condition that may affect the power tool's operation. If damaged, have the power tool repaired before use. Many accidents are caused by poorly maintained power tools.
- Keep cutting tools sharp and clean. Properly maintained cutting tools with sharp cutting edges are less likely to bind and are easier to control.
- Use the power tool, accessories and tool bits etc. in accordance with these instructions, taking into account the working conditions and the work to be performed. Use of the power tool for operations different from those intended could result in a hazardous situation.
SERVICE
- Have your power tool serviced by a qualified repair person using only identical replacement parts. This will ensure that the safety of the power tool is maintained.
HEDGE TRIMMER SAFETY WARNINGS
- Keep all parts of the body away from the cutter blade. Do not remove cut material or hold material to be cut when blades are moving. Make sure the switch is off when clearing jammed material. A moment of inattention while operating the hedge trimmer may result in serious personal injury.
- Carry the hedge trimmer by the handle with the cutter blade stopped. When transporting or storing the hedge trimmer always fit the cutting device cover. Proper handling of the hedge trimmer will reduce possible personal injury from the cutter blades.
- Keep cable away from cutting area. During operation
the cable may be hidden in shrubs and can be accidentally cut by the blade.
ADDITION
Advice to check the hedge for foreign objects, e.g. wire fences.
- Recommendation for the use of a residual current device with a tripping current of 30mA or less.
- Instruction to hold the hedge trimmer properly, e.g. with both hands if two handles are provided.
READ ALL INSTRUCTIONS BEFORE OPERATING
- Read the instructions carefully. Be familiar with the controls and proper use of the unit.
- Do not operate this unit when tired, ill, or under the influence of alcohol, drugs, or medication.
Inspect the unit before use. Replace damaged parts. Check for battery pack leaks. - Make sure all fasteners and guards are in place and secure. Replace cutting blades or any other parts that are cracked, chipped, or damaged. Make sure the cutting blade is properly installed and securely fastened. Failure to do so can result in personal injury to the operator and bystanders, as well as damage to the unit.
Use the right tool. Only use this hedge trimmer for the purpose intended. - Do not use hedge trimmer if switch will not turn the unit on or off. A unit that cannot be controlled with the switch is dangerous and must be repaired.
- Clear the area to be cut before each use. Remove all objects such as cords, lights, wire, or string which can become entangled in the cutting blade.
- Clear the area of children, bystanders, and pets. At a minimum, keep all children, bystanders and pets outside a 15m radius; there still may be a risk to bystanders from thrown objects. Bystanders should be encouraged to wear eye protection. If you are approached, stop the unit immediately.
- Do not operate power tools in explosive atmospheres, such as in the presence of flammable liquids, gases or dust. Power tools create sparks which may ignite the dust or fumes.
- To avoid the risk of electric shock, do not operate unit in damp or wet locations.
- Do not handle the unit with wet hands.
- Do not allow children under the age of 15 or untrained individuals to use this hedge trimmer.
To reduce the risk of injury, always wear full eye protection, footwear, goggles and clothing when using this machine.
Wear a face or dust mask if the operation is dusty. - Dress properly. Do not wear loose clothing or jewellery; they can be caught in moving parts. Use of
English
rubber gloves, substantial footwear and long trousers is recommended when working outdoors.
- To prevent hair from being drawn into nearby air vents and becoming entangled in moving parts, wear protective hair covering to contain long hair or secure covered hair above shoulder level.
- Do not use electric or battery operated units in rain or damp weather.
- When transporting or storing the machine always fit with blade cover.
Always be aware of your surroundings and stay alert for possible hazards that you may not hear due to the noise of the machine. - Form the habit of checking to see that keys and adjusting wrenches are removed from the tool before turning it on.
Always ensure all the handles and guards are fitted when using the tool. - Never attempt to use an incomplete machine or one fitted whith an unauthorised modification.
WHILE OPERATING
- Do not use trimmer without front handle in place. Keep both hands on handles when unit is in use.
- To avoid accidental starting, never carry your unit with your finger on the trigger.
- Stay alert and pay attention to what you are doing. Use common sense when using this hedge trimmer.
- Wear heavy, long pants, substantial footwear and well fitting gloves. Do not wear short pants, sandals or go barefoot.
- Do not operate in poor lighting. Use the unit only in daylight or good artificial light.
- Do not overreach or stand on unstable support. Keep good footing and balance at all times. Do not use on ladder.
- Do not force the hedge trimmer. It will do the job better and with less likelihood of a risk of injury at the rate for which it was designed.
-
Release the trigger, allow the motor to stop, and remove the battery pack before performing maintenance, repair, or making adjustments.
This hedge trimmer is to be used for cutting hedges, bushes, and shrubs only. Do not use for any other purpose.
Before starting the unit, make sure the cutting blades will not come in contact with anything.
If you strike or become entangled with foreign objects, stop the unit immediately, remove the battery pack and check for damage. Do not operate before repairing damage. Do not operate the unit with loose or damaged parts.
Watch what you are doing. Use common sense. -
Maintain hedge trimmer with care. Keep cutting edge sharp and clean for best performance and to reduce the risk of injury. Follow instructions for lubricating and changing accessories. Keep handles dry, clean, and free from oil and grease.
- Check damaged parts. Before further use of the hedge trimmer, a guard or other part that is damaged should be carefully checked to determine that it will operate properly and perform its intended function. Check for alignment of moving parts, binding of moving parts, breakage of parts, mounting, and any other condition that may affect its operation. A guard or other part that is damaged should be properly repaired or replaced by a Authorised Service Centre unless indicated elsewhere in this manual.
- Risk of cut. Keep hands away from blades. Do not attempt to remove cut material or hold material to be cut when blades are moving. Make sure battery pack is removed and the trigger is released when clearing jammed material from blades. Do not grasp the exposed cutting blades or cutting edges when picking up or holding the unit.

CAUTION
Blades coast after unit is turned off.
- Keep hands, face, and feet at a safe distance from moving parts. Do not touch or try to stop the cutting blades when they are moving.
Always stop the motor when cutting is delayed or when walking from one cutting location to another. - Keep unit clean of grass clippings and other materials. They may become lodged in the cutting blades.
Store the unit inside in a dry place, either locked up or up high to prevent unauthorised use or damage. Keep out of the reach of children or untrained individuals. - Replace blade cover when unit is not in use.
- Never douse or squirt the unit with water or any other liquid. Keep handles dry, clean and free from debris. Clean after each use, see Storage instructions.
- Be sure to secure the unit while transporting.
- Keep these instructions. Refer to them often and use them to instruct other users. If you loan someone this unit, also loan them these instructions.
SERVICE
Service on unit must be performed only by qualified repair personnel. Service or maintenance performed by unqualified personnel could result in a risk of injury to the user, or damage to the unit. It may also void your warranty.
- When servicing a unit, use only identical replacement parts. Follow instruction in the Maintenance section of this manual. Use of unauthorised parts or failure to follow Maintenance Instructions may create a risk of shock or serious injury to the user, or damage to
English
the unit. It may also void your warranty.
- When replacing the blade the whole blade assembly should be changed.
BATTERY TOOL USE AND CARE
- Ensure the switch is in the off position before inserting battery pack. Inserting the battery pack into power tools that have the switch on invites accidents.
- Recharge only with the charger specified by the manufacturer. A charger that is suitable for one type of battery pack may create a risk of fire when used with another battery pack.
Use power tools only with specifically designated battery packs. Use of any other battery packs may create a risk of injury and fire. - When battery pack is not in use, keep it away from other metal objects like paper clips, coins, keys, nails, screws, or other small metal objects that can make a connection from one terminal to another. Shorting the battery terminals together may cause burns or a fire.
Under abusive conditions, liquid may be ejected from the battery; avoid contact. If contact accidentally occurs, flush with water. If liquid contacts eyes, additionally seek medical help. Liquid ejected from the battery may cause irritation or burns. - Disconnect the plug from the power source and/or the battery pack from the power tool before making any adjustments, changing accessories, or storing power tools. Such preventive safety measures reduce the risk of starting the power tool accidentally.
BATTERY SAFETY
- Battery operated units do not have to be plugged into an electrical outlet; therefore, they are always in operating condition. Be aware of possible hazards even when unit is not operating.
- Remove the battery pack before making any adjustments, cleaning, storing, or removing material from the unit, or when not in use.
A battery pack must be recharged only with the specified charger for the battery pack. A charger that may be suitable for one type of battery pack may create a risk of fire when used with another battery pack. Use battery pack only with charger listed.
To reduce the risk of explosion and possible injury, DO NOT place battery units or their batteries near fire or heat. - Do not open or mutilate the battery pack. Re leased electrolyte is corrosive and may cause damage to the eyes or skin. It may be toxic if swallowed.
A damaged battery pack is subject to explosion. To avoid serious personal injury, properly dispose of a damaged battery pack.
Batteries vent hydrogen gas and can explode in the presence of a source of ignition, such as a pilot
light. To reduce the risk of serious personal injury, never use any cordless product in the presence of open flame. An exploded battery pack can propel debris and chemicals.If exposed, flush with water immediately.
- Do not charge unit in a damp or wet location. Following this rule will reduce the risk of electric shock.
- For best results, your battery unit should be charged in a location where the temperature is more than 10^ ( 50^ ) but less than 38^ ( 100^ ). Do not store outside or in vehicles.
Under extreme usage or temperature conditions, battery pack leakage may occur. If liquid comes in contact with your skin, wash immediately with soap and water, then neutralise with lemon juice or vinegar. If liquid gets into your eyes, flush them with clean water for at least 10 minutes, then seek immediate medical attention. - Do not dispose of batteries in a fire. The cell may explode. Batteries should be recycled, consult your local waste authority for information regarding available recycling and/ or disposal options.
- When battery pack is not in use, keep it away from other metal objects like: paper clips, coins, keys, nails, screws, or other small metal objects that can make a connection from one terminal to another. Shorting the battery pack terminals together may cause sparks, burns, or a fire.
CHARGER SAFETY
To reduce risk of injury, charge only nickel-cadmium type rechargeable batteries. Other types of batteries may burst, causing personal injury and damage.
- Do not expose charger to wet or damp conditions.
Use of an attachment not recommended or sold by the battery charger manufacturer may result in a risk of fire, electric shock, or injury to persons.
To reduce risk of damage to charger body and cord, pull by charger plug rather than cord when disconnecting charger.
Make sure cord is located so that it will not be stepped on, tripped over, or otherwise subjected to damage or stress.
An extension cord should not be used unless absolutely necessary. Use of improper extension cord could result in a risk of fire and electric shock. If extension cord must be used, make sure:
a.That pins on plug of extension cord are the same number, size and shape as those of plug on charger.
b. That extension cord is properly wired and in good electrical condition.
Do not operate charger with a damaged cord or plug. If damaged, have replaced immediately by a qualified serviceman.
English
- Do not operate charger if it has received a sharp blow, been dropped, or otherwise damaged in any way; take it to a qualified serviceman.
- Do not disassemble charger; take it to a qualified serviceman when service or repair is required. Incorrect reassemble may result in a risk of electric shock or fire.
To reduce risk of electric shock, unplug the charger from outlet before attempting any maintenance or cleaning. Turning off controls will not reduce this risk. - Disconnect charger from power supply whennot in use.
- Risk of electric shock. Do not touch uninsulated portion of output connector or uninsulated battery terminal.
- Save these instructions. Refer to them frequently and use them to instruct others who may use this unit. If you loan someonethis unit, loan them these instructions also.

WARNING
If any parts are missing, do not operate unit until the missing parts are replaced. Failure to do so could result in possible serious personal injury.
SAVE THESE INSTRUCTIONS. REFER TO THEM FREQUENTLY AND USE THEM TO INSTRUCT OTHERS WHO MAY USE THIS UNIT. IF YOU LOAN SOMEONE THIS UNIT, LOAN THEM THESE INSTRUCTIONS ALSO.
PRODUCT SPECIFICATIONS
Motor 18V
No Load Speed 1200 min-1
Blade Length 457 mm
Cutting Capacity 10 mm
Weight With Battery Pack 3,2 kg
Battery pack BPP-1817M/BPP-1815M/
Charger
BPP-1817MG /ABP1801/
ABP1802/BPL-1815/
BPL-1820/BPL-1820G
BC-1800 /
BC-1800M / BC-1815S /
BC-1815SMG /
ACR1800/BCL-1800/
BCL-1800G
FEATURES
Fig.1
A. BLADE COVER
B. GUARD
C. FRONT HANDLE
D. TRIGGER LOCK BUTTON
E. REAR HANDLE
F. BATTERY PACK
G.BLADE
H. SENSOR SWITCH
I. TRIGGER
Fig. 2
A. BATTERY PACK
B. LATCHES
Fig. 3
A. FRONT HANDLE
B. SENSOR SWITCH
C. TRIGGER LOCK BUTTON
D. TRIGGER
Fig. 6
A. BLADE COVER SCREWS
B. BLADE COVER
Fig. 7
A. BLADE SCREWS
B. BAR PLATE
C. RETAINING RING
D. WASHER
E. RETAINING PLATE
F. CUTTER BLADE ASSEMBLY
G. YOKES
H. CAMS
I. PINS
Fig.9
A. CUTTER BLADE
B. GUARD
Fig. 10
A. BLADE COVER
Fig. 11
Red LED on = Fast charging mode.
Green LED on = Fully charged battery pack.
No LED on = Defective charger or battery pack.

CAUTION
To prevent damage to battery pack, remove battery pack from charger immediately if no LED comes on. Return battery pack and charger to your nearest Authorised Service Centre for checking or replacing. Also, if you are removing battery pack from charger and no LEDs are on, return both battery pack and charger to your nearest Authorised Service Centre. Do not insert another battery pack into charger. A damaged charger may damage a battery pack.
English
The battery pack for this unit has been shipped in a low charge condition to prevent possible problems. Therefore, you should charge it prior to use.
NOTE: Batteries will not reach full charge the first time they are charged. Allow several cycles (trimming followed by recharging) for them to fully charge.
TO CHARGE
Charge battery pack only with the charger provided.
Make sure power supply is normal household voltage, 230 volts, 50Hz , AC only.
Connect charger to power supply.
- Place battery pack in charger. Align raised rib on battery pack with groove in charger.
- When charger is properly connected, red light will turn on. Press down on battery pack to be sure contacts on battery pack engage properly with contacts in charger.
- Normally, the yellow and green lights on the charger will come on. This indicates charger is in control charge mode and should switch to fast charge mode within 5 minutes. When charger is in fast charge mode the yellow and green lights will go off and the red light will come on.
If after a period of 15 minutes the yellow and green lights remain on, remove the battery pack, wait 1 minute and reinsert battery pack in charger. If the yellow and green lights continue to remain on an additional 15 minutes, the battery pack is damaged and will not accept charge.
- When your battery pack becomes fully charged, the red light will turn off and the green light will turn on. After normal usage, 1 hour of charge time is required to be fully charged. A minimum charge time of 1 to 1-1/2 hours is required to recharge a completely discharged battery pack. The battery pack will become slightly warm to the touch while charging. This is normal and does not indicate a problem.
DO NOT place charger in an area of extreme heat or cold. It will work best at normal room temperature.
IMPORTANT INFORMATION FOR RECHARGING HOT BATTERY PACK
When using your line trimmer continuously, the batteries in your battery pack will become hot. You should let a hot battery pack cool down for approximately 30 minutes before attempting to recharge.
NOTE: This situation only occurs when continuous use of your line trimmer causes the batteries to become hot. It does not occur under normal circumstances. If battery pack is below normal temperature range, the green LED on charger will come on. Allow battery pack to reach normal temperature, then the red LED will come on.
INSTALL BATTERY PACK
- Place the battery pack in the string trimmer. Align raised rib on battery pack with groove in string trimmer. See Figure 2.
Make sure the latches on the battery pack snap in place and that battery pack is secured in string trimmer before beginning operation.
REMOVE BATTERY PACK
- Locate latches of battery pack and depress both sides to release the battery pack from the string trimmer. See Figure 2.
- Remove battery pack from the string trimmer.
CAUTION
When placing battery pack in your string trimmer, be sure raised rib on battery pack aligns with groove in string trimmer and latches snap in place properly. Improper assembly of battery pack can cause damage to internal components.
STARTING THE HEDGE TRIMMER
Remove the blade cover.
- For added safety, there is a sensor switch in the upper handle. See Fig. 3. When operating, hold the trimmer with both hands, one hand to push the trigger lock button forward, and the other hand to squeeze the front handle.
- Release the trigger lock button and continue to squeeze the trigger for extended operation.
STOPPING THE HEDGE TRIMMER
Release the trigger to stop the hedge trimmer.
Upon release of the trigger, the trigger lock button will be automatically reset to the lock position.
OPERATING TIPS
- Do not force the hedge trimmer through heavy shrubbery. This can cause the blades to bind and slow down. If the blades slow down, reduce the pace.
- Do not try to cut stems or twigs that are larger than 10mm thick, or those obviously too large to feed into the cutting blade. Use a non-powered hand saw or pruning saw to trim large stems.
If desired, you can use a string to help cut your hedge level. Decide how high you want the hedge. Then, stretch a piece of string along the hedge at this height. Trim the hedge just above this guide line of string. See Figure 4. Trim the side of a hedge so that it will be slightly narrower at the top. See Figure 5. More of the hedge will be exposed when shaped this way, and it will be more uniform. If blades do become jammed, stop the motor, allow the blades to stop and remove the battery pack before attempting to remove the obstruction.
Wear gloves when trimming thorny or prickly growth. When trimming new growth, use a wide sweeping
English
action, so that the stems are fed directly into the cutting blade. Older growth will have thicker stems and will be trimmed easiest by using a sawing movement.

DANGER
If blade jams on any electrical cord or line, DO NOT TOUCH THE BLADE! IT CAN BECOME ELECTRICALLY LIVE AND VERY DANGEROUS. Continue to hold the hedge trimmer by the insulated rear handle or lay it down and away from you in a safe manner. Disconnect the electrical service to the damaged line or cord before attempting to free the blade from the line or cord. Failure to heed this warning will result in serious personal injury or possible death.

WARNING
Clear the area to be cut before each use. Re-move all objects such as cords, lights, wire, or string which can become entangled in the cutting blade and create a risk of serious personal injury.

WARNING
Avoid using solvents when cleaning plastic parts. Most plastics are susceptible to damage from various Types of commercial solvents and may be damaged by their use. Use a clean cloth to remove dirt, oil, grease, etc. When servicing use only identical Ryobi replacement parts. Use of any other parts can create a hazard or cause product damage.

CAUTION
Do not at any time let brake fluids, gasoline, petroleum based products, penetrating oils, etc., come in contact with plastic parts. They contain chemicals that may damage, weaken, or destroy plastics
MAINTENANCE AND REPAIR
REPLACING BLADES

WARNING
Blades are sharp. When handling blade assembly, do not place your hand or fingers between blades or in any position where they could get pinched or cut. NEVER touch blades or service unit with battery pack installed.
REMOVING THE BLADE (Fig. 6 & 7)
Remove battery pack from hedge trimmer.
- Place hedge trimmer upside down on a workbench and remove four (4) blade cover screws.
Remove blade cover. See Figure 6.
Remove bar plate from the two pins. See Figure 7.
- Remove retaining ring, washer and retaining plate. See Figure 7.
Align the caps.
NOTE: The yokes can not be lifted unless it clears the lip of the cans.
Remove the four (4) blade screws.
Each blade has an oval yoke attached at one end. Slide the blades into position so the yokes align. Remove the blade from the housing.
INSTALLING THE BLADE (Fig. 6 & 7)
Align the caps.
- Place new blade on housing and align yokes to drop into place. Rotate the blade so that it drops past the lower cam.
NOTE: When properly aligned, the blade assembly fits in recessed slot in motor housing.
Re-Install the four (4) blade screws and tighten securely.
Re-Install retaining plate, washer and retaining ring.
Re-Install the bar plate over the two pins.
Install the blade cover using the 4 blade cover screws. Tighten securely

WARNING
Make sure bottom plate is replaced before inserting the battery pack, and starting the hedge trimmer. Failure to do so will expose internal parts, which could cause an accident or electrical shock, resulting in serious injury.
NOTE: If binding occurs after replacing the blade assembly, repeat the steps under "Removing the Blade" and "Installing the Blade".
Battery units do not have to be plugged into an electrical outlet; therefore, they are always in operating condition. To prevent serious personal injury, always remove the battery and take extra precautions and care when performing maintenance, service or for changing the cutting blade.

WARNING
To prevent serious personal injury, remove the battery pack before servicing, cleaning, or removing material from the unit.
BLADE CARE
Lubricate the cutting blades after each use.
Periodically inspect the blades for damage and wear.
Always use the manufacturer's specified replacement blades.
TO LUBRICATE BLADE
Remove battery pack from hedge trimmer.
For easier operation and longer blade life, lubricate the hedge trimmer blade before and after each use.
English
Before lubricating, remove the battery pack and lay hedge trimmer on a flat surface. Apply light weight machine oil along the edge of the top blade. See Figure 8.
- Occasionally, you should oil your hedge trimmer during use. Before oiling, stop hedge trimmer, remove battery pack, then oil. You then can resume trimming. Do not oil while hedge trimmer is running.
SHARPENING BLADE
- Allow the blades of hedge trimmer to come to a stop in the position shown in Figure 9. This will allow clearance for the file between cutter teeth and guard teeth.
Remove battery pack from hedge trimmer. - Clamp blade assembly in a vice and file the exposed cutting surface of each blade tooth with an 203mm (8 inch) smooth round file, 6.4mm (1/4 inch) or 5.6mm (7/32 inch) diameter. Be sure to retain the original angle of tooth when filing.
- Remove the hedge trimmer from the vice, replace battery pack and restart the hedge trimmer. Allow the blades of the hedge trimmer to come to a stop so that the unsharpened edges of the cutter blade teeth are exposed.
- Remove battery pack from hedge trimmer and repeat the sharpening procedure as described above.
All of the bearings in this tool are lubricated with a sufficient amount of high-grade lubricant for the life of the unit under normal operating procedures.
Therefore, no further lubrication is required.

WARNING
Do not attempt to modify this unit or create or mount any accessory not specifically recommended in this manual for use with this hedge trimmer. Any such alteration or modification is misuse and could result in a hazardous condition leading to possible serious personal injury.

WARNING
Examine hedge trimmer frequently to assure all parts are unbroken and securely attached. Make sure all screws and fasteners are securely tightened to prevent the risk of serious personal injury.
CLEANING THE HEDGE TRIMMER
Remove the battery pack

WARNING
To prevent serious personal injury, remove the battery pack before servicing, cleaning,
or removing material from the unit.
Clean the unit using a damp cloth with a mild detergent.
- Do not use any strong detergents on the plastic housing or the handle. They can be damaged by certain aromatic oils such as pine and lemon, and by solvents such as kerosene.
- Moisture can cause a shock hazard. Wipe off any moisture with a soft dry cloth.
Use a small brush or the air discharge of a small vacuum cleaner brush to clean the air vents on the battery pack housing and motor housing.
- Keep the air vents free of obstructions.
STORING THE HEDGE TRIMMER
- Clean the hedge trimmer thoroughly before storing. Store the hedge trimmer in a dry, well-ventilated place that is inaccessible to children. Keep away from corrosive agents such as garden chemicals and de-icing salts.
Always place blade cover on cutting blades before storing. See Figure 10. - Store and charge your batteries in a cool area. Temperatures above or below normal room temperature will shorten battery pack life.
- Never store batteries in a discharged condition. Wait for battery pack to cool and charge immediately.
- All batteries gradually lose their charge. The higher the temperature, the quicker they lose their charge. If you store your unit for long periods of time without using it, recharge the batteries every month or two. This practice will prolong battery pack life.
DISPOSAL


Waste electrical products should not be disposed of together with household waste. Please recycle where facilities exist. Check with your local authority or retailer for recycling advice.
Deutsch
SICHERHEITSHINWEISE

WARNING
BPP-1817M / BPP-1815M /
BPP-1817MG/
ABP1801 / ABP1802 /
BPL-1815 /
BPL-1820/BPL-1820G
Ladegerät* BC-1800/
BC-1800M / BC-1815S /
BC-1815SMG /
ACR1800 / BCL-1800 /
BCL-1800G
BAUTEILE
Abb.1
A. SCHUTZSCHEIDE FÜR DAS SCHERBLATT
B. SCHUTZBLENDE
C. VORDERER GRIFF
D. FREIGABEKNOPF DES EIN-/AUS-SCHALTERS
E. HINTERER GRIFF
F. AKKU
G. SCHERBLATT
H. VORDERER EIN/AUS-SCHALTER
I. HAUPT-EIN-/AUS-SCHALTER
Abb.2
A. AKKU
B. SPERRLASCHEN
Abb. 3
A. VORDERER GRIFF
B. VORDERER EIN/AUS-SCHALTER
C. FREIGABEKNOPF DES EIN-/AUS-SCHALTERS
D. EIN/AUS-SCHALTER
Abb.6
A. SCHRAUBE DES SCHERBLATTSchUTZES
B. ABDECKUNG DES SCHERBLATTSCHUTZES
Abb. 7
HECKENSCHERE AUSSCHALTEN
BPP-1817M / BPP-1815M /
BPP-1817MG/
ABP1801 / ABP1802 /
BPL-1815 /
BPL-1820/BPL-1820G
BC-1800 /
BC-1800M / BC-1815S /
BC-1815SMG /
ACR1800 / BCL-1800 /
BCL-1800G
DESCRIPICón
Fig. 1
A. FUNDA DE PROTECCION DE LA HOJA
B. PANTALLA PROTECTORA
C. EMPUNADURA DELANTERA
D. BOTON PARA LIBERAR EL GATILLO
E. EMPUNADURA TRASERA
F. BATERÍA
G. HOJA
H. GATILLO DELANTERO
I. GATILLO PRINCIPAL
Fig. 2
A. BATERÍA
B. LENGÜETAS DE BLOQUEO
Fig. 3
A. EMPUNADURA DELANTERA
B. GATILLO DELANTERO
C. BOTON PARA LIBERAR EL GATILLO
D. GATILLO
Fig. 6
A. TORNILLOS DEL CÁRTER DE LA HOJA
B. TAPA DEL CÁRTER DE LA HOJA
Fig. 7
A. TORNILLOS DE SUJEccion DE LA HOJA
B. PLACA DE MONTAJE
C. ARANDELA DE BLOQUEO
D. ARANDELA PLANA
E. PLACA DE SUJECCION
F. BASE DE LA HOJA
G. ASAS
H. PERNOS
I. CLAVIJAS
Fig. 9
A. DIENTES DE LA HOJA
B. DIENTES ACANALADOS
Fig. 10
A. FUNDA DE PROTECCION DE LA HOJA
Fig. 11
A. CARGADOR DE LA BATERIA
B. INDICADOR VERDE
C. INDICADOR ROJO
FUNCTIONAMENTO
BPP-1817M / BPP-1815M /
BPP-1817MG/
ABP1801 / ABP1802 /
BPL-1815 /
BPL-1820/BPL-1820G
BC-1800 /
BC-1800M / BC-1815S /
BC-1815SMG /
ACR1800/BCL-1800/
BCL-1800G
DESCRIZIONE
Fig. 1
A. FODERO DI PROTEZIONE DELLA LAMA
B. SCHERMO DI PROTEZIONE
C. IMPUGNATURA ANTERIORE
D. PULSANTE DI SBLOCCO DEL GRILLETTO
E. IMPUGNATURA POSTERIORE
F. BATTERIA
G. LAMA
H. GRILLETTO ANTERIORE
I. GRILLETTO PRINCIPALE
Fig. 2
A. BATTERIA
B. LINGUETTE DI BLOCCAGGIO
Fig. 3
A. IMPUGNATURA ANTERIORE
B. GRILLETTO ANTERIORE
C. PULSANTE DI SBLOCCO DEL GRILLETTO
D. GRILLETTO
Fig. 6
A. VITE DEL CARTER DELLA LAMA
B. COPERCHIO DEL CARTER DELLA LAMA
Fig. 7
A. VITE DI FISSAGGIO DELLA LAMA
B. PIASTRADI ASSEMBLAGGIO
C. RONDELLA DI SICUREZZA
D. RONDELLA PIANA
E. PIASTRADI FISSAGGIO
F. BASE DELLA LAMA
G. ANSE
H. CAMME
I. PERNI
Fig. 9
Accupak* BPP-1817M / BPP-1815M /
BPP-1817MG/
ABP1801 / ABP1802 /
BPL-1815 /
BPL-1820/BPL-1820G
Laadapparaat* BC-1800 /
BENAMINGEN
Afb. 1
A. BESCHERMKOKER VAN HET SNOEIBLAD
B. AFSCHERMING
C. VOORGREEP
D. ONTGRENDELKNOP VAN DE DRUKSCHAKELAAR
E. ACHTERGREEP
F. ACCUPAK
G. SNOEIBLAD
H. VOORSTE DRUKSCHAKELAAR
I. HOOFDRRUKSCHAKELAAR
Afb. 2
A. ACCUPAK
B. VERGRENDELLIPPEN
Afb. 3
A. VOORGREEP
B. VOORSTE DRUKSCHAKELAAR
C. ONTGRENDELKNOP VAN DE DRUKSCHAKELAAR
D. DRUKSCHAKELAAR
Afb. 6
A. SCHROEF VAN DE BLADBESCHERMKAP
B. DEKSEL VAN DE BLADBESCHERMKAP
Afb. 7
A. BEVESTIGSSCHROEF VAN HET SNOEIBLAD
B. MONTAGEPLAAT
C. BORGRING
D. SLUITRING
E. STEUNPLAAT
F. BASIS VAN HET SNOEIBLAD
G. AANDRIJFJUK
H. AANDRIJFNOKKEN
I. STIFTEN
Afb. 9
A. TANDEN VAN HET SNOEIBLAD
B. INGEKERFDE TANDEN
Afb. 10
A. BESCHERMKOKER VAN HET SNOEIBLAD
Afb. 11
A. ACCULAADAPPARAAT
B. GROEN LAMPJE
C. ROOD LAMPJE
Nederlandds
BEDIENING
BETEKENIS VAN DE LAMPJES OP HET LAADAPPARAAT
Zie afbeelding 11.
DE LAMPJES TONEN DE STATUS VAN HET LAADAPPARAAT EN DE ACCU
Batteri* BPP-1817M / BPP-1815M /
BPP-1817MG/
ABP1801 / ABP1802 /
BPL-1815 /
BPL-1820/BPL-1820G
Oplader* BC-1800/BC-1800M/BC-1815S/
BC-1815SMG /
ACR1800 / BCL-1800 /
BCL-1800G
BESKRIVELSE
Fig. 1
A. KLINGESKEDE
B. BESKYTTELSESAFSKAERMNING
C. FORRESTE HÄNDTAG
D. START-STOPKNAPPENS OPLÅSNINGSKNAP
E. BAGERSTE HÄNDTAG
F. BATTERI
G. KLINGE
H. STARTGREB FORAN
I. START-STOPKNAP
Fig. 2
A. BATTERI
B. LASETAPPE
Fig. 3
A. FORRESTE HÄNDTAG
B. STARTGREB FORAN
C. START-STOPKNAPPENS OPLÅSNINGSKNAP
D. START-STOPKNAP
Fig. 6
A. SKRUE I KLINGESK/ERM
B. DAEKSEL PÄ KLINGESKÄERM
Fig. 7
A. KLINGESKRUE
B. SAMLEPLADE
C. LASESKIVE
D. SP/ENDSKIVE
E. HOLDEPLADE
F. KLINGESKAFT
G. BØJLER
H. KNASTER
I. STIFTER
Fig. 9
A. KLINGENS TENDER
B. TAKKEDE TENDER
Fig. 10
A. KLINGESKEDE
Fig. 11
A. BATTERIOPLADER
B. GRØN LAMPE
C. RØD LAMPE
DRIFT
OPLADERLAMPERNES FUNKTION
Se Figur 11.
KONTROLLAMPERNE VISER BATTERIETS LADETILSTAND
VEDLIKEHOLD OG REPARASJON
SKIFTE BLADET

ADVARSEL
VEDLIKEHOLDE HEKKSAKSEN
Ta ut batteriet.

ADVARSEL
TUOTTEEN TEKNISET TIEDOT
| Moottori | 18 V |
| Tyhjäkänty | 1200 kierrosta/min |
| Terän pituus | 457 mm |
| Leikkuukapasiteetti | 10 mm |
| Paino (akun kanssa) | 3,2 kg |
| Akku* | BPP-1817M / BPP-1815M / BPP-1817MG / ABP1801 / ABP1802 / BPL-1815 / BPL-1820 / BPL-1820G |
| Laturi* | BC-1800 / BC-1800M / BC-1815S / BC-1815SMG / ACR1800 / BCL-1800 / BCL-1800G |
Suomi
KUVAUS
Kuva 1
A. TERÄN SUOJATUPPI
B. SUOJAKILPI
C. ETUKAHVA
D. LIIPAISIMEN LUKINNAN VAPAUTUSNAPPI
E. TAKAKAHVA
F. AKKU
G. TERÄ
H. ETULIIPAISIN
I. PÄÄLIIPAISIN
Kuva 2
A. AKKU
B. LUKINTAKIELEKKEET
Kuva 3
A. ETUKAHVA
B. ETULIIPAISIN
C. LIIPAISIMEN LUKINNAN VAPAUTUSNAPPI
D. LIIPAISIN
Kuva 6
A. TERÄN SUOJUKSEN RUUVI
B. TERÄN SUOJUKSEN KANSI
Kuva 7
A. TERÄN KIINNITYSRUUVI
B. ASENNUSLEVY
C. PAINEALUSLEVY
D. ALUSLAATTA
E. PIDATYSLEVY
F. TERÄLEVY
G. KAHVAT
H. OHJAUSNOKAT
I. TAPIT
Kuva 9
A. TERÄN HAMMAS
B. HAMMASTUS
Kuva 10
A. TERÄN SUOJATUPPI
Kuva 11
A. AKUN LATAAJA
B. VIHREA MERKKIVALO
C. PUNAINEN MERKKIVALO
KÄYTTO
LATURIN MERKKIVALOJEN TOIMINTA
Katso Kuva 11.
MERKKIVALOT OSOITTAVAT AKUN LATAUSTILAN
A. ΔONTIA THΣ ∧AMAΣ
B. ΔONTIA ME ERKONEZ
.10
A. ΘHKH ΠPOΣTAIAZ THΣ ∧AMAS
X. 11
A. ΦOPTIΣTHΣ THΣ MΠATAPIAΣ
B. ΠPAZINH ΦΩTEINH ENΔEIEH
C. KOKKINH ΦΩTEINH ENΔEIEH
AEITOYPTIA
SYNTHPHESH THS AMAATOY OAMNOKONTH

PPOEIAOIOIHsH
Mnv EexvATE NwC TA ETTAVAPOPTcOeVA epaaleia eiva TnVTA ETouva aeitoupynoov evoov de XpeiaCetai vaouvdethetauve nlektpknpiZa. Iua vaoTPOuyete kOe oBapso OwauTKo Tpaumato, aPaeite PAVTA TnV MNTAPiX KAI TpApuevet Eelapetik A PPOeKTIKoi KA tN OUVtnpOnn TnV AVTKaTaoTOn TnL Aaoc.

ПОЕДОПОIHESH
SYNTHPHSEH THE AMA
SYNTHPHESH TOY OAMNOKONTH

\PPOEI OIOIH H
PpOg aTIOouynv OoBapou OwmuAtikou TpaUmaTIOPOU, aPApEoTe TnV mTAPia Tpv TnV eTIOkeu, To KAtaPioa n TnV aPapoeon oToIxeiw Tou epyAeiou.
ELHELYEZÉS A HULLADEKBAN


BPP-1817M / BPP-1815M /
BPP-1817MG/
ABP1801 / ABP1802 /
BPL-1815 /
BPL-1820/BPL-1820G
BC-1800M / BC-1815S /
BC-1815SMG /
ACR1800 / BCL-1800 /
BCL-1800G
POPIS
Obr. 1
A. KRYT STRÍHACÍ LIŠT Y
B. OCHRANNY ŠTΙT
C. RUKOJET S VYPINAČEM
D. TLACITKO PRO ODBLOKOVÁNÍ SPOUŠTEČE (POJISTKA)
E. ZADNI RUKOJET
F. AKUMULATOR
G. STRÍHACÍ LISTSA
H. PREDNI RUKOJET
I. SPOUSTEC
Obr. 2
A. AKUMULÁTOR
B. BLOKOVACI ZAPADKY
Obr. 3
A. PREDNI RUKOJET
B. RUKOJET S VYPINAČEM
C. TLACITKO PRO ODBLOKOVÁNÍ SPOUŠTEČE (POJISTKA)
D. SPOUSTEC
Obr. 6
A. SROUB PRO UPEVNÉNI KRYCÍ DESKY
B. KRYCÍ DESKASTRÍHACÍ LIŠT Y
Obr. 7
A. ŠROUB STRÍHACÍ LIŠT Y
B. DESTICKA
C. ARETAÇNÍ PODLOŽKA
D. PLOCHA PODLOZKA
E. UPINACI PRILOZKA
F. STRIHACI LISTA
G. DRžADLA
H. VAČKY
I. VRETENA
Obr. 9
A. ZUB STRÍHACÍ LIŠT Y
B. PROTIZUB
Obr.10
A. OCHRANASTRÍHACÍ LIŠT Y
Obr. 11
A. NABIJECKAAKUMULATORU
B. ZELENA KONTROLKA
C. CERVENÁ KONTROLKA
PROVOZ NÁRADI
VYZNAM SVETELNYCH KONTROLEK NA NABIJECCE
Viz obrakc c. 11.
SVETELNE KONTROLKY NA NABIJEČCE INFORMUJI O STAVU NABIJENI AKUMULÁTORU.
HacToIeI npaBnJa TexHKn 6e3OpNaChOCTn IJIy EJIeKtpHuYeCKHX IHCTpyMeHTOB OTHocTc TaKKe IN K aKKMyJIaTOPbIM IHCTpyMeHTaM.
PABOQUE MECTO
CJIeHrTe 3a YHcTToTOn H OcBeIeHHem pa6Oyero MeCTa. 3axJAMJIeHHbIe H IIIOXo OcBeIeHHbIe pa6OyHe MeCTa BeYt K HeCuaCTHBIM CJUyAaM.
HeIOJIb3yItecb 3JIeKtpnuecknH HcTppyMeHTOM BO B3pbIBOOIIacHbIX MecTax,HaIIpHmep,pIaOM C JIeRKO BOCIIJAmHeHEmbIMN KHKoCTaMH,ra3OM HJIIN IIbJIbIO. NcKpbI I3 3JIeKtpnuecknx HcTppyMeHTOB MOrYBOCIIJAmEHHTb HX HJIIN B3OpBaTb.
He IIOIIyckaIteIeTe,IOCTOpOHnIX INOMaIHnIX KHBOTbIX K pa6OyeMy MecTy BO BpeMpa6oTbI 3JIeKtpUYeCKHM IHCTpyMeHTOM. Bbl MoKeTe OTBJeYbcN I IOTePrtb KOHTpOJIb HAI IHCTpyMeHTOM.
JIeKTPuECKA B3OIIACHOCTb
BnIka HnCTpyMeHTa OJIXHa IIOXoHtB K ceTeBOI po3eTke. HnKOrIa He pa36HpaiTe BnJIky ceTeBOI shypa. HnKOrIa He IIOJb3yIteCb aJaITepamH IIpi pa6Ote 3a3emJIeHHbIM HnCTpyMeHTom. 3TO IIMOKeT H36ExKaTb yIapa TOkOM.
H36eraTe KOHTaKaTa C 3a3eMJIeHHbIMN IIpeIMTaMN H IIpeIMTaMN, IIOJKIIOUeHHbIMN Ha Maccy (Tpy6aMN, 6aTaperaMN, KXYOHbIMN IIINTaMN, XOJOINJBHHKaMN N T.I.) IIpn COIIpIKOCHOBEHN C 3THMN IIpeIMTaMN ONaCHOCTb yJapa TOKOM BO3paCTaeT.
He octabJIaIte HNCTpyMeHT IOI IOJKeM IIN B cbIpbIX MecTax. IIpn IIOIaIaNHN BOIbI B 3JIeKtpHueckn HNCTpyMeHT OIaCHOCTb YIapa TOKOM BO3paCTaET.
I IopJepKnBaHte cTeBOH IIHyp B XopoWHe m pa6ooyem coCTOAHHH. HNKOrJa He IepXHTe HNCTpyMeH 3a ceTeBOH IIHyp H He IepraHte 3a HrO, YTObI BbHyTb erO H3 PO3eTKH. IepXHTe cTeBOH IIHyp IIOJaJIbIIe OT HCTOuHHKOB TeJIa, OIT MacJa, peJyIINx IpeIMeTOB I IOBnKbIX JETaJIe. IpiN IOBpeJdEHHom cTeBOM IIHype ONaCHOCbYdapa TOKOM BO3paCTaET.
■ Ipn HapyKbIx pa6oTax IOJb3yIteCb TOJbKO cIeIHaJIbHbIMN yIINHITeJIaMn IJIa HapyKbIx pa6ot. 3TO IIMOxET N36eKaTb yIapa TOKOM.
EcnBbI BbHyKdHb pa6oTaB BO BJaXHo cpeJe, IOKJIIOuAte HcTpymeHT K 3JIeKTPoINHaHHO, 3aIIHHeHHOMy yCTPOINCTBOM IORIIOSeHHN OCTaTOUHorToKa (DDR). NcIOJIb3OBaHne yCTPOINCTBa IORIIOSeHHN OCTaTOUHorO TOKa ORpaHnHBAe Ptck yJapa TOKOM.
IIpHmeeHHe: TepMHN "yctpoIcTBO IORJIOUeHHOCTaTOUHOToKa (DDR)" MoKeT 6bITb 3aMeHEn TepMHOM "BbIKJIOuAteJIb yTeuKN B 3emJIHO".
JIUHNAJE3OIIACHOCTb
Бульte 6ительны. Пп рабоTe элктучecнMu HhctpyMeHTamn cJIeHnte 3a aIeKbathOcTbIO CBOHX IeHCTBm HpeHHeHn. He IOJIb3yIITecb HNCTpyMeHTOM B yCTaBIeM COCTOAHHN, B COCTOAHHN aIKORoJbHO rHIN HapKOTHueCKTO OIIbHaHEHn, a TAKKe IIOI BO3dEICTBHeM MeIHKAmeHTOB. POMHnte, YTO IOCTaTOUHO ceKyHnBi HEBHIMAHn, YTO6bI IOJIyUHTb TЯжELYIO TpaBMy.
IIOJIb3yIITecb HINHINBHNyaJIbHBIMN 3aIIHTHBIMN cpeCTBaMn. BcerIgda 3aIINIaIte rIa3a.Bo I36exKaHne TjKeJIbIX TpaBM IIPIHNO6XOIMMOCTn IOJIb3yIITecb pecIIHpataTopOM, HeCKOJIb3raIeI O6yBbIO, KACKOI n cpeCTBaMn 3aIIHTbI CJIyxa.
I36eraHTe clyuaaHoro 3aunyca HnctpyMeHTa. IpejKeJe WM BKJIIOuATb HNCTpyMeHT B CeTb H/INBCTaBJTb B HeTo aKKyMylAToP IpOBepaTe, YTOsbI BbIKJIOUaTeJIb CToJI B NIOJOKeHH NBIKJI. TaKke IIPOH3BOJNTe 3Ty IpOBepKy IpeE TpaHcNOpTHpOBKa INCTpyMeHTa. Bo H36eXaHHe HecuacthBxClyuaeB He IpepeHocHTe HNCTpyMeHT C NaJIbUeM Ha KypKe H He BKJIIOUaTe ero B ceTb, KOJa BbIKJIIOUaTeJIb CToHT B NIOJOKeHH BKJI.
Pycckn
Ipeen3aynycOM HnctpyMeHTa BbIHbTe H3 Heo BCE 3aTJXHbIE KJIIOHy. 3aTjXHOH KJIIOUHa IIOJBHXHO JETaJIN HnctpyMeHTa MOKeT bI3BaTb TJeKJIbIe TpaBMbl.
He BbITaHbAitpe pyKn daJIeKo. KpeIIO Ko IepXHTecb Ha Horax.YcToIuHBoe pa6Oooie IOJIOKeHne IO3BOJIaET JyUIIe KOHTPOJINPoBAt b HcTpyMeHT B cIJyuae HeOxNJaHHocTHn.
IIOJIb3yIteCb aIeKBAthOJ OeJIo. He HaJeBaITe IINpOKyO JeJy H 6NjyTePnHO. JepKHTe BOJocbl, OeJy IIepYaTKI OJaJIbIIe OT IOJBHXHbIX DeTaJIe INCTpyMeHTa. IINpOKaOeJda, 6NjyTePnH N IINHHbIE BOJOCbl MOrYT IIOIaTb B IIOBNUKHBie JTeJIn.
EcIN HnCTpyMeHT OCHaIeH CNCTeMOYdJIeHHN IbJIN, ycTaHOBInTe ee Ha HnCTpyMeHT INIOJIb3yIITecb eI IIpI pa6Ote. 3TO IIMOxKET N36ExKaTb HeCuaCTHOrO cIyua.
ИСПОЛБЗОВАHЕ И OБСЛУЖИВАНЕ ЗЛЕКТРИЕCKOTOИНСТPyMЕNTA
He fOpchpyIte HNCTpymeHT. HcIOJIb3yIte HNCTpymeHT, IIOxOJaIIIN JIA KaKJIOJ DaHHoJ pa60TbI. IHCTpymeHT 6yJeT pa60TaTB IIPOH3BOIDHTeJIbHeE IN HaJeXHee B peXHMe, IJIa KOTOPORO OH 6bl Pa3pa6oTaH.
He IIOJIb3yIteCb 3JIeKTpHueCKHM INHCtpyMeHTOM, ecJIH BbIKJIOUaTeJIb He pa6OtaE. EcJIH INHCtpyMeHT HeJIb3B BKJIIOUHTb IIIN BbIKJIOUHTb, 3TO OIIaCHO. ERO HEo6XoJIMO OTpeMOHTnPOBaTb.
Ipepe peryuHPOBko, cMeHOJ aKceccyapOB u yKJIaIKoH Na xpaHeHHe cHMaHTe aKKyMjTOp C HcTpymeHTa. To IIMOxket H36eKaTb cNyauHOrO 3aIycka HcTpymeHTa.
XpaHnTe 3JIeKTpHuEcKn HnCtpyMeHT IOnaJbIe OTeT. He IOBepaIte IHCTpyMeHT pa6OuHM, He 3HaHOIMero HHe IpoUHTaBIMn HactoIIee pyKOBOcTBo. Bpykax HEoIIbITbIX pa6OuHX IHCTpyMeHTbI IIpeIcTaBJIaHOT OIIaCHOCTb.
3a60TJINBO yXaXHBAIte 3a IHCTpyMeHTAMn. IPOBepaTe JINHeHHOCTb IOBnKbIX DeTaJIeN. IPOBepaTe CEIOCTHOCTb Bcex DeTaJIeN. IPOBepaTe c6OpKy IHCTpyMeHTA IN BCE 3JIeMeHTbI, OT KOTOpBX 3aBNCHT erO pa6oTa. IPrn IOJOMke DeTaJIeN peMOHTpyNe IH, IpexKeIe IPOJOJIkaTb HcNOJIb3OBaTbcra IHCTpyMeHTOM. MHorne HeCecAACTHBie CJUyAH INpOHxCODT IN3-3a HEIIpaBHJIbHORO yXoJa 3a IHCTpyMeHTAMn.
IepKHTe HhCTpyMeHTbI 3aTOyeHHbIMn N hCtBIMN. 3aTOyeHHbI N YHCTbI peKyuIIN HhCTpyMeHT He 3acTpraHet npn pa6Ote H IO3BOJIHT JyUHe erO KOHTPOJInPObaTb.
Co6JIIOJaTe HacTOnIaHpeBnla TeXHHKn 6e30NaChOcTHN B O6paIeHNn C HcTpyMeHTOM, AkceccyapamH, HacaJkaMn H Ip. YuHTbIaBHe Tc Oco6eHNocTH N HcTpyMeHTa, pa6Oyeo MecTa H IpeIcTOnIaHepa6ToBt. Bo H36eKaHne OIIaChbIX cHTyaIaH, POJIb3yIteCb 3JIeKTPHuCeCKm INcTpyMeHTOM TOJIbKO IIraTex pa6OT, dIA KOTOpbIX OH IIpeJHa3HaueH.
OBCJUYKINBAHNE
PemOHThbIe pa6OtBi IOJXHbI IpnH3BOJHTbcKBAJIHΦHIIpOBaHHbIM TexHHKOM c HcIOJIb3OBaHHEm
MapoHbIX 3aIpaCTe. TOrJa 3JIeKtpruecknM HhCTpyMeHTOM MOKHO pa6OtaTB BIOJHO 6e3OnaCHOCTH.
IIPEIOCTEPEKHEHNE OTHOCHTJEbHO BE3OIIACHOTIOJb3OBAHNY KUCTOPE3A
He IOnyckaIte KOHTaKaTc YaCTeB BaIIero TeJa C HOKeBbIM IIOJIoTHOM. He cHMaTb cpe3bIbAembI HIn yIepKINBaEMbI MaTePnaJI, IIOJIeKaIuN Cpe3Ke, BO BpEmaIBNXeHN HoxBeBOrO IIOJIoTHa. Y6eIITecb, YTO BBIKJIIOUaTeJIb HaxoJNTcB I IOJIOXeHNn BbIKJI. (off) IIpn OunchTe 3actPraBIIeRo MaTePnaJIa. HeBHMaTeJIbHoe o6paIueHne C KycTope3OM IIpn eRcKCIpyATAuIN MoKET IIpNBecTHn B cepBe3HbIM YeJIOBeYeCKM TpaBMam.
I IepenocHTe KcTOpe3 3a pyuKy cOCTaHOBJIeHHbIM HOKeBBIM IOJIOTHOM.Ipn TpaHCnOpTnPOBKe HJIN XpaHEHNH KcTOpe3a BceIJa HaJeBaIte KpbIIHKy IJIpeKyuIeRo yCtPoIcTBA. IOnJHKHOe ObaIeHne C KcTOpe3OM COKpaHTN BO3MOXHbIe YeJIOBeYeCKHe TpaBMbl OT HOKeBOrO IOJIoTHa.
Держнше ka6eь bДаин OT pekyшen oblaactH.Bo Врмя ксплуataiIN Ka6eь может сИчайно побалntьсВ Куст И IOBpeIHTbcr OT HOKeBOrO IIIOJToHa.
JOIOJIHEHNE
■ PekomehnyetcI npOBepTb KINByU H3rOpOJB Ha NaJIuHne IocToPOHHnx IIpeIMeTOB, HApPImep, IpBOJIOuHOI orpaIbI.
PeKOMeHnyeTcHcNIOJIb3OBAt bYcTpOINCTBO 3aIHTbI OT TOKOB 3aMbIkaHnHa 3eMJIHO C TOKOM OTKJIIOUeHn 30 M A HJIN MEHbIIIE.
CJIeIyET IepKaatb KcyTope3 HauJIeJkaIIMM 06pa3OM, HauIpyMeP, IByMa pyKaAMH, ecJIN IOCTaBJIaETCa BepcNc C IByMa pyKamH.
IIPEД HauAJOM PABOTbI IIPOHTITE BCE IIPABNJIA TEXHUNKBE3OIIACHOCTN.
BHHMaTeJIbHO IpoUHTHe Bce HHCtpyKUnn IIO TexHnKe 6e3OIIaIacHOCTN.O3HaKoMbTeCb C IHCTpyMeHTOM.
HeIOJIb3yItecB HNCTpyMeHToM B yCTaBIIeM COCTOHH NJI B HeNyTe, B COCTOHH aJIKOroJIbHOrO HJIN HApKOTnueckoro OIIbJeHHa, a TaKKe IIOB O3JeCTBHeM MeJIKaMeHTOB.
I IpeH NaaJOM pa6oTbI IpoBepaTe coCTOHNHe HnCTpyMeHTa.3aMeHraTe IOBpeKdEHHbIe JeTaJIH. IpoBepbTe, YTObI H3 aKKyMylTopa He TEK 3JIeKTpOJIHT.
I IpoBepbTe IeJIocTHOcTB n 3aTjKky Bcero KpeNexKa n cpeCTB 6e30nacHocTh. 3aMeHnTe pactPecKaBIIHece, pa36bTbIe I IOBpeJxDeHHbIe IIOIoTHa I IpOuHne JeTaJIH. IpoBepbTe yCTaHOBKy I KpeIeX IIIOIoTHa. 3To I36aBnT ot OIIaCHOCTIIOLOMK INHCTpyMeHTa I TJeJIbIX TpaBM KaK CaMOrO IIoJIb3OBAteJIa, TaK IIIOCTOpOHnIX.
I OJIb3yI TeCb aIeKBaTHbIMn HNCTpyMeHTaMn. IIOJIb3yI TeCb HNCTpyMeHToM TOJIbKO IJIa TEX pa6OT, IJIa KOtOpbIX OH IIpeJHa3HaueH.
He IOnIb3yItec b HNCTpyMeHTOM,ecJIH BByIKJIIOUaTeJIb He pa6Otae.T.EcJIH HNCTpyMeHT HeJIb38 BKJIIOUHTb
Pycckn
HJIN BbIKJIHOHTb, 3TO OIaCHO. Ero Heo6XoJHMO OTpeMOHTnpOBaTb.
OuHuaIte 30Hy cTPhKKn Ipeep pa6oToi. Y6HpaiTe IIHypbI, IIPOBOJa, BepeBKN IIpoQHe IIpeDMeTbI, MOryIIHne IIOIaCTb B IOJOTHO.
IocToPOHHHe,JeTH,NIOMAIHHe JHBOHTbIE He JOJIJKbI Iprn6JIHXaTbcK pa6OyeMy MeCTy. He IOJNysKaIte IocToPOHHIX,JeTei N JXHBOThbIX 6JIHXe 15 MeTPOB: BO BpeMCTpHXKN H3-IOI IOJIOtha MOYr BblJEtaTB pa3HbIe IIpeIMTeBI. IprhcyTcTBYIOUIM IIpi pa6Ote peKOMeHnyETcI IOJIb3OBaTbc3aIIHTbIMN OUYKaMH. EcJIN BO BpeMpa6OTbIKTO-TO IOJXODHT,HEMeIJeHHO OCTaHaBJIHBaIITe KycTope3.
Bo n36eKaHne yIapa TOKOM, He oCTaBJIeTe 3apJHOe ycTpoIcTBO IIOI IOXJIeM, COJIHIIeM, a TaKKe B JkapKHX IN BJIaJHKbIX MecTax.
He pa6oTaIe KycTope3OM MOKpbIMH pyKaAMH.
HeonbIthbIM pa6oTHnKam I JeTm 10 15 JeT pa6oTaTb KycTope3OM 3aIpeIaEaTc.
Bo H36exKaHHe Tla3HbIX TpaBM, IIpI pa6Ote KycTope3OM BcerJa IOJIb3yITeCb 3aIIHTbIMN OYKaMn.
- IIpn IIbIbHbIX pa6Otax TaKKe IIOJIb3yIITecb 3aIIINTHbIM 3a6paJIOM IN pecIIINPAtopOM.
IIOJIb3yIITecb aIeKBAthOJ OJekJIoH. He HaeBaHTe IIINPOKYIO OJekJHy IIN 6NkYTEpHIO. OHN MOrYT IIOIaCTb B IIOIBNXHbIe YAcTH INcTpyMeNTA. PnH HApyXhIx pa6OTax IIOJIb3yIITecb pe3HHOBbIMN IepTaTKaMn H HeCKOJIb3raIeB OByBbIO.
3aKaJIbIbAIte IINHHbIe BOJIOcBi BbIIIE IIJeU, YTO6bI OHHe IIOJIaINB IIOBUNKbIe YAcTHn HHCtpymEHTa.
He ocTabJIaIe HnCTpyMeHT nIN aKKyMyJrTOP IOJIOKdEM ININ B cbIpbIX MeCTax.
I Ipn IepenocKe H yKJaIke Ha xpaHHe He 3a6bBaIte 3aYexJIaTb IIIOJTOHO KycTope3a.
CJIeIITe 3a pa6oHMM OKpyKeHHem H 6yIbTe 6JIHTeJIbHbI: 3a IyMOM IHCTpyMeHTa MOxHO He ycJIbIIaTb pyrIX 3ByKOB.
Ipeen3aynckom HnCtpymeHTa BcerTa IpoBepaTe, He OCTaJIOcb JINB HEm 3aTjXKbIX KJIHOyei.
Ipepe pa6oToB BceTgA IIPOBepaTe yctaHOBky pyKoTOK H cHCTeM 3aHNTbI.
Hnkorda He pa6oTaIte HnCTpyMeHTOM, ecJIb B He XBaTaET KaKHXJIbO JeTaJIe HJIn ecJIb Ha Hero yctaHOBJeHbI He peKOMeHNIOBaHHbIe akceccyapbl.
He IIOJIb3yI TeCb 3JIeKtpnuecckn HnHCTpyMeHTOM BO B3pbIBOOIIaChbIX MeCTax, HaIIpHmep, PraIOM C JIeKo BOCIIJIaMeHReMbIMN KnIKOCTaMH, Ra3OM HJIN IIbJIbHO. NcKpbI I3 3JIeKtpnueccknx HnHCTpyMeHTOB MOryt BOCIIJIaMeHHTb HX HJIN B3OpBaTb.
IIPABUNJA TEXHNUKBE3OIIACHOCTNIPII PABOTE KYCTOPE3OM
He pa6oTaIe KycTope3Om 6e3 IpeEiHei pyuKn.
Pn pa6oTe IepKHTe HNCTpyMeHT O6eIMn pyKaMn.
Bo H36eJahHe pNcKa cIyuaHOrO 3aynCka, He HocHTe HnCTpyMeHT C IaJIbIeM Ha Kypke BbIKJIOuYateJIy.
6yIbTe 6JIITeJIbHbI.CJIeJIITe 3a CBOHMn IeJCTBnMn H 6yIbTe paccyIITeJIbHbIMn.
IIЯ pa6ObI haIeBaIte IIIOThIbe 6pIOKn, 6e3OJIaChYIO HeCKOJIb3aIyU O6yBb I IepuATKn. He pa6OtaTe KycTope3OM B IIOrTaX, caHJaJIHX HJIH 6OcHkOM.
He pa6oTaIte B IIOXO OCBeIeHHbIX MecTax. CJIeIITe 3a XopoIIMM OCBeIeHHem pa6oYeTo MeCTa (JHbHOH NIN HCKycCTBeHHbI CBET).
BcerdaIepKHTe paBHOBeche H He pa6oTaHte Ha HeycToHnHBix IOBepxHocTEx.KpeIKO IepKHTecb Ha Horax H He BbITaHBAHte pykCJINHKOM DaJIeKO. He IIb3yITeCb IHCTpyMeHTOM Ha JieCTHNiE.
He fOpchpyTe HnctpymeHT. HnctpymeHT 6yIeT pa6oTaTB IIPOH3BOJNTeJIbHei HnaJeXHei BpeXIme, IJIa KOTOPoro OH 6blI pa3pa6OraH.
IpepeI uHCTKO, peMOHTOM H peryInpOBKO INHCTpyMeHTa OTnycHTe KypOK, IIOJOKdHTe, IOKa HHCtpyMeHTIIOJIHOCTbHO OCTaHOBTcN CHHMITE c HeO aKKMyJITop.
Kyctope3 npedha3Haueh TOJIbKO IJIa cTpJHKN KycTOB IN JKNBbIX N3rOpOJe. He nIOJIb3yIe KycTope3 B dpyHX IIeJIAX.
■Перелз苹сков Кустореа убintecь ВTom,чToHa TpaekTopи ПОЛТ haTпрЯтCTBи.
EcJN KycTope3 HaTKHylcH a HIpenTCTBHe JIN B IIOJIoTHO IIOJaI NOCTopOHHH IIpeIMeT, HeMeJJeHHo OCTaHOBHTe erO, cHmHte C Hero aKKyMyJIaTOp H IPOBepbTe IeJIOCTHOCTb IeTaJIeH. He IIOJB3yIITecb HHCtpymeHTOM, He cIeJIaB Heo6XoJHMbI peMOHT. He IIOJB3yIITecb HNCtpyMeHTOM, ecJIeTaJIH He 3aTAYbI HJIN IOBpeJxDeHbI.
CJIeIHTe 3a CBOHMn IeIcTBHnMn. ByIbTe paCCyIITeJIbHbI.
3a60TJIHBO yxaxHbAte 3a KycTope3OM. YTo6bI HnCTpyMeHT pa6oTaJI IPOH3BOJNTeJIbHee IN B IIOJIHOI 6e3OIIacHOCTN, CJIeINTe 3a YnCTOTOn I 3aTOUKO IIIOJIOTHa. Cma3bIABaTe I MeHJeIte AkceccyapBb B COOTBeTcTBHN C HnCTpyKIIHMN. CJIeINTe 3a TeM, YTo6bI pyuKN HnCTpyMeHTa 6blIN Bcerla cyXHMN IN YnCTbIMN, YTo6bI Ha HNX He OCTaBAJIOcb CJeIOB MacJa IIN Jxnpa.
I IpoBepaTe IeIOCTHOCTb IeTaJIe. IpeXJte Yem IpoIOJIkaTb IOJIb3OBAtbcra HnCTpyMeHTOM, IpoBepbTe pa6ooyee coCTOAHne IOBpeXJdeHHbIX DeTaJIe NII akceccyapOB. IpoBepaTe JInHeHOCb TIOINBXKHBIX DeTaJIe. IpoBepaTe IeIOCTHOCTb BcEx DeTaJIe. IpoBepaTe c6Opky INcTpyMeHTa N BCE 3JIeMeHTbI, OT KOTopbIX 3aBnCHT erO pa6ota. YexOI IOJIoTHa NII JIO6a Jpyra TdAJIb IOJIKHbI 6bITb OTpeMOHTnpOBaHbI NII 3aMeHeHbIB CHeTpE TexHueCKoro O6cJyKbAHnR Ryobi, ecN ToJIbKO B HacTOrIeM pykoBOcTBe N0 EKCIyataaHn Het dpyrHex yka3aHn.
Bo n36eXaHHe Iope3OB IepKHTe pyKn IOnaJIbIe ot IIOJIoTHa.
Pycckn
He IIbTaIteCb BbIHMaTb I3 pa6oTaIOJero KcTope3a OCTaTKN KcTOB H He IepKHTe pyKaMn KcTbI BO BpeMra6oTbI. IpeXJIe Yem BbIHMaTb 3acTpRAIIH NcT H3 HNCTpyMeHTa, y6eINTeCb, YTO KypOK BbIKJIIOuAteJIa OTNyIeH n AKKyMylJrTop cHrT. KorlaBepeTe INcTpyMeHT, He IOITpaIHBaIteCb Do IIOJIoTHa.

IPEJUYIPEKJEHNE
IocJIe BbIKJIOueHn HNCTpyMeHTa NOJIoTHO IIpoIOJIkaet pa6OTaTb IIO INHePcHH HeCKoJIbKOcekyHd.
IepKHTe pyKn, JINIO H HOrn IIOJaJIbIe OT IOIBNXHbIX YacteH. He IOTpaIraHbaITecb IIOJIoTHa H He IIbIraTecb OCTaHOBHTb eO BO BpeMa pa6OTbl.
■ПипесхODEсоногo pa6oeryo MectaHa pyroe BbIKJIIOuayTe MOTOp.
He octabJIaIe T B HnCTpyMeHTe OINJIKN H OCTaTKN KycTOB. IIOJIOTHo MoKet 3a6JIOKnPOBaTbcr.
Bo n36eKaHHe IOBpeKJdeHn H hepA3peIeHHoro IIOJIb3OBAHHN IHCTpyMeHTOM, XpaHNTe eRO B cyXOM MeCTe, Ha BBICOTe HJIN IIOI 3aMKoM. XpaHNTe IHCTpyMeHT B MecTaX HeIOCTYINbIX JeTAM H HeONIIbITbIM pa6OTHNkAm.
B Hepa6ooyee BpeM 3aexJHTe IIOJTOHO KycTope3a.
He okyhaIte Kcytope3 B BOy I npyrhe XnIKKoCTH IN HnYem He OnpbickNaBte erO. CJeIHTe 3a TeM, YTO6bl pyKn HnCTpyMeHTa 6blIN BcERda CyXIMN HnCTbIMN, YTO6bl Ha HNX He OCTaBaJIoCb 0pe3KOB KcyTOB. YnCTHTe HnCTpyMeHT IOcJIe KaJIOrO HcNOJB3OBaHHN. CJeIyTe HnCTpyKIIHM n3 pa3JeJa "XpaHeHne Kcytope3a".
IpeTpaHcNOpTnpOBKo IpoBepaTe KpeJIeHne Jetae HnCTpyMeHTa.
XpaHnTe HactoIeepyKOBoCTBO.PeyJrphO IpeyeHTbIaIteero INHΦOpMnpyIte npyrnx IOJIb3OBaTeJeI. OdaJIkHBaI INCTpyMeHT, pIHKJaIbIBaIte K HeMy HacToIeepyKOBoCTBOIO 9KcIIJyTaIHH.
PEMOHT
IopuyaHTe peMOHT INHCTpyMeHTa KBaJIINΦIIINpOBaHHOMy CneIHaJIInctTy.ObcJyXKBaHNHe IpeMOHT,IPoIN3BOIMbIe HEKBAJIINΦIIINpOBaHHbIMn TexHNKaMn,BeIyT K TpaBmAm IIOJOMKe INHCTpyMeHTa.HecO6JIIOJeHne 3TORO IIpaBnla aHHyJIInpyET rapaHTHO Ha INHCTpyMeHT.
I Ipn 06cJyKbAHHH IOJIb3yIteCt ToJIbKO MapOuHbIMn 3aIuaCTaMH. Co6JIIOaIte HNCTpyKcHH n3 pa3JeJa "O6cJyKbAHHe" HAcTOnIeero pyKOBoIcTBa. 3To I NOMoKet H36eKaTb TjKeJIbIX TpaBM n IIOJOMKn HNCTpyMeHTa. HecO6JIIOeHHe 3TOrO IIpaBbIa aHHyJIInpye rapaHTHNO Ha IHCTpyMeHT.
n 3y6bI IOJIoTHa HeJIb3a MeHЯrB IIO OJHOmy; IIpi HEO6XoJIMOCTH 3aMeHЯrTe BCE IIOJOTHO.
ПРавиJA TEXHUNI BE3OIIACHOCTNДЛАKKUMYJIATOPHBIX INHCTPUMEHTOB
Ipejke yem ycTaHaBJIHbA b aKKyMyJITop, IPOBepbTe,
YTO6bI BbIKJIOUOaTeJIb CToJI B IOJIOKeHHBbIKJI HJIH 6bl3a6JIOKInpOBaH.YcTaHOBKa aKKyMjTOpa Ha BKJIOHeHHbI INHCTpyMeHT BeET K HeCuaCTHBIM CJIyHaAM.
3apjKaIte aKkMyJIaTOP TOJIbKO B 3apJHOM yCTpOiCtBe, peKomeHIOBaHHOM H3rOTOBHTJeM. 3apJHoe yCTPOIcTBO IJIa OJHIX aKKMyJIaTOPOB MOKeT BbI3BaTb IIOkap IIpi HcIOJIb3OBAHHN C IpyTHM TNIOM aKKMyJIaTOPOB.
HcTpyMeHT IOJIkeh pa6oTaTB TOJIbKO Ha cIeIHaJIbHO npEHa3HaueHHOM IJIa HeRo aKKymJrTOpe.
NIOJIb3OBAHHe IpyTHx aKKymJrTOpOB MOKeT BbI3BaTb Ioxkap.
B Hepa6ooyee BpemI IepKHTe aKKymJITop IOdaJIbIIe OT MeTaJIINuecCKHX IIpeIMTeOB, TaKHX KAc cKePIKN, MOHeTBI, KJIIOHN, BnHTbI, TBO3IN, IN JIObIX IpyrIX IIpeIMTeOB, KOToPbIE MOrY3aMKHyTB KOHTaKTbI aKKymJITopa. KopOTKoe 3aMbIKaHHe KJIeMM aKKymJITopa MoKet BbI3BaTb OXoRn HINIOxap.
H36eraIte KOHTaKTa C 3JIeKTPoJInTOM B cJyuae ero yTeuKn. B cJyuae cJyauHoro KOHTaKTa C 3JIeKTPoJInTOM HEmEJIleHHO IIpOMOIte IopaKeHHoe MecTo YHcTOn BOIOJ. Ecln 3JIeKTPoJInT IonoJI B rJa3a, o6paTHeCb K BpaCy. 3JIeKTPoJInT MoKeT BbI3BaTb pa3IpaKeHne HIN OXOr.
Ipepe peryiHpOBKO, cMeHO aKceccyapOB n yKJIaIKoH Na xpaHeHHe cHImaHTe aKKyMJIaTOp c HnCTpyMeHTa. 3To IIMOxKeT H36ExaTb cNyaiHOrO 3aIyCKa HnCTpyMeHTa.

IIPEIYIPEJKJEHNE
EcIn B KOMIIeKe The Xbataet IeTaJIeH, He IIoJIb3yIiTeCb IHCTpyMeHTOM, He ycTaHOBnB INX. HecO6JIIOJIeHne 3ToI INHCTpyKIIIN MOKeT IOBJIeYb TAgKeJIbIe TpaBMbl.
XPAHHTE HACTOIIHNE HHCTPYKIIH IO TEXHNKE B30IACHOCTN. PEYJIAHPHO IEPeHTbBAHTE IX HHHΦOPMIPyHTE IPYINX IIb3OBATEJEI. ODAJIKNBAA IHCTPymeT, PIPKJIaIbBAHTE K HEMY HACTOIIIEE PYKOBOIDCTBO IIO 3KCIJIYATAIIH.
OBIIHE XAPAKTEPNCTIKN
Motop
CKopocTb Ha
XOJIIOCTOM XOJY
JIINHHa NOJIOTHa
MoHocTb pe3KN
Bec (cakkyjTOpOM)
AkkymyJITop*
18B
12006/MHH
457 MM
10MM
3.2 K
BPP-1817M / BPP-1815M /
BPP-1817MG/ABP1801/
ABP1802/BPL-1815/
BPL-1820/BPL-1820G
BC-1800/
BC-1800M / BC-1815S /
BC-1815SMG /
ACR1800/BCL-1800/
BCL-1800G
Pycckn
ОПИСАНЕ
Pnc.1
A. YEXOJI IIOJIOTHA
B. OTPAXATEJIB
C.IIPEIIHRA PYKOKTKA
D. KHONIKA PA36JIOKINPOBKN KYPKA
E.3AДнЯpyKОТKA
F.AKKYMJITTOP
G. IIOJIOTHO
H. IEPEDHRAIHTKA
I. OCHOBHON KYPOK
Pnc.2
A.AKKYMUYJITOP
B.3ACTEKK
Pnc.3
A.IIPEIIHRA PYKORTKA
B. ПЕРДНЯ ГИЕТКА
C. KHONIKA PA3BJOIKPOBKN KYPKA
D. KYPOK
Pnc.6
A. BИNT KAPTEPA ПОЛOTHA
B.KpbIIIIKA KAPTEPA IIOJIOTHA
Pnc.7
A. BNIHT KPEJIJEHINI IOJIOTHA
B. CBOPHAR IIJACTIHA
C. CTONIOPHAR IIIAIBA
D.IJIOCKAⅢIAIBA
E. YDEPKINBAIOIIA IJIACTNHA
F. OCHOBAHNE IOJIOTHA
G.YIJKN
H. KUJIAчКИ
I. IITbIPN
Pnc.9
A. 3y6b8 IIOJIOTHA
B. CTPEJOUHbIE 3YbIa
Pnc.10
A. YEXOJI IIOJIOTHA
Pnc.11
A. 3APJHOE YCTPOICTBO
B. 3EJIeHbI INHДIKATOP
C. KPACHbI INHINKATOP
PABOTA
ФУнкци CBETOBbIX DATUKNOB 3APYHNO YCTPOIcTBA
Cm.Puc.11.
CBETOBBIEIATUKNIIIOKA3bBAIOT 3TAlbl 3APJIKNAKKUMYJIYTOPA
KpacbIⅡaTcHK =peJHM 6bICTpo3apJKN.
3eJenbI IaTtHK = aKKyMylrTop IOJIHOCTbIO 3apxKeH.
Hn OJINH JaTUnK He rOpHT = HEnCIIpaBbIy aKKyMyJIaTOp HJIN 3apJHoe yCTpoiCTBO.

IIPEIOCTEPEXHENE
Bo n36eXaHHe nIOJOMKn aKKymjIaTopa, HeMeJIeHHo cHMaIte eO C 3apJIKN, ecJIn Hn OINH JaTcHK He rOpHT. CdaBaIte aKKymjIaTOp I 3apJIHOoe ycTpoIcTBo B IeHTp TexHnueCKoTO o6CJyKHNbAHnryobi IJIa IIPOBepKn HIn 3aMeHbI. EcJIn Hn OINH daTcHK He rOpHT, cJaBaIte aKKymjIaTOp I 3apJIOHOe ycTpoIcTBo B IeHTp TexHnueCKoTO o6CJyKHNbAHnryobi. He NtTaItecb 3apJxKaTb IpyrOaKKymjIaTOp. IcIopUeHHoe 3apJINHOe ycTpoIcTBo MOKeT IOBpeIITb aKKymjIaTOp.
3APJDKA AKKUMYJITOPA
Bo n36eKaHHe HeIepnTtHOcTeaKKyMylTOp TpHMpepaIOCTabJIeH B KOMIIeKTe He IIOJIHOcTbIO 3apJxKeHHbIM. IIpei NaJiom paOToI ero HAO 3apJNTb.
IIpmeaHHe: IIpn IepBoN 3apJIke aKkyMjIaTOp IIOJIHOCTbIO He 3apJIITc. YTO6bI aKkyMjIaTOp IIOJIHOCTbIO 3apJINlC, HeoXOIMHOeCKOJIbKO IIKJIOB (paOta - 3apJIka).
3APJKA AKKUMYJYTOPA
I OJIb3yIteCb TOJIbKO 3apAaHbIM yCTpOcTBOM, IocTabJIeHHbIM B KOMIIJIeKTe c aKKyMyJITOpOM.
IIpoBepbTe HnApJxKeHHe B ceTH. OHO IOJIxHo 6bITb 230B 50 TI IepemehHOro ToKa (ObIyHoe DOMaHHee HnApJxKeHHe).
BkIIOHHTe 3apJHHe yCTPOIcTBO B ceTb.
YcTaHOBHTe aKKyMylTOp B 3apJHoe ycTPOIcTBO, COBMecTHB eRO IIa3bIC BbIeMKaMI B 3apJHOM ycTPOIcTBe.
EcJn aKKymyIaTOp IpaBnJIbHO BCTaBJIeH 3apJdHoe ycTpoIcTBO,3aKJraEcra KpacHbI DaTPhK. HaXMMTe Ha aKKymyIaTOp, YTO6bI eRO KJIeMMbI 3aIIeJIKHHyJIncb Ha KJIeMMax 3apJdHOrO ycTpoIcTBa.
JKeJIbI H 3eJIeHbI DaTUnKn DOJIxHbI TOXe 3aRopeTbcS. OHIIoka3bIBaHO, YTO 3apAINHO yCTPOcTBo BpeXIMe IIOBepKn. 3apAINHO yCTPOcTBO IEPEXOInT BpeXHM 6bICrpoi 3apAINKuYepe3 5 MNHyT. KOrJa 3apAINHO yCTPOcTBo IEPEXOInT BpeXIM 6bICrpoi 3apAINKn,
Pycckn
JeJIbI H 3eJIeHbI JaTcHKn rachyT, a KpaHbI 3aKnHaetc. EcJIn, IIO npoiieCTBn 15 MHHyT, JeJIbI H 3eJIeHbI JaTcHKn Bce eIe ropT, BbIHbTe aKKymjIaTOp, IIOJokIIte MHHyTu, 3aTeM BCTaBbTe erO o6paTHo B 3apJdHoe yctpOcTBo. EcJIn eIe chepe3 15 MHHyT JeJIbI H 3eJIeHbI JaTcHKn He IoracJIn, 3NaHT aKKymjIaTOp IIOBpeJdeH H He MOKeT 6bIT bApJxKeH.
KorJa aKKyMjIaTOp IJIHOCTbH 3apJxKeH, KpaCHbI DaTcHK rachet, a 3eJIeHbI 3aRopaetc. IocJe o6bIuHoro HcIOJIb3OBAHH, YTO6bI 3apJIHTb aKKyMjIaTOp, HaIO OKoJIIO yaca. EcJIN aKKyMjIaTOp IJIHOCTbH pa3pJxKeH, TO IJIa 3apJIKn IOTpe6Byetc IIOITopa yaca. B TeueHne 3apJIKN 6aTape cJIerKa HArpeBaETc. 3To HopMaJIbHO IN He CBHJeTeJIbCTByET HN O KaKoi IIOJOMKe.
HE YCTAHABJIHBAIte 3apJdHoe ycTpoCtBO B MeCTax C OyeHb Hn3KHMn IIN OueHb BbICOKHMn TeMIIpepaTpaMn. 3apJdHoe ycTpoCTBO pa6Otae T haNboJIbIeepoN3BOIDTeJIbHOcTBIO IIpn KOMHaTHOH TeMIIpepaType.
BAKHbIE HNCTPYKUNIJI3APJKNI TOPRNUXAKKYMJYTOPOB
OTdoJIroHnHeIpepbIBHOpa6OtbyaKKymJITOp HArpeBaETc. EcJIn aKKymJITOp HaPeJIc,JaTe emy ocTbITb 30 MmHyT NepeJ3apJIKoN.
IIpImeuaHHe: AkKymyJIaTOp HArpeBaetcToJbKO OTДЛHTeJIbHOI HeIIppeBIBHOI pa6OTbI HHCtpymeHTa. B HopMaJIbHOM pa6OoHem pexHMe 3TOrO He IpoHcxOJNT. EcJIH TemIepaTpya akKymyJIaTOpa cJIINIKOM Hn3Ka, 3aRopaeTcA 3eJIeHbI DaTUnK 3apAnHOrO yCTPOiCTBa. IIOJoxJInte Noka akKymyJIaTOp He pa30rpeEtcdo HopMaJIbHOI TemIepaTpybI: 3aRopaeTcKpaChbI DaTUnK.
YCTAHOBKA AKKYMJITOPA
BcTabbTe aKKMyJITop B TpHMMep. JIa 3TOrO coBMeCTHe Ia3bI aKKMyJITopa c pe6paMn TpHMMepa. Cm.Puc.2.
IpeH haJIOm paObTI IpoBepbTe, YTO6bl 3aCteXKc C IByX cTOpOH aKKMyJIaTOPa 3aCteRHyJIiHc H YTO6bl aKKMyJIaTOp 6bl II ppaBHJbHO BCTaBJIeH B TPhMMep.
CHYTNE AKKYMJITOPA
- ΦTO6bI CHaTb aKKyMJIaTOp C TpHMMepa, HαKMnTe Ha 3aCTeKKn C o6eHX cTOpOH aKKyMJIaTOpa. Cm. Puc. 2.
CHMHnTe aKKyMyJrTop c TprHMMepa.

ПЕДОСТЕРЖЕНЕ
BcTaBJIa aKKyMJIaTOp B TpHMMep, IIPOBepIe, YTO6bI eO Ia3bI COBIIaJIn C pe6paMn B TpHMMep E YTO6bI 3aTeKKn IIpaBNIbHO 3aCTeRHyJIInCb. HeIIpaBNIbHa yCTaHOBKa aKKyMJIaTOpa MoKeT IOBpeINb BHYTpEHHne DeTaJIH.
3AIIYCK KYCTOPE3A
CHHMMTe YExOJI C IIOJIoTHa.
I JIJI 60JIbIeI 6e3OJnacHocTn KcSTope3 HMeet pyKyBbIKJIOHaTeJIb Ha IpeJHeI pyUke. UTo6bI 3aNyCTNTb INCTpyMeHT, HAO OJIOHBpeMeHHo HaxaTb Ha KypOK HAp yUky-BbIKJIOHaTeJIb. PpH pa6Ote IepKHTe OCHOBHyOp pyUky OJHO pyKO, YTO6bI IeRKO HaxHMaTb Ha KHOIIKy pa36JIOKINPOBKN KypKa HHa cAm KypOK, a IpyrOy pyKO KpeIKO IepKHTe IpeEHNIO pyUky, YTO6bI yIepKINBaTb pyUky-BbIKJIOHaTeJIb.
IocJIe HaKaTHHa KypOK MoXHO OTNycTHTb KHOIIKy pa36JIOKHPOBKN KypKa. Ioka KypOK HaKaT, OH He 3a6JIOKHPyETc.
OCTAHOBKA KYCTOPE3A
YTo6bI octaHOBHTb Kcytope3,OTnycHTe Kypok.
Kornda Kypok OTnyueH, KhoNka 6JIOKnpOBKn aBTOMaTHueCKn 6JIOKHPye KypOK.
COBETbI IO HcIOJIb3OBAHIO
He fopcnpyTe IHCTpymeHT B ctpnKke CJINIKOM ryctbIX KycTOB. IIOJIOHO MOKeT COHyTBcH 3aMeJInTb XoI. EcJIN IIOJIOTHO 3aMeJInET CBOXoI, ctpnITte MeJInEHHee.
He IIbTaIteCb CTPNb CTBOJIb IJIN BeTK NToJIe 10 MM I IpOChc CJINIKOM KpyIHbE JJIa 3y6beB IIOJIoTHa IopocJIn. OTe3aIte ToJIcTBie BETKn pyHoi IINJOI HJN ceKaTOpom.
IJIy OueHb ToUHO CTpHHKKn KcCTapHHKa peKOMeHnyEeTcN IOJb3ObaTbcBa BepeBko. OIppeJeJIte Huxhbl ypoBeHb CToHHKn. HaTaNHe TbepeBky BIOJIb KcyCTapHHKa Ha 3tOM ypoBHe. CtpnHrTe KcyCTapHk IprMo HAD HATaHyTOB BepeBKO kak IOKa3aHo Ha pnc. 4. CtpnHrTe 6oka KcCTapHHKa IOn IprMbIM yTJOM (cm. pnc. 5). Torda cTpHexKa 6yEt POBHO. EcJIN 3y6bJa IIOIoTHa 3aeJAIOT, OCTaHOBHTe MOTOP, IIOJOxJIte IOKA IIOLOTHO IIOIHOCbIO OCTaHOBHTcN H ChHMNTe aKKyMyJIaTOp, IIpeJZe Yem BbIHMaTb N3 IIOIoTHa 3acTpyBIIHe BETKN.
I Ipn cTpnKke KOJIIOUeRO KcyTapHnKa HadeBaHTe IIepuATKn. Ipn cTpnKke MOIOJOrO KcyTapHnKa JeJaIte KcyTOpe3OM IIIpOKHe JBHXeHHa, YTO6bI erO 3y6bYXBaTHJIN BETKn. Ipn cTpnKke B3PocJloro KcyTapHnKa, HAObOpOT, JeJaIte BO3BpaTHO-IOCTyIIaTeJIbHbIE JBHXeHHa, T.K. erO BETKn TOJIiue.

ONACHOCTb
EcJH 3y6bKaKcTope3a DOrpoHyJIncb
O JIeKtpnuecknx IpOBoOB, HE
IOTPAINBAITECB DO IOJIOTHA! OHO
MOXET 3JIeKTPN3OBATbcr. 3TO OUYHb
ONACHO. IepxHtE KycTope3 3a OCHOBHyU
H3OJIHpOBaHHyU pyuKy H aKKypaTHO OTJIOXHTe
ero IIOJaJIbIe. OTKJIIOHTe IIITaHHe 3aTeToro
3JIeKTPpOIIPOBOHa, IpeKJte Yem BbIHMaTb erO H3
3y6beB IOJIoTHa. HecoJIIOHeHne 3TOTO pPaBnla
TexHNKn 6e30PiacHOCTn MOXET IOBJeYb 3a CO6oT
TJXeJIbIe TpaBMbl.
Pycckn

IPEUYIPEXJEHNE
OuHnIaHte 3Ony cTPhKKn Ipeep pa6oToN. Y6npaIte HHypbl IIHTaHHa, 3JIeKTPoIIpOBOJa N BepeBKn. OHN MOryt INonAcTb B 3y6bI IOJIoTHa N BB13BaTb TjXKeJIbIe TpaBMbl.

IIPEUYIPEXJEHNE
HnKoRgHa He NIOJb3yIteCb pactBOpHTeJIaMn IJIa YNCTKN IIaCTMaCCOBbIX DeTaJIe. BoJIbIIINHCTBO IIaCTMaCC MoKeT IOBpeJInTBcA OT O6bIuHbIX pactBOpHTeJIe. JJIa UdaJIeHnra rP3N, MacJa, XHpa, IIbIJ IN T.I. IOJIb3yIteCb YNCTOn TprIKoB. B cJIyuae CMeHbI DeTaJIe IOJIb3yIteCb TOJIbKO MapOuHbIMN 3aIYactmRyobi. IcIOJIb3ObaHne JIO6bIX dpyrIX 3aIYacTe M oKeT pPeIcTaBJIArTb ONaCHOCt b IJI NIOBpeJInTB HnCTpyMeHT.

ПЕДОСТЕРЖЕНЕ
IIJaCTMaccOBbIe IeTaJIH HNKoRHa He IOJXHBi O6pa6aTbIBaTbC8 TOPMO3HOJ XIKKOCTbIO, 6eH3HOM, HeΦTeπpOДyKtAmN, eKHM MacJ lamN T.I. ΘTH XMHKaTbI COePkaT BeIecTBA, KOTOpBie MOrYT HcIopTHTb, OcJIa6HTb HIN pa3pyIITb IIJaCTMaccy.
OBSCJUYXKUBAHNE IN PEMOHT
CMEHA IIOJIOTHA

IPEUYIPEXJEHNE
3y6bI IIOJIoTHa OueHb OcTpbIe. IIpn MaHHNyJIaIINx IIOJIoTHa HNKoRgA He 3aIynckaIte PaJIbIbI B 3y6bI H36eRaIe Ta6OuHX IIOJIoKeHN, B KOTopbIX IaJIbIbI HIn pyKn MOryT B HNX IIONaCTb. HNKoFIIA He IOTpaHbAI TeCb IIO 3y6bE B IIOJIoTHa H He 06cJIyXbIbIe KycTope3, ecJIH aKKymJIaTOp He CHrT.
CHTNE IOJIOTHA (Puc.6 n 7.)
CHIMITEaakKymyJITopcKycTope3a.
IpeBepHHTe Kcytope3 Ha BepCTake H cHMMTe YeTbipe BNHTa (4) KapTepa IIOIIHHIKOB.
CHMHTe KpbIiKy KapTepa IIOJIINHIKOB (cm. pnc. 6).
CHHMMTE IIJIaCTHHy, BCTaBJIeHHYIO MEJHy IByX IITbIpei (cm. pnc. 7).
CHIMMTE cToIopHyIO IaIb6y, IIIOCKyIO IaIb6y H yIepKINBAIOUyIO IIaCTINHy (cM. pnc. 7).
CoBMeCTHTe KJyIaKN.
IIPIMEUAHNE: yIiKN HeJIb3a CHrTb, IIOKa OHI He BbIJIIN Ⅲ Na3OB KJlauKOB.
CHMMHTe YeTbIpe BnHTa (4), IepKaIJIne IIOJIoTHO.
IIOJIoTHO KycTope3a 3aKaHUnBaetcIbMy OBAJIbHbIMn yIKaMn. CoBMeCTHe yIKN IIoJIoTHa c Hx OTJeJIeHNem. BbIHbTe IIOJIoTHo H3 KapTepa KycTope3a.
YCTAHOBKA IIOJIOTHA (Pnc.6 n 7.)
CoBMeCTHTe KjlauKN.
BcTaBbTe HOBoe IIOJIoTHO, YTO6bI eRo yIiKN IIpaBnJIbHO
BOIIIN BOTNeJIeHne KapTepa. IPOBepHHTe IOJIoTHO, YTO6bI OHO BOIIIO HIXe yPOBHn HIXKHeRo KyJaUka.
IIPIMeyAHNE:KorJaBceIeTaJINIpaBnJIbHO paCIOJOKeHbI,IOJIOTHO CBO6OJHO BXoJNT B KapTeP MOTopa.
BcTaBbTe Ha MeCTO H KpeIIKO 3aTbHIne YeTbIpe BnHTa (4) IIOJIOTHa.
YcTaHOBHTe Ha MeCTO yIepKINBaHOUyIO IJIaCTHHy, IIOCKyIO H CTOnIOpHYIO IIaIbI.
UcTaHOBHTe IJIaCTHHy HaI DByMg IITbIpMaH.
YcTaHOBHTe Ha MeCTO KpbIiKy KapTepa H 3aTHeHTE 4 COOTBeTCTByIOIIHe BHNtA. 3aTHeHtE Hx IOTyKe.

IIPEDUYIPEXJEHNE
Ipejke yem ycTaHaBJIbBaTb aKKymJITop n 3aynckatb Kcytope3, IpOBepbTe KpeJIleHne KapTepa IIOIIHHNKOB. B IpOTNBHom cIyueae BHyTpEHHne JeTaJIN Kcytope3a MOrYT bI3BaTb HecuactHBi CJIyauH NJIH yap TokOM, BeNyUH N TjaKeJIbIM TpaBMam.
IIPIMMEUAHHE: EcJIn IIOcJIe yCTaHOBKn IIOJIoTHO H3rIb6aETcR, cHOBa IIpoJeJaIte 3TaIbI "ChrTHe IIOJOTHa" N "YCTaHOBKa IIOJOTHa".
ОБСЛУЖИBAHAНИЕ ПОЛOTHА KYCTOPE3A

IPEyIPEKJENHE
He 3a6bIbAaTe, YTO aKKyMyJIaTOPHbIe HNCTpyMeHTbI BcERda rOTOBbl KpaOte, T.K. HX He HaIO BKJIIOUaTB B cETb. Bo N36eKaHHe TjaKeJIbIX TpaBM, IpiN O6CJIyKJBaHHn H CMeHe IIOJIoTHa BcERda CHImaIte aKKyMyJIaTOP H6yIbTe KpaJIHe 6dJIteJIbHbI.

IIPEIYIIPEKJEHNE
Bo n36eJhaHHe T8KeJIbIX TpaBM, IpePeI peMOHTOM, YnCTKO HIN pa36OpKo INcTpymeHTa CnHMaTe C HeRo aKKyMylTOp.
OBCJIYUKBAHNE IIOJIOTHA
Cma3bIbaTe IIOJTOH IOcJIe KaKJIOrO HcIOJIb3OBaHHa.
PeryIpaHIO pOBeRpaTe H3Hoc I eJeIOCTHOCTb 3y6bE.
■ПиЗамепОЛьзУТecьTOЛьКOMapOчHBIMN IOJIOTHAMN.
CMA3KA IIOJIOTHA
CHIMITEaakkyMjTOpcKycTope3a.
IIJ6 60JIbIeI IPOIN3BOIDTeJIbHOCTN I IPOJLeHnIcPOKa cJIyX6bl IIOJIoTHa CMA3bIBaIte erO IO IIIOcJIe KaJIOrO HcIOJIb3OBaHnI. IpeEi CMA3KOI IOJIoTHa CHIMITE aKKymJITOp I IOJIOKHTe KcyTOpe3 Ha POBHyIOIOBepxHOCTb. HaHeCHTe JIEKOE MOTOPHoe MacJIO Ha BepxHnI KpaIIOJToHa KAK IOKa3aHO Ha pHC.8.
■ Ipn Heo6xOIMMOCTn Cma3bIbAaTe IIOJIOHO B IpepepbIbax MejNy pa60Toi. B 3TOM cIyuae ocTaHOBHTe KycTOpe3, CHMHTe aKKyMyJIaTOp H cMaKbTe IIOJIOTHo. IocJIe Cma3KN IIpoIoJIkaTe pa60Ty. HIKoTJa He Cma3bIbAaTe IIOJIOHO pa60TaIOUeRO KycTOpe3a.
Pycckn
3ATOUKA IIOJOTHA
IaTe 3y6bYIM IOJIOTHA IOJIHOCTbIO OCTaHOBTbcB IIOJOKeHH,IOKA3aHHOM Ha pnc.9.B 3TOM IOJIOKeHH OTKpbIBaETcI IOCTaTOHoe MeCTO MEKJy peKJuIMMn H 3aIIHTbIMN 3y6bYIMN.
CHMMHTe aKKyMyJITop c KycTope3a.
3aXMHTe IIOJIOHO B TNCKAX H 3aTOUHTe OTKpbI TYO IIIOCKOCTb 3y6beB IIOJYKpyrJIbIM HAINJIbHHKOM JINHHOJ 203 MM INIHaMeTpOM 6,4 HJN 5,6 MM. IIpH 3aTOUKe He MEHNTE yTOJ 3y6beB.
BbHbTe Kcytope3 H3 TnCKOB, yCTaHOBHte aKKyMyJITOP 3aIycHTHe erO. ChOba ocTaHOBHte Kcytope3 B IOJIOxKeHHN, YTO6bI OTKpbJIcra IocTyII K eIe He 3aToUeHHbIM CTOPOHAM 3y6beB.
CHMMHTe aKKyMyJIaTOp II 3aTOUHTE 3TN cToPOHbI 3y6BeB KAK OIIHCaHO BbIIIE.
CMA3KA KYCTOPE3A
Bce IIOIINIIHKN 6bJIIN CMa3aHbI Ha 3aBOJe BbICOKOKaueCTBeHHoN CMa3KOJ Ha BeCb cPOK CJyX6bI INCTpyMeHTA HOpMaJIbHOM peKHMpepa6OTbI. INCTpyMeHT He HUxJaETCB JDOIOJIHNTeJIbHOcMa3Ke.

IPEJUYIPEKJEHNE
He IIbIaTaeTcB MoINHnHnHPOBaTb IHCTpyMeHT HJIn yCtHaHaBJIbBaTb Ha Hero He peKOMeHNIOBaHHbIe B HactOraIeM pyKOBOIcTBe Akceccyapbl. IIOIObHbIe MOINHnHkAciHn IIpeo6pa3OBaHnI PpeiCTaBJIaHOT co60H HeIIpaBnJIbHOe HcIIb3OBaHHe IHCTpyMeHTa HMOrY cO3JaTb ONaChbIE CHTyaAciH, BeNyUHne K TAgKeJIbIM TpaBMam.

IPEUYIPEJKJEHNE
PeryIpaHO OcMaTpHbAaTe HnHCTpyMeHT n IpoBepaTe TeJeIOCTHOCTb eRO JeTaJIe N Hx KpeIeK. Bo H36eKaHHe TjaKeJIbIX TpaBM, IpoBepaTe 3aTajKy BcEx BnHTOB N KpeIeK BcEx JeTaJIeN.
ОБСЛУЖИBAHAНИЕ KUCTOPE3A
CHMHTe aKKymJITop.

IIPEDUYIPEXJEHNE
Bo n36eXaHHe T8KeJIbIX TpaBM, IpePeI peMOHTOM, YHCTKO HJIN pa36OpKoI HHCTpyMeHTa cHmaiTe C HeRo aKKyMyJITop.
OuHCTHTe KcyTOpe3 TpIIOKc MOIOIHMcpeIcTBOM.
He IIOJIb3yIteCb CJIbHbIMN MOIOUHMN cpeIcTBaMn JIJI YIcTKn IIJaCTMaCCOBOrO KapTepa HpyeK. OHH MOrTy IOBpeIHTbcr O pA3JIuHbIX apOMaTHuecknx MaceJI, HApPmep XBOHbIX HJIN JIMMOHHbIX, a TaKxE oT pactBOpHTeJe, HApPmep O KepocHa.
OcToPoxKHO!BlaaXHoCTbMOKeT BbI3BaTb yIap TOKOM. BbITnpaIte HNCTpyMeHT MraKoI cyXoI TpIIKoI.
IIJIa YNCTKN BeHTHJIaIIOHHbIX JKaJIIO3N KapTePOBaKKyMJuTOpa H MOTopa IIOJIb3yIITecb IIeTOUKO HJIN BO3JYXOM H3 MAJIOMOIIHORIO IIJIECOCa.
CJIeIHTe 3a TeM, YTO6bI BeHTNJIaIOHHbIe KaJIHO3H NIKoIJa He 3a6bBaJIHcB.
XPAHEHNE KYCTOPE3A
I Iepy kJaakOn Ha xpaHeHne TtuaTeJbHo OuHCTHTe KycTope3. XpaHnTe KycTope3 B cyXOM IIPOBETpHBAEMOM NOMEiEHHN, BHe IpeJeIOB IOcraeMoCTn JeTeH. He IepxHrte erO pAiom C Koppo3n HbIMn BeIeCTBaMn, TaKHMn KaK caIOBbIe XHMKaTbI HJIn pa3MOpaXHBAHOIIa coJIb.
■Перед укладков нахраанец BCERда 3ачexлг Te NOJOTOHOKaK nokaasoHa pnc.10.
XpaHHTe H 3apJkaIte aKKMyJIaTOp B IIPOxJaIHOM MecTe. TempeatypbI bIIHe H HnKe KOMHaTHoI cOKpaIIaIOT cPOK cIyK6bI aKKMyJIaTOpa.
HnKOrJa He xpaHHTe pa3pJxKeHHbIe aKKyMJIaTOpbl. IocJIe HcIOJIb3OBAHnI daJIte aKKyMJIaTOpY ocTbITb I cpa3y 3apJInTe erO.
CoBpeMeHem aKKyMJIaTOpbI TepeHOT cnJy 3apJIKn. YEm BBIIe TeMIIepaTypa, Tem 6bICtpee aKKyMJIaTOp TepaET cnJy 3apJIKn. PIn pIoIOJIIXteJIbHOM IpocToe KycTope3a, 3apJXaJIte aKKyMJIaTOp KaKJIbIe MeCJI HIN IBa. 3To IIpoJIInT cPOK erO cIyJx6bl.
OBPAIIeHHe COTXODAMN


He Bb6paBbAaTe 3JIeKtpnueckn HnCTpyMeHT BmecTe c XO3raCTBeHHbIMN OTXoJAMH! CdaBaIte erO B cIpeJHaJIbHbIe IeHTpbI IO Ipepa60TKe. O3HaKOMbTecb c IIpoJeDypaMn CdaHn Ha Ipepa60Tky y MeCtHbIX Blaacte NIIu y DInJIepa.
Româna
MÁSURI DE SIGURANTA

AVERTISMENT
INFORMACJE DODATKOWE
BPP-1817M / BPP-1815M /
BPP-1817MG/
ABP1801/ ABP1802 /
BPL-1815 /
BPL-1820/BPL-1820G
BC-1800 /
BC-1800M / BC-1815S /
BC-1815SMG /
ACR1800/BCL-1800/
BCL-1800G
OPIS
Rys.1
A. POKROWIEC ZABEZPIECZAJACY LISTWE NOZOWA
B. OSLONA OCHRONNA
C. UCHWYT PRZEDNI
D. PRZYCISK ODBLOKOWANIA SPUSTU
E. UCHWYT TYLNY
F. AKUMULATOR
G. BRZESZCZOT
H. SPUST PRZEDNI
I. SPUST GLOWNY
Rys. 2
A. AKUMULATOR
B. MECHANIZMYBLOKUJACE
Rys.3
A. UCHWYT PRZEDNI
B. SPUST PRZEDNI
C. PRZYCISK ODBLOKOWANIA SPUSTU
D. SPUST-WLACZNIK
Rys.6
A. ŠRUBA OBUDOWY LISTWY NOŽOWEJ
B. POKRYWA OBUDOWY LISTWY NOZOWEJ
Rys.7
A. ŠRUBALISTWYNOZOWEJ
B. PLYTKA
C. PODKLADKAOPOROWA
D. PODKLADKAPŁASKA
E. PLYTKAPRZYTRZYMUJACA
F. PODSTAWA LISTWY NOZOWEJ
G. PÁŁAK
H. KRZYWKI
I. SWORZNIE
Rys.9
A. USTAWIANIE TARCZY
B. OCHRONA
Rys.10
A. POKROWIEC ZABEZPIECZAJACY LISTWE NOZOWA
Rys. 11
A. LADOWARKA AKUMULATORA
B. KONTROLKA ZIELONA
C. KONTROLKA CZERWONA
Polski
FUNKCJONOWANIE
FUNKCJA LAMPEK KONTROLNYCH LADOWARKI
Patrz Rysunek 11.
LAMPKI KONTROLNE WSKAZUJA STAN NAŁADOWANIA AKUMULTORA
NAVODILA ZA VARNO UPORABO

OPOZORILO
BC-1800M / BC-1815S /
BC-1815SMG /
ACR1800/BCL-1800/
BCL-1800G
LASTNOSTI
SI.1
A. POKROV REZILA
B. ŠčITNIK
C. SPREDNJI ROCAJ
D. GUMB ZAPORE STIKALA
E. ZADNJI ROCAJ
F. AKUMULATOR
G. REZILO
H. SENZORSKO STIKALO
I. STIKALO ZAVKLOP
SI. 2
A. AKUMULATOR
B. ZAPAHI
SI. 3
A. SPREDNJI ROCAJ
B. SENZORSKO STIKALO
C. GUMB ZAPORE STIKALA
Slovensko
D. STIKALO ZA VKLOP
SI.6
A. VIJAKI ZA POKROV REZILA
B. POKROV REZILA
SI.7
A. VIJAKI ZA REZILO
B. PLOŠCA MEČA
C. ZADRČEVALNI OBROČEK
D. PODLOZKA
E. ZADRČEVALNA PLOŠCA
F. SESTAV REZILA
G. JARMI
H. NAPERKE
I.ZATICI
SI. 9
A. REZILO
B. ŠčITNIK
SI. 10
A. POKROV REZILA
SI. 11
A. POLNILNIK BATERIJE
B. ZELENA LUCKA
C. RDEČA LUCKA
DELOVANJE
FUNKCIJE LED LUCK NA POLNILNIKU
Glejte Sliko 11.
Gori rdeča LED = Način hitrega polnjenja.
Gori zelena LED = Popolnama napoljnen akumulator.
Ne gori nobena LED = Pokvarjen polnilnik ali akumulator.

POZOR:
BPP-1817M / BPP-1815M /
BPP-1817MG/
ABP1801/ ABP1802 /
BPL-1815 /
BPL-1820/BPL-1820G
Ikrovikliss*
BC-1800 /
BC-1800M / BC-1815S/
BC-1815SMG /
ACR1800 / BCL-1800 /
BCL-1800G
Lietuviskai
APRAŠYMAS
1 pav.
A.AŠMENU APSAUGOS DEKLAS
B.APSAUGINIS SKYDELIS
C.RANKENOS JUNGIKLIS
D.STREKTÉS DEBLOKAVIMO MYGTUKAS
E.PAGRINDINE RANKENA
F.BATERIJA
G.ASMENYS
H.PRIEKINE RANKENA
I.STREKTÉ
2 pav.
A.BATERIJA
B.FIKSATORIAI
3 pav.
A.PRIEKINE RANKENA
B.RANKENOS JUNGIKLIS
C.STREKTÉS DEBLOKAVIMO MYGTUKAS
D.STREKTE
6 pav.
A.KRUMPLINES PAVAROS GAUBTO VARZTAS
B.KRUMPLINES PAVAROS GAUBTAS
7 pav.
A.AŠMENU VARŽTAS
B.PLOKSTELE
C.SPYRUOKLINE POVERZLE
D.PLOKŠCIAPOVERŽLÉ
E.FIKSAVIMO PLOKŠTELE
F.ASMENYS
G.ASOS
H.KUMSTELIAI
I.PIRSTAI
9 pav.
A.ASMENU DANTIS
B.APSAUGOS ITAISAS
10 pav.
A.AŠMENU APSAUGOS DÉKLAS
11 pav.
A. BATERIJOS JKROVIKLIS
B. ZALIAS INDIKATORIUS
C. RAUDONAS INDIKATORIUS
VEIKIMAS
IKROVIKLO SVIESOS INDIKATORI VIEKIMAS
BPP-1817M / BPP-1815M /
BPP-1817MG /
ABP1801/ ABP1802 /
BPL-1815 /
BPL-1820/BPL-1820G
Uzladetajs*
BC-1800 /
BC-1800M / BC-1815S /
BC-1815SMG /
ACR1800/BCL-1800/
BCL-1800G
Latviski
Hocete IIbTHn pa6oTHn pKabN, KOHTo He ce XJIb3rAT.

BcHKn cTpaHnHn JIna Tp8bJa cToaT Ha pa3cToaHHe Hain-Majko 15 M ot pa6oTHn yuactbK.
OBIII IIPABNJIA 3A BE3OIIACHOCT

IPEUYIPEXJEHNE
PpoyeTe BHNMaTeJIHO BCNUKn IIpeyIpeJxdeHn I yka3aHn. IIpn HeCna3BaHe Na daJeHHte IIO-JOly HNCTpyKuH NMOKe Ja ce IIpNHHT 3IIOJLOyKN KaTO IOXkap, TOKOB ynap IIN TeKKn TeJIeCHN IOBpeHn.
3aIa3eTe Te3n IpeynpeHn H yKa3aHn, 3a Ja MoKeTe H B6bIeIeJa ce KOHCyJITnpaTe C T8X.
TepMHbT "eJIeKtpnueckn HNcTpymeHT", H3IOJI3BaH B IIpaBnIaTa 3a 6e3OIIaNcHocCT IO-IOJy, O6O3HaYaba KaKTo eJIeKtpnueckn INcTpymeHTn c6c 3axpaHbAhe OT eJIeKtpnueckaTa Mpeka, Taka H INcTpymeHTn 6e3 Ka6eJI.
PABOTHA CPEIa
Pa60THnIr Bn yuacTBk Tp86Ba Ja e IIO6pe oCBeTeH. Ha Hepa3yHCTeHH N MpaHn MeCt a ce cb3JaBaT ycIOBn 3a 3JIOIOJyKn.
He H3IOJI3BaITe eJIeKtpNueCkn HnCTpyMeHTN B EKCIIIO3HBa CpeIa, HAnpHMeP B 6JIN3OcT Do 3aIIaJIIMN TeYHOCTN, Ra3OBe HJIN IpaX. Te3N MaTePnaJIn MOrat Ja ce Bb3IIJaMeHr T H36yXHaT OT HCKPITe, KOHTo Ce IopaxJAt B eJIeKtpNueCkNTe HnCTpyMeHTN.
Ieata, cTpaHnHHTe JInua n IOMaIHHTe KHBOTHN Tp6Ba Ja cTOrT HaJaJIeU, KOrATo pa6OHTe C eJIeKtpuYeCKN HhCTpyMeHT. Morat Ja Bn pa3ceT n Ja 3aRy6HTe KOHTpol HaI hHCTpyMeHTa.
EJEKTPNUECKA BE3OIIACHOCT
IIeIeJIbT Ha eJIeKtpHuecKn HhctpyMeHT TpI6BaJa oTROBapHa 3aXpaHbAaNk KOtAcT. Hnkora He MoIINΦHuaPaiTe IeIeCJHa. Hnkora He H3IOJI3BaIte 3a3eMeH aIaIaTep 3a eJIeKtpHuecKn HhctpyMeHTn. TaKaIe H36ErHeTe OIaChOCTTa OT TokOB yIap.
■ H368raBaiTe BCaKaKbB KOHTaKT cbc 3a3eMeHN IOBbpxHocTn (KaTO Tpb6n, paHaTopn, rOtBapcKn IeKN, xJaINJHHuN IIp.). OIacHOCTTa OT TOKOB yIap e IIO-ROJIMa, KOraTO YAcT OT TJIOTOB E B KOHTaKT cbc 3a3eMeHN IOBbpxHocTn.
He H3JIaRaIte eJKeKtpnuecknTe HnHcTpymEnTH Ha IbXJd HJIN Ha BJIra. OnaHocCTTa OT TOKOB yIap ce yBeJIuYaba, KOraTO B eJKeKtpnuecknHa HnCtpyMeHT IOnJaIHe BOJa.
I IopIbPkaIte 3axpaHbuaNkabeJI B H3IIpaBHO c6CTOHNHe. HNKora He IpeHacraTe TpnoHa 3a 3axpaHbuaNkabeJI HNKORA He To H3KJIIOuBaHTe, KaTO IbpiTa 3a Ka6eJa. IIpbXte 3axpaHbuaNkabeJI DaJIeUOT H3TOUnnHa TOIIHHa, OT MacJIO, OT pexKeIeJIeMeHTn IN DInHexeIe N Ce IIpeIMetN. OIacHoCTT aT OTKOB yIap ce IOBbIaBA, aKO Ka6eJIbTe IIOBpeJeHIN ONJIeTeH.
Korato pa60HTe HABbH, n3IOJI3BaIte eEINHCTBeHO yIbJIIXTeJIN, IpEJaHa3HaueHn 3a pa6Ora Ha OTKpHTo. Taka Ie N36ErHeTe ONaCHOCTTa OT TOKOB yIap.
Ako HnMaTe H36Op H Tpr6Ba Ia H3IOJI3BaTe HNCTpyMeHTa B yCIOBnHa BlaIra, H3IOJI3BaIte eJKeTpUeCKO 3axpaHbAHe, 3aIIHTeHO OT IIpeKbCBaY 3a OcTaTBHo eJEKtpUeCTBO (DDR). H3IOJI3BaHeTO Ha IIpeKbCBaY TIN DDR orpaHnUaBA OIaChOCCTTa OT TOKOB yIap.
BeJekKa: TepMHbT "IpeKbcBa 3a ocTaTbHoeJIeKtpNuecTBO (DDR)" MoKe Ia 6bIe 3aMeHeH OT TepMHa "IpeKcbBa 3a TOKOBa yTeKA b 3emrTa"
JIIMHA BE3OIIACHOCT
БьдeTe 6нITEJIHH. BHHMaBAIte KaKBO TOUHO IIpaBHTe 6bITe pa3ymHn, KaTO pa6OTHTe c eJIeKTPuyeCKN HhCTpyMeHTn. He pa6OTe c eJIeKTPuyeCKN HhCTpyMeHTn, aKO cTe I3MopeHn, 60JIHN, IIOI Bb3JeiCTBHe Ha aJIkoXOI JIN OnHaTH, INJn aKO B3MaTe JlekapCTBa. He 3a6paBMyTe, Ye n IIpn MmH HeBHHMaHHe MoKeTe Ja IocTpdaTe TeJxKO.
Hocete IpeIina3HN cpeICTBa. BnHaIg N3IIOJI3BaIte IpeIina3HN cpeIcTBA 3a OYH. CInopeJ yCIOBnaTa Hocete IpoTHBOIIpaxOba MaCKa, OByBKn, KOHTo He ce IIbP3JIaIyt, KacKa IpeIina3HN cpeIcTBA 3a yIHHTe, 3a Ja H36eHHeTe pNcKa OT TeXKN TeJIecHN IOBpeIN.
BHHMaBaIteJaHeToBKJIOUHTe HeBOJIHO.YBepTe ce, Ye IpeBKKJIOUBATeJIaT E B IOLOKeHne“CTOn”IpeiHa BKKJIIuHTe HHCtpyMeHTa B KOHTaKTA H/IN JaIOCTaBHTe 6aTePnIa, KaKTo IN KORaTO B3eMaTe INIIN IpeHacrTe HHCtpyMeHTa.3aJa N36eHHeTpeNcKaOT3IOIOJyKn, HE IpeHacraTe IHCTpyMeHTa C IpbCT BbPxY IyCKOBn JIOCT H He To BKJIOUBAHte, aKO IpeBKKJIOUBATeJIaT e BB BKJIIOUHeHO IOLOKeHne.
■ IpeJnJa BkJIIOUHTe HNCTpyMeHTa, MaxHeTe raeYHNTe KJIIOUOBe. Ako Bbpxy JBNXKeIc eJIeMeHT ocTaHe IIpHKaueH raeueH KJIIOU, TOBa MoKe Ja IIpHUNH TeXKN TeJIecHN IOBpeJn.
Българскn
He IpoTgAte IIpeKaJIeHO MHO rO pIeTe cN. CTBaHTe BnHaHcTa6HJHo. IIpn Cta6HJHa IO3HJNA 3a pa6oTa MoKeTe IIO-JIO6pe Ja KOHTPOJIHpATE INHCTpyMeHTa B HeIIpeBnDHeH cInTuAHH.
Hocete IOxOJIyIO oJleKIO.He cJIaraiTe IINpOKn IpxN H 6NkTyTA. Na3eTe Kocata, IpxNTe n pIeTe cn JaJIey OT IBNXeIIN ce YacTH.NIInpOKnTe IpxN, 6NkYtaTn IbJIITe KOCN MORaT Da ce 3aKaaAT B IBNXeIIN ce YacTH.
Ako BaIIHnI T HcTpMeHT ce IocTaBc acIIHpAtop 3a npax, IIorpHexe ce da 6bJe IpaBnJHO IHcTaJInpaH n H3IOJ3BaH. Taka Ie H36erHete onaChOCTTa ot IIPOH3IeCTBnI..
HAUYH HAPABOTA IIOIDPbJKA HA EJEKTPUeCKN IHCTPYMEHTI
He IpeTOBapBaIte HnCTpyMeHtA. H3IOJI3BaIte IOJXOJIaIIH NHCtpMeHT 3a pa6OTata, KOJTo NCKaTe Ja N3BbPfHTe. IIe pa6OTn MHOrO IIO-eΦeKTHBHO n 6e30IaHc, aKO cIIa3BaTe peXHMa, 3a KOJTo e pa3pa6OTeh.
He pa6oTeTe c HnHcTpymeHTa, ako IpeBkJIIOuBaTeJIrT He BKJIIOUBA/H3KJIIOUBA IIPOJyKTa. KOraTO HnCtPymeHTbT He M0Ke Ja Ce BKJIIOUBA H3KJIIOUBA IIpaBUNHO, ToI e OIIaceH 3aIbJIIXeJIHO TpI6Ba Ja ce peMOHTnpa.
■ИзклioчbaиTe Инстpyм enta OT aXpaHbAheTo IINBaIeTe 3axpaHbAaTa 6aTeprna OT INHcTpymeHTa IIpeiNperyIlnpaHe, cMaHa Ha IIpiHaJIeJxHocTnTe I IIpuIbpaHeHa INHcTpymeHTa. Taka IIe H36erHeTe I OIIaChOcTtA OT HeBOJIHO BKJIIOUBAHe HA INHcTpymeHTa.
I Ipn6npaIte eJIeKtpnuecknte HNcTpymEnTH Ha HeIOocTbIIHO 3a DeIa MxCTo. He IOnyckaIte C HNcTpymEnTa da pa60rT JInua, KOHTo He ca 3aIO3HaTH c Hero n C IIpaBnJlata 3a 6e3OIIacHocT. EJIeKtpnuecknte HNcTpymEnTH IIpeIcTaBJIaBat OIaHocT B pIeTe Ha Heo6yuHen JInua.
I IoiIaraiTe rpnKn 3a HnctpyMeHTHe. IpOBepeTe JaJI IN DnJKeIInTe ce qacTn ca IeHTpObaHn. YBepeTe ce, che Hma CuyIeHN qactn. IIpoBepTe crIO6KaTa, KaKTo n BCNUKO OCTaHaJIo, KOETO MOKeJa IOBJIIne Ha N3IIpaBHOTO cyHKiIOHOHPaHe. Ako hMa HeIN3IIpaBHn qactn, Tp8BaJa 6bJat peMOHTnpaHH IpeDN yIOtpe6a. MHorO OT 3JIOIOJIyKInTe ce JbJIkaT Ha JIoIIa IIOIIpBxKkHa TeXHnKaTa.
IHCtpyMeHTHe Tp6BaJa ca ChCTn 3aToeHn. KOraTo peKeiHrT HcTppyMeHT e 3aToeH n ChT, BepoTHocTTa Ja 6IOKHPa e IIO-MaJIbK H IIe MoKeTe IIO-ycIIeIIHO da rO OBJiaJeTe.
Cna3BaIte HacToHITe IpaBnla 3a 6e3oIaHocT, KOraTO n3IOJI3BaTe IpoDyKta, IpnHaJIIeXHOCTHTe, YAcTHTE IN T.H. HMaIte IpeJBnO cO6eHOCHTHe Ha IHcTpymEHTa, pa6OTnHryuactbK H pa6oTaTa, KOrTo Tp6BaJa ce H3BbPfHN. N3IOJI3BaIte eJeKtpUyeckn HcTpymEHT eINHCTBeHo 3a pa6oTaTa, 3a KOrTo e IpeJHa3HaueH, 3a Ja H36eHHeTe ONACHn CHTyaIHH.
IODIPTbXKA
BcHKn BnIOBe peMOHT TpI6Ba Ia ce H3BbPbIBaOT KbaJIHΦHnpaH TexHnK n caMo C opHnHaJIHN pe3epBHH
Tachn. Taka Iue ocnrypnte HaIbJIHO 6e3oIaHa eKcIIIOaTaIIH N aEJIeKTpNueckn HNCTpyMeHT.
IIPEIYIPEJKDEHNA B63OJIACHOCT 3A INHCTPYMEHT 3A IIOJPR3BAHE HA JKNB IIJET
I IpbKTe BcHKn Chactn Ha TJIIOTo JaJIeU OT OCTPHeTaTa. He OTCpaHbBaIte OTP3aHnMaTePnAJI He IpbKTe MaTePnAJI, KOITOp Tp6BaJa ce OTpeKe, JOKaTO OCTPHeTaTa ce IBnKAT. YBepTe ce, Ye IpeBkJIOuBaTeJIrT e H3KJIIOueH, IIpeIN Da IOChTHe 3aceHnAJI MaTePnAJI. MInr HeBnHaHne IIO BpeMe Ha pa6Ota C INHCTpyMeHTa 3a IIOIp3BaHe Ha JxNB IIJeT MoKe Ja IOBeJe Do cepHo3HO fN3NuecKO HapaHbBaHe.
■Пи НOCHe IpyKTe HNCTpymeHTa 3a pBkoXBtKaTa, KaTO OCTpHcTeTAt Tp86Ba Da He pa6oT. Пи ИpeHacHne HIN CSbXpaHcHne Ha HNCTpymeHTa 3a IOIp3BaHe BnHaRn IOCTaBmTe KaIaKa Ha OCtpHeTa. IIpaBnIHOTO 6OpBeHc C HNCTpymeHTa 3a IOIp3BaHe Ha JxNB IIlet Ie HaMaJIb BePOrTHocTTa OT ΦH3NuEcKO HapaHBAhe OT peJeeIITe OCTpHeTa.
IpybXTe Ka6eJaHa pa3CToHHe OT O6JIaCTTa Ha IIOpIa3BaHe. IIO BpeMe Ha pa6Ota Ka6eJIbT MoKe Ja ce cKpHe B XpaCTHTe HJa 6bIe OTPa3Ah CJIyauHc OocTpHeTo.
JOIIbJIeHEHNE
CbBET 3a npOBepKa Ha HnCTpyMeHTa 3a ChxKnn IpeIMeTH, Naip. TeJIeHH orpaH
■ПпелорьказИЗПОЛЗВаHETOнуСТРОДСТВОзOCTaTБЕНТOKсссвбоJOEHТOKOT30mAилno-МДЮ.
Hnctpykuiha 3a npabHJIO nbpkaHe Ha nHcTpymeHTa 3a IIOIpa3BaHe Ha JKB NJIeT, HAnpHMepe C DBe pIue, aKO HMa DBe pBkoXBaTKN.
IIPEIN PABOTA C HHTPYMEHTA IIPOYETETBCNUKN IIPABNJIA 3A BE3OIIACHOCT.
■Почete BнмаTeJIHO BCnUKN yka3aHnna 3a 6e3OIIacHocT. 3aIO3HaIte ce c MaINHnHaTa n HaUNHa N ha pa6oTa.
He pa6oTeTe c To3n HnCTpyMeHT, aKo cTe H3MopeHN, 60JIHN, IIOB Vb3JeIcTBHe Ha aJIKOxOJI IJIN OIINaTH, IJIN aKO B3IMaTe JIeKapCTBa.
I IpeiYIIOTpE6a IIPOBepTe cIbCTOJHHeTo Ha MaIIINHaTa. IIOMeHeTe HeN3IIpaBHHe TeacTH. YBepTe ce, ye ot 6aTePnIa He H3TNa TeYHOCT.
YBepTe ce, ye BcHcKn fHKcHpaIuN I npEIIa3HN eJIeMeHTn caIOCTaBeHH N IO6pe 3aTeHaTH. IIOMeHeTe HOka II BCHcKN YacTH, KOHTO ca HanyKaHH, OTUyIeHH IIN IOBpeHn. YBepTe ce, ye HOXbT e IOCTaBeH IpabHJHO n OIKCpAH MHOrO IO6pe. Taka Ie N36erHete ONaCHocTt AOT TeJckN TeJeCHN IOBpeIa 3a OIepaTopa IIN cTpaHHHITe JInca, KAKTO IN PnCKa OT IOBpeJa Mo MaIHHaTa.
■ H3noJ3BaIte IIOxOJaIaII npOjyKt. H3noJ3BaIte XpactOpe3a eHnHCTBeHo 3a pa6oTaT, 3a KOrTo e IIpeHa3HaueH.
He pa6oTeTe c xpaTope3a, aKo IIpeBKMJIHOuBaTeJIrT He BKJIIOUBA/H3KJIIOUBA IIPOJyKta. KOraTO INHCTpyMeHTbT He
Българскn
MOKeJa ce BKJIIOUBa/H3KJIIOUBa IO6pe,ToIe OIIaCeH N 3aJIbJIIXTeJIHO TpR6BaJa ce peMOHTnpa.
I IpeHn pa6oTa c HnCtpyMeHTa pa3uHcTeTe pa6OTHn yacTbK. MaxHeTe BChUKN 3axpaHbAun, eJIeKtpuYeCKn Ka6eJIn, JxNn HIp., KOnTO MoRat Ja ce 3aKauaT Ha HOxa.
IeuaTa, BbHINHTe JInu I OMAUHHTe KINBOTn Tp6Ba Ja cTOrT JaJIeU OT pa6OTTHyAcTBK. JeuaTa, BbHINHTe JInu I KINBOTnTe Tp6Ba Ja cTOrT Ha Hau-MaJIO 15 M, TbN KaTO IO BpeMe Ha p3aHe MoRat Ja OTXBbPcAt IIpeIMTeI. IIpeOpBHTeJIHO eJa ce HocrT IIpeJNa3HN CpeCTBa 3a OUnTE. AKO IIO BpeMe Ha pa6Ota HraKoI ce IIpi6JIiXKn Jo Bac, He3a6aBHO N3KJIIOue Te XpaCTOpe3a.
3aJa H36eHHeTe ONaCHoCTTa OT TOKOB yIap, He H3JIaRaIte 3apJHOTO yCTPOCTBO Ha IbKd HJIN BJIra.
He H3IOJI3BaITe xpaCTOpe3a c MOKpn pIe.
3a6paHЯBa ce Ieua IOI 15 roHHn H npyrn Heo6yehn JInua da pa6oTc xpactope3a.
3a da ce HamaJIn OIacHocCTTa OT cepHO3HN OUHN HapaHbAHn, IIpi pa6ota c xpaTope3a BUNHaHn HocTe 3aIIHTN OUJIa.
Ako np pa6oTaTa ce c3JaBa Ipax, HocTe MacKa 3a JInie nn IpOTnBOIpaxOba Macka.
Hocete IIOxOJaIO o6JIeKJIO.He Hocete IIINPOKn JIpexn H 6NjKyta, KOHTOMORAT Ja ce 3aKaayat B DInHexIte Ce qactn. Pn pa6oTa Ha OTKpHTo BN IppeIopbVbame Ja HocHTe rymEHn pBkABuHn IOyBKN, KOHTO He ce IIbP3aJIaT.
Ako cTe cIbJIra Koca, BInrHeTe HaJ paMeHaTa, 3a Ja He ce 3aKaUn BINXKeIIITe ce YacTn.
He H3JIaRaIte eJIeKTPnueckHTe HNCTpyMeHTN 6aTePnraHa IIbXd HJIN Ha BJIaRa.
Korato MeCTHHe HJIN IIpH6Hpate Xpactope3a, BHHaHn IocTabRHTe IIpeIIa3HnKaJIbΦ Ha HOka.
BHHaHn cJIeTe o6cTaHObKaTa H 6bJeTe 6JITeJIHN: IyMbT O T pa6OteIINHcTpymeHT MoKe Ja 3aJIyIIN npYrHrTe IyMObE.
Cb3aIte cn HABnKa BceKn IIbT IpeH ynoTe6a da IIpoBepBaTe JaIN raeuHIne KJIIOObe ca MaxHaTH OHTpyMeHTa.
IpeHpa6oTa c MaHHaTa BnHaHn IpOBepBaHTe JaHn ca IocTaBeHN IpBxKHTe HIpEIIa3HTeJIHTe.
HnKora He H3IOJ3BaIte HNCTpyMeHTa, aKO hMa JINICBaIu NaCTH NJIH aKO ca IocTaBeHN HeOpHrHaJIHn NaCTH IN IIpHnAdJeXHOCTH.
He H3IIOJI3BaIe eJIeKTpHuecKn HnCtpyMeHTN B EKCIIIO3HBa CpeIa, HAnPIMep B 6JIN3OCT IO 3aIIaJIHMN TeuHOCTN, Ra3OBe HIn IpaX. Te3N MaTePhaJIH MoRAT Ja ce Bb3IJIaMeHrT Hn36yXHaT OT HcKpHte, KOHTo Ce IopaxJaT B eJIeKTpHuecKHTe HnCtpyMeHTN.
YKA3AHNIA PABOTA C XPACTOPE3A
He n3IOJ3BaIte xpaCTope3a, aKo IpeJHaTa IpbjKka He e IocTaBeHa. IIO Bpeme Ha pa6Ota IprjXTe HnCtpyMeHTa c IBe pIe.
3aJa H36eHHeTe pNcKa OT HeBOJIHO BKJIOUBaHe, HNKOra He IIpeHacIte HHCTpyMeHTa C IIpbCT Bbpxy TpIRepa.
БьДeTe 6иTeJIHH. BHIMaBaIte KaKBO TOnHO IpaBHTe H 6bДeTe pa3yMHN.
Hocete IIbTe HnHTaJIOH, 3aIHTHN 6OTyuIN, KOHT He ce IIbP3aJIaT, IN pKAbuIN. He pa6oTe c xpaCTope3a, aKO CTe C Kbcn IaHTaJIOHn, caHaJI N 6OCH Kpaka.
He pa6oTeTe c HnCtpymeHTa npn cJa6a CBeTJIHa. Pa6oTHnIyuactbK Tp6Ba Ja e IIO6pe OCBteH (JHEBHa JINH N3KyCTBeHa CBeTJIHa).
BHHaHr Tp86Ba Ia Ia3HTe paBHOBecne H He pa6oTe Te Bbpy HeCTa6HJHa IOBbpxHOCT. CtBIIe Ce6HJHO Ha 3emra H He IIpoTgAaTe pIe HAdaJIeH. He pa6oTe c HnCtpyMeHTa Ha CtBJI6a.
He IpeTOBapBaIte HNCTpyMeHTa. IIe pa6OTn MHOrO IO-eΦeKTHBHO N 6e3OJaCHO, aKO cIIa3BaTe peXHMa, 3a KOITo e pa3pa6OTe.
OttyncheTe TpHepa, H3yakaIte IBNrTaTeJIrT HaIIbJIHO Ja cIpe, cJIeT TOBa H3BaIeTe 6aTePnIra T IpeIIN IOuHCTBaHe, IIOIpaBka HJIN peJIJaX Ha MaIIHHata.
To3n xpactope3 e npedHa3HaueH eINHCTBeHo 3a IIOJpy3BaHe Ha JKNB PJIeT, Xpactn H y6paun. He n3IOJ3BaIte pOjkykTa 3a npyri neJIn.
I IpeJn Ja IycheTe HNCTpyMeHTa, yBepeTe ce, Ye HOKbT HmaJa cpeIHe IpeJIaTcTBHJ.
Ako xpactope3bT ce ynapn B IpeMeT HInaKO TaKbB 3aceHe B HOxa, He3a6abHO N3KJIIOUte HNCTpyMeHTa, H3BaTe 6aTePnra T IIPOBepTe JaJIN HMa IOBpeHa Yact. He pa6oTeTe C INHCTpyMeHTa, IpeJn Da cTe H3BbPUnJIn Heo6xoJIMnTE IIOpABKn. He H3NoJ3BaIte MaHHaTa, aKO YaCTHrE Ha ca MOHTnpaHn KaKTo Tp8Ba HJIn aKO ca Hen3IIpaBHN.
BHHMaBaIte KaKBO TOUHO npaBHTe. JeCTBaIte pa3yMHO.
I IopIbpxaIte xpactope3a B IO6po cIbCTOHNHe. Hoxbt BNHaHr Tpr6Ba Ja e Ynct HIO6pe 3aTOueH, 3aJa MoKe Xpactope3bT Ja cyHKnOHnpaIO6pe H6e30NaCHO. Cma3BaIte HIOMeHnTe PnHaJIeXKHOCTHe cIOpeJyKa3aHHaTRA. YBepTe ce, Ye npBXKHTe BNHaHcCa cyxN HnCTn H BpXy MaHHHaTa HMa HnKaKBO MacJo HJIN CMA3Ka.
YBepete ce,Ye HMa IOBpeHn qactn. IpeHn da npOblJXHTe pa60Ta, IpOBepTe JaJIIN cbOTBeTHaT a cact HJIN IOBpeHa IpuHaJIeXHOCT MOKe Ja pa6OTn H3IpaBHO. IPOBepTe JaJIIN DBHXeHNTe ce qactn ca ueHTpnpaHH. YBepete ce, Ye HMA cUyHEn HacTh. IPOBepTe crIO6KaTA, KaKTO H BcHcKO OCTaHaJO, KOEt MOKe Ja IOBJIHRe Ha H3IpaBHOto fYHKINOHpHaE. PEmoHTbT JIn IIOMmaHaTa Ha HOKOB IpeJIIa3HTeJI N HA BcHcKN IpTyHn HEH3IpaBHN eJeMeHTn Tp8BaJa ce N3BbPbBAT B OTOpN3HpAH cepBN3 Ha Ryobi, oCBeh aKO B HACTOIO pBkoBOIDCTBO 3a yIOTpe6a He e yKa3AHO npyTo.
CtoIte IaJIeUOT HOJa,3aIaHececpexKeTe.HNKoRa He ce OINTBaIte Ja BaIInTe H3pe3KN HJIN Da IIbPjKHTe TOBa,KoEtO IIe peXeTe,KORaTO HOKbT Ce BbPTH. IpeJn Da BaIInTe 3aceHaJI B HOJa IIpeIMeT,yBepTe ce, Ye 6aTeprnaTa e N3BaJeHa N Ye TpHreTpE oTIIychat. BHIMaBaIte Ja He IOKocBaTe HOJa,KORaTo XBAaIaTe HHCTpyMeHTa.
Българскn

IIPEDUYIPEXJEHNE
CJIeI N3KJIIOUBaHeTo Ha HHCtpyMeHTa HOXbT IIpoIbJIkaBa Ia ce BbPTn 3a KpaTKO BpeMe IIO INHePIIIA.
■ Pa3eTe pBte, JInIeTo H KpaKaTa OT IINHKeIHTe ce Yactn. He ce OINTBaHTe Ja XBaIaTe HOXa, 3a Ja ro CnpTe, KORATO CE BbPTH.
BHHaHn cinnpaTte IBHrataTeJIA, KORAto He Bb3HaMepeBaTeJa peKeTe HIn KORAto ce IIpeMeCTBaTe OT eINH pa6OteH yactbK Ha Ipyr.
He octabraIte Bbpxy HNCTpyMeHTa Ja ce cb6HpAT H3pe3KN HJIN IpyH MaTePHaJI. Moke Ja 6JIOKHpAT HOka.
■ПибираиTe MaIIINHаТа Ha BnCOKO И cyXO MЯСTO ИЛЯ 3akJIIOUBAIte,3aДИЗБeHHeTe HENpaBnJIHa yNtpe6a I IOBpeIa.ИнстPyMeHTbT TpЯ6BaJa ce Пибира Na HeIOCTbIHO 3aДeцИН HeO6yUeHN JInIa MЯСTO.
Korato He pa6oTHe c xpactope3a, nocTaBnTe IpeIHa3HnKaJIbΦ Ha HOka.
He IOTaIaIe H He IIpbckaIte MaIIHHaTa C BOJa HJIc Ipyra TeUHocT. IpbKkTe BnHaRr Tpr6Ba Ja ca cyXn, YHCTn H 6e3 H3pe3Kn. H36bpcBaIte MaIIHHaTa CJIeI BC8Ka yIOTpe6a. BnXTe yka3aAHnTa B pa3JeI "PpHbpaHe Ha xpactope3a".
I IpeiN TpaHcPiOpTnPaHe Ha xpaTope3a ce yBepTe, Ye BChUKN YacTH 3a IIO6pe 3axBaHaTH.
3aia3eTe Te3n HcTpyKuHn. PeIOBHO ce KOHCyTTnpaHTe c T8x I nIpeIOCTaBMyTe Ha npTyN JInua, KOnTO IIe H3IOJ3BaT IpOdykTa. Ako IIe IpeIOCTaBMyTe xpaCTope3a Ha npTyO JInue, CbIo Taka IaIIte N TOBa pBkoBOCTBO 3a yIOTpe6a.
PEMOHT
PemOHnpaHTo Ha IpoNyKta Tpr6Ba Ja ce H3BbPbBa OT KBAJINΦHnIpaH TexHnK. IIOJIpBXKa HJIn pemOHT, H3BbPbBaHH OT HeKBAJINΦHnIpaHH JInca, MoKeJa IOBeJAT DO PNCK OT TeXkA TeJIeCHa NOBpeJa HIOBpeHa Ha IpoNyKta. IIpn HeCnA3BaHe Ha Ta3N INHcTpkyKnra rapAHIIyTA Bn Ce 063cnJIba.
I Ipn IIOIipbXka Tp6Ba Ia H3IOJ3BaTe eINHCTBeHO opHnHaJIHN pe3epBHN qactN.Cna3BaIte HnCTpyKuHnTe, IaJeHN B pa3JeJa "IIOIipbXka" Ha HacToIooT O pkoBOJcTBO. TaKa Ie N36erHeTe OnAcHocCTTa OT TeKKI TeJIecHN IOBpei, KaKTO I pnCKa OT IOBpeia IIO MaHHaTa. Ipn HeCnA3BaHe Ha Ta3n HnCTpyKuHra rapAHIIra Ta Bn ce 06e3cnJBA.
CIIEUNFNUHINIPABNJIA3ABE3OINACHOCT3A BE3KAEBJHNHHCTPYMEHTN
I IpeHn Da IocTaBnTe 6aTepeHnTa, yBepeTe ce, Ye IpeBkJIOUbATEJIeT E B IIOJOKeHne "H3KJIIOueH" HIN 6JIOKHpAH. Ako IocTaBnTe 6aTeepHn B INcTpymeHT B IIOJOKeHHe "BkJIIOueH", MOKe Ja CE IIpNHHT 3JIOIOJyKn.
Батугята ce Заржда само с оюбөно отпюнзвовинеля заряйно устю CTBO. Ако заряйно устю CTBO, пэрэнэнуэno 3a einnьнд saтугя, се Иллзвс с дуг, TOBA може на пэрэнвика loхар.
C6e3Ka6eJIeH INHcTpymeHT Tp8BaJa ce H3IOJ3Ba caMo
eINH KOHKpeTeH TII 6aTePHN. N3IIOJI3BaHeTO Ha BCJKAKBb Ipyr BnI 6aTePHN MOKe Ja IIpeIH3BnKa IOXkap.
Korato He H3IOJ3BaTe 6aTepeHnTa, Ia3eTe oT MeTaJIHN IIpeIMETH KATO KJIaMePH, MOHeTH, KJIIOUOBE, BHTOBE, IIHOHN H BCRAKBNIpyTN IIpeIMETH, KOHTO 6hxa MOrJIN Da HAnpABrT KOHTaKT. AKO 6aTepeHnTa ce CBbPke Ha Kbco, TOBa MoKe JIpruHHN H3rapAHHN HIN IOKap.
H368BaIe BcKaKbB KOHTaKT c TeUHOCTTa ot 6aTepeHra, aKO H3Teue B pe3yJIiT aHa HeIIpaBNJHa yIOtpe6a. Ako ce cIyuH taKOBa HeIIO, H3JIaKHeTe 3aceHnatyuaCTbK c YnCTa BOJa. Ako IocTpaaT OUnTE BN, IOTbpcTe JlekapcKa IOMOII. Ako BN H3IpbcKa TeuHOCT OT 6aTepeHra, TOBA MoKe Ja IIpHuHH Ipa3HeHe HJH H3rapHHN.
N3KJIIOUyBaIte HNCTpyMeHTa OT 3axpaHbAHeTo IIN BaIeTe 3axpaHbAIIaTa 6aTePnry OT HNCTpyMeHTa IIpeIn peYJlnpHa, CmHa Ha IIpiHaIJIeXHOCTHTe I IIpH6HpAHe Ha HNCTpyMeHTa. Taka IIe H36ErHeTe I OIIaCHOCCTTa OT HeBOJIHO BKJIIOUyBaHe HA HNCTpyMeHTa.

IIPEDUYIPEKJEHENE
Ako JINICBa HЯKÖ YAcT OT INHCTpyMeHTa, He rO H3IOJ3BaIte, JOKATO He JaHa6aBHTe. IIpn HecnA3BaHe Ha Ta3N INHCTpyKIIra MoKeJa ce IIpIuHHrT TeXKKI TeJIeCHN IOBpeHN.
3AIIA3ETE TE3H HNCTPYKUN. PEOBHO CE KOHCYJITHPAHTE C TAX H N IPEIOCTABRAITE HA JPYTN JIua, KOUTO II E N3IOJ3BAT IPOJyKTA.AKO II E IPEIOCTABTRE IPOJyKTA HA IpyTO JINU, CbIO TAKA DAHTE IN TOBA PbKOBOIDCTBO 3A YIOTPEBA.
TEXHINUeCKA INHΦOPMAIIN
| ДВИГАТЕЛ | 18 V |
| СКорOSC на паразен xов | 1200 оборotinga/Mин. |
| Дьлжинна на рекецата Шинна | 457 MM |
| КалачтET на рязанe | 10 MM |
| Терло (с akумлaitopa) | 3,2 кг |
| Бастени* | BPP-1817M / BPP-1815M / BPP-1817MG / ABP1801/ ABP1802 / BPL-1815 / BPL-1820 / BPL-1820G |
| Зарядно устюпстvo* | BC-1800 / BC-1800M / BC-1815S / BC-1815SMG / ACR1800 / BCL-1800 / BCL-1800G |
ОПИСАНЕ
Φn.1
A.IPENEIIA3EHKAJIbΦ3AHOXA
B.IPUEIIA3HO IPIPNCIOCOBJEHNIE
C.IIPEIIHA IIPbXKA
Българскн
D. BSYTOH 3A BJIOKIPAHE HA TPNIPEPA
E.3AДHA ПБЖKA
F. BATEPNI
G.HOK
H. IPIEENCITYCSbK
I. OCHOBEH CIIYCbK
Φn.r.2
A. BATEPNY
B. ПЛЯСТУН 3A 3ACTОПОРBAHE
ΦnR.3
A.IPDEIIHA IPrbXKA
B. ПРЕДЕН СПУСБК
C. BSYTOH 3A BJOKIPAHE HA TPNIPEPA
D. TPNIEP
Φn.r.6
A. BINT HA KYTINRA HA HOXA
B. KAPIK HA KYTINRA HA HOXA
Φn.r.7
A. BINT3A 3ACTOIONPRAHE HA HOKA
B.ПJOUKA 3A CГЛОБВАНЕ
C. 3ACTOIIOPRAIIA IIIAIIBA
D. ПЛОСКА IIIAИБА
E. ПОДПИРАША ПЛДАCTИHA
F. OCHOBA HA HOXA
G. OБрьчн
H.Γ'bPENUHNДИСКОBE
I. INJIN
Φn.r.9
A. 3b6H HAOXA
B. 3AOCTPEHIN 3b6N
Dn.r.10
A.IIPEIIIA3EH KAJIbΦ 3A HOXA
Φn.r.11
A.3APJINHOYCTPOICTBOHA BATEPINA
B. 3EJIENHIIKATOP
C. YEPBEH INHДИKATOP
PABOTA C INHCTPYMEHTA
ФУHKИHA CBETJIINHHITE INHДNKATOPH HA 3APJHOTO YCTPOICTBO
BnKTe .11.
CBETJIHHHTE HNDIKATOPN YKA3BATCTEIEHTA HA 3APEKDAHE HA BATEPNYTA
CBeTeIeH eRBeH HnHnKaTOp = peXHM Ha 6bP3o 3apeKJaHe.
CBeTeI3eJIeH HnIINKaTOp = 6aTepeIra e HnIbJIHO 3apeJeHa.
HЯMa cBeTeII HnIINKaTOp = IOBpeIeHO 3apIINo yCTpO'CTBO HIn 6aTePnI.

BHIMAHNE
3aJa ce H36eH Ye YBpeKdAne Ha 6aTepeHra Ta Tp86BaJa ce H3BaJIn He3a6abHo OT 3ap4nHOTo yCTpoiCTBO, aKO He CBeTH NHTO eINH INIINKaTOp. 3aHeceTe 6aTepeHra H 3ap4nHOTo yCTpoiCTBO B Ha-6JIIN3KNa cepBn3 Ha Ryobi 3a IPOBepKa HIN 3aMHa. CbIO TaKa, aKO H3BaJInTE 6aTepeHra Ha 3ap4nHOTo yCTpoiCTBO, 3aIOTO HNTO eINH INIINKaTOp HE CBETN, OTHeceTe 3ap4nHOTo yCTpoiCTBO c 6aTepeHra Ta B Ha-6JIIN3KNa cepBn3 Ha Ryobi. He ce OINTBaiTe Ja IOCTABYte Ipyra 6aTepeHra B 3ap4nHOTo yCTpoiCTBO. IIOBpeJeHO 3ap4nHO yCTpoiCTBO MOKe Ja IIOBpeJN 6aTepeHra.
3APEXDAHE HA BATEPNYTA
BAJHH YKA3AHNJIPII 3APEKDAHE HA TOIIIN BATEPHN
Pn npoIbJxHrTeJIHa ekCIIIOaTaIIN Ha TpIMepa, 6aTePrrTa ce 3aTOIIJ. Korato 6aTePrrTa e TOIIa, Tp8BaJa a oCTaBHTe Ja ce OXlaIa 3a OKOIO 30 MmHyTH, IpeiHa JzapeKJate.
BeJIeKka: BaTePnIa ce 3aToIIJI eINHcTBHeO npIn IpoIbJIIXHTeJIHa pa6oTa c INHcTpymEHTa. ToBa He ce cJlyuBa B yCIOBnHa o6NuaHHa ekCIIIOaTauNIA. AKO TeMIIepaTpyaTa Ha 6aTePnIa e TBbPte HnCKa, CBeTBA 3eJIeHNrT INHdkaTOP Ha 3apAHHOTy cTPOHcTBO. N3UaKaIte 6aTePnIa Ta JIoCTHrHE HopMaJIHa TeMIIepaTpya - Toraba cBeTBA YepBeHnrt INHdkaTOP.
IOCTABRHE HA BATEPRAITA
IocTabeTe 6aTePnTa B TpImepa.3a Ta3n IeJI IIOJaPaBHepe6pOTo Ha 6aTePnTa C KJIe6a Ha TpImepa.Buxme fuz.2.
I IpeHn pa6oTa ce yBepTe, ye IIaCTHHte 3a 3actOnIopBaHe, pa3IOJIOKeHN O T JBeTe cTpaHN Ha 6aTePnHa, BIn3at IIOpe H Ye 6aTePnTa e IpaBnHO 3axBaHaTa B TpImepa.
CBAJIHE HA BATEPINA
BnKTe IJIaCTHINHe 3a 3aCTOnOpRAhe H nHaTHcHete, 3aJa H3BaJInTe 6aTePnIyTa OT TpHMepa. BuXme fUz.2.
I3BaJeTe 6aTepeHraTa OT TpHMepa.

BHIMAHHE
Korato nocTabnTe 6aTepeHnTa B TprHmepa, yBepTe ce, ye pe6poto Ha 6aTepeHnTa e IIOpaBHeHO IIpaBnIHO C JkJIe6a Ha XpactOpe3a H Ye IJaCTnHnTe 3a 3aCToIIopBaHe BIn3aT KaKTo Tp6Ba. Ako 6aTepeHnTa e IocTabeHa loIIO, BbTpEeHHnTe YacTH MoRat Ja Ce IIOBpeJrT.
IIYCKAHE HA XPACTOPE3A
CbaJIeTeIpeIIa3HnKaJIbΦ3aHOka.
3a IIO-ROJMA 6e3OIIacHOCCT XpAcTope3bT HMa IprbKKa C IIpeBkJIIOuBaTeJI, HAMnpaIa Ce BbPxy IIpeHaTa
Дрьжka, KОЯTO TРЯба Да HaTNCHeTe, 3a Дa TpьгHe, KaTO CБиЕВсpeMHNO HaTNCKaTe И ТprHRepa. Пп работа с XpacTope3a ДрьжTe OCHOBHaTa Дрьжka с Edna PaBka, 3a Да можTe ЛecHO Дa HaTNCHeTe 6byToHa 3a 6JIOkpHa He Na TprHRepa HAnPeI, CJIeД TOBa HaTNCHeTe TprHRepa, a CДpyraTa cN pBka XbaHeTe 3Дрabo IpeДHaTa Дрьжka, 3a Дa ДьЖнTe ПpeBKJIIOUHbATEJЯ HaTNCHaT.
CJIeI KaTo HaTnChHeTe TpHRepa, MoKTe Ja OTnycHeTe 6yToHa 3a 6JIOkHpAHe. TpHRepbT HMa Ja ce 6JIOkHpA, JOKaTo e HaTnCHaT.
CINPAHE HA XPACTOPE3A
- OtynycheTe TpHepa, 3a Ja cnpTe Xpactope3a.
Korato OTnycheTe TprRepa, 6yToHbT 3a 6JIOknpaHe aBTOMaTHUHO 3aKJIIOuBa TprRepa.
CbBETI3A YIOTPEBA
He pexeTe IpeKaJIeHO TbCT IIeT, 3a Ja He IpeTOBAPHTe HnCTpyMeHTa. HoKbT MoKe Ja ce OrBHe JJa 3a6aBN XoJ. Ako HOxBT 3a6aBN XoJ, peXeTe IIO-6aBHO.
He ce onnTbaIte Ja pexKeTe Ctb6Ja n KJIOHN c dnaMaTeBp IIO-ROJIM OT 10 MM, KaKTo n TaKINBa, KOHTo ca TBbPJe ROJIeMH, 3a Ja 6bDat cpzAHn OT 3b6HTe. KJIOHtE, KOHTo ca TBbPJe ROJIeMH, MORa Ja ce cpexKaT c O6NKHOBeH TPhOH HIN KAcTpauKa.
Ako nckate Ja IIOpejKeTe KHBnI PABHO, IIpeIIOpBvBame BN Ja H3IOJI3BaTe BpBb. IIpbBO ONpeJeIeTe JKeJHaHATA BHCQUHnHa Ha KHBnI IeT. CJIeI TOBA OITbHeTe BpBbTa HA Ta3N BNCQUHnI IO IPOJBJIkeHne Ha IJIeTa. PeJKeTe HJIHNBOTo HA OIIbHaTata BpBb, KaKTo e IOKa3aHo Ha qnr. 4. IIOpejKeTe JKBnI IeT IOTcPaHH, Taka Ye Ja e cTeCHeB B rOpHata Yact (BHXte qnr. 5). Taka IIOprzAHnIr IJIET Ie e IIO-paBHomepeH. AKO 3b6nte ce 3aIPbCTrI, H3KJIIOHTe IBnIATEJI, H3UkaJIte HOXbT Ja cInpe, H3BaIeTe 6aTePnra, cJIeI KOEt MAxHete 3aceINHtE B 3b6nte H3pe3Kn.
Hocete pBkABHn, KOraTO IIOJp3BaTe 6OJIINb JKNIB IIIEr. Korato IIOJp3BaTe MJIaIN KJIOHN, pa6oTeTe c IIINPOK 3aMax, 3aJa MoKe 3b6HTe Ja 3aXBaHaT JIo6pe CTb6JIata. N o6paTHOTO, KOraTO peXeTe IO-CTapH n3pacTBuN, IBNJKeHHeTO Tp6Ba Ja e OTIIpeI Ha3aI, TBJ KATo KJIOHHTe ca IIO-JHJIaBn.

OIIACHOCT
Ako 3b6nte BJIa3at B KOHTaKT c eJIeKTPnuecka Jxua HIN Ka6eJ, HE IOKOCBAITE HOXA! MOXE IA IIPOBEXJA TOBA E N3KJIIOHTEJIHO ONACHO. IpbjTe xpaTope3a 3a OCHOBHaTa IpbXka, KOTo e H3OJInpaHa, H MHO BHNMaTEJIHO r IOCTaBeTe JaJIeU OT Bac. IIpbBO IpeKbChTe 3axpaHBaHeTO Ha cPra3aHaTa Jxua HIN Ka6eJ, CJIeT ToBA r H3BaIteOT HOxa. IIpn HeCnAsBaHe Ha Ta3N INHcTpkyKuIna MoXeJa ce IIpHuHHr TeKKn TeJIeCHN IOBpeH NIN cmbPt.

IIPEIYIPEJKJEHNE
IpeHn pa6oTa c HcTpyMeHTa pa3HcTeTe pa6OHTHn yuacTBk. MaxHeTe BcHcKN IpeImeTH KaTO
Българскн
3axpaHbau, eJIeKtpnueckn Ka6eJIn HJIN KIuN, KOHTO MoRat Ia ce 3axBaHaT B 3bOHTe Ha HOJa Ia IIpHuHHr TeXKN TeJIeCHN IOBpeJi.

IIPEUYIPEXJEHNE
He nouchTbaIe IIacTMacOBHte qactn c pa3TBOpHTeJI. IObeueTo IIaCTMacOBH qactn MORAT Ja ce IIOBpeJrT OT pa3TBOpHTeJI. IpeJIaRaHH B TbProBcKaTa MpeXa. H36bPWeTe 3aMbpcraBaHHa Ta, MacIoTO, Cma3KaTa H.T.H. OT HHCTpyMeHTa C YHCTa KbPiHa. 3a CmHa H3NoJ3BaHTe EHHCTBeHO opHnHaJIHN pe3epBHH qactn Ha Ryobi. Ako H3NoJ3BaTe IpyTH qactH, TOBa MoKe Ja IopOJN OIIaCHoCT HJIN Da IOBede IIOBpeH N IpOjYkTa.

BHIMAHNE
IIlaCTMaOBHTe YacTH He Tp6Ba HNKORA Ja BJIIN3aT B KOHTaKT Cbc CInHpauHa TeYHOCt, 6eH3HH, IpoIyKTHn Ha HeΦTeHa OCHOBA, IpoHnKBaIIu MaCJa N Ip. Te3N XHMHeecKn IIpoIyKTHcBbPkaT BeIeCTBa, KOHTO MoTa Jda IOBpeJrT, H3TbHrT INJn pa3pyIiAt IIlaCTMaCaTa.
ПОДПВЖКИ ПЕМОН
ПОДМЯHA HA HOЖА

IPEUYIPEXJEHNE
3b6nte Ha HOxCa MHOO ocTpn. Pp nppaOta c HOxHa IIocTabaIte pIte Cm MeJNy 3b6nte H He 3acTabaIte BIOLOXKeHne, PpN KOEt POCKyBaTe Ja cn IpeuHnTe NnCpeKTe pIte. HNKOTA He JOKOCBaIte 3b6nte H He N3BbPbBaIte IOIIpBxKa, KOrATo 6aTePnTa e IocTabeHa B INHCTpyMeHTa.
CBAJIaHE HA HOKA (BnKTe qHr. 6 n7)
I3BaIeTe 6aTepeHraTa ot Xpactope3a.
IocTaBeTe xpaTope3a Ha 6paTHo Bbpxy Te3rIx H maxHeTe YeTHpHte (4) BNHTa Ha cKOpocThaTaN KyTHA.
CbaJIeTe ckOpocThHaTa KyTHa (BHXTe Hr.6).
CbaJIeTe IIaCTHaTa MExJy IbTe HrJIi (BHXTe nIg.7).
MaxheTe 3acToOpraBaIaTa IaIb6a,IIIOcKaTa IIaIb6a H 3aIbPkaIaTa IIIACTINHa (BnKTe fHr.7).
IoppaBHeTe rbp6HHTe NcKObE.
BEJEXKA:OBpbHTeMOraTJa ce BnHHaTe EJbCaJIeKaTO rN OCBOOJNTe OT KJIe6OBeTe NM.
CbaJIeTe YeTHnPTe (4) BnHTa, KOHTo 3aKpeIIBaT HoJa.
ObaJIHnTe 6pbuH orpaHnUaBAt HoJa Ha xpactope3a. YBepete ce, ye 6pbuHTe Ha HoJa IraT IO6pe Ha mCTOTO cH. H3BaIeTe HOKa OT KyTHaHa HHCTpyMeHTa.
HIOCTABRHE HA HOXKA (BnKTe pHr. 6 n7)
IoppaBHeTe rbp6HHTe NcKObE.
IocTaBeTe HOB HOK B KUTnTa, KaTo ce yBepnTe, Ye o6pbHTe JraT IO6pe Ha MCTOTO cn. 3aBbPTeHOxKa, 3a Da BJe3e IIOJ D0JIHnO6pbu.
BEJEXKA: KoraTo BCnUKn eJIeMeHTn ca IIObpe IOIpaBHeHn, HOKbT JieCHO BIn3a B KyTna Ha JBnraTeJIa.
IocTaBeTe YeHnPeTe (4) BnHTa Ha Hoxa N Do6pe rN 3aTeHHeTe.
IocTaBeTe 3aJIbPkaAaTaPiJAcTHHa,IIIOckaTa IIIa6a H 3actOnOpBaAaTa IIIa6a.
IocTabete IIJaCTINHaTa HAd JBeTe INJH.
3axbaheTe n cKOpocThaTa KyTHa cYbC cBOTBeHTHe 4 BnHTa. 3aTeHerTe MHOrO IIOpe.

IIPEIYIPEJKJEHNE
YBepete ce, che cKOpocThaTa KytTne e IIObpe IocTabeHa, IIpei Da cIooJIte 6aTepeHra Ta I Da BkJIIOuHTe Xpactope3a. AKO He H3IIbJInHe ToBa Yka3aHHe, BbTpEiHHTe YacTH MoKe Ja ce IOKaKaT I Da IIpei3BVKaT 3IIOIlyKa IIN TOKOB yIap, KOeTo Ia IIpHuHH TeXKK TeJIeCHN IOBpeiN.
BEJEXKKA: Ako HOXbT ce ycyue cJIeI IocTabaHrTo My, IOBTOpe Yeka3aHnra To pa3JeJIi "CbaJIaHe Ha HOxA" N "IOCTabHa HOxA".
ПОДРьЖKA HA HOЖA HA XPACTOPE3A

IIPEDUYIPEXJEHNE
He 3a6paBraHTe, Ye 6e3Ka6eJHnTe HNCTpyMeHTn BnHaH MoT Ta Ce BKJIOuAT, Tb KATO HMaT HyKJa OT eJIeKTPnuecckn KOHTaKT. 3a Ja H36eHHeTe TeKKn TeJIeCn IIOBpei, BnHaR BaIte 6aTepeHrTa H6bJeTe H3KJIHOHTeJIHO BHNMaTeJIHn IIpr IIOIIpBxKa HJN IIpr IIOIMHa Ha HOka.

IIPEDUYIPEXJEHNE
3aДаИЗБЕгнTe TeKKN TeJIeCHN IOBpeHn,BAIteTe 6aTePnIyTa,KORATO Ie IIOIIpaBЯTe,IIOHCTBaTe HIN BAJIte TaCtN OT INHCTpyMeHTa.
ПОДРьЖKA HA HOЖA
Cma3BaIte HOka cJIeI BCja yIIOrpe6a.
PeIOBHO IPOBepaIte CTeIeHTa Ha H3HocBaHe Ha 3b6HTe H ce yBepTe, Ye Ha ca IIOBpeJeHH.
■Пи ПОДмЯнИЗПОЛ3BaIteВиHArHOpINHAJIHNYacTn.
CMA3BAHE HA HOKA
IzhbaTeTe 6aTepeHraTa OTo xpaTope3a.
3a IIO-JIecHa pa6oTa c HNCTpyMeHTa H IO-ⅡbJIbIg KINBOT Ha HOka CMA3BaIte HOka IIpeH N CJIeI BcKa yIOTpe6a. IIpeH Ja CMAKeTe HOka, I3BaIeTe 6aTePnHa T HIOCTaBeTe XpactOpe3a Bbpxy paBHa IOBbPxHocT. HaHeceTe JIeKo MToPOH MaJIO IIpoJbJIkeHHe Ha roPHnPa bHo HA HOka, KaKTO e IIOKA3aHO Ha φHr.8.
IIOHAKORA MOKeJa Ce HaJIOKn Ia CMAKeTe HOKa IIOBpeMe Ha pa6oTa. B To3N cIyaua H3KJIIOUeTe XpactOpe3a, H3BaIeTe 6aTePnHa I cMAKeTe HOKa.CJeI TOBa MOKeTeJa IIOHOBHTe pa6oTaTcN.HNKora He cMa3BaIte HOKa,IOKaTO XpactOpe3bT pa6OTn.
Българскн
3ATOUBAHE HA HOKA
H3yakaTe 3b6nte Ha HoXa Ja cnpaT HnBJIHO B IIOJoxKeHHeTO, NOKa3aHO Ha qnr. 9. TaKa Ie HMa IocTaTbUHO pa3cToaHne MeJx y 3b6nte I npEIIa3HTeJIHTe.
IzhbaTeTe 6aTepeHraTa ot xpaTope3a.
XBaHHe To Hoka B MeHReMe N 3aToUeTe BbHHaTa IOBbPxHOCT Ha BCEKN 3b6 c rJaIka, KpbIJa IINJa C IIbJIJKHa 203 MM N c dHaMeTbp O T 6,4 IN5,6 MM. BHIMAbaiTe Ja He IpomehnTe HAKIoHa Ha 3b6nte,IOKAto Rn IINHTe.
CbaJIeTe xpaTOpE3a OT MeHReMeTO,IOCTaBeTe 6aTePnHTa H IyChHeTe HNCTpyMeHtA. OTHOBO rO cIpTe, taKa Ye He3aToUeHHTe 3b6H Ja ca OTrope.
MaxheTe 6aTePnTa Ha xpaTOp3a H 3aToUeTe rOpHnTe 3b6n IIO cbIuHaun KaTO IIpeHN.
CMA3BAHE HA XPACTOPE3A
JaerePHTe Ha IPOJyKTA ca Cma3aHn C H3BecTHO KOJIHcTeBO BHCOKOKaueCTBeHa Cma3Ka, IOCTaTbUHO 3a IeJIINr JINBOT Ha MaIIHHaTa IIpn HopMaJIHN ycIIOBnHa EKCIIIOaTaIINr. 3aTOBa MaIIHHaTa HMA HUkJa OT IOnIbJIHNTEJIHO CMA3BaHe.

IIPEDUYIPEXJEHNE
He ce ONIHTBaIte Ia MoINHnIuPaTe MaIIHHaTa HIN Da NocTABrTe PInHaJLeJxHOCr, KOrTO He e IpeIopbUaHa B HAcTOrIIOTo PbKOBOJCTBO. PIn IOIO6HN IpOMeHN HMOINΦKaUN MOKe Ja ce CTnIHe Do HnPabNJHa YNtpe6a I da Ce Cb3JaAT ONaChN ycJIOBHra, KOrTO Ja IIpNUnHr T cepNo3HN TeJIeCHN IOBpeiN.

IPEUYIPEXJEHNE
ПоберяBaite peIOBHO xpaTOpE3a 3a chyIeHH HIN 3JIe ΦNKcnpAHn YacTH. YbepTe ce, Ye BCNUKn BnHTObe I ΦNKcnpaIIe JIeMeHTn ca IO6pe 3aTeRHaTH, 3a Ja ce HaMaJIIn OIIaChOcCTTa OT TeJXKN TeJIeCHN IOBpeI.
ПОДРьЖKA HA XPACTOPE3A
H3BaIeTe 6aTepeHra.

IIPEDUYIPEXJEHNE
3aДаИЗБЕгнTe TeKKN TeJIeCHN IOBpeHn, BaIteTe 6aTePryTa, KORATO Ie IOIIpaBryTe, IOUHCTBaTe HIN BAITHe YacTHn OT INHCTpyMeHTa.
I ONUHCTeTe xpactOpe3a C BJIaJHa KbPIIa, HAIIOEHa B MEK IIOUHCTBaII IIpeIIapAT.
He H3IOJI3BaIe CnJIHn IIpeIIapaTH 3a IOuHCTBaHe Ha KyTnIa HJIN Ha IpbXkKaTa - Te3N YacTH Ca IIJaCTMacOBn. MoKe Ja ce IIOBpeIaT OT OIIpeJeJIeHN apOMaTHn MacJa KaTO 6OpOBO HJIN JIMMOHeHO HJIN OT pa3TBOPHTeJIH KaTO KepocHH.
BHHMaHHe,IIpH BJIaRa MoKe Ia ce IIpHcHnTOKOB yIap. IOnCyIeTe IO6pe c MeKa H cyXa KbPna.
C MaJIka YeTka HJIN CbC cJa6a Bb3JyHHa cTpya IOnHcTeBeHTNJlaIOHHnTe OTBOpH Na KyTHra Ha 6aTepeHrTa H aJBnIgTaJIa.
BeHTnJIaIIOHHHe OTBOpN Tp86Ba BnHaRn Da ca OTIIyIeHH.
ПИБИРАЕ НАХРACTОPE3A
I OOnHCTeTe OCHOBHO xpaCTope3a, IpeJn Ia ro IprH6peTe. IprH6peTe xpactope3a Ha cyxo, IpoBoETpHBO H HeIOCTbIIHO 3a Deua MAcTo. He ro OCTaBMyTe B 6JIH3OcT IO Kopo3HBn MaTePnaJIn KaTO rpaIHhCKN XHMHKaJIn HJIN COJIN 3a pa3Mpa3BaHe.
IpeiHa IIpH6ePeTe xpaCTope3a, BnHaHn IocTaBnIe IpeHa3HHa KaIbΦ Ha HOxa, KaKTo e NOKa3aHO HaΦnr. 10.
BaTePnraTa ce npn6npa n 3apeKJa Ha XJaIHO MAcTo. KHBOTbT Ha 6aTePnraTa ce cBkpaIaBa Iprn IIO-BHcOKn I IO-HNcKN TeMIIepaTyph.
Hnkora He npnbpaTe 6aTepeHra, ako e pa3peHa. CJeIpa6oTa H3aKaaiTe 6aTepeHra Ta ce oxlaJn H he3a6aBHO Ja 3apeJeTe.
C TeueHHe Ha BpeMeTo BCnUKN 6aTeepHH HamaJIbBaT KaIauHTeTa cn Ha 3apeXJaHe. KoJIkOTO IIO-BnCOka e TeMIIepaTypaTa, ToJIKOBa IIO-6bP3O 6aTeepHrTa rY6N KaIauHTeTa cn Ha 3apeXJaHe. AKO He N3IOJ3BaTe xpactope3a 3Io-IpoIbJIxKHTeJIeH IepNoI, 3apeXJaHTe 6aTeepHra TcEKN Meecu IIIN Ha IBA Meecua. Taka IIe yIbJIxKHTe KINBOTa II.
TPETHPAHE HA OTIIaIbIu


Hnkora He n3XBpJIe Te eJIeKtpnueckn HNcTpymEnTH 3aeJHO c IOMaKHcKHe OITnAIBu. IIpeaIte Tn B IyHKT 3a peuNKJIpaHe. 3a IOBeYe INΦOpMaIIHa 3a cbOTBeTHaTa IIpoUeDpya 3a peuNKJIpaHe ce o6bPHeTe KbM JbPkaBHInTe HHCTHTUINHJIN KbM IIpoJaBaYa.
TTI warrants this outdoor product to be free of defects in material or workmanship for 24 months from the date of purchase by the original purchaser, subject to the limitations below. Please keep your invoice as proof of date of purchase.
This warranty is only applicable where the product is used for personal and non-commercial purposes. This warranty does not cover damage or liability caused by / due to misuse, abuse, accidental or intentional acts by user, improper handling, unreasonable use, negligence, failure by end user to follow operating procedures outlined in the user's manual, attempted repair by non-qualified professional, unauthorized repair, modification, or use of accessories and/or attachments not specifically recommended by authorized party.
This warranty does not cover belts, brushes, bags, bulbs or any part which ordinary wear and tear results in required replacement during warranty period. Unless specifically provided under applicable law, this warranty does not cover transportation cost or consumable items such as fuses.
This limited warranty is void if the product's original identification (trade mark, serial number, etc.) markings have been defaced, altered or removed or if product is not purchased from an authorized reseller or if product is sold AS IS and / or WITH ALL FAULTS.
Subject to all applicable local regulations, the provisions of this limited warranty are in lieu of any other written warranty, whether express or implied, written or oral, including any warranty of MERCHANTABILITY OR FITNESS FOR A PARTICULAR PURPOSE. IN NO EVENT SHALL WE BE LIABLE FOR SPECIAL, INCIDENTIAL, CONSEQUENTIAL OR INCIDENTAL DAMAGES. OUR MAXIMUM LIABILITY SHALL NOT EXCEED THE ACTUAL PURCHASE PRICE PAID BY YOU FOR THE PRODUCT.
This warranty is valid only in the European Union, Australia and New Zealand. Outside these areas, please contact your authorized Ryobi dealer to determine if another warranty applies.
Nom du fabricant : Homelite Far East Co., Ltd., 24/F, CDW Building, 388 Castle Peak Road, Tsuen Wan, Hong Kong.

DECLARATION OF CONFORMITY
We declare under our sole responsibility that this product is in conformity with the following standards or standardized documents.
EN60745, EN50366, EN61000, EN55014, ISO11680, 98/37/EC, 89/336/EEC, 2000/14/CEE
Sound pressure level LpA=71dB(A), KpA=3 dB(A)
Sound power level LwA=91dB(A), KwA=3 dB(A)
Weighted root mean square acceleration value 1.0m / s^2 K = 1.5m / s^2 Date of issuance Issued by
Technical documents are kept by the Quality Assurance Department - Regulatory Team, Techronic Appliances Factory, Sam Tuen Management Zone, Hou Jie Town, Dongguan City, Guangdong 523941, China.
Manufacturer name: Homelite Far East Co., Ltd., 24/F, CDW Building, 388 Castle Peak Road, Tsuen Wan, Hong Kong.

Name des Herstellers: Homelite Far East Co., Ltd., 24/F, CDW Building, 388 Castle Peak Road, Tsuen Wan, Hong Kong.

Fabricante: Homelite Far East Co., Ltd., 24/F, CDW Building, 388 Castle Peak Road, Tsuen Wan, Hong Kong.

Nome del produttore: Homelite Far East Co., Ltd., 24/F, CDW Building, 388 Castle Peak Road, Tsuen Wan, Hong Kong.

DECLARACHO DE CONFORMIDADE
Declaramos, sob{nossa exclusiva responsabilité, que este produit cumpre as segentes normas ou documents normativos. EN60745, EN50366, EN61000, EN55014, ISO11680, 98/37/EC, 89/336/EEC, 2000/14/CEE
Nivel de pressao acustica LpA=71dB(A), KpA=3 dB(A)
Nivel de potencia acustica LwA=91dB(A), KwA=3 dB(A)
Valor da accelerationa da media quadratica ponderada 1.0 m/s², K=1.5 m/s²
Nome do fabricante: Homelite Far East Co., Ltd., 24/F, CDW Building, 388 Castle Peak Road, Tsuen Wan, Hong Kong.

CONFORMITEITSVERKLARING
Fabrikantens navn: Homelite Far East Co., Ltd., 24/F, CDW Building, 388 Castle Peak Road, Tsuen Wan, Hong Kong.

SAMSVARSEKLAERING
Vi erklær pæ eget ansvar at detteprodukter er i samsvar med følgende standarder og normative dokumenter:
EN60745, EN50366, EN61000, EN55014, ISO11680, 98/37/EC, 89/336/EEC, 2000/14/CEE
Lydtrykkniva LpA=71dB(A), KpA=3 dB(A)
Lydstyrkenivå LwA=91dB(A), KwA=3 dB(A)
Veid kvadratisk middelverdi av aktselerasjonsverdien
1.0 m/s², K=1.5 m/s²
Ustededsesdato
Utstedt av
Den tekniske dokumentasjonen beholdes av: Avdeling for kvalitetssikring - standardiseringsteamt, Techtronic Appliances Factory, Sam Tuen Management Zone, Hou Jie Town, Dongguan City, Guangdong 523941, Kina.
Produsentens navn: Homelite Far East Co., Ltd., 24/F, CDW Building, 388 Castle Peak Road, Tsuen Wan, Hong Kong.

TODISTUS STANDARDIN-MUKAISUDESTA
Valmistaja: Homelite Far East Co., Ltd., 24/F, CDW Building, 388 Castle Peak Road, Tsuen Wan, Hong Kong.

H H YMMOP H
e UTEUvWOS OTo TPOIOV auto uuMOPPOUTa TPOCSaKoAovOAnPOTUTnTTOINueyepα:
EN60745, EN50366, EN61000, EN55014, ISO11680, 98/37/EC, 89/336/EEC, 2000/14/CEE
'Ovouα Tou κατακειαστή: Homelite Far East Co., Ltd., 24/F, CDW Building, 388 Castle Peak Road, Tsuen Wan, Hong Kong.
SZABVÁNY RENDELKEZÉSEK
Gyartoneve:HomeliteFarEastCo.,Ltd.,24/F,CDWBuilding,388
Castle Peak Road, Tsuen Wan, Hongkong.

PROHLÁŠENÍ O SHODE
Castle Peak Road, Tsuen Wan, Hong Kong.

3AABJEHNE O COOTBETCTBHH CTAHJAPTAM
MbI CO BcEi OTBeTCTBHeHHOCTbI 3aBJIaEM, YTO HAcTOnIaIpa IPOJyKIIIA COOTBeTCTByET HIXe CJeJyHOIIHM HOpMaH I JOKyMeHTaM:
EN60745, EN50366, EN61000, EN55014, ISO11680, 98/37/EC, 89/336/EEC, 2000/14/CEE
YpOBeHb akyCTnueCKoTO daBJIeHHa LpA=71dB(A), KpA=3 dB(A)
YpOBeHb akyctHueckoMooHocTH LwA=91dB(A),KwA=3dB(A)
BeJIuHnHa yckopeHnna cpeHne yMepeHHoN KBaJpaTHueCKO
1.0 m/s², K=1.5 m/s²
Дага
3aBHTeJb
TexHHueCKA JOKUMeHTaIINXpAHITcB B OTJTeJIe KaHeCTBa - rpyIIa cTaNaprtH3auH, Techtronic Appliances Factory, Sam Tuen Management Zone, Hou Jie Town, Dongguan City, Guangdong 523941, KHP.
Hannemohabnne H3rOToBHTeJIa: Homelite Far East Co., Ltd., 24/F, CDW Building, 388 Castle Peak Road, Tsuen Wan, TOnkOHr.

DECLARATIE DE CONFORMITATE
Numele producatorului: Homelite Far East Co., Ltd., 24/F, CDW Building, 388 Castle Peak Road, Tsuen Wan, Hong Kong.

DEKLARACJA ZGODNOSCI
Ime proizvajalca:Homelite Far East Co., Ltd., 24/F, CDW Building, 388 Castle Peak Road, Tsuen Wan, Hong Kong.

DEKLARACija O USKLA-ENOSTI
Odgovorno izjavljujemo da je ovaj proizvod u skladu sa sljedećim normama ili normiranim dokumentima:
EN60745, EN50366, EN61000, EN55014, ISO11680, 98/37/EC, 89/336/EEC, 2000/14/CEE
Razina akustičnog pritiska
LpA = 71dB(A),KpA = 3dB(A)
Razina jačine zvuka
LwA=91dB(A), KwA=3 dB(A)
Ponderirana vrijednost ubrzanja RMS-a1.0 m/s², K = 1.5m / s^2
Datum izdavanja
lzdao
Tehničku dokumentaciju Čuva: Odjel za osiguranje kvalitete -ekipa za normizaciju, Techtronic Appliances Factory, Sam Tuen Management Zone, Hou Jie Town, Dongguan City, Guangdong 523941, Kina.
Ime proizvodača: Homelite Far East Co., Ltd., 24/F, CDW Building, 388 Castle Peak Road, Tsuen Wan, Hong Kong.

UYGUNLUK BELGESI
Uretici adi: Homelite Far East Co., Ltd., 24/F, CDW Building, 388 Castle Peak Road, Tsuen Wan, Hong Kong.

VASTAVUSDEKLARATSIOON
Me kinnitame omal vastutusel, et see toode vastab jargmistele standarditele voi standardiseeritud dokumentidele:
EN60745, EN50366, EN61000, EN55014, ISO11680, 98/37/EC, 89/336/EEC, 2000/14/CEE
Helirohutase
LpA = 71dB(A) KpA = 3dB(A)
Helivöimsuse tase
LwA=91dB(A), KwA=3 dB(A)
Castle Peak Road, Tsuen Wan, Hong Kong.

ATITIKTIES DEKLARACIJA
Razotajuznemums: Homelite Far East Co., Ltd., adrese: 24/F, CDW Building, 38/8 Castle Peak Road, Tsuen Wan, Hong Kong.

PREHLÁSENIE O SHODE
Meno výrobcu: Homelite Far East Co., Ltd., 24/F, CDW Building, 388 Castle Peak Road, Tsuen Wan, Hong Kong.
Ha haia oTOBOPHOCT JeKJIapHpAME, Ye To3N IPOJyKT cBoTBeTcBA Ha CJIeHNHe CTaHApTN H cTaHApTN3HpaHn DOkymeHTH:
98/37/EC, 89/336/EEC
AkyctuHOnHaJIraHe
LpA = 71 ΜB(A), KpA=3 ΜB(A)
CnlaHaⅢyMa
LwA=91πB(A),KwA=3πB(A)
I3MepeHo cpeHNo yckopeHne
1.0m / s^2 K = 1.5m / s^2
IataHaH3JaBaHe
N3daBa ce ot
TexHHuecKaTa JOKyMeHTaIe Ce Ia3H O:OT:OteJI 3a oChrypBaHe Ha KaHeCTBOTO -ekHI IO cTaNdApTrHaauIN, Techronic Appliances Factory, Sam Tuen Management Zone, Hou Jie Town, Dongguan City, Guangdong 523941, Chine.
Пюнзворочи: Homelite Far East Co., Ltd., 24/F, CDW Building, 388 Castle Peak Road, Tsuen Wan, Hong Kong.
RYOBI TECHNOLOGIES (UK) LIMITED.
Medina House,
Fieldhouse Lane, Marlow,
Buckinghamshire,
SL7 1TB,
UNITED KINGDOM
Tel: +44 (0) 1628 894400
Fax: +44 (0) 1628 894401
Technical Helpline: + 44 (0) 800 389 0305
RYOBI TECHNOLOGIES SAS
Zoning artisanal - bathtub 5
B - 1410 Waterloo
BELGIQUE
Tel: +32(0) 2357 8140
Fax: +32(0) 2357 8149
RYOBIITALIA
Via Vincenzo Borelli, 13
I - 41100 Modena
ITALIA
Tel: +39(0) 5923 8408
Fax: +39(0) 5924 6960
RYOBI IBÉRICA
388 Castle Peak Road,
Tsuen Wan, Hong Kong.
Tel: +852 2402 6888
RYOBI TECHNOLOGIES GMBH
Itterpark 4
D-40724 Hilden
DEUTSCHLAND
Tel: +49 (0) 2103 2958-0
Fax: +49 (0) 2103 2958-29
RYOBI TECHNOLOGIES GMBH
Building B, Rosehill Industrial Estate,
3 Shirley Street,
Rosehill NSW 2142
AUSTRALIA
Tel: (02) 8892 1800 or 1300 361 505
Fax: 1800 807 993
TECHTRONIC INDUSTRIES (NZ) LIMITED.
27 Clemow Drive, Mt Wellington
PO Box 12-806, Penrose, Auckland
NEW ZEALAND
Tel: +64 (0) 9573 0230
Free Call: +64 0800 279 624
Fax: +64 (0) 9573 0231
A&M MIDDLE EAST FZCO
P.O.Box 61254
Jedel Ali, Dubai,
UNITED ARAB EMIRATES
Tel.: +9714 8861399
Fax: +9714 8861400