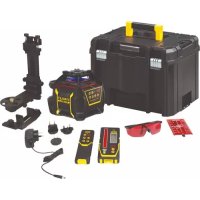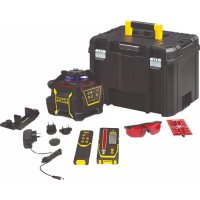
Fatmax FMHT77449 - Laser pointer STANLEY - Free user manual and instructions
Find the device manual for free Fatmax FMHT77449 STANLEY in PDF.



User questions about Fatmax FMHT77449 STANLEY
0 question about this device. Answer the ones you know or ask your own.
Ask a new question about this device
Download the instructions for your Laser pointer in PDF format for free! Find your manual Fatmax FMHT77449 - STANLEY and take your electronic device back in hand. On this page are published all the documents necessary for the use of your device. Fatmax FMHT77449 by STANLEY.
USER MANUAL Fatmax FMHT77449 STANLEY
Please read these instructions before operating the product.




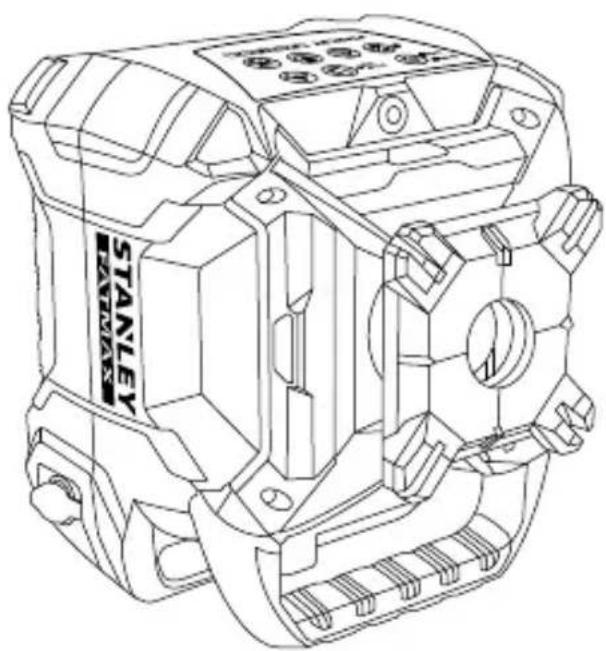



RL600
RL600L
RL700L
RL 750L-G







1
②
3
(4)
Contents
- User Safety
- Keypad and LEDs
- Battery Safety
- Batteries and Power
Using the Accessories - Turning the Laser On/Off
Performing Accuracy Check and Calibration - Operating the Laser
Using the Remote Control
Using the Detector - Maintenance and Care
- Specifications
User Safety
The definitions below describe the level of severity for each signal word. Please read the manual and pay attention to these symbols.

DANGER: Indicates an imminently hazardous situation which, if not avoided, will result in death or serious injury.

WARNING: Indicates a potentially hazardous situation which, if not avoided, could result in death or serious injury.

CAUTION: Indicates a potentially hazardous situation which, if not avoided, may result in minor or moderate injury.
NOTICE: Indicates a practice not related to personal injury which, if not avoided, may result in property damage.
If you have any questions or comments about this or any Stanley tool, go to http://www.2helpU.com.

WARNING:
Read and understand all instructions. Failure to follow the warnings and instructions in this manual may result in serious personal injury.
SAVE THESE INSTRUCTIONS

WARNING:
Carefully read the Safety Instructions and Product Manual before using this product. The person responsible for the instrument must ensure that all users understand and adhere to these instructions.

CAUTION:
While the laser tool is in operation, be careful not to expose your eyes to the emitting laser beam. Exposure to a laser beam for an extended time may be hazardous to your eyes.

CAUTION:
Glasses are supplied in some of the laser tool kits.
These are NOT certified safety glasses. These glasses are ONLY used to enhance the visibility of the beam in brighter environments or at greater distances from laser source.
SAVE THESE INSTRUCTIONS

WARNING:
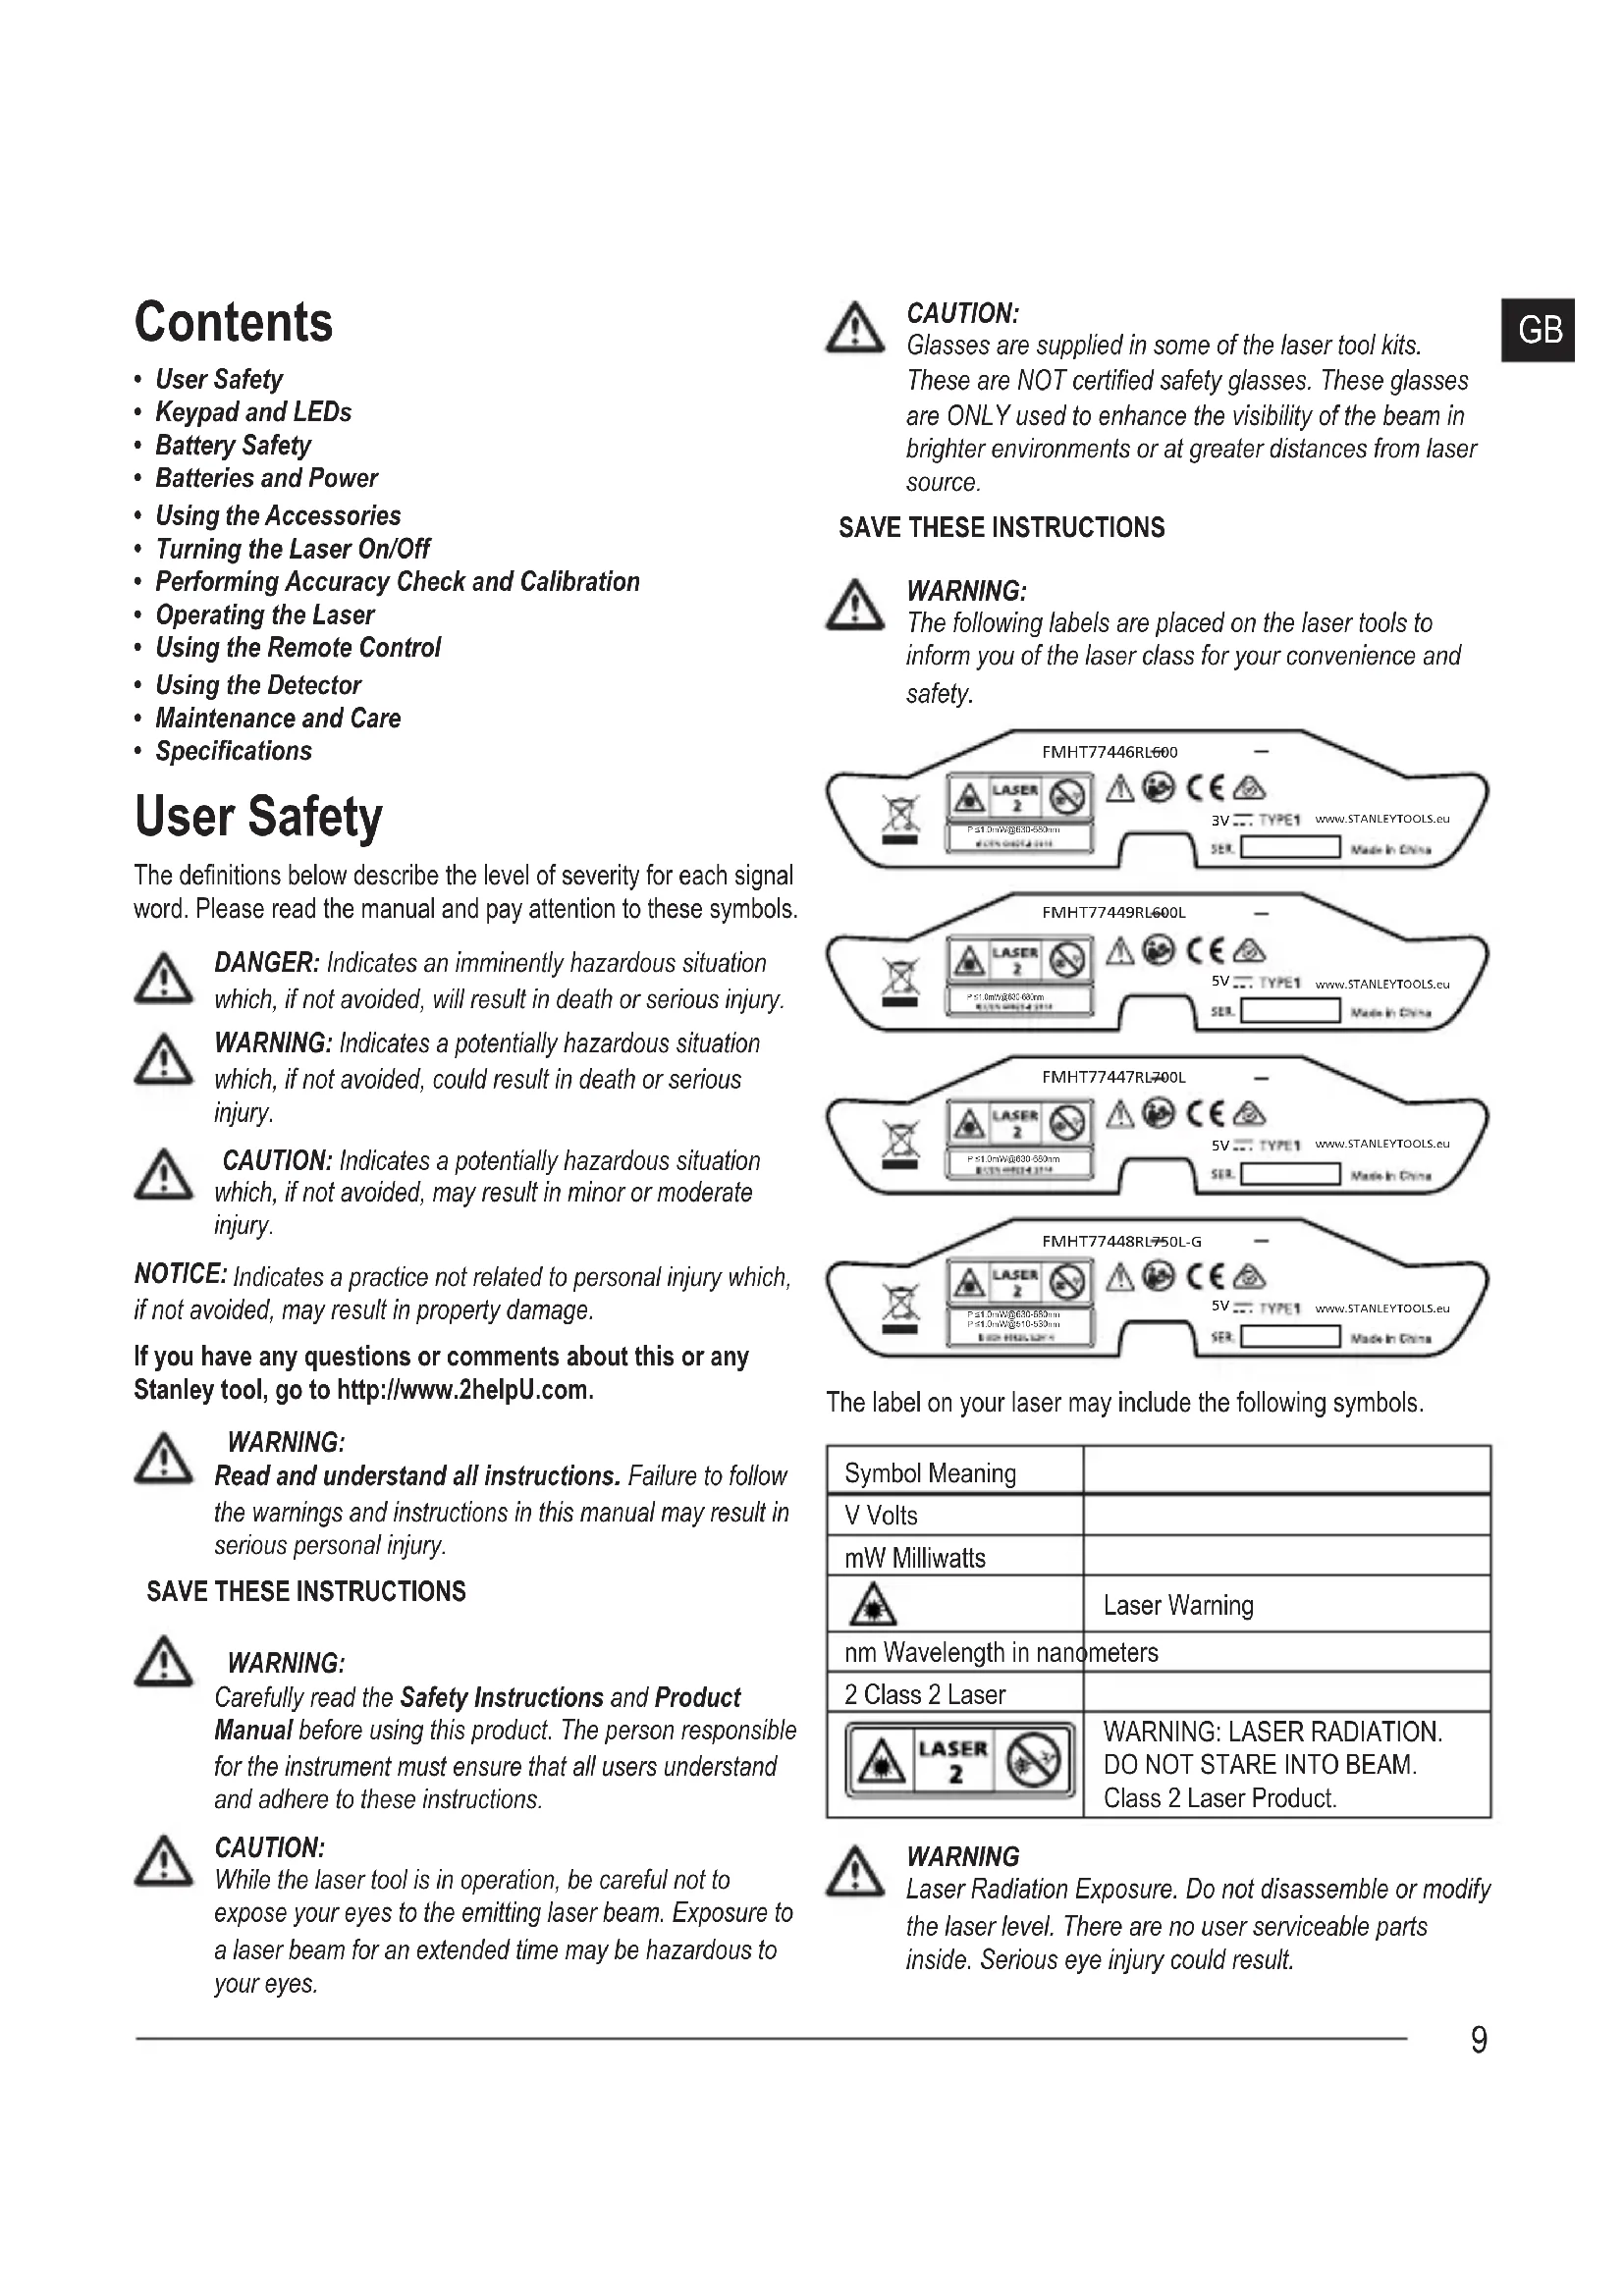
The following labels are placed on the laser tools to inform you of the laser class for your convenience and safety.
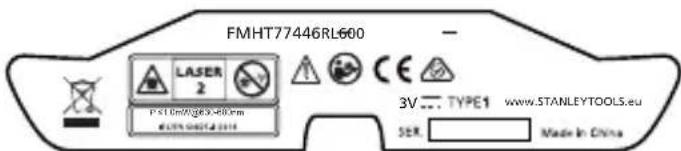
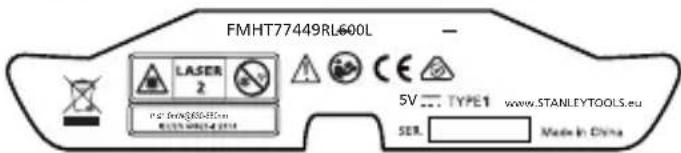
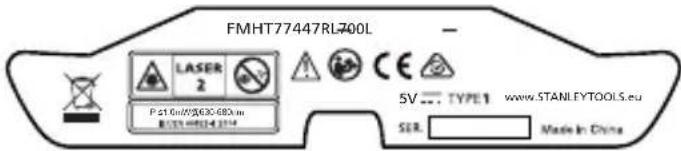
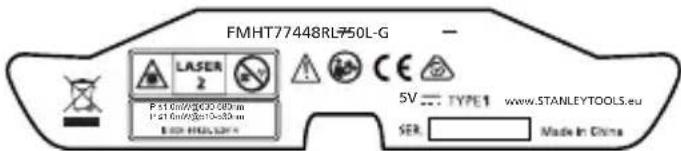
The label on your laser may include the following symbols.
| Symbol Meaning | |
| V Volts | |
| mW Milliwatts | |
| A | Laser Warning |
| nm Wavelength in nanometers | |
| 2 Class 2 Laser | |
| LASER 2 | WARNING: LASER RADIATION. DO NOT STARE INTO BEAM. Class 2 Laser Product. |

WARNING
Laser Radiation Exposure. Do not disassemble or modify the laser level. There are no user serviceable parts inside. Serious eye injury could result.
GB
- Do not operate the laser in explosive atmospheres, such as in the presence of flammable liquids, gases, or dust. This tool may create sparks which may ignite the dust or fumes.
- Store an idle laser out of reach of children and other untrained persons. Lasers are dangerous in the hands of untrained users.
- Tool service MUST be performed by qualified repair personnel. Service or maintenance performed by unqualified personnel may result in injury. To locate your nearest Stanley service center go to http://www.2helpU.com.
- Do not use optical tools such as a telescope or transit to view the laser beam. Serious eye injury could result.
- Do not place the laser in a position which may cause anyone to intentionally or unintentionally stare into the laser beam. Serious eye injury could result.
- Do not position the laser near a reflective surface which may reflect the laser beam toward anyone's eyes. Serious eye injury could result.
- Store an idle laser out of reach of children and other untrained persons. Lasers are dangerous in the hands of untrained users.
- Turn the laser off when it is not in use. Leaving the laser on increases the risk of staring into the laser beam.
- Do not modify the laser in any way. Modifying the tool may result in hazardous laser radiation exposure.
- Do not operate the laser around children or allow children to operate the laser. Serious eye injury may result.
- Do not remove or deface warning labels. If labels are removed, the user or others may inadvertently expose themselves to radiation.
- Position the laser securely on a level surface. If the laser falls, damage to the laser or serious injury could result.
Personal Safety
- Stay alert, watch what you are doing, and use common sense when operating the laser. Do not use the laser when you are tired or under the influence of drugs, alcohol, or medication. A moment of inattention while operating the laser may result in serious personal injury.
- Use personal protective equipment. Always wear eye protection. Depending on the work conditions, wearing protective equipment such as a dust mask, nonskid safety shoes, hard hat, and hearing protection will reduce personal injury.
Tool Use and Care
- Follow instructions in the Maintenance and Care section of this manual. Use of unauthorized parts or failure to follow Maintenance and Care instructions may create a risk of electric shock or injury.
Keypad and LEDs Keypad
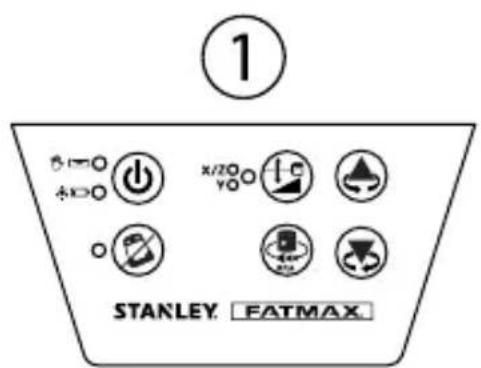
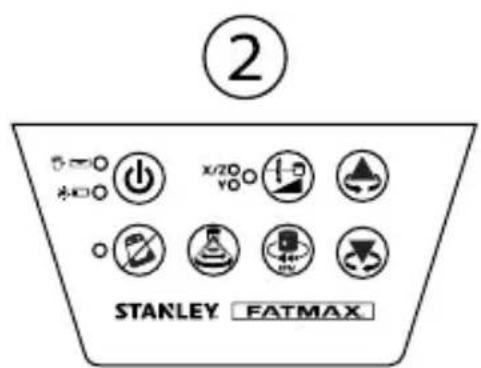
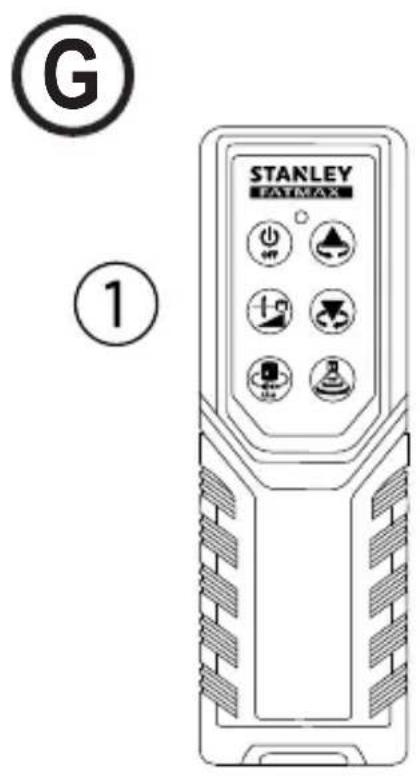
To reference keypad and LED display, see Figure ()1 (RL 600 and RL 600L) or Figure ()2 (RL 700L and RL 750L-G).

Power ON/OFF Key

Tilt Warning ON/OFF Key

Scan Mode Key
RL 700L and RL 750L-G only.

Manual Slope Mode Key

Rotation Speed Key

Up Arrow Key (counterclockwise)

Down Arrow Key (clockwise)
LEDS
| Power LED | |
| Solid Green • Charging complete. • Auto-Levelling Complete. | |
| Flashing Green • Laser Tool is Auto-Levelling. • In Calibration and/or Default Tilt Warning Set Up. | |
| Flashing Red | • Low Battery. |
| Solid Red RL 600L, RL 700L, & RL 750L-G | • Battery needs recharging, power supply required. • Hot/Cold battery delay or cell failure. Laser can be operated by adapter power. |
Manual LED


Flashing Red - Manual Mode ON (Auto-Levelling OFF).
Power LED & Manual LED
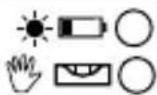
Alternately Flashing Green and Red
- Out of Leveling Compensation Range.
Tilt Warning LED

Solid Red · Tilt Warning ON.
Flashing Red
Out of level.
X/Y Select LED


Solid Green · X Axis Adjust Slope Mode.
Solid Red
- Y Axis Adjust Slope Mode.
Flashing Green · X Axis at Maximum Allowed Slope in Slope Mode.
- X axis adjust Calibration Mode.
Flashing Red
-
Y Axis at Maximum Allowed Slope in Slope Mode.
-
Y axis adjust Calibration Mode.
Battery Safety
The RL 600 is powered by alkaline batteries. The RL 600L, RL 700L, and RL 750L-G are powered by a Li-ion battery.

WARNING:
To reduce the risk of injury, the user must read the product User Manual, the Laser Safety Manual, and the Battery Safety Manual.

WARNING:
The battery and charging/power adapter can be damaged if damp. Always store and charge the tool in a dry and covered place.

Always insert batteries correctly with regard to polarity (+ and -), as marked on the battery and the equipment. Do not mix old and new batteries.
Replace all batteries at the same time with new batteries of the same brand and type.

WARNING:
Batteries can explode, or leak, and can cause injury or fire. To reduce this risk:
- Carefully follow all instructions and warnings on the battery label and package.
- Do not mix battery chemistries.
- Do not dispose of batteries in fire.
- Keep batteries out of reach of children.
- Remove batteries if the device will not be used for several months.
- Do not short battery terminals.
- Do not charge disposable batteries.
- Remove dead batteries immediately and dispose of per local codes.
End of Life
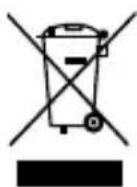
DO NOT dispose of this product with household waste.
ALWAYS dispose of batteries per local code.
PLEASE RECYCLE in line with local provisions for the collection and disposal of electrical and electronic waste under the WEEE Directive.
EC-Declaration of Conformity Radio Equipment Directive

Stanley Fatmax Self-Leveling Rotary Laser FMHT77446, FMHT77449, FMHT77447, FMHT77448
Stanley hereby declares that the Stanley Fatmax Self-Leveling Rotary Laser FMHT77446/FMHT77449/FMHT77447/ FMHT77448 is in compliance with the Directive 2014/53/EU and to all applicable EU directive requirements.
The full text of the EU Declaration of Conformity can be requested at Stanley Tools, Egide Walschaertsstraat 14-16, 2800 Mechelen, Belgium or is available at the following internet address: www.2helpU.com.
Search by the Product and Type Number indicated on the nameplate.

GB
Stanley Tools declares that the CE Mark has been applied to this product in accordance with the CE Marking Directive 93/68/EEC.
This product conforms with IEC/EN60825-1:2014.
Batteries and Power Battery Installation
Laser Tool Battery Installation
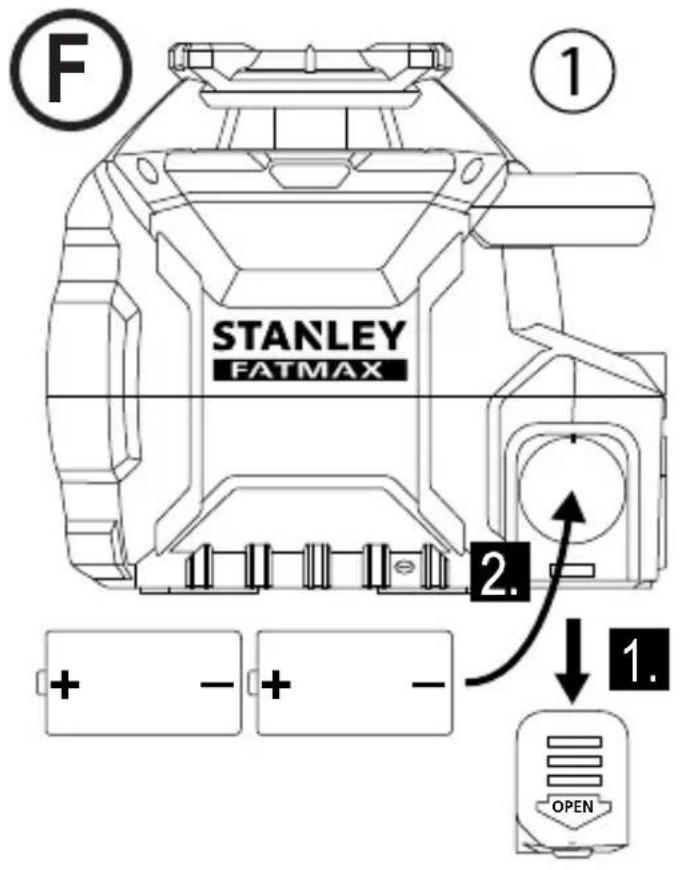
RL600
See Figure E①
- Press battery compartment cover and slide out.
- Install two new D cell batteries. Orient batteries correctly when placing into laser tool.
- Securely close and lock battery compartment cover.
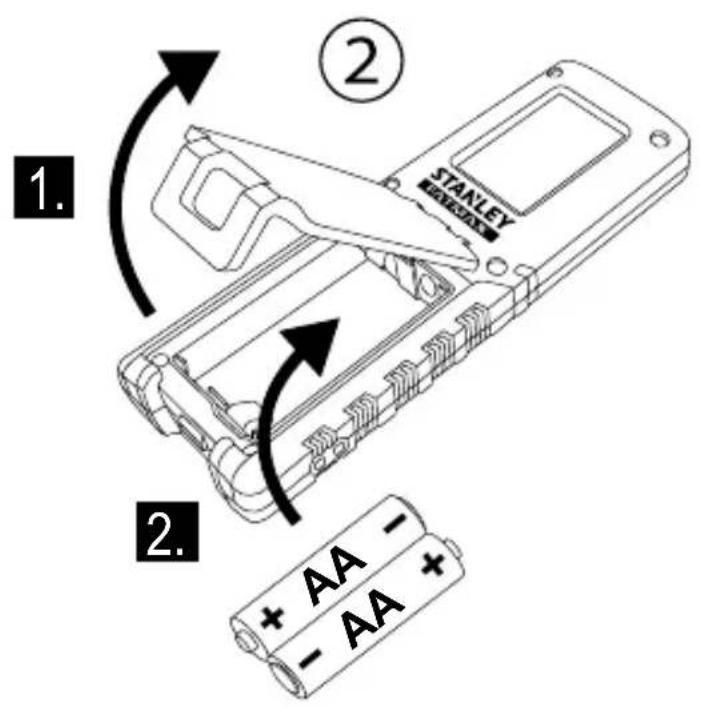
Remote Control Battery Installation RL 600L, RL 700L, and RL 750L-G
See Figure G②
- Open battery compartment by unlatching cover.
- Install two new AA batteries. Orient batteries correctly when placing into laser tool.
- Securely close and lock battery compartment cover.
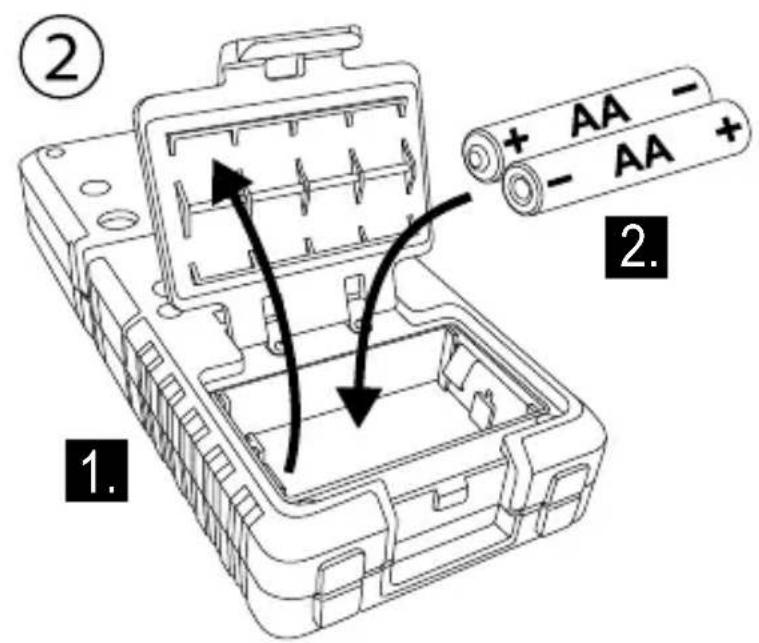
Detector Battery Installation
See Figure C2
- Open battery compartment by lifting open battery cover.
- Install two new AA batteries. Orient batteries correctly when placing into laser tool.
- Securely close and lock battery compartment cover.

WARNING:
Pay close attention to the battery holder's (+) and (-) markings for proper battery insertion. Batteries must be of same type and capacity. Do not use a combination of batteries with different capacities remaining.
Charging the Li-ion Battery
RL 600L, RL 700L, and RL 750L-G
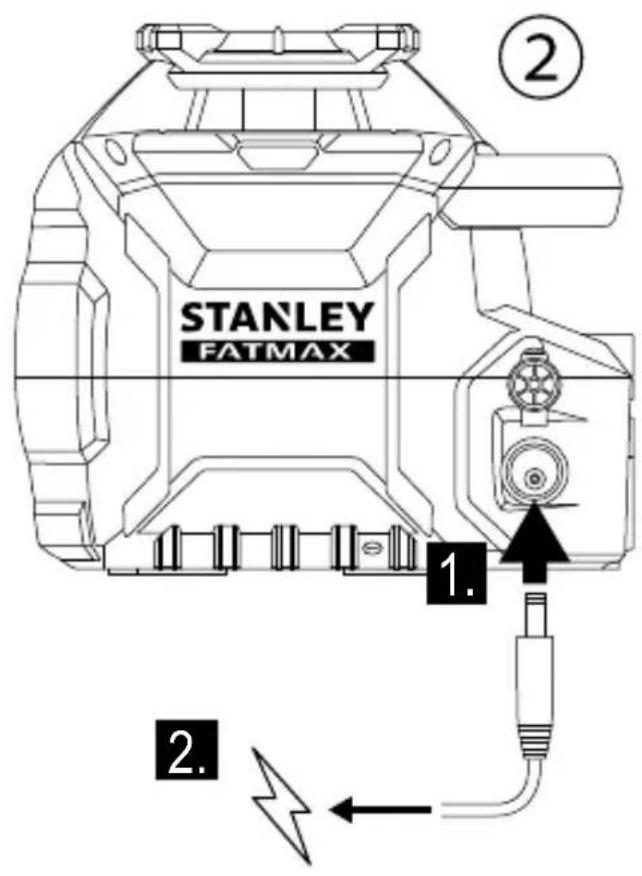
See Figure ②
-
Plug charging/power adapter plug into charging jack of laser tool.
-
Plug charging/power adapter into power outlet (110 V or 220 V) with appropriate plug receptacle.
The LED will light RED during charge.
- Leave battery to charge for approximately 7 hours to reach full charge.
The LED will light GREEN when charge is complete. - When battery is fully charged unplug the charging/power adapter from laser tool and power outlet.

WARNING: Charge laser only with the power adaptor supplied. Using any other type of charger may result in damage and/or personal harm.
Operating with Charging/Power Adapter
- Laser tool can operate while plugged into charging/power adapter.
- Functions and controls of laser tool are the same as when not plugged into charging/power adapter.
Using the Accessories

CAUTION: Do not leave the laser tool unattended on an accessory without fully tightening the mounting screw. Failing to do so may lead to the laser tool falling and sustaining damage.
Mounting Bracket
RL 700L and RL 750L-G
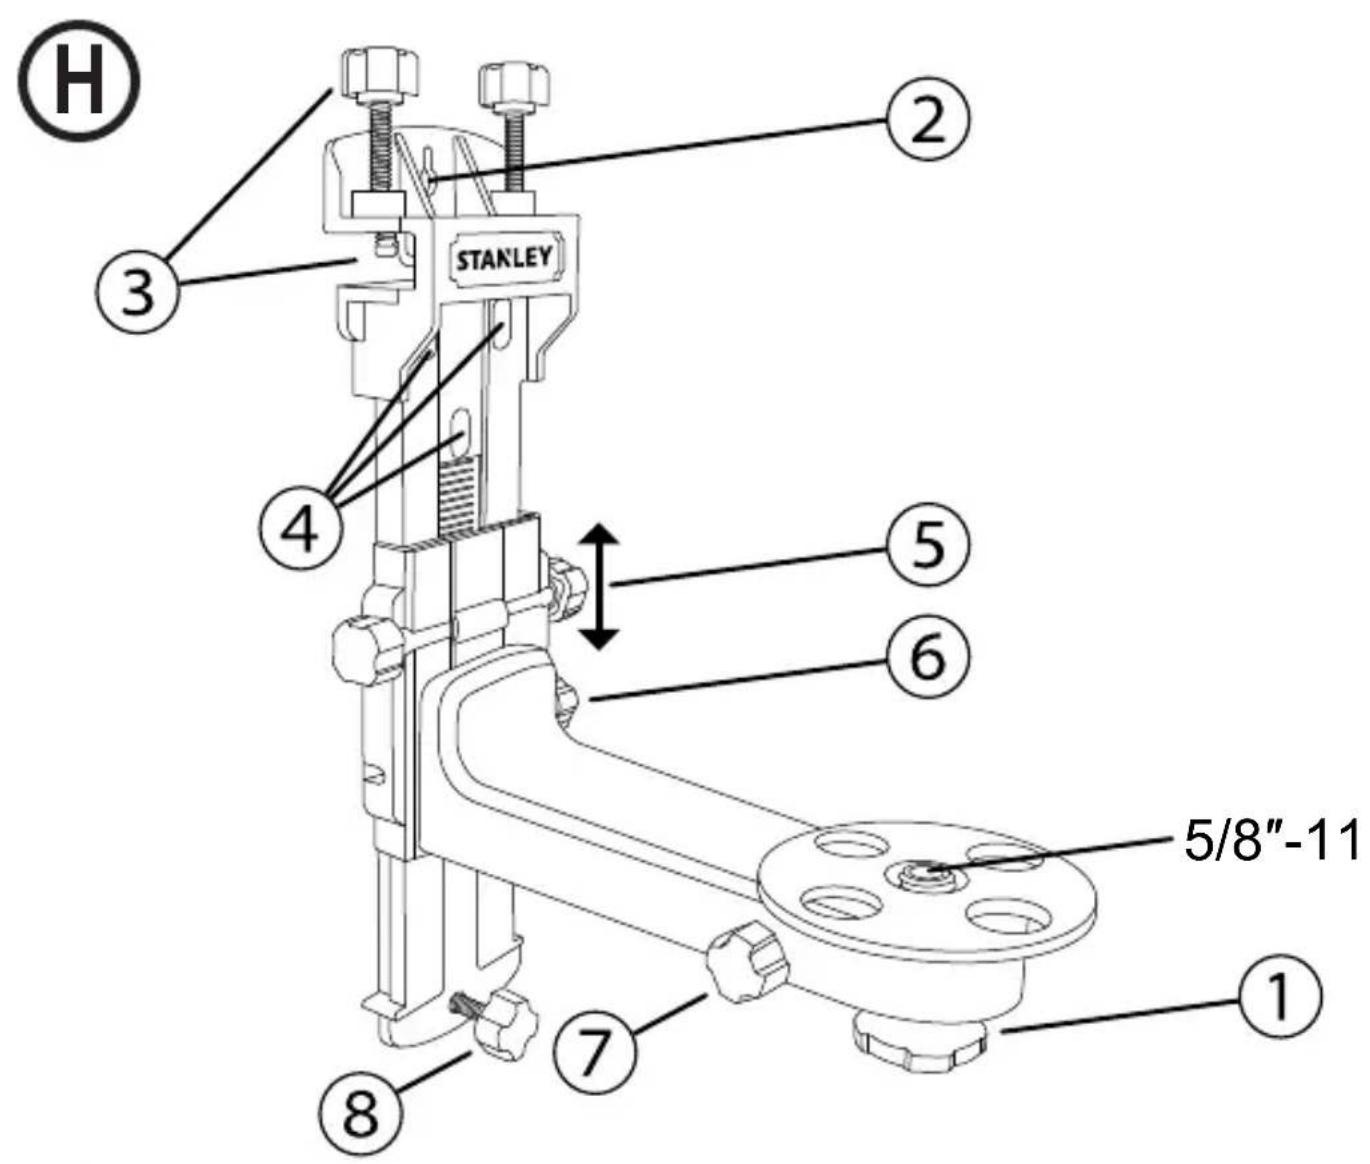
See Figure H
NOTE:
- It is best practice to support the laser tool with one hand when placing or removing the laser tool from an accessory.
-
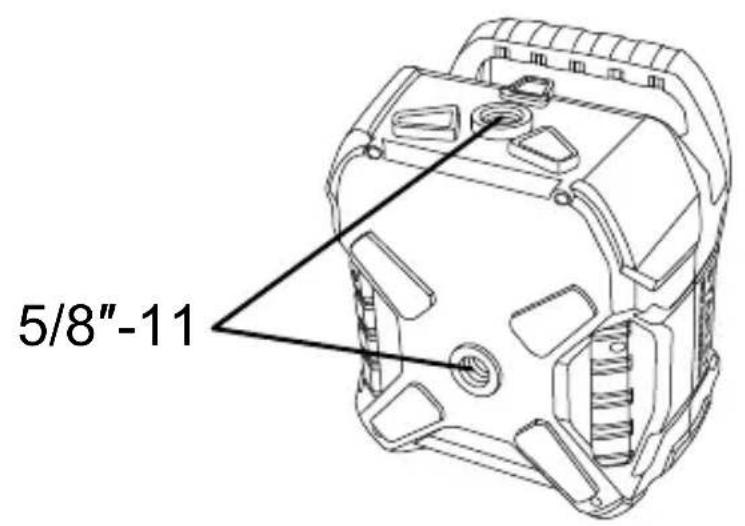
If positioning over a target, partially tighten the 5/8 "11 screw mount, align laser tool, and then fully tighten the 5/8 "11 screw mount.
-
Securely position the Mounting Bracket using one of the following methods:
-
Hang the Mounting Bracket from a wall using the Keyhole Slot (Figure ②).
- Attach the Mounting Bracket to a ceiling edge using the Ceiling Grid Clamp (Figure ③).
- Use the Keyhole Mount (Figure ④) with any compatible accessory.
2 Orient the bracket mounting surface so it is approximately horizontal.
3. Mount one of the laser tool's attachment points (Figure ①) to the bracket's 5/8 -11 mounting screw and tighten the tightening knob (Figure ①).
4. Use any of the following parts on the Mounting Bracket to further adjust the position of the laser tool.
- The Vertical Fine Adjust Knob (Figure ⑤) moves the laser up and down the vertical track. The Vertical Adjust Lock Knob (Figure ⑥) secures the vertical position.
- The Rotary Fine Adjust Knob (Figure ①⑦) rotates the laser tool.
The Wall Tilt Adjustment Knob (Figure ⑧) adjusts the angle between the Mounting Bracket and the wall.
Tripod Mount
See Figure K
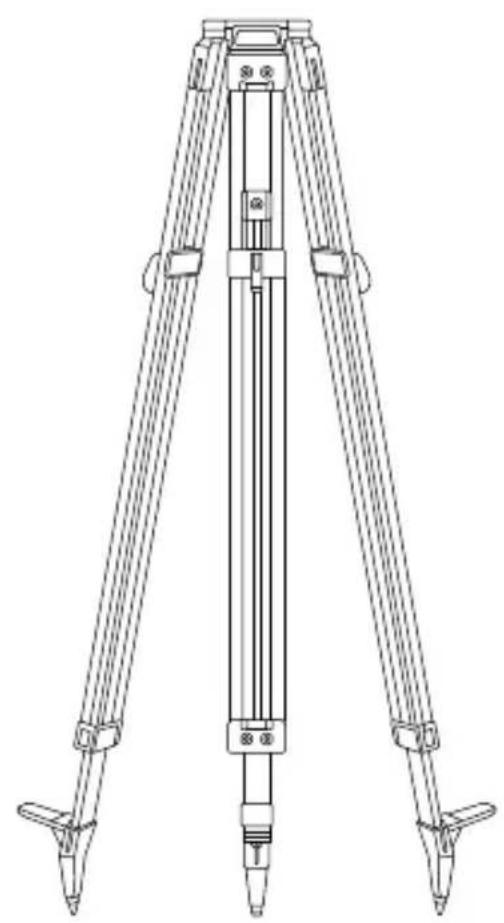
- Choose a location for the tripod near the center of the area of interest where it will not be disturbed.
- Extend tripod legs as required. Adjust legs so the tripod head is approximately horizontal.
- Mount one of the laser tool's attachment points (Figure ①) to the tripod using a 5/8 -11 mounting screw then tighten the mounting screw.
Target Card
See Figure
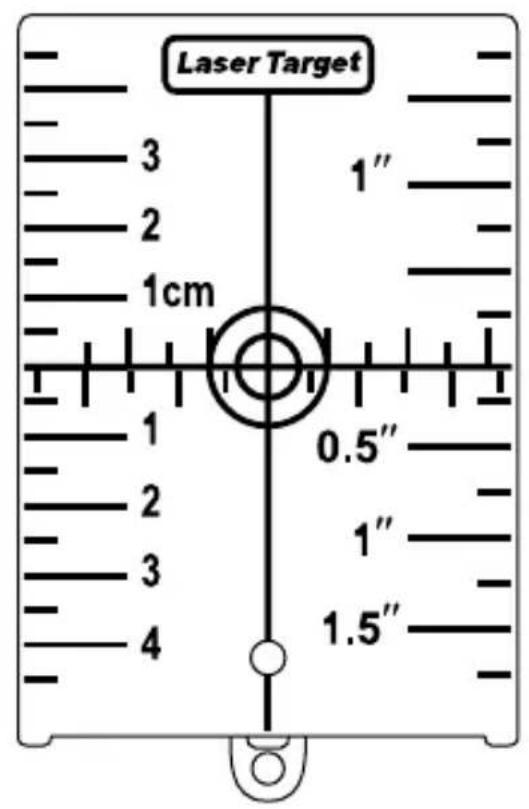
Some laser kits include a Laser Target Card to aid in locating and marking the laser beam. The target card enhances the visibility of the laser beam as the beam crosses over the card. The card is marked with standard and metric scales. The laser beam passes through the red or green plastic and reflects off of the reflective tape on the reverse side. The magnet at the top of the card is designed to hold the target card to ceiling tracks or steel studs to determine plumb and level positions. For best performance when using the Target Card, the front of the card should be facing you.
Laser Enhancement Glasses
See Figure
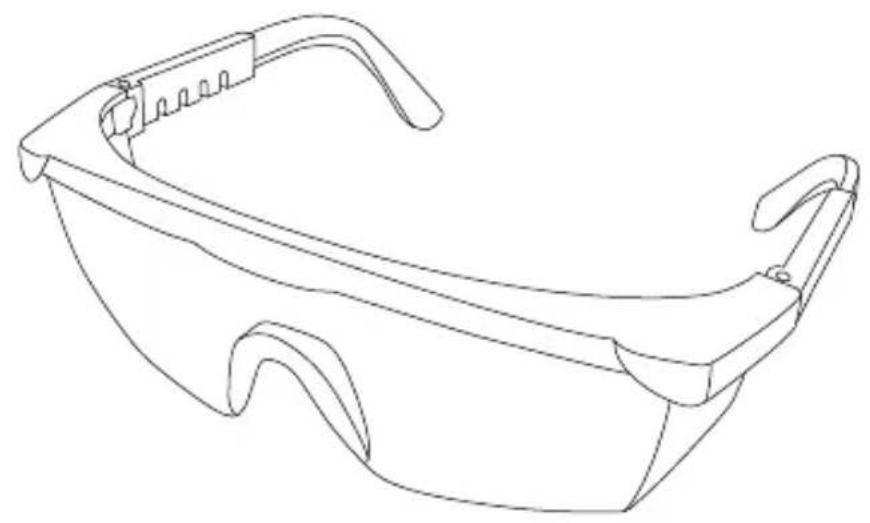
Some laser kits include Laser En hancement Glasses. These glasses improve the visibility of the laser beam under bright light conditions or over long distances when the laser is used for interior applications. These glasses are not required to operate the laser.

CAUTION:
These glasses are not ANSI approved safety glasses and should not be used while operating other tools. These glasses do not keep the laser beam from entering your eyes.

CAUTION:
To reduce the risk of serious injury, never stare directly into the laser beam with or without these glasses.
Turning the Laser On/Off
1 Choose a smooth, flat, level surface to place the laser.
2. Depending on the desired application, position the laser horizontally (Figure A) or vertically (Figure B).
- Press the key to turn the laser tool ON.
- The laser beings Auto-Leveling. During Auto-Leveling the LED flashes GREEN, the rotary laser (Figure A①) flashes, the Plumb Up Dot laser (Figure A②) flashes, and the Plumb Down Dot laser (Figure A③) is steady (if available).
- When the Auto-Levelling procedure is complete, the LED turns solid GREEN, the rotary laser rotates at the last used RPM setting, the Plumb Up Dot laser is steady, and the Plumb Down Dot laser (if available) remains steady.
NOTE: The laser tool's default Auto-Leveling mode can compensate for an uneven surface up to 5^ . If the laser tool is not level within 5^ , the GREEN LED and the RED LED alternately flash. Reposition the laser tool within the 5^ limit and allow Auto-Leveling to complete.
Auto-Leveling levels the plane of the rotary laser and sets the Plumb Up Dot laser and the Plumb Down Dot laser (if available) perpendicular to the rotary laser plane.
GB
Performing Accuracy Check and Calibration
NOTE:
- The laser tool is sealed and calibrated at the factory to the accuracies specified.
It is recommended to perform a calibration check before use. - Be sure to allow the laser tool adequate time to Auto-Level (< 30 seconds) prior to a calibration check.
- The laser tool should be checked regularly to ensure its accuracies, especially for precise layouts.
Horizontal Check
See Figure
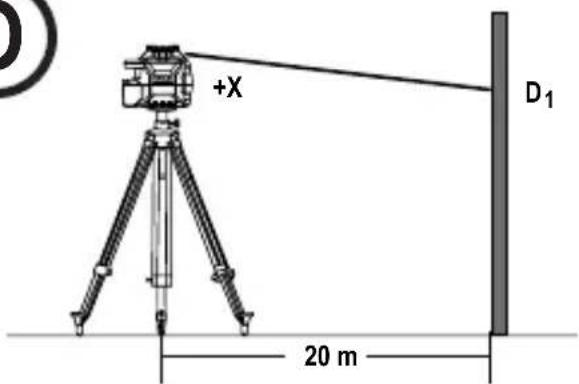
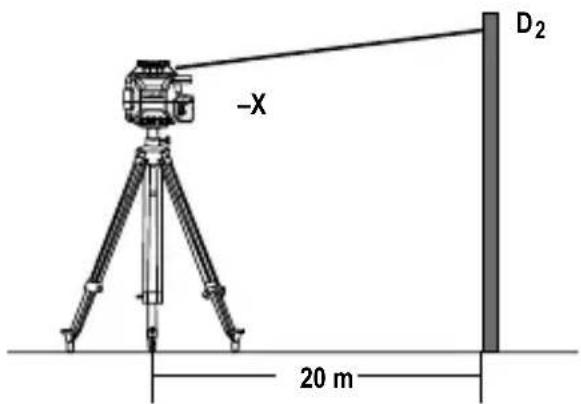
- Set the laser tool on a tripod 20m away from a wall with the " ^+^ side facing the wall (Figure ①).
- Power ON the laser tool. Allow the laser tool to Auto-Level and be sure the laser is rotating.
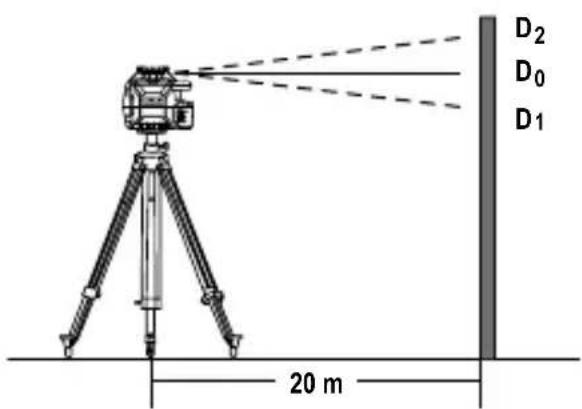
- Mark a reference point "D 1" where the laser line appears on the wall. If available, use a detector to more easily locate the beam.
- Loosen the laser tool from the tripod and rotate the laser tool 180^ . The "-X" side should now be facing the wall (Figure ②). Mark a reference point "D2" where the laser line appears on the wall.
- Measure the vertical distance between reference points "D 1" and "D2" (Figure ①③).
- If the distance "D 1" to "D2" is < 2.0 mm , calibration is not required.
RL600&RL600L
If the distance "D" to "D2" is ≥ 3mm then calibration is necessary.
RL 700L & RL 750L-G
If the distance "D" to "D2" is ≥ 2mm then calibration is necessary.
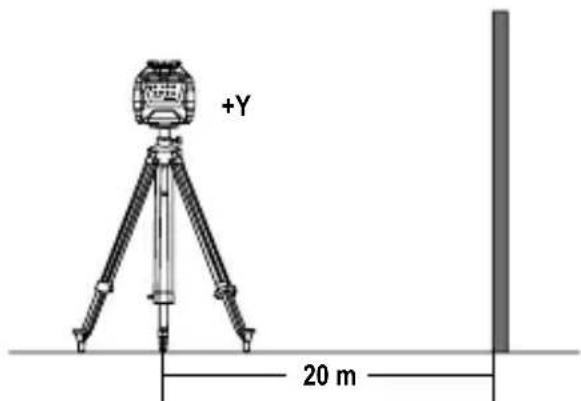
- Rotate the laser 90^ . Repeat steps 1. through 6. for the Y-axis. Replace "+" with "+" and "-X" with "-Y" (Figure ④).
Horizontal Calibration
See Figure
- Rotate the laser to the same position as step 1. of the Horizontal Check procedure (with the "+" side facing the wall).
- With laser tool powered OFF, press and hold the key followed by the key.
- Release the key and continue to hold the key for ≥ 3 seconds.
- Release the key.
- The 三 ~ 一 ~ ~ 二 ~ ED flashes GREEN when the laser tool is in X-axis Calibration mode.
If necessary, adjust the X-axis by using the key and the key to align the beam with D0. D_0 is the halfway point between the points D1 and D2 established during the X-axis check (Figure ③).
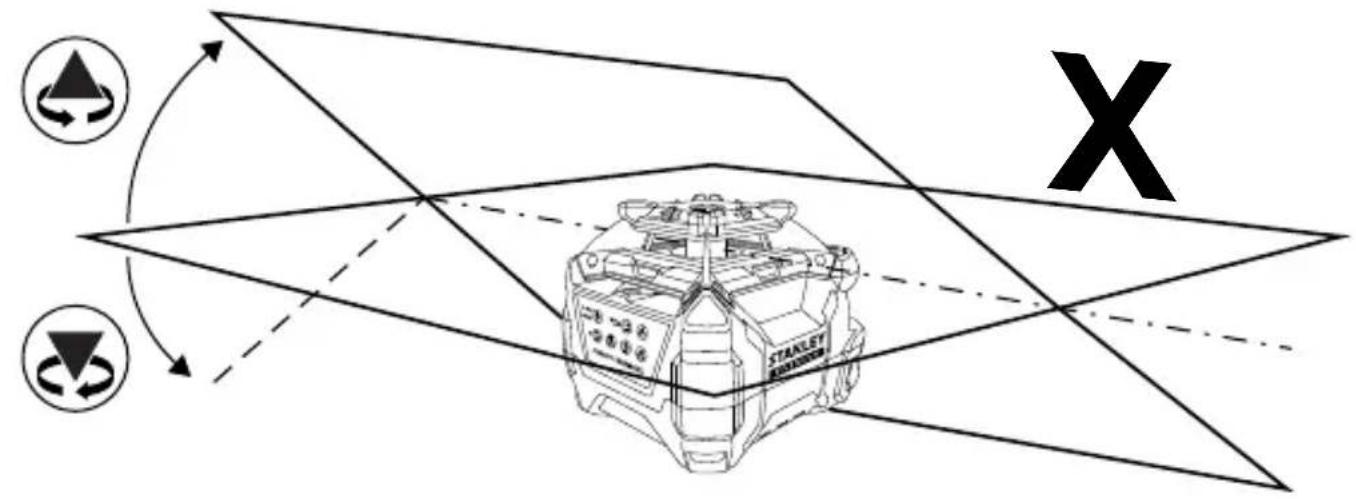
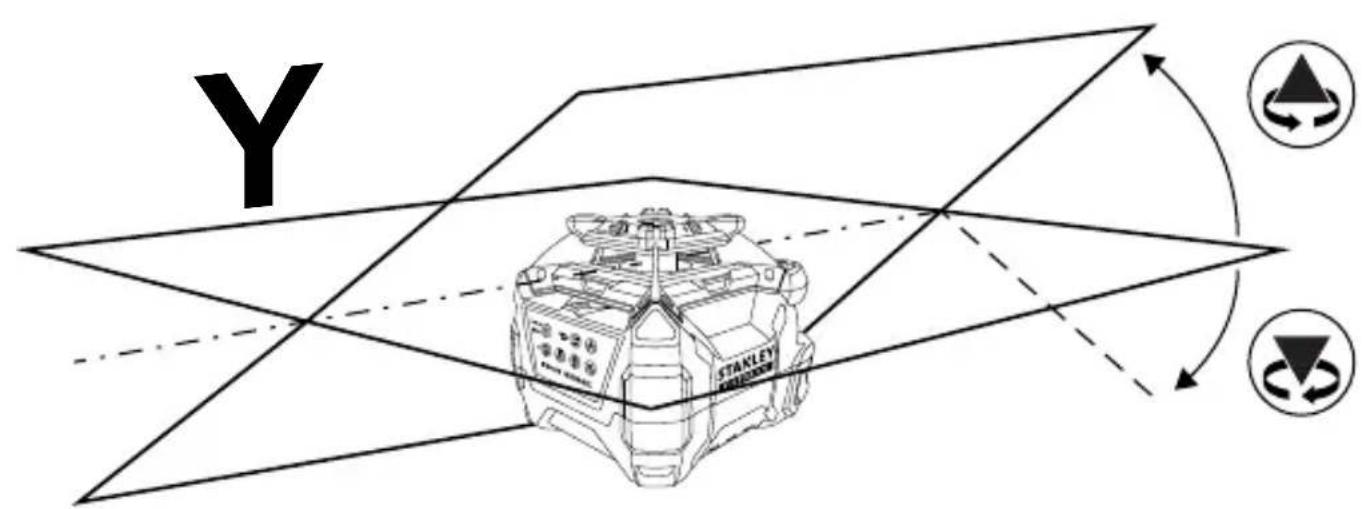
NOTE: Pressing the key or the key slopes the axis by 0.01^ (4.4 mm @ 25 m). Figure M illustrates how the arrow keys affect each axis.
- Press the key again to set the X-axis and proceed to the Y-axis adjustment. The ED flashes RED when the laser tool is in Y-axis Calibration mode.
- Rotate the laser to the same position as step 7 of the Horizontal Check procedure (with the "+" side facing the wall).
- If necessary, adjust the Y-axis by using the key and the key to align the beam with D0.D0 is the halfway point between the points D1 and D2 established during the Y-axis check.
- Press the key again to set the Y-axis and exit Calibration Mode.
Axis settings are now saved. Calibration Mode is OFF and the laser tool begins Auto-Levelling.
- Repeat the Horizontal Check procedure to determine if the calibration was successful.
If the laser tool can still not be calibrated after following the Calibration procedure, send the laser tool into an Authorized Service Center for repair.
Operating the Laser
Because the laser tool is a high precision instrument, it is preferable to use the remote (if provided) whenever possible.
Correcting a Tilt Warning
(Not available in Manual Mode)
If the laser is disturbed during operation the Tilt Warning LED changes from solid RED to flashing RED and the laser stops rotating and starts flashing. (Tilt Warning is on by default when the laser tool leaves the manufacturer.)
To correct a Tilt Warning:
- Check the laser tool to make sure it is positioned correctly.
- Press the key to reset the Tilt Warning.
- The laser Auto-Levels then begins rotating.
- Check the laser tool's alignment with the original target.
Turning the Tilt Warning Off
(Not available in Manual Mode)
- Power on the laser tool and wait for Auto-Leveling to complete.
- Press the key.
- The Tilt Warning LED changes from solid RED to off.
- To turn the Tilt Warning back on, press the key.
Changing the Tilt Warning Default Setting
- When powered OFF, press and hold the key then press the key.
- Release both keys.
- If the Tilt Warning LED is ON (red), the default Tilt Warning setting is ON. If the Tilt LED is OFF, the default Tilt Warning setting is OFF.
The Laser tool begins Auto-Levelling.
- Repeat the above steps to toggle the Tilt Warning setting ON/OFF.
Using Manual Mode
Manual Mode allows the laser tool to be placed at a range of angles. The laser does not Auto-Level and the Tilt Warning is set to OFF. Because Auto-Levelling is OFF, the beam is not guaranteed to be level.
- After powering on the laser tool, press and hold the key for ≥ 2 seconds to turn Manual Mode ON/OFF.
Note: When Manual Mode is activated, the rotary laser plane remains fixed with respect to the laser tool.
- Manual Mode is indicated by the flashing RED LED.

Note: Auto-Levelling is OFF in Manual Mode.
- The Laser tool can be manually positioned at any angle.
- Press and hold the key for ≥ 2 seconds to turn Manual Mode OFF. The laser tool begins Auto-Levelling.
Using Manual Slope Mode
Manual Slope Mode allows the user to adjust the slope of the rotary laser in the X-axis and the Y-axis in a horizontal (Figure A) or vertical (Figure B) position.
- When powered ON, press the key once. Manual Mode turns on, indicated by the flashing RED Auto-Levelling is OFF and Tilt Warning is disengaged.
- A solid GREEN X/Y Select LED indicates X-axis adjustment is active. If X-axis adjustment is not required, proceed to Step 5.
- Press the key to adjust the X-axis up. Press the key to adjust the X-axis down. Figure ① illustrates how and affect each axis.
NOTE: Holding on down slopes the axis continuously. The rate of slope change increases over time. Pressing or once adjusts the slope by 0.01^ .
- The X/Y Select LED will flash GREEN when the maximum slope angle is reached. The axis will not move any further in the X direction.
- Press the key again to set the X-axis and activate Y-axis adjustment.
- A solid RED X/Y Select LED indicates Y-axis adjustment is active. If Y-axis adjustment is not required, proceed to Step 9.

- Press the key to adjust the Y-axis up. Press the key to adjust the Y-axis down. Figure ⑧ illustrates how and affect each axis.
NOTE: Holding or down slopes the axis continuously. The rate of slope change increases over time. Pressing (A) once adjusts the slope by 0.01^ .
- The X/Y Select LED will flash RED when the maximum slope angle is reached. The axis will not move any further in he Y direction.
- Press the key again to set the Y-axis. The X/Y Select LED #tns off.
- The X-axis and Y-axis are now set to manually adjusted slopes. Use the laser in Manual Slope Mode.
- To turn Manual Slope Mode OFF, press and hold for ≥ 2 seconds. When Manual Mode is turned OFF, the LED stops flashing and the laser tool begins Auto-Levelling.
NOTE: To change between horizontal and vertical positions the laser tool must be powered OFF, repositioned, and then powered ON in the new position.
Changing the Rotation Speed
Press the Rotation Speed Key cycle through the available speed settings from fastest to slowest to Spot.
| Available Speeds | ||||
| RPM: | 600 | 300 | 150 | 0 (Spot) |
Using Spot Mode
Spot mode halts the rotary laser's rotation and allows the user to manually adjust the angle of the "Spot".
- Use the key to cycle to the Spot setting (0 RPM).
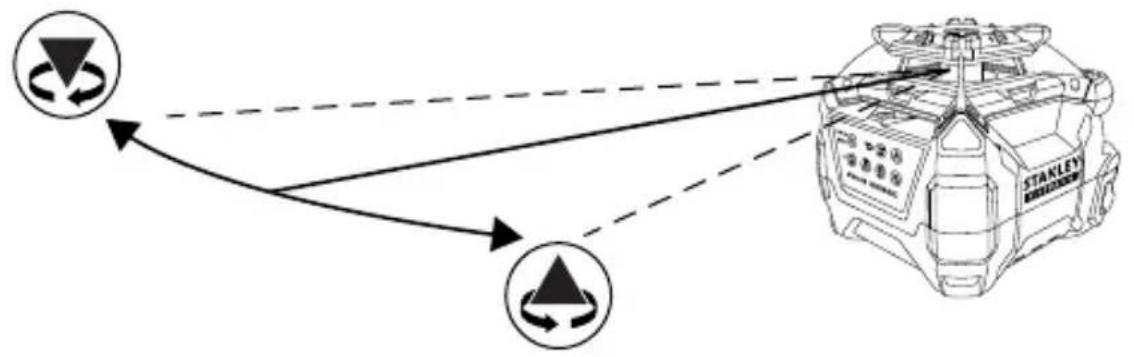
Use the key to rotate the Spot counterclockwise. Use the key to rotate the Spot clockwise.
NOTE: Holding down the key or the key will rotate the Spot continuously. After holding down an arrow key for several seconds, the Spot flashes 3 times and then rotates at a faster rate. A single press of an arrow key will rotate the spot 0.5^ .
Figure illustrates how the arrow keys affect the Spot rotation.
Using Scan Mode
RL 700L and RL 750L-G
Scan Mode limits the rotary laser's projection to a set scan angle and allows the user to manually adjust the position of the scan.
- Press the key to cycle through the available Scan angles (10^ / 45^ / 90^) .
Use the key to rotate the Scan counterclockwise. Use the key to rotate the Scan clockwise.
NOTE: Holding down the key or the key will rotate the Scan continuously. After holding down an Arrow Key for several seconds, the Scan flashes 3 times and then rotates at a faster rate. A single press of an Arrow Key will rotate the Scan 2.0^ .
Figure ⑨ illustrates how the arrow keys affect the Scan rotation.
- Press the key to turn off Scan Mode and return to the last used speed setting.
Using the Remote Control
RL 600L, RL 700L, and RL 750L-G
All available functions and modes are accessible through the keys on the Remote Control with the exception of toggling the Tilt Warning ON/OFF and powering ON the laser tool. (The laser tool can be powered off.)
Using the Detector
The Detector allows the user to determine the location of the laser when distance or lighting conditions make the laser difficult to see.
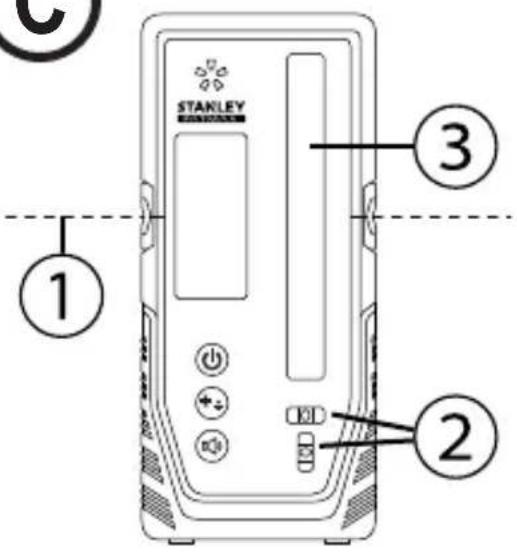
Detector Keypad

Power ON/OFF Key

High/Low Accuracy Key

Speaker Volume Key
Detector LCD Icons

Laser Detected - Reference Line Higher than Laser Beam. Move the Detector the Direction Shown (Down).

Laser Detected - Reference Line Lower than Laser Beam. Move the Detector the Direction Shown (Up).

Laser Detected - Reference Line in Line with Laser Beam Reference Level.

Buzzer Volume - Loud/Soft/Mute.

OFF

Low Accuracy Setting

High Accuracy Setting
Detector Setup
(The Detector can be used in hand or with optional clamp to mount the detector to a measuring rod, pole, or similar object)
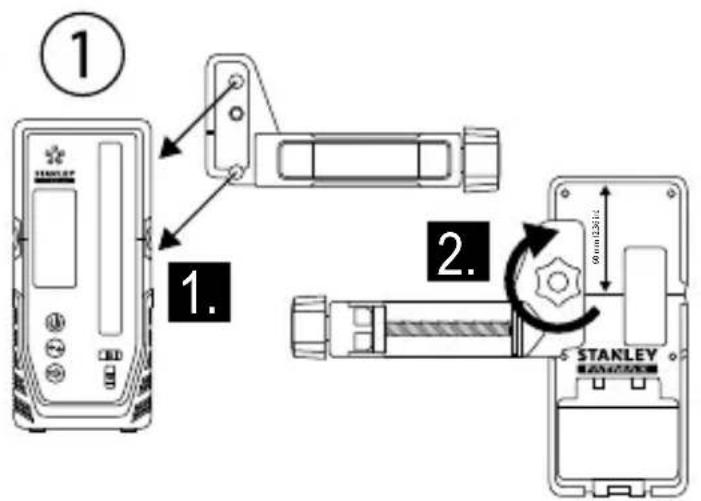
Mounting Clamp onto Detector
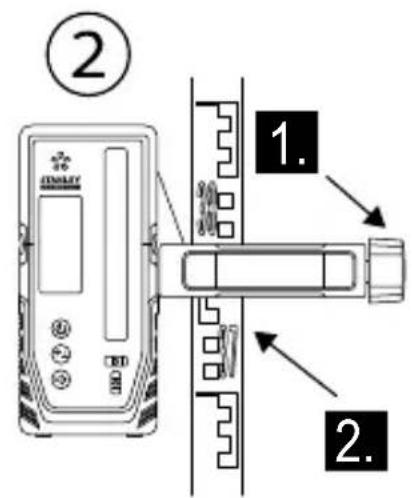
See Figure D①
- Guide the clamp onto the detector using the alignment hole.
- Tighten the fixing screw.
Mounting Clamp onto Level Staff, Pole, or Similar Object
See Figure ①②
- Loosen tightening knob.
- Place onto level staff, pole, or similar object.
- Tighten tightening knob to secure the clamp.
-
When locating reference level, loosen clamp to allow for up/down positioning.
-
When reference level is found, tighten knob again to secure the Detector. Read the position shown at the Reference Line (Figure ①) edge of the clamp.
Operating the Detector
(See Keypad and LCD Descriptions for indications during operation)
Powering on the Detector
- Press the key to turn detector ON.
- When powered ON, the entire LCD will momentarily display all icons (use this to ensure the LCD is functioning correctly).
- Press and hold the key for ≥ 2 seconds to turn the detector OFF.
NOTE: The detector will automatically power OFF after not detecting a laser beam for 10 minutes. To power ON again, press the key.
Illuminating the Detector LCD
- When detector is ON, press the key to turn ON/OFF LCD illumination.
NOTE: The illumination will automatically turn OFF after 60 seconds of not detecting a laser beam or having a key pressed.
Adjusting the Detector Accuracy
- When powered ON, press the key to toggle the accuracy setting between HIGH and LOW.
The default accuracy setting is HIGH.
NOTE: Use the LOW accuracy setting when:
- The HIGH accuracy setting is not needed.
- A stable reference level cannot be obtained due to vibrations.
- Heat haze interferes with the laser beam.
Adjusting the Detector Speaker Volume
- When powered ON, press the key to toggle through the volume settings (LOUD/SOFT/MUTE).
- When powered ON, the default volume setting is set to LOUD.
GB
Detecting Reference Level
- While powered ON, position the detector where the laser beam is projected.
- Use the detector's bubble vials (Figure ②) to maintain a level plane.
- Point the laser reception window (Figure ③) toward the laser beam source. The reception window must face within 40^ of the laser source.
- Use the "Laser Detected" icons on the LCD to align the Reference Line (Figure C①) with the laser beam.
NOTE: If the speaker volume is ON (LOUD/SOFT), a audible tone also assists with) aligning the detector. A fast beeping tone signals the detector must be moved down. A slow beeping tone signals the detector must be moved up. A steady tone indicates the laser beam is aligned with the Reference Line on the detector.
| Steady Tone Aligned with Reference Line |
| Fast Beeping Tone Move Detector Down |
| Slow Beeping Tone Move Detector Up |
- When the laser is aligned with the Reference Line, mark that position.
NOTE: If the top of the detector is used as a marking location, reference the back of the detector for the measurement compensation value.
Maintenance and Care
- When the laser is not in use, clean the exterior parts with a damp cloth, wipe the laser with a soft dry cloth to make sure it is dry, and then store the laser in the kit box provided.
- NEVER use solvents to clean the laser.
- Do not store the laser at temperatures below -10^ or above 40^ .
- To maintain the accuracy of your work, check the laser often to make sure it is properly calibrated.
- Calibration checks and other maintenance repairs may be performed by STANLEY service centers.
Laser Tool
GB
Specifications
| RL 600 RL 600 | RL 700L RL 750L-G | |||
| Horizontal Rotary Accuracy:* at 20°C | +/-2.2mm @30m +/- | -2.2mm @30m +/-1.5mm @30m +/-1.5mm @30m | ||
| Vertical Rotary Accuracy:* at 20°C | +/-3.0mm @30m +/- | -3.0mm @30m +/-3.0mm @30m +/-3.0mm @30m | ||
| Plumb Up Dot Accuracy:* at 20°C | +/-4.4mm @30m +/- | -4.4mm @30m +/-3.0mm @30m +/-3.0mm @30m | ||
| Plumb Down Dot Accuracy:* at 20°C | N/A N/A +/-8.7mm @30m +/-8.7mm @30m | |||
| Compensation Range: 5° 5° 5° 5° | ||||
| Slope Range: ±10% (dual axis) ±10% (dual axis) ±10% (dual axis) ±10% (dual axis) ±10% | ||||
| Minimum Slope Increment: 0.01°(4.4mm @ 25m). | 0.01°(4.4mm @ 25m). | 0.01°(4.4mm @ 25m). | 0.01°(4.4mm @ 25m). | 0.01°(4.4mm @ 25m). |
| Scan Range: 10°/ 45°/ 90° ±20% | 10°/ 45°/ 90° ±20% | 10°/ 45°/ 90° ±20% | 10°/ 45°/ 90° ±20% | |
| Working Range Diameter with Detector: | ≤ 600 m | ≤ 600 m | ≤ 600 m | ≤ 600 m |
| Leveling Time: | ≤ 30 seconds | ≤ 30 seconds | ≤ 30 seconds | ≤ 30 seconds |
| Rotation Speed:* at 20°C (room temperature) | 0/150/300/600 rpm +/- 10% | 0/150/300/600 rpm +/- 10% | 0/150/300/600 rpm +/- 10% | 0/150/300/600 rpm +/- 10% |
| Laser Class: | Class 2 ≤ 1.0mW(IEC 60825-1:2014) | Class 2 ≤ 1.0mW(IEC 60825-1:2014) | Class 2 ≤ 1.0mW(IEC 60825-1:2014) | Class 2 ≤ 1.0mW(IEC 60825-1:2014) |
| Laser Wavelength: | 630nm - 680nm | 630nm - 680nm | 630nm - 680nm | 630nm - 680nm |
| Operating Time: | ≥ 30 hours | ≥ 40 hours | ≥ 40 hours | ≥ 30 hours |
| Recharge Time: | N/A | ≤ 7 hours | ≤ 7 hours | ≤ 7 hours |
| Power Source: | 2x D-cell alkaline | Li-Ion Battery | Li-Ion Battery | Li-Ion Battery |
| IP Rating: | IP54 | IP66 | IP66 | IP66 |
| Operating Temperature Range: | -10°C ~ +40°C | -10°C ~ +40°C | -10°C ~ +40°C | -10°C ~ +40°C |
| Storage Temperature Range: | -10°C ~ +40°C | -10°C ~ +40°C | -10°C ~ +40°C | -10°C ~ +40°C |
Remote Control
Type:
Infrared
Indoor Operating Range:
15 m
Power Source:
2 x AA Batteries (Alkaline)
Detector
Levelling Accuracy (High)
≤1mm
Levelling Accuracy (Low):
≤ 2mm
Laser Reception Window Width:
55 mm
Working Range Radius:
≥ 300m
Bubble Vial Accuracy:
3^ / 2mm
Operating Time:
20 h
Auto Power Off (with No Signal Detected):
10 min
Power Source:
2 × AA
IP Rating:
IP66
Operating Temperature Range:
-10°C to +50°C (+14° F to +122° F)
Storage Temperature Range:
-25°C to +70°C (-13°F to +158°F)
Notes
Inhalt
Power led & Handmatig led
- X as aanpassen kalibratie stand.
Knippert rood
-
Y as op maximaal toegestane helling in de helling stand.
-
Y as aanpassen kalibratie stand.
Veiligkeit van de batterijen
Knapp for rotationshastighet

Knapp med uppátpil (moturs)

PA/AV-knapp for ström

Knapp for hog/lag noggrannhet

Knapp for hogehtalarvolym
SE

Laseren starter selvretting.
Tast for hoy/lav noyaktighet

Volumtast høytaler
Detektor LCD-symboler

LED PpoεiδoTPOiOng κλiσng

H M E I H
H kalutepn npaktikn evai va unoatnpizrto epyaiao laizep 1Eva xepi otav tonotheite n apaipite to epyaiaio aicep 1eva aessouap.
Av toothei Te naww ano eva oToxo, ophiEevmuepi Tn otepewon Bi0a 5 / 8^ - 11 , eUthuypaumotro epyaaleio hεcp kai karomiv ophiEe nnpwoTn otepewon Bi0a 5 / 8^ - 11
-
TToT@TneTe aOaAeia To otnpiyua EyKataoTaonc XpnoiOtTOIwVtac ia atio tic npakatw e06ouc:
-
Avapntote to otnpiyua Eykataaotaans eEvav toixo xpnoioutoiwvtan oxiaun oxnpatoc kAedapotputtac (Eikova H2).
-
SuvoTe To otpiyMa EYkataoTaonc OEv aKpo oopocx npoiotoiWvTac to oivktnpa bIKTuWmuOc opocn (Eikova H③).
Xpnooioane Tnepeewon eoow ontns oxnatoKlaedapotpuTac (Eikova H4) e otoioodntote oubetao aoeouap. -
Ipoosavatoiaote nvy eipaveia ykataotaonc tou Otnpiypatoc wote va eivai TepiTou opizovia.
-
TToTtnte eva ato ta anueia ouvdoanc tou epyaleiou EiEep (Eikova ①) stn biDa eykataaotaans 5/8"-11 tou otpiymuoc kai oigre tn aBn ouoqigns (Eikova H①).
-
Xpnoiopoioane oioohtote ato ta akoloutheta apntmuata naw oTo ot npiyya Eykarotaon yia va TpoapapoetepaipewTn theon tou epyaleiou aeizep.
To koupiTi Ka0eTnS iKpoppuOiOns (Eikova H5) μεταkivεi to λειερ προς ta πανω και κατω επi TnS kaθeTnS paγaS. To koupiTi aσφλiOng καθeTnS ρθμiOng (Eikova H6) ασφλiζει ην καθeTn θεη.
To koumi TEPiOTPOPIKIC MIPOPPUEIOE (Eikova H7) TEPiOTpeEi To epyaEio AIEeP.
To koupi Tpooapoyn kianc toixou (Eikova H8) TpoopaozEi n ywia avapeo aOTo otnpiypa Eykaataaonc kai oTov toxO.
Bao n tripioobou
BA.Eikova K
TYTO POKNY USCHOVEJTE

VAROVÁNÍ:
Prid pouzitim tohoto vyrobku si peclive prectete BezpecnostniPokyny a Uzivatelskou prirucku.Osoba odpovedna za tento pristroj musi zajist,aby vsichni uzivotelé pochopili a dodrzovali tyto Pokyny.

UPOZORNENI:
Je-li tento laserovy pristroj pouzivan, daveje pozor, aby vysilan'y paprsek nemiril primo do oci. Dlouhodobé pusobeni laseroveho paprsku na vase oci muze byt nebezpecné pro vas zrak.

UPOZORNENI:
TYTO POKNY USCHOVEJTE

VAROVÁNÍ:
AkkymyJIaTOpHbIe 6aTapeN n NHTaHne
YctaHObKa 6aTapei
YcTaHOBka aKKymyIaTOPHO6aTapEn Na3epHOro INHCTpyMeHTa
RL600
CM.Puc.①
- HaxmTe Ha KpbIuKy 6aTapeHoro OTcKa Nn3BneKeITe ee.
-
YctaHOBtTe DBe HObIX 6atapeKu Tuna «D». Ipn yCTaHOBKe 6atapeek B INCTpyMeHT COBJIOdaIte npabINbHyIO NOJRAHOCtB.
-
Hadejko 3akpoTe n 3aФNKcnpyTe KpbIuKy 6aTapeHoro OTEka.
YcTaHOBka 6aTapen nyIbTa dNCTaHcNoHHoro ynpabNeHn
RL 600L, RL 700L, n RL 750L-G
CM.Puc. ⑥②
OTKpoTe 6aTaapeHbI OTcEK, CHB KpbIshKy.
2. yctahOBtTe DBe HOBbIe 6aTapeKu AA. Pn yctahOBKe 6atapeek B INCTpyMeHT co6JIoDaIte npabNbHyIOIPOJPHOCTb.
3. HadejHo 3aKpOte n 3aФnKcpyIte KpbIuKy 6aTapeHoro OTceKa.
YctahOBka 6atapei dTeKTopa
CM.Puc. ⑥ 2
- OTKpoTe 6aTapeHbIX OTEcK, NOdHbKpbIiKy.
- yctahOBHTe DBe HOBbIe 6aTapeKu AA. Ipn yctahOBKe 6aTapeek B INCTpyMeHT co6nOdaTe npabNbHyIOJIpaHOCTb.
- HadejHo 3aKpoTe n 3aФNKcpyuTe KpbIuKy 6aTapeHoro OTceKa.

OCTOPOXHO!
Co6nHOaune npaeunbHyo nonpHocmb (+) u (-), yka3aHHyHa bamaepuHOM omceke. BamapeukdoJXhbl 6bIMb odHOo muna u oIadamb oUHaKOBou EMKOCMbIO. He ucnObn3yume bamaeukcpa3hbim ypoBEm 3apda.

3apraKa IOHHO-NTHeBOB 6aTapeN
RL 600L, RL 700L, n RL 750L-G
CM.Puc.⑤②
1.ПОДКИJOHTeIteKep aanTepa 3apRKn/NITAHINK 3apRHOmy rHe3dy na3epHOrO nHCTpyMeHTa.
2.Поdkночte aanTeep 3apAnKu/nTuHnK po3eTke (110Bnnn 220B).
Bo BpemcBToDnOd 6yTeTtopebKpaChbIM UBeTom.
- Octabte 6aTapeo 3apjkaTbcn np6nnteNbHO 7 aocob noHoro 3apya.
CBeToNDHaHHTMraTb3eJIeHbIM,KOrda3aprKa 6yDen3aBepueHa.
- Korda 6atapey 6ydt nonHocb0 3apxkeHa, OTKIOHTe aanTep 3apnNITAHnO T pO3ETK.

OCTOPOXHO! 3apxaaime naepHb uHcmpymem monko c nomoubdo adanmepa, exodaezo e komnlekmauuo. Mcnoh3oaehue kaoo-n6pdye02 3apdhozoycmpoucmea moxem npueecmu K noepexdehuu u/Unu luuchbIM mpaamam.
3Kcnpnyatauia aanterpa 3apdKn/ nHTaHn
- Na3epHbI INHCTpyMeHT MOXeT pa6oTaTB npn NOkNIOueHN K aanTepy 3aprKn/NTAHNA.
-Функионироваимеи 3лем entы упаьеня пазрно нстумета analorunhbl Tem, KOTobie nCNoIb3yOToC, KOrda адаNTep 3apdkn/NITaHnH He noDknUoyeH.
3Kcnpnyatazaia npHaJneXHocTei

BHIMAHHE! He ocmaenlme naepbui uHcmpyMeHm 6e3 npucmopha Ha npuaadnexhocmu, ecnu Kpenexhui Eunm He 3amrhym Hadnexaum oba3om. Hecobkdoene daHHo mpe6oBaHua MOxem npueecmu k naedeHIO naephozo uHcmpyMeHma, e pe3yIbmae yeo OH dyem noepexkdien.
KpenexHbI KPOHHTeH
RL 700L n RL 750L-G
CM.PnC. H
PIMMEYAHNE.
-
Ycmahaauea u cHMa naepbui uHcmpyMeHm cnpuHaadnHexHoC Mu, peKomeHyemra HadeXho ydepxuabMb eO odHou pykou.
B cnyuae 3akpenlenu haed eelb0 3amHume buhmoyo onopy 5/8"-11, ycmahoeum uhcmpymem heo6xodumom noIoxehu, 3aem nonHocmbio 3amHume buhmoyo onopy 5/8"-11. -
Hadejno paonoloxnTe KpeeKhB KPOHHTeH OdHM n3 cnedyuux cnoocob:
-
NoBecbTe KpeNExKbI KpoHHTeIN Ha CteHe c NOMOu bIO na3a (Pnc. H②).
YCTAHOBHTe KpeEnXhbl KPOHHTeHN Ha KpaIO NOTOJka C NOMOUBIO 3axmOB DnI NOTONOCHORo KApKACA (Pnc. H③).
BocnoIb3yITeCb KpeJIeHNHeM COTBepCTHem (Pnc. H4) c IHO60nOxOJaUe npHaJNeXHOCTbIO. -
PacnoNoXnTe KpeNexHbI KPOHHTeH, YTO6bI OH 6blI pacnoNoXeH npu6n3nteBHO B TOpu3OHTaJIbHOM NOIOXeHm.
-
YctahOBHTe Ody n3 Toeyk KpeHneHnna3epHoro HCTpyMeHTa (Pnc. ①)Ha BnHTOBe KpeHneHne 5/8"-11 n 3aTaNHTe pyKy (Pnc. ①).
4.ДядьншeyperynipOBKINnoJoxeHna3epHOrO HCTpyMeHTaNCNoB3yIteJIIO6OIN3CNeDyUxK KOMNOHETOB.
PyuKa ToHkO BepTnKaJIbHO nperyInpOBKn (Pnc. H5) nepemeaaet Ia3epHbIn INCTpyMeHT BBePx IN BnI3 BDOJIb BepTnKaJIbHO npOxxKn.PyUka PnKcaunBepTnKaJIbHO nperyInpOBKn (Pnc H6) pIKCpyeT BepTnKaJIbHOe noIOXeHne Ia3epHoro INCTpyMeHTa.
Pyka ToKoP perynipOBKn BpaueHn (Pnc. ⑦) NOBOPaUNBaET na3epHbI INCTpyMeHT.
Pyuka perynipobkn HAKNOHa NO OTHOWeHIO K CTHe (Pnc H8) perynipyet yroJ Mekdy KpeNexKhbIM KPOHHTeHOM NCTHOI.
Tpehora
CM.Puc. K
- YctaHOBITE TpeHory IIO CEHTpy 3OHBI IIpIMHeHnRA3epHOro HNCTpyMeHtA, rDe OHa He 6ydt CnyaHNO CMeueHa.
- BbDnBHe HOKKn TpeHOrn B Heo6xOaMoe NOXKeHne. OtperynpyTe HOKKn TaKIM 6pa3OM, YTO6bl rOIOBka TpeHOrn HaxOaIacb npu6n3nteIbHO B rOpN3OHTaIbHOM NoJoxKeHn.
- YcTaHOBnTe OndHy n3 ToUeK KpeNHeHna3epHOro HnCTpyMeHTa (Pnc. ①)Ha TpeHore c NOMOuBu BnHTOBORO KpeNHeHn5/8"-11 n3aTaNHe TKepeXhbl BNHT.
MnweHb
CM.Puc.
HekotopbIe KOMPnEKTaun Ia3ephBIX INCTpyMeHTOB BKIOUaOT MIIeHb dIy Ia3epa, KOtopa nOMoraet HaITN I OTMeNTb Ia3epHbI JyU. MIIeHb yLyuHaAET BNDIMOCbI Ja3epHoro Jyua.
Ha MIIeHb HAnecea SHkaJa B MetpueeCKo N 6pntAHcko CnCTeme MeP. Ja3epHbI JynpoxOHT Upe3 KpaCHyo N 3eJeHyO pIactMaCCy I OTPaKaETcR O T OTPaJOSeI NeHTbl, paCNOJooHeHHoB 3aDHe YactN. MarHIT B BepxHe YactN MIIeHN IpeDHa3NaueH dIy KpePnEHHa MIIeHN K NOTOLOHMy Kapkacy IIN npOPhiJAM dIy ONpeDeJIeHHa YPOBHi N OTBeCa. Ipn IcNoJIb3OBAHm MIIeHN NpeDnra ee YacTb DOJIXHa 6bItb HanpaBHeHa Ha Bac.
OuKn dIyucnEnHbUdHMocTN Ja3epHOro Lyya CM.Pnc.
HekotopbIe KOMnJIeKTAuIN Ia3epHBIX INHCTpyMeHTOB BKJIOUaIOT OcKn IyCNIeHNr BvIMMOCTN Ia3epHO rO Lyua. 3TN OcKn YBeJIuINBaIOT BVIMOCtB JIa3epHO rLyua B rPKNX NOMEUeHNx Ha 6oJIbXnx paCCToRHaX. DaHHbIe OcKn He o6ra3aTeJIbHbI dIra 3KcPnyatauIN Ia3epHO rHCTpyMeHTa

BHIMAHHE!
Ochu He RaIbIOMc 3aumHbIMu U He UmeHOM ymepxdenr ANSI, noomomy ux ekcnnyamaucn c dpyzumu uHcmpymemamu 3anpeueHa. Ochu He 3auiauom 2na3a om nonadHure Hux na3epHBix nuyei.

BHIMAHHE!
Bo u36eXaHue nonyuHua mJxKebI xmpaM, He cmompume npraMo 8 na3epHbI pyu, eHe 3aeucumocmu om Hauuur 3mux Oyko8.
EcInpacCTOJHnEOTD 1》IOoD2>coCTaBnReT ≥2MM,Heo6XoIMMo BbIOnJIHTbKaJIINOpOBKy.
TOpn3oHTaJIbHaJaKanI6pOBka
CM.Pnc.
- ПовернITE Лазерньи ИСТумЕВ TO_JE NOLOKEHNE, KOTOPOE ИСПОЛБЗОВАЛOCБ B WARE 1.поцедрbl ropИЗHTаьHoJ поверки (сторна «+X» ДОЛЖА 6ытб HANРавпера на CTehу).
2.Пи ВьклочenvHom Ja3epHOM HCHtpymeTe HaKMITE udepxuBaTe KONky TaTEM KONky . - OTnycTInTe KHONky npoJOnJaTe yIepKINBaTb KHOKNy B TeueHne ≥ 3 c.
- OTnyctnte KhoNky
- Korda napehbl mHCTpymeHT haoDNTcB pexime KaIb6pOBKn ocN X, CBeToNDmMaaet 3EJIeHbIM CBETOM.
- EcnHHeo6xOaHMo,OTkAIn6pyTe oC X c NMOuBIO KHONK HKNKIN TO6bI BbIPAbHrTb Na3epHbI Nyc TToKoD0.D0-3TO ToUka,HaxOJaIaIcraNocpeEINHe MeJy D1nD2,OTMeueHHaB XoJe npOBepKn OcX (Pnc ③).
NPMMEAHHE. HaxaTne KhoKn N Mameet HaKIOH OcHa 0,01° (4,4 MM Ha pacCToHn 25 M). Ha Pnc. M OTO6paKeHo, KaK HaxaTne KHOONK BnIeT Ha KaKdyO ocB.
- HaxMMTE KONKy BTOBPOHO, YTO6bI COXpAHNTb HAcTPOKN OCN X N HauaTb perynipOBky OCN Y. Korda na3epHbI INCTpyMeHT HAXOINTCB PEXKIME KAIN6PObKN OCN X, CBETODNOJ MFAeT KPACHbIM UBeTom.
- ПовернITE Лазерьи Иструмент в ТО КЕ ПОJOKEHNE, KOТОРоЕ ИСПОЛБЗОВАLOСь B WARE 7.прочдурbl ropИЗОНТальНой поверки (сторona «+Y»doJХна 6ыТь habравлеса на CTehу).
- EcHn Heo6xOaHMo, OTKaIIN6pyTe oCb Y c NOMOuK HONKn U KHOKN TO6bl BbipabHrTb Ia3epHbI JyC TOTKO D0.D0-3TO TOUka, HaxOJaAuaCra NocepeDHe MeKdy D1N D2, OTMeueHHaB XoJe npOBepKn OcN Y.
- Haxmte KhONky BTOpHo, YTObI COxpaHHTb HAcTpoiKN OcN Y INoKHyTb peXIM KaIN6pOBKn.
HactpoynocoxpaHebl.PekmKanibpobKn BbIKIOaetcNla3epHbINHCTpyMeNT nepexOHTBpekmCaMOBbIpaBHBaHn.
- NobtopTe npoceDpyr ropn30HTaIbHoi npOBepKn, YTO6bl npOBepuTb npaBnIbHoCTb KaIIb6pOBKn.
Ecnu na3epHbI uHcmpymHe moxem 6bimb omkaubpoehn hadJeKauum oba3om e coomeemcmeu c npouedypou KaUbpoBku, omppaBme na3epHbI uHcmpyme h e aMopU3oBaHHbI cepucbI ueHmp Ha pEmHm.
3KcPnyataunna3epHoro nHcTpymeHa
IockoNbky Ia3epHbI INHCTpyMeHT YBnETCB BICOKOTOHybIM INHCTpyMeHTOM, NO BO3MOxHOCTn peKOMeHNyETcN cIOJb3OBAtB nyIbT dNCTaHNoHHOrO ynpaBHeHn (pnp HAnuHn).
YcTpaHHe npeDynpexKdEHNaKaKloHe
(HeoctynhoBpyHOMpeKmE)
EcHnIa3epHbI INCTpyMeHT 6blJ 3aTeB XoJe pa60tbl, CBeTODIO CMeHReTcNocToRrHO ropraeero KPACHOTo CBetaHaMIRaHOuMI KPAChbIINCBet,Ja3epHbIMyIpeKpaAaET BpaTaBcN HauHnaEeMTMaRaTb.(PepdUnpeXeHHe OHaKnOHe BKIOUeHO No yMOJIaHIO, KOrDa Ia3epHbIM INCTpyMeHT NOKndaet 3aBOd.)
YcTpaHHeNnIpeDynpEckEnnO hKnloNe:
Ia3epHbI INCTpyMeHT HauHHaET npoZeypy camOBblpaBHBaHn.
- NOBTOPTe WAn BbIe DnB KJIIOueHn N BbIKIOueHn npdynpeKJeHn OHaKIOHe.
IcnoJb3OBaHne pyHoro pexnma
PyHoi pexHM nO3BOJareBbIOnHHTyCTaHOBYka3epHO IHCTpyMeHa B dnaIana3OHe yTIOB. Ja3epHyIN HcTpMyeHT He BblONJIHReT cMOBbIPaBHNBaHne, a IpeDynpKJeHne O hakIOHe BbIKIOUHeHO. NocOKbky cMOBbIPaBHNBaHne BbIKIOUeHO, pacNoIooKeHne J3epHoro Lyua no ypOBHo He rapaHTnpyetcra.
- После BKluуеня Лазерно Инстурмента нахшITE udeprЖиBaIte KhoNkY bTeueHne ≥ 2 c.dЯ BKluoyehn/ BblKluoyehn pyHoro peKIMa.
PpmeaHne. PnB KblnoeHHom pyHOM peXmE pNOCKOCTb BpaueHna3epa ocTaeTc HEnoDBHXHO NO OTHoSeHHIO K Na3epHOMy INCHTpymEtY.
2.При BKIOHOMpyHOMpeXIMe CBETOINOJ MInraet KPACHbIM UBeTOM.
Примочаим.В руном ржимеCAMOBыравнванe BBIKHOUyeHO. - Ia3epHbI INCTpyMeHT MOXHO BpyHyIO paCNOJIOKNTb NOI HIO6bIM YrTlOM.
- Haxmte n ydepkmbaite KhoNky 8TeueHne ≥ 2 c.dnBbIKIOeHnpyuHOro pekima. Ia3epHb mHCTpyMeHTHaunhaet npOeDpy caMOBbipabHbAHnIa.
IcnoJb3OBaHne HaKloHa B pyHOM pexnme
HaKIOH BpyHom pexnme No3BOJAErNoJIb3OBaTeJIIO OTpeYInpoBaTb HaKIOH BpaAuaOeROcJa3epa no oCn X nOCN Y no ropn3oHTaII (Pnc. A) nI IN BeptnKaII (Pnc. B).
1.ПиВКПIOHcEHOM INCTpMHe HAKMITE KHOIN pa3.PuHoipeXIM BKNIOaETCn,Pn3TOM CBeTOIOO mIraeKPACHbIM UBeTOM.CaMOBbIPaBNBaHne n npedynpeXJdHnO hAKIOHe BbIKNoUeHbl.
2. Topu3n 3EJIeHbI CBeToaIOoBbIpaOcN X/Y yka3bIbaeHa To, YTO BbIbpaHa perynpobKa ocX.Ecn nperynpobKa ocX He tpe6yeTcA, nepeiDnte K wary 5.
3.ДпяпетмшеняOCNXBврхнхнгупяпетмшеняOCNXBH3нхнгунгупс.МOTOBpaЖeHo,ΚΑΚΗχаТиEΚΟΝΚВηηтHaΚχdIyO OcB.
PIMMEYAHNE. Pn ydepXaHn KHOKn INBbIOHReTc npoDOxNTeIbHbHn HAKNOH OcN. Pn ydepXaHn KHOKN CKOpocTB HAKNoHa YBeINuBaETCOnHKpTaHoe Haxatne KHOKN pnpnyet HaKIOH Ha01°
- CBeToIOIO BbIbopaOcN X/Y HauBET MIRaTb 3EJIeHbIM UBeTOM Pn DoCTNXKeHm MaKcMaJbHorO yHa HaKNoHa. DAnbHeiWgA perynipOBka OcN B HapPabNeHn X 6yDet HeBO3MOxKHa.
- Haxmte KhoNky OBTOPHO, YTObI COxpaHnTB HAcTPOKnOcN X n Haatb peynipOBKy ocN Y.
- Topu KPAHbI CBeToaOp aocn X/Y yka3bIBaet Ha To, YTO BbIbpaHa perynipOBKa ocN Y. Ecnn peynipOBKa ocN Y He tpebyTc, nepeiDnte K 9.
7.ДпяпелемшнгocnYВврхнхмnteKhONky 4ЯпелемшнгocnYВин3нхмnteKhONkyHaPnc.OTOBpaЖeHo,КakHaxatneKHOKNOKNINREtHaKaJdUOocb.
PIMMEYAHNE. Pn ydepkaHn KHOKn N BbIOHReTc npoDOnKInTeIbHbHn HAKNOH OcN. Pn ydepKaHn KHOKN CKOpocTb HAKNoHa YBeINuHBaETC OdHOKpTaHoe HaxKaTne KHOKN pNnpyET HaKIOH Ha01°
- CBeToIOIO BbIbopaOcX/Y HaHT MIRaTb KPACHbIM UBeTOM Pn DoCTMKeHm MaKcMaJIbHO rHa KaNloHa. DaJIbHeuJaa perynipOBka OcN B HAnpaBNeHn Y 6yTe T HeBO3MOxHa.
- Haxmte KhoNky eue pa3, YTO6bI coxpaHnTB hAcTpoKnocnY.CBToND Bb6opa ocX/YraHeT.
10.OcnXuYtenepbyCTaBHeHbI NOHaKHOHOM, OTPeryNIpOBaHHbIM BpyHyIO. Icnonb3yTe Na3epHbIN HcTpyMeHT BpyHom peJHmpe pyNpOBKn HaKNoHa.
11.ДЯ Вькюченя руного ржима PerynilpoBkn HaKNoHa HaxMTe n ydePxNBAaTe 6TeueHnge ≥ 2 cekynI.Ppn
BbIKHIOeHNpyHOro pexIma CBeTODIO npekpaaaet nIa3epHbIN HCTpymENT HaunHaet npoeDpy CaMObIPaBHbAHn.
IPMMEUHNE.ДЯИЗМЕнEHn paCNoIoxHn Ia3epHOrO nHCTpyMeHTa CROPu3oHTaJIbHOrO Ha BepTnKaJIbHbI, INI HAO6OpOT, Ia3epHbI INHCTpyMeHT Heo6XODIMBO BVIKIOuHTb, NepemecNTb, 3aTeM BKIOHHTB BOHOM NOLOXeHN.
I3meHeHne cKOpOCTn BpaUeHnA
Haxmte KhoNky ckOcTN BpaueHnna nepeKnIOeHn mExNy DOCTyINbIMn peKmAMn CKoPcTN OT camoro 6bICTpOro K caMOMy MeIeHHOMY N TOUKe.
Hn3ka HacptpoKa TOnHOCTN

BbICOKa HacTPOKa TOnHocTn
YcTaHOBka DeTeKTopa
(Демекр можно удахьамь в руке улс nomоцьдонлимьногоз зжumsдя усановке на мерhoшpeke/ cmonбе unu noxokem npedmeme)
YcTaHOBka 3axnma Ha deTeKTop
CM.PuC.①
- YctaHOBtTe 3aKIM Ha DeTeKTOp C NOMOuIbIO OTBepCTnIy BbipABHnBaHn.
- 3aHTHe KpeJEnHbBnHT.
YcTaHOBka 3aXIma Ha HnBeJIuPHyIO peKy, CToI6 NII NOXOXN IpeDMET
CM.PnC.①
1 Ocna6bte pyky 3aTjxKn.
2. YctahOBInTe Ha HnBEnHpyKeIky, cTOn6 nIIN NOXOXm IpeMMeT.
3. 3aTAHnTe pyKy 3aTAAKK, YTO6bI 3aKePnITb 3aJIM.
4.Пи располбкен OnopHorO ypoBЯ ocna6bTe 3axmДпуруnpOBKN BBepx/BHn3.
- Поссе onpedenenno onopnor ypoBna ChOba 3aTnHnTe pyky, YTO6bl 3akpenTb deteKToP. Cm.nonoxKeHne, noka3aHHoe OTHOCHTeNbHO OnopHnJIHHN (Pnc. ()1) kpa3axkMa.
3KcPnyatauia deTeKTopa
(B xode 3kcnnyamauuu cm. onucahue KhonoohnnaHenu u KK-ducnner)
BkIouehne nHTaHn deTeKTopa
- HaxMnte KhONky BkHIOUeHnI deTeKTopa.
-При Вкючим Ha XX-Dиспee краTKOBpeMeHNo OTOбрахаOTcBce 3начи (ЗTo Heo6xOДМо ДЯnpOBeрКn HAnLnxKaUeroФункцИОнрованя XX-Dиспя).
-ДЯВыклоченя DeTeKTopa HaxMITE ydepxmbaTe KHONky B TeueHne ≥ 2 c.
PIMMEYAHNE. DeTeKTop aBtOMaTnueeCKN OTKIOHNTcR NOcNe TOrO, KaI Na3epHbI JyH He 6yTe ObHApXKeH DoJIbWe 10 MmHT. YTo6bl CHOba BKNIOHTb yCTPOINCTBO, HAXMITE KHOJKy
PoiocBetka KK-dncnner detektopa
- Pn BkIIOueHHOM DeTeKTOpe HaxMMte KHOKNy BkIOueHnBbIKIOueHn NOcBeTKN KK-dncnner.
IyIbT InCTaHcNoHHOrO ynpabLeHnA
Tn:
Pabouyn dana3oH TempepaTbp NomeuEHHX:
VCTOCHNK NITAHIA:
Hnphpaekpacbni
15 MM
26aTapeiKaA A (IeIoUHbIe)
TeKTop
TIETO POKNY USCHOVAJTE

VAROVANIE:
Pred použitim tohto vyrobku si pozorne precitajte bezpečnostnéPokyny a prisčku k produktu. Osoba zodpovedná za pristroj musi zabepezit, aby vsetci použivatelia poznali a dodržiavali tietoPokyny.

UPOZORNENIE:
TIETO POKNY USCHOVAJTE

VAROVANIE:
MoNTaJHa 6aTePnIa Ha Ja3epHnIaHTpymeHT
RL600
BuxΦnrypa F①
- Hatachete Kanaka Ha otJeHeHneTo 3a 6aTeepnTe, KaTo ro PJIb3HeTe HABbH.
- MoNTnpaIte DBe HOBn D KJIeTbUHn 6aTePnn. OpneHTnpaIte 6aTePnIte npabUNHO, KOrato IIN NOCTaBtE B Ja3epHnI INCTpyMeHT.
- 3dpaBo 3aTbOpTe N 3akIkyote KaNaKa Ha OTdeJeHneTo Ha 6aTepyTa.
MONTAX Ha 6aTePnraTa Ha dNCTaHcNoHHOTO ynpabIeHne
RL 600L, RL 700L n RL 750L-G
BuxΦnrypa G②
- OTbopete OTdeneHneTo Ha 6aTepeyra, KaTO OTKJIIOUHTe Kanaka.
- Пoctabete Дve HOBn AA 6aTePmN. OpneHTnpaIte 6aTePmTe npaBnHO, KOrato Tn NOCTaBtE B Na3epHn INHcTpymeHT.
- 3dpaBO 3aTBOpTe N 3akIIOyTe KaNaka Ha OTdeIeHHeTo Ha 6aTepyTa.
MONTAX Ha 6aTepeyra Ha dTeKTopa
BuxΦnrypa C②
- OTBopete OTdeneHneto Ha 6aTepeyra, kato NOBmHHeTe Kanaka Ha 6aTepeyra.
2.ПocTabeTe IBe HOBn AA 6aTePmN.OpneHTnpaIte 6aTePmIe npaBnHIO,Korato mNoCTaBtE B Na3epHn INHcTpymENT. - 3dpaBO 3aTBOpTe N 3akNIOUeTe KanaKa Ha OTdeJIeHHeTo Ha 6aTepeyTa.

NPEdynpeKdEHHe:
Obpheme eHumaHue Ha MapkuOpokama (+) u(-)Ha dbpkaHa 6amepuma 3a npabunHomo nocmabHe Ha 6amepuma. Bamepuume mpa6ea da 6bdam om cbuur mun u kanaumem. He u3non3baume kombunaqur om 6amepuu c pa3nuehen ocmbyeh Kanauumem.
3apexdahe Ha IHTneBO-IOHHaTa 6aTePn
RL 600L, RL 700L n RL 750L-G
BnxΦnrypa⑤②
- BkHouTe 3apAnHTo 3axpaHBaHe/3axpaHBaunr aanTep B 3apAnHJxak Ha Jla3epHnI INCTpyMeHT.
- BkIoue 3apJHOTO yctpoiCTBO / 3axpaHbaunia aanTep B eIekTpueckn KOHTaKT (110 V nnn 220 V) c noDxodu z ceen.
CBeToIOIOBbT 电贝B YepBHe IO BpeMe Ha3apeKdaHTo.
- Octabete 6aTeepnTa Da ce 3apeu 3a okono 7 yaca, 3a da IOCTnIHe IbIHO 3apeXdaHe.
CBeToIOIOBt 电贝3EJIeHO,KoRaTO 3apeKdaHTo npKNIouN.
4 Korato 6aTePnTa e HnblnHO 3apeDeHa, n3KlHoyete 3aprHTo yctpoNCTBO/3axpaHbAunrT aanTpE OJ na3epHn INcTpymeHT N OT eNEkTPnuecknT KOHTaKT.

PNEpyPExEHEHc:3apekdaume naepa cmo cnpedocmaeeHm 3axpanea, adanme. H3noI3eaHemo ha dpyu bud 3apRed ycmpoUcMoXe da doBede do noepeda u/Unu hapaHbaHe.
- MoHTnpaTe eHa ot ToUKHe 3a 3aKePbBaHe Ha na3epHn HnCTpyMeHT (FInypa 1) KbM TpHNOxHnKa, KaTo n3NoJ3BaTe MOHTaxeH BnHT 5/8 -11, CneT TOBa 3aTeHHeTe MOHTaxHnBnHT.
UeJeba KapTa
Bux Knypa L
HЯkon na3epnK KOMJIeKTH BKNIOUcBt Na3epHa ueJeBa KapTa, KOrTo nomara 3a HAMnPaHeTO I MapKnPaNHeTO Ha Na3epHnIbYu. ZeleBaT a KaPa NODobpRa BvDnMOCCTT a Ha Na3epHnIbU, Korato JbUyt Ipcecua KaPATA. KaPATA e MapKnPAna Cbc CTaHApTHN IMetpuHN cKaJIN. Na3epHnI T bY IpemHnaba npe3 UepBeHATA uNn 3eNeHATA IIaCTMaC a NTpa3ra BAaTa TaHTA OT o6paTHa TcPAna. MarHnTb T B rOpHata Yact Ha KApTaTa e KOHCTpyuPAh Taka, Ye da NbPxN CELeBaTA KapTa HA TabAHn peLcn NlN CTOMaHEnb BoNTObe, 3a Da ONpeDeJN NO3uNTe Ha BePTkAnaT a N paBnHata. 3a Hai-Do6pa eΦeKTHBHOCT pRn N3NoJ3BaHe Ha ceJeBaT a KapTa npeHa tauch Ha KApTa Tp8BaDa e O6bpHata KbM Bac.
OuIna 3a noDcINBaHe Ha na3epa
BnxΦnrypa
Hakon na3epn KOMPNeKTN BKNIOUByat OunHa 3a NOcINBaHe Ha na3epa. Te3n OUnna NODo6pBbAT BNDIMOCCTTa Ha na3epn HbU npn JRPka CBETnHa INN Ha Dbln pa3CTOHN, KOrato Na3epbT ce n3noTBA 3a BbTpEshn PnpINOKeHn. Te3n OUnna No npnHcIn He ca HeoXoDmN 3a pa60Ta c na3epa.

BHIMAHHE:
Te3u ouuna He ca odobpehu no ANSI npedna3hu ouuna u He mpr6ba da ce u3non3eaam npu pa6oma c dpyeu uncmpymenu. Te3u ouuna He npedna3eaam om dupekmhomo HaBn3aHe Ha Na3epHua m Pb4 6b8 bawume oyu.
BG

BHIMAHHE:
3a da hamaunme pucka om cepuo3hu hapnraeaHua, Hukoza He 2neadaume dupekmno 8 naapehur Ib4, Cbc Unu be3 mezu ouuna.
N3KJI./BKn. Ha na3epa
1.ИЗберете rnaДка,плосka, paВна NOВьрхНOCТ,за дпocтавиTe пэ体育场.
2. B 3aBucnMoCT OT JKeIaHTo npINIOXeHne, noCTaBeTe na3epa xOpN3OHTaJHo (FInrpya A) nIN BePTnKaJHo (FInrpya B).
3. HataChete ToHa, 3a da BkIOHTe Ia3epHnI INCTpyMeHT.
- La3epbT 3aNoCbBa da ce camOHnBeHnpa. No BpeMe ha camOHnBeHnpaHeTo 0eToOnoDa npMnRBA B 3EJIeHO, poTaunOHnIaT Ja3ep (Anypa A1) npMnRBA, La3epbT BePknAHa rOpHa TOnkA (Anypa A2) npMnRBe, a Ja3epbT BePknAHa dOnHa ToKcA (Anypa A3) e ctaBnEn (ako e HnueH).
- Korato npoceDypata 3a abTomTuH NHBenipane 3abbpns,0eToOnOdbT CBeTa 3EJIENOHO, potaONHHrT Ia3ep Ce 3abpTa Ha nocJeHNte HAcTpoKn Ha 06./MIn.,Ia3epa BepTKaHa rOpHa ToKa e cTa6uJEn I na3epa BepTKaHa DoJaHa ToKa (aKO e HaJIuHe) OCTaBa cTa6uJEn.
Xopn3oHTaJIHa npOBepka
BnxΦnrypa
-
Harnacete Na3epHnT NHCTpyMeHT Ha TpHNOxHnK Ha 20 M OT CTeHata, KaTO CtpaHata "+X" e o6bpHata KbM CTeHata (Φnrypa ①).
-
BkIIOUeTe 3axpaHbaHeTo Ha Ia3epHnI INCTpyMeHT. OctabeTe Ia3epHnI INCTpyMeHT Ha ABTomaTHNO HIBeJIIPAHe I ce yBepTe, Ye Ia3epbT Ce BbpTu.
3 MapknpaTe pepepeHTHa Toka "D 1", KbJeTo JaepHaTa JINHnCe NOBra Ha CTeHata. Ako e HAnuyeH, INoJ3BaTe DeTeKTop, 3a Da HAmepTe NO-JeCHO JbYbT. - Pa3xna6eTe Na3epHnT INHCTpyMeHT OT TpNHOKNka N 3aBbPteTe Na3epHnT INHCTpyMeHT Ha 180°. CtpaHaTa "-X" Tp8Ba Da e o6bpHaT KaM CTehata (Fmypa ①② ). MapknpaIte pepepeENTHa ToyKa "D2", KbJeTo Na3epHaT aINHnCe IONBBA Ha CTehata.
5.Измеретевертукално pa3ctонne мжду peферentHTHte TOUKN"D1"и"D2"(ФИгра ①③). - Ako pa3ctoHneTo ot "D 1" do "D2" e <2,0 MM, He e Heo6xOdmo KaIb6pnpaHe.
RL600uRL600L
Ako pa3ctoHHeTo OT "Di"do "D2"e ≥ 3 MM, TOraba e Heo6xoDMo KaIb6pupaHe.
RL 700L u RL 750L-G
Ako pa3ctoHneto OT "Di"do "D2"e ≥ 2 MM,ToRaBa e Heo6xOIMO KaII6pnpaHe.
- 3aBbptete Na3epa Ha 90^ . NOBTOpe CTbIKN 1. do 6.3a Y-oCTa. 3ameHete "+X" c "+Y" n "-X" c"-Y" (Fmrypa ①④).
Xopn3oHTaJIHo KaIIb6pnpaHe
BnxΦnrypa
- 3aBbptete Na3epa Ha cBuaTa No3nna KaTo CTbNkata 1. Ha npoceDypata no npOBepka Ha xOpHOnTaIaTata (Cbc CtpaHaT " + X" o6bPhata KbM CTeHaTata).
2.ПиИЗКЛЮЕнлAZepeH INHCTpyMeHT,HaTICHeTe 3aIpbKTe HIOUa,IocNeBaHOOT KNOUa . - OcbobodeTe 10uca n npoIbIxKeTe da IbpxKeTe KIOUa 3a≥3cekyHdN.
- OcbobodeTe KIOUa
- CBeToIIOIbT 3EJIHO, KOraTo Ja3epHnT HnCTpyMeHT e BpeKIM Ha KaIN6pnpaHe X-oCTa.
6 Ako e Heo6xOIMO, peryIpaIte X-oCTa, kaTo n3NoJ3BaTe KIOUa 4KIOUa 3pABHBAHe Ha Ibua D 0. Do e ToTHa HnOBn pa3cTOnHne OT ToKIne D1n D2, ot6JIra3Hn IO BpeMe Ha npOBepkata Ha X-oCTa (fNrypa O③).
БЕLEЖKA:HaTnCKaHeTo Ha KInOua HnKInOuaHaKNaHcOCTa C0,01°(4,4MM @ 25M).ФИrypa MIIIOCTpnpa KaK KInOyOBeTe CbC CTpeJIKN BINRAIT Ha BCraKa OC.
- HaTnCHete OTHOBO KInOua 1a Da HAcTpOnTe X-oCTa n npoIbIxKeTe KbM peryInpaHTo Ha Y-oCTa.CBeToDIOBt npmIrBa YEPBHEO, Korato Na3epHnT INcTpymeHT e B pexIM Ha KaJIIN6pnpaHe Y-oCTa.
- 3abptete Na3epa Ha cbuata Na3nua KaTO CTbPKata 7. Ha npoeDypata no npOBepka Ha xOpN3oHTanata (cbc cTpaHata " ^+ Y" o6bpHata KbM cTeHata).
9.Ako e Heo6xOdmo,perynpaTe Y-oCTa,KaTO n3n03BaTe KIOUa KIOUa 3pABHBAHe Ha Nbua D 0.D0 e ToTuHa IIOBnP a3cTOnHne OTouKtTe D1N D2, OToJIa3AHn IO BpeMe Ha npOBepkata HaY-oCTa. - HatncheTe OTHOBO KIOUca 3a da HactponTe Y-oCTa n 3Jne3Te OT pekima Ha KaJIb6pupaHe.
Cera hactpoiknte Ha oCHTe ca 3aana3ehn. PekmblHa KaH6pnpaHe e N3KJI. nIa3epHnT INCTpyMeHT 3anOyBa ABTOMATNUHO HNBELIPAhe.
- NObTOpTe npOeDpypTa NO xOpN3oHTaJIHaTa npOBepKa, 3a Da nOTBbPnTe daI KAIb6pnpaHTo e ycNeuHo.
Ako na3epnur m uHcmpymem 6ce oue He moke da 6bde kaubupan cne npunaahe Ha npouedypama 3a kaubupane, u3npameme na3epa 8 omopuzupan cepu3en ueHmbp 3a peMOH.
Pa6ota c Ia3epa
TbI KaTo Ja3epHnIHT HNCTpymeHT e NHCtpyMeHT C BnCoka ToHocT, 3a IpeIIOuHTaHe e I3NoI3BaHTo Ha yCTpoIcTBOTo 3a DnCTaHcUHO ynpabJIeHne (aKO e HAIuHO), KOraTO e Bb3MOxHO.
KopuRupaHe Ha npEduynpeXeHne 3aHaKlaHnHe
(He e haJIuHbBpyeHpeKmM)
Ako Ia3epbTe pa3MeCTeH NO BpeMe Ha pa6oTa, CBeToIOIObT 3a npedynpexkDeHne 3a HAKHO ce npomeHa OT IOCTOARHO cepBHeHO HA Miraio cepBHeO, a na3epbT cnpa Da ce BbpTu 3aOnuBa Da Mira. (PpeDynpexkDeHneTo 3a HAKlaHnE e BKIOUeHO No IOpa36bupaHe, KOrato Ia3epHnT INCHtpymeHT 13JIN3a OT 3aBODa-IPON3BOIDNTeI.)
Kopurpahe Ha npedynpexJeHHe 3a HaknaHHe:
- Поверете пазерпунстумент, за р се уberпг, ч e noctавен правино.
-
HataHcHe KInOua a da npehaCtponTe npedynpeXeHnEto 3a HaKlaHaHe.
-
ABTomatnHOTo HnBeNipaHe Ha na3epa ige 3anOHe da ce Bbptn.
- Поберете поразвяваент на пазерни Иструмент с оригиналнда за.
I3KJIIOUyBaHe Ha npEduynpeXeHneHNeTo 3a HauKaHЯHe (He eHaIyuHO BpbueH peXm)
- BkIIOUeTe Ia3epHnI INCTpyMeHT N I3uKaIte Da 3aBbPmN aBTOMaTNUHOTO HNBENIPAHe.
- HattncHeTe KIOUOa
- CBeToIIOJa 3a npedynpexdEne npnHaKNoH ce npomeHa OT nocToaHHo YEPBEHO Do n3KnUoyeH CBeToIIOJ.
- 3aДаВКПIOUHTe OTHOBO npeDynpexKdEHNeTo npHnHaKnAHAHe, HATNCHETe KIIOUa
MoHTIpaHe Ha cKO6aTa Bbpxy DeTeKTopa BIX Knrypa D①
- Hacouhe cko6aTa Ha deTeKTopa, KaTO n3non3BaTe OTbopa 3a noDpaHBraHe.
2.3aterHete 3akpenBaunrT BnHT.
MoHTnpaHe Ha cKo6a Ha n3MepBaTeJeH npbT, npbUka nJI nOIo6eH npEdMeT
BnxΦnypa①②
- Pa3xna6te KOnyTe 3a 3atraHe.
- IocTaBeTe Ha n3MepBaTeJen npbT, npbUka nn noo6eH npedmet.
- 3aterheTe konyeto 3a 3atrahe, 3da qnknpate cko6ata.
- Korato noctabare N3MepBaTeJeH npbT, pa3xna6eTeCKo6ata, 3a da no3BOJNTe no3uOHOHaPe Harope/HaOny.
- Korato Измерваеллгпрът He e OTkpnt, 3aterheTe OTHOBO KONHTO, 3a da 3akpenite DeTeKTopa. Почетete no3ицята, nokazhaHa np6a Ha ckobataHa Измерваеллгпрът (ФИура ①).
Pa6ota c dTeKTopa
(Buxme Onucunna Ha Knaaumypama u cemoduodume 3a undukauu no epeme ha pa6oma)
BknIOUbaHe Ha dTeKTopa
- HatncheTe KIOUa da Ba BKnIOHTe DeTeKTopa.
Koratoe BkHoueH, eJnT LCD ekpaH MOMHTaHNo ige nokaxe BCnKu NKoHKn (I3non3BaTe TOBa, 3a Da ce yBepnte, ye LCD ekpHa pa60Tu npabnHo).
HaTnchTe n 3aApbXkTe KJIoua 品 ≥ 2 ceKyHn, 3a da H3KNIOHTe DeTEKTopa.
BENEKKA: DeTeKTOpbT aBTOMaTHNo ige ce n3KnHouN, aKO He OTKPme Ia3epen IIbY do 10 MNHyTn. 3a da rO BKnHouNte OTHOB, HATNCHETe KInOHa
CBeTbaHe Ha CBeToIIOHa Ha DeTeKTopa
Korato deTeKTopa e BKNIOueH, HATNCHEte KIOUa Da BKJ./N3KJI. cBeTeHTo Ha cBETOINOJa.
BENEKKA: OcbTneHnTo aBTOMaTHNo ige ce n3KnOuyn cNei 60 cekyHni, KOrato He ce OTKpne Na3epeH nbu nn He e HATNCHaT KIOU.
PerynnpaHe Ha ToUHocTTa Ha DeTeKTopa
Korato e BkHouen, HATNCHETe KIOHa 8a da npeBKnOHTe HAcTpoKaTa 3a TOHOC TMeKdy BNCOKA n HNCKA.
Hactpoikata3aToHocTno noopa3bupahe BVCOKA.
BENEXKA: N3noJ3BaTe HAcTpoiKNe 3a BNCOKA ToHOCr, KOrato:
HactpoKnTe 3a BNCOKA TOuHOCHe He e Hneo6xoDIma.
He moke da ce nolyu ctaubnHO pepepeHTHO HBO npaBn Bn6paun.
ToTnHHaTaMbIgnaIpeuHaJa3epHnJbU.
HactpoBbHe Ha cnIaTa Ha 3Byka Ha BnCOKOrOBOpNTeIHa DeTeKTopa
Korato e BkIIOueH, HATNCHE Te KIOUa 3a da npBekIOuHTe HACTpoIKTe 3a cna Ha 3bYka (BUCOK/MEK/3AflnyUEH).
Korato e BkIIOueH, HAcTpoiKnTe Ha 3Byka no nOpa36bnpaHe e HAcTpoeH Ha BNCOK.
OTkpmbaHe Ha pepepeHTHO HnBO
1.ДOKATO e BKNIOHEn, NOCTaBte DeTeKTopa TAm, KbIeTO ce IPOEKTIpa Na3epHnT JbY.
2.ИЗнорзВаiteТрбБИЧКИТeСМexучpeTeHaДeTeKToPa(ФИгра (已 2) ,NOДыржATEpaBHHaHaHINBOTo.
3. IocTabete np03opeza 3a npnemane Ha na3epa (Hrypa C③) KbM n3TOUHnKa Ha na3epHnT NbY. Ip03opezt 3a npnemane Tp6Ba Da e Ha nIe B paMKInTe Ha 40^ ot n3TOUHnKa Ha na3epa
4.ИЗползайтЕиконITE"Ja3eрHo pa3no3HаBaHe"Ha LCD ekpaHa,3aДа пдраВнite PepepeHTHaTа Линя (Фигра(C①)слэрнЯлч.
BENEXKA: Ako cnIata Ha 3Byka Ha BnCOKOrOBOpnteIe BKN. (BnCOK/MEK), 3ByKObNt CnHaN CbIoo NoIiomara 3a H3paBnBaHe Ha DeTeKTopa. BbPnT NOBTapAe Ce 3Byk Noka3Ba Ha DeTEKTopa, Ye TpR6Ba Da CE npEMecTN HoJOny. BaBHnT NOBTapAe Ce 3Byk Noka3Ba, Ye DeTEKTopa Tpr6Ba Da ce npEmecTN HArope. CTabuHnT 3Byk Noka3Ba, Ye Na3epHnT PbU e NoDpaBHeH C PepepeHTHaTa IINHn Ha DeTEKTopa.
| Стабиени тон | Повравень с Робереньта Линия |
| Бърп постаяss сe 3вук | Пөмecтete DeTeKTopa Надoly |
| Бавен постаяss сe 3вук | Пөмecтete DeTeKTopa Нагоpe |
- Korato na3epbTe n3paBHeH c PepepeHTHaTa NHHa,OT6eHexeTe Ta3n No3uNIA.
BENEKKA: Ako rohpata qact Ha deTeKTopa ce 3n013Ba KaTO MRCTo 3a MapknpaHe, o6bpHete CE KbM 3aHaTa CtpaHa Ha DeTEKTopa 3a CTOnHOCTTa Ha KOMNeHCAuYrTa Ha N3MepBaHeTo.
PoiapbXka n rpnXka
Korato na3epa He e B ynoTpe6a, noHnCTe BbHnHnTe Yactn C MOKpa Kbpna, n36bpwete Na3epa C Meka Kbnpa, 3a Da cTe cnrypn, Ye e cyx, n Cnei TOBa rO cbxpanete BV npedoctabehata Kytn.
- HNKOΓA He n3non3BaIe pa3TBOpn 3a noocTbaHe Ha na3epa.
He cxbxpanhaBte na3epa npu TemnepaTpa nD-10°C nnHad 40°C.
3a da ocnpitte tohocctt ha Baata pa6ota, cheTo npoBepraBaTe Ia3epa 3a npabnH0 KaIbpupe.
- PpOBepKHa KaIb6paIyTa IpyrN nonpaBKn, CbP3AHn C NOdApBxKaTMOKe Da Ce N3BbPsaT B cepBn3HnTe UeHTPOBe Ha STANLEY.
Cneunfkaaun
Лазэрэнтурмент
| RL 600 RL 600L | RL 700L RL 750L-G | |||
| Точnost на:xorinsoнталноTo bvpTeHe:* пи 20°C | +/-2,2 MM @30 M +/-2 | 2 MM @30 M +/-1,5 MM @30 | M +/-1,5 MM @30 M | |
| Точnost на Верпкално ВьрTeHe:* пи 20°C | +/-3,0 MM @30 M +/-3 | 0 MM @30 M +/-3,0 MM @30 | M +/-3,0 MM @30 M | |
| Точnost на Горна точka на OTbEsca* пи 20°C | +/-4,4 MM @30 M +/-4 | 4 MM @30 M +/-3,0 MM @30 | M +/-3,0 MM @30 M | |
| Точnost на долнatable точka на OTbEsca* пи 20°C | N/A N/A +/-8,7 | MM @30 M +/-8,7 MM @30 M | ||
| Овxbат на komпенсанята: 5° 5° 5° 5' | ||||
| Овxbат на Наплona: ±10% (Двоин ос) | ±10% (Двоин ос) ±10% (Двоин ос) | (Двоин ос) ±10% (Двоин ос) | ||
| Минимално увелучения на Наclюнa: 0,01° (4,4 MM @ 25 M). | 0,01° (4,4 MM @ 25 M). | 0,01° (4,4 MM @ 25 M). | 0,01° (4,4 MM @ 25 M). | |
| Овxbат на сканиранe: 10°/45°/90° ±20% | 10°/45°/90° ±20% | 10°/45°/90° ±20% | 10°/45°/90° ±20% | |
| Диаметър на равOTниот обxbат сдetectор: | ≤600 M ≤600 M | ≤600 M ≤600 M | ||
| В記錄и на Изравлике: ≤30 sek. ≤30 | sek. ≤30 sek. | ≤30 sek. | ||
| Сокорst на Вьртое:* пи 20°C (стайна Temпераразуа) | 0/150/300/600 ob./mн. +/- 10% | 0/150/300/600 ob./mн. +/- 10% | 0/150/300/600 ob./mн. +/- 10% | 0/150/300/600 ob./mн. +/- 10% |
| Клас на пазера: | Клас 2 ≤1,0 MB (IEC 60825-1:2014) | Клас 2 ≤1,0 MB (IEC 60825-1:2014) | Клас 2 ≤1,0 MB (IEC 60825-1:2014) | Клас 2 ≤1,0 MB (IEC 60825-1:2014) |
| Дылжина на пазернata вллна: | 630 hm/680 hm | 630 hm/680 hm | 630 hm/680 hm | 510 hm/530 hm630 hm/680 hm |
| В記錄и на равotа: | ≥30 ча: | ≥40 ча: | ≥40 ча: | ≥30 ча: |
| В記錄и на пазереда: | N/A | ≤7 ча: | ≤7 ча: | ≤7 ча: |
| Източник на зхравае: | 2х D-kljetчни поалкални | Литиево-йонna батерия | Литиево-йонnaSBATERIA | Литиево-йонnaSBATERIA |
| IP Клас: | IP54 | IP66 | IP66 | IP66 |
| Диапазон на равOTнатa Temпераразуа: | -10°C ~ +40°C | -10°C ~ +40°C | -10°C ~ +40°C | -10°C ~ +40°C |
| Диапазон на Temпераразуа при сбхравае: | -10°C ~ +40°C | -10°C ~ +40°C | -10°C ~ +40°C | -10°C ~ +40°C |
© 2018 Stanley Tools
Stanley Europe, Egide Walschaertsstraat 14-16,
2800 Mechelen, Belgium
P/N 022793 (August 2018)
www.2helpU.com