
Proseries 4600 - Laminating machine GBC - Free user manual and instructions
Find the device manual for free Proseries 4600 GBC in PDF.
| Brand | GBC |
| Model | Proseries 4600 |
| Product type | Laminating machine |
| Power supply | 220-240 V / 50-60 Hz / 1050 W / 6.0 A |
| Dimensions (L x D x H) | 691 x 271 x 112 mm |
| Weight | 20.0 kg |
| Maximum pouch width | 480 mm |
| Maximum pouch thickness | 2 x 350 microns (total 700 microns) |
| Maximum pouch + document thickness | 3.0 mm |
| Preheat time | 6 minutes |
| Temperature range | 0 °C to 140 °C |
| Roller speed | 1 (slow) to 9 (fast) |
| Laminating modes | Hot, cold, 2 memory modes |
| Control panel functions | POWER, HOT, COLD, REV, RUN, MEMORY (1/2), temperature and speed settings |
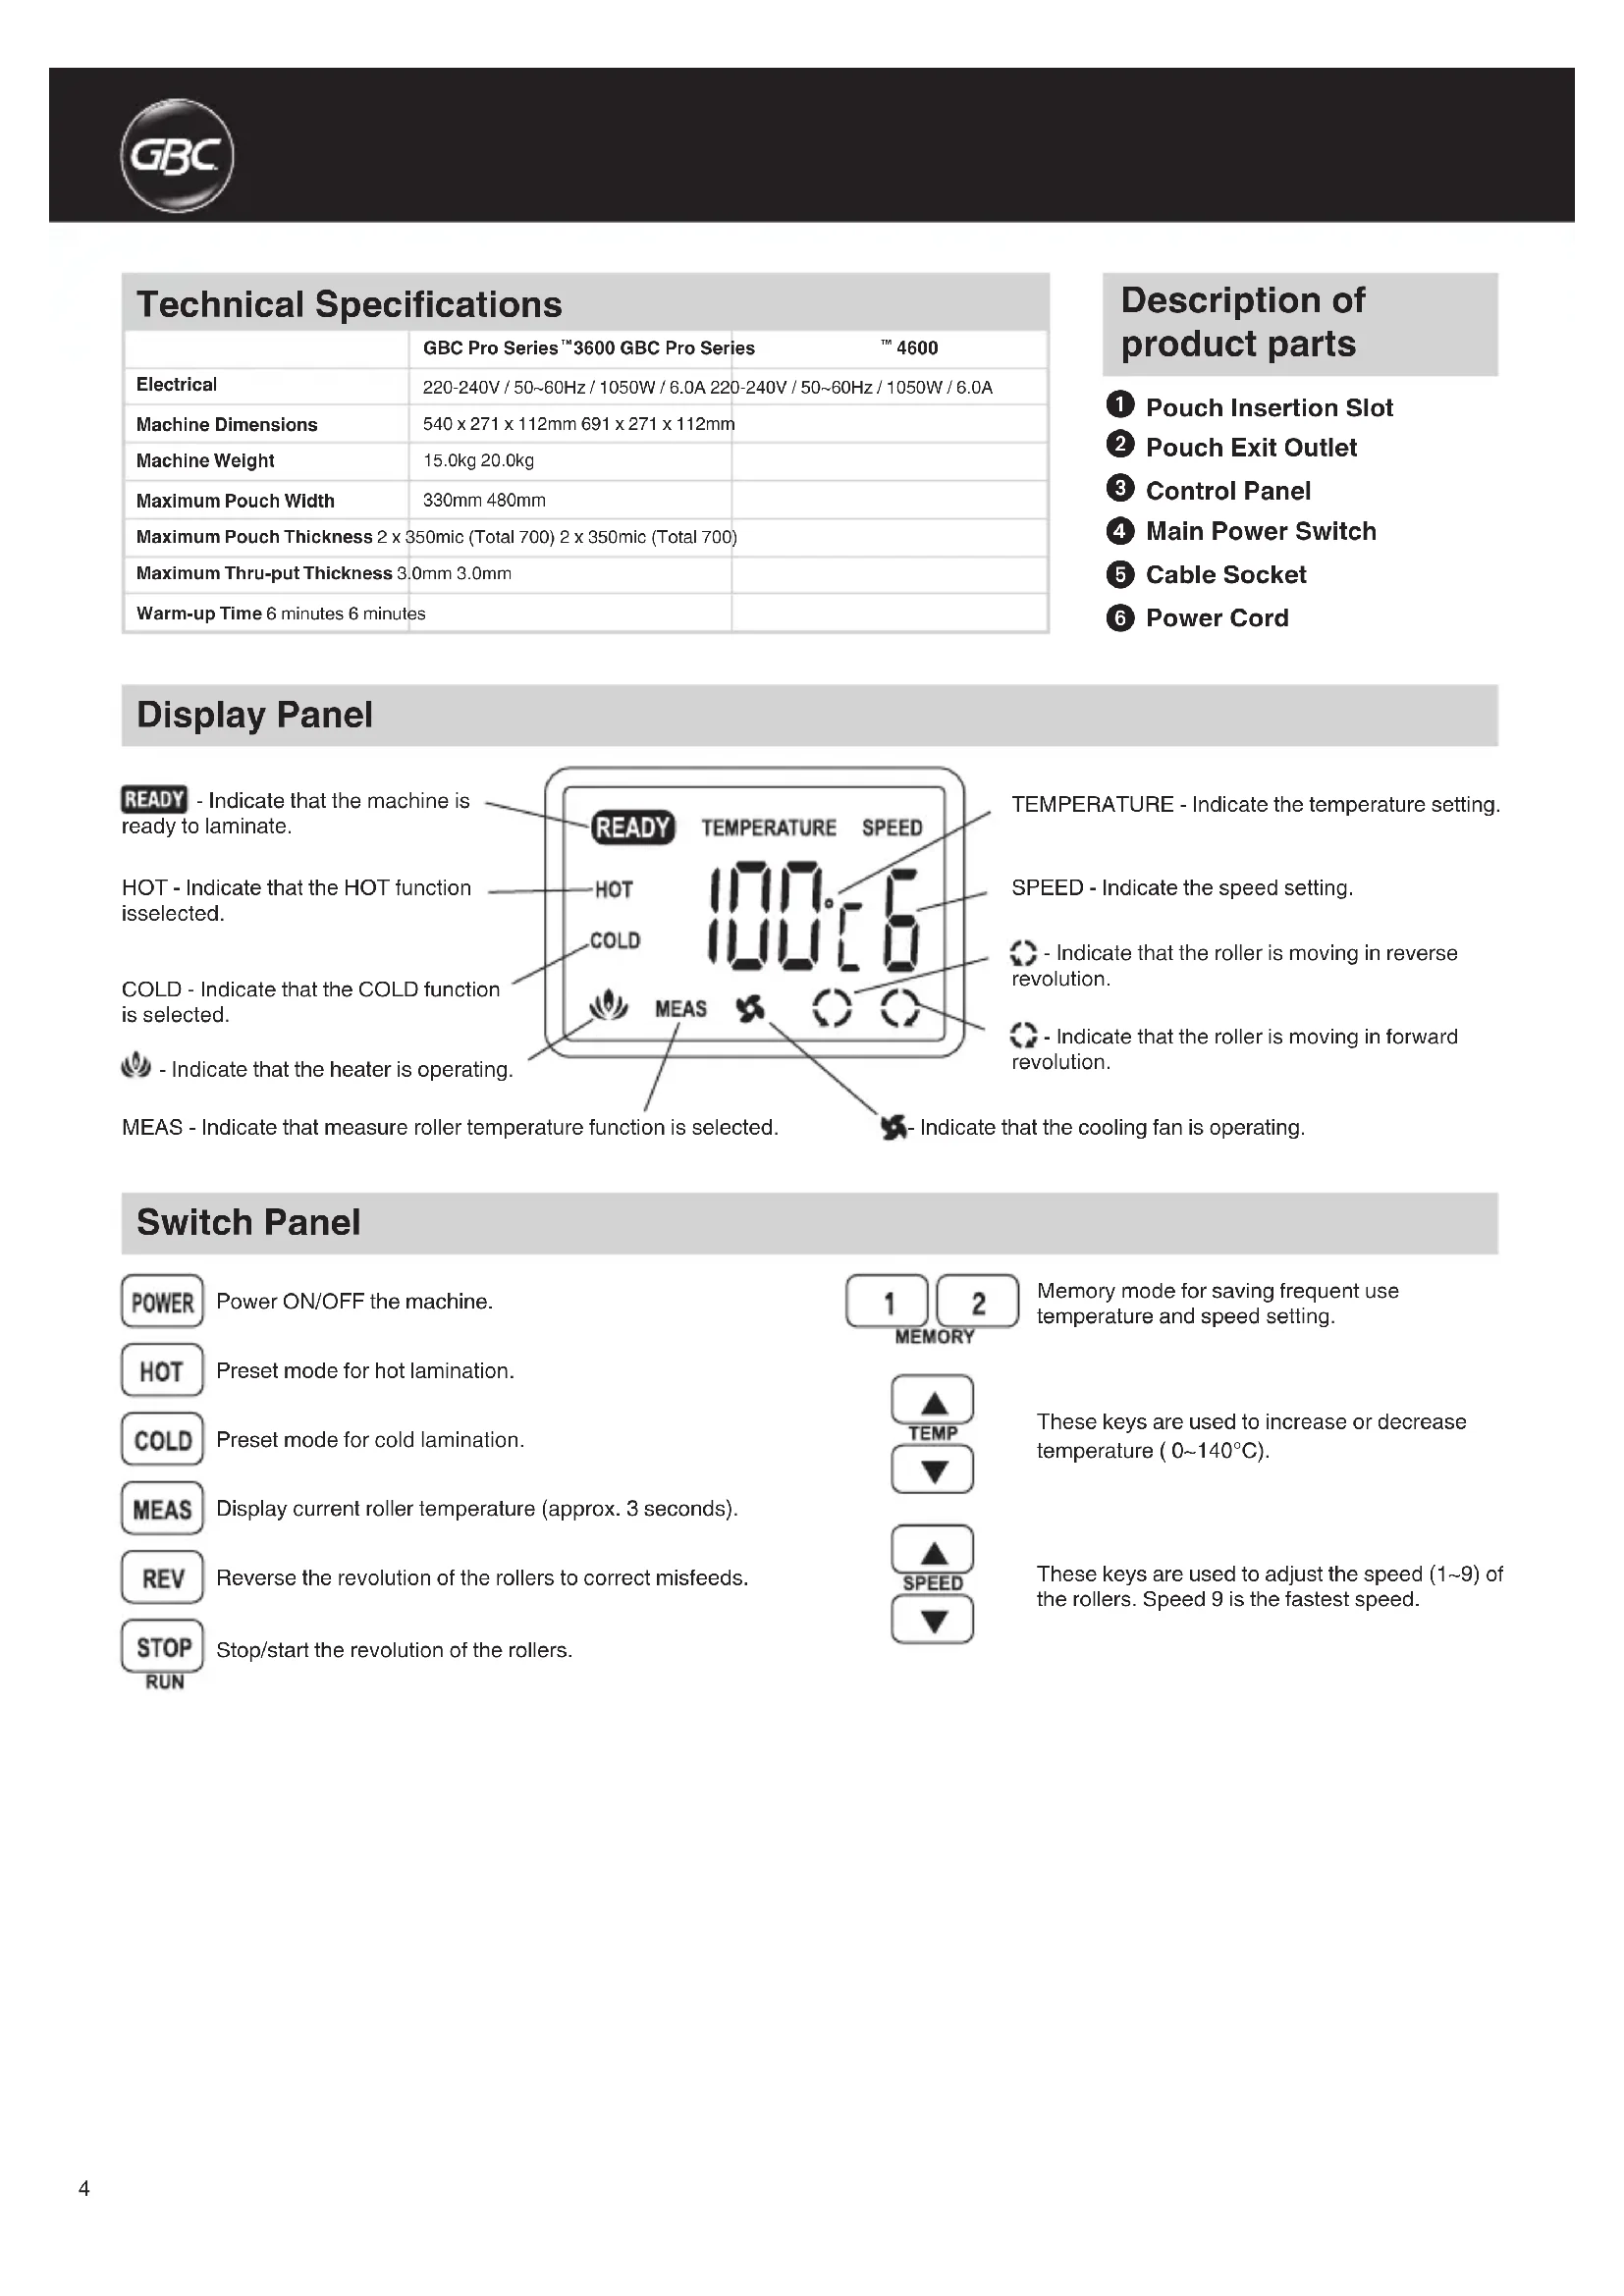
| Display | LCD: READY, HOT, COLD, heating, temperature, speed, forward/reverse, fan |
| Auto shut-off (standby) | After 120 minutes of inactivity |
| Cooling | Built-in fan, automatic shutdown after cooling below 65 °C |
| Cleaning | Exterior with damp cloth; do not use detergents or sprays |
| Warranty | 1 year (normal use) |
| Intended use | Indoor only |
Frequently Asked Questions - Proseries 4600 GBC
User questions about Proseries 4600 GBC
0 question about this device. Answer the ones you know or ask your own.
Ask a new question about this device
Download the instructions for your Laminating machine in PDF format for free! Find your manual Proseries 4600 - GBC and take your electronic device back in hand. On this page are published all the documents necessary for the use of your device. Proseries 4600 by GBC.
USER MANUAL Proseries 4600 GBC
Technical Specifications
| GBC Pro Series™ 3600 GBC Pro Series™ 4600 | |
| Electrical | 220-240V / 50~60Hz / 1050W / 6.0A 220-240V / 50~60Hz / 1050W / 6.0A |
| Machine Dimensions | 540 x 271 x 112mm 691 x 271 x 112mm |
| Machine Weight | 15.0kg 20.0kg |
| Maximum Pouch Width | 330mm 480mm |
| Maximum Pouch Thickness 2 x 350mic (Total 700) 2 x 350mic (Total 700) | |
| Maxlmum Thru-put Thickness 3.0mm 3.0mm | |
| Warm-up Time 6 minutes 6 minutes | |
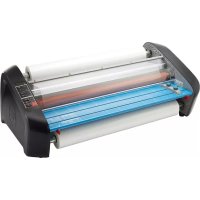
Description of product parts
Pouch Insertion Slot
Pouch Exit Outlet
Control Panel
4 Main Power Switch
5 Cable Socket
Power Cord
Display Panel
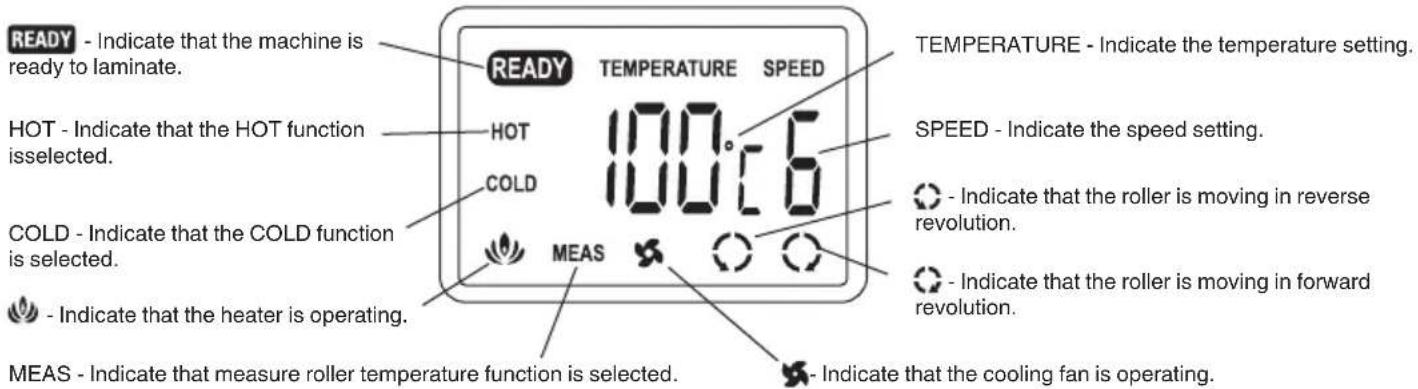
Switch Panel
Special Notice
Thank you, for your recent purchase of a GBC Pouch Laminator. Your new laminator may emit a slight odour during the initial stage of operation. It is normal and will diminish after several hours of operation.
Safety Instructions

YOUR SAFETY AS WELL AS THE SAFETY OF OTHERS IS IMPORTANT TO ACCO BRANDS. IN THIS INSTRUCTION MANUAL ARE IMPORTANT SAFETY MESSAGES. READ THESE MESSAGES CAREFULLY.

THE SAFETY ALERT SYMBOL PRECEDES EACH SAFETY NOTICE IN THIS INSTRUCTION MANUAL. THE SYMBOL INDICATES A POTENTIAL PERSONAL SAFETY HAZARD TO YOU OR OTHERS, AS WELL AS CAUSE PRODUCT DAMAGE OR PROPERTY DAMAGE.
Waste Electrical and Electronic Equipment (WEEE)

Electrical and electronic devices contain materials and substances that can have damaging effects on human health and the environment. This symbol indicates that this device must not be treated as unsorted municipal waste but must be collected separately. Dispose of the device via a collection point for the recycling of waste electrical and electronic equipment within the EU, UK and in other European countries that operate separate collection systems for waste electrical and electronic equipment. By disposing of the device in the proper manner, you help to avoid possible hazards for the environment and public health that could otherwise be caused by improper treatment of waste equipment. The recycling of materials contributes to the conservation of natural resources.
Important Safeguards


WARNING: FOR YOUR PROTECTION DO NOT CONNECT THE POUCH LAMINATOR TO ELECTRICAL POWER UNTIL YOU READ THESE INSTRUCTIONS COMPLETELY. KEEP THESE INSTRUCTIONS IN A CONVENIENT LOCATION FOR FUTURE REFERENCE. TO GUARD AGAINST INJURY, THE FOLLOWING BASIC SAFETY PRECAUTIONS MUST BE OBSERVED IN THE SET-UP AND USE OF THIS PRODUCT.
General Safeguards
- Use the unit only for its intended purposes of laminating documents.
- Do not place anything in the throat opening of the laminator other than pouches/documents.
- Place unit on a secure, stable work area to prevent the unit from falling and possibly causing personal injury and damage to the unit.
- Follow all warnings and instructions marked on the unit.
- The socket outlet shall be installed near the equipment and shall be easily accessible.
- Do not attempt single side lamination, this will destroy the laminator.
- Do not block the vent slots, this will cause the laminator to overheat.
Electrical Safeguards
- The unit must be connected to a supply voltage corresponding to the electrical rating shown on the unit.
- Unplug the unit before moving it, or when it is not in use for an extended period of time.
- Do not operate with a damaged supply cord or plug. Do not alter the attachment plug. The plug is configured for the appropriate electrical supply.
- Do not overload electrical outlets beyond their capacity; fire or electrical shock could result.
- The unit is intended for indoor use only.
- Close supervision is required when this product is used near children.
Cleaning

Caution: Unplug this product before cleaning.
- Wipe exterior only with a damp cloth. Do not use detergents or solvents.
- Do not use aerosolusters or cleaners.
- Do not spray anything into the machine.
Service
Do not attempt to service or repair the pouch laminator yourself. Unplug the unit and contact an authorised ACCO Brands service representative for any required repairs.
Operation, hot lamination
- Connect power cord to appropriate power source.
- Press the power switch on the back of the laminator and press the POWER button for 1 second to turn on the machine (fig. A).
-
Using the lamination guidelines, select the appropriate temperature setting for the pouch gauge thickness and material you are laminating.
-
If the laminated item appears to be cloudy, it means that the laminator temperature is not hot enough. Allow the laminator to heat for a few more minutes then run the pouch through again.
-
If the laminated item is wavy, the TEMPERATURE is too hot. Verify temperature selector is set at the appropriate temperature.
-
Always allow sufficient time for the laminator to adjust to changes in temperature setting.
1. Preset Mode 2. Manual Mode
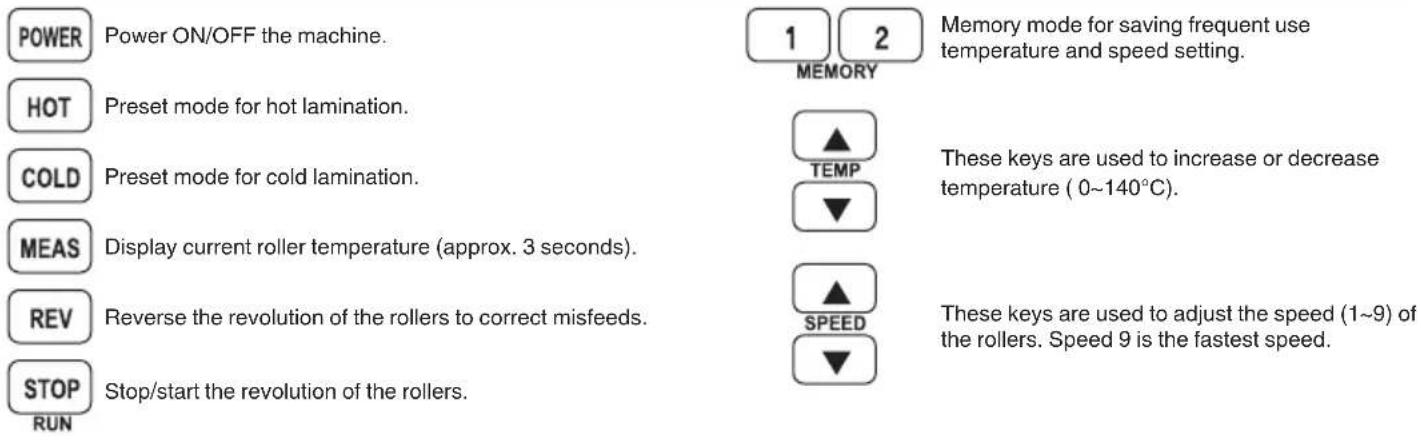
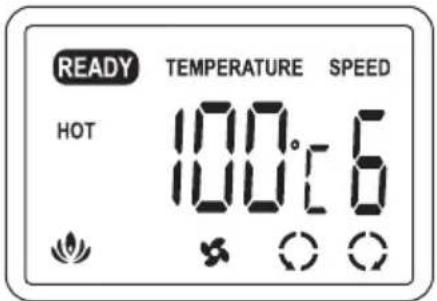
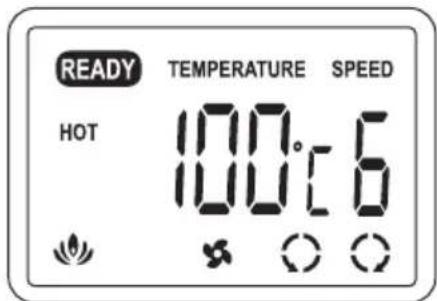
a. Press HOT button to choose Preset mode. Machine is set to temperature 100^ / speed 6 and "HOT" symbol appears on the LCD. (fig. B).
(to change speed and temperature manually):
a. Press the temperature Up/Down arrow keys to modify the temperature setting.
b. Press the speed Up/Down arrow keys to modify the speed setting.
3. Memory Mode
(to save specific temperature and speed in memory):
a. Press either button 1 or 2 for one second to enter memory mode.
b. Set your frequent use temperature and speed setting using the Up/Down arrow keys.
c. Press the number button again to save setting to memory.
d. To use a saved memory, select either button 1 or 2. The LCD will indicate the temperature and speed selected.
- As the machine warms up, the heating symbol ( ) will flash. When the machine is ready to laminate, the laminator will beep and the "READY" symbol appears on the LCD (fig. C).
- Centre the item to be laminated within the pouch left to right with the top edge against the sealed edge of the pouch (fig. D).
- Insert the pouch with the sealed edge first into the machine (fig. E).
- The laminated item will automatically exit the rear of the machine. After the pouch has stopped moving, immediately place it on a flat surface to cool for one minute before handling (fig. F).
Operation, cold lamination
- Connect power cord to appropriate power source.
- Press the power switch on the back of the laminator and press the POWER button for 1 second to turn on the machine.
- Press COLD button and "COLD" symbol appears on the LCD.
- When the machine is ready to laminate, the laminator will beep and the "READY" symbol appears on the LCD.
- Use and laminate your cold pouch by pressing the STOP
button to start or stop the roller.
CAUTION: If you have just done hot lamination, press COLD button (to cool down machine) and wait for the "READY" symbol to reappear on the LCD before attempting to do cold lamination.
Reverse Button
In the event of a misfeed or a jam follow these instructions.
- Press the REV button and hold down. This will reverse the rotation of the rollers allowing the pouch to exit the front of the machine.
- Pull the document out of the laminator.
- After the document is out of the machine clean the rollers by running the cleaning sheet through the laminator.
CAUTION: Be careful when removing the laminated pouch from the machine. It may be hot.
Finishing lamination
- Press and hold POWER button for one second and "COOL" symbol appears on the LCD.
- After the roller cool down (below 65^ ), the laminator will beep and power will be stopped automatically.
- Press the power switch on the back of the laminator to turn the machine off.

CAUTION: Cooling down the machine before turning off the power switch protects and extends the life of the rollers.
NOTE: For added safety and environmental reasons the laminator will automatically go into sleep mode after 120 minutes of inactivity. If you wish to use the laminator again, press the POWER button for 1 second to turn on the machine.
Laminating Tips
DO NOT LAMINATE AN EMPTY POUCH.
- Never insert the loose end of the pouch into the machine first. This could cause the machine to jam.
- Before laminating important or unique documents, always run a test pouch through the laminator using a similar type of document.
- As soon as hot lamination is completed, remove the lamination from the front of the machine and place on a cool flat surface for cooling to prevent the pouch from curling.
- Do not cut pouches prior to lamination.
Lamination Guide
| Material Film thickness | Setting without Carrier Setting with | Carrier | |||
| Temperature Speed | Temperature Speed | ||||
| Copy Paper | 75 ~ 100 Micron 100°C 6 130°C 4 | ||||
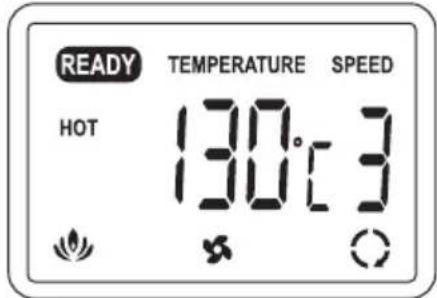
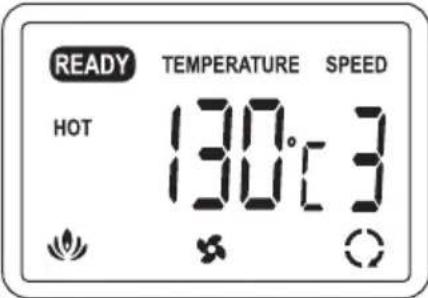
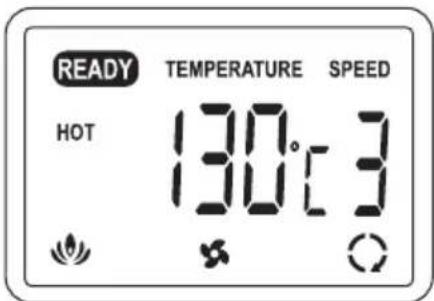
| 125 ~ 150 Micron 120°C 4 130°C 3 | |||||
| 175 ~ 250 Micron 120°C 3 140°C 2 | |||||
| 300 ~ 350 Micron 130°C 2 -- | |||||
| Brochure Paper | 75 ~ 100 Micron 100°C 5 130°C 4 | ||||
| 125 ~ 150 Micron 120°C 3 140°C 3 | |||||
| 175 ~ 250 Micron 130°C 2 140°C 2 | |||||
| 300 ~ 350 Micron 140°C 2 -- | |||||
| Photo Paper | 75 ~ 100 Micron 100°C 4 130°C 3 | ||||
| 125 ~ 150 Micron 130°C 3 140°C 2 | |||||
| 175 ~ 250 Micron 140°C 2 140°C 1 | |||||
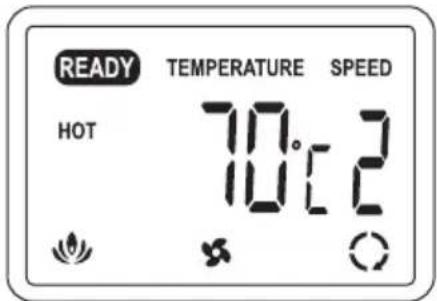
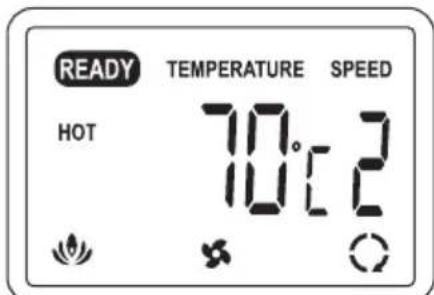
NOTE: For "STAND BY" mode, please keep the temperature at 70^ and speed 2.
Guarantee
Operation of this machine is guaranteed for 1 year from date of purchase, subject to normal use. Within the guarantee period, ACCO Brands Europe will at its own discretion either repair or replace the defective machine free of charge. Defects due to misuse or use for inappropriate purposes are not covered under the guarantee. Proof of date of purchase will be required. Repairs or alterations made by persons not authorised by ACCO Brands Europe will invalidate the guarantee. It is our aim to ensure that our products perform to the specifications stated. This guarantee does not affect the legal rights which consumers have under applicable national legislation governing the sale of goods.
Register this product online at www.accobbrands.com
If you experience a technical fault with your product during the warranty period, please contact the relevant ACCO service centre. Depending on the diagnostics and the model type, we will either arrange a service call by an engineer or we will ask you to return the machine to ACCO. If you return the machine, ACCO will, at its discretion, in accordance with law, either (i) repair the machine using either new or refurbished parts, or (ii) replace the machine with a new or refurbished machine that is equivalent to the machine being replaced.
Specifications techniques
Operation, hot lamination
- Connect power cord to appropriate power source.
- Press the power switch on the back of the laminator and press the POWER button for 1 second to turn on the machine (fig. A).
-
Using the lamination guidelines, select the appropriate temperature setting for the pouch gauge thickness and material you are laminating.
-
If the laminated item appears to be cloudy, it means that the laminator temperature is not hot enough. Allow the laminator to heat for a few more minutes then run the pouch through again.
-
If the laminated item is wavy, the TEMPERATURE is too hot. Verify temperature selector is set at the appropriate temperature.
-
Always allow sufficient time for the laminator to adjust to changes in temperature setting.
1. Preset Mode 2. Manual Mode

a. Press HOT button to choose Preset mode. Machine is set to temperature 100^ / speed 6 and "HOT" symbol appears on the LCD. (fig. B).
(to change speed and temperature manually):

a. Press the temperature Up/Down arrow keys to modify the temperature setting.
b. Press the speed Up/Down arrow keys to modify the speed setting.
3. Memory Mode
(to save specific temperature and speed in memory):

a. Press either button 1 or 2 for one second to enter memory mode.
b. Set your frequent use temperature and speed setting using the Up/Down arrow keys.
c. Press the number button again to save setting to memory.
d. To use a saved memory, select either button 1 or 2. The LCD will indicate the temperature and speed selected.
- As the machine warms up, the heating symbol ( ) will flash. When the machine is ready to laminate, the laminator will beep and the "READY" symbol appears on the LCD (fig. C).
- Centre the item to be laminated within the pouch left to right with the top edge against the sealed edge of the pouch (fig. D).
- Insert the pouch with the sealed edge first into the machine (fig. E).
- The laminated item will automatically exit the rear of the machine. After the pouch has stopped moving, immediately place it on a flat surface to cool for one minute before handling (fig. F).
Operation, cold lamination
- Connect power cord to appropriate power source.
- Press the power switch on the back of the laminator and press the POWER button for 1 second to turn on the machine.
- Press COLD button and "COLD" symbol appears on the LCD.
- When the machine is ready to laminate, the laminator will beep and the "READY" symbol appears on the LCD.
- Use and laminate your cold pouch by pressing the STOP
button to start or stop the roller.

CAUTION: If you have just done hot lamination, press COLD button (to cool down machine) and wait for the "READY" symbol to reappear on the LCD before attempting to do cold lamination.
Reverse Button
In the event of a misfeed or a jam follow these instructions.
- Press the REV button and hold down. This will reverse the rotation of the rollers allowing the pouch to exit the front of the machine.
- Pull the document out of the laminator.
- After the document is out of the machine clean the rollers by running the cleaning sheet through the laminator.

CAUTION: Be careful when removing the laminated pouch from the machine. It may be hot.
Ppoulaeic yia to nEkrpiok ouotma
H oukeun npenei va eival ouvdsuevno nyn taon tpofooioiaou avtoioxie otnv oovmaotikn tuin taon nauaypafetai on ouokeun.
Anouvdeote to ciTNS oukeuans antnV npia npotou nV metakivnoeTe n av dev npoketal va xpoaonoinei yia eyaXpoviko diatnma.
Mn leitoupyeite n oukeun av to kalwio tropofooiaac n to fic exu unooie zmu. Mny tponnoie to fic.To fic evai diaumopwoev yia tvkataaan taon tropofooiac.
MnV unepoortwveTc nEeKtpkeC npicnc npa ano tnpoiaypaes touc. eavtiEeTn epintwn, npoei va npoknthetai npkayia nEeKtponlxiia.
Houkeun npoopiEaiaokkietikayia xpioneewteipoucs xwpous.
Anaritei tOeVn eTlBLeyn otav autn n oukeun xpnoonoeitau kovtae naia.
Kaθαρισμός

Ppoox: Ppotou kaagiaeTe Tn ouakeun, va anoovdeEeTe to fic ano nn npiz.
kouniTe mOvoTo EwTeipko hoc Tc oovueuc uypo navi.Mn npoiOnoiite anoppuavtka n diaUteC.
MxnpoiooiieKaBapiotka aepoluata n aepoluata yia tvn aphipeon okovnc.
Mynyekacetineiota maoukeun.
Σερβις
Mny enxipeite va kavete movo aac epyaiec oepic n eitkeunc
otov paaotikoini thn kwv. AIOouvdeote to cns ouokeuncs
anopynpica kal ENIkoivwneote me Eouaiodotnve n avtinpoowia
oepeic nC ACCO Brands yia onoiadhnote anaitouevn enkueun.
Aetoupyia, nlaotikoinonv
- 2uvδεσετο καλωδιο πεύματος σε μίακαταλληληπρία.
- Patnote tv 6iaokntn 5eitoupyiac oTo niow mepoc tou nlaotikonountn kai patnote to koumti POWER eri 1 8eutepolento yia va evepyontne Tn oukeun (ekova A).
- Akoouwvtaov nivaka obnyuw nlaotikonoinons napakatw, enuEeTmV kataaAaI npOmuon eepokpaiaac yia to naoc hknks kai tvo Tuto xapiou nov npoketial va nlaotikonoine
Av to nlaotikoinmu evo avkei evo faivetai va exei Boi oyn, auto onmaivei ot ngepokpaia tou nlaotikoinnt dev eiva apketa uyn. Ahote tov nlaotikoinnt naepaevi yia akopa aenra kai, ont ouvexia, gavaenepae t thn mea ano tn oukeun.
Av to nlaotikotounevo avtkeieevo exi kujatotn oyn, tote n OEPMOKPAIA eivai nou uyn. Eunepaiwote otixeTe eruaeeT Nkataaann npuonpupokaaic.
HOT -akTnBaunuФyHKuH HAFPEB.
COLD -akTbauaФyHKuIN OXJIAHDEHNE.
-akTbauuHaRpeBaTea.
MEAS-BbIbOpfynKcNn“H3MepeHneTeKuSeiTeMnpaTpyBaIIKNOB
TEMPERATURE - TEKUДА YCTAHOBKA Tempeatypbl.
SPEED - Tekuza yctahOBka chopoctn.
- BpaueHHe BaIKNOB B O6paTHOM HapabJIeHN.
- BpaueHHe BaJIKOB B IpRmOM HapabLeHH.
pa60taeTOXlaKaIaIOuIeBENTHJIaTOp.
Panaelb ynpablenna
POWER BKNIOUeHHe N BbIKIOUeHHe NITaHnYcTPOINCTBa.
HOT npedyctaHOBJIeHHb peKIM dIra rOpJero lamHHPOBaHH.
COLD npedyctaHOBHeHHbI peKIM dIy XOLOHOro IaMHNHPOBAHJ.
MEAS TeKyuzaa TemnepaTypa BaJIHKOB (npIM. Ha 3 cekyHdbI).
REV 6bpaTHoe BpaSeHnE BaJIHKOB IJIa KOppeKcIIN HePpaBnJIbHoN IOaH.
STOP 3aanyck n octaHOBka BpaueHnBaJIHKOB. RUN
1 2 peKIM 3aONMHaHnI dIe COxpaHeHnI cTcO NCIOJIb3yEmbIX 3HaueHnI TempePaTypbl n CHOpOCTN.


3TN KHONKN HcNOJIb3yOTCnДI NOBblWeHnN ININHKeHnTeMnepaTpby (0-140°C).
3TN KHNKIN CNOJIb3yOTcR DnI yCTaHOBKn
CHOPoCTN BpaueHn (1-9) BaJIHKOB. 3HaueHne
9 COOTBETCTByET CAMO60JIbWOn CHOPoCTn.
Oco6oe npimechne
5naoapm Bac 3a HeabHO cdehaHny noky nakeTHoro lamHaTopa GBC Pouch Laminator. Baw HObI lamHaTOp MOKeHTnDaBaTJeRkn 3anax B TeueHne HauJIbHOrO nepHOda 3KcNpyatau. 3TO BNOJHE HopMaJIbHO; 3anax yMeHbWNTCn oocJe HEckOblkHX YacOB pa60Tbl.
Hnctpykunno6e3onacnoctn

BAJSA B30NACHOCTb HAPyC B30NACHOCTbIO DpyrN X NLIU RBLRETc BAH HBIM ACNEKTOM I KOMIaHHI ACCO BRANDS.B DAHHOI INHCTPYKINI IO 3KCIYATAUcNOCEPHNTcBAKHAR NHΦOPMALIO NO B30NACHOCTH.NPOCMBAC BHIMATEJIbHO O3HAKOMITbCR C HEN.

DAHHbI INPEyINPEXIAIOUH 3HAH B HICTPYKUNI NO 3KCIJYATAUHN PACNOJOHOHEN NEPEK KAHdbIM COOSEHEM, IDE PEYb IDET O COBJIOEHN MEP BE3ONACHOCTN.
DAHHbIM 3HAK3bIBAET,HTO HEKOPKEKTHAR 3HCNIYATAUH YCTPOICTBA MOHET NPNBECTN H NOJUYEHIO TPABM BAMN JIN DpyTUMN JIUCAMN A TAHHE BbI3BATb NOBPEXDEHNE YCTPOICTBA INN IMYUECTBA.
OToXoDbI 3JIeHTpHuecHOrO n 3JIeHTpoHHOrO o6OpydoBaHnA

3JIeHTPnueCHeN 3JIeKTHPOHHbIe YcTPOHCTBa COepJkaT MaTePnaJIbI N BeUeCTBA, KOTOpBIE MOrY T OKa3bIBaTb BpeHoe BO3eHcTBNe Ha 3dOpOBBe YeJIOBeka N OKpyKaHouCyO cpeDy.
He yTHINHINPOBaTc 6bITOBBIM NTXoDAMN.
No OKohuaHn cpoKa cnyh6bl npibopdoJnHex 6blb yTNIN3npoBaH B COOTBtCTBN C npabINamaI NO yTNIN3aoun OTXoDObB BAwem pernoHe.
BaxHbIe MEPbl npedocTopoXHOCTN


IPEyIPEHJEHNE. JIA BAWE B3OJACHOCTN, IPEHDE YEM IODHJIIOUATb PAHETHBI JAMNHATOPK 3JEKHTPOCETN, POJIHOCTbIO O3HAKOMBTECB C DAHHBMN INHCTPYKUIMN XPAHNTE HNCTPYKUNB YDO6HOM MECTE JIN OBPAUEHNA K HMM BCJLYAe HEOBXODMOCTNB BUYUEM BO N3BEKHAHNE TPABM PNI YCTAHOBRE N 3HCPIYATAUHN DAHAGO YCTPOICTBA DOJHXHB CO5JIIOATbCR CEYIOUNE OCHOBHbIE MEPbI IPEOCTOPOHHOCTN.
06uhe mepbI 6e3oNaChocTH
-ИспόЛьзУнTe yCtpoIcTBo TOnbKO NO npЯMOMy Ha3HaueHnO —ДЯлмИнрОВангДOKуМeHTOB.
BOTKpbIToNIOCTNaKeTOnPnHmHnKa lamHaTopapaaeHTe NCHIOHTeBHO NaKeTb/DOKymeHTbl.
Pa3meuante yctpoiCTBO Ha 6e3oNacHO, yctOuHBO paOoey NOBepxHocTH BO H36eKaHne NaeHnry yctpoiCTBA, BO3MOHOro HAHeceHnra TpaBM N NOpeXeHnry YcTPOICTBA.
CobioJadTeBceyka3aHnIHCTpyKun,HaHeceHHbIe Ha yctpoiCTBe.
- YcTpoIcTO CJIeMyET YCTaHABINBaTb B6JIm3n PO3eTKI NITaHIN; KPO3eTKe IITAHIN DOJIKeH 6bITb OecneueH CBO6oDhBIOCTyN.
He npoH3BODHTe lamHHnpOBaHHe ToJIbKO OJHO CTOpOHbI DOKyMeHTa -3TO npBBeTe K nopYe lamHaTopa.
He 6IOnHyTe BEHTnlaOHHbIe npope3N — 3TO Bbl3OBET neperpeB lamHaTopa.
Pa6oynHe HnctpyKcnn no ropeMy lamHHnpOBaHIO
- PndcoeMHHTe HHP NTaHnK COOTBeTCTBHyOeMy NCTOUYHK NTaHnA.
- HAMITE Ha BbHIOUATEJIb cETNIITAHNHa 3aHHeI NaHEI JAMHAtopa, nocJe Yero HAKMITE Ha KHOHky POWER B TeueHne 1 ceHyDbl IINBIOUOENy yCTPOJCTBA (PNC.A).
- NcnoIb3y peKomeHdaun no lamHHPOBaHIO B npBedeHHo HnHe TaBInue, BbIbepHTe yCTaHOBY CTeneHN HarpeBa, COOTBeTCTBYUOyTOJIuHne naKeTa n Tny bymar dJ lamHHPOBaHry.
- EcnIaMnHpyembI 3IeMeHT BByIgIyIIT 3aTymaHeHHbIM, 9TO O3HaayeT, YTO TempepaTyPA IaMHaTopa HeOCTaTOHbBICOKa. OctAAbbTe IaMHaTOP B peHmE npOrpeBa eue Ha HeCKoJIbKO MmHyT n 3aTe mIpoRoHIne naKet eue pa3.
- Ecln lamHpyembI 3JIeMENT BblraNT NOKpbITbIM pr6bIO, TO TEMNEPATyPA cIIuKOM BicOka. IpOBepbTe yCTaHOBy npabNtBHorO 3HaueHn rTempePAtbyI.
BcerdaocTabnreB3anacedoCTaTOHoeBpeMKnKoppeKTPOBKnCTeNEHHarpeBaIamHaTopa.
1. PpeyctaHOBHeHHb peHHM 2. PyHoi peHHM
a. HaKMITEHa KHOHNY HOT (HarpeB)ДЯ BbIbopa npedyctaHOBJIeHHORo peHIMa.Ha yCTpoJcTBe YCTaHOBJIeHa TemnepaTypa 100°C nCKOpocTb 6, a Ha HKH-DINcJIee OTo6paKaetcH CmBOJ «HOT».(pnc.B).
PuyHoi peHHM
(dIpyuHoro n3MeHeHHa CHOpOCTn TeMnepaTpybI):

a. YctahOBHTpe6yEmyIO TemepaTpy C NMOUBO COOTBETCTBYUUX KHOIOK CO CTPEJKAAMI.
6. YctaHOBnTe Tpe6yEmyO ChOpocTb C NOMOuBO COOTBETCTByIOUX KHONOK CO CTpeJIkAMN
3. PeKIM 3aONMHaHnA
(DJIaCOxpaHEnnONpeJeHNo TEMpePaTypbI NCHOPoCTN B nAMrTH yCTpOCTBa):
a. HauKmIte Ha KhoNHy 1 nn 2 B TeueHne OndHO CEHyDb IIN nepeXoDa B peKIM 3aONMOHaHnA.
6. YctaHOBInTe TaCTO INCIOb3yEmyH TEMnepaTpy IN CHPoCtB C NOMOuBHO KHONOK CO CTpeKamN.
B. CHOBA HAIKMITE HA KHONHY C HOMEPOM DnIa COXPAHEHNAcTPOE K B nAMrTH.
I. JnncnoJb3OBAHncoXpaHEHHbIX HAcTpoeK HaKMnte Ha KKnHky 1 mN 2 Ha KJ-DcCnnee 6yDet OToOpKaHaTcBc BbI6paHHa TEmpePAtya N CKOpocTb.
- Bo Bpem nporpeBa yctpoCTBa CnBBoI HarpBea ( ) 6ydt Mrrt. IIO DOCTNKeHH COCTOHN FOTOBHOCTN JAMHATOP NOACT 3ByKOBOI CNHaJI Na Hk-DCnJee NoBNTCra CnBBoI "READY" (pnc. C).
- Pa3mctnte DOymuHNT, NOJnEHaaIJIaMHNHOBAAHIO, B NaKeTe TaH, YTObbl BepxHNI KpaI DOymuHTa paCNOIarANcY 3aIaHHO HKpOMKn PAnKaTa, a NOLNo IpaBOI INeBOI CTOpOHAM DOymuHTa 6bln OINHaKOBbIMN (PNC.D).
- BcTaBbTe naket B yctpoCTBO 3anaHHo KpOMKo BnpeD (pnc.E).
- LAMHHPOBAHbI DOKYMERT ATOMATHECHN BbIET C 3aJHeI CTOPHOY ICTPOINCTBa. KaT ToJIbKO DnJIKeHne JAmNHHPoBAHHorO DOKMeHTA pRkpatNTcH, HEMeJIeHNO NOMECTNE ERO HA POBHyIO NOBepXHOCTb Ira OXJaKeHna Ho ONDy MInHy To DO HauHaIera eo DaJIbeHneW o6p60TK (PNC.F).
Pabochne Hnctpykunno XoJODHOMy lamHHnpOBaHIO
- POnCoeHnHTe HHyp NtAHnK COOTBeTCTByOuEMy NCTOuHnKy NtAHn.
- HaKMITE Ha BbIKIOUcATEIb cTe NITaHnHa 3aJHeN naHEn IaMHaTopa, nOce Yero HaKMITE Ha HONky POWER INyEepKBAte ee HaxaToB TteHne 1 cekHyDbI dRn BkIOUeHn yCTpOCTBA.
- HaKMITE Ha KhoNky COLD (oxJaXeHne), noCne Yero Ha)H(H- HnCJIeE NOBHTcR CMBOJ «COLD»
- NoocTNKeHN COCTOHNIGROBHOCTN JAMHAtOP NOACT 3ByKOBoI CNHaJI Ha HKH-DnCnJee NOBHTcN CmBOI «READY»
- NcnoIb3yIte naKeT, npedHa3HaueHHb I dxXoIoHO rAMHnPOBaHHa. BInOJHHTe lamHHPOBAHVE DOHyMeHTA B nakeTe, npedHa3HaueHHOM I dxXoIOHO rAMHHPOBAHH, nyTe m HkaTaTHa Ha KhoNkY STOP
dIra 3anycka n octAHOBKn BAJIKOB.
PPEyPENHEE. EcN BbTolbHO TTO 3aBepnIINrOpee JAMHHPOBAHNE, HAKMITE HA KHNHY COLD (DnOxlanJehn yctpoBCTe, nnoJOnHnTe, noKa Ha HKDCnJIee CHOBa He NOBNTC CNMBOL «READY» M OMOH6byet npctyntb K XoIoNDHomy JAMHHPOBAHIO.
KhoHa o6paTHoro xOda
B clya 3aednna naketa erno hnpabnbo Horo Bboda cnedynt npBeDeHHbIM HnKe HNCTpyKnM.
- HauHHMHTe N ydepKbAaTe KhoNHy REV. TaHaJ Mepa NoJIHOCTbO HmEHHT HaPnBaJIeHne BpaIeHn POJIKNOB, YTO NO3BOJNT NaKeTBy BbTIbO6PaTHo N3 NaKeTOpNIeMHNkA yCTPOINCTBa.
- BbITAHHTe BaW DOKymeHt N3 lamHaTopa.
- PpOuN3BeDnTe YnCTky pOInKOB nyTem npOrHaYepe3 yCTpoNCTBO NCTAeero IIncta ByMaHn.
I PEPDyPENKHEHNE: BybTe octopoxHHb npn 13BLeHEn NAMMHPoBAHHO DOkymeHTa n3 yCTPOYCTBA. OH MoTET bItb TROPAAH.
3aBepseHne lamHHnpBaHn
- HauHmTe N yepHKnBaTte KhoNkY POWER B TeueHne Ooho ceKHyDbl DoHnO, NoHa HAKK-dncnIee He NorBHTcN CMBOJ OXlaJaDaIOe BOE BeHTINrTOpa
- NocLe OcTbBaHnBaJIHOB (HNKe 65°C) JAMnHaTOP NOaCT 3ByKOBOI CINHAJI IN ABTomATnueeCKN OTKIOHT NTaHHe.
- HaHMMTE Ha BbIKIOUaTeIb cETn NITaHHa Ha 3aJHei NaHeJI NaMHaTOPa DnBbIKIOUeHHy YcTPOINCTBa.

PNEyPENHEHNE: OxlanHeHne ycTPOcTBa Do 3aHaHHoN TEMnepaTpybl, npeD Tem KaK PONHOCTbO OTHIOHTb ero NpTeM HaKaTaNHa BbIKIOUaTeIb NITaHnHa 3aAHeN NaHEn, 3aUuIaET BaIHKn N pOpaJIeBaET cPoH IN CUYK6bl.
PIMMEYAHNE.ДЯOBECNEUeHINI DOnONHITbHOb 63oNaCHOCHTN CO6JIIOEHNJ EKOLOINueCKNX HOpM NO NCTeueHN120 MNHT 6e3dEChTBn IaMHATop ABTOMaTHeCKN NEpeKHOaETCB CNIaIpeKHM.EcBbXOTHe BO3O6HOBtB paOToC IaMHATopOM HAnMeTHe Na KhoNkPOWERu YdePknBaIte ee B TeueHne1 CEKYHDbI DIA BKIOUeHINyUCTPOCTBA.
CobetbI NO JAMHHPOBaHNU
HE BCTABJIAIHTE BYCTPOICTBO IAHET BE3 DOHYMEHTA.
HaTeFOpHNeCHn 3aIpeMaAeTcBCTABJIbTB yCTPOICTBO nAket CdoKymeHTOM He3anapAAHHoK PcOMHO BnepeJ, 3TO MOKeT pInBecTeK Eero 3aCTpeBAHMO B yCTPOICTBE.
- Ho NaHai NaOcecca NaMHNHOBaHHBbIX DOKymeHTOB
NIN DOKymeHTOB B eMHCTBEHHOM 3K3EMIIpRe CNEyET BcERda
NporOHb Yepe3 NaMHaTOP np6bHn NaKeT DOKymeHTOB
aHAnJHOrHO TINHa.
- I O OKOHuaHINI ropJeero IaAMHHIOBaHINrN3BLeKeHTe IaAMHHIOBAHbI bDOKyMeHTn 33dHei YCTPOIcTBA n NOMeCTIte erOJnOxAJIkeHEnHa NpOxlaHHyIIOCKHy IOBepHXoCTb BO I36EkaHne CkpyUHbAHIn N3rHOBn KaTeA.
-He o6pe3aIe nakeTbIO JAMHHPOBAAH.
Yka3aHnno BbINOJIHeHHIO IaMHHnpoBaHnra
aaiy jay aaiy aiey yjay aaiy aaiy aaiy aaiy aaiy aaiy aaiy aaiy aaiy aaiy aaiy aaiy aaiy aaiy aaiy aaiy aaiy aaiy aaiy aaiy aaiy aaiy aaiy aaiy aaiy aaiy aaiy aaiy aaiy aaiy aaiy aaiy aaiy aaiy

aLc aLg 1
gag gao gao jai yjaiy jay
1/2
auiu 1yau! g yg jaiui Jaii I gaoew qiu Jia Jae Jie
yj 1
A
aaii 1
aill 14 aegw dol j 11 g yg w g qll
aLg 11 aLg 11
ailll aillgll lallll 0o yolil galsalalalalalalalal
a 100 100
paaai paaa Jaoa aia 21 2. aia y
aal 1
y
pao jally gull lia plssuie yj ie Jldy j
a.b.c.11
aaii iie 100
100 1

jolal y jai jill lalll j jll
150 000
#
aal aal aal aal aal aal aal aal aal aal aal aal aal aal aal
aJalal all jao 10000000000000000000000000000000000000000000000
aJ11 3
(,sill 1
12 1 1 1
yill 4rall jolal 1jolal 1 jll/3u jw galtao plstl qjLgolstl 4rall jolal
3120 3
g 2j1 jlll aai ai jao sli plss (
gdl 2
()
sJrall jj J/3jy jy yla 1
.8Jrall a jy bai Jdail
Jyai Jyai Jyai Jyai yalao Jbail (
Layuua la gauill laill.1
gall bai (jai) HOT jj ta 100 a jaj jai gao 151.
aHOT"64eull/2
(2) 100000000000000000000000000000000000000000000000000
.5
(J)ailljaiy jaiyie aaiiay
(8)
11 1
ailllll llllll aaiiae gaaagaaaeg
Gaaa aaiy bll 1jg y gauy gauy REV jz jzaii.1
S ACD = S COD + S_ CDA
aai 2
3
Lw y 15y 11 11 11 11

yull de aieill
a 1
a power POWER 2
COLD COLD 3
Ae "READY" 30,20000000000000000000000000000000000000000
5
COLD jie bai, gill jai lall jilily ci ci li: aai iiai

#
Jy Jy Jy Lj Lj Jy
a51 aaii i 505 jai jai jai jai jai jai jai
Ae aee eae ae aee aee aee aee aee aee aee aee aee aee aee aee aee aee aee aee aee aee aee aee aee aee aee aee aee aee aee aee aee aee aee aee aee aee aee aee aee aee aee aee aee aee aee aee aee aee aee aee aee aee aae
ACCO Brands 24 10 10 10 10 10 10 10 10 10 10 10 10 10 10 10 10 10 10 10 10 10 10 10 10 10 10 10 10 10 10 10 10
L
www.accobrandsc.com
service addresses
Arnoldstrasse 5, 73614 Schorndorf, Germany
Tel: +497181 887 120 Fax: +497181 887 198
info-de@acco.com
ALIS ACCO Brands Australia Pty Ltd,
2 Coronation Avenue, Kings Park, NSW 2148, Australia
Tel: (02) 9674 0900
enquiry-nsw@acco.com www.accobrandscom.au
ACCO Brands Benelux B.V.
Peppelkade 64, 3992AK Houten, Nederland/Les Pays-Bas
Tel:0800-73362 Fax:02-4140784
info@accobenelux.be www.accobenelux.be
BD ACCO Brands Asia Pte Ltd,
47 Ayer Rajah Crescent, #05-08/17, Singapore 139947
Tel: -65 6776 0195 Fax: +65 6779 1041
webmaster@accobbrandsasia.com
Arnoldstrasse 5, 73614 Schorndorf, Germany
Tel: +497181887120 Fax: +497181887198
info-de@acco.com
DK ACCO Brands Nordic AB,
Makadamgatan 5,25464 Helsingborg,Sweden
Tel: +46 42 38 36 00 Fax: +46 42 38 36 10
service-nordic@acco
E ACCO Brands Iberia SL,
P Isaac Peral 19,28820 Coslada (Madrid)
Tel: 902 500 182 ext. 2 Fax: 91 309 6412
servicio.technico@acco.com
EST ACCO Brands Nordic AB,
Makadamgatan 5,25464 Helsingborg,Sweden
Tel: +46 42 38 36 00 Fax: +46 42 38 36 10
service-nordic@acco.com
Acco Brands France SAS,
Service après-vente, ZAC Excellence 2000
6 rue Robert Schuman, 21800 Chevigny Saint Sauveur
Tel: +33 3 80 68 60 30 Fax: +33 3 80 68 60 49
contact@vmbs-fr
GB ACCO Service Division,
Hereward Rise, Halesowen, West Midlands, B62 8AN
Tel:08456586600 Fax:08704215576
www.accoc.co.uk/service
OPI Customer Service
Tel.: +359 2 80 99 166 Exportee@accoeu-local
ACCO Brands Italia Srl,
Servizio post-vendita, Via Oberdan, 33, 28070 Tornado (NO)
Tel:800-87-86-16 Fax:0321-88-01-27
IND ACCO Brands Asia Pte Ltd,
47 Ayer Rajah Crescent, #05-08/17, Singapore 139947
Tel: -65 6776 0195 Fax: +65 6779 1041
webmaster@accobbrandsasia.com
IDI ACCO-Rexel Ltd,
Clonshaugh Business & Technology Park,
Clonshaugh, Dublin 17, Ireland
Tel:018164346 Fax:018164302
admin@accoservice.eu www.accorexel-ie
ACCO Brands Nordic AB,
Makadamgatan 5,25464Helsingborg,Sweden
Tel: +46 42 38 36 00 Fax: +46 42 38 36 10
service-nordic@acco.com
IDN GBC-Japan K-K.
14F Harmony Tower, 1-32-2 Honcho, Nakano-ku,
Tokyo 164-8721
Tel: (81)-03-5351-1801 Fax: (81)-03-5351-1831
serv@gbc-japan-co-jp www.gbc-japan-co-jp
TT ACCO Brands Nordic AB,
Makadamgatan 5,25464Helsingborg,Sweden
Tel: +46 42 38 36 00 Fax: +46 42 38 36 10
service-nordic@acco-com
LUV ACCO Brands Benelux B-V,
Peppelkade 64, 3992AK Houten, Nederland/Les Pays-Bas
Tel: 0800-21132 Fax: 02-4140784
info@accobenelux.be www.accobenelux.be
V ACCO Brands Nordic AB,
Makadamgatan 5,25464HelsingborgSweden
Tel: +46 42 38 36 00 Fax: +46 42 38 36 10
service-nordic@acco.com
N ACCO Brands Nordic AB,
Makadamgatan 5,25464Helsingborg,Sweden
Tel: +46 42 38 36 00 Fax: +46 42 38 36 10
service-nordic@acco-com
ACCO Brands Benelux B-V,
ACCO Brands Iberia SL,
P Isaac Peral 19,28820 Coslada (Madrid)
Tel: 902 500 182 ext.2 Fax: 91 309 6412
servicio-technico@acco-com
DAK ACCO Brands Asia Pte Ltd,
47 Ayer Rajah Crescent, #05-08/17, Singapore 139947
Tel:+6567760195 Fax:-6567791041
webmaster@accobbrandsasia.com
DI ACCO Polska Sp.z o-o,
Al-Jerozolimskie 184,02-486 Warszawa
Tel. +48 22 570-18-29 fax +48 22 570-18-33
www-acco-pl
BUC PpeCTaBHTeIbCTBO KOMnAHN
AHHO DoiHaHΓMEX HO·H
Pocna 105005,MockBa,Denncobcnn nep.,d-26
Ten: (495) 933-51-63 ΦaKc: (495) 933-51-64
ACCO Brands Nordic AB,
Makadamgatan 5,25464Helsingborg,Sweden
Tel: +46 42 38 36 00 Fax: +46 42 38 36 10
service-nordic@acco-com
SK XERTECA-s
Kloknerova 2278/24 (vchod z ulice Kostirova,
budova CeWe Color - Fotolab), 148 00 Praha 4 - Chodov
Tel:225004411 Fax:225004162
servis@xertec.cz http://www.xertec.cz
IA Ankor-DA LLC
Byn-KiIcBbKa, 75, c-CooiBcKa BopuariBa,
KHEBO-CBATOHNCbKn p-H, KINBCbKa 06n, 08131, YkpaHa
Tel: +380 (44) 502-94-40 Fax: +380 (44) 502-94-88
office@da.ua
7A Rexel Office Products (PTY) Ltd,
Crusher Road, Crown Ext-3, PO Box 102, Crown Mines,
Johannesburg 2025, South Africa
Tel: +27 (0)11 226 3300 service@rexelsa.co.za

BRANDS
ACCO Brands Europe
Oxford House
Aylesbury HP21 8SZ
United Kingdom
www.accobbrands.com


- Description of product parts
- Display Panel
- Switch Panel
- Special Notice
- Safety Instructions
- Waste Electrical and Electronic Equipment (WEEE)
- Important Safeguards
- General Safeguards
- Electrical Safeguards
- Cleaning
- Service
- Operation, hot lamination
- Preset Mode 2. Manual Mode
- Memory Mode
- Operation, cold lamination
- Reverse Button
- Finishing lamination
- Laminating Tips
- Guarantee
- Ppoulaeic yia to nEkrpiok ouotma
- Kaθαρισμός
- Σερβις
- Aetoupyia, nlaotikoinonv
- Panaelb ynpablenna
- Oco6oe npimechne
- Hnctpykunno6e3onacnoctn
- OToXoDbI 3JIeHTpHuecHOrO n 3JIeHTpoHHOrO o6OpydoBaHnA
- BaxHbIe MEPbl npedocTopoXHOCTN
- 06uhe mepbI 6e3oNaChocTH
- Pa6oynHe HnctpyKcnn no ropeMy lamHHnpOBaHIO
- PpeyctaHOBHeHHb peHHM 2. PyHoi peHHM
- PuyHoi peHHM
- PeKIM 3aONMHaHnA
- Pabochne Hnctpykunno XoJODHOMy lamHHnpOBaHIO
- KhoHa o6paTHoro xOda
- 3aBepseHne lamHHnpBaHn
- CobetbI NO JAMHHPOBaHNU
- aLc aLg 1
- aLg 11 aLg 11
- a.b.c.11
- #
- aJ11 3
- gdl 2
- Layuua la gauill laill.1
- 1
- yull de aieill
- service addresses
Brand : GBC
Model : Proseries 4600
Category : Laminating machine