MaxoMixx MS8CM6190 - Blender BOSCH - Free user manual and instructions
Find the device manual for free MaxoMixx MS8CM6190 BOSCH in PDF.
User questions about MaxoMixx MS8CM6190 BOSCH
0 question about this device. Answer the ones you know or ask your own.
Ask a new question about this device
Download the instructions for your Blender in PDF format for free! Find your manual MaxoMixx MS8CM6190 - BOSCH and take your electronic device back in hand. On this page are published all the documents necessary for the use of your device. MaxoMixx MS8CM6190 by BOSCH.
USER MANUAL MaxoMixx MS8CM6190 BOSCH
MaxoMixx Accessories (Hand blender)
MSM8..
MS8CM6..
[de] Gebrauchsanleitung Zubehor (Stabmixer) 3
[en] Instruction manual Accessories (Hand blender) 10
[fr] Mode d'emploi Accessoires (mixer plongeant) 17
[i] Istruzioni per l'uso Accessori (Frullatore assiale) 25
[n] Gebruiksaanwijzing Toebehoren (Staafmixer) 33
[da] Brugsanvising Tilbehør (blenderstav) 40
[no] Bruksanvising Tilbehør (Stavmikser) 47
[sv] Bruksanvising Tillbehör (Stavmixer) 54
[fi] Käytöohje Varusteet (Sauvasekoitin) 61
[es] Instrucciones de uso Accesorios (Batidora de varilla) 68
[pt] Instruções deServiço Acessórios (Varinha magica) 76
[el] O8nyiec xphonc EExptnma (AvaeduTnp) 84
[tr] Kullanim kilavuzu Aksesuar (El blenderi) 92
[p]Instrukcja obslugi Akcesoria (Blender roczny) 99
[uk]IHCtpykuia3ekcnayataui IprnaaDpaunn6eep 106
[ru] INCTpyKuIy IIO 3KcIIaYatauI IPrnHaAeXHoCTN (TOrpyKHO6eHep) 114
[ar] pdswJU 128
Honig-Apfel-Mischung (CNHR29C):
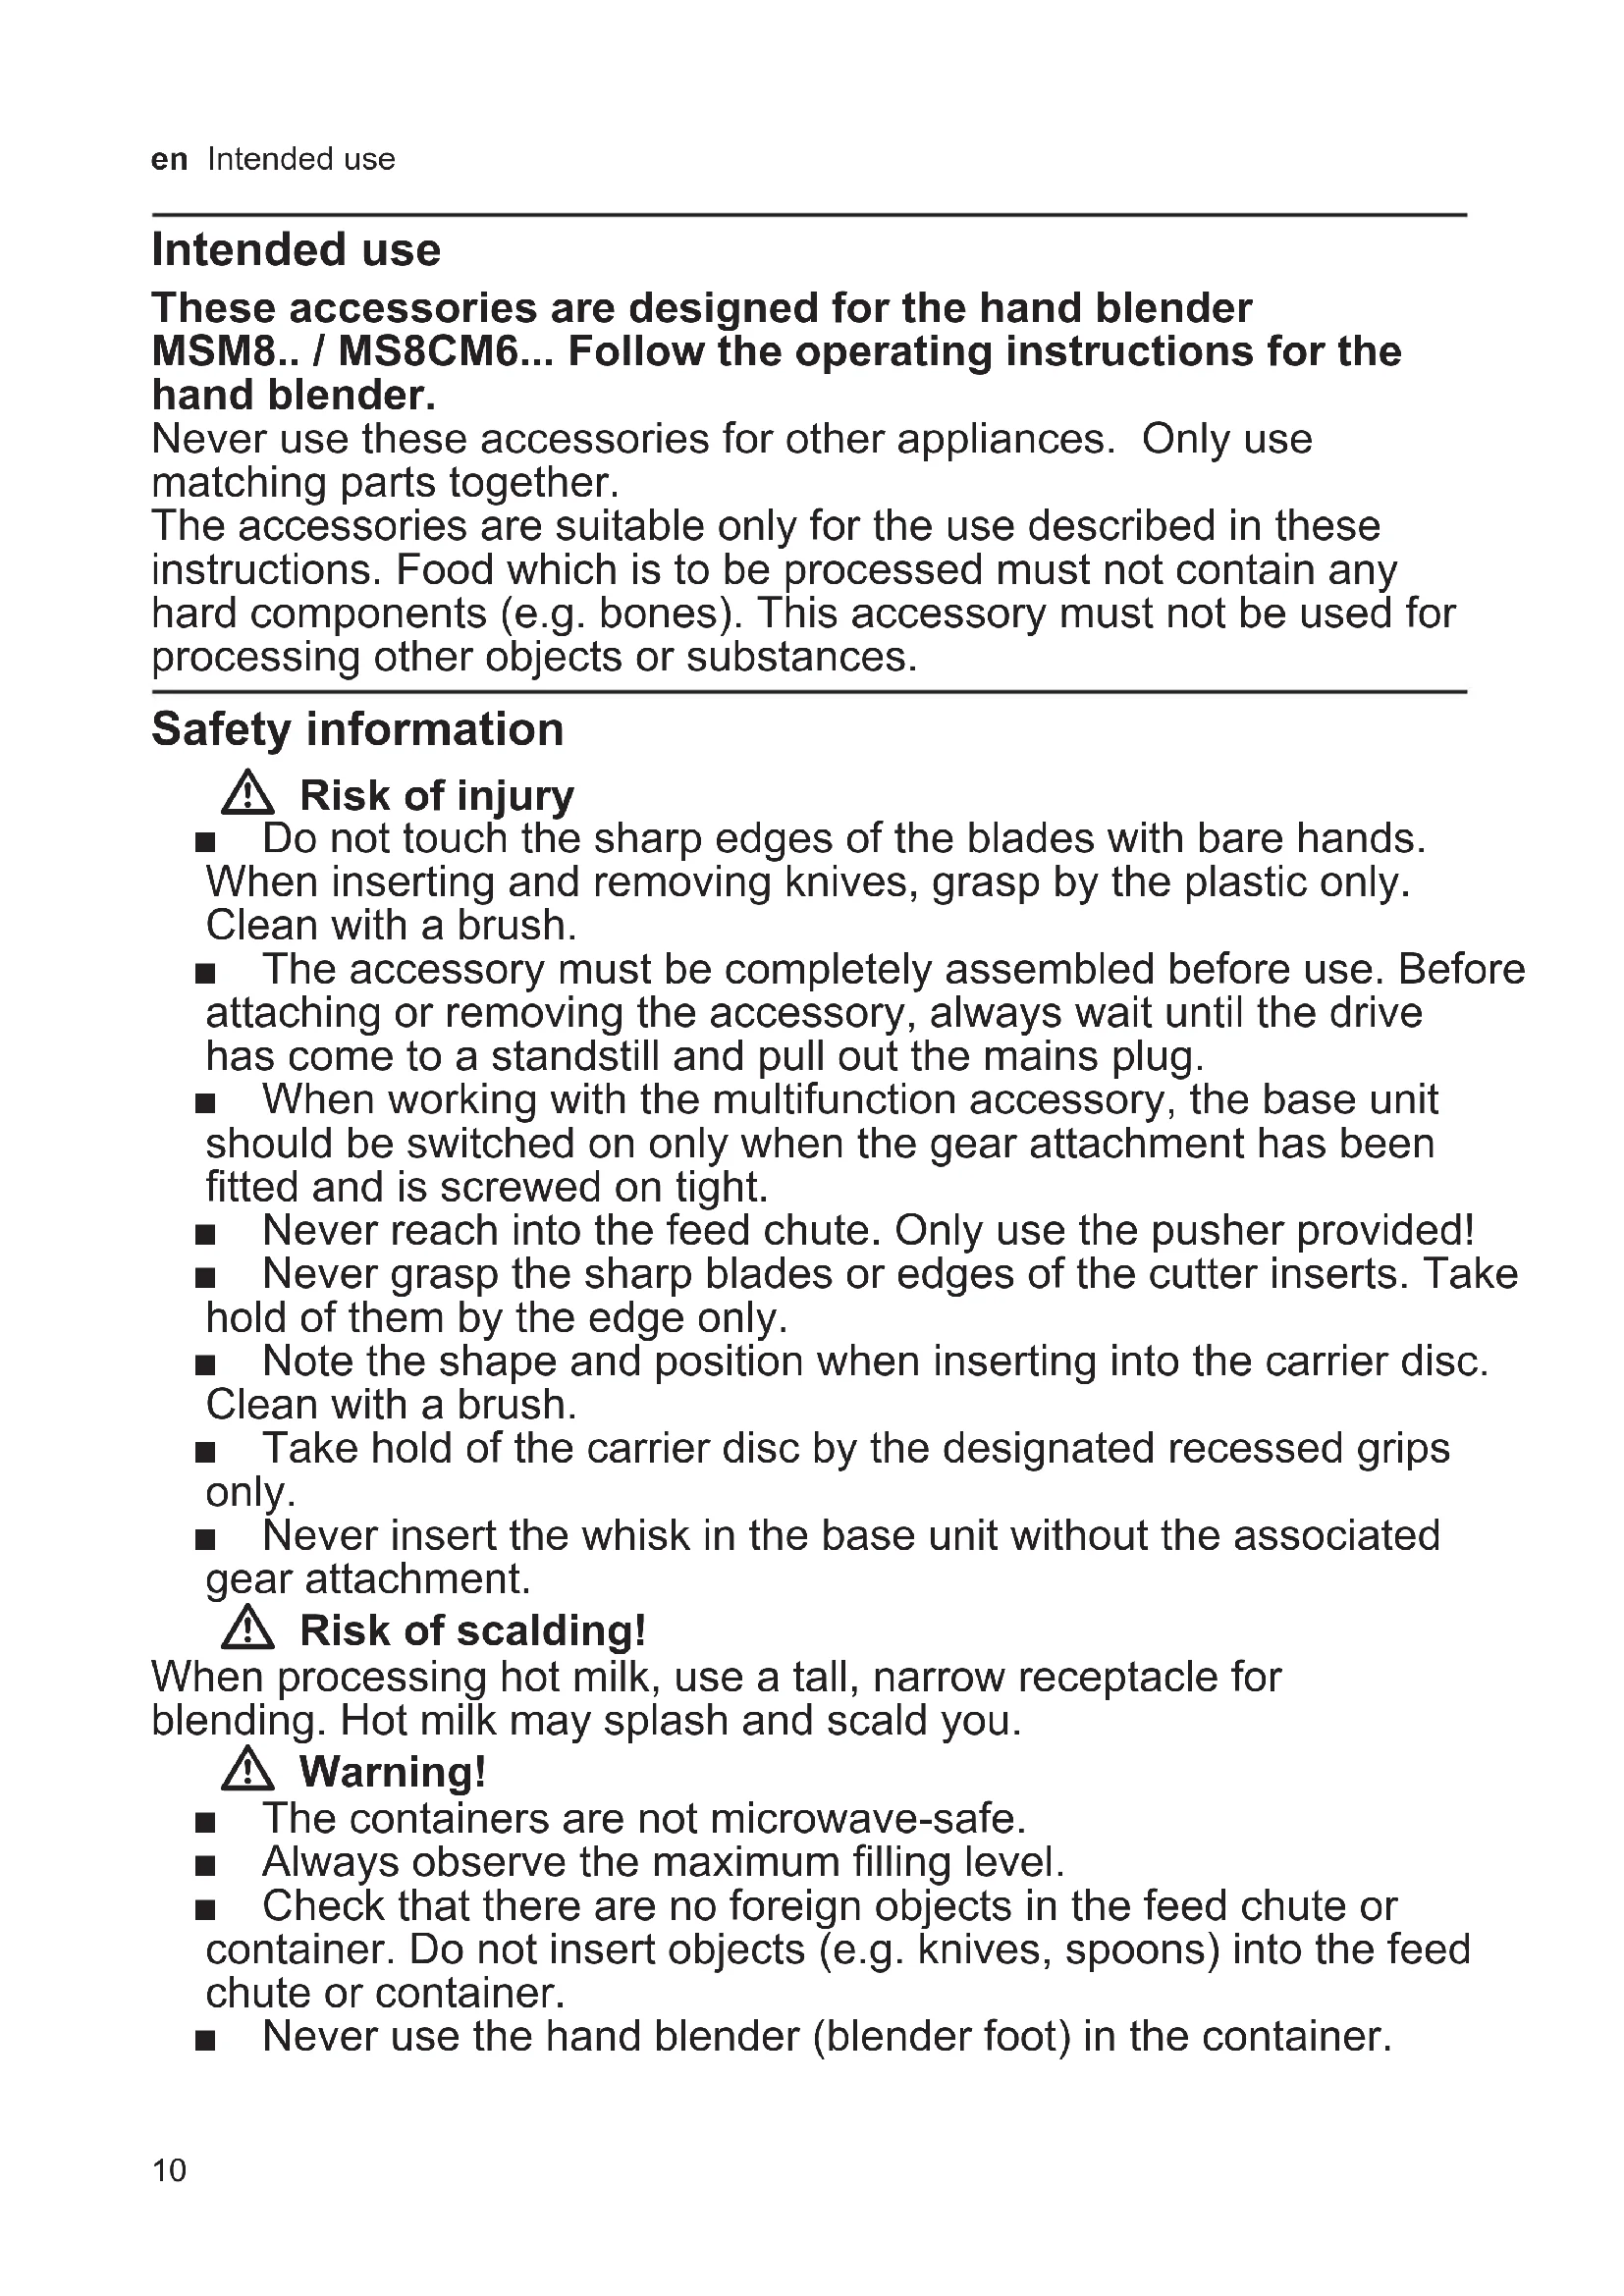
These accessories are designed for the hand blender MSM8.. / MS8CM6... Follow the operating instructions for the hand blender.
Never use these accessories for other appliances. Only use matching parts together.
The accessories are suitable only for the use described in these instructions. Food which is to be processed must not contain any hard components (e.g. bones). This accessory must not be used for processing other objects or substances.
Safety information
Risk of injury
- Do not touch the sharp edges of the blades with bare hands. When inserting and removing knives, grasp by the plastic only. Clean with a brush.
The accessory must be completely assembled before use. Before attaching or removing the accessory, always wait until the drive has come to a standstill and pull out the mains plug. - When working with the multifunction accessory, the base unit should be switched on only when the gear attachment has been fitted and is screwed on tight.
- Never reach into the feed chute. Only use the pusher provided!
- Never grasp the sharp blades or edges of the cutter inserts. Take hold of them by the edge only.
Note the shape and position when inserting into the carrier disc. Clean with a brush.
Take hold of the carrier disc by the designated recessed grips only. - Never insert the whisk in the base unit without the associated gear attachment.
Risk of scalding!
When processing hot milk, use a tall, narrow receptacle for blending. Hot milk may splash and scald you.
Warning!
The containers are not microwave-safe.
Always observe the maximum filling level.
- Check that there are no foreign objects in the feed chute or container. Do not insert objects (e.g. knives, spoons) into the feed chute or container.
- Never use the hand blender (blender foot) in the container.
- Never immerse the following parts in liquids, hold under running water or clean in the dishwasher: gear attachments, lid with gears.
Important!
It is essential to clean the accessory thoroughly after each use or after it has not been used for an extended period. "Cleaning and maintenance" see page 15
Before use, read these instructions carefully in order to become familiar with important safety and operating instructions for this appliance. Please keep the operating instructions in a safe place.
If passing on the appliance to a third party, always include the operating instructions.
Overview
Fig. A
1 Universal cutter L^*
a Container
b Universal blade (L)
c Ice crusher blade (L)
Gear attachment
e Lid
2 Universal cutter XL *
a Container
b Universal blade (XL)
c Gear attachment
d Lid
3 Multifunction accessory
a Container
b Kneading hook
c Universal blade
d Lid with gears
e Pusher
f Carrier disc for disc inserts
Disc inserts*
g Slicing insert - coarse
h Slicing insert - fine
i Shredding insert - medium
j Grating insert - coarse
4 Whisk*
a Gear attachment
- depending on the model
Before using for the first time
Before the new accessory can be used, it must be fully unpacked, cleaned and checked.
Warning!
Never operate a damaged accessory!
- Remove all accessories from the packaging and dispose of all packing materials.
Check that all parts are present and examine them for obvious damage.
→Fig.A
Thoroughly clean and dry all parts before using for the first time.
"Cleaning and maintenance" see page 15
Symbols and markings
| Symbol | Meaning |
| Caution! Rotating tools. Do not reach into the feed chute. | |
| Not suitable for dishwashers. | |
| Do not immerse in liquids or hold under running water. | |
| Marking on gear attachment. When fitting onto container, align marking with fixing point. |
Universal cutter (size L and XL)
Warning!
Always observe the maximum quantities and processing times in the table.
Table I
Universal blade: For cutting up meat, hard cheese, onions, herbs, garlic, fruit, vegetables, nuts and almonds.
Ice crusher blade (only size L):
For crushing ice cubes (crushed ice). Optimum processing quantity: 4-6 ice cubes (max. 100g
Warning!
- Before cutting up meat, remove gristle, bones and sinews.
- The universal cutter is not suitable for cutting up very hard items (coffee beans, radishes, nutmeg) and frozen food (fruit etc.).
- Ice cubes should be processed only with the ice crusher blade
→Fig. 3
- Place the container on a smooth, clean work surface and press into position. Insert the universal blade or ice crusher blade.
Important: The blade must be positioned straight in the container.
2.Add food. - Place the gear attachment on the container and rotate clockwise until it clicks into position.
- Place the base unit on the gear attachment and press until it clicks into position.
- Insert the mains plug.
- Hold the base unit and universal cutter firmly. Press Turbo button ①. The appliance remains switched on as long as the button is pressed.
- Process the food with the universal cutter.
-
Release the button after processing. Wait until the drive comes to a standstill. Disconnect the mains plug.
-
Hold down both release buttons and remove the base unit.
- Turn the gear attachment anticlockwise and remove.
- Take out the blade.
- Empty the container.
Clean all parts immediately after use. "Cleaning and maintenance" see page 15
Sample recipe: Honey cake with apples
Honey/apple mixture (CNHR29):
- 110 g forest honey (5 °C)
-
30 g apple in cubes (11 mm)
-
Add to the universal cutter and mix on Turbo speed for 3 seconds.
Honey/apple mixture (CNHR29C):
- 130 g forest honey (5 °C)
-
30 g apple in cubes (11 mm)
-
Add to the universal cutter and mix on Turbo speed for 2 seconds.
Cake:
-3 eggs
- 60 g butter
- 100 g plain white flour
- 60 g ground walnuts
-1 tsp cinnamon
- 2 packets vanilla sugar
- 1 tsp baking powder
- 1 apple
Separate the egg yolks from the whites.
Beat the egg whites until stiff.
Beat the yolks and sugar, then add the softened butter and the honey-apple mixture.
Mix the flour, ground walnuts, cinnamon and baking powder in a separate bowl. Add to the moist ingredients and mix in. Using a spatula carefully mix in the beaten egg whites.
Line a rectangular loaf tin (dimensions 35cm× 11cm with greaseproof paper and pour in the prepared mixture.
Peel the apple and slice. Arrange the slices on the cake.
Preheat the oven to 180^ and bake the cake for 30 minutes.

Multifunction accessory
The multifunction accessory is suitable for kneading, cutting and shredding food.
Risk of injury from sharp blades/rotating drive!
Never reach into the container while the appliance is operating. Always use the pusher to add ingredients. After switching off, the drive continues running for a short time. Change tools only when the drive is at a standstill. When working with the multifunction accessory, the base unit may only be switched on when the lid has been fitted and screwed on tight.
Warning!
Multifunction accessory must always be completely assembled before use!
Caution!
Before cutting up meat, remove gristle, bones and sinews.
The multifunction accessory is not suitable for cutting up very hard food (coffee beans, radishes, nutmeg) or frozen food (fruit, etc.).
Warning!
Always observe the maximum quantities and processing times. Table J
After each operation cycle allow the appliance to cool down to room temperature.
Recommended speeds
4-8 Slicing inserts
8-12 Shredding and grating insert
①
Universal blade/kneading hook
Universal blade/kneading hook Universal blade
For cutting up meat, hard cheese, onions, herbs, garlic, fruit, vegetables, nuts and almonds.
Kneading hook
For kneading small amounts of dough.
Risk of injury from sharp blade!
Do not touch the sharp edges of the universal blade with bare hands. Take hold of the universal blade by the plastic handle only.
Fig. 6
- Place the container on a stable, smooth and clean work surface. Insert the universal blade or kneading hook.
Important: The blade / kneading hook must be positioned straight in the container.
2.Add food. - Place the lid on the container () and rotate anti-clockwise until it clicks into position. Insert the pusher in the feed chute.
Note: If fitting the lid is a bit stiff, turn the three-piece coupling on the underside of the attachment slightly and try again.
- Place the base unit on the gear attachment and press until it clicks into position.
- Insert the mains plug. Hold the base unit and multifunction accessory. Press Turbo button ①. The appliance remains switched on as long as the button is pressed.
- Process the food.
Add ingredients:
- Release the button. Wait until the appliance comes to a standstill.
- Remove the pusher and add ingredients through the filling opening.
-
Replace the pusher and continue working.
-
Release the button after processing. Wait until the drive comes to a standstill. Disconnect the mains plug.
- Hold down both release buttons and remove the base unit.
- Rotate the lid in a clockwise direction and remove.
- Take out the blade/kneading hook.
- Empty the container.
Clean all parts immediately after use.
"Cleaning and maintenance" see page 15
Sample recipes: Bread dough
Basic recipe
-200gflour
- 120 ml water
-7g sugar
- 7 g margarine
-0.5gyeast
-4g salt

Tool: kneading hook
- Add all ingredients except the water to the container.
Mix ingredients on Turbo speed.
After a few seconds add the water through the filling opening.
Process everything on Turbo speed.
Maximum switch-on time: 45 seconds
Maximum quantity: 1x basic recipe
Short pastry
Basic recipe
-200gflour
- 100 g margarine or butter (room temperature)
- 100 g sugar
-1 egg
- 1/2 packet baking powder
- 1 packet vanilla sugar
-1 pinch salt
Tool: kneading hook
Add all ingredients to the container.
Mix ingredients on Turbo speed.
Chill the pastry dough.
Process further if required.
Maximum switch-on time: 2 minutes
Maximum quantity: 1x basic recipe
Carrier disc with disc inserts
Slicing insert - coarse
Set speed control to low speed to slice: cucumbers, carrots and potatoes.
Slicing insert - fine
Set speed control to low speed to slice: cucumbers, carrots, beetroot and courgettes.
Shredding insert - medium
Set speed control to high speed to shred: apples, carrots, cheese and white cabbage.
Grating insert - coarse
Set speed control to high speed to grate: potatoes for dumplings and potato pancakes; fruit and vegetables for salads. It must not be used for grating carrots.
Caution!
The disc inserts must not be used for cutting up very hard foods (Parmesan cheese, chocolate).
The disc inserts are only suitable to a limited extent for processing fibrous foods (leek, celery and rhubarb).
Risk of injury from sharp blade!
Exercise particular caution when handling the inserts! Note the shape and position of the insert when inserting into the carrier disc
( Fig. D). Take hold of the carrier disc by the designated recessed grips only. Do not reach into the filling opening. Only use the pusher when adding more ingredients.
Fig. 1
- Fit the required insert into the carrier disc.
- Place the container on a stable, smooth and clean work surface. Grasp the carrier disc by the recessed grips and insert.
- Place the lid on the container (12) and rotate anti-clockwise until it clicks into position.
- Place the base unit on the gear attachment and press until it clicks into position.
- Set the required speed with the speed control. Insert the mains plug.
- Hold the base unit. Press ON button ①. The appliance remains switched on as long as the button is pressed.
-
Add the food to be processed to the feed chute. Cut up very large pieces beforehand. If required, push down the pusher by applying light pressure.
-
Release the button once processing has finished or the processed food reaches the underside of the carrier disc. Wait until the drive comes to a standstill. Disconnect the mains plug.
- Hold down both release buttons and remove the base unit.
- Rotate the lid in a clockwise direction and remove.
- Grasp the carrier disc by the recessed grips and remove.
- Empty the container.
Clean all parts immediately after use. "Cleaning and maintenance" see page 15
Sample recipe:
Potato patties

- 500 g potatoes
-1 large egg
-3 tbsp flour
Salt and pepper to taste
Tool: grating insert
Peel and grate the potatoes.
- Then mix the potatoes, egg, flour, salt and pepper.
If the mixture is too liquid, add some more flour.
Heat the oil in a pan. Then add a large spoonful of the mixture to the oil and shape into patties. Fry on both sides until golden brown.
Whisk
For whipping cream, beating egg whites and milk froth from hot milk (max. 70^ ) and cold milk (max. 8^ ) as well as for making sauces and desserts.
Risk of scalding!
When processing hot liquids, use a tall, thin blending receptacle.
Warning!
- Never insert the whisk into the base unit without the gear attachment.
- Do not attach or remove the gear attachment with the whisk until the appliance is at a standstill.
→ Fig 6
- Place the prepared food in the blender jug or other suitable receptacle or process in the pan used for cooking.
- Place the gear attachment on the whisk and press until it clicks into position.
- Place the whisk with the gear attachment on the base unit and press until it clicks into position.
- Connect the mains plug.
- Set the required speed with the speed control (high speed recommended)
- Take hold of the base unit and blender jug and press the ON button ①.
- Process the food with the whisk.
- Release the ON button after processing. Wait until the drive comes to a standstill.
- Disconnect the mains plug.
- Hold down both release buttons and remove the whisk with the gear attachment from the base unit.
- Remove the gear attachment from the whisk.
Clean all parts immediately after use. "Cleaning and maintenance" see page 15
Cleaning and maintenance
The accessories used must be thoroughly cleaned after each use.
Risk of injury
Do not touch the sharp edges of the universal blade, ice crusher blade or the cutter inserts with bare hands. To clean, only grasp by the plastic and use a brush.
Warning!
- Do not use cleaning agents containing alcohol or spirits.
- Do not use sharp, pointed or metal objects.
- Do not use abrasive cloths or cleaning agents.
- Never immerse the following parts in liquids, hold under running water or clean in the dishwasher: gear attachments, lid with gears.
en Cleaning and maintenance
Please note:
- Do not wedge plastic parts in the dishwasher as they could become deformed.
- When processing food such as red cabbage or carrots, plastic parts may become discoloured. This can be removed with a few drops of cooking oil.
Fig. H gives an overview of how to clean the individual parts.
Universal cutter / whisk
Only wipe the attachment of the universal cutter and the gear attachment of the whisk with a soft, damp cloth and dry off.
Clean the other accessory parts with a detergent solution and a soft cloth or sponge or place them in the dishwasher. Clean the blades with a brush.
Multifunction accessory
Wipe the gear attachment with a soft, damp cloth and dry off.
Turn over the carrier disc to press out the inserts ( Fig. 3).
The container, universal blade, carrier disc and cutter inserts are dishwasher-safe.
Subject to change.
Honing-appelmengeling (CNHR29C):

Honning-æble-blanding (CNHR29C):
- 130 g skovhonning (5 °C)
-30 g aebler i tern (11 mm)
Fyld det i minihakkeren, og blend det i 2 sekunder med turbo-hastighed.
Kage:
AEndringer forbeholds.
Korrekt bruk
Dette tilbehoret er beregnet for stavmikseren MSM8.. / MS8CM6.. Følg bruksanvisningen for stavmikseren.
Endringer forbeholds.
Avsedd användning
Omena-hunajaseos (CNHR29C):
EvEto Eaptnma Kottns -ovtpo
EvEto Eaptnma Kottnc- iIao
Koqtns yevikns xpnoons/
XTuTTnTnpi
KouTIOTe TO EITHEa Tou KOPTN YEVIKnC XpOngs KAI TO TPOoAPtnuA MUtdoOns TNC KIVONc Tou XTuTTnPioU MOVc Ev a MaakO, Uypo TTAVI KAI OTeyVwOTe Ta.
Bal-elma karisimi (CNHR29C):
i Bctabka dny cepedhboro WaTkyBaHHa
j BCTabKa dnyrpybOHaTnpaHn
4 BiHnUOK JIJI 36NBaHHN*
a PeDyKTopHa npncTaBka
- 3aJIeJxHObIД MoIeJI
Ipeed nepshm BnKOpncTaHHaM
Ipeed noatakom ekcnnyatauio HOBOr npnnaDnnoTpi6H NoBHicH o3NaKyBaTN, ONUCTNT Ta nepeBipNTN.
Ybara!
Hikon He BnKOpncToByTe noXkoJKeHe npnaIaI
BnIMtByce npnaJ3 ynaKOBKa Ta 3HIMtB naKyBaIbHm MaTepiJ.
IpepeBipTe Bci Detani Ha KOMPJIeKTHiCt b i BNIMi NOUKOJKeHHa.
→MaJIHOHOKA
Ipepei nepuim BnKOpncTaHHm peTeNbHO ouNCTbTe Ta BnCywiTb yci detani. «UuueHna ma doznao» due. cmop. 113
CnMBoJn Ta nO3HaUKn
YHIBePcAblbHn HIX: DnI NOpPi6HeHHaM'ra, TBepDOrO Cnpy, u6yJI, 3eJIeHi, YachNkU, pkyTIB, OBOuIB, ropixIB, MmDaIIIO.
HixdnybOy (nwe po3mip L):I npdi6HeHHKy6NKIBNbOy (npriOtBuHHN IbOHOI KpIXTN).
OnTImaJIbHa KINbKICtB dIra o6po6Kn: 4-6 Ky6nKiB IbOdy (MaKc. 100 r).
yBara!
- Ppei nOpi6HeHnM M'ra Ca BuaIitb i3 HbOrO xpa, KiCTKN Ta cyxoxnnna.
- YHIBePcAblbHn NOpi6HOBaH He npn3HaueHo IЯ NOpi6HeHHy DyJke TBepdIX npOdyKTiB (KaBOBnx 3epeH, peBKn, MyCKaTHNX rOpixiB) i 3amopoxeHnx npOdyKTiB (ΦpykTiB Too).
- KybuknNbOdy MoXHa o6pO6Tn BnKIOUHO HOKeM dJa NbOdy
→MaJIIOHOK B
- NocTaBTe NOcydHy Ha pIBHy n YnCTy po6Ouy NOBepxHIO i npNTnCHiTb ii. BcTaBTe yHIBepcaIbHn HIX a6o HIX dIa IbOdy.
Baxnbo: Hix y nocydiHi MaC 6bytn PO3TaOBoAHN IprMo. - 3aBaHTaKTe npOdykTn.
- YctaHObitb Ha nocuHny peDyKTopHy HacaIky I NOBepHiTb HacaIky 3a rOdHHNKOBIO CTPIIKOIO, IO6 BOHa 3aΦikCyBaJACr 3 XapaKTepHm 3ByKOM.
- YcTaHOBITb OCHOBNH 6JOK npnJaHy Ha peDyKTOpHy HacaIky N HaTnCHiTB, IIO6 BIn 3aΦikCyBaBCa 3 XapaKTePnM 3BykOM.
- BCTaBTe 1TEnCeIbHy BNkY Bpo3eTKy.
6.ПиТрИМУTe OCHOВн 6LOKпрИау и yHiBepcaIbHn NOpi6HIOBaY. HaTnCiTiB KHOnKy Tpy6OpexIMy ①. ПрИЯд пацюВатIME,ДOKN Bn He BiDnyCTIne KHOnKy. - 06po6iB npo4yKtn yHibepcaIbHnM noDpi6HIOBaUeM.
8.Писяперробк BiДуСТИКнКнКУ BBIMKHeHЯ.DочекайTeСяУнHeHЯ npIBOda.BuМiTb StTeNceJIbHy BnIky 3 pO3eTKI. - HataHcyBn uTpmyuOn o6nDi KhoNkpo36JOKyBaHHa, 3HiMiOCHOBHn 6nK npnaDy.
- NOBepHITb peDyKTopHy hacaKy npOTn roHHNKOBoi CTpiIKN i 3HiMItb II.
- BnIMiTb HIX.
- BnnpoxkHtB nocyDnHy.
Odpa3y nicnBnKOpncTaHHoUNCbTe Bci Detani. «UuueHnma doaJrdo) duB.cmop.113
PpiknaPeenty: Meobn npir 3 y6nykamn
MeDoBO-Я6nyuHa cymiU (CNHR29):

-110rnicoboroMey (5^)
-30rЯ6nykky6nkaMn(11MM)
IoknaiItbByHBepcalbHn Ioppi6HOBaui3cekyHdN3MiWyTeHa Typ6oBnDkoCTi.
MeYOBO-Я6nyuHa cymiu (CNHR29C):

-130rnicoboroMey(5°C)
-30rЯ6nykky6nkaMn(11MM)
■ПokладыВуИВерсальни
нор pi6HOBaU i 2 cekyHdi 3MiшуITE ha
ТурбОшВиДКоCTI.
Nipir:
-3yin
-60rBepuKOBOroMacJa
-100r6iIoro6bopoSha(TIn405)
-60rnoDpi6HeHnxIicOBnx ropixiB
-1u.n.kopnci
-2 naK. BaHinbHoro ukypy
-1u.n.po3nywyaTicTa
-1Я6nyko
BidinitbKOBTKBid6ikib.
KpyTo 36nITe 6JIKN.
36nTe KOBTKi 3uKpOM,a ToDi OdaTe M'Ke MacNo N MeDoBO- 6nyHy cymiw.
3MiwaIte B OKpemim Mnci6bopoH0 3 noDi6HeHmR opixamn, Kopuceio i po3nywBaueM ticTa. DOnaIte do BOJorIX IHrpeiicHTiB i NiDiMiwaIte. O6epexHo NiDiMiwaIte IonoataOkoIO 36nti 6iKn.
BuknaiTb npMOKyTHy fOpMy (35 x 11 cm) kylinapHn m nanepom i noknaiTb Tdy niIroTOBaHy cyMi.
I OounctbTe a6nyko n HapiixTe ckn6kamn. Po3nojnlitb a6nyuHi ckn6Kn no npory.
■Порріп Te duxOBkydo 180 ^ C i BnikiAte npir 30 xBnHH.
BaratoФункцioHaJIbHe npIaIaIaI
BaratofoyHKioHaJIbHe npIaIJa npIaTHe IJIa3AmUyBaHHa, HApI3aHHa Ta WAtKyBaHHn npOdyKTIB.
He6e3neKa npaHeHHraTcPmHnHOxamN / npuBOdom, 0oO6epTaCTbca!
IodaaHnHaHRpeDiHTiB:
BiDnycTiB KHonky. DoyekaTecy 3ynHeHH npnlaNy.
BnIMtB wTOBXaU i 3aBaHTaxTe iHrpeiEHTN Uepe3 3aBaHTaxyBaJIbHn OTBip.
3HOBy BCTaBTe wTOBXaU i npoObKyuTe po60Ty.
7.ПicЯперробк BiДиуctNTи KHONky BBIMKHeHHa.DOчeKaItec 3yINHeHHa npIBoJa.BuIMtB uTeNceJIbHy BnKy 3 po3ETKn.
8. HatachyBn uTpmyuOn oNDbi KHOPIPO36JOKyBaHHa, 3HIMITb OCHOBHNI 6JOK npnaDy.
9. NOBepHItb KpNkky 3a roDnHHNKOBIOCTpiIKOIO Ta 3HIMITb II.
10. BnIMtB hIX / rauOK dIy3amIwYBaHHra.
11. BnnpoxhItb nocyduHy.
Odpa3y nicra BnKOpncTaHHr OuNCbTe Bci Detani. «UuueHnma do2n4o? du. cmop. 113
PnKlaI pecentiB:
Ticto nla xni6a
OchOBHn peeent:

-200r6bopouha
-120MNI BODN
-7rUkykpy
-7rmaprapnHy
-0,5rnpixkxib
-4rconi
3Hapra:raqok dIa 3amiSyBaHHr
■ Nomicitb yci iHrpeiEHTn, Kpim BOdN, y nocyDnHy.
■ NepemiwaTe iHrpeDiEHTn Ha Typ6oWbNdkocTi.
Yepe3 KINbKa ceKyHd IoJaTe BODY Kpi3b 3aBaHTaKyBaJbHn OTBip.
O6po6itb yce Ha Typ6oWbNdkoccti.
MaKcImaJIbHa TpIbAICIb yBIMKHeHHa: 45 cekyHd
MaKcImaJIbHa KInbKiCtB: 1 X OCHOBHN peCNT
ПиоунТICTO
OchOBHn peeent:

-200r6opousha
- 100 r maprapnHy a6o macna (kimhaTha tempepatya)
-100rzykpy
-1yue
-1/2 nak. po3nyuBaay Ta TicTa
-1 nak. BaHinbHoro ukypy
-1nyka coni
3napa:raqoknla 3amwbaHH
BcTaBaKdIg rpy6oHaTnpaHnH
YctaHObitb BnCOky qactoty o6epTaHHa HATnpaTe: KapToTNIu Ha depuHn, OBOci NfpykTu Ha caIaN. He niIxOHTb dJa HAtnpaHHa MOpKBn.
06epexHo!
IoppiHOBaTN DnCKOBIMN BCTaBkamn DyKe TBepdi npOdyKTn (napMe3aH, WOKoJa) He MOxHa.
O6po6JIaTI DnCKOBIMN BCTaBkAmN BOJOKHnCTI npOdyKTn (nopei, cIepey, peBInb) MOxHa TiIbKn 3a neBHX yMOB.
He6e3neka npaHeHHra roCTpM HOxem!
Будte ocobnBO obepexhi nIac MaHInyIaIi 3i BCTaBkAm!BCTabJIouN BCTaBky B INCK-TPMaU,ypaxOByTe II fOpMy Ta po3TaWyBaHHa ( ManHOK D).INCK-TPMaU MOxHa6patN TiIbKn 3a BiIDNoBIdHi pyKIN-3arIIbIeHNHe 3acOByTe naIbciB y 3aBaHTaXyBaIbHni OTBip.ДЯpiDITOBxYBaHHa BIKOPNCTOByTe TiIbKn ITOBXaU.
→MaHIOHOK F
- BCTaBTe noTpioHy BCTaBky B DnCK-TPMaay.
- ПoctabTe nocydInHy Ha CTiIky, piBHy Ta qncty po6oy nobepxHIO. Bi3bMitb DnCK-tpImaay 3a pyuKN-3aIIN6JIeHHra Ta BCTaHOBiTb Ha Micce.
- YctaHObitb Ha nocuHInHy KpnUky () i NOBepHITb npOTn rOHHNKOBoi cTpiIKN Do φikcaui 3 xapaKTEpHIM 3BykOM.
- YcTaHOBIb OCHOBnH 6JOK npuJaHy Ha peDyKTOpHy HacdKy N HATNCHiTb, 06 BIn 3aΦiKcYBaBCa 3 XapaKTepHM 3BykOM.
- YctahOBiTb 6axaHv qactOty o6epTaHHa 3a DOnOMOrO BIDNOBIDHO peryIaTopa. BCTaBTe wTenCeIbHy BNkY B p03eTKy.
- Pntpmmyte oCHOBn 6nok npnaady. HATNCHTb KONky BBIMKHeHHa ① . Pnpad npaIOBaTme, Dokn Bn He BiDnyCTnte KHONKy.
- 3aBaHTaXTe o6pO6JIoBAnI npOdyKTN B rOpNoBnHy. 3aBeNkI uMaTkn CnId 3a3dAneriNb nOpri6HnTu. Y pa3i notpe6n NiDItOBxuYte npOdyKTN, 3JERKa HATnCKaUOn Ha IToBxAu.
- BiDnyctitb KhoNky, KOJI 3aBepuNTe o6po6ky a6o o6po6JIOBaHI npOdyKTH cIHyTb HIXHbOro 60ky DnCKa-tpMaaya. DoyeKaITeCra 3yINHeHHr npNBoJa. BInMITb 7TeNCeJIbHy BNKy 3 po3eTKn.
-
HataChyBn u TpummyoOn oNDbi KhoNk P036JOKyBaHHa, 3HIMITb OCHOBHn 6Jok npnaNy.
-
NobeprHtB KpNkky 3a rOdHHNKOBIOCTpiJIKOTo Ta 3HIMITb ii.
- Bi3bmitb dNCK-tpMaay 3a pyKn-3aIIN6JIeHHa Ta BnMIt b Ioro.
- BnnpoxhHtB nocuHy.
Odpa3y nicnBnKOpncTaHHoUncTbTe Bci Detani. «UuueHnma doaJrdo? duB.cmop.113
PpKnaPeceenty: DepyHn
-500rkaptonni
-1BeNkeJnCe
-3 cT.π. δορωnhα
-Cinb,nepeub3a cMaKOM

3Hapra: BCTaBka-TepTuIka
I OuaCTnI hAteptN kAPTONJIIO.
IOTIM 3miataN kaptonnIO,nae, bopoHNO,cInb i npeuB.
■Якwo maca 3aHaTo pIDka,doaTu Ie Tpoxn 6opOsha.
PozirpiTu OJIIO y BeJNKiC KOBOpOdi, DoaTu Macy No OdHi BBeJNKi IooKci i HaDaTu FOpMy OJaOk. ObcMaXHTu 3 06ox 6okIB Do 3oJIoTnCTo-KOpUHeBOro KOJbOpY.
BiiHuyokДЯ36nBaHHa
BcTabka-Tepka KpynHa
YcTaHOBnTepeyIaTOpOM YncNo O6OpOTOB Ha BbICOKoe 3HaueHHe dJa HAtnpaHnHa: KapToPeJIa DnK JLeUcO KApToPeJIbHbIX OJaIi; PpyKTob N OBOuEe IJa cAJaTOB. He DonyckaETc DaJHaTnpaHn MopKOBI.
OcTopoxHo!
I3MeJIbUeHHe OueHb TBepdbIX npOdyKTOB (cbipa «IapMe3aH», wokonada) c NOMOuBIO BCTaBOK B DnCK HeOnyCTUMO.
BCTaBKn B DnCK TOnbKO yCJIOBHO npnroHbI ДЯперетКи BOLOKHnCTbIX npOdyKTOB (лук-nopeи, сeьdpeи, peBeHB).
OnachocTb TpaBMnpoBaHnOcTpblm HOXOM!
Heo6xOIMO co6nIOaTb oc6yO
OCTOPOXHOCTb B O6paueHm CO BcTaBkAm!
YuNTbIbaTe fOpMy n NOJoxeHne
BCTaBKn npu yCTaHOBKe B DnCK dJa
KpeJIeHnRA BCTaBOK ( PncyHOKD).
DnCK dJa KpeJIeHnRA BCTaBOK MoXHO
6paTB TOJbKO 3a IpeDyCMOTpeHHbIe dJa
3TOrO BbIeMKn dJa 3axBaTa. He BBODHTe
NaIbCuB B 3aRpy30Hoe OTBepCTne. Jnra
NoDTaJIKNBaHnRA NcNOJb3yIte TOnbKO
ToJkATEJIb.
PncyHOK F
-
BCTaBbTe HxKHyIO BCTaBky B INCKДЯ KpeJIeHnA BCTaBOK.
-
NocTaBbTe KOHTeHep Ha npOHyU, rJaKyo uNcTuyo pa6Ouyu NOBepxHOCTb. Bo3bMnte DnCK dJa KpeJIeHnB CtABOK 3a BbIeMKn dJa 3axBaTa n BcTaBBte erO.
- YcTaHOBnTe KpbIuKy Ha KOHTeHep () INIOBepHnTe npOTnB YacOBOy CTpeJIKN DoΦNKCaun CO UeJYKOM.
- YctaHOBNTe OCHOBHOJ 6nOK Ha peDyKTOpHyIO HAcADky I HAXMNTe Do fNKCaUN CO UeJIYKOM.
- YctaHOBInTe HuxHoe uNcNo o6OpOTOB c NOMOupeRyIaTopa uNcNa o6OpOTOB. BCTaBBte uTeNCeIbHyU BnIKy B po3eTKy.
6.ПидерхиBaIte OCHOBнoi 6JOK. HaxmTe KHOKy BKIOUeHnI ① . Ipi6op ocTaetcBKnIOUeHHbIM, noka hXkata KHOkA. - 3arpy3nte nepepa6aTbIiBaembie npOdykTbIB 3arpy30uHbI CTBOJ. PpeBapnteIbHO n3MeIbUHTe KpyNbIE Kycn. Ppi Heo6xOIMOCtN cIerKa noDTaIKnBAiTte TOnkaTeJeM.
- Iocne okOHuaHnpepea6oTKn, nIKN KOrda nepepa6aTbIBaEmbIe npOdyKTbl NOUTN DOCTnHyT HIXHeN CTOpOBbl DnCKa dIg KpeJIeHnB CtABOK, OTnyCTnTE KHOKKy. DoXdntEcB NOJHO OCTaHOBKn npINBOJa. BbIHbTe 1TEnCeJIbHyIO BNkU y N3 pO3eTKn.
9.ДерханжаТьIMNObeKHOKN pa36JIOKINPOBKN,CHIMITE OCHOBHON 6JOK. - ПовернITE Крышky по уасов� STpeЛke И симпerte ee.
11.Bo3bMNTe DNCK JnKpeNneHnBCTaBOK 3a BbIEMKn DnJ 3aXBaTa N BblHbTe eRo. - Onopokhnte kohteHep. OunuTe Bce qactn npnbopa cpa3y nocne nCnoB3OBaHna. «Oucmka u yxod» cm. cmp. 121
PpimepHbI peeent:
Дранки
-500rkaptopejna
-16oIbIwoeraio
-3cT.I.MyKIn
- coIb, nepeu no Bkycy

HacaKa: BCTaBka-TepKa
Kaptooepenb ounctntb n HatepeTb.
3aTeM CMeWaaTb KapToOpelb, RnO, MyKy, CoIb n Nepeu.
EcnMaccacnUKOMXnKaJ, doabntb eue HEMHOro MyKn.
Pa30rpeTb B CKBOPoPe paCTntBHOe MacNo, 6OJbIooJIoXKOI BbIKJaIbIBaTb B CKBOPoDy Maccy, fOpMnpyu n3 Hee IpaHnK. Obxapntb c o6eNxCtOPOH Do TEMHO-3OJOTNCTO RBeTa.
Bench B36nBaHna
ДяВЗБИВАнЯСЛВОК,6eЛКOBиMOLOKa Bпeнуи3 roрчero(makc.70°C)и XOJOHOrO MOLOKa(makc.8°C),a TaKke ДяпriROTOBNeHЯ COYCOBиDEceptOB.
Onachoctb ownapBaHnra!
Дпя поразбOtКи ropЧИХ КИДКОCTe ИСПОЛьЗУМТe BBICOKYU y3KуI O EMKOCTb ДЯ CMeшИВаHЯ.
BHMMaHHe!
- Hn B KOem Cnyuae He BCTaBJaIte BeHcIK DnB36uBaHnB OCHOBHO 6nok 6e3 peDyKTopHo npNCaBKn.
- PeDyKTOpHyO npNCtAByC BeHcNKOM DnB36nBaHm MOxHO yCTaHaBnBaTb N CHMaTb TOJbKO nocne OCTaHOBKn npnbopa.
→PncyHOK
- 3arpy3nTe nOdrTOBHeHHbIe npOdyKTbI B cTaKaH 6JIeHdepa IIN dpyrYIO NOxOJaUyEO EMKoCTb, IIn6o nepepaBaIBaIte npOdyKTbIB KacTpHJe.
- YctaHOBNTe peDyKTOpHyo npNCtABky Ha BeHcIK DnI B3bBaHnI n PnIXMITE Do fHKcaCm CO UeJhKOM.
- BCTaBbTe BeHnK dIa B3bHaHna C peDyKTOpHO npICTaBKO B OCHOBHO 6NOK n npXmTe Do fNKcaun Co ueJYKom.
- BCTaBnTb 7TeNceIbHyIO BnKy Bpo3eTKy.
-
YctaHOBnTb peRyIaTOpOM uNcna o6OpOTOB HxKHOe UNCIO o6OpOTOB (peKOMeHdaUra: BbICOKoe UNCIO o6OpOTOB).
-
YdepKIBaOCHOBHO6IOK IN CTaKaH 6IeHepa, HaxaTb KONky BKNIOUeHnA.
7.ПользуясьBEнчИКOMДЯВ36иВан,在pepeapoTaIte npOdyKТbl. - После посяпгдггггггггггггггггггггггггггггггггггггgngngngngngngngngngngngngngngngngngngngngngngngngngngngngngngngngngngngngngngngngngngngngngngngngngngngngngngngngngngngngngnggnggnggnggnggnggnggnggnggnggnggnggnggnggnggnggnggnggnggnggnggnggnggnggnggngg. БКЛЮЧЕнЯ. ДОЖДNTeСь NOЛНоHО OCTaHOВКИ ППИВОДа.
- BbInbTe ⅢTeNcBHyIO BNkU n3 pO3ETKn.
10.ДерханжаТьIMN obe KhoNK pa36JOKINPOBKN,CHMNTe BeHnK dJa B36nBaHnC peDyKTOpHO npNCtABKOc OCHOBHorO 6JOKa. - Chmnte peDyKTopHyIO npNCtABky C BeHnka DnRA B36nBaHnra.
OuHuaTe Bce qactn npnbopa cpa3y nocne nCnoJb30BaHnra. Oucmka u yxod》cm.cmp.121
Ounstka n yxoid
IocneKaKdOrOpnpMeHEnn IcNoIb3OBaHHbIe qactN npHaJNeXHOCTeI DOJXHbI 6bITb TuaTeJIbHo OUnSeHbI.
He nckJIIOyeHa onaChocTb TpaBMnpoBaHn
He kacaTecb roIbIMn pykAmn ne3Bn yHNBepcaIbHOro HOXa, HOX dJa n3MeIbYeHn IbDa n I3MeIbYnteJIbHbIX BCTaBOK.ДЯ OUnCTKn 6epNTecb TOnbKO 3a PnactMaCCOByU qAcTb N HcNoJIb3yInTe UTeKy.
BHHMaHHe!
-He nCnoJb3yIte moUoIne cpeIcTBA, coDepeKaaIe aNkoRoiJI nn CnIPT.
-He nCnoJb3yIte MeTaJIInueckne n octpOKOHeHbIe IpeDMtbl,a TaKKe IpeDMtbl C OCTpbIMN KpOMkAMn.
-He npimmeHnTe rpy6yUo TkaHb nIa6pa3nBhIe YnCTraIcne cpeDCTBa.
- Hn B Koem cnyuae He norpykaite B XndkocTN He MOITE NOI npoTOUHOB BOOn nJI N B NOcyDOMOeHNO MaUNHe CNeDyUOUIue YAcTn: peDyKTopHaJ HacaIka, peDyKTopHaJ npICTaBKa, KpbIuKa c peDyKTopOM.
Yka3aHnra:
-Пл actMaccobbie DeTaHn He 3axmamte B NocydomoeyHO MaunHe Mejdy Nocydo, TaK KaK Bo3MOxHa INX DeΦopMaun.
-ПиперетабOTke,нанример, Краснокочин Кадусты Ил Моркови Н пласмССОвьIX DeТаIGNX MOжET NOЯВИТSCЯ CBeTHOн HaIeT.Ег моЖно удайтс СnomоцьH HeCKOLbKnx KaJIeNb pactNTeЛьНOrMaCJa.
Ha pncyHke H noka3aHo, KaK OunchTb OTdJIbHbIe Yactn np6opa.
YHnBepcaJIbHbI N3MeJIbUHTeJIb/ BeHcN DJIa B36uBaHn
I PpOtnpaTe HacaKy yHnBepcaJIbHOrO n3MeJbUHTeJI N peDyKTopHyIO npICTaBky BeHnka IIN B36NBaHnA TOJIbKO MArKO BJaXHoT KaHbIO n 3aTEM IpocuWBAHTe.
OuHauTe npOue qactn
PnHaIeXHoCTeMbIbHbIM
pactBOPOM MmKoTkAHyIO
Hn r6ko, n6o MoTe Hx B
NocydomoeyHO MaHHe. Jn OcHCTKn
HOKe INcNoJIb3yIte UeTKy.
MhoroofyHKcnoHaJIbHa npHaJdJeXHOCTb
I npotnpaTe peDyKTopHyo HacaKy TOJIbKO MЯrKoB BlaJxHOn TKaHbIO 3aTEM npocuWnBaIte.
■ПepeBepHnTeДИСКДЯКрпЛeньВCTaBOK,YTO6bl BbIaBHTb BCTaBKN(→PncyHok).
KoHTeHep, yHnBepcaIbHbI HOK, DnCK IJRA KpeJIeHNA BCTaBOK IN3MeJIbUHTeJIbHbIe BCTaBKN MOxHO MbITB NOCyDOMOeHOn MaunHe.
OcTabnem 3a co6oI npaBO Ha BHeceHne N3MeHeHn.
10 10
11 11
.
(2)
a
!
[ - {21} \div {21}]
.
a + b = 1
-0jaiu
-
AALLue 1gaii jLcui
a gao gao gao jilll aocao ool
.
:
-
L
j 1
1gill j! j5y 1j yill o8 .4suiu yll 1j
pabll j j jj j j j j
45 1
a.ii
y/laiaai 1giiia bai
aegaae 1
g 1
$$ \begin{array}{l} \int_ {0} ^ {1} \mathrm {d} t \int_ {0} ^ {t} \mathrm {d} s \int_ {0} ^ {s} \mathrm {d} t \int_ {0} ^ {t} \mathrm {d} s \int_ {0} ^ {t} \mathrm {d} s \int_ {0} ^ {t} \mathrm {d} s \int_ {0} ^ {t} \mathrm {d} s \ j a l l \ \int_ {0} ^ {\infty} \frac {1}{2} \int_ {0} ^ {\infty} \frac {1}{2} \int_ {0} ^ {\infty} \frac {1}{2} \int_ {0} ^ {\infty} \frac {1}{2} \int_ {0} ^ {\infty} \frac {1}{2} \int_ {0} ^ {\infty} \frac {1}{2} \int_ {0} ^ {\infty}, \ \therefore \angle B = 1 1 \ \begin{array}{l} \dot {j} \dot {a} \dot {b} \dot {c} \dot {d} \dot {e} \dot {f} \dot {g} \dot {h} \dot {i} \dot {j} \dot {k} \dot {l} \dot {m} \ \dot {x} \dot {s} \dot {t} \dot {u} \dot {v} \dot {w} \dot {x} \dot {y} \dot {z} \dot {w} \dot {x} \dot {y} \dot {z} \dot {w} \dot {x} \dot {y} \dot {z} \dot {w} \dot {x} \dot {y} \dot {z} \dot {w} \dot {x} \dot {y} \dot {z} \dot {w} \dot {x} \dot {y} \dot {x} \dot {y} \dot {z} \end{array} \ \cdot \dot {s} \dot {s} \dot {s} \dot {s} \dot {s} \dot {s} \dot {s} \dot {s} \dot {s} \dot {s} \dot {s} \dot {s} \dot {s} \dot {s} \dot {s} \dot {s} \ \end{array} $$
#
J 70
8 )
.
1gsly
bls cgl 1i
.
4
jL j 5
.
g w g jill aeg oagj 1
j 1
G
e 1
g j 10
.
2
4a
gaa
aagaae aee
jaiy aabai jag yulwJg
gaaa 1
J 4
buaa aee
()
Jieeill jiebcaiall
al gai jia jia cai jia jia jia jia jia jia jia
.01 1
.
F
- Jolal
2 cluio
Jaa Jalal Jajll Jai j
A
)
Jrduy aclll 2c dolj
gaaa 1
a 1
gaa
.
①
bge jll lalb xie jgall jy
slicai 2gol jll boll iiaiaia
aill lsc wll 15i pddwly lele bll
Jolal Joll jll lll
. 1
1
wJl
9 2
10 acl
S OBC = S COD + S_ BOC
11
12.
jll 1c jj
()←,p1
ar-7 1
Jai Jauu aag
aag j 1
500
S ACD = S COD + S_ CDA
a_3 = 12
aJl Jalal
S OBC = S COD + S BOC - S BOC
jui juiuui
J 15
.(Turbo)
.
g jill l ic jlll
2:
1 1
e bai jui jai jai jai
-
ii
a blll jjll jai:
aLi - 2b
aaiia i jg ie yie gll ie y
.
aagill bua gio -y
a a a a a a a a a a a a a a a a a a a
8 0
wulj
9 24cl
10
11.
1
()←p1suiyjaoeijiy
ar-7 1jil
:

j
:
-
- elo Jo
- 5
-()
- j_1 p
[ - {2}^{10} \rightarrow 0]
S OBC = S COD + S BOC - S BOC
OE BC
山
.(Turbo)
a 1
.(Turbo)
45:
1 1

:
()100
一
一
一
1
12
1
1
Jn Jn
aalssu 1
aaiiie 1111111111111111
g j g j g j g g g g g g g
.
.
y
.
J 1
Suiu 1
C
jolalii j 1
在 Rt ABN 中:
15
a
)
Jrnnnne nnnnne nnne nee
J.
.
a 100000000000000000000000000000000000000000000000000
laallll lglgall gaiy
Jg 1
4a 1
gaa
.
1c bai 1. 1000
j j ①
bgh
:cligall
.45
j 1
i#
JJI JIgGwSIL Jd
6
a 18
30 1
aillg 1
J 1
aie 100
1
1 1
1 1
J 1
ailll llll llll llll lll
1
Lbgyg y
1
4 4c gao zao xia jie wu yjie jie jie (yao
1
120g gall lal 1y
5 jieai
a 1
S木弟形 COBD = S COD + S_ BDO
ae yall Cg
6
a1 = 2,a2 = 32,b2 = 43,c2 = 56
4-8 2
8-12
①
| 10 | olajil | ### | ### | ### |
Thank you for buying a Bosch Home Appliance!
Register your new device on MyBosch now and profit directly from:
- Expert tips & tricks for your appliance
- Warranty extension options
- Discounts for accessories & spare-parts
- Digital manual and all appliance data at hand
- Easy access to Bosch Home Appliances Service
Free and easy registration - also on mobile phones:
www.bosch-home.com/welcome
BOSCH
HOME APPLIANCES
SERVICE
Looking for help?
You'll find it here.
Expert advice for your Bosch home appliances, need help with problems or a repair from Bosch experts.
Find out everything about the many ways Bosch can support you:
www.bosch-home.com/service
Contact data of all countries are listed in the attached service directory.