
Caleo Glass - Electric heater OLIMPIA SPLENDID - Free user manual and instructions
Find the device manual for free Caleo Glass OLIMPIA SPLENDID in PDF.
| Product type | Electric radiator |
| Brand | Olimpia Splendid |
| Model | Caleo Glass |
| Nominal power (high) | 2000 W |
| Nominal power (eco) | 1000 W |
| Supply voltage | 220-240 V ~ 50/60 Hz |
| Operating modes | Anti-freeze, Eco, Heating |
| Programmable timer | Yes, from 1 to 24 hours |
| Remote control | Infrared, CR2025 button cell |
| Integrated WiFi | Yes, smartphone control |
| Overheat protection | Automatic shutdown in case of overheating |
| Control lock | Automatic after 1 minute of inactivity |
| Installation | Wall-mounted (bracket supplied) or on feet |
| Safety distance (wall) | 1 m from ceiling, 15 cm from floor |
| Routine maintenance | Dry cloth, vacuum cleaner for grilles |
| Cleaning | Damp cloth (warm water, mild detergent) |
| Standby consumption | 0.001 kW |
| Remote control batteries | 1 CR2025 lithium button cell 3V |
| Intended use | Domestic heating |
| Child safety | Automatic key lock |
Frequently Asked Questions - Caleo Glass OLIMPIA SPLENDID
User questions about Caleo Glass OLIMPIA SPLENDID
0 question about this device. Answer the ones you know or ask your own.
Ask a new question about this device
Download the instructions for your Electric heater in PDF format for free! Find your manual Caleo Glass - OLIMPIA SPLENDID and take your electronic device back in hand. On this page are published all the documents necessary for the use of your device. Caleo Glass by OLIMPIA SPLENDID.
USER MANUAL Caleo Glass OLIMPIA SPLENDID
natural_image
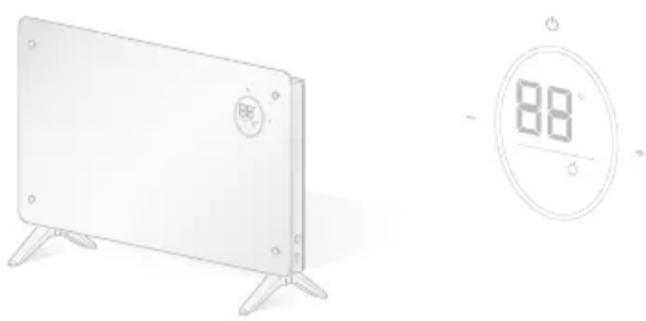
Illustration of a flat-screen heating device with a digital display showing 88°C, mounted on a stand (no text or symbols)INSTRUCTIONS FOR INSTALLATION, USE AND MAINTENANCE
EN
INSTRUCTIONS POUR L'INSTALLATION, L'UTILISATION ET L'ENTRETIEN
FR
natural_image
Illustration of a flat-screen electric heating device with a digital display and mounting base (no text or symbols)TÄMÄ TUOTE SOVELTUU VAIN ASIANMUKAISESTI ERISTETTYIHIN YMPÄRISTÖIHIN TAI SATUNNAISEEN KÄYTTÖÖN.
DETTE PRODUKTET ER KUN EGNET FOR BRUK I KORREKT ISOLERTE ROM ELLER TIL SPORADISK BRUK
A TERMÉK CSAK MEGFELELÖEN SZIGETELT HELYISÉGBEN TÖRTÉNŐ HASZNÁLATRA ILLETVE ALKALMI HASZNÁLATRA LETT TERVEZVE
TENTO VÝROBEK JE VHODNÝ POUZE K UMÍSTĚNÍ DO SPRÁVNĚ IZOLOVANÝCH PROSTOR NEBO K PŘÍLEŽITOSTNÉMU POUŽITÍ
6
natural_image
Illustration of a flat-screen device with a digital display and two tools, no text or symbols present.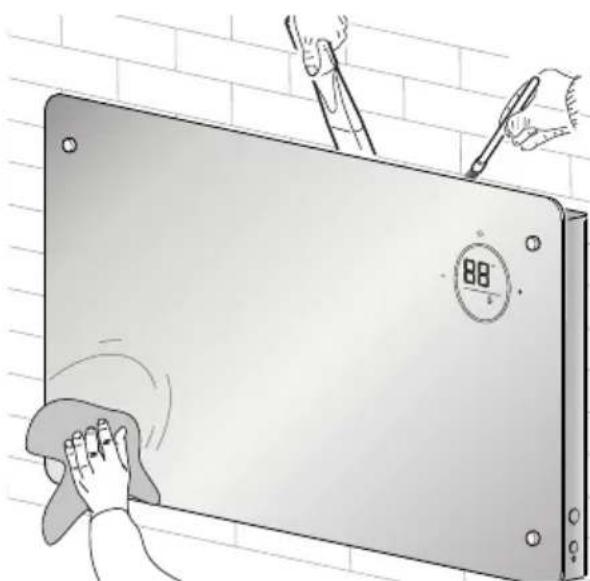
natural_image
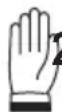
Illustration of a hand cleaning a large electronic device with a digital display and tool nearby (no text or symbols)0 - AVVERTENZE 2
2 - INSTALLAZIONE
natural_image
Illustration of a flat-screen electronic device with mounting legs and a circular button on the front panel (no text or symbols)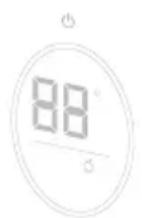
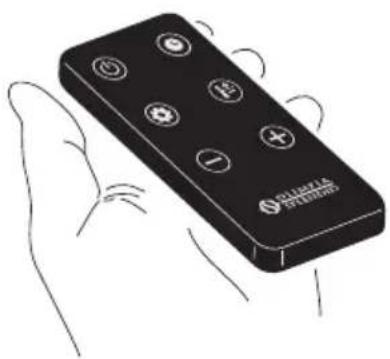
3.1 - PANNELLO COMANDI E TELECOMANDO

natural_image
Illustration of a hand holding a black remote control with six buttons (no text or symbols)
natural_image
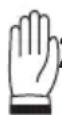
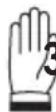
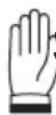
Illustration of a hand using a power plug to insert an electrical socket (no text or symbols present)
0 - WARNINGS....2
0.1 - GENERAL INFORMATION......2
0.2 - SYMBOLS 2
0.2.1 - Editorial pictograms......2
0.3 - GENERAL WARNINGS ....3
0.5 - PROPER USE 7
0.6 - UNINTENDED AND POTENTIALLY DANGEROUS
USE 7
1 - DESCRIPTION OF THE APPLIANCE AND OF THE COMMANDS......8
2 - INSTALLATION ......9
2.1 - FLOOR
INSTALLATION....9
2.2 - WALL INSTALLATION ......9
3 - USE OF THE APPLIANCE......10
3.1 - CONTROL PANEL AND
REMOTE CONTROL....11
3.2 - USE OF THE REMOTE CONTROL..11
3.2.a - Insertion of batteries....12
3.2.b - Replacement of batteries .....12
3.2.c - Location of the remote control...13
3.3 - USE OF THE APPLIANCE .....13
3.3.a - Preliminary operations....13
3.4 - INSTRUCTIONS FOR
OPERATION....13
3.4.a - ON/OFF key (A1) 13
3.4.b - Timer key (A2)....13
3.4.c - Mode key (A3)....14
3.4.d - Command lock (L5)....14
3.4.e - WIFI key 14
3.5 - PROTECTION FROM
OVERHEATING....15
4 - MAINTENANCE AND CLEANING .....15
5 - PRESERVATION OF THE APPLIANCE.16
6 - TECHNICAL DATA ......16
DISPOSAL
This symbol on the product or its packaging indicates that the appliance cannot be treated as normal domestic trash, but must be handed in at a collection point for recycling electric and electronic appliances.
Your contribution to the correct disposal of this product protects the environment and the health of your fellow men.
Health and the environment are endangered by incorrect disposal.
Further information about the recycling of this product can be obtained from your local town hall, your refuse collection service, or in the store at which you bought the product.
This regulation is valid only in EU member states.
EN - 1
CALEO GLASS
0 - WARNINGS
0.1 - GENERAL INFORMATION
First of all, we would like to thank you for choosing our appliance.
0.2 - SYMBOLS
The pictograms in the next chapter provide the necessary information for correct, safe use of the machine in a rapid, unmistakable way.
0.2.1 - Editorial pictograms
 | Indicates that this document must be read carefully before installing and/or using the appliance. |
| Indicates that this document must be read carefully before any maintenance and/or cleaning operation. | |
 | Indicates that there may be additional information in attached manuals. |
| Indicates that information is available in the user manual or in the installation manual. | |
 | Indicates that the assistance personnel must handle the appliance following the installation manual. |
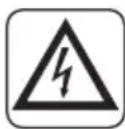
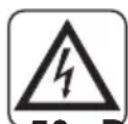
 | Signals to the personnel that the operation described could cause electrocution if not performed according to the safety rules. |
 | It informs the personnel concerned that if the operation is not carried out in compliance with the safety regulations, it presents the risk of suffering physical damage. |
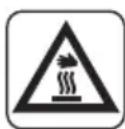
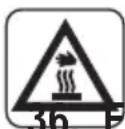
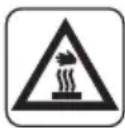
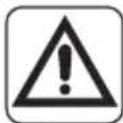
  | It informs the personnel concerned that if the operation is not carried out in compliance with the safety regulations, it presents the risk of burns due to contact with components at very high temperatures.Paragraphs marked with this symbol contain very important information and recommendations, particularly as regards safety. Failure to comply with them may result in:- danger of injury to the operators- loss of the warranty- refusal of liability by the manufacturer. |
 | Refers to actions that absolutely must not be performed. |
 | Indicates to the personnel concerned, that it is prohibited to cover the appliance, to prevent over-heating. |
0.3 - GENERAL WARNINGS
WHEN USING ELECTRICAL EQUIPMENT, BASIC SAFETY PRECAUTIONS MUST ALWAYS BE FOLLOWED IN ORDER TO REDUCE RISKS OF FIRE, ELECTRIC SHOCKS AND INJURY, INCLUDING THE FOLLOWING:

This document is restricted in use to the terms of the law and may not be copied or transferred to third parties without the express authorization of the manufacturer, OLIM-PIA SPLENDID.
Our machines are subject to change and some parts may appear different from the ones shown here, without this affecting the text of the manual in any way.
Read this manual carefully before performing any operation (installation, maintenance, use) and follow the instructions contained in each chapter.

Keep the manual carefully for future reference.
- After removing the packaging, check that the appliance is in perfect condition. The packaging materials must not be left within reach of children as they can be dangerous.
-
THE MANUFACTURER IS NOT RESPONSIBLE FOR DAM-AGES TO PERSONS OR PROPERTY CAUSED BY FAILURE TO FOLLOW THE INSTRUCTIONS IN THIS MANUAL.
-
The manufacturer reserves the right to make any changes it deems advisable to its models, although the essential features described in this manual remain the same.
-
Before connecting, make sure that the plate data corresponds with the mains electrical supply. The data plate is located on the appliance.

-
Install it according to the manufacturer's instructions An incorrect installation can cause damage to people, animals or property for which the manufacturer accepts no responsibility.
-
Always and only use it in a vertical position.
Place the appliance in an appropriate environment and on a stable and plane surface.
-
Always unreel the cable completely during use.
-
The appliance is equipped with a power cord with plug (Y-type connection). If the power cord is damaged, it must be replaced by the manufacturer, his technical service or a similarly qualified person in order to eliminate all possible risks.
-
Install it in such a way that the switches and other controls cannot be reached by persons using the bath or shower.
-
Do not use extensions, if not with particular care.
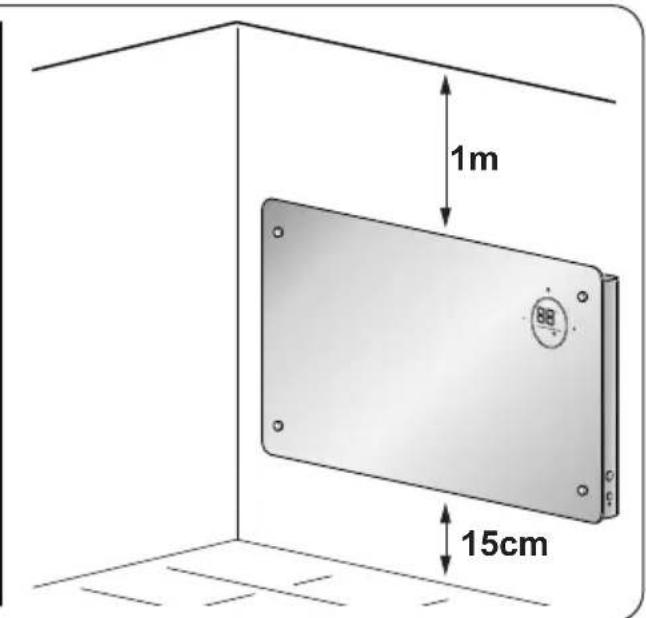
14a. If the appliance installed on the floor is used (with the feet), make sure to keep a distance of at least 1m from other objects (fig. 1).
14b. If the appliance installed on the wall is used (with the bracket), make sure to keep a distance of at least 1m from the roof and of at least 15cm from the floor (fig. 1).
14c. DO NOT install the appliance on wooden walls
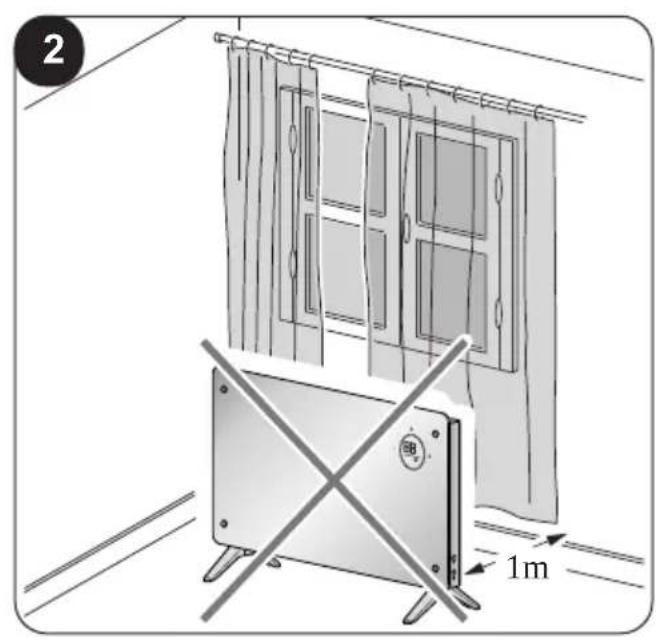
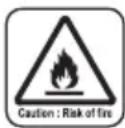
14d. To avoid the risk of fire, keep the air outlets of the appliance at a distance of at least 1m from any object, curtains, fabric or flammable materials (fig. 2).
-
Do not place appliance close to a radiant heat source.
-
Do not use the appliance to dry clothes.
-
Do not insert or allow foreign objects to enter any ventilation or exhaust opening, as this may cause an electric shock, fire or damage to the appliance.
-
Do not allow cord to come in contact with heated surfaces during operation.
-
Do not run cord under carpeting, throw rugs or runners etc. Arrange cord away from traffic areas so that it will not be tripped over.
-
Do not twist, kink or wrap the cord around the appliance, as this may cause the insulation to weaken and split.
-
Do not store appliance while it is still hot.
-
Do not use this appliance outdoors, or on wet surfaces.
-
Do not use this heater with programmer, timer or any other device that switches the heater on automatically since a fire risk exists if the heater is covered or positioned incorrectly.
-
The appliance is conceived for vertical use.
-
Never use the appliance horizontally.
-
Avoid spilling liquid on the appliance.
- It is forbidden for the appliance to be used by children or unassisted disabled persons.
- The appliance may be used by children over 8 years of age and by persons with reduced physical, sensorial or mental capacities, or without the required experience or knowledge, provided they are supervised or have been instructed in the safe use of the appliance and understand the hazards involved.
- Children must not play with equipment. Children must not be allowed to clean the appliance or perform user maintenance without proper supervision.
- Children of less than 3 years should be kept away unless continuously supervised.
- Children aged from 3 years and less than 8 years shall only switch on/off the appliance provided that it has been placed or installed in its intended normal operating position and they have been given supervision or instruction concerning the use of the appliance in a safe way and understand the hazards involved.
- Children aged from 3 years and less than 8 years shall not plug in, regulate and clean the appliance or perform user maintenance.
- Do not use this heater in the immediate surroundings of a bath, a shower or a swimming pool.
- Some parts of this product may become very hot and could cause burns. Be very careful when children or vulnerable adults are nearby.
-
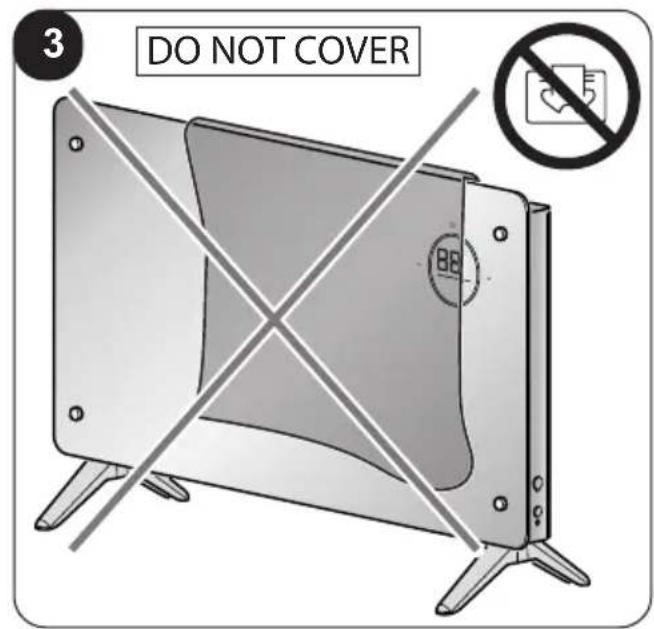
WARNING: in order to avoid overheating, do not cover the heater (fig. 3).
-
For correct use of the appliance NEVER:
a. Place it immediately underneath a mains wall socket.
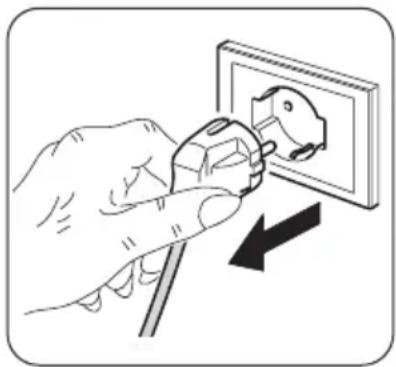
b. Pull the power cable or the appliance itself to remove the plug from the mains socket.
c. Leave it expose to atmospheric agents (rain, sun, etc.).
d. Leave it plugged in when not in use.
e. Touch it with wet or damp hands.
- Use this appliance only as described in this manual. Any other use is not recommended by the manufacturer and may cause fire, electric shock or injury.
- The most common cause of overheating is deposits of dust or fluff in the appliance. Ensure these deposits are removed regularly by unplugging the appliance and vacuum cleaning air vents and grilles.
- Do not use abrasive cleaning products on this appliance.
Clean with a damp cloth (not wet) rinsed in hot soapy water only.
- Always remove plug from the mains supply before cleaning.
-
Do not connect the appliance to the mains voltage until completely assembled and adjusted.
-
Do not immerse the appliance in water or in other liquids. Short circuits or fires may occur.
- Do not let the appliance work in enclosed areas such as a cabinet since it could cause a fire.
- If the appliance's plug is incompatible with the socket, have the socket replaced with a suitable one by a qualified technician, who must ascertain that the section of the socket cables is compatible with the power absorbed by the appliance. We do not recommend using adaptors and/or extension cables. If they cannot be avoided, however, they must comply with current safety regulations and their ampacity (A) must not be below the maximum ampacity of the appliance.
- Do not use the appliance in case of malfunctioning or faults, if the cord or plug are damaged, or if it has been dropped or damaged in any manner.
Turn the appliance off, disconnect the plug from the socket and let it be checked by professionally qualified personnel.
-
Disassembly, repair or reconversion performed by an unauthorized person could cause heavy damages and will cancel the manufacturer warranty.
-
Neither disassemble nor modify the appliance.
-
Repairing the appliance by yourself is extremely dangerous.
-
In the presence of gas leaks from other equipment, ventilate the room well before activating the appliance.
-
Do not remove plug from power socket until the appliance has been switched off.
-
If you no longer wish to use this appliance, it must be made inoperative by cutting the power supply cable after removing the plug from the power socket.
-
Hazardous parts of the appliance must be rendered harmless, especially as there is a risk of children playing with it.
-
At first use and after a long period of inactivity of the appliance, a slight noise may be heard and a slight odour may be smelled. It is a normal phenomenon which will disappear after a few minutes of operation.
0.5 - PROPER USE
-
The appliance must be used exclusively as an electrical thermal convector with the only purpose of making the room where you are staying comfortable.
-
This appliance is only designed for domestic use or similar, not for commercial or industrial use.
-
An improper use of the appliance with possible damages caused to people, things or animals releases OLIMPIA SPLENDID from any responsibility.
0.6 - UNINTENDED AND POTENTIALLY DANGEROUS USE
- Do not use the appliance in areas in which are used or stored petrol, varnishes or other flammable liquids or in environments with the presence of flammable or explosive gases.
EN - 7
-
Do not use the appliance if insecticide gas has just been sprayed in the room or in the presence of burning incenses, chemical vapours or oily residues.
-
Do not use this appliance in small rooms occupied by persons which are not able to leave it autonomously unless constant supervision is supplied.
-
CAUTION - Do not cover the appliance in order to avoid overheating (fig. 3).
This product must be used exclusively according to the specifications indicated in this manual. Use different to that specified, could cause serious injuries.
THE MANUFACTURER IS NOT LIABLE FOR INJURY/DAMAGE TO PERSONS/OBJECTS DERIVING FROM FAILURE TO COMPLY WITH THE REGULATIONS CONTAINED IN THIS MANUAL.
1 - DESCRIPTION OF THE APPLIANCE AND OF THE COMMANDS
- Appliance body
-
Air inlet/outlet grille
-
Wall installation bracket
- Instruction booklet
-
Power cord
-
Feet
- Screws kit
- Led Display
- Remote control

2 - INSTALLATION
• After removing the packaging, check that the appliance is in perfect condition; in case of doubts do not use it and refer to professionally qualified personnel.
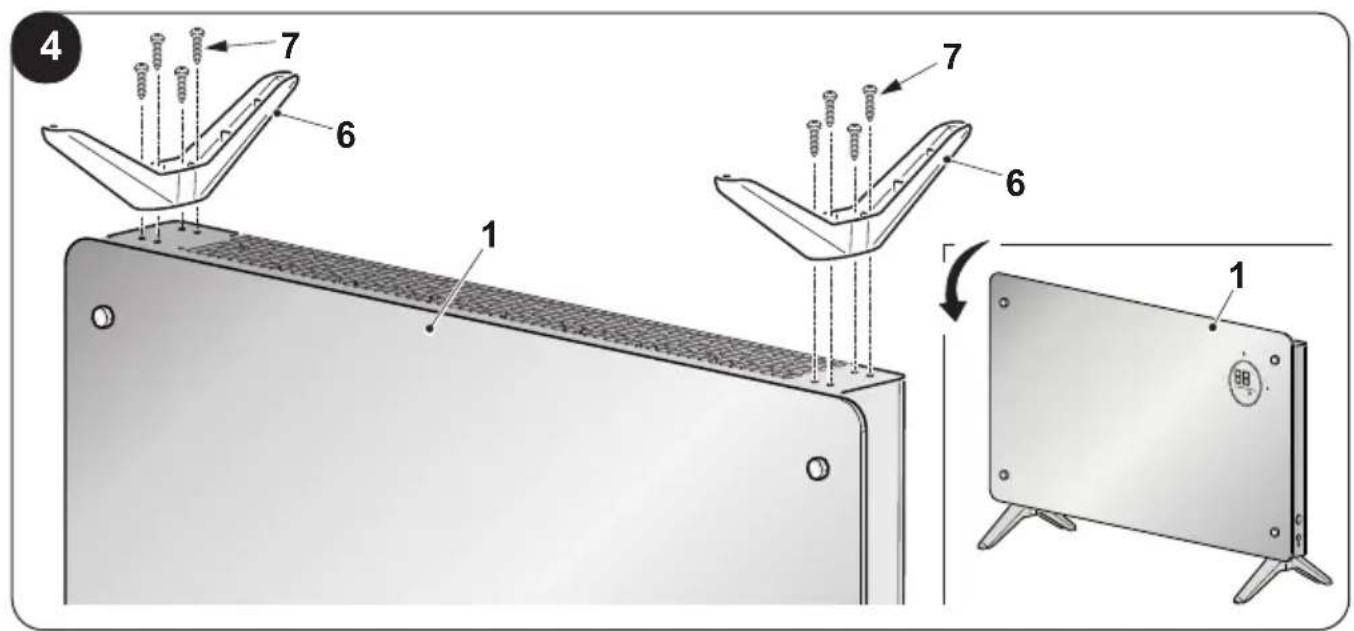
2.1 - FLOOR INSTALLATION (Fig.4)
- Rotate the appliance upside down.

Position the appliance on a flat and stable surface, making sure it does not spoil or fall. Position a soft cloth between the bearing surface and the appliance to protect the surfaces.
- Place the feet (6) on the appliance body (1).
• Fix the feet (6) with the specific screws (7).
Make sure the feet are mounted correctly.
- Entirely straighten the power cord.
2.2 - WALL INSTALLATION
- Before proceeding with the wall installation, make sure that:
- The appliance is not exposed to sources of heat or steam.
- Make sure the space between the roof and the appliance is not lower than 1m (figure 1).
- The appliance must be installed at a minimum height of 15 cm from the floor (figure 1).
- The wall on which it is intended to fix the internal unit must be stable, solid and suitable to bear its weight.
- There must be no obstacles for free circulation of air both from the intake side and especially from the air outlet side.
- The appliance must not be installed directly onto a household appliance (TV, radio, fridge, etc.) or on a source of heat.
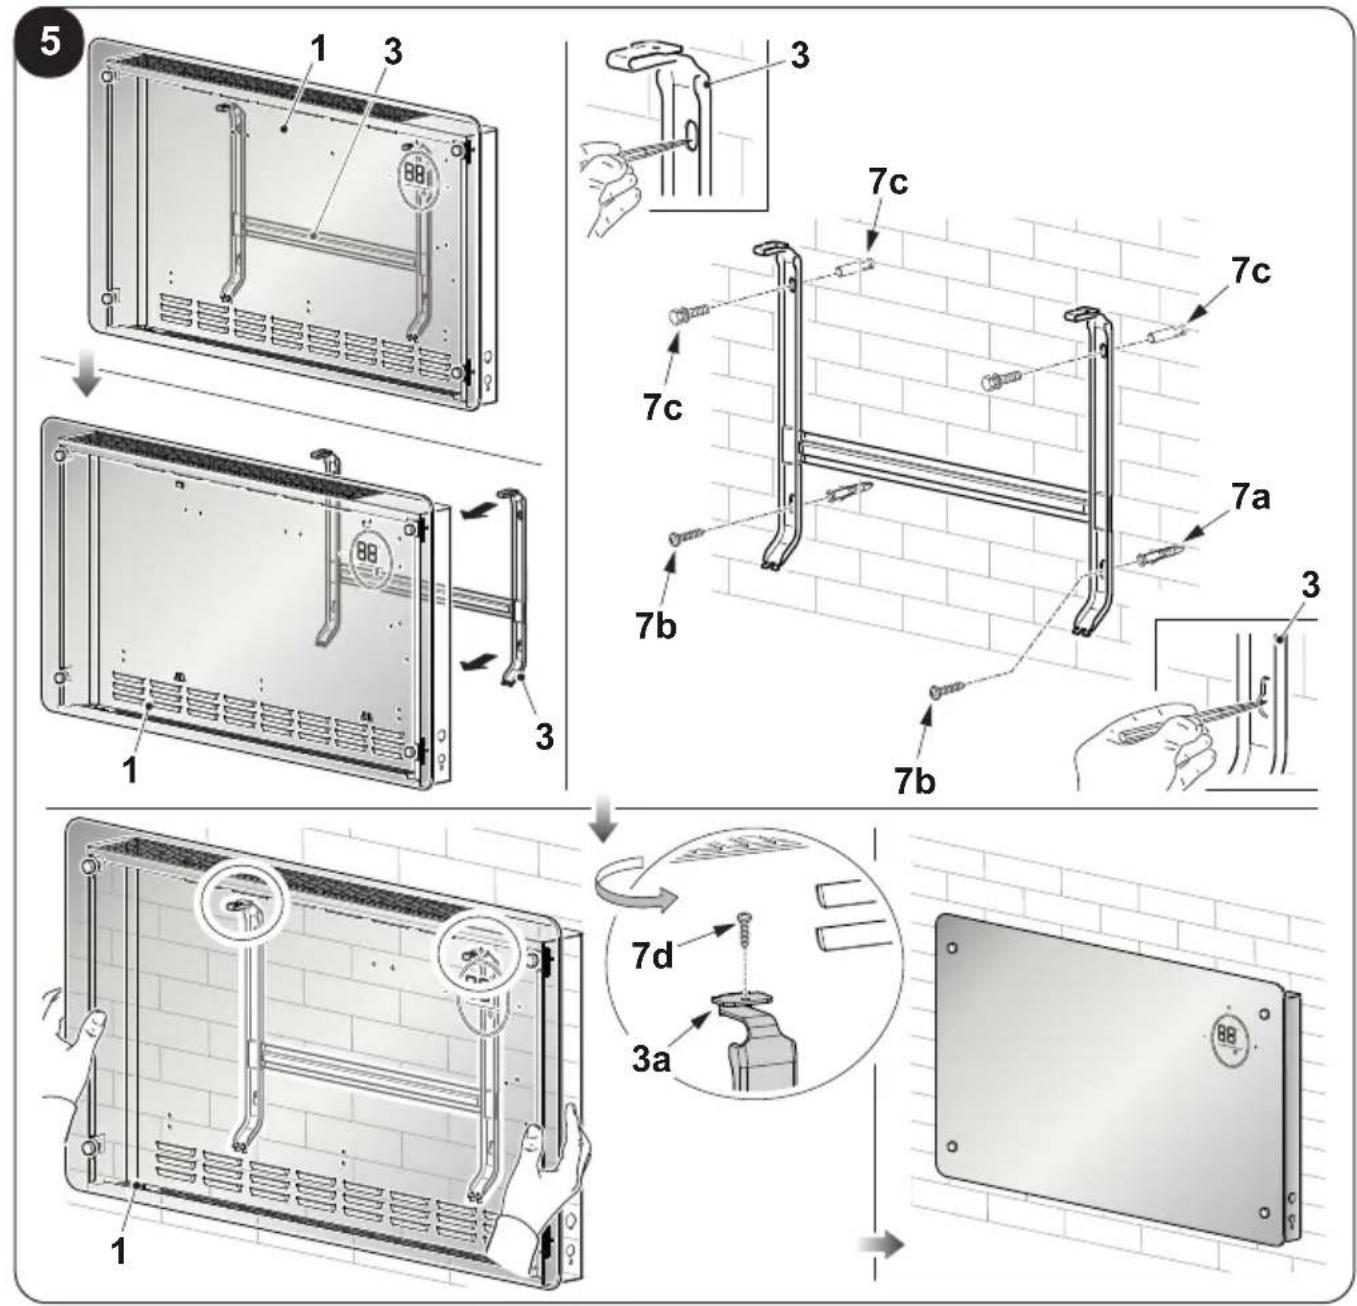
- After checking what has been previously described, proceed with the mounting of the fixing bracket (Fig.5):
- Position the bracket (3) against the wall.
- Mark the drilling points making sure drilling is levelled.
- Drill the necessary holes using a tip suitable for the wall to be drilled.

Make sure that in the drilling area there are no pipelines or electrical conduits.
- Insert the dowels (7a) in the holes and fix the bracket (3) to the wall using the supplied screws (7b - 7c) (figure 5).

Using a spirit level, make sure the fixing bracket (3) is levelled.
- Check stability of the bracket (3) moving it laterally and vertically.
- Position the appliance (1) in correspondence of the hooks (3a) of the bracket (3).
- Lock the appliance (1) to the bracket (3) by making the hooks (3a) trigger.
Try to move the appliance vertically and laterally to make sure it is hooked safely.
- Tighten the screws (7d) positioned in the upper part of the bracket (3) as shown in figure 5.
- Make sure that curtains or other objects do not obstruct the air flow (fig. 2).
- Connect the plug to the power socket.

Make sure the mains data correspond to what is indicated on the appliance nameplate. Place the cord in non-transitional areas so as to avoid tripping.
3 - USE OF THE APPLIANCE
The appliance operating modes can be selected either using the remote control supplied or the control panel.
The reception of the selected function is confirmed by the emission of a “beep” by the buzzer.
natural_image
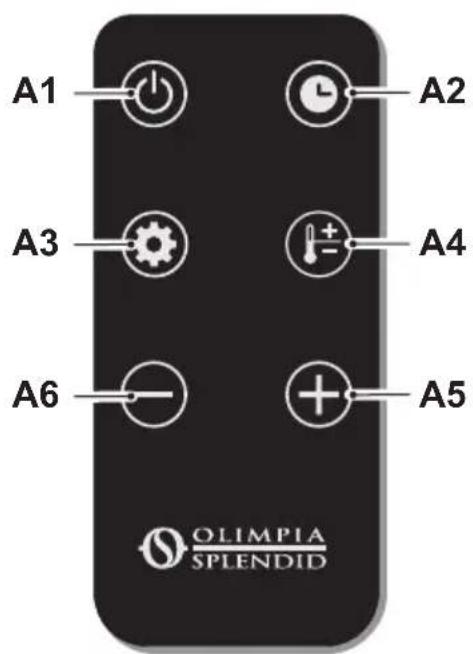
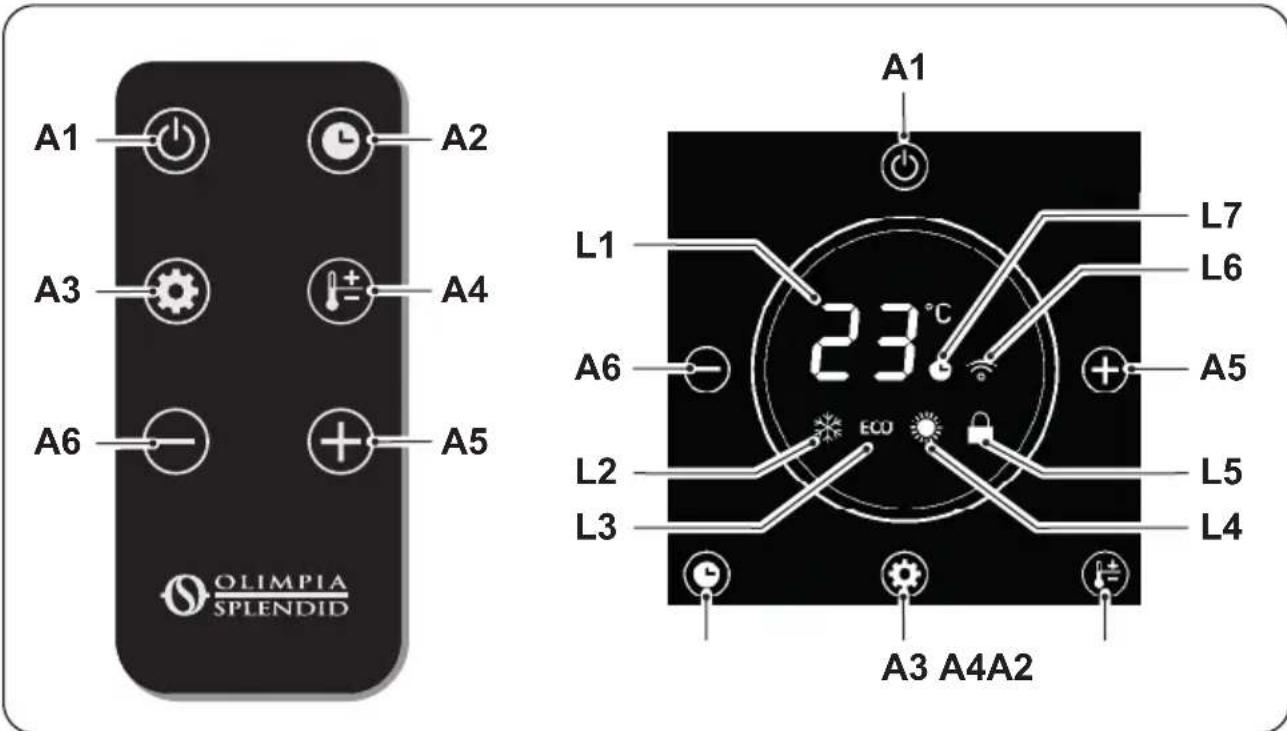
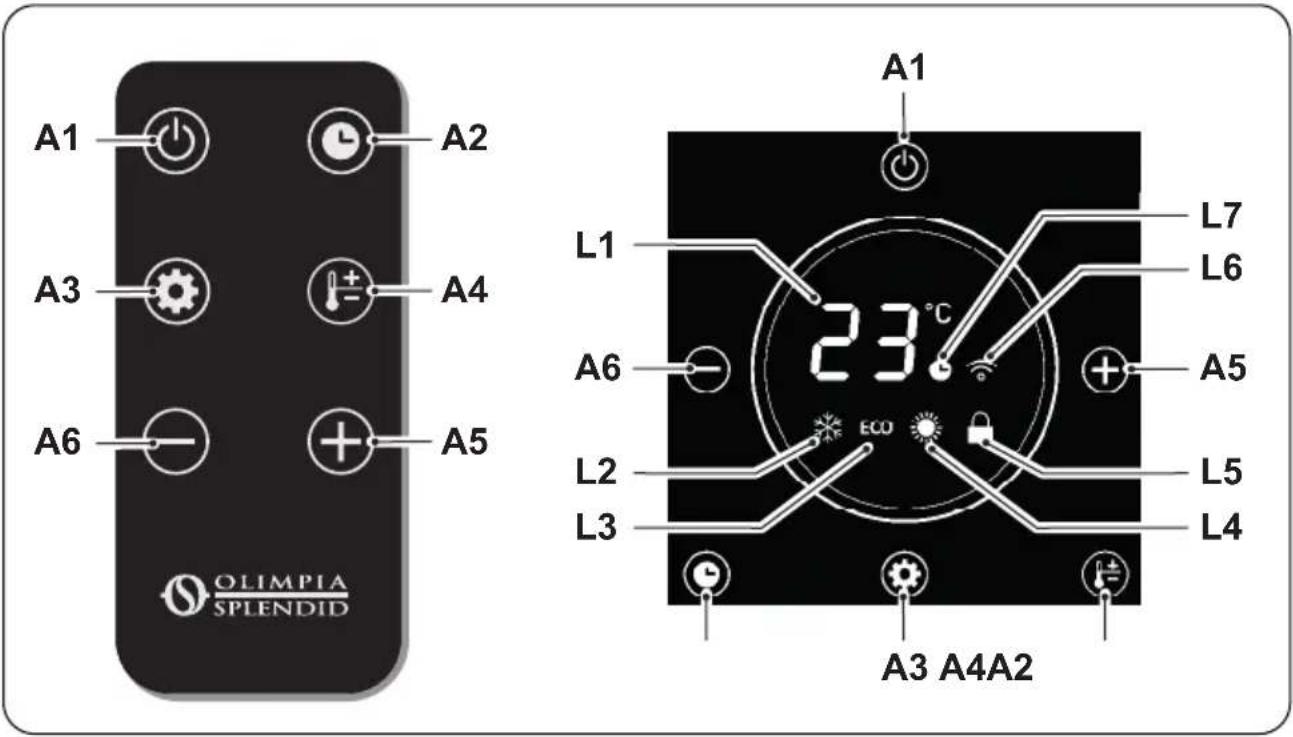
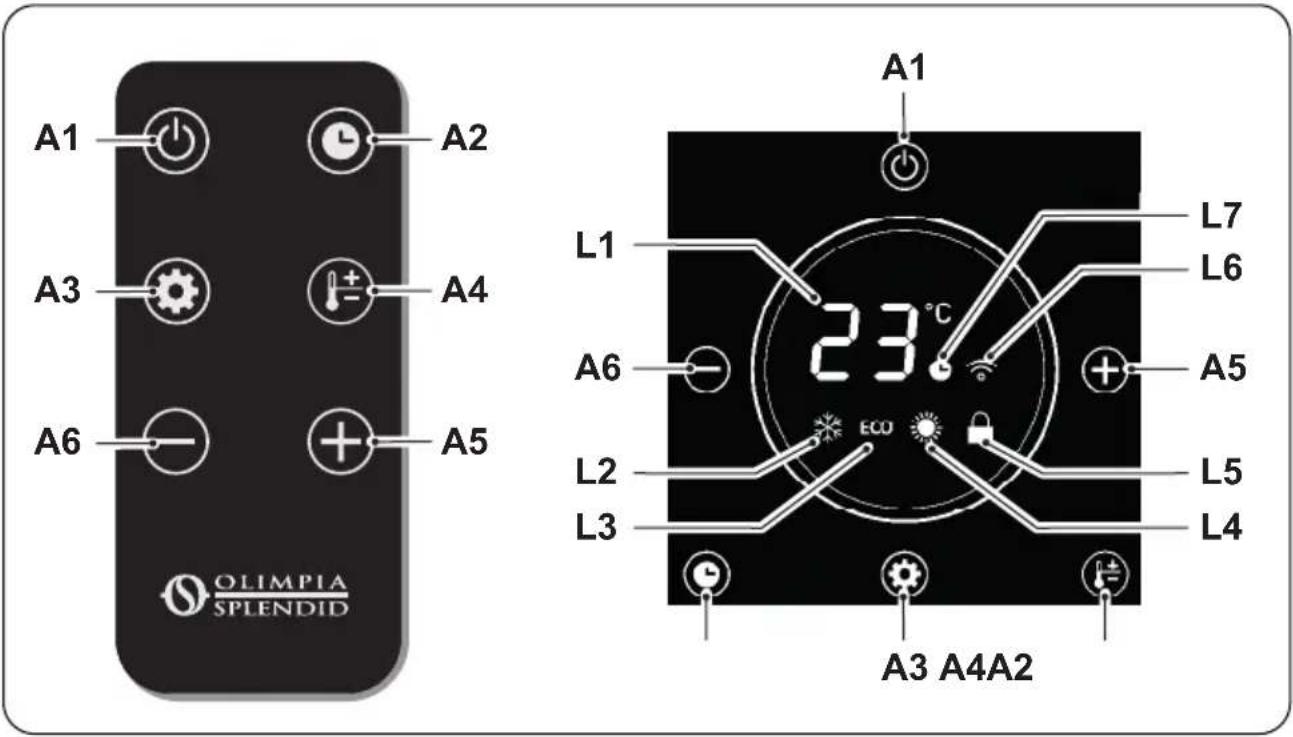
Illustration of a flat-screen electric heater with a digital display showing 88°C (no text or symbols on the device itself)3.1 - CONTROL PANEL AND REMOTE CONTROL
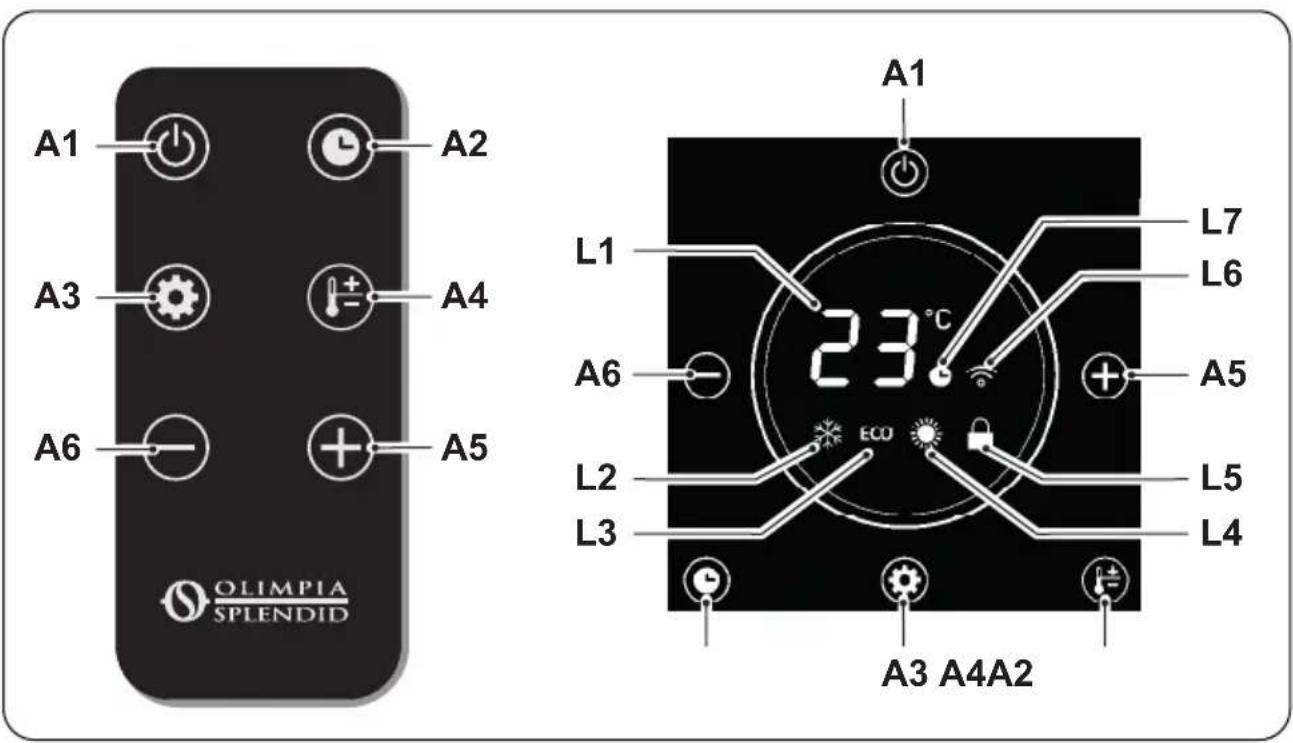
A1. ON/OFF key
A2. Timer key
A3. Mode key
A4. Temperature key
A5. Timer/Temperature increase key
A6. Timer/Temperature decrease key
L1. Display
L2. Antifreeze mode LED
L3. Eco mode LED
L4. Heating mode LED
L5. Commands lock LED
L6. WIFI mode LED
L7. Timer mode LED
3.2 - USE OF THE REMOTE CONTROL
The remote control supplied with the appliance is the instrument that will allow you to use the appliance in the most comfortable way possible. It should be handled with care and in particular:
- Keep it dry (do not clean it with water or leave it outdoors in bad weather).
- Avoid dropping or bumping it.
- Keep it out of direct sunlight.
natural_image
Illustration of a hand holding a black remote control with six buttons (no text or symbols on the device itself)
- The remote control operates by means of an infrared beam.
- Avoid obstacles between the remote control and the appliance during use.
- If other appliances in the room have remote controls (TV, stereo, etc...), there may be interference.
- Electronic and fluorescent lights may interfere with the transmissions between remote control and appliance.
EN - 11
- Remove the batteries in case of prolonged disuse of the remote control.
3.2.a - Insertion of batteries
The batteries are supplied with the machine.
To insert the batteries correctly:
a. Remove the batteries compartment cover (9a).
b. Insert the batteries into the relevant compartment.
Check the polarity indicated on the bottom of the compartment.
c. Close the compartment correctly.
3.2.b - Replacement of batteries
Replace the batteries when you no longer hear a beep from the appliance when pressing any key on the remote control.
Always use new batteries. The use of old or different batteries could generate malfunctioning of the remote control.
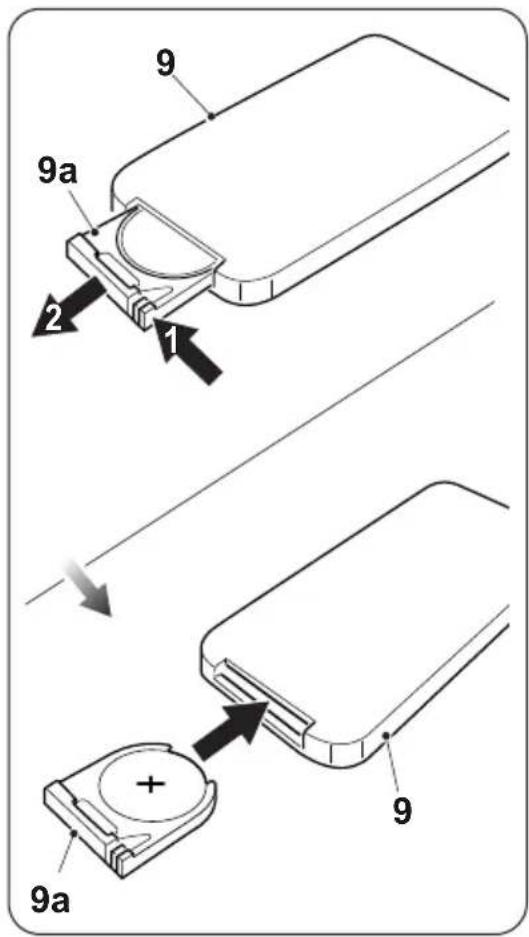
The remote controller uses a 3,0V lithium battery (type CR 2025).

When replacing batteries, replace both and dispose of the dead batteries in the appropriate collection centres and as required by law.
- If the remote control is not used for several weeks or longer, remove the batteries.
Any leaks from the batteries could damage the remote control.
Do not re-charge or disassemble the batteries. Do not throw the batteries into the fire. They can burn and explode.
3.2.c - Location of the remote control
Keep the remote control in a position from which the signal can reach the receiver of the appliance (maximum distance is approx. 4 metres - with charged batteries). The presence of obstacles (furniture, curtains, walls, etc.) between the remote control and the appliance reduces the remote control range.
3.3 - USE OF THE APPLIANCE
3.3.a - Preliminary operations

• After installing the appliance as described in the previous paragraphs, make sure the mains data correspond to what is indicated on the appliance nameplate.
- Insert the plug in the power socket; the appliance emits a “beep” and the key (A1) light up on the display.
3.4 - INSTRUCTIONS FOR OPERATION
When the appliance is switched on for the first time, you will hear a beep and it will go into stand-by. All buttons will be disabled, with the exception of the ON/OFF one. The keys of the control panel light up and on the display is shown the detected room temperature.
The functions can be enabled or modified either from the control panel or from the remote control.
3.4.a - ON/OFF key (A1)
When the appliance is in stand-by, all buttons are disabled, with the exception of the ON/OFF button.
The starting mode is set to Heating (LED L4 on); all the functions are available.
3.4.b - Timer key (A2)
Press the key (A2) to enter Timer mode, press the keys (A5) or (A6) to increase or decrease time according to this sequence:
$$ (0 h (T i m e r o f f) \dashrightarrow 1 h \dashrightarrow 2 h \dashrightarrow .. 2 3 h \dashrightarrow 2 4 h \dashrightarrow .. 0 h (T i m e r o f f) \dashrightarrow ..). $$
When the function is active, the LED (L7) lights up.
When Antifreeze mode is active, press the key (A2) to set switching on of the appliance; press the keys (A5) or (A6) to increase or decrease time according to this sequence:
$$ (0 h (T i m e r o f f) \dashrightarrow 1 h \dashrightarrow 2 h \dashrightarrow .. 2 3 h \dashrightarrow 2 4 h \dashrightarrow .. 0 h (T i m e r o f f) \dashrightarrow ..). $$
When the function is active, the LED (L7) lights up.
3.4.c - Mode key (A3)
Press the key (A3) on the panel or through the remote control to select the function; the LED in correspondence of the desired mode lights up.
Antifreeze mode
The appliance heats only when the detected temperature is below 5 degrees. The appliance stops working if it detects a room temperature above 7 degrees.
When this mode is active, it is not possible to set the desired temperature.
Eco mode
The appliance heats with a power equal to 1000W (low power).
When this mode is active, it is possible to set temperature by pressing the key (A4) and selecting the desired value using the keys (A5) and (A6).
Heating mode
The appliance heats with a power equal to 2000W (high power).
When this mode is active, it is possible to set temperature by pressing the key (A4) and selecting the desired value using the keys (A5) and (A6).
When the desired temperature is set, the value flashes for approximately 10 seconds and, once set, the display returns to show the detected room temperature.
3.4.d - Command lock (L5)
After 1 minute of inactivity, the appliance enters stand-by mode and the LED (L5) lights up on the display.
Press the keys (A5) or (A6) to remove the commands lock. The Led (L5) switches off.
3.4.e - WIFI key
When the appliance switches on, it enters device search mode and the LED (L6) flashes.
If it is desired to activate the function in a second moment, keep the key (A1) pressed for a few seconds on the panel until the LED (L6) starts flashing.
When the appliance connects with the smartphone, the LED (L6) stops flashing and remains steady on on the display.

Frame the QR code to download the instructions for connection to the WiFi network and for use of the App.
3.5 - Protection from overheating
The appliance is equipped with a protection system from overheating which turns it off if it overheats.
In this case:
a. Switch off the appliance and disconnect the power plug;
b. remove the possible cause (air intake grid clogged, obstacles in front of the air outlet or inlet, etc.);
c. let the appliance cool down for 30 minutes;
d. restart the appliance.
If the issue persists, turn the appliance off, disconnect the plug from the power outlet and please contact the retailer or the technical assistance service.
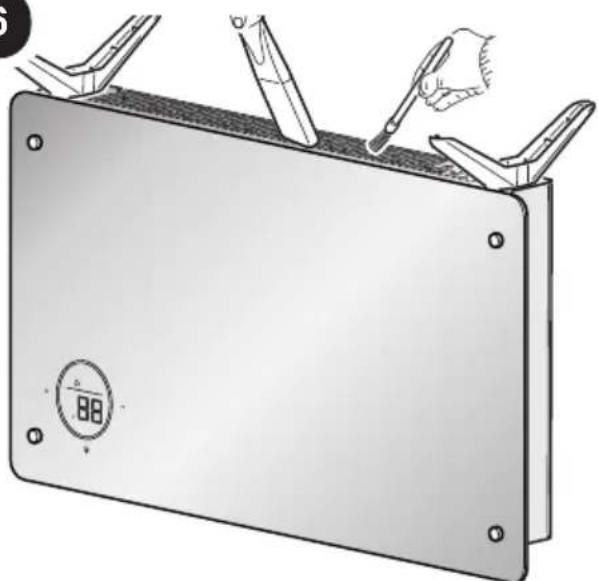
4 - MAINTENANCE AND CLEANING
Before performing any cleaning or maintenance intervention on the appliance, disconnect the plug from the power socket and wait for the fan to stop completely.
natural_image
Illustration of a hand using a power plug to insert an electrical socket (no text or symbols present)- Use a dry cloth to clean the appliance.
- If the appliance is very dirty, it is possible to use a cloth dampened with warm water (max 50^ ) and a mild detergent to clean its external parts. Dry with a dry cloth.
- Use a vacuum cleaner to remove dust from the air inlet/outlet grids (fig. 6).

- Make sure the appliance is completely dry before reconnecting the plug to the power socket.
- Do not use a chemically treated or antistatic cloth to clean the appliance.
- Do not use petrol, solvents, polishing pastes or similar. These products could break or deform the plastic surface.
- Do not use oils, chemical substances or abrasive products to clean the appliance.
- Neither wash nor immerse the appliance with/in water.
In case of an appliance malfunction, do not try to disassemble it but instead refer to the retailer or to the technical assistance service.
5 - PRESERVATION OF THE APPLIANCE
- If you do not intend to use the appliance for a particularly long period of time or if operations which could produce a lot of dust must be performed, it is advised to store the appliance as follows:
- Switch the appliance off and disconnect the plug from the power socket.
• Store in a fresh and dry place away from humidity.
6 - TECHNICAL DATA
• See the table in the last pages of the manual.

0 - MISES EN GARDE....2
0.1 - INFORMATIONS GÉNÉRALES.....2
0.2 - SYMBOLES....2
2.1 - INSTALLATION AU SOL....9
2.2 - INSTALLATION MURALE......9
3 - UTILISATION DE L'APPAREIL .....10
3.1 - PANNEAU DE COMMANDE ET TÉLÉCOMMANDE....11
3.2 - UTILISATION DE LA TÉLÉCOMMANDE....11
3.2.a - Introduction des piles .....12
3.2.b - Remplacement des piles .....12
2 - INSTALLATION
2.1 - INSTALLATION AU SOL (Fig.4)
natural_image
Illustration of a flat-screen electric heater with a digital display showing 88°F (no text or symbols on the device itself)3.1 - PANNEAU DE COMMANDE ET TÉLÉCOMMANDE

natural_image
Illustration of a hand holding a black remote control with six buttons (labeled 1 to 6) and a plus sign, no text or symbols present.
3.5 - Protection contre la surchauffe
natural_image
Illustration of a hand using a power plug to switch an electrical outlet (no text or symbols present)
0 - HINWEISE....2
0.1 - ALLGEMEINE INFORMATIONEN...2
0.2 - SYMBOLE 2
0.2.1 - Piktogramme 2
0.3 - ALLGEMEINE HINWEISE......3
0.5 VORGESEHENER GEBRAUCH....7
0.6 - UNSACHGEMÄSSER UND POTENTIELL GEFÄHRLICHER GEBRAUCH ....7
natural_image
Illustration of a flat-screen electronic device with mounting legs and a circular button labeled '图1' (no text or symbols on the device itself)
3.1 - BEDIENFELD UND FERNBEDIENUNG

natural_image
Illustration of a hand holding a black remote control device with six buttons (no text or symbols on the device itself)

natural_image
Illustration of a hand using a power plug to insert an electrical socket (no text or symbols present)
2 - INSTALACIÓN
natural_image
Illustration of a flat-screen TV unit with a circular display showing 88 degrees (no text or symbols on the device itself)3.1 - PANEL DE MANDOS Y MANDO A DISTANCIA

natural_image
Illustration of a hand holding a black remote control with six buttons (no text or symbols)
natural_image
Illustration of a hand using a power plug to switch an electrical outlet (no text or symbols present)
0 - ADVERTÊNCIAS....2
0.1 - INFORMAÇÕES GERAIS .....2
0.2 - SIMBOLOGIA 2
0.2.1 - Pictogramas editoriais....2
0.3 - ADVERTÊNCIAS GERAIS ......3
0.5 - USO PREVISTO....7
2 - INSTALAÇÃO
natural_image
Illustration of a flat electronic device with mounting legs and a circular button on the front panel (no text or symbols)
3.1 - PAINEL DE COMANDOS E CONTROLO REMOTO

natural_image
Illustration of a hand holding a black remote control with six buttons (no text or symbols)
natural_image
Illustration of a hand using a power plug to switch an electrical outlet (no text or symbols present)
0 - WAARSCHUWINGEN ....2
0.1 - ALGEMENE INFORMATIE......2
0.2 - SYMBOLLEN 2
0.2.1 - Pictogrammen 2
0.3 - ALGEMEEN ADVIES....3
0.5 - EIGENLIJK GEBRUIK 7
0.6 - NIET BEOOGD EN POTENTIEEL GEVAARLIJK GEBRUIK......7
1 - BESCHRIJVING APPARAAT EN BEDIENINGSORGANEN......8
2 - INSTALLATIE ......9
2.1 - INSTALLATIE OP DE GROND .....9
2.2 - MUURINSTALLATIE....9
3 - GEBRUIK VAN HET APPARAAT......10
3.1 - BEDIENINGSPANEELE EN AFSTANDSBEDIENING....11
3.2 - GEBRUIK VAN DE AFSTANDSBEDIENING ....11
natural_image
Illustration of a flat electronic device with mounting legs and a circular button on the front panel (no text or symbols)
3.1 - BEDIENINGSPANEELE EN AFSTANDSBEDIENING

natural_image
Illustration of a hand holding a black remote control with six buttons (no text or symbols on the device itself)
natural_image
Illustration of a hand using a power plug to switch an electrical outlet (no text or symbols present)
0 - ΠΡΟΕΙΔΟΠΟΙΗΣΕΙΣ ......2
EL - 8
2 - ΕΓΚΑΤΑΣΤΑΣΗ
natural_image
Illustration of a flat electronic device with mounting legs and a circular button on the front panel (no text or symbols)
natural_image
Illustration of a hand holding a black remote control with six buttons (no text or symbols)
natural_image
Illustration of a hand using a power plug to switch an electrical outlet (no text or symbols present)2 - INSTALACJA
natural_image
Illustration of a flat-screen electronic device with mounting legs and a circular button on the front panel (no text or symbols)
natural_image
Illustration of a black remote control with six buttons and plus signs, held by a hand (no text or symbols)

0 - AVERTIZĂRI....2
0.1 - INFORMATII GENERALE .....2
0.2 - SIMBOLURI....2
0.2.1 - Pictograme editoriale....2
0.3 - AVERTIZĂRI GENERALE .....3
0.5 - FOLOSIRE PREVĂZUTĂ......7
0.6 - FOLOSIRE NEPREVĂZUTĂ
ȘI POTENTĂIAL
PERICULOASĂ ....7
1 - DESCRIERE APARAT ŞI COMENZI......8
2 - INSTALARE....9
2.1 - INSTALARE PE PODEA....9
2.2 - INSTALARE PE PERETE......9
3 - FOLOSIREA APARATULUI....10
3.1 - PANOU DE CONTROL
ŞI TELECOMANDĂ......11
3.2 - FOLOSIREA TELECOMENZII......11
3.2.a - Introducerea bateriilor .....12
3.2.b - Înlocuirea bateriilor....12
3.2.c - Pozitia telecomenzii....13
3.3 - UTILIZAREA APARATULUI .....13
3.3.a - Operatiuni preliminare....13
3.4 - INSTRUCTIUNI PENTRU
FUNCTIONARE....13
3.4.a - Buton ON/OFF (A1)....13
3.4.b - Buton timer (A2)....13
3.4.c - Buton mod de functionare (A3).14
3.4.d - Blocare comenzi (L5) .....14
3.4.e - Buton WI-FI 14
3.5 - Protecție la supraîncălzire .....15
4 - ÎNTRETINERE ŞI CURĂTARE......15
5 - DEPOZITAREA APARATULUI .....16
6 - DATE TEHNICE....16
CEIMINARE
2 - INSTALARE
natural_image
Illustration of a flat-screen electronic device with mounting legs and a circular button on the front panel (no text or symbols)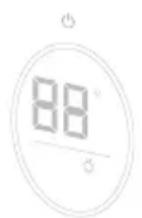
3.1 - PANOU DE CONTROL ŞI TELECOMANDĂ
A1. Buton ON/OFF
A2. Buton Timer
A3. Buton Mod de func-
tionare
A4. Buton Temperatură
A5. Buton mărire Timer/
Temperatură
natural_image
Illustration of a hand holding a black remote control with eight buttons (no text or symbols on the device itself)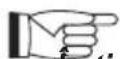
natural_image
Illustration of a hand using a power plug to switch an electrical outlet (no text or symbols present)0 - WARNINGAR....2
0.1 - ALLMÄN INFORMATION......2
0.2 - SYMBOLER....2
0.2.1 - Redaktionella piktogram......2
0.3 - ALLMÄNNA VARNINGSTEXTER....3
0.5 - AVSEDD ANVÄNDNING......7
0.6 - OAVSIKTLIG OCH
POTENTIELLT FARLIG ANVÄNDNING....7
1 - BESKRIVNING AV APPARATEN OCH KOMMANDON......8
2 - INSTALLATION ......9
2.1 - MONTERING I GOLVET......9
2.2 - VÄGGMONTERING .....9
3 - ANVÄNDNING AV APPARATEN......10
3.1 - MANÖVERPANEL OCH FJÄRRKONTROLL....11
3.2 - ANVÄNDNING AV FJÄRRKONTROLLEN....11
2 - INSTALLATION
natural_image
Illustration of a flat-screen electronic device with mounting legs and a circular button on the front panel (no text or symbols)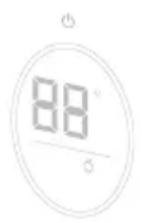
3.1 - MANÖVERPANEL OCH FJÄRRKONTROLL

natural_image
Illustration of a hand holding a black remote control with six buttons (labeled 1 to 6) and a 'CHILLI'S TECHNOLOGY' logo on the right (no text or symbols on the device itself)
natural_image
Illustration of a hand using a power plug to switch an electrical outlet (no text or symbols present)0 - VAROITUKSIA....2
0.1 - YLEISTIETOJA 2
0.2 - SYMBOLIT....2
0.2.1 - Tekstinlaadinnassa käytetyt piirrokset....2
0.3 - YLEISET VAROITUKSET 3
0.5 - KÄYTTÖTARKOITUS....7
0.6 - KÄYTTÖTARKOITUKSEN VASTAINEN JA POTENTIAALISESTI VAARALLINEN KÄYTTÖ....7
6 - TEKNISET TIEDOT ....16
HÄVITTÄMINEN
FI - 8
2 - ASENNUS
natural_image
Illustration of a flat-screen electronic device with mounting legs and a circular button on the front panel (no text or symbols)
natural_image
Illustration of a hand holding a black remote control device with six buttons (no text or symbols on the device itself)
natural_image
Illustration of a hand using a power plug to insert an electrical socket (no text or symbols present)
0 - ADVARSLER....2
0.1 - GENERELL INFORMASJON......2
0.2 - SYMBOLER....2
2 - INSTALLASJON
- Snu apparatet opp-ned.

natural_image
Illustration of a flat-screen electronic device with mounting legs and a circular button on the front panel (no text or symbols)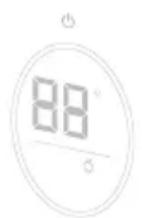
3.1 - KONTROLLPANEL OG FJERNKONTROLL

natural_image
Illustration of a hand holding a black remote control with six buttons (no text or symbols)
natural_image
Illustration of a hand using a power plug to insert an electrical socket (no text or symbols present)0. - FIGYELMEZTETÉSEK ...... 2
0.1.- ÁLTALÁNOS INFORMÁCIÓK......2
0.2.-SZIMBÓLUMOK....2
0.2.1. - Szerkesztői piktogramok .....2
0.3. - ÁLTALÁNOS FIGYELMEZTETÉSEK..3
0.5. - RENDELTETÉSSZERÜ HASZNÁLAT....7
0.6. - NEM RENDELTETÉSSZERÜ
ÉS POTENCIÁLISAN
VESZÉLYES HASZNÁLAT ....7
2. - TELEPÍTÉS
natural_image
Illustration of a flat electronic device with mounting legs and a circular button on the front panel (no text or symbols)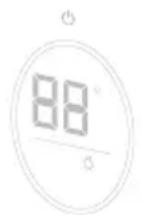
natural_image
Illustration of a hand holding a black remote control with six buttons (no text or symbols on the device itself)
natural_image
Illustration of a hand using a power plug to switch an electrical outlet (no text or symbols present)
0 - UPOZORNĚNÍ .....2
0.1 VŠEOBECNÉ INFORMACE......2
0.2 - SYMBOLY....2
0.2.1 - Piktogramy ...... 2
0.3 - VŠEOBECNÁ UPOZORNĚNÍ .....3
0.5 - ZAMÝŠLENÉ POUŽITÍ......7
0.6 - NEZAMÝŠLENÉ A POTENCIÁLNĚ
NEBEZPEČNÉ POUŽITÍ ....7
1 - POPIS A OVLÁDÁNÍ SPOTŘEBIČE......8
2 - INSTALACE....9
2.1 - INSTALACE NA PODLAHU......9
2.2 - INSTALACE NA STĚNU .....9
3 - POUŽITÍ SPOTŘEBIČE......10
3.1 - OVLÁDACÍ PANEL A
DÁLKOVÝ OVLÁDAČ......11
3.2 - POUŽITÍ DÁLKOVÉHO
OVLÁDAČE ......11
2 - INSTALACE
2.2 - INSTALACE NA STĚNU
natural_image
Illustration of a flat-screen electronic device with mounting legs and a circular button on the front panel (no text or symbols)
3.1 - OVLÁDACÍ PANEL A DÁLKOVÝ OVLÁDAČ
natural_image
Illustration of a black remote control with six buttons and plus signs, held by a hand (no text or symbols)
natural_image
Illustration of a hand using a power plug to switch an electrical outlet (no text or symbols present)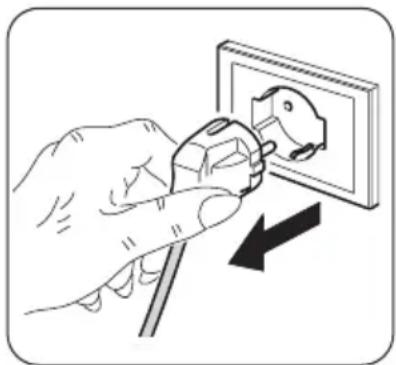
natural_image
Illustration of a hand using a power plug to switch an electrical outlet (no text or symbols present)
2 - УСТАНОВКА
natural_image
Illustration of a flat electronic device with mounting legs and a circular button on the front panel (no text or symbols)
natural_image
Illustration of a black remote control with six buttons and a 'CHINA'S POWERING' logo, held by fingers (no text or symbols on the device itself)
natural_image
Illustration of a hand using a power plug to install an electrical socket (no text or symbols present)0 - ADVARSLER....2
0.1 - GENERELLE OPLYSNINGER .....2
0.2 - ANVENDTE SYMBOLER ..... 2
5 - OPBEVARING AF APPARATET .....16
6 - TEKNISKE SPECIFIKATIONER......16
BORTSKAFFELSE
2 - INSTALLATION
natural_image
Illustration of a flat-screen electronic device with mounting legs and a circular button on the front panel (no text or symbols)
3.1 - BETJENINGSPANEL OG FJERNBETJENING
A1. Knappen ON/OFF
A2. Knappen "Timer"
A3. Knappen "Tilstand"
A4. Knappen "Temperatur"
A5. Knappen og "Timer/ Temperatur"
A6. Knappen sænk "Ti-
mer/Temperatur"
L1. Display
L2. LED-indikator for frost-beskyttelsesfunktionen
L3. LED-indikator for Eco-funktionen
L4. LED-indikator for op-
varmningsfunktionen
L5. Spærring af betje-
ningselementerne
L6. LED-indikator for funktionen WIFI
L7. LED-indikator for funktionen Timer
3.2 - BRUG AF FJERNBETJENINGEN
natural_image
Illustration of a hand holding a black remote control with six buttons (no text or symbols on the device itself)

natural_image
Illustration of a hand using a power plug to install an electrical socket (no text or symbols present)| Type of heat output/room temperature control | Si No | |
| Single stage heat output and no room temperature control | □ | ☑ |
| Two or more manual stages, no room temperature control | □ | ☑ |
| With mechanic thermostat room temperature control | □ | ☑ |
| With electronic room temperature control | □ | ☑ |
| Electronic room temperature control plus day timer | □ | ☑ |
| Electronic room temperature control plus week timer | ☑ | □ |
| Other control options | ||
| Room temperature control, with presence detection | □ | ☑ |
| Room temperature control, with open window detection | □ | ☑ |
| With distance control option | ☑ | □ |
| With adaptive start control | □ | ☑ |
| With working time limitation | □ | ☑ |
| With black bulb sensor | □ | ☑ |
| info@olimpiasplendid.it | Olimpia Splendid SpAVia Industriale 1/3, 25060 Cellatica, Brescia, Italy |

- - AVVERTENZE 2
- - INSTALLAZIONE
- - PANNELLO COMANDI E TELECOMANDO
- - WARNINGS....2
- - DESCRIPTION OF THE APPLIANCE AND OF THE COMMANDS......8
- - INSTALLATION ......9
- - USE OF THE APPLIANCE......10
- - MAINTENANCE AND CLEANING .....15
- - PRESERVATION OF THE APPLIANCE.16
- - TECHNICAL DATA ......16
- DISPOSAL
- - WARNINGS
- - GENERAL INFORMATION
- - SYMBOLS
- - GENERAL WARNINGS
- - PROPER USE
- - UNINTENDED AND POTENTIALLY DANGEROUS USE
- - DESCRIPTION OF THE APPLIANCE AND OF THE COMMANDS
- - INSTALLATION
- - FLOOR INSTALLATION (Fig.4)
- - WALL INSTALLATION
- Make sure that in the drilling area there are no pipelines or electrical conduits.
- Make sure the mains data correspond to what is indicated on the appliance nameplate. Place the cord in non-transitional areas so as to avoid tripping.
- - USE OF THE APPLIANCE
- - CONTROL PANEL AND REMOTE CONTROL
- - USE OF THE REMOTE CONTROL
- 3.2.a - Insertion of batteries
- 3.2.b - Replacement of batteries
- 3.2.c - Location of the remote control
- - USE OF THE APPLIANCE
- 3.3.a - Preliminary operations
- - INSTRUCTIONS FOR OPERATION
- 3.4.a - ON/OFF key (A1)
- 3.4.b - Timer key (A2)
- 3.4.c - Mode key (A3)
- Antifreeze mode
- Eco mode
- Heating mode
- 3.4.d - Command lock (L5)
- 3.4.e - WIFI key
- - Protection from overheating
- - MAINTENANCE AND CLEANING
- - PRESERVATION OF THE APPLIANCE
- - TECHNICAL DATA
- - MISES EN GARDE....2
- - UTILISATION DE L'APPAREIL .....10
- - UTILISATION DE LA TÉLÉCOMMANDE....11
- - INSTALLATION AU SOL (Fig.4)
- - PANNEAU DE COMMANDE ET TÉLÉCOMMANDE
- - Protection contre la surchauffe
- - HINWEISE....2
- - BEDIENFELD UND FERNBEDIENUNG
- - INSTALACIÓN
- - PANEL DE MANDOS Y MANDO A DISTANCIA
- - ADVERTÊNCIAS....2
- - INSTALAÇÃO
- - PAINEL DE COMANDOS E CONTROLO REMOTO
- - WAARSCHUWINGEN ....2
- - BESCHRIJVING APPARAAT EN BEDIENINGSORGANEN......8
- - INSTALLATIE ......9
- - GEBRUIK VAN HET APPARAAT......10
- - BEDIENINGSPANEELE EN AFSTANDSBEDIENING
- - ΠΡΟΕΙΔΟΠΟΙΗΣΕΙΣ ......2
- - ΕΓΚΑΤΑΣΤΑΣΗ
- - INSTALACJA
- - AVERTIZĂRI....2
- - DESCRIERE APARAT ŞI COMENZI......8
- - INSTALARE....9
- - FOLOSIREA APARATULUI....10
- CEIMINARE
- - INSTALARE
- - PANOU DE CONTROL ŞI TELECOMANDĂ
- - WARNINGAR....2
- - BESKRIVNING AV APPARATEN OCH KOMMANDON......8
- - ANVÄNDNING AV APPARATEN......10
- - MANÖVERPANEL OCH FJÄRRKONTROLL
- - VAROITUKSIA....2
- - TEKNISET TIEDOT ....16
- HÄVITTÄMINEN
- - ASENNUS
- - ADVARSLER....2
- - INSTALLASJON
- - KONTROLLPANEL OG FJERNKONTROLL
- - FIGYELMEZTETÉSEK ...... 2
- - TELEPÍTÉS
- - UPOZORNĚNÍ .....2
- - POPIS A OVLÁDÁNÍ SPOTŘEBIČE......8
- - INSTALACE....9
- - POUŽITÍ SPOTŘEBIČE......10
- - INSTALACE
- - INSTALACE NA STĚNU
- - OVLÁDACÍ PANEL A DÁLKOVÝ OVLÁDAČ
- - УСТАНОВКА
- BORTSKAFFELSE
- - BETJENINGSPANEL OG FJERNBETJENING
- - BRUG AF FJERNBETJENINGEN
Brand : OLIMPIA SPLENDID
Model : Caleo Glass
Category : Electric heater