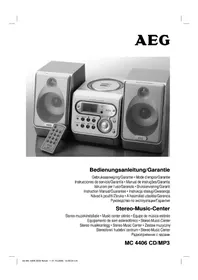
MC 4401 CD - Hi-fi system AEG - Free user manual and instructions
Find the device manual for free MC 4401 CD AEG in PDF.
User questions about MC 4401 CD AEG
0 question about this device. Answer the ones you know or ask your own.
Ask a new question about this device
Download the instructions for your Hi-fi system in PDF format for free! Find your manual MC 4401 CD - AEG and take your electronic device back in hand. On this page are published all the documents necessary for the use of your device. MC 4401 CD by AEG.
USER MANUAL MC 4401 CD AEG
Opmerking: compact discs:
11 Touchelecture/pause II CD
23 Compartment des cassettes
24 Haut-parleurs
25 Bouton de volume VOLUME
Control inhalambrico
Pressional 3× =
Spille inn kassetter
- Legg inn en lydkassett med den siden du vil spille inn pa, forover (den fulle spolen til hoyre). Forsikre deg om at kassetten不信 er kopibeskyttet (kopibeskyttel- sesfl ikene pa den ovre smalsiden av kassetten, ma不同程度.
- Velg opptakskilde med bryteren for funksjonsvalg (26). Start deutsche kilden. Du tar opp fra den lydkilden du horer. Innspillingsmaleren nivajusteres automatisk. Endringer i klang og volum endrer ikke på opptaket.
- Trykk pa opptaksknappen (21), (▶, avspillingsknappen trykkes automatisk ned sammen med donne). Opptaket starter. Alle tidigere opptak slettes automatisk.
- Du kan avbryte opptaket kort med II, pauseknappen (16) aller stanse det helt med / stopp-/ejectknappen (17).
Spille av CD-er
General safety instructions
To avoid the risk of fire or an electric shock, you should not expose the device to rain or moisture. Consequently, do not use the device in the immediate vicinity of water - for example near a bath tub, a swimming pool or in a damp cellar.
Use the device only for the intended purpose.
Only connect the device at a properly installed plug socket. Pay attention that the specified voltage corresponds to the voltage of the plug socket.
When using external mains supply, pay attention to the correct polarity and voltage. Always place the batteries in the correct direction.
Assemble the device in such a way that the available ventilation openings are not covered.
Never open the housing of the device. Incorrect repairs can constitute a considerable risk for the user. Should the device become damaged, in particular the mains supply cable, do not operate the device any longer, but rather have it repaired by an expert. Check the mains supply cable regularly for damage.
For safety reasons a broken or damaged mains lead may only be replaced by an equivalent lead from the manufacturer, our customer service department or a similary qualified person.
If the device is not used for a longer period, remove the plug connector from the plug socket or take out the batteries.
These symbols may be found on the machine and are intended to indicate the following:

The lightning symbol should advise the user of parts in the inside of the device which carry dangerously high voltage levels.

The symbol with an exclamation mark should advise the user of important operation or maintenance instructions in the accompanying documentation.

Devices bearing this symbol work with a "class 1 laser" for tracing the CD. The built-in safety switches should prevent the user being exposed to dangerous laser light, which is
invisible to the human eye, when the CD compartment is opened.
Under no circumstances should these safety switches be bypassed or manipulated, as this could result in a danger of exposure to the laser light.
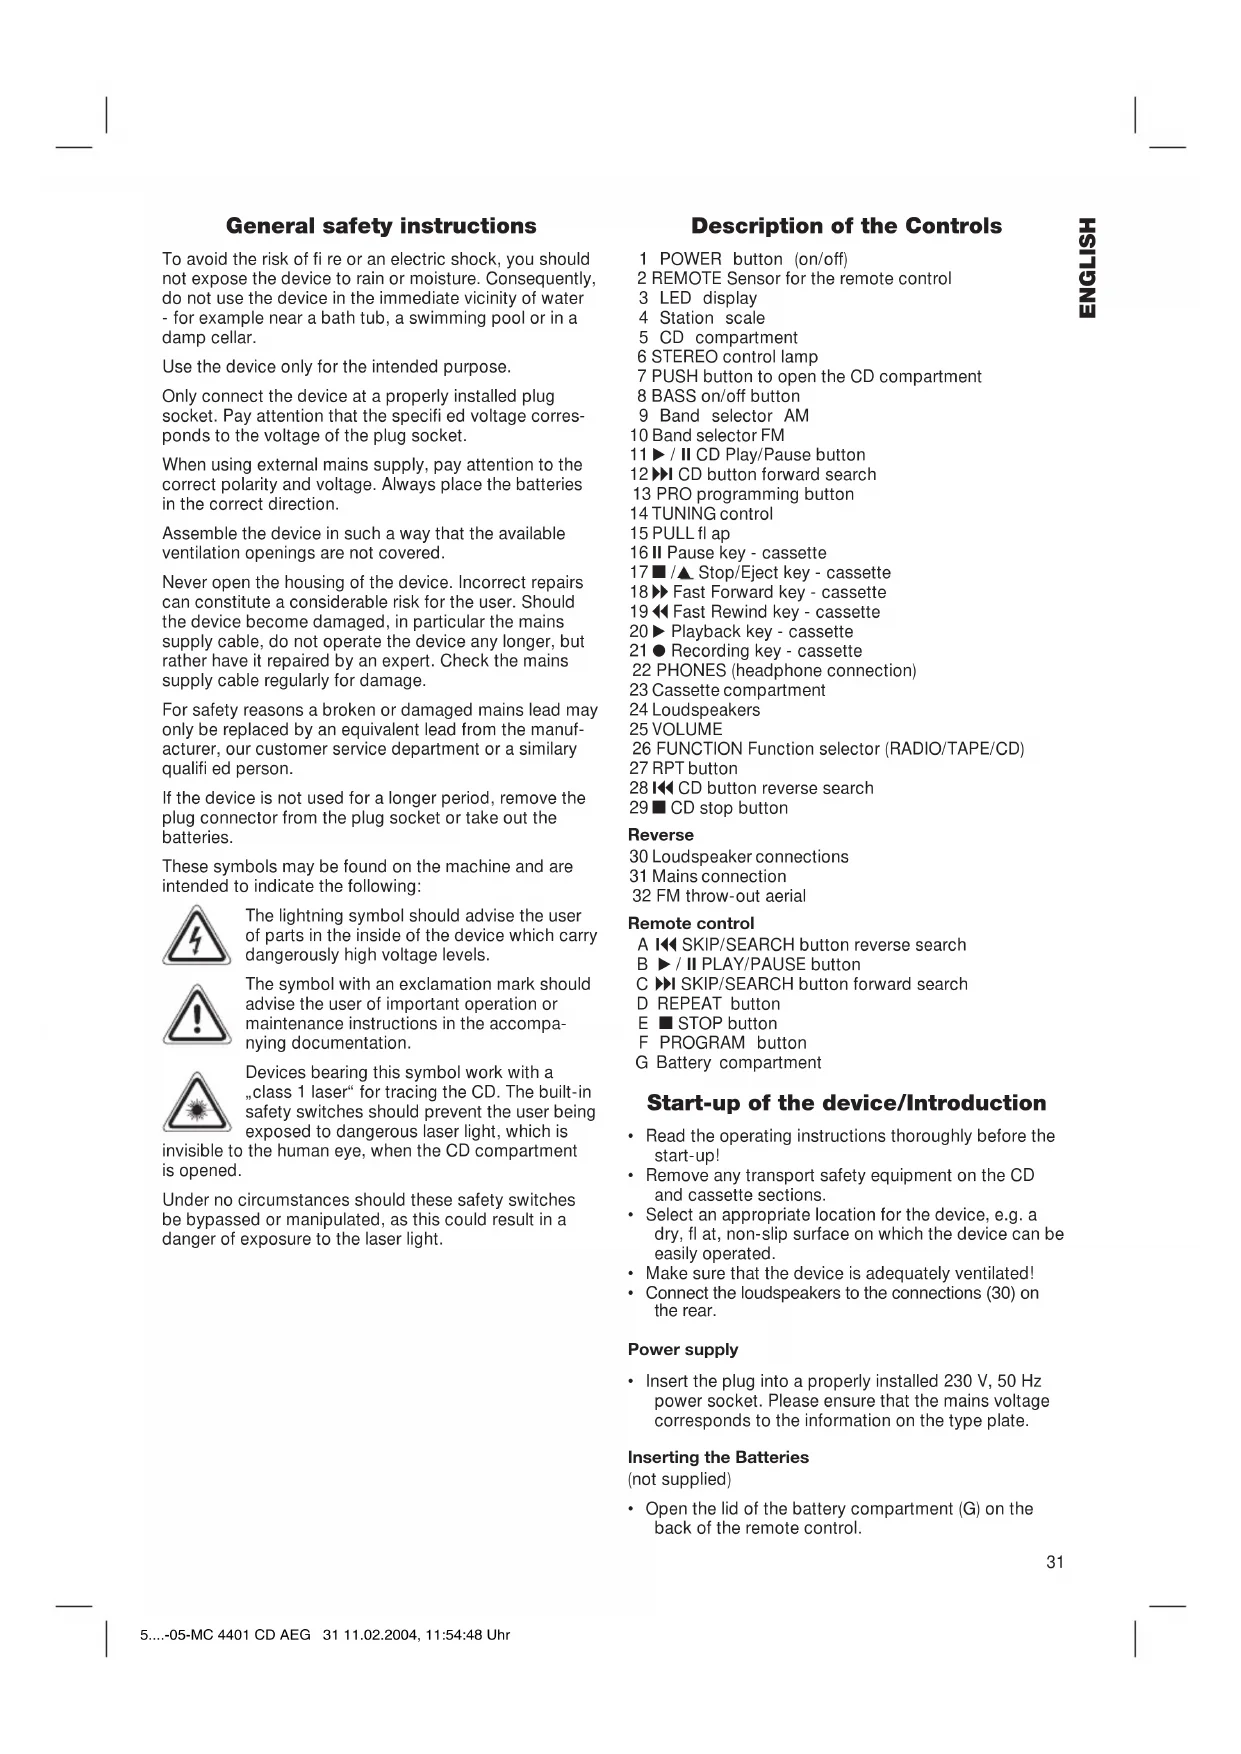
Description of the Controls
1 POWER button (on/off)
2 REMOTE Sensor for the remote control
3 LED display
4 Station scale
5 CD compartment
6 STEREO control lamp
7 PUSH button to open the CD compartment
8 BASS on/off button
9 Band selector AM
10 Band selector FM
11 / II CD Play/Pause button
12 CD button forward search
13 PRO programming button
14 TUNING control
15 PULL filap
16 II Pause key - cassette
17 Stop/Eject key - cassette
18Fast Forward key - cassette
19 Fast Rewind key - cassette
20▶Playback key - cassette
21 Recording key - cassette
22 PHONES (headphone connection)
23 Cassette compartment
24 Loudspeakers
25 VOLUME
26 FUNCTION Function selector (RADIO/TAPE/CD)
27 RPT button
28 CD button reverse search
29 CD stop button
Reverse
30 Loudspeaker connections
31 Mains connection
32 FM throw-out aerial
Remote control
A SKIP/SEARCH button reverse search
B /II PLAY/PAUSE button
C SKIP/SEARCH button forward search
D REPEAT button
E STOP button
F PROGRAM button
G Battery compartment
Start-up of the device/Introduction
- Read the operating instructions thoroughly before the start-up!
- Remove any transport safety equipment on the CD and cassette sections.
- Select an appropriate location for the device, e.g. a dry, fl at, non-slip surface on which the device can be easily operated.
- Make sure that the device is adequately ventilated!
- Connect the loudspeakers to the connections (30) on the rear.
Power supply
- Insert the plug into a properly installed 230V , 50Hz power socket. Please ensure that the mains voltage corresponds to the information on the type plate.
Inserting the Batteries
(not supplied)
- Open the lid of the battery compartment (G) on the back of the remote control.
- Insert 2 batteries of type LR 6 "AA" 1,5V. Please ensure that the polarity is correct (see the fl oor of the battery compartment or the inscription on the outside)! If the remote control is not used for a prolonged period, remove the batteries in order to prevent battery acid leaking.
Always replace the complete set of batteries. Do not replace just one battery.
Warning: batteries are not to be disposed of together with domestic wastes. Dispose of the used batteries at the relevant collection bin or at your dealer's.
Never throw batteries into the fire.
General Operation
POWER (1): Switches the unit to „ready for operation" or to „off". The POWER button lights up in blue.
BASS on/off (8): to increase or decrease the bass output. On = button lights up in blue.
Volume: You can set the desired volume
PHONES (22): using the VOLUME control (25). Insert the plug of a set of headphones into the headphone socket -the loudspeakers are,muted".If your headphone plug does not fit, please use a suitable adapter.
Loudspeakers (24): Connect the loudspeakers to the connections (30) on the rear.
Infrared
remote control: For operating the music centre from a distance of up to 5 metres without a lead. If the range of the remote control is reduced, the batteries have to be replaced. When operating the remote control ensure that there is nothing blocking the view between the remote control unit and the infra-red receiver on the music centre.
Listening to the Radio
- Turn the function selector switch (26) to the RADIO position.
- Select the desired frequency band with the band selection buttons (9/10). VHF Stereo = FM Medium wave = MW/AM (Mono).
- Tune in the desired station with the station adjustment knob TUNING (14).
- The STEREO control lamp (6) only lights up when you have selected FM stereo and the station is being received in stereo quality. If reception is too weak and the station received crackles, it may be that this light will not come on. Try to improve reception by turning and bending or twisting and altering the length of the antenna (32).
- An aerial is integrated into the device for the reception of AM stations. The machine can be aligned to the station by turning it. In this frequency band programs are transmitted in "mono" only.
Cassette Operation
Playing Cassettes
- Select the function TAPE (26).
- Open the fl ap (15).
- Press the /stop/Eject button (17) in order to open the cassette compartment (23).
- Push a recorded audio cassette, with the tape downwards and the listening side facing forwards, into the compartment. Close the cassette compartment.
- Press the playback key (20) to listen to the tape.
- With the /stop/eject key (17) you can stop playback.
- Wind the tape forwards or backwards if necessary in the direction of the arrow keys. = forwards (18), = reverse (19). Always press the / stop/eject key (17) when changing the direction or stopping the tape. This prevents damage to the machine and the tape.
- If the top/eject button (17) is pressed again the fl ap of the cassette compartment opens.
- In order to interrupt playback briefly, press the PAUSE button (16). Pressing again continues playback.
Recording Cassettes
- Insert an audiocassette with the side on which you wish to record facing forwards. Ensure that the cassette is not copy-protected (the copy protection tab on the top narrow side of the cassette must not have been removed).
- Select the source from which you wish to record with the function switch (26) and then start playback from this source if necessary. The sound source which you are listening to is the one from which the recording is made. The recording level is controlled automatically. Any changes to the sound and volume do not affect the recording.
- Please press the record button (21) (the playback button is automatically pressed down at the same time). Recording now begins. All previous recordings are automatically erased.
- The recording can be interrupted briefly using the I pause key (16), or stopped by means of the / stop/eject button (17).
Playing CDs
This is how you play a CD
- Turn the function selector switch (26) to the "CD" position.
- Press the key to open the CD deck cover (7).
- Insert a music CD with the label facing upwards on the central button and close the CD deck cover (5).
- "appears in the display (3) followed by the number of tracks.
- Press the / II PLAY/PAUSE button (11/B) to listen to the CD. The CD will play from the fi rst title. The current track and the symbol are shown in the display.
- You can set the desired volume using the VOLUME control (25).
- To remove a CD, press the CD STOP key (29/E), open the CD deck with the PUSH key (7) and take out the CD carefully.
Description of the CD buttons
/II PLAY/PAUSE (11/B):
You can briefly interrupt the playing. Renewed pressing of the button will re-start the playing from the same place.
The symbol in the display (3) fl ashes.
SKIP/SEARCH (28/A):
Press once = This starts the current track again from the beginning.
Press a second time =
This jumps back to the previous track.
Press a third time =
This plays the song before etc. If the button is kept pressed down, the machine starts to search through the tracks.
SKIP/SEARCH (12/C):
With this button you can jump to the following track or the next track but one etc. If the button is kept pressed down, the machine starts to search through the tracks.
STOP (29/E): The CD is stopped.
REPEAT (27/D):
Press once he current track is repeated continuously (REPEAT appears in the display)
Press a second time =
the whole CD is played continuously (REPEAT ALL appears in the display) Press a third time: the function is deactivated.
Programmed Play
This can be used to program any desired sequence of tracks.
- Press the STOP key.
- Press the PRO(GRAM) key (13/F). The number "00" (storage location) and the symbol PROGRAM fl ash in the display (13). Use the SKIP / I buttons to select the desired track and then press the PROG button again. Repeat the procedure until all the desired tracks are selected.
- Press the / PLAY/PAUSE button. The playback starts. The PROGRAM display fl ashes. Press this button to pause briefly the playback (see the section on PLAY/PAUSE).
- Press once the STOP key to stop the playback while retaining the program.
- To play the programme again, please first press the PRO button (13/F) and then the / II PLAY/PAUSE key.
The device stops automatically once the entire sequence of programmed tracks is completed. The programmed sequence remains in the memory until the CD is taken out of the CD deck or until the device is switched off. In order to play back the programme and order of tracks again, please press the PRO button fi rst and then the PLAY/PAUSE key.
It is also possible to combine the programmed tracks with the REPEAT function. After you have programmed and started the device, please press the REPEAT button (27/D) up to three times and then you can use the functions as described under "REPEAT".
Note: Compact Disks:
- This device is able to play CDs with a diameter of 8 cm and 12 cm. Note: Only place one disc in the CD compartment at a time.
- Only audio CDs, CD-R and CD-RW disks can be played on this machine.
Always place the CD into the CD compartment with the label facing upwards. Compact discs can only be played on one side. - Fingersprints and dust should be carefully removed from the recorded side of the CD (the side without the label) with a soft cloth. Wipe off in straight lines from the centre to the edge.
After being played, CDs should be returned to their case so that they do not become scratched. - Do not expose CDs to direct sunlight, high humidity levels or prolonged high temperatures in order to prevent them from warping.
- Do not adhere any paper to the CD or write on it.
- Do not spray any cleaning agents or antistatic sprays on to the CD as in the case of phonographs.
=
This device has been tested according to all relevant current CE guidelines, such as electromagnetic compatibility and low voltage directives, and has been constructed in accordance with the latest safety regulations.
Subject to technical changes without prior notice!
Guarantee
The device supplied by our Company is covered by a 24 month guarantee starting on the date of purchase (receipt).
During the life of the guarantee any fault of the device or its accessories *) ascribable to material or manufacturing defects will be eliminated free of charge by repairing or, at our discretion, by replacing it. The guarantee services do not entail an extension of the life of the guarantee nor do they give rise to any right to a new guarantee!
Proof of the guarantee is provided by the proof of purchase. Without proof of purchase no free replacement or repair will be carried out.
For repairs or replacement during the life of the guarantee return the device in its original packing together with the proof of purchase to your dealer.
- Damage to accessories does not mean automatic free replacement of the whole machine. In such cases please contact our hotline. Broken glass or breakage of plastic parts are always subject to a charge.
Defects to consumables or parts subject to wearing (e.g. motor pistons, kneading blades, drive shafts, spare remote control, spare toothbrushes, saw blades, etc.) as well as cleaning, maintenance or the replacement of said parts are not covered by the guarantee and hence are to be paid!
The guarantee lapses in case of unauthorized tampering.
After the expiry of the guarantee
After the expiry of the guarantee repairs can be carried by the competent dealer or repair service against the payment of the ensuing costs.
9 PepeKIOUaTeJIb dIaIa3OHOB AM
10 PepeKIOUaTeJIb dIaIa3oHOB FM
11 Khonka Bocnpoun3BedeHne/ny3a /II CD
12 KhoK nonck Bnepe CD
13KhONka nporpaMMnpoBaHnA PRO
14 PerjLTop TUNING
15 KpbIka PULL (THyTb)
16II KhoNka nay3a
17 TOn/BBb6poc Kaccetbl
18> NepemOTka kaccTeBnpeD
19 NepemOTka KacCeTb Ha3a
20 KhoNka Bo3npOn3BedeHn KaCCeTb
21●KhoNka 3aIncn KaccTeB
22 PHONES (THe3I0 nOdkIIOUeHnHayuHmKOB)
23OTcEKJIAKacCEbI
24AkkyctnueckneKOJOhKn
25VOLUME PeryjTOp rpoMkoCTN
Hn B KOem cnyae He 6pocaiTe 6aTapeKuB OROhb.
06uie npabnla nolb3Oba
POWER (1): BkIIOUHTe nII N BYIKIOUHTe CEHTp. KhoIka "POwER" CBETNTcra FOJy6bIM CBEtOM.
BASS
Bk./BbKl.(8): cIyXnT nIy ycIeHnI nnocIa6JIeHnI baccOB. BkI. = KHOIIKa CBETITcR IOny6blmCBETOM.
Perynupobka
rpoMkoctn: POMKOCTb 3Byka peRyInpyeTc npn nOmoi KhoNKn "VOLUME" (25).
PHONES (22): Ecln wTeNCeIb roOBhIX TeJeFOHOB BCTaBJIeH B rHe3IO, TO KOJIOHN OTKJIIOUaIOTc. Ecln wTeNCeIb He IooXoIIT K rHe3dy, noID6epNTe IOxOJaI IN nepexoHNIK.
AkkycTnueckne
KoJIOHKn (24): NdoKJIIOUHTe KOJIOHKN K rHe3dAm (30) Ha 3aJNei CTOpOHe.
HΦpaKpachbI
ПДУ: ДябспобODногу уравлени c paacstOBHЯdo 5 MeTpoB. EclI duCTaHnIy yMeHbIaETcR Heo6xOJIMO CmEHHTb 6aTapeiKN. IproctpaHCTBO MExdy ПДУи IHΦpakpaCHbIM npneMHNKOM Ha My3bIKAJIbHOM ueHTpe DOnJXHO 6bITb CBO6OJHbIM.
PpocnyuBaanpepaHonepea
- YctaHOBITEyHKUOHaJIbHbI nepeKIOuTaTeIb (26) B NOLOXHe "RADIO".
-
Bb6epTe HxKbI dnaNa3OH npn nOoIepeKIOHaTeJIaNAp3HOB (9/10).YKB(cTepeo) = FM CpeHNBEJHbI "MW/AM"MOHO
-
HactpoTecb Ha HyxHyIO paAnocTaHcIIO npi nOmoU peryIaTopa TUNING" (14).
- KoHTpOlbHbAJaMNoUka"STEREO"(6)CBETNTcT TaIbKO B TOM Cnyuae,ecnBbIbpaH dHaana3OH YKB cTepeo n npHnMaemra paNocTaunr TpaHCInpyeT bPexKmE"CTepeo".EcIn npHem PLOXOn I C NOMExAMn,He NCKInOHeO,HTO OHa He 6ydet CBETNbCER. EcnnpHem PNOxOn I C NOMExAMn,JaMNoUkA 6yDet Mrratb. Nonpo6yTe yLyuWntb npHem, BpaUaJ,ckpyuHBaJI nnI paKpyuHBa aHTEHy (32).
5.Длпnpиema paanonepeaч B anana3oHe CB (AM) B ueHtp BCTpoeHa aHTehHa. Bpauaia nIIN n3MeHra ee noLoXeHne HacTpoiTeCb Ha paAnocTaHcIO. B 3TOM dnaana3OHe paanonepeaay TpaHCnIpyIOTcToJIbKO B pexIMe "MOHO".
KaccetHbIMaHHToΦOH
Bocnpon3BeDeHne 3aHncn
- BbIbepeTepeKIM "TAPE"(26).
- OTKpoTe KpbIuKy (15).
- Haxmnte /▲ KHONky/CTON/Bbl6poc (17), YTo6bl OTKpbITb KaccetHnK (23).
- BctaBbTe B OTCek ayDnO-kaccety Co 3Byko3anncbI, neHToB Hn3 n npocnyuBaemc TcPOHOK ce6e. 3akpoTte oTcE.
5.ДявocnpoIN3BedeHnIaIIcN HaxMNTe KHOKy" (20). - KhoIkoN ■/▲ cToN/BbIbPoc (17) MoXHO OCTaHOBtB BOCpON3BeDEHne.
- Pn Heo6xOIMOCn KACCtMy MoXHO NepemOTaB BnepeN Ha3aD npN NOMOuN KOHONK CO CTpeJkAmN.
BnpeiD(18),Ha3aD(19).
Mexny nepeKIOUeHnA M, IJRA OCTaHOBKn JHeTbI, BcERda HaxmMaTe KONKy /△CTON/Bbl6poc.
3TO ctpaxyET O NOLOMKJ IeHTOnpOTxHORo MExaHn3Ma HHaHeceHnIOBpeXdEHNJIeHTe.
- NOBTOPHOE HAXATNE KONKNI/▲ CTON/Bbl6poc (17)OTKpbBaet KpbWky OTCEKA KACCETbl.
- YTo IpeoCTaHOBtB BOCnpOn3BeDeHne KAccTebHa KOpOTKoe Bpem HaxMnTe KhONKy "II PAUSE" (16).IobTOpHoe HaxTaNe KhoNKn IpOdoJXnT BOCnpOn3BeDeHne.
3aHbHaKaCCeTy
1.BCTaBbTe BOTcEK NcyTyo ayDIO-KaccTe, 3aINCbIbAemOc TcPOHOK C6e6 (NoHaa KaTyUka DOJXHa 6bITb Cnpaba).PpOBepbTe, He 3aUuHe AIN KACCETa OT 3aINCn (IIaCTMaCCOBbI Ra3bHOK C y3KOI CTOpOHbI KACCEbI He DoJIKeH 6bITb BBJOMaH).
2.Пи nOMOuIФyHKUHOHaJIbHOro nepeKJIIOuATEeIa (26) BbIbepInTe NCTOCHNK 3aIncn I BKIOUHTe erO. 3aIncbIbAeTcR To, YTO BblCJIbIbIe. YpOBeHb 3aIncn peYunpyetc ABtOMaTHueCKn. BpaSeHne peYunpoBOK rPOMKOCTn I TEM6pa He BlnReT ha 3aIncb.
3. Haxmnte KhoNky"3aNcB (21), (KHOJa BOCPON3BeHHe Haxmetc aBTOMaTneCKn). HaHnaETc3aNNcB. Bce npdeIyuue 3aNNcHaJeHTe aBTOMaTneCKn CTpaIOTcR.
4. 3aNNc bMOxHO npeoCTaHOBnTB Ha KopoTkoE Bpemr, Haxab KhONky "I Pause" (16) IIN octaHOBnTB COBCeM, Haxab KhONky /A CTOn/BbIbPoc (17).
PonrpBbHne CD
Tak nponrpbBaetcKOMnakt-dnck
- YctaHOBInTe ΦyHKUHOHaIbHbI IpepeKJIIOuTaTeIb (26) B NOLOXHe "CD".
- Haxmte KhoNky, TTo6bI OTkpblbOTcK CD (7).
3.BCTaBbTe BOTcK,Ha CEHTpnpyUOuN uHn, KOMNaKT-DINCK CO 3ByKO3aIncbIO, 3TNIKETKOI BBepx, H3akpoTe KpbIuKy (5)OTceKa CD. - Ha nncnnee (3) noBntcra"_, a 3aTeM YncNo neceH Ha KOMnakT-DnCKe.
- Haxmnte KhoNky"II PLAY/PAUSE"(11/B),YTo6bI CTapTOBaTb BocnpOn3BeDeHne. BocnpOn3BeDeHne HaHHeTcC nepBoi neChn DnCKa. Ha DnCnlee OTo6paxKaETcBocnpOn3BODIma neChn n CnMBoI ▷
- FrpomKocTb 3Byka peRyIpyeTc npn nOmoi KhoNKn "VOLUME" (25).
- TTo6bI BbHyTb KOMnAaKT-ДИСК HαЖMnte ChaЧаЛА KHOПКу" CD STOP"(29/E), OТКроЛte OТсЕк пи NOMOUI KHOПКИ "PUSH"(7) И OCTOPОХНО ВБИHБTe ДИСК.
OnncHne fynkui KhoNOK CD npeepa
/II PLAY/PAUSE (11/B):Bocnpoun3BeDeHne MOxHO npepBaTb Ha KOpOTKoe BpeMn. NOBTOpHoe HaxaTne KHONKn IPODOJXHT BOCpOuN3BeDeHne C TOrO Xe MeCTa.CmBOL ▷Ha dncnlee(3)6ydet Mrratb.
I SKIP/SEARCH (28/A): 1 pa3 HaxaTb = NOBTOBPOCnpon3BOIDMOI neCHN
2pa3aHaKaTaB=
3pa3aHaKaTaB=
CKaYOK Ha NECHIO Ha3a
CKaOH Ha NcEHIO BnpeepN T.D.EcIN DePkaTb KHOKny HaxaToBKNIOHTCpexmNONCA.
IKSKIP/SEARCH (12/C):PnnoMoOnu3ToN KHONKMOXHOpeeHTn Ha CNeDuIouyIO neChIO, cKaKNyTB uepe3 OndHy n T.D.EcNI DEpKaTb KHNKy HaxaToB BKIOHITcra pexIM Nocka. STOP(29/E): KompaKT-DnCK OCTAHOBNTcra.
REPEAT (27/D): 1 pa3 HaKaTb (HaДиСплee CBeNTcra "REPEAT"): BOCПОИЗВODIMЯ NaДаннь мОмЕТпеся 6удET HeNpepepbHNO IOBTOрЯТсЯ.
2pa3aHaKaTaB(Ha
ДИСПЛЕ CBETITcRA"ALL REPEAT}): BeBb KOMnAKT-ДИСК 6удET HeNpepbIBHO NOBTOPЯTbCra.
3pa3aHaXaTb:
peKIM BbIKIOUaETcA.
PpOgpaMnpoBaHne npoJaB BocnpOn3BeDeHn
IyckaTcJIO6oNoprOOKBocPOn3BeDHeHnIeCnH.
- HaKMMTe KhoNky "STOP".
- HaxmTe KhONky "PRO(GRAM)" (13/F). Ha nucnnee haHneT MInratab 00" (Homep yueKn namrTu) n HauNcB "PROGRAM". Bb6epnte npn NOMOuIN KhoNOK" I/IKSKIP/SEARCH" HyxHyIO neCHIO n NOBTOPO HaxmTe KhONky "PRO". NoBToPraIte 3Ty IpoueDpy Do Tex nop, noka He Bb6epnte BCE neChn.
- HaxMnte KhoNky II PLAY/PAUSE". HaunHaeTcB BOCPOM3BeDEHeIe. HApnncb "PROGRAM" MmraE. Haxab 3Ty Ke KhoNky MOxHO npepBaTb IpOprpyMMy BOCPOM3BeDEHeIHa KopoTKe BpEmr (CM. pa3dJI "PLAY/PAUSE").
- OndokpaTHoe HaxaTne KhoNKn "STOP" OCTaHaBnBaet BocnpOn3BeDeHne, npOrpMaXe coxpaHReTcra.
5.ДЯ NOBTOPOHOrO BOCPON3BeDEHnI npoPpAMMbI HaxMNTe Chayana KhoNky"PRO"(13/F),a 3aTeM KhoNky"▶/II PLAY/PAUSE".
NocIe BOCnpOn3BedeHn BCex NceH nporpAmMa ABTomAtneckn OCTaHOBNTc. 3aIporpamMPOBaHHbI NOPdOK BOCnpOn3BedeHn XpaHITcB NaMRTn DO Tex Nop, NOKa KOMNaKT-DnCK He 6yDet BbHYT n3 OTcKa INMy3bKaJIbHbI UeHTp He 6yDet BbIKJIOUeH. IJIr IOBTOpHO BOCnpOn3BedeHn 3aIporpamMPOBaHHO NOpAJa Ka HaxMITE CHaHaJa KhONky "PRO", a 3aTeM KhoNky "PLAY/PAUSE".
IMeTcB O3MOXHOCTb KOM6HnHPOBaTb 3aInporpaMMNPOBaHHbIe NecHc C yHKuJeI REPEAT. Iocne nporpaMMNPOBaHnI cTapTa nporpaMMbl HaxMnte KhoNky "REPEAT" (27/D),do 3 pa3,IN BCE yHUn MoKHO npImeHHTb Ha npOrpaMMy,KaK 3TO ONuCaHO b pa3deJe "REPEAT".
PnmueyHne:KOMNaKT-DNCK
Ha 3TOM ueHTpe MOXHO npOuRpbIbATb KOMNaKT- DnCKK KaC cDnaMeTpOM 8 cm, TaK n 12 cm. PnmeuaHne: BCTaBJIaTe BOTceK CD ToJIbKO OINH DnCK.
Ha 3TOM ueHTpe MOxHO npOnrPbIbTaB KOMnAaKT- DnCKn TOJIbKO B oOpMaTax Audio CD, CD-R u CD-RW.
Bcerda BCtabnIte KOMNaKT-DNCK BOTCEK 3TNKeTko BBepx.KOMNaKT-DNCK NMEET 3aINCb TOJbKO C ODHONCTOPOHbl.
- OTneuATkn naIbIeB nIbIb Ha CnHrHaIbHOI CTOpOHe DnCKa (CTOPoHa 6e3 3TnKETKn) HEOxOIMTOIaTeJIbHO ydaIaTb npN NOMOUs MmKoT TpAIOHKn. IpoTnpaTb JeTKM, pPmBIM DnXKeHemOT CepeDInHbIK KpaM.
-Послпрогьанн He06xOДМо 3acyHyTb KOMnakT-DnCKn O6paTHOBKopo6Kn,HTo6bI OHn He nozaapanacb.
- PpeOxpaHnTe KOMNaKT-DnCKn OT DeIcTBnnpAbx COJIHeuHbIX NyueB, BICOKoB BlaXHOCTN INDITeBHoro BO3DeIcTBnB BICOKnx TempeaTpy, 3TO MOKeT NOKOpOBnTb Nx.
- He KneiTe Ha KOMnakT-DnCK HnKaKnx 6yMaXhBix NaKleek N He NnUIne Ha HnX.
He HanbIyIe Ha NcKn HNkaknx MOIOxuN aHTnCTaTNUeCKNX CpeIcTB.
3To n3dJIeHnpeoJIO BCE Heo6XoDmblie n
akTyIaIbHbIe npOBepKn, ppeINcaHHbIe dIpKeKTHBOI
CE,K npM. Ha 3neKTpOMaHHTHyO COBMeCTUMOCt b N
COOTBeTCTBnE Tpe6OBAHnM K Hn3KOBoIbTHoN TeXnKe,
OHO 6bIIO TaKke CCKOHCTpyuPObaHO N NOCTpoEHO
C yueTOM nocJIeHNx Tpe6ObaHn N IO TexHnKe
6e3OnacHOcTn.
Mbl octabJem 3a coboi npabo Ha TexHueckne n3MeHeHnI
TapaHTnHoe 6o3aTeJbCTBO
TapaHTnHbI cpoK Ha TeppuToPnn PocCnCKoI Φeepaun yCTaHaBnBaETCa NOHOMOHbIMN IpeDCTaBNTeJIaMn.
KaccobbyuekraBnTcraPapHTnHbIM TaIOHOm.Be3 HeRo HEBO3MOXeH 6ecPiAThbI peMOHT NJI 3aMeHa n3dennr.
B cnyae BO3HKnHOBXHn npTeH3n no rapaHTn, npebIbIte n3dJIe N BnHOnKOMnKeTAtuN, C opnHaIbHoYnakOBKn KaccOBm YekOM TOpROBoi TOyKe, pOdaBWe 3TO n3dJIeN.
*) DeΦeKtBi npnHaIeXHcTei He clykat npnHoiD nA BTOMATNueCKo 3aMeHb BCErO N3dEJIy. B 3TOM cLyuae no3BOHInTe Ham, noxanyjCTa, noToprye JINHn! Pa36ntBle CTKeJHbIe I NOIOMaHbIeIIactMaCCOBie DeTaIIN BO3MeuaOTcra TOnbKO 3aDonONHInTeIbHyIO ONlAty!
DeΦeKbI N3HaWNBaEMbIX PnHAnDJIeXHoCTe NII IN TpyuNXcR DeTalei (HaPnIMep KOHTaKTHBie UeTKM MOTOpOB, CMEcNTeJIbHbIe KpIOKn, PnINBOHbIe peMHN, 3aNaChbIe NylbTbI ynpabJIeHn, 3aNaChbIe 3y6HbIe UeTKN, NIIbHbIe NOIoTHa I T.D. ), a TaKxE YnCTKa, TexO6ClyKbIaHHe NII 3aMeHa TpyuNXc DeTalei He NOnaIaIOT NID rapaHTNo, NIO3ToMy IpOBoJrTCs 3a OTdJeIbHyIO ONlAty!
TapaHTN TepaETc npB BCKpbITn N3dJIIN NOCTOPOHHIMN JIuCAmN.
Pocne rapaHTn
IocJe OKOHuaHncrepoka rapaHTnn,peMOHTn3deJnI npOn3BOoNTcra 3a ONaTpy,COOTBeTCTByIOUIMM MaCTepCKmN INI PyHKTaMNCepBnCHOrO O6CnyKbAHn.
Technische Daten
Modell: MC 4401 CD