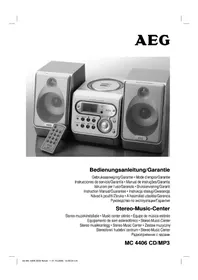
MC 4411 CDMP3 - Hi-fi system AEG - Free user manual and instructions
Find the device manual for free MC 4411 CDMP3 AEG in PDF.
| Product type | Hi-fi system |
| Brand | AEG |
| Model | MC 4411 CDMP3 |
| Power supply | 230 V, 50 Hz |
| Output power | 100 W PMPO |
| Protection class | II |
| Radio frequency ranges | FM 87.5 ~ 108.0 MHz / MW 522 ~ 1620 kHz |
| Playback formats | CD audio, CD-R, CD-RW, MP3 |
| Removable media | USB, SD/MMC memory card |
| Main functions | CD/MP3 playback, FM/MW radio, programming, repeat, random, timer, sleep, equalizer (Classic, Rock, Pop, Jazz, Pass), ESP anti-shock, DBBS, intro, mute |
| Headphone output | 3.5 mm stereo jack socket |
| Remote control | Infrared, range up to 5 m, 2 x AAA batteries (not included) |
| Antenna | Flexible FM antenna, built-in MW antenna |
| Speakers | Connection at the back (RIGHT/LEFT) |
| Display | LCD screen |
| Warranty | 24 months from date of purchase |
| Maintenance and cleaning | Unplug before cleaning; use a slightly damp cloth without additives |
| Safety | Class 1 laser; do not open the device; avoid moisture; do not expose batteries to heat |
| Languages of the manual | FR, CS, DE, EN, ES, HU, IT, NL, NO, PL, PT, RU and others |
Frequently Asked Questions - MC 4411 CDMP3 AEG
User questions about MC 4411 CDMP3 AEG
0 question about this device. Answer the ones you know or ask your own.
Ask a new question about this device
Download the instructions for your Hi-fi system in PDF format for free! Find your manual MC 4411 CDMP3 - AEG and take your electronic device back in hand. On this page are published all the documents necessary for the use of your device. MC 4411 CDMP3 by AEG.
USER MANUAL MC 4411 CDMP3 AEG
Overview of the Components.. 3
Instruction Manual.. 49
Technical Data. Page 54
Guarantee
FRANÇAIS
JEZYK POLSKI
Sommaire
Listedesifferentéselementsdecommande.. Page3
Mode d'emploi.. 17
D-47906 Kempen/Germany
SD/MMC-Card-gleuf (9)
UKW = FM, middengolf = MW (Mono)
ESP (Antishock-function)
Ligaoes para as colunas
$$ A M = \text {m a n h} _ {\mathrm {a}}, P M = \text {t a r d e}. $$
PRE-UP (4 do commando)
Num CD com fornato MP3:
$$ B B S O N = p \mathrm {a}, B B S O F F = a v. $$
INTRO (20 pá fjernbetjeningen)
General Safety Instructions
Read the operating instructions carefully before putting the appliance into operation and keep the instructions including the warranty, the receipt and, if possible, the box with the internal packing. If you give this device to other people, please also pass on the operating instructions.
- To avoid the risk of fire or an electric shock, you should not expose the device to rain or moisture. Consequently, do not use the device in the immediate vicinity of water - for example near a bath tub, a swimming pool or in a damp cellar.
- Use the device only for the intended purpose.
- Only connect the device at a properly installed plug socket. Pay attention that the specified voltage corresponds to the voltage of the plug socket.
- When using external mains supply, pay attention to the correct polarity and voltage. Always place the batteries in the correct direction.
- Assemble the device in such a way that the available ventilation openings are not covered.
- Never open the housing of the device. Incorrect repairs can constitute a considerable risk for the user. Should the device become damaged, in particular the mains supply cable, do not operate the device any longer, but rather have it repaired by an expert. Check the mains supply cable regularly for damage.
- For safety reasons a broken or damaged mains lead may only be replaced by an equivalent lead from the manufacturer, our customer service department or a similary qualified person.
- If the device is not used for a longer period, remove the plug connector from the plug socket or take out the batteries.
These symbols may be found on the machine and are intended to indicate the following:

The lightning symbol should advise the user of parts in the inside of the device which carry dangerously high voltage levels.

The symbol with an exclamation mark should advise the user of important operation or maintenance instructions in the accompanying documentation.

Devices bearing this symbol work with a ,class 1 laser for tracing the CD. The built-in safety switches should prevent the user being exposed to dangerous laser light, which is invisible to the human eye, when the CD compartment is opened.
Under no circumstances should these safety switches be bypassed or manipulated, as this could result in a danger of exposure to the laser light.
Children and Frail Individuals
- In order to ensure your children's safety, please keep all packaging (plastic bags, boxes, polystyrene etc.) out of their reach.
Caution! Do not allow small children to play with the foil as there is a danger of suffocation!
- In order to protect children or frail individuals from the hazards of electrical equipment, please ensure that this device
is only used under supervision. This device is not a toy. Do not allow small children to play with it.
Symbols in these Instructions for Use
Important information for your safety is specially marked. It is essential to comply with these instructions in order to avoid accidents and prevent damage to the machine:
WARNING:
This warns you of dangers to your health and indicates possible injury risks.
CAUTION:
This refers to possible hazards to the machine or other objects.
NOTE: This highlights tips and information.
Special safety information
This device works with a class 1 laser.
Overview of the Components
1 PHONES Headphones connection
2 BAND button
3 IR Sensor for the remote control
4 STANDBY/ON button
5 VOLUME MIN./MAX. (volume) control
6 FUNCTION Function selector button
7 USB connection 8 I/I buttons
(forward search/reverse search)
9 SD/MMC CARD Slot
10 MEMORY button (memory/time)
11 CD compartment
12 PUSH/Open (open) CD compartment
13 LCD display
14 PLAY/PAUSE button (Play/Pause)
15 REPEAT button (repeat)
16 STOP button
Reverse Side
Loudspeaker connections
18 Mains connection
19 ANT. throw-out aerial
Remote Control
1 PLAY/PAUSE Play/Pause) button
2 STOP button
3 SKIP-DN/SKIP-UP
(reverse search/forward search)
4 PRE-DN/PRE-UP
(down/up album/Radio memory preset)
5 REPEAT button (repeat)
6 CLOCK/MEMORY
7 RANDOM button (random)
8 FUNCTION Function selector button
9 MUTE (geluiduit) button
10 VOL-DN/VOL-UP (volume) buttons
| 11 | STEREO/MONO/ESP | button |
| 12 | POWER | button |
| 13 | TUNER/BAND | button |
| 14 | SLEEP | button |
| 15 | TIMER | button |
| 16 | EQ | button |
| 17 | CARD-USB | button |
| 18 | Number | buttons |
| 19 | DBBS | button |
| 20 | INTRO | button |
Start-up of the device/Introduction
- Read the operating instructions thoroughly before the start-up!
- Select an appropriate location for the device, e.g. a dry, flat, non-slip surface on which the device can be easily operated.
Make sure that the device is adequately ventilated! - Connect the loudspeakers to the back of the music centre to the sockets market „Speaker RIGHT and LEFT" (17).
- Insert the plug into a properly installed 230 V, 50 Hz power socket. Please ensure that the mains voltage corresponds to the information on the type plate.
- The stored time and stations are lost as soon as the power supply is interrupted.
Setting the Time (in Standby Mode)
- Keep the CLOCK/MEMORY button (10/6) pressed down. The words "24 HOUR" appear in the display.
- Use the SKIP-UP /SKIP-DN buttons (8/3) to choose between the 24 hour and 12 hour display. Press the CLOCK/MEMORY button (10/6) to confirm.
I NOTE:
The following appears in the case of the 12 hour display AM = in the morning, PM = in the afternoon/evening.
- Press the SKIP-UP /SKIP-DN I buttons (8/3) to set the hours. Keep the button pressed down until the desired hour is reached. Press the CLOCK/MEMORY button (10/6) to confirm.
- Press the SKIP-UP /SKIP-DN 1 (8/3) button in order to set the minutes. Keep the button pressed down until the desired minutes are reached.
- Press the CLOCK/MEMORY button (10/6) again to store the time.
Remote Control Batteries (not supplied)
- Open the lid of the battery compartment on the back of the remote control.
- Insert 2 batteries of type R03,AAA" 1,5 V. Ensure that the polarity is correct (see the floor of the battery compartment)!
If the remote control is not used for a prolonged period, remove the batteries in order to prevent battery acid leaking. - Different battery types or new and used batteries must not be used together.
CAUTION:
Batteries are not to be disposed of together with domestic wastes. Disposse of the used batteries at the relevant collection bin or at your dealer's.
WARNING:
Do not expose the batteries to high temperatures or direct sunlight. Never throw batteries into the fire. There is a danger of explosion!
CD deck transport protection
Please open the CD compartment (11) by pressing the PUSH/ OPEN (open) button (12). Remove the transport protection from the CD player if present before use.
General Operation
i NOTE:
Some keys are to be found both on the device itself and on the remote control. Keys with the same designation have the same function.
STANDBY/ON / POWER (4/12)
Switch the device to the standby mode with the STANDBY/ON / POWER button (the time is displayed). If this button is pressed once more, the device switches on again.
Volume (5/10)
This is used to set the individual volume. The letters VOL^ and a figure appear in the display (13). This corresponds to the volume that has been set as far as VOL 30^ or VOL 00^ .
PHONES Headphone Socket (1)
Please use headphones with a 3.5mm stereo jack plug; these should be inserted into the headphone socket. The loudspeakers are then switched off.
DBBS (19 on the remote control)
To increase or decrease the bass output.
$$ B B S O N = o n, B B S O F F = o f f. $$
INTRO (20 on the remote control)
Press the INTRO button (INTRO appears in the display). Each track on the CD is played for 10 seconds. Press this button again to stop searching. The currently selected track is played.
Infrared remote control
For operating the music centre from a distance of up to 5 metres without a lead. If the range of the remote control is reduced, the batteries have to be replaced. During operation ensure that there is nothing blocking the direct line between the remote control and the sensor (3) on the machine.
USB Connexion (7)
This device has been developed in accordance with the latest technical developments in the USB field. Unfortunately the large number of different types of USB storage media on offer today
makes it impossible to guarantee full compatibility with all USB storage media. For this reason there may be problems in rare cases with playing back from USB storage media. This is not a malfunction of the device.
- In order to switch on the device please press the STANDBY/ON / POWER switch (4/12).
- Now press the FUNCTION button (6/8) to select the CARD-USB mode.
- Connect a USB storage medium.
- Press PLAY/PAUSE (14/1) to play back the music data.
For operating instructions please see the section "Playing CDs/MP3s".
i NOTE:
- The FIND function is restricted.
- With the SD/MMC card inserted it is not possible to switch over to the USB connection.
- By pressing the CARD-USB button (17 on the remote control) you can also select the CARD-USB mode.

CAUTION:
Before removing the USB storage medium, switch the device to TUNER operation using the TUNER/BAND button (2/13).
SD/MMC Card Slot (9)
- If you would like to play back data on an SD/MMC card please insert it into the opening provided.
- Now press the FUNCTION button (6/8) to select the CARD-USB mode.
- Press PLAY/PAUSE (14/1) to play back the music data.
For operating instructions please see the section "Playing CDs/MP3s".
i NOTE:
- The FIND function is restricted.
- By pressing the CARD-USB button (17 on the remote control) you can also select the CARD-USB mode.
Listening to the Radio
- Press the FUNCTION button (6/8) to select between FM or MW.
$$ V H F = F M, \text {M e d u i m w a v e} = M W (\text {m o n o}) $$
- Tune in to the desired station with the help of the SKIP-UP /SKIP-DN buttons (8/3).
-
The FM.ST control lamp ((ST)) (in the display) only lights up if the selected station is being received in stereo quality. If reception is too weak and there is noise on the station being received, this lamp will flicker. Try to improve reception by turning and bending or twisting and altering the length of the antenna (30). In the case of FM stations you can use the STEREO/MONO/ESP button (11 on the remote control) to switch between MONO and STEREO reception. Where reception is bad we recommend switching to MONO.
-
An aerial is integrated into the device for the reception of MW stations. The machine can be aligned to the station by turning it. In this frequency band programs are transmitted in "mono" only.
- If you have found the desired station, press the CLOCK/ MEMORY button (10/6). The word MEMORY lights up and the station memory number fl ashes.
- In order to select the program location, press the PRE-DN/PRE-UP buttons (4 on the remote control).
- To store this position, press the CLOCK/MEMORY button (10/6). Please note that the programme storage location must be entered within five seconds as the procedure is then cancelled.
To select a stored station press the PRE-DN or PRE-UP button (4 on the remote control).
I NOTE:
By pressing the TUNER/BAND button (2/13) you can also switch over to radio mode.
Playing CDs/MP3
This is how you play a CD
- Press the FUNCTION button (6/8) repeatedly until CD^* appears in the display.
- In order to open the CD compartment (11), press the PUSH/ OPEN (open) button (12).
- Insert an audio CD with the printed side facing upwards on to the central cone so that the CD clicks into place and then close the lid of the CD compartment.
- AUDIO CDs:
In the display the symbols "Cd" and "ESP" appear together with the number of tracks and the total playing time. Press the PLAY/PAUSE button (14/1) to play back the CD. The CD is played from the first track onwards. The track currently being played and the time that has elapsed are shown in the display.
CDs in MP3 Format:
In the display the symbols "STOP" and "ESP" appear together with the number of folders e.g. 04 and the total number of tracks. Press the PLAY/PAUSE key (14/1) to play the CD. The CD is played back from the first track onwards and from the first folder. The song currently being played and the time that has elapsed are shown in the display. With the PRE-DN or PRE-UP (4 on the remote control) you can select the individual folders.
- To remove a CD, press the STOP key (17) (2 on the remote control), open the CD deck with the PUSH/OPEN (open) key (12) and take out the CD carefully.
Always keep the CD deck closed.
i NOTE:
- If a disc is inserted incorrectly or no disc is inserted, the letters .CD READa, and .NO DISCa appear in the display.
- Playback of CDs produced by the user cannot be guaranteed due to the large variety of software and CD media available.
Description of the CD buttons
PLAY/PAUSE (14/1)
You can briefly interrupt and resume playback using this button. The playing time that has elapsed fl ashes in the display. Pressing again continues playback.
SKIP-UP▶I/SKIP-DN I (8/3)
With an audio CD or a CD in MP3 format playing:
With SKIP-UP I (8/3) you can jump to the next or previous track etc. If the button is kept pressed down, the machine starts to search through the tracks (the sound is muted).
The SKIP-DN button (8/3) can be used as follows:
Press once = This starts the current track again from the beginning.
Press twice = This jumps back to the previous track.
Press three times = This plays the song before etc. If the button is kept pressed down, the machine starts to search through the tracks (the sound is muted).
In radio mode:
To tune the desired radio station.
STOP (17/2)
The CD stops.
MUTE (9 on the remote control)
Used for switching off the sound immediately. To cancel this function, press the MUTE key again.
I NOTE:
There is no indication that the mute function is activated in the display.
EQ (16 on the remote control)
(Preset equalizer function). Various sound modes are available (CLASSIC, ROCK, POP, JAZZ, PASS).
STEREO/MONO/ESP (11 on the remote control)
In FM radio mode:
To change between STEREO and MONO.
For an audio CD:
ESP (Anti-Shock Function)
It fi lls the 40-second electronic memory to protect against the jumping of the CD. If the player is jolted, the CD music data is read out continuously from an intermediate memory (not in MP3 mode). Reading errors are corrected subsequently in the intermediate memory. After the player has been switched on this appears in the display to show that the anti-shock function has been activated and the memory is being charged. Press the STEREO/MONO/ESP button if you want to deactivate this function.
For a CD in MP3 format:
You can search for the content on the CD (if burned on the MP3) as follows:
Press once: The name of the first track with the initial "A" is shown in the display. If the word "A-NONE" appears there is no track available with the initial "A". With the SKIP-UP I/SKIP-DN I buttons (8/3) it is possible to select the first track of the following initial "A-Z" and "0-9". With the PLAY/PAUSE button the first track with the selected initial is played back.
Press twice: The track of the first folder appears in the display. Use the SKIP-UP▶I/SKIP-DN I▶buttons (8/3) to select the desired folder and press the PLAY/PAUSE button. Playback begins with the first track of this folder.
Press three times: The display changes to normal operation.
Keep pressed down: If ID-3 Tag information has been stored this appears in the display in the form of an LED ticker display. Keep the button pressed down again to switch the function off again.
REPEAT (15/5)
Press once: (the REPEAT emits a fixed light). The current track is repeated continuously.
Press twice: (the REPEAT ALL emits a fi xed light). The whole CD is played continuously.
Press three times: all functions are cancelled. The normal play mode is resumed.
Only for CDs in MP3 format
Press once: the current track is repeated continuously (REPEAT appears in the display).
Press twice: the whole CD is played continuously (REPEAT ALL appears in the display).
Press three times: the selected folder of the MP3 CD is repeated continuously (REPEAT ALBUM appears in the display). With the PRE-DN/PRE-UP buttons (4 on the remote control) you can select the individual folders.
Press four times: the function is deactivated and the CD is played in the normal mode.
RANDOM (7 on the remote control)
Press once: the display (13) contains the word RANDOM, ESP and the track number that is to be played first. All tracks are played back in random order.
Press twice: the function is deactivated and the CD is played in the normal mode.
PRE-DN (4 on the remote control)
For a CD in MP3 format:
Press this button during playback to change to a folder further down. The display, e.g. 01, fl ashes briefly. Then the MP3 CD begins to play back automatically.
In radio mode:
To tune the desired radio station.
PRE-UP (4 on the remote control)
For a CD in MP3 format:
Press this button during playback to change to a higher folder. See the above paragraph for the following step.
In radio mode:
To tune the desired radio station.
SLEEP (14 on the remote control)
With the device switched on this sets the period in 10-minute steps from 90 to 10 minutes after which the device switches to standby. Press the button repeatedly until the required duration is shown in the display. With this function activated the word SLEEP appears in the display. The device switches off automatically after the set time.
In order to call up the remaining time press the SLEEP button. This time can also be subsequently shortened or switched off again (00 Min).
TIMER (15 on the remote control)
You can set the device so that it switches on and off again at a certain time.
- Keep the TIMER button pressed down until ON appears in the display. The hours fixture begins to fl ash.
- Use the SKIP-UP /SKIP-DN I buttons (8/3) to select the switch-on time (hours).
- Press the TIMER button and use the SKIP-UP / SKIP-DN I buttons (8/3) to select the switch-on time (minutes).
- When the TIMER button is pressed the word ^ appears in the display. The hours fi gure begins to fl ash.
- When setting the switch-off time, please proceed in the same way as described above.
- Press the TIMER button and use the SKIP-UP /SKIP-DN I button (8/3) to select in which mode the radio should switch on (TUNER or CD).
- Press the TIMER button and use the SKIP-UP /SKIP-DN I buttons (8/3) to select the switch-on volume VOL.
- Press the TIMER button again. The settings are shown in the display briefly one after the other and then the device switches back to the normal display. appears in the display and the timer is activated.
In order to deactivate the timer, briefly press the TIMER button. The word disappears from the display.
CLOCK/MEMORY (10/6)
This is used for setting the time, storing stations and programming playback.
Keep this button pressed down fur approx. 3 seconds to call up the time on the display. Press this button once more to return to the radio frequency or CD/MP3 track display.
Programmed Play
This can be used to program any desired sequence of tracks.
- Press the STOP key (17/2).
- Press the CLOCK/MEMORY key (10/6). "00 P-01" (memory location) appears in the display (13) together with the word MEMORY. In MP3 format the number of the file (00) fl ashes, while the track number (000), the word MEMORY and the memory storage number P-01 are shown. Use the SKIP-UP /SKIP-DN buttons (8/3) to select the desired track and then press the CLOCK/MEMORY button (10/6) again. The display changes to memory slot P-02.
- Select the next track with the SKIP-UP /SKIP-DN key and press the CLOCK/MEMORY key again. Repeat the procedure until all the desired tracks are selected. In MP3 format fi rst select the folder. Press the CLOCK/MEMORY button and then select the desired track.
- Press the PLAY/PAUSE key (14/1). The playback starts. The first track number selected appears in the display. The words "Cd", "ESP" and "MEMORY" appear in the display. Press this button to pause briefly the playback.
- Press once the STOP key (17/2) to stop the playback while retaining the program. The MEMORY control lamp goes out.
- To resume the playback of the program press first the CLOCK/MEMORY key once and then the PLAY/PAUSE key.
- To delete the program (in stop mode) first press the CLOCK/ MEMORY button and then the STOP button.
The device stops automatically once the entire sequence of programmed tracks is completed. The MEMORY control lamp goes out. The programmed order of tracks remains in the memory until you change to a different mode, remove the CD from the CD compartment or switch off the device.
It is also possible to combine the programmed tracks with the REPEAT function. After you have programmed and started the device, please press the REPEAT button (5) up to three times and then you can use the functions as described under "REPEAT".
Playing back Music in MP3 Format
With this device it is possible to play back pieces of music in MP3 format. The device also supports all standard CD types: CD, CD-RW, CD-R.
This machine of is able to play MP3 CDs. Up to 200 tracks can be compressed and stored on these CDs. Your machine detects an MP3 CD automatically (the total number of tracks and folders appears in the display). If you would like to play one of these CDs, proceed as described under „Playing CDs/MP3". Tracks can be programmed as described under „Playing Back Programmed Tracks".
Please note:
There are a number of different recording and compression methods, as well as quality differences between CDs and self-recorded CDs.
Furthermore, the music industry does not adhere to fixed standards (copy protection).
For these reasons it is possible that in rare cases there are problems with the playback of CDs and MP3 CDs. This is not a malfunction of the device.
Cleaning and Maintenance
Always remove the mains plug before cleaning the machine.
- Any marks on the surface can be wiped off with a slightly damp cloth without any additives.
Technical Data
Model: MC 4411 CD/MP3
Power supply: 230 V, 50 Hz
Output rating: 100 W PMPO
Protection class: II
Radio section:
Frequency ranges: FM 87,5 ~ 108,0 MHz AM 522 ~ 1620 kHz
This device has been tested according to all relevant current CE guidelines, such as electromagnetic compatibility and low voltage directives, and has been constructed in accordance with the latest safety regulations.
Subject to technical changes without prior notice!
Guarantee
The device supplied by our Company is covered by a 24 month guarantee starting on the date of purchase (receipt).
During the life of the guarantee any fault of the device or its accessories ascribable to material or manufacturing defects will be eliminated free of charge by repairing or, at our discretion, by replacing it. The guarantee services do not entail an extension of the life of the guarantee nor do they give rise to any right to a new guarantee!
Proof of the guarantee is provided by the proof of purchase. Without proof of purchase no free replacement or repair will be carried out.
If you wish to make a claim under the guarantee please return the entire machine in the original packaging to your dealer together with the receipt.
Defects to consumables or parts subject to wearing as well as cleaning, maintenance or the replacement of said parts are not covered by the guarantee and hence are to be paid!
The guarantee lapses in case of unauthorized tampering.
After the expiry of the guarantee
After the expiry of the guarantee repairs can be carried by the competent dealer or repair service against the payment of the ensuing costs.
Meaning of the "Dustbin" Symbol
Protect our environment: do not dispose of electrical equipment in the domestic waste.
Please return any electrical equipment that you will no longer use to the collection points provided for their disposal.
This helps avoid the potential effects of incorrect disposal on the environment and human health.
This will contribute to the recycling and other forms of reutilisation of electrical and electronic equipment.
Information concerning where the equipment can be disposed of can be obtained from your local authority.
12 PUSH/OPEN (otevfrt) CD mechanika
13
LCD-displej
14 Tlacitko PLAY/PAUSE (pfehravani/pauza)
15 Tlačitko REPEAT (pro opakováni)
16
Tlacitko STOP
Zadni strana
17 Zdfiky pro priopojen reproductoru
SPEAKERS RIGHT/LEFT
18 Sifovpripoj
19 Antena pro prijem vysilani v pásmu ANT.
5 Khonka REPEAT (noBtop)
6 Khonka
CLOCK/MEMORY
7 Khonka
RANDOM
Ipeed BkHouhenem TuaTeJIbHO npOHTaTe pyKOBODCTBO noJb30BaTeJI!
I OJ6epHTe I OXoI Ruee MeCTO IaYcTaHOBKn CEHTpa N KOIOHOK. I OXoIaIIM M BJIaRETCa CyXoe, POBHOE H EeKoJIb3Koe MeCTO, Ha KOTOPOM 6yJeT yIO6HO IOJIb3OBaTBcR CEHTPOM.
-
PpocneIte 3a TEM, YTObI CEHTp xopoIo O6yBaJIcH BO3dyXOM!
-
PoiKJIIOHHTe KOJIOHN K IHe3dAm "Speaker RIGHT" "Speaker LEFT" (17), Ha 3aJHcI CTOpOHe cHTpa.
BCTaBBte cetebyo Bnky Bpo3eKy C hAnpRKeHneM ceTn 230 B,50 Tc, yCTaHOBLeHHyo B COOTBeTcBm C npEaHcAHMaMH. Y6eIInTeCb B TOM, YTO HApRKeHne 3NEKTPocEt CoBnaAaet C HAnpRKeHneM NITaHn IeHTpa, yKa3aHHoe Ha TINOBOM Rpbike. - YctaHOBKn actpoHomMueCKoBpeMeHN paAINOCTaHcNIN nponaKaOT,ecnI npepbIbAeTcra NdaCa 3JKeKTo3HePrrn.
IporpamHPOBaHne yacob(BpeKHeMe OxHaHnStandby)
- Haxmte H depKte HaKaToH KhoNky CLOCK/MEMORY (10/6).Ha dncnnee noBnIeTc coo6ueHeNe ,24 HOUR"
- Bb6epTe npn noMoOnK hONok SKIP-UP I/SKIP-DN 8/3)24-xnn12-nacOBynoHnDnKaunIOBpeMeHn. Pocne Bb6opa HAKMTe nI NOITBePckDeHHK hONkyc CLOCK/MEMORY (10/6).
I INPIMEYAHHE:
Bcnyae BbOopa 12-uaCobOu HnDkaun noBtca
AM=do nolnydHA,PM=nocne nolnydHA.
-
- Yo6bI BBcTn NOKa3aHnHa cOob HaKIMMaTe KHOJIKN SKIPUP I/SKIP-DN1 (8/3). DepKHTe ee HAKaToi do yCTaHOBJIeHnH HyKbIX NOKa3aHn. JINr NOITBepKJHeHn HaKMITE KHOJky CLOCK/MEMORY (10/6).
- YTo6bI yCTaHOBtI NOKa3aHIN MmHyT HaKMITE KHOIIky SKIP-UP /SKIP-DN I (8/3). DepKHTe ee HkaTOn Do yCTaHOBJIeHIN HyKHbIX NOKa3aHIn.
- HauKmTe KhoNky CLOCK/MEMORY (10/6) eue pa3, uTo6b3aONMHTb BpeMra.
BaTapeKn Ndy
DBBS (KhoNka 19 Ha Iy)
CnykntIyucneneHnnOcnabneHnBaccOB.
BBS ON = BKJIIOUeHO, BBS OFF = BBKJIIOUeHO.
INTRO (KhoNka 20 Ha N,
HaKMMte KlaBnUy INTRO (Ha dncnnee noRbntc HaDnncb "INTRO").KaKdAOTdeNbHaa 3aNncb Ha CD 6ydet npOnrpbBaTcB a TeueHne 10 cekHyd. YTo6bl npePbaTb nonck, HAKMMte Ha 3Tu KlaBnUy eue pa3. PocJeMyet BOCpOu3BeDeHne Bb6paHHo 3aNcN.
HnΦpaKpaChbIpy
IaB6cnpboDHOO ynpabHeHH C pacCTOHn DO 5 MetpoB. Ecn nctauny yMeHbWaeTc HEOxOdNMO CMEHnB 6atapeKn. IpocpaHCTBO MEXdy Ndy NceHCOPOM (3) Ha My3bKaJIbHOM ueHTpe DoJNKHO 6bTb CBO60dHbIMt.
Pazbem USB (7)
JaHHe 3dEne COKCTpynpoHaC yETOM nocJeHHx Texnuecknx DoctXeHn B O6NaCTn nepeaun DaHHbIX uepe3 USB npT. Ondako 60JIbWoO KoINeCTBO BHeUHnx 3aONMaHOuX ycTPOncTB USB pa3NHyOH KOHCTpyKcHn, KOTOpoe ceroHn PpeJnaraetC TropOBnE, He rapaHTnpyOT, K CoKaJIeHIO, IN NOIHOn COBMeCTIMOCCT Dpyr C dpYROM. No 3ToI npUHHe, B peDKHX CnyaHx, MOrYT NORBtCA pNo6IeMbIC BOCpON3BeDEHEm C MyNbTMmedaNBHO namrTH, HMeJOe pa3bE m USB. 3To pOncxOJT He no npUnHe HEnCpapBHOCTbO daHHoro 3dEInA.
- BkIIOHHTe H3DeJIne, HαKαB KHOKNy STANDBY/ON / POWER (4/12).
- Пи помоши Кногки FUNCTION (6/8) Вьберпге peжим CARD-USB.
3.BCTaBtBe B rHe3do USB BHeUHee 3anOMnHaOuIee yCTpOCTBO. - HanMMTe KhoNky PLAY/PAUSE (14/1), YTO6bI BKNHOHTb YTeHHe My3bIkaNbHbIX daHHbIX. KaK ynpaBnTb n3DeJIeMOnncAHO B rnaBe, Bocpon3BeDeHne DnCKOB CD/MP3".
Kak ynpabJIbIb n3dennem onncaHO B rnaBe „BocpOn3BeDeHne DnCKOB CD/MP3".
I PIMMEUAHHE:
- PeKIM FIND yHKUOHpyet C HeKOtOpbIMN OtpaHueHMRM.
EcnBCTaBHeHa KapTa SD/MMC Card,To npeekHoueHne Ha pa3bEM USB HeB03MOxHO. - Hακμмα Κλαβιψγ CARD-USB (ΚΗΝικα 17 ΜΙΝΥ) BbI TOKE MΟχΕte BBδραΤΜΟύγε CARD-USB.
BHIMAHINE:
PpeT KAK ydaJIbMbIbTMHeaJIbHyNo nAmrTb C pa3bEmOM USB,peKIIIOHTe npIbOp npn NOMOu KNOHKn TUNER/BAND (2/13)B pexm TunER.
Tne3do SD/MMC-Card (9)
- TRObI BOCPON3BecTn 3aInc b c KapTb SD/MMC-Card, BCTaBtE ee B npeyCMOTpeHHoe dIe Hee OTBepCTHe.
- Пи помоши Кногки FUNCTION (6/8) Вьберпге ржIM CARD-USB.
- HaKMITE KhoNky PLAY/PAUSE (14/1), YTO6bI BKNHOHTb YTeHHe My3bKaIbHbIX DaHHbIX. KaY npaBnTb N3DeJIHem ONICAHO B rnaBe, Bocpon3BeDeHne DnCKOB CD/MP3".
Kak ynpabJIbI h3dennem onncAo B rnaBe „BocnpOn3BeDeHne DnCKOB CD/MP3".
I PPHMeyAHHE:
- PexnM FIND fyHKUOHHpyet C HeKOTOpbIMN ORpaHueHnMI.
- Haxkma KnaBmUy CARD-USB (KhONka 17 Ha Iy) Bbl TOke MoKeTe Bb6paTb MoYc CARD-USB.
PpocnyuHbAHne paHonepea
$$ Y K B = F M, c p e \text {Д n e} B O N H b l = M W (M O H O) $$
- Haximma KhoNky FUNCTION (6/8) cdeNaTe BbIbOp MeKdy FM m MW dHaana3oHaMn.
- HacptpoTeB npn nmoOn KhoNOK SKIP-UP /SKIP-DN (8/3) Ha JekelaMyo paAnocTaHIO.
3.CBcToHnDnKatop FM.ST((ST))(Ha nCnPee)CBeTnTCaTOIbKO B TOM clyae,ecnbl bIbpaHHa paNocTaHnnaI npHHMaetcBApeXnme Stereo.Ecnnpemnoxoi n C NOMExAMn, lamnoUka byet MIRATb. POnpoByTe yNyUHTb pInem,Bpaua,ckpyuBaA Hn paKpyuBaA anTeHNy (30).Bo BPem npEema paNocTaHnB DnAna3OHe YKB(FM) ImeETcBAo3MOKnOCTb nepeKlUChENHn3peKnMaSTEREO Ha MONOpn NOMO uN KHOKN STEREO/MONO/ESP (KHOKN 11 Ha Iy).B cnyuae nNoXoro npEema peKomeHnyETc npEekluOHtbcraHa peKmM MONO.
4.Длпnpнema paanonepeaay Bdnana3ohe CB (MW) B ceHTp BCtpoeHa aHTehHa. BpauaЯ nInn 3mHey ee noLoKeHne HactpoIteCb Ha paAnocTaunIO. B 3tOM dnana3oHe paanonepeaay TpaHcnipuyOTcTolbko B peKIme "MOHO". - Korda byet haJaHeHa Heo6xOImma paHIOCTaHnIHAHNMTe KhoNky "CLOCK/MEMORY" (10/6). Ha nciIee 3acBETnTc coo6ueHne MEMORY n HauHET MmTaTb HOpem RyeKn NaMAtn.
6.ДЯ BBIObOPa RNeKn NaMHTNaHKMmaTe KHOKN PRE-DN/PRE-UP (KHONKa 4 Ha Ndy).
7.ДЯЗANOMHAnHn HAnMnTe KHOHky CLOCK/MEMORY (10/6).YHTNE,TOHmOpEryeKn NaMaTn HeoXoDnMo 3aDaTb B TeueHHn 5ceKyHn,INaYe npOeDypa npepBcTc.
Yro6bI Bbl3BaTb n3 naMRTn 3aONMHeHHy opaIOCTaHIO HauKMITE OHy n3 KHOIOK PRE-DN nIN PRE-UP (KHOIIKa 4 Ha I,IV).
I PIMMEAHHE:
Haxab KhoNky TUNER/BAND (2/13) MoXHo nepeKJIouHTbcra B peKIM paDNOpnEma.
PpOHHrpBbAHne CD/MP3
Tak npoHpbBaetcKOMnKT-Dnck
- HaximmaTe KhoNky FUNCTION (6/8) Do tex nop, noka Ha dncnnee He noBntC cooOeHne CD".
- OTKpoIte oTceK CD (11), HaxaB KhoNky "PUSH/OPEN (OtkpbITb)" (12).
- BCTaBbTe B OTcEKN, HauHTpnpuyoHm IHN, KOMnKT-DnCK C 3aIINCbHO, 3TNKETKO BBePx N 3aKpOte KpbUkY OTcEka.
- TteHme dNcKa AUDIO CD:
Ha nCnnee noBnTcra Coo6eHHe "Cd", ESP" uNcNo 3aIncen n o6ue Bpem Bocpon3BeHnHn. Haxmnte KhoNky PLAY/PAUSE (14/1), TTObI CTapToBaTb YTeHne CD dNcKa. Bocpon3BeHnHn HaHHTcR C nepBOH 3aIncn CD dNcKa. Ha nCnnee noBnTcra Ha3BaHnE 3aIncn N ICTeKuHn E Bpem BOCpon3BeHnHn.
YteHne CD dncKa c 3aHcBbO B φOpMaTe MP3:
Ha nncnnee noBHTcno6ueHne,“STOP”,“ESP” KOnuYeCTBO nAnok,KnPmEpy 04 nO6uee YnCNo 3aInceM. HAnKMITE KhoNkY PLAY/PAUSE (14/1),yTo6bl CTapTOBaTb tHeHne CD nCka. Bocpon3BeDeHne HaHETcC n nepBoo 3aHncn nepBoi npKn CD nCka. Ha nncnnee noBHTcH Na3BaHne 3aHncn H nCTekUee BpEmra Bocpon3BeDeHn. Ppi NOMOUI KHOIOK PRE-DN mN PRE-UP (KHOINKa 4 Ha INDY) MoKHO BbIbpaTb Heo6xOdmyo nAnky.
- 4to6bI BbHtB KOMnAaT-DnCK HaKMITE ChaJa Ka HONky "STOP" (17) (KHOIIKa 2 Na Iy), OTKpoIe OTcEK npi NOMOUI KHOIIKN "PUSH/OPEN (OTKpbIb) (12) n OCToPOXHO BbIHbTe DnCK.
ДерхиITE кршу Oтсека CD потоанно зakритов.
I PIMMEUAHME:
Ecnn BCTaBHeH HnpaBnIbHO nN BOO6e OTCyTCTByET,Ha NcPiee NoBnReTc COo6eHne ,CD READ"uNO DISC"(HT).
Bocnpn3BeHHe CD-DCOB, m3roTOBHeHHbIX co6CTBeHHbIMn CnilAMn, He rapaHTnpyETc, nO npuHMe MHOrOo6pa3Hn npmHeReMOro nporpaMMHO 0ecneueHn CD-polnnHrob.
Onncanhe yHKnK HONOK CD npeepa
PLAY/PAUSE (14/1)
Bocnpo3BeHeMe MOxHO IpepBaTb Ha KopoTKe BpeMa IN BkIOuHTb ONrTb. Ha DCnJIeE MURAeT BpeMa C MOMeHTa HauJaPiOnpRbIbAHN. NobToPHe HaKaTne KHOPIKIN pOdoJIKT BOCnpo3BeHeHc.
SKIP-UP▶I/SKIP-DN I (8/3)
Bo BpemB BoCpOn3BeDeHnA DnCKa B FOpMaTe Audio-CD nn MP3:
Pn nomou KhoNk SKIP-UP (8/3) MoKHO nepenpybHTb Ha CneIyOuIIO nn npdeBdyUIO dopoKky. Ecnn depKaTb KhoNkHaKaTo, To BKNIOHTcpeKIM NOnCKa (3BYK OKJIIOUaETc).
KhoNa SKIP-DN1 (8/3) Imeet cIeJyUOJIne yHKnIIM:
1 x pa3 haKaTb = BocPon3BeHne TeKyuEi DOpOJKn Chayana.
2xpa3aHaKaTb=CKaOKKnpdeIyueiDopokke.
3xpa3aHaKaTb= CkaQOK K cneDyIOuei DOpOKe nT.d.Ecnn depKaTb KHOKNy HaKaTO, TO BKnIOHTcpeKMM NOnCKa (3BYK OKNIOVAeTCa).
BpeKmE Radio:
HnHaTPOHKnHaJKeMaEMyo paNIOCTaHcIO.
STOP (17/2)
KOMnKaT-DnCK OCTaHOBHTCA.
MUTE (KhoNka 9 Ha Iy)
CnykntIaB6bIcTporo BbIKIOHEnH3ByKa.HTO6bl BKNIOHTb 3ByK O6b4HO, HAKMITE KONky eue pa3.
I PIMMEAHHE:
HaIINCIIe He 6yET yKa3AHn HA AKTNB3nPOBaHHe nepeKJIouChHe 6ecUWMHO HAcTpoKN
EQ (KhoNka 16 Ha ΠdY)
RANDOM (KhoNka 7 Ha IIy)
1x pa3 haKaTb: Ha dncnlee (13) noBHTc8 coo6eHHe RANDOM, ESP n HmOp 3aInCn, KOtpor Bdyet BocnpOn3BOJntb8 nepBoi. Bce 3aInCn 6yDyT BOCnpOn3BOJNTb8 c8 OHa 3a DpyroB CnuyahHom nopRdKe.
2x pa3a HaKaTb: DeakTNBpyETcN BOCnpOn3BeDeHHe CD- DnCKa nepeiTeB HOpMaJIbHbI peKIM.
PRE-DN (KhoNka 4 Ha Iy)
B cnyuae ecn CD b foopmate MP3:
HaKMMTE 3Ty KONIKy BO BpEMr BOCPON3BedeHn, YTO6bI nepeTn Ha ONDHy nAnky HnKe. Coo6zHeHne, K npImepy 01, Mrraet HeKOTOpoe BpEMr. Iocne 3tOro aBtOMaTHueckn CTapTyETcBocPON3BedeHne MP3 CD-dncka.
B pexnme Radio:
HnHaTpoiKnHaKeJaEMyo paNIOCTaHcIIO.
PRE-UP (KhoNka 4 Ha Iy)
B cnyuae ecn CD B φopmate MP3:
HaKMMTE 3Tu KONky BO BpemB OBCpon3BeHn. YTo6bI nepeTn Ha OHy panky Bblwe. TaIbHeuWne Warr CMOTpn Ha a63au Bblwe.
BpeKmE Radio:
HactpoKnHaKeJaeMyo paNIOCTaHcIO.
SLEEP (KhoHa 14 Ha Iy)
3decb MMeeTc BO3MOXHOCbY cTaHOBnB Bpem, Jaramn No 10 MmHT B dHaana3OHe 10-90 MmHT, NO nCTeueHH NOTOPORo N3dJIne nepeKIOUHTC B pexHM rTOOBHcN (Standby). HaKImaTe KONkY Do Tex nop, NOKa HA DnCnIe He NOBHTC HyKHOE Bpem. EcIn 3a FyHKuR aKTHBn3npoBaHa, To Ha DnCnIe CBeTnTc COo6UeHne SLEEP. No nCTeueHH 3aDaHOrO BpemEH N3dJIe ABToMaTnueckn BBKIOUHTCra.
Yro6b y3HaBt Bpem, OCTaBueeecr Do BBkIOUeHn, HaKMTe KhoNky SLEEP. 3To Bpem MoXHO NOKOppeKTHPOBaTb BH3 nIy mEmhwnTb COBcEM (00 Min).
TIMER (KhoKa 15 Ha N,
Pn6op MoKHO 3anporpammmpoBaTb TaK, YTO OH 6ydet BKNIOHATBCN BIKIOHATCB HJHXHOB PEMR.
1.Держнite Khonky TIMER haKaToI, nokaHa dinCnIe He noBHTc coo6uHHe "ON".Пoka3aHry YacOB HaHHaiOT MIRAtb.
2.Пи помоши Кногп SKIP-UP I/SKIP-DNI (8/3) BBEДИТЕ рOKAZAHЯЧАСВ.
3. HaxMMTe KhoNky TIMER IN BBeINe Tnp Ni NMOUKN KhoNKN SKIP-UP /SKIP-DN I (8/3) NOKa3aHnM MnHyT.
4. HαKMnTE KhoNkTy TIMER,Ha dnCnJee NOBHTcCoO6ueHHe,OFF".Ioka3aHna YacOB HaunHahOT MInraTb.
5.Длгпрогаммювань Времи Вькночени NOCTYNAITE KAK 3TO 6blno OINCAHO BbIe.
- HaxMMTE KHOKNy TIMER N BbIepe TpN NMOUIN KHOKN SKIP-UP I/SKIP-DN (8/3) peXIM pa60tba pAno (TUNER nn CD).
- HaxMMTE KhoNky TIMER n yctaHOBnTe npn NOMOuIN KhoNk SKIP-UP I/SKIP-DNI (8/3) NaaJIbHyIO rpoMkoCTb VOL.
- HaKMMTe KhoNky TIMER eue pa3. Ha Incnlee NocIeIOBaTeJIbHO NOKaKyTcB CSeIaHbIe H3MeHeHr, a B 3aKJIouHeHm OH nepeKJIIOuHTcRA Ha HopMaJIbHbI peKIM mHdIkaun. Ha Incnlee NoBHTcR 一 ^ 一 n BKIOUHTcra TaMep.
IINBbIKIOHHe TaHMepe HAKMITE KopoTKO KHONKY TIMER. Coo6ueHHe,Ha DCnIe e NOTyXHEr.
CLOCK/MEMORY (10/6)
CnykntIyycTaHOBKn actpoHomueckoro BpeMeHH, 3aONMHaHnpaJnoctaHcnn N BOCppon3BeHeHH 3aIporpaMnpoBaHHOrO
Ecnn Bb6yTe DePkaTb 3Ty KnaBnuy HaKaToI npM.3 cekyHbI, To Ha DCNCEE 6yTe yKa3aHO actpoHomueckoe Bpem. Ira TOrO, YTO6bl CHOBA BuTe b Ha DCNCEE paAnocactoty nHn FyHKuIN CD/MP3, ChoBa Haxmnte 3Ty KnaBnuy.
PporpaHpoBaHne npraKb BocnpOn3BeDeHHA
Ionyckaetra IIO6oBIO npraDOK BOCnpoH3BeDeHn necen.
- Haxmnte KhoNky"STOP" (17/2).
- HaKMITE KHONKY "CLOCK/MEMORY" (10/6). Ha dinclnee (13) noBnIeTcra,00 P-01" (yueKa namrIn) n COO6uHHe MEMORY. B pexmme MP3 mnaet homep napan (00), a TaKHe CBETTCRA HOpE 3aHnCn (000), COO6UHeHE MEMORY n HOpE RyeKn namrtn P-01. Pp n NOMOni KNHOK "SKIP-UP /SKIP-DN I " (8/3) Bbl6epnte HxHyIO neCHIO n HaKMITE NOBTOPO HO KhoNky "CLOCK/MEMORY" (10/6). Tokaahn DaNCnnepeuDyt Ha CneDuOuyo RyeKy namrtn P-02".
- Пи поши Кногok"SKIP-UP /SKIP-DNI " Bb6epeite CneIyUOуNeCnIO nHaKmTe NOBtOHO KhoNky"CLOCK/MEMORY".NoBtOpye 3Ty npOeIpy DoTexnop,poKa He Bb6epeite BCE neChN. BpeKIme MP3 cHauana BcERda Heo6xOdmo Bb6paTb NaKy.3aTeM HaKmTe KhoNky CLOCK/MEMORY n Bb6epeIte HxHHyO 3aINCb.
- HaKMITE KhoNkY "PLAY/PAUSE" (14/1). HaunhaetcB OBCnpOn3BeDHeHne. Ha dinCnIe NORBtC HOMep nepBOB BbI6paHHo 3aHcNc. Ha dinCnIe NORBtC COO6UeHne .Cd", ESP" nIN ,MEMORY". HaKab 3Ty KhoNkY MOxHo npepBaTb nporpyMMy BOCnpOn3BeDHeHn Ha KOpOTKoe BpEMr.
- OndokpaTHoe HaKaTne KhoNkN "STOP" (17/2) octaHaBnBaet BocnpOn3BeJeHne, npOrpMaJke coxpaHReTc. KoHTpOlbHaa lamMnoUka "MEMORY" notyXHET.
-
Дяговоста порогамьн haЖмITE счаял одн pa3 на конky CLOCK/MEMORY, a 3aTeM конky PLAY/PAUSE.
-
Tro6bI NotyHInTB nporpamMy (B peKHMe Stop) HAKMITE CHaHana KhoNky CLOCK/MEMORY, a 3atEm STOP.
Iocne BOCPON3BEdHn BCx neCen npOrpMaMA aBTOMaTHeCKN OCTaHOBnTc. KOHTpObHaJ NaMNoUka MEMORY notyXnet. 3anpoRpaMMnPoBaHn InpAdoK BOCPON3BEdHn XpaHnTC B NAMrN n CTpaEt CToIbKO B TOM Cnyae, ecn My3bKaIbHbN ueTp bdyet nepeKJIoueH B dpyro peKHM, KOMNaKT-Dnck bdyet BbHyT n0TceKa Hn CEHTp bdyet npocTo BbIKIOueH.
IMeetcB03MOKHOCTb KOM6HINPOBaTb 3aIporpamMnPOBaHHBe NcCHN CfYHKUe REPEAT. Iocne nporpaMMIOBAHN H cTApTa nporpAMMbHaKMITE KhoNkY REPEAT (5),do 3 pa3, IN BCE fHyCNMOKHO pImeHTb Ha nporpaMMy, KaK 3TO OINCAHO B pa3dene "REPEAT".
Bocnpon3BeDenHe My3bIKn B φopMaTe MP3
HMeetcB03MOxHOCtB BOCnPOn3BOOHTb 3ByKO3aNCH, CEnaHHBe BΦopMaTe MP3. Kpome 3toro nIeep uHTaET noTHBce paocnpoctpaehHHBe BnDbI DNCKOB: CD, CD-RW, CD-R.
Pnep Bocpon3BODHT CD-dnCKn C 3aHNCmN B FopMaTe MP3.Ha noo6hny dncke moKHO 3aHNCaTb do 200 dopOKe. Pnep pacno3Haet 3OT fOpMaT ABToMaTuYeCKn (Ha DcPiee nOBJIeTc OB ocuee KOuHeCTBO Ha3BaHn H paIIOB).JnB BOCpON3BeDEHn 3aHnceB 3tOM fOpMaTe NOctynaiTe KAK 3TO OINCaHO B rIabe "BOcPON3BeDEHne CD-DnCKOB/ MP3".PporpaMMPOBaHne nopRkA BOCpON3BeDEHn MOxHO pON3BeDHTe No npOeDype, ONCaHO B rIabe "PporpaMMPOBaHne nopRkA BOCpON3BeDEHn"
PonanyuTa yUHTte:
CuyectBye60bIoopepa3Hoo6pa3ne nporpaMMnKOMnpcecNIMaIHCnDaHHbIX,aTaKHe pa3JIuYB KaueCTBeNyctbIX 3aIncAHbIX CD DnCKOB.
Kpome 3TOrO My3bKaJIbHaN npOMbiUJIeHHOCtB He npIneApKHeBaETcYTBepKHeHHbIX CTaHdApTOB (3aUHTa OT KOnnpoBaHn).
IIO 30I npuHHe, B peKnx CnyaX, MOrY Bo3HNKHyTb np6nEmbl C TeHnEM CD DnCKOB n DnCKOB C 3aINCbHO BΦopMaTe MP3. 3TO IPOCNxOHT He IIO npuHHe HEnCnpabHObCTbIO DAHHOro N3dEInr.
UncTka n yxOJ
-ПередческовынмайтБИКуиретК.
- PAnTHa ChapyKn KOpnyCa MOJHO ydaNITb CneRka BnaKHO TpAikO, 6e3 pImMeHHeM ROUox CpeCTB.
TexHnueckne daHHbIe
MoIeIb: MC 4411 CD/MP3
3JIeKtpoMTaHHe: 230B,50T
BbIXoHaMaMoUHocTb: 100BaTTPMPO
Klacc 3aunTbI: II
PdAnOpnpHmNk:
Дианэзовсчадт: YKB / FM 87,5~108,0 MHz
CB/AM522\~1620kHz
3To n3deneHne npoJIo BCE Heo6xOaMlbIe n AkTyalbHbIe npOBepKn, npEtnncAHNble DnpeKTHBOI CE, K npim. Ha 3JIeKTPomarHHTHyO COBMecTmOCtBn COOTBETCTBNE Tpe6oBaHnM K Hn3KOBoIbTHOH TEXHKe, OHO 6blIO TaKHe CKOHCTpynpoBaHO IN NOCTpoEO C yYeTOM NocJeHNX Tpe6oBaHn IO TEXHKe 6e3OnaChOCTH.
MbOCTaBnAeM 3a C06oI npaBO Ha TeXHueckne HmMeHeHa!
TapaHTnHoe 6o3aTeJbCTBO
TapaHnHbI cpoK Ha TeppntOpn PoCcncko Fedepaun yCTaHaBnBaetcN NlHOMOHyIMN PpeCTaBtEnrMn.
KaccobbyuekraBnEraTcRapaHnHbIM TaHOHom.Be3 Hero HEBO3MOKeH 6ecNtAthbpeMOHT HIN 3aMeHa H3dJIIA.
B cIyae Bo3HKnHOBxHn npTeH3n no rapaHTn, npeIbRbTE H3JeJIe B NOHOBKOMNKeTauHH, COpHnHaJIbHOJ yNaKOBKo I KACCobbIM YekOM TpROBOI TOUKe, IpOdaBWe 3To H3dJIe.
DepeKtBu 3HaWNBaEmbIX npHnAdneXHOCTe Hn TpyuNXcB DeTaeI, a TaKKe YnCTKa, Texo6CnyXBaHHe Nn 3aMeHa TpyuNXc DeTaeIe He NOnaJAIOT NOI rapaHTIO, n IIO3Tomy npBOOAnrTcA OTDelbHyO ONlAty!
TapaHTN TepaETc npB BckpbITn H3dJIIN NOCTOPOHHIMN liuamn.
Pocne rapaHTM
Iocne OKoHuaHnI cpoKa rapaHTn, peMOHT n3deNn Ipon3BODITcra 3a Onlaty, COOTBetCTByUOzHM MaCTepCKMn IINI PyHKtAMn CepBnCHOrO o6ClyKnBaHH.
GARANTIE-KARTE
Garantiebewijs · Carte de garantie