
WP165E WP165E.X - String trimmers WORX - Free user manual and instructions
Find the device manual for free WP165E WP165E.X WORX in PDF.
| Product type | Cordless grass trimmer |
| Brand | WORX |
| Model | WP165E / WP165E.X |
| Rated battery voltage | 20 V max (18 V nominal) |
| No-load speed | 7600 rpm |
| Cutting diameter | 30 cm |
| Cutting line diameter | 1.65 mm |
| Weight (without battery) | 2.0 kg |
| Compatible battery | 20 V Li-ion, model WA3551 (2.0 Ah) or WA3551.1 |
| Compatible charger | 20 V, model WA3760 or WA3880 (2.0 A) |
| Sound pressure level (LpA) | 74 dB(A) |
| Sound power level (LwA) | 90 dB(A) |
| Measured vibration (ah) | < 1.8 m/s² |
| Vibration uncertainty (K) | 1.5 m/s² |
| Line feeding system | Automatic (bump feed) and manual |
| Main functions | Edge cutting, trimming under bushes and on slopes |
| Safety | Lock switch, protective guard, flower guard |
| Auxiliary handle | Yes, adjustable |
| Telescopic shaft | Yes, adjustable |
| Adjustable head | Yes, tilt for edge cutting |
| Guide wheels | Yes, for edge trimming |
| Maintenance | Cleaning with dry cloth, checking screws, no special lubrication |
| Spare parts and repairability | Spool line, battery, charger; repair by authorized service |
| Standards and certifications | CE, EN 60335-1, EN 50636-2-91, EN 62233, EN ISO 3744, EN 55014 |
Frequently Asked Questions - WP165E WP165E.X WORX
User questions about WP165E WP165E.X WORX
0 question about this device. Answer the ones you know or ask your own.
Ask a new question about this device
Download the instructions for your String trimmers in PDF format for free! Find your manual WP165E WP165E.X - WORX and take your electronic device back in hand. On this page are published all the documents necessary for the use of your device. WP165E WP165E.X by WORX.
USER MANUAL WP165E WP165E.X WORX
PRODUCT SAFETYGENERAL SAFETY WARNINGS

WARNING: Read all safety warnings and all
instructions. Failure to follow the warnings and instructions may result in electric shock, fire and/or serious injury.
Save all warnings and instructions for future reference.
The appliance is only to be used with the power supply unit provided with the appliance.
IMPORTANT
READ CAREFULLY BEFORE USE
KEEP FOR FUTURE REFERENCE
SAFE OPERATING PRACTICES 1. TRAINING
a) Read the instructions carefully. Be familiar with the controls and the correct use of the machine.
b) Never allow children, persons with reduced physical, sensory or mental capabilities or lack of experience and knowledge or people unfamiliar with these instructions to use the machine, local
regulations may restrict the age of the operator.
c) Keep in mind that the operator or user is responsible for accidents or hazards occurring to other people or their property.
2. PREPARATION
a) Before use, always visually inspect the machine for damaged, missing or misplaced guards or shields.
b) Never operate the machine while people, especially children, or pets are nearby.
3. OPERATION
a) Wear eye protection, long trousers and stout shoes at all times while operating the machine.
b) Avoid using the machine in bad weather conditions especially when there is a risk of lightning.
c) Use the machine only in daylight or good artificial light.
d) Never operate the machine with damaged guards or shields or without guards or shields in place.
e) Switch on the motor only when the hands and feet are away from the cutting
means.
f) Always disconnect the machine from the power supply (e.g. remove the battery pack from the machine)
1) whenever the machine is left unattended;
2) before clearing a blockage;
3) before checking, cleaning or working on the machine;
4) after striking a foreign object;
5) whenever the machine starts vibrating abnormally.
g) Take care against injury to feet and hands from the cutting means.
h) Always ensure that the ventilation openings are kept clear of debris.
i) Never fit metal cutting elements.
j) Always be sure of your footing on slopes.
k) Walk, never run.
I) Not overreach and keep the balance at all times.
m) Not to touch moving hazardous parts before removing the battery pack from the machine and the moving hazardous parts have come to a complete stop.
4. MAINTENANCE AND STORAGE
a) Disconnect the machine from the power supply (e.g. remove the battery pack from the machine) before carrying out maintenance or cleaning work.
b) Use only the manufacturer's recommended replacement parts and accessories.
c) Inspect and maintain the machine regularly. Have the machine repaired only by an authorized repairer.
d) When not in use, store the machine out of the reach of children.
SAFETY WARNINGS FOR BATTERY PACK
a) Do not dismantle, open or shred cells or battery pack.
b) Do not short-circuit a battery pack. Do not store battery packs haphazardly in a box or drawer where they may short-circuit each other or be short-circuited by conductive materials.
When battery pack is not in use, keep it away from other metal objects, like
paper clips, coins, keys, nails, screws or other small metal objects, that can make a connection from one terminal to another. Shorting the battery terminals together may cause burns or a fire.
c) Do not expose battery pack to heat or fire. Avoid storage in direct sunlight.
d) Do not subject battery pack to mechanical shock.
e) In the event of battery leaking, do not allow the liquid to come into contact with the skin or eyes. If contact has been made, wash the affected area with copious amounts of water and seek medical advice.
f) Keep battery pack clean and dry.
g) Wipe the battery pack terminals with a clean dry cloth if they become dirty.
h) Battery pack needs to be charged before use. Always refer to this instruction and use the correct charging procedure.
i) Do not maintain battery
pack on charge when not in use.
j) After extended periods of storage, it may be necessary to charge and discharge the battery pack several times to obtain maximum performance.
k) Recharge only with the charger specified by Worx. Do not use any charger other than that specifically provided for use with the equipment.
I) Do not use any battery pack which is not designed for use with the equipment.
m)Keep battery pack out of the reach of children.
n) Retain the original product literature for future reference.
o) Remove the battery from the equipment when not in use.
p) Dispose of properly.
q) Do not mix cells of different manufacture, capacity, size or type within a device.
r) Keep the battery away from microwaves and high pressure.
SYMBOL
| ! | Read operator's manual |
| Batteries may enter water cycle if disposed improperly, which can be hazardous for ecosystem. Do not dispose of waste batteries as unsorted municipal waste | |
| Do not burn | |
| Wear eye and ear protection | |
| Keep bystanders away | |
| Do not expose to rain | |
| Wear protective gloves | |
| Waste electrical products must not be disposed of with household waste. Please recycle where facilities exist. Check with your local authorities or retailer for recycling advice. | |
| Edging | |
| Trimming |
| Make sure the battery is removed prior to changing accessories. | |
| Lock | |
| Unlock | |
| Li-Ion battery This product has been marked with a symbol relating to 'separate collection' for all battery packs and battery pack. It will then be recycled or dismantled in order to reduce the impact on the environment. Battery packs can be hazardous for the environment and for human health since they contain hazardous substances |
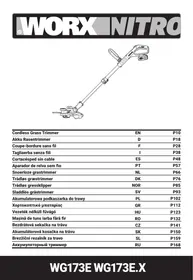
COMPONENT LIST
| 1. | LOCK OFF BUTTON |
| 2. | REAR HANDLE |
| 3. | ON/OFF SWITCH |
| 4. | BATTERY PACK * |
| 5. | HANDLE unlock BUTTON |
| 6. | UPPER SHAFT |
| 7. | LOCKING COLLAR |
| 8. | LOWER SHAFT |
| 9. | SAFETY GUARD |
| 10. | FLOWER GUARD |
| 11. | AUXILIARY HANDLE |
| 12. | COMMAND FEED BUTTON |
| 13. | EDGER WHEEL |
| 14. | LINE FEED BUTTON |
| 15. | LINE CUTTER |
- Not all the accessories illustrated or described are included in standard delivery.
TECHNICAL DATA
Type WP165E WP165E.X (1-designation of machinery, representative of Battery- powered Lawn Trimmer)
| WP165E WP165E.X*** | |
| Voltage | 20V--- MAX** |
| No load speed | 7600/min |
| Cutting diameter | 30cm |
| Line diameter | 1.65mm |
| Machine weight | 2.0kg |
Voltage measured without workload. Initial battery voltage reaches maximum of 20 volts. Nominal voltage is 18 volts.
* X=1-999, A-Z, M1-M9 there are only used for different customers, there are no safe relevant changes between these models
| Category | Type | Capacity |
| 20V Battery | WA3551 | 2.0Ah |
| WA3551.1 | 2.0Ah | |
| 20V Charger | WA3760 | 2.0A |
| WA3880 | 2.0A |
We recommend that you purchase your accessories from the same store that sold you the tool. Refer to the accessory packaging for further details. Store personnel can assist you and offer advice.
NOISE DATA
| A weighted sound pressure | LpA = 74dB(A) |
| KpA & KWA | 3.0dB(A) |
| A weighted sound power | LwA = 90dB(A) |
| Wear ear protection |
VIBRATION INFORMATION
Vibration emission value a_h < 1.8m / s^2
Uncertainty
K = 1.5m / s^2
The declared vibration total value may be used for comparing one tool with another, and may also be used in a preliminary assessment of exposure.
WARNING! The vibration emission value during actual use of the power tool can differ from the declared value depending on the ways in which the tool is used dependant on the following examples and other variations on how the tool is used: How the tool is used and the materials being cut or drilled.
The tool being in good condition and well maintained. The use the correct accessory for the tool and ensuring it is sharp and in good condition.
The tightness of the grip on the handles and if any anti vibration accessories are used.
And the tool is being used as intended by its design and these instructions.
This tool may cause hand-arm vibration syndrome if its use is not adequately managed.
WARNING! To be accurate, an estimation of exposure level in the actual conditions of use should also take account of all parts of the operating cycle such as the times when the tool is switched off and when it is running idle but not actually doing the job. This may significantly reduce the exposure level over the total working period.
Helping to minimize your vibration exposure risk. ALWAYS use sharp chisels, drills and blades.
Maintain this tool in accordance with these instructions and keep well lubricated (where appropriate).
If the tool is to be used regularly then invest in anti vibration accessories.
Plan your work schedule to spread any high vibration tool use across a number of days.
ASSEMBLY AND OPERATION

NOTE: Before using the tool, read the instruction book carefully.
Intended Use
The machine is intended for the cutting of grass and weeds under bushes, as well as on slopes and edges that can not be reached with the lawn mower.
WARNING! The charger and battery pack are specially designed to work together so do not attempt to use any other devices. Never insert or allow metallic objects into your charger or battery pack connections because of an electrical failure and hazard will occur.
WARNING! Always wear the eye protection. Never lean over the trimmer head. Rocks or debris can ricochet or be thrown into eyes and face and cause blindness or other serious injury. When operating unit, check for the following: Wear eye protection and heavy clothing. Hold front handle with one hand and auxiliary handle with the other hand. Keep unit below waist level. Work only from your right to your left to ensure debris is thrown away from you. Without bending over, keep line near and parallel to the ground (perpendicular when edging) and not crowded into material being cut.
WARNING! Make sure that line is fed out before operation. Make sure motor is up to full speed before trimming or edging.
WARNING! Only use 1.65mm diameter cutting line. Other sizes of line will not feed properly and will result in improper cutting head function or can cause serious injury. Do not use other material such as wire, string, rope, etc. Wire can break off during cutting and become a dangerous projectile that can cause serious injury.
| Action | Figure |
| Assembly | |
| Assembling the Safety Guard | See Fig. A1, A2 |
| Mounting the Edger Wheel警告:WARNING: Make Sure theON/OFF Switch is LockedOff to Prevent AccidentalStarting. | See Fig. B |
| Installing and Removing the BatteryPack | See Fig. C |
| Charging the battery packMore details can be found incharger's manual | See Fig. D1, D2 |
| Checking the battery conditionNote: Fig. D3 only applies for thebattery pack with battery indicatorlight. | See Fig. D3 |
Operation
| Safety ON/OFF Switch WARNING! The cutting head continues to rotate after the trimmer has been switched off; wait until it has completely stopped then lay down the tool. | See Fig. E |
| Trimming | |
| - Adjusting the Shaft WARNING! Make Sure the ON/OFF Switch is Locked Off to Prevent Accidental Starting. | See Fig. F |
| - Adjusting the Trimmer Head | See Fig. G1, G2 |
| - Adjusting the Auxiliary handle | See Fig. H |
| - Trimming | See Fig. I1 |
| - Using the Flower Guard | See Fig. I2 |
| Edging | |
| - Changing the tool into the Edging mode | See Fig. J1, J2 |
| - Edging | See Fig. K |
| Command feeding the line - Note: Press as needed. | See Fig. L |
| Manually feeding the line | See Fig. M |
| Replacing the trimmer Spool | See Fig. N1, N2, N3 |
| Manually winding the line | See Fig. 01, 02, 03, 04 |
WORKING HINTS
1.AUTOMATIC LINE FEED SYSTEM
When initially switching on the trimmer, a small length of line is fed out.
A 'clattering' noise will be heard when the lines hit the Line Cutter. DO NOT BE ALARMED. This is quite normal. After about 5 seconds the line will be cut to the correct length and the noise will reduce as the motor gains full speed.
If the noise of the line being cut can't be heard, more line will need to be fed out.
To feed more line, it is first necessary to allow the trimmer to stop completely; it must come to a complete rest, then restart, allowing the motor to reach full speed.
Repeat above until you hear the line hitting against the Line Cutter.
CMMANDTM 2. FEED
Your grass trimmer is equipped with a Command Feed System. Just press the button while the machine is running, new line will feed out and then stop when you hear the 'clattering' noise of the new line being cut. The motor stops briefly when the Command Feed button is pressed, and restarts when released. This
process enables the machine to automatically feed out new line.
3. MANUALLY FEEDING THE LINE (See Fig. M)
Press and release manual line feed button (14), whilst gently pull out the lines until the lines reaches the line cutter.
If the line extends past the line cutter, too much line has been fed out.
If too much line is fed out, remove the cutting head cover and rotate the spool anti-clockwise until the line is at the desired length.
MAINTENANCE
After use, disconnect the battery from the tool and check for damage.
Your power tool requires no additional lubrication or maintenance. There are no user serviceable parts in your power tool. Never use water or chemical cleaners to clean your power tool. Wipe clean with a dry cloth.
Always store your power tool in a dry room temperature
location. Keep the motor ventilation slots clean. Keep all working controls free of dust.
ENVIRONMENTAL PROTECTION

Waste electrical products must not be disposed of with household waste. Please recycle where facilities exist. Check with your local authorities or order for recycling advice.
TROUBLESHOOTING
The following table gives problems and actions that you can perform if your machine does not operate correctly.

- WARNING: Switch the machine off and remove battery prior to any troubleshooting.
| Problems | Possible Causes | Corrective Action |
| Trimmer fails to operate. | Battery discharged. | Recharge battery; also see the content in charger manual. |
| Battery too hot/cold. | Allow to cool/warm. | |
| Motor is broken. | Contact Service Agent. | |
| Internal wiring of machine damaged. | Contact Service Agent. | |
| Trimmer runs intermittently. | Motor is broken. | Contact Service Agent. |
| Battery not fully charged. | Recharge battery. | |
| On/Off switch defective. | Contact Service Agent. | |
| Excessive vibrations/noise. | Machine defective. | Contact Service Agent. |
| Line spool is not wound well. | Rewind the line. See "MANUALLY WINDING THE LINE" (Fig. 01, 02, 03, 04). | |
| Cutting time per battery charge too short. | Battery has not been used for long period or only charged for short term. | Recharge battery; also see the content in charger manual. |
| Grass too high. | Cut in stages. | |
| Battery defective. | Replace the battery. | |
| Machine does not cut. | Line broken. | Replace the line. |
| Battery not fully charged. | Recharge battery; also see the content in charger manual. | |
| Motor is broken (speed is too low). | Contact Service Agent. | |
| Grass entangled around cutting head. | Remove grass. | |
| Continuous lighting of the battery charge indicator.No charging procedure possible. | Battery not (properly) inserted. | Properly insert battery into battery charger. |
| Battery contacts contaminated. | Clean the battery contacts or replace the battery. | |
| Battery defective. | Replace the battery. | |
| Battery charge indicator does not light up. | Plug of battery charger not plugged in (properly). Socket outlet, mains cable or battery charger defective. | Insert mains plug (fully) into the socket outlet. Check the mains voltage; have the battery charger checked by an authorized after-sales service agent. |
| Auto Feed/Command feed does not work | Cutting line is not wound well. The line is tangled. Line is used up. | Manually feed the line, if still cannot feed out, remove the Spool out and rewind the line. Replace with a new spool of line. |
DECLARATION OF CONFORMITY
We, Positec Germany GmbH Postfach 32 02 16, 50796 Cologne, Germany
On behalf of Positec declare that the product Description Battery-powered Grass Trimmer Type WP165E WP165E.X (1-designation of machinery, representative of Battery- powered Lawn Trimmer) Function Cutting grass and similar soft vegetation and for trimming grass edges
Complies with the following Directives: 2006/42/EC, 2014/30/EU, 2011/65/ EU&(EU)2015/863, 2000/14/EC amended by 2005/88/EC
2000/14/EC amended by 2005/88/EC: Conformity Assessment Procedure as per Annex VI - Measured Sound Power Level 86dB(A) - Declared Guaranteed Sound Power Level 90dB(A)
The notified body involved
Name: ISET S.r.l. Unipersonale
Address: Via Donatori di sangue, 9-46024 Moglia (MN)
Standards conform to EN 60335-1 EN 50636-2-91 EN 62233 EN ISO 3744 EN 55014-1 EN 55014-2
The person authorized to compile the technical file, Name: Marcel Filz Address: Postec Germany GmbH Postfach 32 02 16, 50796 Cologne, Germany


2021/11/12
Allen Ding
Deputy Chief Engineer, Testing & Certification
Positec Technology (China) Co., Ltd
18, Dongwang Road, Suzhou Industrial Park, Jiangsu 215123, P. R. China
18, Dongwang Road, Suzhou Industrial
Park, Jiangsu 215123, P. R. China
SECURITE DU PRODUIT AVERTISSEMENTS DE SECURITE GENÉRAUX
INFORMATIONS RELATIVES AUX VIBRATIONS
Déclaration DE CONFORMITÉ
Nos,
Positec Germany GmbH
Postfach 32 02 16, 50796 Cologne, Germany
18, Dongwang Road, Suzhou Industrial
Park, Jiangsu 215123, P. R. China
SICUREZZA DEL PRODOTTO AVVISI GENERALI PER LA SICUREZZA
18, Dongwang Road, Suzhou Industrial
Park, Jiangsu 215123, P. R. China
18, Dongwang Road, Suzhou Industrial
Park, Jiangsu 215123, P. R. China
SEGURANÇA DO PRODUTOAVISOS GERAIS DESEGURANÇA
TipwWP165EWP165EX(1-designacao de
18, Dongwang Road, Suzhou Industrial
Park, Jiangsu 215123, P. R. China
PRODUCTVEILIGHEID ALGEMENE VEILIGHEIDSWAARSCHUWINGEN
WAARSCHUWING! Lees alle instructies
WAARSCHUWING: Voor de
TIPS VOOR HET WERKEN MET UW APPARAAT
1.AUTOMATISCHE DRAADTOEVOER
Herhaal de bovenstaande handeling totdat u de draden de draadsnijder hootr raken.completely; it must come to a complete rest, then restart, allowing the motor to reach full speed.
Repeat above until you hear the line hitting against the Line Cutter.
COMMANDTM 2. FEED
18, Dongwang Road, Suzhou Industrial
Park, Jiangsu 215123, P. R. China
PRODUKTSIKKERHED GENERELLE ADVARSLER I FORBINDELS

2021/11/12
Allen Ding
Deputy Chief Engineer, Testing & Certification
Positec Technology (China) Co., Ltd
18, Dongwang Road, Suzhou Industrial Park, Jiangsu 215123, P. R. China
PRODUKTSIKKERHET GENERELLE SIKKERHETSADVARSLER
3. Å FYLLE PÅ TRÄD MANUEL T (SE FIG. M)
Trykk og slipp trådmatingsknappen (14), mens du forskigt trekker ut et av trädene til den när trådskæreren.
EU&(EU)2015/863, 2000/14/EC amended by 2005/88/EC
2000/14/EC revidert ved 2005/88/EC:
-Tilpassningsbedommelse Utfort ifolge Anneks VI.
- Malt Lydkraftniv 86dB(A)
-Erklert Garantert Lydkraftniv 90 dB(A)
Deputy Chief Engineer, Testing & Certification
Positec Technology (China) Co., Ltd
18, Dongwang Road, Suzhou Industrial
Park, Jiangsu 215123, P. R. China
PRODUKTSÄKERHET
GENERELLA
SÄKERHETSVARNINGAR

WARNING! Lås alla
18, Dongwang Road, Suzhou Industrial
Park, Jiangsu 215123, P. R. China
BEZPIECZENSTWO
PRODUKTU
OGOLNE OSTRZEZENIA
DOTYCZACE
BEZPIECZENSTWA
18, Dongwang Road, Suzhou Industrial
Park, Jiangsu 215123, P. R. China
AΣΦΑΛΕΙA ΠΡΟΙΝΤΟΣ ΠΡΕΙΔΟΝΟΙΗΣΕΙΣ AΣΦΑΛΕΙAΣ ΓENIKOY
18, Dongwang Road, Suzhou Industrial
Park, Jiangsu 215123, P. R. China
BIZTONSÁGOS TERMÉKHASNZÁLAT ALTLÁNOS FIGYELMEZTETÉSEK
18, Dongwang Road, Suzhou Industrial
Park, Jiangsu 215123, P. R. China
SECURITATEA PRODUSULUI AVERTISMENTE GENERALE DE SIGURANTA
2021/11/12
Allen Ding
Adjunct Inginer Şef, Testare si certificare
Positec Technology (China) Co., Ltd.
18, Dongwang Road, Suzhou Industrial Park, Jiangsu 215123, P. R. China
BEZPECNOST VYROBKU VŠEOBECNÉ BEZPECNOSTNI POKYNY
18, Dongwang Road, Suzhou Industrial
Park, Jiangsu 215123, P. R. China
BEZPECNOST VYROBKA VŠEOBECNÉ BEZPECNOSTNÉ POKYNY
POKNY K BEZPECNÉMU POUŽITIU
1. ZÁŠKOLENI
INFORMÁCIE TYKAJÜCE SA HLUČNOSTI
18, Dongwang Road, Suzhou Industrial
Park, Jiangsu 215123, P. R. China
VARNOSTNA NAVODILA SPLOŠNA VARNOSTNA NAVODILA
VARNA UPORABA 1.USPOSABLJANJE
18, Dongwang Road, Suzhou Industrial
Park, Jiangsu 215123, P. R. China
WORX
it's your nature
www.worx.com
Copyright © 2021, Positec. All Rights Reserved.
AR01623800
- PRODUCT SAFETYGENERAL SAFETY WARNINGS
- WARNING: Read all safety warnings and all
- Save all warnings and instructions for future reference.
- IMPORTANT
- READ CAREFULLY BEFORE USE
- KEEP FOR FUTURE REFERENCE
- SAFE OPERATING PRACTICES 1. TRAINING
- PREPARATION
- OPERATION
- MAINTENANCE AND STORAGE
- SAFETY WARNINGS FOR BATTERY PACK
- TECHNICAL DATA
- NOISE DATA
- VIBRATION INFORMATION
- This tool may cause hand-arm vibration syndrome if its use is not adequately managed.
- ASSEMBLY AND OPERATION
- Intended Use
- WARNING! Make sure that line is fed out before operation. Make sure motor is up to full speed before trimming or edging.
- WORKING HINTS
- 1.AUTOMATIC LINE FEED SYSTEM
- CMMANDTM 2. FEED
- MANUALLY FEEDING THE LINE (See Fig. M)
- MAINTENANCE
- ENVIRONMENTAL PROTECTION
- TROUBLESHOOTING
- DECLARATION OF CONFORMITY
- SECURITE DU PRODUIT AVERTISSEMENTS DE SECURITE GENÉRAUX
- INFORMATIONS RELATIVES AUX VIBRATIONS
- Déclaration DE CONFORMITÉ
- SICUREZZA DEL PRODOTTO AVVISI GENERALI PER LA SICUREZZA
- SEGURANÇA DO PRODUTOAVISOS GERAIS DESEGURANÇA
- PRODUCTVEILIGHEID ALGEMENE VEILIGHEIDSWAARSCHUWINGEN
- WAARSCHUWING! Lees alle instructies
- TIPS VOOR HET WERKEN MET UW APPARAAT
- 1.AUTOMATISCHE DRAADTOEVOER
- COMMANDTM 2. FEED
- PRODUKTSIKKERHED GENERELLE ADVARSLER I FORBINDELS
- PRODUKTSIKKERHET GENERELLE SIKKERHETSADVARSLER
- Å FYLLE PÅ TRÄD MANUEL T (SE FIG. M)
- PRODUKTSÄKERHET
- GENERELLA
- SÄKERHETSVARNINGAR
- WARNING! Lås alla
- BEZPIECZENSTWO
- PRODUKTU
- OGOLNE OSTRZEZENIA
- DOTYCZACE
- BEZPIECZENSTWA
- AΣΦΑΛΕΙA ΠΡΟΙΝΤΟΣ ΠΡΕΙΔΟΝΟΙΗΣΕΙΣ AΣΦΑΛΕΙAΣ ΓENIKOY
- BIZTONSÁGOS TERMÉKHASNZÁLAT ALTLÁNOS FIGYELMEZTETÉSEK
- SECURITATEA PRODUSULUI AVERTISMENTE GENERALE DE SIGURANTA
- BEZPECNOST VYROBKU VŠEOBECNÉ BEZPECNOSTNI POKYNY
- BEZPECNOST VYROBKA VŠEOBECNÉ BEZPECNOSTNÉ POKYNY
- POKNY K BEZPECNÉMU POUŽITIU
- ZÁŠKOLENI
- INFORMÁCIE TYKAJÜCE SA HLUČNOSTI
- VARNOSTNA NAVODILA SPLOŠNA VARNOSTNA NAVODILA
- VARNA UPORABA 1.USPOSABLJANJE
Brand : WORX
Model : WP165E WP165E.X
Category : String trimmers