Live Cam Vista IM - Cam CREATIVE - Free user manual and instructions
Find the device manual for free Live Cam Vista IM CREATIVE in PDF.
User questions about Live Cam Vista IM CREATIVE
0 question about this device. Answer the ones you know or ask your own.
Ask a new question about this device
Download the instructions for your Cam in PDF format for free! Find your manual Live Cam Vista IM - CREATIVE and take your electronic device back in hand. On this page are published all the documents necessary for the use of your device. Live Cam Vista IM by CREATIVE.
USER MANUAL Live Cam Vista IM CREATIVE
2 Installing Drivers and Applications
Getting Started
Step 1: Installing Drivers and Applications
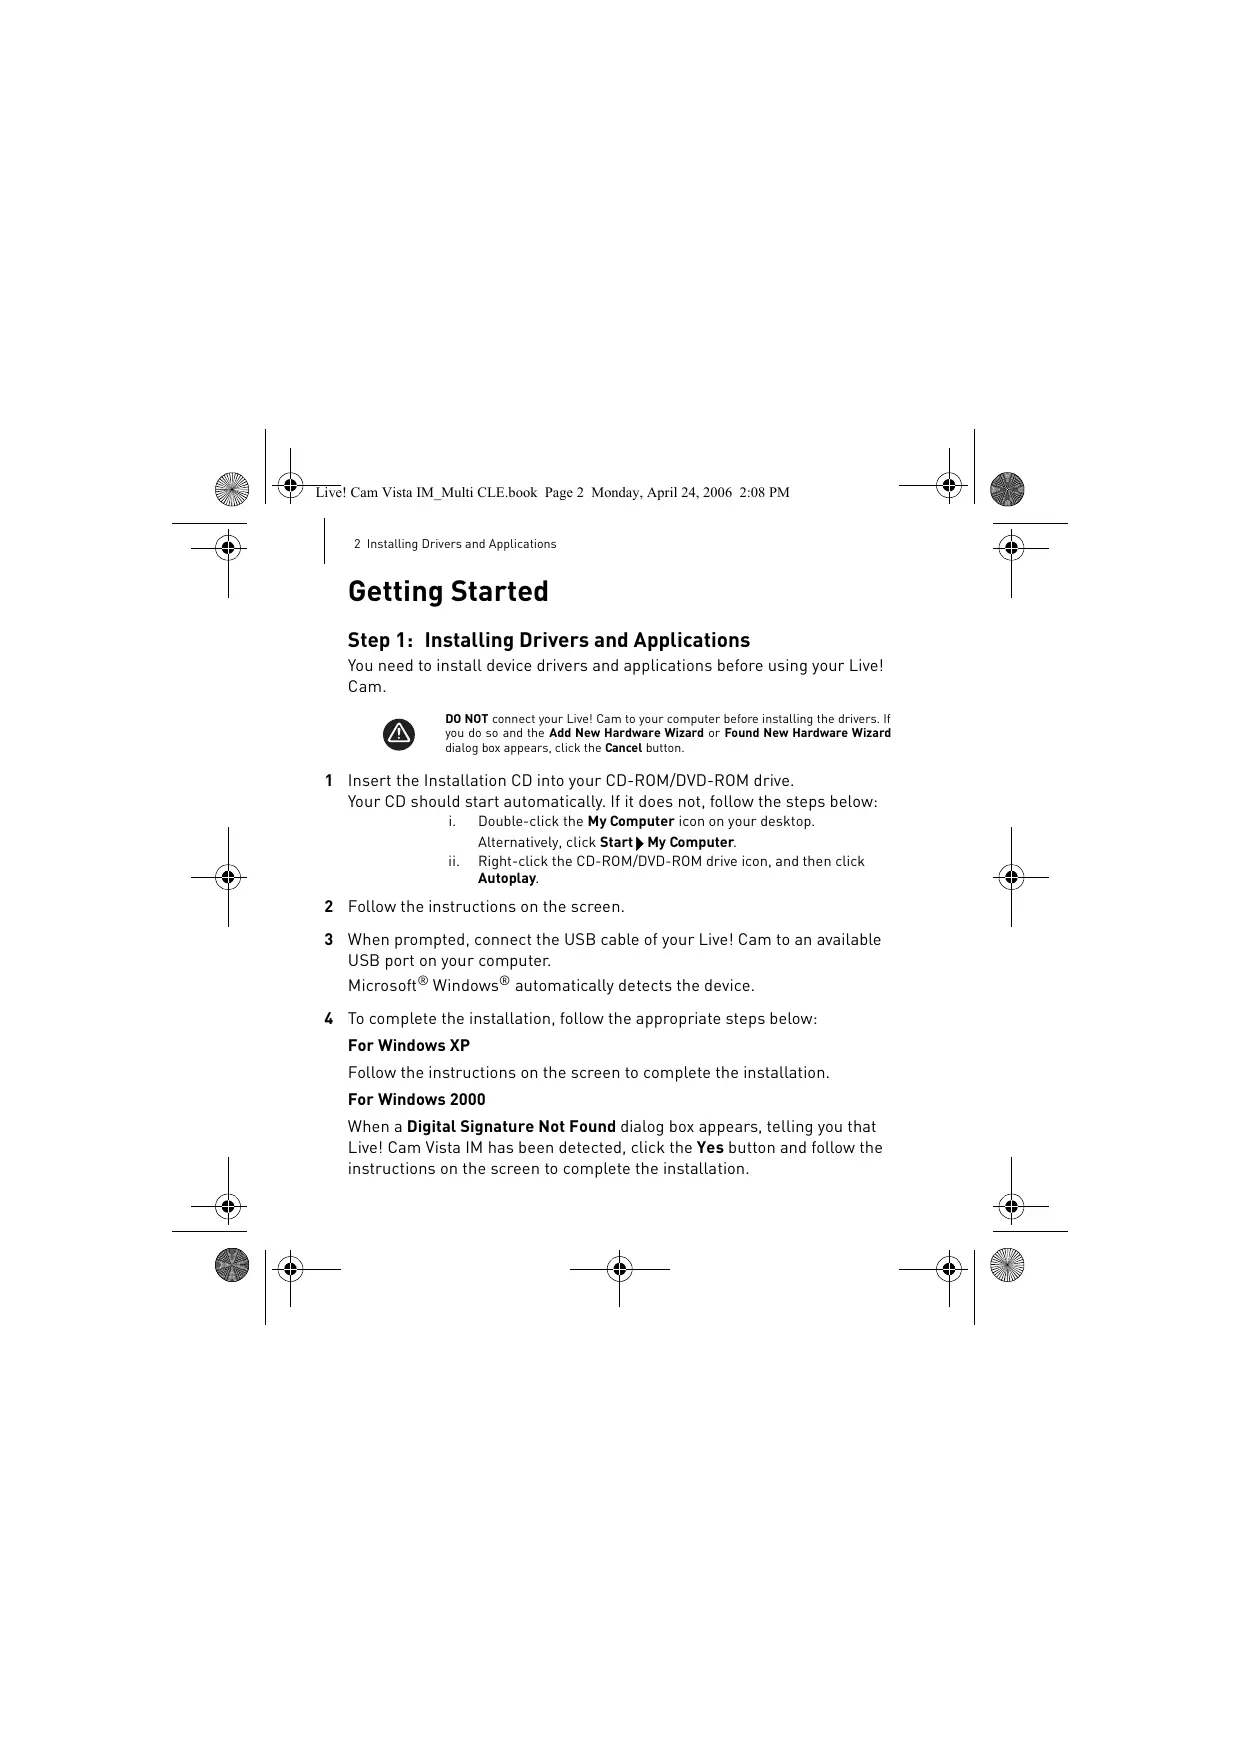
You need to install device drivers and applications before using your Live! Cam.

DO NOT connect your Live! Cam to your computer before installing the drivers. If you do so and the Add New Hardware Wizard or Found New Hardware Wizard dialog box appears, click the Cancel button.
1 Insert the Installation CD into your CD-ROM/DVD-ROM drive.
Your CD should start automatically. If it does not, follow the steps below:
i. Double-click the My Computer icon on your desktop.
Alternatively, click Start My Computer.
ii. Right-click the CD-ROM/DVD-ROM drive icon, and then click
Autplay.
2 Follow the instructions on the screen.
3 When prompted, connect the USB cable of your Live! Cam to an available USB port on your computer.
Microsoft® Windows® automatically detects the device.
4 To complete the installation, follow the appropriate steps below:
For Windows XP
Follow the instructions on the screen to complete the installation.
For Windows 2000
When a Digital Signature Not Found dialog box appears, telling you that Live! Cam Vista IM has been detected, click the Yes button and follow the instructions on the screen to complete the installation.
Installing Drivers and Applications 3
For Windows Me and Windows 98 SE
If you are prompted to insert the Windows 98 SE or Windows Me CD, replace the Installation CD with the appropriate CD. In the Insert Disk dialog box, click the OK button and follow the instructions on the screen to complete the installation.
5 You may be asked, after the drivers have been successfully installed, if you want to restart your computer. Select No until all the applications are installed.
6 Restart your computer after all the applications have been installed.

For users of Windows Me and Window 98 SE only
Some computers may be supplied without the Windows CD, but have the necessary files stored in c:\windows\options\cabs [replace c with the drive letter of the hard drive on which Windows has been installed].

4 Connecting Your Live! Cam
Step 2: Connecting Your Live! Cam

DO NOT connect your Live! Cam to your computer before installing the drivers.
1 Place your Live! Cam on top of your computer monitor or other flat surface. For LCD flat panel monitors or notebook computers, use the integrated hinged lever to balance your Live! Cam.
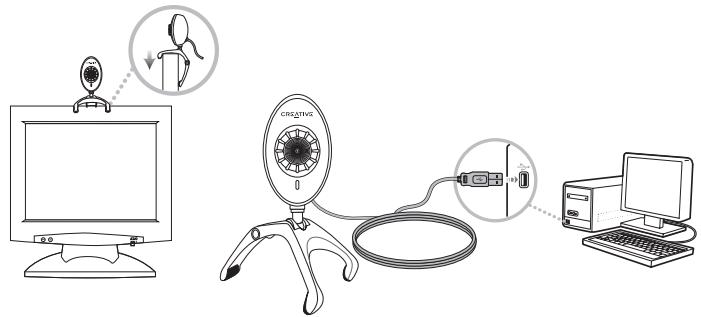
2 Connect the supplied lapel microphone to your computer or audio card's microphone connector. Refer to your computer or audio card's documentation for more information.

Verifying the Installation 5
Step 3: Verifying the Installation
Right-click the My Computer icon on your desktop or in the Windows Start menu.
In Windows XP and Windows 2000
1 In the System Properties dialog box, click the Hardware tab.
2 Click the Device Manager button.
3 In the Device Manager dialog box, click the Plus (+) sign next to the Imaging Device icon.
Your Live! Cam's name appears.
In Windows Me and Windows 98 SE
1 In the System Properties dialog box, click the Device Manager tab.
2 In the Device Manager dialog box, click the Plus (+) sign next to the Imaging Device icon.
Your Live! Cam's name appears.
6 More Information
Using Your Creative Live! Cam
Taking a Photo/Video
1 Click Start Programs or All Programs Creative Creative WebCam Creative WebCam Center.
2 In the Creative WebCam Center window, click the Capture tab.
3 Click the Photo/Video resolution box and select the resolution that you want.
4 Click the Snap photo button to capture an image or the Record button to start and stop a video recording.
More Information
User's Guide
Read the User's Guide found on your Installation CD to learn more about your Live! Cam's many features. Go to d:\manual\language>manual.chm [replace d:| with the drive letter of your CD-ROM/DVD-ROM drive, and
Creative Knowledge Base
Resolve and troubleshoot technical queries at Creative's 24-hour self-help Knowledge Base. Go to www.creative.com, select your region and then select Support.
More Information 7
Product Registration
Registering your product ensures you receive the most appropriate service and product support available. You can register your product during installation or at www.creative.com/register.
Please note that your warranty rights are not dependent on registration.
Customer Support Services and Warranty
You can find Customer Support Services, Warranty and other information in the Installation CD.
| Customer Support Services | d:\support\region\language\support.chm |
| Warranty | d:\warranty\region\language\warranty.chmPlease keep your Proof of Purchase for the duration of the warranty period. |
| User's Guide | d:\manual\language\manual.chm |
(replace d:\ with the drive letter of your CD-ROM/DVD-ROM drive,
Waste Electrical and Electronic Equipment (WEEE) Symbol
The use of the WEEE Symbol indicates that this product may not be treated as household waste. By ensuring this product is disposed of correctly, you will help protect the environment. For more detailed information about the recycling of this product, please contact your local authority, your household waste disposal service provider or the shop where you purchased the product.
Copyright © 2006 Creative Technology Ltd. All rights reserved. The Creative logo is a registered trademark of Creative Technology Ltd. in the United States and/or other countries. Microsoft, Windows and the Windows logo are registered trademarks of Microsoft Corporation.
Felicitations!
WEEE- (Waste Electrical and Electronic Equipment)-Symbol
Creative Knowledge Base
www.creative.com/register.
Creatives Knowledge Base
Creative Knowledge Base
WEEE-symbolet (Waste Electrical and Electronic Equipment)
Bruken av WEEE-sybolet indikerer at dette produit-itke kan behandles som hushholdningsavfall. Du vil bidra til 日 beskytte miljoget ved a sorge for at dette produit blur avhendet a en forsvarlig maje. Ta Kontakt med kommunale myndigheter, renovasjonsselskapet der du bor erller forretningen hvor du kjopte produit fer a f mer informasjon om resirkulering av dette produitet.
Tillykke!
2. LED-indicator for strøm
Lyser, nár dit Live! Cam er sluttet til computerens USB-port og streamingvideo.
3. Hängselarm
Fastgor dit Live! Cam pa en LCD-skaerm (Liquid Crystal Display).
4. USB-kabel
Slutter til computerens USB-port.
Installation af drivere og programmer 65
Sādankommen duigang
Trin 1: Installation of drivere og programmer
Creatives Knowledge Base
www.creative.com/register.
Creative Knowledge Base
Ba3a 3HaHn Creative nocTynHa KpyrIocytoHn n ppeHa3NaeHa dJa
camoCTOaTeNbHO peSeHnA TexHnueckx BOpocOB uycpaHeHn
HeNoLaDOK. JIra o6paUeHnK 6a3e 3HaHn nepeuDInTe K
www.creative.com, Bbl6epiTe HxKnBn peHn n OTKpoTcCTpaHnCuy
Support (TexHnuecka noDnepkKa).

98 DOnJIHHTeJIbHaI INHΦOpMaζη
Perncptaun yctpoictba
Pernctpauny yctpoictba n03boNT Bam nOlyatb Heo6xodmoe 06cnykmbahne nTexHnueckyo nOndepkky. YcptoiCTBO MOXHO 3apeTnCtpnpobat npu ycTaHOBKe, a TaKke Ha Be6-CTpaHnue www.creative.com/register.
O6paTnte BHMmaHne, YTO DeIcTBnE rapaHTnHbIX o6ra3aTeJIbCTB He 3aBNCNT OT HaJIINrN IIN OTCyTCTBnR peRnCTpaunn N3dennr.
Cnyx6a TexHnuecko NopdepKKN KIneHTOB n rapaHTNHBie 063aTeNbCTBa
CbeHnno 06cnyKbAHNIO KJIeHTOB, rapaHTnHbIM O6Ba3aTeNbCTBAM nIpyra IHOpMauncoepKaTcHa YCTaHOBOyHOM KOMNaKT-DnCKe.
| Служба Тechимецкий подөрχки Клиентов | d:\support\perhoN>\{\яык\support.chm |
| Гаранта | d:\warranty\perhoN>\{\яык\warranty.chm Сохсанту дokument, подөрχддүйдүйдүйдүйдүйдүйдүйдүйдүйдүйдүйдүйдүйдүйдүйдүйдүйдүйдүйдүйдүйдүйдүйдүйдүйдүйдүйдүйдүйдүйдүйдүйдүйдүй徳п.В т Equinь BCero Гарантуногор nepiNoja. |
(Замен总体规划 CD-ROM/DVD-ROM Валero Компьов,在 CBOIM релнон, a <язбК> -язбКOM, на КOTOPOM напсан ДOKум ent)

DOnonHnTeNbHa HnHOpMaun 99
Cpok 3KcnpIyatauOnHHo DOnlroBeuHocTn
B COOTBETCTBUN C 3aKoHOdaTeNbCTBOM PoCCnCKo Φeepaun KOMNaHn Creative yctahabnBaet dny daHHoro Tobapa cpoK cnJxkb2 roJa.
Yka3aHHbI cpoK - 3TO nepIOD BpeMeHn, B TeueHne KOTOPORO KOMNaHn
Creative rapaHTnpyeT Bo3MOXHOCTb mCnOJb3OBAHnI npOdyKuIN B
COOTBETCTBUN C ee Ha3NaueHnEM. Kpome TORO, BO BpeMg 3TORO cpoKa KOMPNAHnna Creative rapaHTnpyeT:
(i) 6e3oNaChOcTb TOBaPa, (ii) BO3MOxHOCtB BbIOnHeHn erO peMoHTa nNoIyHeHn TEXHnuecko NODepKKn, (iii) NOCTaBky 3aIacbix qacteY.
OndaKo yctaHOBHeHne cPoka cnyXbI He 03HaayeT aBtOMaTHueCKOrO 6ecnPaTHoro npedocTaBHeHnaTexHnueckoN noDnepxKu N o6cnyKBaHn.
3TN Bnbl yCnyr npedocTabJYOTc 6ecnnaTHo TOnbKO B TeueHne rapaHTnHOrO nepuOda B COOTBeTCTBm C rapaHTnHbIMN 063aTeJIbCTBaMn.
100
Συγχαρητήρια!
Creative Knowledge Base
Avañntne TnV atavtnon yia oTIOIAHNTNE Txvika epwnmuata exete otyn 24wn Knowledge Base (baon yvwoew) nC Creative. Metaeite OTnv toioeia www.creative.com, EIIAETE TnV TEPIOXn OaC kAI OTN ouvexia EIIAESE Support.
Anwn tou npoiovtoc
Av to TPOIOV OAC 8a EIOTE BéBAIOI OTI 8a LAMBAVETIC TIAEV KATAALNAE CIIaEOAIEC PEINPOOPOIEC UTOOTNIPIENG KAI OEPBC.H DnLWON MTOPEI VA YIVEI KATA TIV EYKAATAOAN N apyOTepa, ATO TNI DIEUUVON www.creative.com/register.
I\nI\nI\nI\nI\nI\nI\nI\nI\nI\nI\nI\nI\nI\nI\nI\nI\nI\nI\nI\nI\nI\nI\nI\nI\nI\nI\nI\nI\nI\nI\nI\nI\nI\nI\nI\nI\nI\nI\nI\nI\nI\nI\nI\nI\nI\nI\nI\nI\nI\nI Kai aE alles xwEs. Ov ovoaiec Microsoft, Windows kai to loyoturo Windows eivai anpata katoateevta ncs Microsoft Corporation.
Gratulálunk!
Creative Knowledge Base
Creative Knowledge Base
Dél techniniu problemu ar paklausimu galite kreiptis | visa para veikianchia „Creative" pagalbos duomenu bazé. Nueikite adresu www.creative.com, pasirinkite regiona ir paspauskite Support.
Produktor registraciona
Creative Knowledge Base
Pri riešeni technickych otázok a problémov použite databázu
KnowledgeBase spolocnosti Creative, ktorá je k disposzćici 24 hodín denen.
Chod'te na adresu www.creative.com, zvol'te krajinu a vyberte položku
Support (Podpora).