
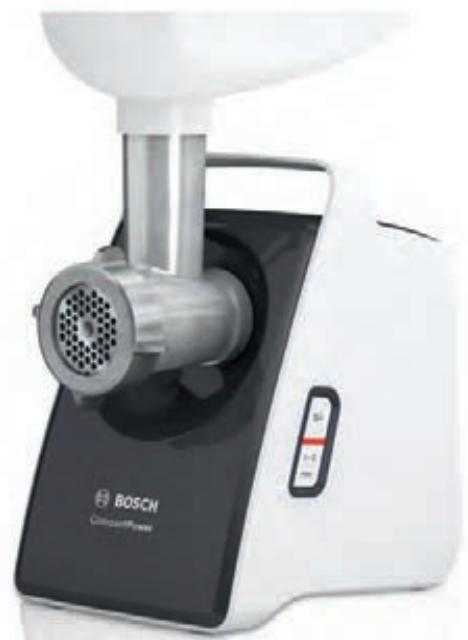
COMPACTPOWER MFW3640A - Meat Grinder BOSCH - Free user manual and instructions
Find the device manual for free COMPACTPOWER MFW3640A BOSCH in PDF.



| Product type | Meat grinder |
| Brand | Bosch |
| Model | COMPACTPOWER MFW3640A |
| Power supply | 220-240 V, 50-60 Hz |
| Speeds | 2 speeds (slow/fast) + reverse function |
| Maximum operating time | 10 minutes continuous |
| Housing material | Plastic |
| Blade material | Stainless steel |
| Included accessories | Grinder, sausage attachment, kibbeh mold, grater, citrus press |
| Perforated discs | Fine (2.7 mm), medium (4 mm), coarse (8 mm) |
| Safety system | Accessory lock, automatic overload shutdown (fuse drive blade) |
| Cleaning | Removable parts washable with water; base unit not submersible |
| Warranty | According to distributor's terms |
| Use | Domestic only |
Frequently Asked Questions - COMPACTPOWER MFW3640A BOSCH
User questions about COMPACTPOWER MFW3640A BOSCH
0 question about this device. Answer the ones you know or ask your own.
Ask a new question about this device
Download the instructions for your Meat Grinder in PDF format for free! Find your manual COMPACTPOWER MFW3640A - BOSCH and take your electronic device back in hand. On this page are published all the documents necessary for the use of your device. COMPACTPOWER MFW3640A by BOSCH.
USER MANUAL COMPACTPOWER MFW3640A BOSCH
Register your new Bosch now: www.bosch-home.com/welcome

MFW35...
MFW36...
MFW38...

BOSCH
Read and follow the operating instructions carefully and keep for later reference! Enclose these instructions when you give this appliance to someone else.
If the instructions for correct use of the appliance are not observed, the manufacturer's liability for any resulting damage will be excluded.
This appliance is intended for domestic use only. Use the appliance for processing normal quantities of food for domestic use.
The appliance and accessories (depending on the model) are suitable for the following purposes:
Meat mincer: for cutting and mixing raw and cooked meat, bacon, poultry and fish.
Sausage filler: for making sausages and meat rolls.
Kebbe maker: for making dough and minced meat pockets.
Shredding attachment: for shredding, grating and cutting up food.
Citrus press: for squeezing juice out of citrus fruits.
Food which is to be processed must not contain any hard components (e.g. bones). The appliance should not be used for processing other substances or objects. Additional applications are possible if the accessories approved by the manufacturer are used. Use the appliance only with genuine parts and accessories. Never use the attachments or slicing / shredding inserts on other appliances. Only use matching parts for the relevant attachments. Only use the appliance indoors at room temperature and up to 2000m above sea level. Do not place the appliance on or near hot surfaces, e.g. hobs.
Your work surface should be easily accessible, resistant to moisture, firm, flat, dry and large enough to prevent any harm from splashing and to let you work unhindered.
This appliance can be used by persons with reduced physical, sensory or mental capabilities or lack of experience and knowledge if they have been given supervision or instruction concerning safe use of the appliance and if they understand the hazards involved. Keep children away from the appliance and connecting cable and do not allow them to use the appliance.
Children must not play with the appliance. Cleaning and user maintenance must not be performed by children.
Safety instructions
Danger of electric shock and fire
The appliance may only be connected to a power supply with alternating current via a correctly installed socket with earthing. Ensure that the protective conductor system of the domestic supply has been correctly installed.
Connect and operate the appliance only according to the type plate specifications. Do not use if the mains cable or appliance show any signs of damage. To avoid potential hazards, repairs such as replacing a damaged cable must only be carried out by our customer service personnel. Never connect the appliance to timer switches or remote-controllable sockets. Never leave the appliance unattended while it is switched on! We recommend that the appliance is never switched on for longer than is necessary to process the ingredients.
The mains cable must not come into contact with hot parts or be pulled across sharp edges. Never immerse the base unit in water or place it in the dishwasher. Do not steam-clean the appliance. Do not use the appliance with damp hands and do not operate at no load. The appliance must always be disconnected from the mains after each use, whenever the appliance is unattended, prior to assembly, disassembly or cleaning and in the event of a fault.
Risk of injury
Immediately after using the appliance wait for it to stop. Before fitting or replacing attachments, the appliance must be switched off and disconnected from the mains.
Do not grasp the sharp blades and edges of the shredding and slicing inserts. Keep hands clear of rotating parts. Never reach into the feed chute or outlet opening. Never put the food to be processed into the feed chute with your hands. Only use the pusher provided! Never clean the sharp blades and edges of the shredding and slicing inserts with your bare hands.
Caution! Risk of damaging the appliance
Check that there are no foreign objects in the feed chute or attachments. Do not poke objects (e.g. knives, spoons) in the feed chute or outlet opening.
Only allow the appliance to run uninterrupted for a maximum of 10 minutes. Then switch off and allow to cool down to room temperature.
Important!
It is essential to clean the appliance as described after each use or after it has not been used for an extended period. → “Care and daily cleaning” see page 24
Congratulations on the purchase of your new Bosch appliance.
On the following pages of these operating instructions you will find useful information for safe use of this appliance.
We request that you read these operating instructions carefully and observe all instructions. This ensures you will be able to enjoy this appliance for a long time, and the results will confirm your choice of this appliance.
Retain these operating instructions for subsequent use or for the next owner. You can find further information about our products on our website.
Content
Intended use 16
Safety instructions 17
Overview. 19
Before using for the first time. 19
Control and display elements 20
Overload protection 20
Speed setting. 20
Reversing function. 21
Base unit. 21
Base attachment. 21
Shredding attachment 23
Citrus press attachment. 23
Care and daily cleaning 24
Recipes. 25
Tips 25
Disposal. 26
Guarantee 26
Spare parts and accessories 27
Troubleshooting 28
Overview
→Fig.A
1 Base unit
a Drive for attachments b Button I or O/I c Button O or 1·2 | rev d Operation indicator e Release button f Carrying handle g Storage compartment with cover h Mains cable i Cable storage compartment
2 Base attachment
a Housing b Feed chute c Filling tray d Pusher e Worm gear with agitator paddle f Threaded ring
3 Meat mincer insert
a Blade b Perforated disc, fine* c Perforated disc, medium d Perforated disc, coarse
4 Sausage filler insert
a Bearing ring b Sausage filler nozzle
5 Kebbe insert
a Conical ring b Kebbe nozzle
→ Fig. 3
6 Shredding attachment*
a Housing b Feed chute c Cap d Filling tray e Pusher f Slicing insert g Shredding insert, coarse h Shredding insert, fine i Grating insert
7 Citrus press attachment*
a Collecting tray b Filter insert c Pressing cone d Driving shaft with spring
- depending on the model
The operating instructions refer to different models of the appliance. An overview is provided on the pages that feature the figures. → Fig.
Spare parts and accessories are available from Customer Service or at www.bosch-home.com. → "Spare parts and accessories" see page 27
Before using for the first time
Before the new appliance can be used, it must be fully unpacked, cleaned and checked.
Caution!
Never operate a damaged appliance!
Remove the base unit and all accessories from the packaging. - Remove the packaging material that is present. Dismantle any assembled parts into their individual parts. Do this in reverse order, as described under "Preparation". Check all parts for completeness.
→Fig.A/B
Inspect all parts for visible damage. Thoroughly clean and dry all parts before using for the first time.
→ "Care and daily cleaning" see page 24
Control and display elements
MFW35...
Button I
Press button I to switch on the appliance.
The drive will start up at once.
Button O
Press button O to switch off the appliance.
The drive stops.
MFW36.../MFW38...
Button O/1
Press button O/I to switch on the appliance. The drive starts running immediately with speed 2 (fast). Press button O/I again to switch off the appliance. The drive stops.
Button 1-2 | rev
Pressing button 1-2 | rev briefly switches the speed of the appliance between 1 (slow) and 2 (fast). → "Speed setting" see page 20
Pressing and holding button 1-2 | rev starts the reversing function. → "Reversing function" see page 21
All models
Operation indicator
The operation indicator lights up when the appliance is switched on. On models with the reversing function the function indicator flashes for as long as the 1-2 | rev button is pressed.
Release button
Press the release button to unlock an attachment fitted on the appliance. Only when the release button is pressed is it possible to turn the attachment clockwise and remove it from the base unit.
Cable storage compartment
The mains cable can be pulled out of the cable storage compartment or pushed back in again. Only ever pull the cable out as much as is required.
Storage compartment
Unused perforated discs belonging to the meat mincer can be kept in the storage compartment, which is closed with the cover.
Overload protection
To prevent serious damage to your appliance if the base attachment is overloaded, the agitator paddle has a notch (predetermined breaking point). If overloading occurs, the agitator paddle will break at this point. A new agitator paddle is available from Customer Service (No. 630701). Spare parts with a predetermined breaking point are not covered by our warranty obligations.
Replace agitator paddle
→Fig. 6
- Release the screw in the agitator paddle with a screwdriver (PH2) and remove the faulty paddle.
- Fit a new agitator paddle and screw tight again.
Speed setting
ONLY MFW36.../MFW38...
Using the speed setting feature, the speed can be set to 1 (slow) or 2 (fast).
Caution!
For certain applications, it is imperative to use speed 1 (slow). Take note of the recommended speeds! Please also refer to table → Fig.
- Switch on the appliance with button O/I. The appliance will run at speed 2 (fast). Press button 1-2 | rev briefly. The appliance will switch to speed 1 (slow). Press button 1-2 | rev briefly. The appliance will switch back to speed 2 (fast).
Recommended speeds
| Attachment | Speed | |
| 1.2 | fast | |
| 1.2 | fast | |
| 1.2 | slow | |
| 1.2 | slow | |
Reversing function
ONLY MFW36.../MFW38...
The reversing function is designed to release food that has got stuck by briefly running the worm gear in reverse. The reversing function switches off automatically after 15 seconds.
Caution!
Never press and hold button 1-2 | rev continuously while the appliance is switched on. Only press and hold button 1-2 | rev continuously once the appliance has come to a complete stop.
- Switch the appliance off with button O/I and wait until the drive has stopped. Press and hold button 1-2 | rev. After approx. 5-10 seconds, release button 1-2 | rev and wait for the drive to come to a standstill.
- Switch the appliance on again with button O/I.
Note:
If food that has got stuck is not released by briefly putting the appliance into reverse, switch the appliance off, unplug and clean it. → "Care and daily cleaning" see page 24
Base unit
Preparation
⚠ Risk of injury!
Do not insert the mains plug until all preparations for working with the appliance are complete and the required attachments are assembled correctly and connected to the base unit.
- Place the base unit on a stable and level work surface. Pull the mains cable out of the cable storage compartment to the required length.
The base unit is now prepared.
Base attachment
The base attachment can be used for the following applications:
Meat mincer
For chopping up raw or cooked food. Select the appropriate perforated disc depending on the type and consistency of the food to be processed. See "Tips" on page 25.
Sausage filler
For filling artificial and natural casings with sausage meat. For producing meat rolls.
Kebbe maker
For producing tubes of dough or minced meat.
Note: Other applications are possible using the base attachment and appropriate accessories available from Customer Service.
Caution!
When assembling the different individual parts, make sure that the notched markings on the inserts match up with the relevant one on the housing.
Preparation for meat mincer
Risk of injury!
Do not reach into the sharp knife.
Caution!
Always only use one perforated disc.
→ Fig. 1
- Insert the worm gear with the agitator paddle at the front in the housing.
- First fit the knife and then the required perforated disc onto the worm gear.
- Fit the threaded ring onto the housing and screw tight in a clockwise direction without using force.
The meat mincer is now prepared.
Preparation for sausage filler
→ Fig. 1
- Insert the worm gear with the agitator paddle at the front in the housing.
- First fit the bearing ring onto the worm gear and then the sausage nozzle into the housing.
- Fit the threaded ring onto the housing and screw tight in a clockwise direction without using force.
The sausage filler is now prepared.
Preparation for kebbe maker
→ Fig. 3
- Insert the worm gear with the agitator paddle at the front in the housing.
- First fit the conical ring onto the worm gear and then the kebbe nozzle into the housing.
- Fit the threaded ring onto the housing and screw tight in a clockwise direction without using force.
The kebbe maker is now prepared.
Use
Note: The food is processed in different ways depending on the application.
"Recipes" see page 25
The following example describes use of the base attachment as a meat mincer:
Risk of injury!
- Do not reach into the feed chute with your hands. Only use the pusher when adding more food.
Caution!
- Do not process bones, gristle, sinews or other solid components.
- Do not process frozen meat.
- Do not apply great force with the pusher.
Sequence of figures G
- Fit the prepared attachment onto the drive of the base unit, holding it at an angle.
- Turn the attachment anticlockwise until you hear it click into position.
- Fit the filling tray and insert the pusher in the feed chute.
- Prepare your food. Chop up large parts beforehand so they fit into the feed chute without having to press them in.
- Place a suitable container under the attachment. Add the prepared food to the filling tray.
- Connect the mains plug. Switch on the appliance.
Note (MFW36.../MFW38...):
After switching on, the appliance runs at the ideal speed 2 (fast).
- Use the pusher to slide the food down the feed chute, applying light pressure.
- Once you have finished, switch off the appliance and pull out the mains plug.
- Remove the filling tray and pusher.
- Hold down the release button and turn the attachment clockwise until it disengages.
- Remove the attachment, take it apart and clean all parts. → "Care and daily cleaning" see page 24
Shredding attachment
For shredding, grating and slicing items such as cheese, fruit, vegetables, nuts, almonds, dried bread rolls and other hard foodstuffs. Select the appropriate insert depending on the type and consistency of the food to be processed. → "Tips" see page 25
Preparation
△ Risk of injury!
Do not reach into the sharp blades and edges of the shredding, grating and slicing inserts.
Sequence of figures H
- Open the cap. Fit the required insert into the housing.
- Close the cap until you hear it click into position.
The shredding attachment is now prepared.
Use
Risk of injury!
- Do not reach into the feed chute with your hands. Only use the pusher when adding more food.
Caution!
- The pusher can only be inserted in one direction.
- Remove hard shells (e.g. on nuts).
- Do not apply great force with the pusher.
Caution! (MFW36.../MFW38...)
Always use the shredding and cutting inserts at speed 1 (slow). Use the grating insert at speed 2 (fast). See "Speed setting" on page 20.
Sequence of figures I
- Fit the prepared attachment onto the drive of the base unit, holding it at an angle.
- Turn the attachment anticlockwise until you hear it click into position.
- Fit the filling tray and insert the pusher in the feed chute.
- Prepare your food. Chop up large parts beforehand so they fit into the feed chute without having to press them in.
- Place a suitable container under the attachment. Add the prepared food to the filling tray.
- Connect the mains plug. Switch on the appliance.
Caution! (MFW36.../MFW38...)
After switching on, the appliance runs at speed 2 (fast). To use the shredding and cutting inserts, you must press button 1·2 | rev once to switch to speed 1 (slow).
"Speed setting" see page 20. 7. Use the pusher to slide the food down the feed chute, applying light pressure. The food is now cut up or shredded. 8. Once you have finished, switch off the appliance and pull out the mains plug. 9. Remove the filling tray and pusher. 10. Hold down the release button and turn the attachment clockwise until it disengages. 11. Remove the attachment, take it apart and clean all parts. → "Care and daily cleaning" see page 24
Citrus press attachment
For squeezing juice out of citrus fruits, e.g. lemons, oranges, grapefruits.
Preparation
△ Risk of injury!
The attachment for the citrus press is directly assembled on the base unit. Do not insert the mains plug until all preparations for working with the appliance are complete.
Caution!
The base unit is moved through 90° for preparation and use of the citrus press attachment. Never use other attachments in this position.
Sequence of figures
- Hold the base unit by the carrying handle and carefully tip up so the drive points upwards. Possibly turn the base unit to make the buttons easily accessible.
- Insert the driving shaft with the spring element pointing down in the drive of the base unit.
Caution!
It should be possible to push the driving shaft down lightly with your finger. It must not get sticky with residue from juice or become blocked with pips or foreign bodies.
- Fit the collecting tray onto the drive at an angle.
- Turn the collecting tray anticlockwise until you hear it click into position.
- Fit the filter insert onto the collecting tray.
- Fit the pressing cone onto the driving shaft.
The citrus press attachment is now fitted to the base unit and prepared.
Use
→ Sequence of figures K
- Cut the citrus fruits in half.
- Place a suitable container under the attachment.
- Connect the mains plug. Switch on the appliance. The drive is running.
Caution! (MFW36.../MFW38...)
After switching on, the appliance runs at speed 2 (fast). To use the citrus press, you must press button 1· 2 | rev once to switch to speed 1 (slow). → "Speed setting" see page 20
- Position the halved citrus fruits with the cut surface on the pressing cone and press down. As soon as the fruit is pressed onto the pressing cone, the cone will rotate.
- To finish the process, reduce the pressure on the cone.
- Once you have finished, switch off the appliance and pull out the mains plug.
- Hold down the release button and turn the attachment clockwise until it disengages.
- Remove the attachment, take it apart and clean all parts. → "Care and daily cleaning" see page 24
Notes:
- To obtain the largest amount of juice, the pressing procedure should be repeated a few times.
- The filter insert with the pulp and pips should be emptied as necessary.
Care and daily cleaning
The appliance, all attachments and the relevant accessories must be thoroughly cleaned after each use.
Risk of electric shock!
- Disconnect the mains cable from the socket prior to cleaning.
- Never immerse the base unit in liquids and do not clean in the dishwasher.
Risk of injury!
Do not reach into the sharp blades and edges of the shredding and slicing inserts.
Caution!
- Do not use any cleaning agents containing alcohol or spirits.
- Do not use any sharp, pointed or metal objects.
- Do not use abrasive cloths or cleaning agents.
Fig. L gives an overview of how to clean the individual parts.
- Wipe the outside of the base unit with a soft, damp cloth and dry off. Dismantle the attachments used in reverse order (see "Preparation" for the relevant attachment). Clean all accessories with a detergent solution and a soft cloth/sponge or with a soft brush.
- Allow all parts to dry.
Notes:
- Immediately rub metal parts dry and apply a little cooking oil to protect them from rust.
- Discolouration of plastic parts may occur when processing foods such as carrots. This can be removed with a few drops of cooking oil.
Recipes
Kebbe
Note (MFW36.../MFW38...):
For all operating steps, set the speed to 2 (fast).
Dough pockets:
- 500 g lamb, cut into strips
- 500 g bulgur wheat, washed and drained
- 1 small onion, chopped. Process the lamb and wheat with the meat mincer, alternating between the two (perforated disc, fine).
- Mix the dough thoroughly and mix in the onion. Process the mixture another two times with the meat mincer.
Filling:
- 400 g lamb, cut into strips
- 2 medium-sized onions, chopped 1 tablespoon of oil 1 tablespoon of flour
- 2 teaspoons of pimento Salt and pepper Process the lamb with the meat mincer (perforated disc, fine). Fry the onions until golden brown. Add the lamb and fry until well done. Add the remaining ingredients. Fry everything gently for about 1-2 minutes. Pour off the excess fat. Leave the filling to cool down.
Prepare the kebbe:
Use the kebbe maker to process the mixture for dough pockets. Cut off pieces 7.5 cm in length from the hollow strand of dough.
Press one end of the dough pocket to seal. Insert a little filling in the opening and also seal the other end of the dough pocket. Heat the oil (approx. 180°C) and deep-fry the dough pockets for about 6 minutes until golden brown.
Marzipan
Note (MFW36.../MFW38...):
For all operating steps, set the speed to 2 (fast).
- 210 g almonds (coarsely ground)
- 210 g icing sugar A little rose-water 1 drop of bitter almond oil Mix the almonds and icing sugar together well. Divide the mixture up into 6 equal-sized portions (about 70 g each). Prepare the base unit using the meat mincer attachment and the fine perforated disc (2.7 mm - depending on the model → "Spare parts and accessories" see page 27).
- Add the first portion to the filling tray and switch on the appliance.
- Add a new portion every 5 seconds until everything is processed.
- Then add a little rose-water and 1 drop of bitter almond oil, mix well and leave to rest.
Tips
Meat mincer
Using the perforated discs
- Perforated disc, fine (2.7 mm) for: cooked chicken / pork / beef, cooked liver, cooked fish for soups; raw pork and beef for meat loaf; raw liver, meat and bacon for liverwurst; pork for Mettwurst
- Perforated disc, medium (4 mm) for: pork and beef for pâté and Cervelat sausage
- Perforated disc, coarse (8 mm) for: roast pork for goulash soup; leftovers (joint, sausage) for bakes. If you require a finer consistence to your processed food, process it several times or use different perforated discs one after the other (coarse, medium, fine).
- You can add other ingredients (e.g. onions, spices) directly during processing. This ensures all ingredients are mixed together thoroughly.
Sausage filler
Soak natural casing in lukewarm water for about 10 minutes before processing. - Do not stuff casings too full or the sausages may burst during boiling or frying.
Shredding attachment
Caution! (MFW36.../MFW38...)
Always use the shredding and cutting inserts at speed 1 (slow). - Use the grating insert at speed 2 (fast).
"Speed setting" see page 20
Using the inserts
- Slicing insert: for carrots, celery, kohlrabi, courgettes
- Shredding insert (coarse): for carrots, nuts, hard cheese (e.g. Emmentaler)
- Shredding insert (fine): for nuts, hard cheese, Parmesan cheese. Grating insert: for potatoes, Parmesan cheese, nuts
Disposal

Dispose of packaging in an environmentally-friendly manner. This appliance is labelled in accordance with European Directive 2012/19/EU concerning used electrical and electronic appliances (waste electrical and electronic equipment - WEEE). The guideline determines the framework for the return and recycling of used appliances as applicable throughout the EU. Please ask your specialist retailer about current disposal facilities.
Guarantee
The guarantee conditions for this appliance are as defined by our representative in the country in which it is sold. Details regarding these conditions can be obtained from the dealer from whom the appliance was purchased. The bill of sale or receipt must be produced when making any claim under the terms of this guarantee.
Changes reserved.
Spare parts and accessories
| Spare parts and accessories | ||
| 2.7 mm | 638407 | Perforated disc (fine) for meat mincer |
| 4 mm | 637985 | Perforated disc (medium) for meat mincer |
| 8 mm | 637986 | Perforated disc (coarse) for meat mincer |
| 637987 | Sausage filler: for filling artificial and natural casings with sausage meat. For producing meat rolls. | |
| 12000397 | ||
| 638281 | Kebbe maker: for producing tubes of dough or minced meat. | |
| MFZ3DS1 | Shredding attachment: for shredding, grating and slicing | |
| 798161 | Slicing insert for the shredding attachment | |
| 798162 | Shredding insert (coarse) for the shredding attachment | |
| 798160 | Shredding insert (fine) for the shredding attachment | |
| 798130 | Grating insert for the shredding attachment | |
| 791603 | Citrus press attachment: for squeezing oranges, lemons and grapefruits. | |
| Spare parts and accessories are available from retailers and Customer Service. | ||
Troubleshooting
| Problem | Cause | Remedy |
| The appliance does not start when switched on. | Appliance has no power supply. | Insert the mains plug in the socket. |
| The appliance is running normally, but the food is not being processed. | The appliance was overloaded, and the agitator paddle has broken at the predetermined breaking point. | Switch the appliance off and wait until it has stopped. Unplug the appliance, remove the attachment, take it apart and clean. Replace the agitator paddle.→“Overload protection” see page 20 |
| The food is not being processed or only very slowly. | The attachment or worm gear is blocked. | Appliance without reversing function: Switch appliance off, wait until it has stopped and unplug. Remove the attachment, take it apart and clean to eliminate the blockage.→“Care and daily cleaning” see page 24 |
| Appliances with reversing function: Switch off the appliance with button O/I and wait for the drive to come to a standstill. Press and hold button 1·2 | rev. After approx. 5-10 seconds, release button 1·2 | rev and wait for the drive to come to a standstill. Switch the appliance on again and continue to use it.→“Reversing function” see page 21 | ||
| The pressure on the pusher is too great or the feed chute is too full. | Reduce the pressure on the pusher and fill the feed chute with less food. | |
| The food to be processed still contains hard components. | Remove hard components. Precook/steam vegetables before processing them. | |
| The reversing function does not start. | Button 1·2 | rev was pressed too briefly. | Press and hold button 1·2 | rev until the reversing function starts. |
| The worm gear is blocked right up. | Switch the appliance off, wait until it has stopped and unplug. Remove the attachment, take it apart and clean to eliminate the blockage.→“Care and daily cleaning” see page 24 |
If you are unable to solve the problem, always call the hotline! You will find the telephone numbers at the back of these instructions.
Overload protection
Storage compartment
Storage compartment
Overload protection
Overload protection
Warning! MFW36.../MFW38...
Warning! MFW36.../MFW38...
Before first use, read the instructions.
Please read the instruction manual and safety information carefully before using the appliance, and keep it for future reference.
Caution!
Never operate a damaged appliance!
Remove the packaging and all accessories. Dispose of the packaging materials. Sort the accessories and parts into their respective compartments. In this case, proceed as described in the section "Checking the completeness of all parts. → Fig. A/B Check all parts for visible damage. Before first use, clean all parts and dry them. → "Care and daily cleaning" see page 152
Information (MFW36.../MFW38...):
Information (MFW36.../MFW38...):
www.bosch-home.com/tr
www.bosch-yetkiliservisi.com
Do not use the appliance outdoors. Do not operate it with wet hands and do not run it without load.
After each use, also check the appliance for damage. If necessary, clean it according to the instructions.
→ "Care and cleaning" see page 196
Bosch service.
In this manual you will find instructions for use and important safety warnings regarding the safe use of this device.
We kindly ask you to read this manual carefully and follow all instructions. This way, you will be able to fully enjoy this device, and the results of your work will be proof that you made the right choice.
Keep the instruction manual for future reference or for the next owner of the device.
You will find additional information about our products on our website.
Contents
Intended use.187
Safety rules.188
List of contents.190
Before first use.190
Control elements and indicators..... 191
Overload protection.191
Charging.191
a Fine mesh strainer, b Fine mesh strainer, c Medium mesh strainer, d Coarse mesh strainer
4 Sausage filler attachment
a Support ring for sausage filler attachment
5 BcTabka Ke66e
a KoHyche KInbue b ConJIO ke6e
→ ManIOHOK B
6 HacaKa-TePKa*
a Kopnyc bTopnoBnHa c 3acnIHka d 3abaHTaKyBaJIbHa YaSha e 1Tobxay f BcTabka nla Hapi3aHn g BctabkaДЯшКУВАнг,KpynHa h BctabKa dny WaatkyBaHHa, diiHa i Bctabka dny Tepty
7 HacaKa-cokOBuTnCKaY dJa cnTpycobnx
a 36ipha yaa b Citvactn pfjltp c KoHyc cOKOBHTnCKaHa d PnviDHH BaJ 3 npyKInHOJ
- 3aJIeXHo BⅡd MoIeJI
Y ciinhctpykci 3 ekcnnyataciOnncahOpi3n biapiaHTN BIKOHAnHna. Ha iIOCTpOBaHnx ctopiHKax e orIy npIaNy. → ManIOHOK AkceCyapni 3anachi qactnHm MoJHa npIbAtn B cepBicHomy ueHTpi a6o Ha caTti www.bosch-home.com. → «3anachi qacmuHa akceCyapu» due. cmop. 199
Hikonn He BbOitb B EKcnIyataciIO NOIKoDxKeHNI pInaI
BnmiTb oCHOBnI 6bnok npnlaNy ta Bci akcecyapn 3 ynpaKOBKn. 3HIMtB HaABHn NaKyBaIbHn MaTePiaI. Poz6eipb 3i6paHi YactnHn Ha OkpemI Detani. Ppi cBomy dIte y 3BOPOT-HOMy npraKdy do onncy B po3diJI «PiDrotOBka>. IpebeBipTe Bci DeTani Ha KOMJIeKTHiCtB. →MaJIOHOK A/B IpebeipTe Bci YacTnHn Ha Bi3yaJIbHi NOUKOJKeHHa. PeteIbHO Ounchitb Ta Bucuyitb Bci TeTani neped nepuIM BIKOPnCTaHHM. → «Doanjod i oodeHne ouuueHnra» du8. cmop.196
ElenemEnuynpaBniHHia iHdkaTopn
MFW35...
Khonka I
Ype3yIbTaTi HATNCKaHHK HONIKI I npNJAd BMnKaeTbcra. PpNBOD BiDpa3y J 3anyckaTbcra.
Button O
The result of pressing button O: the drive is switched on. The drive is stopped.
MFW36.../MFW38...
Button O/I
The result of pressing button O/I: the drive is started at speed 2 (low speed). The result of pressing button O/I again: the drive is stopped.
Button 1-2 | rev
Brief pressing of button 1-2 | rev changes the drive speed from 1 (full) to 2 (low) or vice versa. → "Setting the speed" see page 191. The result of pressing and holding button 1-2 | rev starts the reverse function. → "Reverse function" see page 192.
All models
Status indicator
The status indicator lights up when the drive is switched on. In models with reverse function, the indicator functions as long as button 1-2 | rev is in the pressed state.
Emergency stop button
The result of pressing the emergency stop button: the drive is stopped and the motor is disconnected. Only by pressing the emergency stop button again can the motor be reconnected by turning the switch in the opposite direction and removing it from the main body of the drive.
Cable gland height
The connection cable can be pulled out of the cable gland or inserted back. Pull the cable to the required length.
Storage height
If the device is not used, it can be placed in a case for storage and closed with a hook.
Protection against overload
To prevent damage to the base nozzle in case of overload, the protective coupling (overload clutch) is used. In overload practice, the protective coupling breaks at its place. A new protective coupling can be purchased at the service center (No. 630701). Spare parts with the overload place are not covered by warranty obligations.
Replacing the protective coupling
→ Figure
- Unscrew the screw in the protective coupling using the appropriate wrench (PH2) and remove the damaged protective coupling.
- Insert the new protective coupling and tighten it securely.
Speed setting
ONLY MFW36.../MFW38...
The speed setting allows you to set the required rotation speed: 1 (full) or 2 (fast).
Attention!
For heavy-duty use, the required speed is 1 (full). Consider the recommended speed! See also the table → Figure M
Turn on the device with the switch. The device starts at speed 2 (fast). Press and immediately release the button 1-2 | rev. The device switches to speed 1 (full). Press and immediately release the button 1-2 | rev. The device switches back to speed 2 (fast).
Recommended speed
The base nozzle is used for the following operations:
M'acopyka
Do not touch the sharp knife.
Warning!
Use only the specified disc.
→ Figure D
- Insert the plug into the housing with the latch.
- Press the plug onto the socket, then the disc.
- Place the knife blades on the housing and tighten with the arrow, without excessive force.
The meat grinder is ready for use.
Do not touch the sharp knives and the cutting blades during cleaning and cutting.
Warning!
Do not use cleaning agents containing alcohol. Do not use sharp, pointed metal objects. Do not use abrasive sponges or cleaning agents.
In the figure you will find a short description of how to clean individual parts.
Wipe the main block with a damp cloth and let it dry. Use the cleaning brush in reverse direction (see section "Preparation" for the appropriate brush). Rinse all accessories with a mild cleaning agent, using a sponge/cloth, or wash with warm water. Dry all parts.
Instructions:
- Wipe the device dry and store it with the table oil for protection against corrosion.
- When processing, e.g., carrots, on the device, colored lumps may form. They can be removed with a few drops of table oil.
Recipe
Kebbe
Instruction (MFW36.../MFW38...): For all work operations, set the speed to 2 (low).
For the tubes:
- 500 g of lamb, cut into strips
- 500 g of bulgur wheat, rinsed and drained, mixed with the lamb and then ground in a meat grinder (fine disc, fine). Mix well, add salt. Pass this mixture through the meat grinder again.
Filling:
400 g of lamb, cut into strips of medium size, mixed with
1 tablespoon of oil, 1 tablespoon of flour, 2 chopped onions, salt and pepper. Grind the lamb in a meat grinder (fine disc, fine). Fry this mixture until golden brown. Add the lamb and fry. Add the other ingredients. Simmer for about 1-2 minutes. Remove from heat. Cool the filling.
Preparing the kebbe:
Shape the tubes with the kebbe attachment. Cut the tube into pieces of about 7.5 cm. Leave one end of the tube open. Press the filling into the open end and also close the other end of the tube. Heat the oil (approx. 180 °C) and fry the tubes in the hot oil for 6 minutes until golden brown.
Marginalia
Instruction (MFW36.../MFW38...):
For all work operations, set the speed to 2 (soft).
210 g of minced meat (coarse grind) 210 g of pork liver 1 tablespoon of vegetable oil 1 tablespoon of lemon juice. Mix the minced meat and liver thoroughly. Add the remaining ingredients (approx. 70 g). Prepare the main body of the device with the meat grinder attachment and the fine grinding disc (2.7 mm - depending on the model, see "Spare parts and accessories" on page 199). Place the prepared mixture into the loading tray and turn on the device. Every 5 seconds, add the next portion until everything is processed. ■ Then add a little vegetable oil and 1 tablespoon of lemon juice, mix and let it rest.
Tips
Meat grinding
Using grinding discs
- Fine grinding disc (2.7 mm): Cooked chicken, pork, veal, cooked liver, cooked fish for soups; raw pork and veal for minced meat rolls; raw liver, meat and lard for liver sausage; pork for raw sausage.
- Medium grinding disc (4 mm): Pork and veal for pâté and servelat
- Coarse grinding disc (8 mm): Smoked pork for spreadable sausage; leftovers (e.g., roasts, sausages) for fillings. If a coarser consistency of the processed products is needed, repeat the grinding process and use different grinding discs (coarse, medium, fine).
Solid ingredients (e.g., onions, garlic) can be added directly during the grinding process. In this way, all ingredients are well mixed.
Sausage stuffing
Soak natural sausage casings in warm water for about 10 minutes before processing. Do not stuff the casings too tightly, as they may burst during cooking or frying.
Grater attachment
Warning! (MFW36.../MFW38...)
The grating attachments may only be used at speed 1 (low). The grating attachments must not be used at speed 2 (soft). → "Grating" see page 191
Using the stands
Insert for cooking: carrots, peppers, zucchini. Insert for cooking (tube): for carrots, nuts, hard cheese (e.g., Emmental). Insert for grating: for potatoes, hard cheese, Parmesan. Insert for slicing: for carrots, hard cheese, nuts.
Cleaning

The device is marked in accordance with the European Directive 2012/19/EU on waste electrical and electronic equipment (WEEE). The Directive defines the obligations for the return and recycling of used appliances within the European Union. For current disposal options, please contact your local waste management facility.
Warranty terms
The warranty terms for this device are those published by our authorized representative in the country where you purchased the device. You can obtain the warranty terms at any time from the specialized store where you purchased the device, or directly from our representative in your country. The warranty terms for Germany and the address can be found on the last pages of this brochure. Additionally, the warranty terms are also available on the Internet at the specified address. To use warranty services, you must present the purchase receipt in any case.
Possible malfunctions.
Spare parts and accessories
Let the appliance run continuously for a maximum of 10 minutes. Then switch it off and let it cool down to room temperature.
Important!
Before first use
Before using the new appliance for the first time, it must be completely unpacked, cleaned, and checked.
Warning!
It is strictly forbidden to operate a damaged appliance!
Remove the main unit and all accessories from the packaging. Dispose of the packaging material properly. Disassemble the assembled accessories into individual parts. The sequence of actions should be the reverse of the description in the "Preparation" section. Check the completeness of all parts. → Figure A/B Check all parts of the appliance for external damage. Before first use, thoroughly clean and dry all parts. → "Care and daily cleaning" see p. 210
Elements of the control panel
MFW35...
Button I
Pressing the I button turns the device on. The drive starts rotating immediately.
Button O
Pressing the O button turns the device off. The drive stops.
MFW36.../MFW38...
Button O/I
Pressing the O/I button turns the device on. The drive immediately starts working at speed 2 (fast). Pressing the O/I button again turns the device off. The drive stops.
Button 1-2 | rev
Briefly pressing the 1-2 | rev button switches the device speed between 1 (slow) and 2 (fast).
→ "Speed setting" see p. 206 Pressing and holding the 1-2 | rev button activates the reverse function. → "Reverse function" see p. 206
All models
Operating status indicator
When the device is turned on, the operating status indicator lights up. In models with the reverse function, the indicator flashes while the 1-2 | rev button is held down.
Release button
Danger of injury!
Do not touch the sharp knife.
Attention!
Always use only one brake disc.
→Figure
- First insert the shaft with the guide pin into the housing.
- Install the knife on the shaft first, then the lower brake disc.
- Screw the threaded ring onto the housing and tighten it clockwise without applying force.
The shredder is ready for operation.
Preparing the sausage filling
→Figure
- First insert the shaft with the guide pin into the housing.
- First install the upper ring on the shaft, then insert the sausage filling attachment into the housing.
- Screw the threaded ring onto the housing and tighten it clockwise without applying force.
The device is ready for operation.
Preparing the nozzle for kebbe
→Figure
- First insert the mandrel with the guide cartridge into the housing.
- First install the conical ring on the shaft, then insert the mouthpiece for kebbe into the housing.
- Install the threaded ring on the housing and tighten it clockwise without applying excessive force.
The nozzle for kebbe is ready for operation.
Application
Note. Depending on the intended use, the products are processed differently. → "Recipes" see p. 211
Below, using an example, the use of the basic attachment as a meat grinder is described:
Danger of injury!
Do not reach into the feed tube. Only use the pusher for pushing.
Attention!
Do not process bones, cartilage, tendons, or other hard components. Do not process frozen meat. Do not apply excessive pressure with the pusher.
→Figure list
- Install the prepared attachment onto the drive of the main unit.
- Turn the attachment counterclockwise until it locks into place.
- Install the feed chute and insert the pusher into the feed chute. 4. Prepare the food items. Pre-crush large pieces so that they fit into the feed chute without jamming.
- Place a suitable container under the attachment. Load the prepared food items into the feed chute. 6. Connect the power plug to the mains. Switch on the appliance.
Note (MFW36.../MFW38...)
Before cleaning, disconnect the power cable from the electrical outlet. Never immerse the main unit in liquid and do not rinse it under running water.
Risk of injury!
Do not touch the sharp blades and edges of the attachments for shredding and slicing with your hands.
Attention!
Do not use cleaning agents containing alcohol or spirits. Do not use metallic or sharp-edged objects, as well as objects with sharp edges. Do not use abrasive or scouring cleaning agents.
The figure shows an overview of the cleaning of individual parts.
Wipe the main unit housing with a soft, damp cloth and dry it. Disassemble the used attachments in reverse order (see section "Preparation" for the respective attachment). Clean all accessories with mild soapy water and a soft sponge or soft brush. Allow all parts to dry thoroughly.
Note:
- Dry metal parts immediately after cleaning and apply a thin layer of cooking oil to protect them from rust.
- When processing, for example, carrots, a colored coating may appear on plastic parts. It can be removed with a few drops of cooking oil.
__SUPPIMER__
Instruction (MFW36..../MFW38...)
For all operations, set speed mode 2 (fast).
Filling for the rolls:
- 500 g of barley, cut into strips
- 500 g of wheat groats, washed and drained. 1 small onion, chopped. Load into the meat grinder alternately barley and wheat (grinding disc with fine holes). Mix the mass well, add dill. Pass the mass through the meat grinder once more.
Filling:
400 g of barley, cut into strips. 2 onions, chopped. 1 tablespoon of vegetable oil. 1 tablespoon of flour. 2 cloves of garlic. 1 teaspoon of ground black pepper. Pass the barley through the meat grinder (grinding disc with fine holes). Sauté the onion until golden brown. Add the barley and fry. Add the remaining ingredients. Mix everything for about 1-2 minutes. Remove from heat. Cool the filling.
Preparation of the kebbe:
Pass the mixture through the meat grinder with the kebbe attachment. Cut the resulting sausage into pieces 7.5 cm long. Close one end of the tube. Place a little filling into the opening, then close the other end of the tube.
Heat the oil (about 180 °C) and fry the kebbe in the deep fryer for about 6 minutes until golden brown.
Marginal
Instruction (MFW36..../MFW38...)
For all operations, set speed mode 2 (fast).
210 g of coarse flour - 210 g of powdered sugar, a little pink water, 1 drop of bitter almond oil. Mix the flour and powdered sugar well. Divide the mixture into 6 equal portions (about 70 g each). Prepare the main appliance with the mincer attachment and a shaping disc with fine holes (2.7 mm - depending on the model, see "Accessories and attachments" on page 213). Place the first portion into the feed chute and switch on the appliance. Add the next portion every 5 seconds until all portions have been processed. After the last portion, add a little pink water and 1 drop of bitter almond oil, mix and leave to soak.
TIPS
Meat
Using the shaping discs
Shaping disc with fine holes (2.7 mm): boiled chicken, pork, veal, boiled beef, boiled fish for mousse; raw ham and raw smoked meat for minced meat; raw sausage, meat and salami for boiled sausage; pork for smoked sausage
-Shaping disc with medium holes (4 mm): pork and veal for pâté and servelat
Shaping disc with coarse holes (8 mm):
fried pork for goulash soup; leftovers (e.g., roast, sausage) for casseroles from leftovers
If you require a finer consistency of the processed food, repeat the grinding process or use the different shaping discs in sequence (with coarse, medium, fine holes). Certain ingredients (e.g., onions, herbs) can be added directly during processing. This ensures that all ingredients are well mixed.
Sausages
Soak the natural sausage casing in warm water for about 10 minutes before processing. Do not fill the sausage casing too tightly, as otherwise the sausages may burst during cooking or frying.
Attachment for grinding
Attention! MFW36.../MFW38...
With the coarse grating attachment, always use speed setting 1 (slow). - Use the fine grating attachment at speed setting 2 (fast).
→ "Speed setting" see page 206
Use of attachments
Attachments for cutting: for carrots, peppers, cabbage, onions and attachments for slicing (coarse): for carrots, nuts, hard cheese (e.g., Emmental) Attachments for grating (fine): for nuts, hard cheese, Parmesan Grater attachment: for potatoes, Parmesan, nuts
DISPOSAL

Dispose of the packaging using environmentally safe methods. This device is marked in accordance with European Directive 2012/19/EU on waste electrical and electronic equipment (WEEE). These regulations define the rules for the return and disposal of old appliances applicable in the European Union. Information on disposal options can be obtained from the store where you purchased the device.
Warranty conditions
You can obtain up-to-date information about the warranty conditions at your nearest authorized service center, at the service center of the manufacturer "All Household Appliances", or in the accompanying documentation.
We reserve the right to make changes.
Spare parts and accessories
(waste electrical and electronic equipment - WEEE).
:(MFW36..../MFW38...)
(12) Therefore, the area of triangle OBC equals the area of triangle COD plus the area of triangle BOC.
:J (p2.7) aIill aai
Therefore, 4a + b = 9
:
y
ii 5i
1 1
7.5 gJgJg
Jx J 1
aie biie
:
i 1
Jusss
auii jai iiaai jai aai jai jai jai
∴ a + b = 1
aS 10
∴ a i = a 1 + x iαi
1.
∴ ( a + b) ( a2 - ab + b2) = a3 + b3
1
:
5.
6.
1
1.
2.
3.
1
(MFW36.../MFW38...)
[\therefore {lg}\frac{b}{a} = \frac{c}{d}]
plabll gai. alal lci ciuia eeg 5.
iiieill clg g jzall
jll j 6.
(MFW36.../MFW38...)
.()24eJyJyJyJyJy
aai jaii jia i jaii jai 1.
1
sikay gia aalllgai jglal
aJgssy jRjU
J 1
aaiia aaiia aaiia aaiia aaiia aaiia aaiia aaiia aaiia aaiia aaiia aaiia aaiia aaiia aaiia aaiia aaiia aaiia aaiia aaiia aaiia aaiia aaiia aaiia aaiia aaiia aaiia aaiia aaiia aaiia aaiia aaiia aaiia aaiia aalaaalaaalaaalaaalaaalaaalaaalaaalaaalaaalaaalaaalaaalaaalaaalaaalaaalaaalaaalaaalaaalaaalaaalaaalaaalaaalaaalaaalaaalaaalaaalaaalaaalaaalaaalaaalaaalaaalaa
plabll gil liq auiuall aaiy gail prnul
jai (ciui) .Sulai golz! gullal
10 a
Juice
a12 + a22 + a32
1
2.
1
Therefore, the area of triangle OBC equals the area of triangle COD plus the area of triangle BOC minus the area of triangle COD.
(MFW36.../MFW38...)
a
(1) 1 is wall
2 40 Jull buae yolll Jau
5 a jil (a jll b i s)
10gall
1.
jll jll
Therefore, a_i = 1/2.
Ggall
1.
jll jll
3.
C
4.
[\therefore {l}_{2} = {16}]
::(MFW36..../MFW38...)
()
.

C. SΔACD = 1/2 · AQ · CD = 1/2 × 2t
.
C
1.
MFW36.../MFW38...
1
()2(c)1
!
a
M 10
www.bosch-home.com.
12 aai jbi (cllall jll lbi)
aIy jzj! 1
jua 1 jz jz jz jz jz
.
.
la nalic 11 aenall c jai
LaSgssll jjill 0aie.0jall
.《jiaiill》 1
- j = j 1 且 j → j 1 或 j → j2
A/B
jz jie li jz jz jz
.
15.2.11 Li 15.2.12 Lea 15.2.13 Jc15.2.14 Cai
S 1 = x i and S2 = 1/2
3
a
4
a
5
a
a≤a+g b
B
Bosch
154

DE Deutschland, Germany
AE United Arab Emirates,
BSH Home Appliances FZE
Round About 13,
Plot Nr MO-0532A
Jebel Ali Free Zone - Dubai
Tel.: 04 881 4401
mailto:service.uae@bshg.com
www.bosch-home.com/ae
AL Republika e Shqiperise, Albania
ELEKTRO-SERVIS sh.p.k
Rr. Shkelqim Fusha, Selite,
Palli "Konstruksion", Kati 0 dhe +1
1023 Tirane
Tel.: 42278130, -131
Fax: 4 2278 130
mailto:info@elektro-servis.com
EXPERT SERVIS
Ruga e Kavajes,
Kulla B Nr 223/1 Kati I
1023 Tirane
Tel.: 44806061
Tel.: 42274941
Fax: 4 227 0448
Cel: +355 069 60 45555
mailto:info@expert-servis.al
HEATHERTON, Victoria 3202
Tel.: 1300 368 339
mailto:bshau-as@bshg.com
www.bosch-home.com.au
BA Bosna i Hercegovina, Bosnia-Herzegovina
"HIGH" d.o.o.
Gradačačka 29b
71000 Sarajevo
Tel.: 061 10 09 05
Fax: 033 21 35 13
mailto:bosch_siemens_sarajevo@
yahoo.com
BE Belgium
BSH Home Appliances S.A.
European Trade Center Building, 5th floor
1784 Sofia
Tel.: 0700 208 17
Fax: 02 878 79 72
mailto:informacia.servis-bg@
bshg.com
www.bosch.home.bg
BH Bahrain
Khalaifat Est.
P.O.Box 5111
Manama
Tel.: 017400553
mailto:service@khalaifat.com
BY Belarus, Bénapycb
OOO "BSH Bytovaya Tekhnika"
tel.: 495 737 2961
mailto:mok-kdhl@bshg.com
CH Schweiz, Suisse, Svizzera, Switzerland
BSH Hausgeräte AG
Werkskundendienst für
Hausgeräte
Fahrweidstrasse 80
8954 Geroldswil
+7snt/min (incl. VAT 24%)
To arrange an engineer visit, to
order spare parts and accessories
or for product advice please visit
www.bosch-home.co.uk
or call
*Calls are charged at the basic rate, please check with your telephone service provider for exact charges
GR Greece, Ελλάς
BSH Ikiakes Siskeves A.B.E.
Central Branch Service
17 km E.O. Athinon-Lamias &
Potamou 20
14564 Kifisia
Unit 1 & 2, 3rd Floor
North Block, Skyway House
3 Sham Mong Road
Tai Kok Tsui, Kowloon
Hong Kong
Tel.: 2565 6151
Fax: 2565 6681
mailto:bosch.hk.service@bshg.com
www.bosch-home.cn
HR Croatia
BSH Home Appliances Ltd.
Kneza Branimira 22
10000 Zagreb
Tel.: 015520888
Fax: 01 640 36 03
www.bosch-home.com/hr
www.bosch-home.com/hu
IE Republic of Ireland
BSH Home Appliances Ltd.
Unit F4, Ballymount Drive
Ballymount Industrial Estate
Walkinstown
Dublin 12
Service Requests,
Spares and Accessories
Tel.: 01450 2655*
Fax: 01450 2520
www.bosch-home.co.uk
*0.03 € per minute at peak.
Off peak 0.0088 € per minute
IL Israel,
C/S/B/ Home Appliance Ltd.
1, Hamasger St.
North Industrial Park
Lod, 7129801
Tel.: 08 9777 222
Fax: 08 9777 245
mailto:csb-serv@csb-ltd.co.il
www.bosch-home.co.il
IN India, Bharat,
BSH Household Appliances
Mfg. Pvt. Ltd.
Arena House, 2nd Floor, Main Bldg,
Plot No. 103, Road No. 12, MIDC,
Andheri East
Mumbai 400 093
Toll Free 1800 266 1880
www.bosch-home.com/in
IS Iceland
Smith & Norland hf.
Noatuni 4
105 Reykjavik
Tel.: 0520 3000
Fax: 0520 3011
www.sminor.is
IT Italia, Italy
www.bosch-home.com/it
KZ Kazakhstan, Kazakhstan
IP Turebekov Yerzhan
Nurmanovich
Jangeldina str. 15
Shimkent 160018
Tel.: 0252 31 00 06
mailto:evrika_kz@mail.ru
LB Lebanon,
Teheni, Hana & Co.
Boulevard Dora 4043 Beyrouth
P.O.Box 90449
Jdeideh 1202 2040
Tel.: 01 255 211
mailto:Info@Teheni-Hana.com
LT Lietuva, Lithuania
Senuku prekybos centras UAB
Jonavos g. 62
44192 Kaunas
Tel.: 0372 12146
Fax: 0372 12165
www.senukai.It
LU Luxembourg
General Serviss Limited
Bullu street 70c
1067 Riga
Tel.: 07424137
mailto:bt@olimpeks.lv
Elkor Serviss
Brivibas gatve 201
1039 Riga
Tel.: 067 0705 20: -36
mailto:domoservice@elkor.lv
www.servisacentrs.lv
MD Moldova
S.R.L. "Rialto-Studio"
str. Pușkin 98
2012 Chișinău
Tel./Fax: 022 23 81 80
mailto:bosch-md@mail.ru
ME Crna Gora, Montenegro
Elektronika komerc
Ul. Slobode 17
84000 Bijelo Polje
Tel./Fax: 050 432 575
Mobil: 069324812
mailto:ekobosch.servis@
t-com.me
MK Macedonia,Makeonna
GORENEC
Jane Sandanski 69 lok.3
1000 Skopje
Tel.: 022 454 600
Mobil:070697463
mailto:gorenec@yahoo.com
MT Malta
Oxford House Ltd.
Notabile Road
Mriehel BKR 14
Tel.: 021 442 334
Fax: 021 488 656
www.oxfordhouse.com.mt
MV Raajeyge Jumhooriyyaa, Maledives
Lintel Investments
Ma. Maadheli, Majeedhee Magu Malé
Tel.: 0331 0742
mailto:mohamed.zuhuree@
lintel.com.mv
NL Nederland, Netherlands
Unit F 2, 4 Orbit Drive
Mairangi Bay
Auckland 0632
Tel.: 094770492
Fax: 094772647
mailto:bshnz-cs@bshg.com
www.bosch-home.co.nz
PL Polska, Poland
SA Kingdom Saudi Arabia,
Abdul Latif Jameel Electronics
and Airconditioning Co. Ltd.
BOSCH Service centre,
Kilo 5 Old Makkah Road
(Next to Toyota), Jamiah Dist.
P.O.Box 7997
Jeddah 21472
Tel.: 800 244 0043
mailto:kunnumalsp@alj.com
www.aljazeera.com.sa
SE Sverige, Sweden
BSH Home Appliances AB
Landsvagen 32
169 29 Solna
Tel.: 0771 11 22 77 local rate
mailto:Bosch-Service-SE@
bshg.com
www.bosch-home.se
SG Singapore, Singapore
BSH Home Appliances Pte. Ltd.
TECHPLACE I and
Mo Kio Avenue 10
Block 4012 #01-01
569628 Singapore
Tel.: 6751 5000
Fax: 6751 5005
mailto:bshsgp.service@bshq.com
www.bosch-home.com.sg
SI Slovenija, Slovenia
BSH Hisni aparati d.o.o.
Litostrojska 48
1000 Ljubljana
Tel.: 01 583 07 00
Fax: 01 583 08 89
www.bosch-home.com/tr
BSH Home Appliances Private Limited
11F, No. 80, Zhouzi Street, Neihu District, Taipei City
11F., No.80, Zhouzi St., Neihu Dist.
Taipei City 11493
Tel.: 0800 368 888
Fax: 02 2627 9788
mailto:bshtzn-service@bshg.com
gama-electronics.com
XS Srbija, Serbia
BSH Kućni aparati d.o.o.
Milutina Milankovica br. 9ž
11070 Novi Beograd
Tel.: 011 353 70 08
Fax: 011 205 23 89
mailto:informacije.servis-sr@
bshg.com
www.bosch-home.rs
ZA South Africa
BSH Home Appliances (Pty) Ltd.
15th Road Randjespark
Private Bag X36, Randjespark
1685 Midrand-Johannesburg
Tel.: 086 002 6724
Fax: 086 617 1780
mailto:applianceserviceza@
bshg.com
www.bosch-home.com/zai

- SAFETY INSTRUCTIONS
- DANGER OF ELECTRIC SHOCK AND FIRE
- RISK OF INJURY
- CAUTION! RISK OF DAMAGING THE APPLIANCE
- IMPORTANT
- CONGRATULATIONS ON THE PURCHASE OF YOUR NEW BOSCH APPLIANCE
- CONTENT
- OVERVIEW
- →FIG.A
- BASE UNIT
- BASE ATTACHMENT
- MEAT MINCER INSERT
- SAUSAGE FILLER INSERT
- KEBBE INSERT
- → FIG
- SHREDDING ATTACHMENT
- CITRUS PRESS ATTACHMENT
- BEFORE USING FOR THE FIRST TIME
- CAUTION
- CONTROL AND DISPLAY ELEMENTS
- MFW36.../MFW
- ALL MODELS
- OPERATION INDICATOR
- RELEASE BUTTON
- CABLE STORAGE COMPARTMENT
- STORAGE COMPARTMENT
- OVERLOAD PROTECTION
- REPLACE AGITATOR PADDLE
- →FIG
- SPEED SETTING
- ONLY MFW36.../MFW
- REVERSING FUNCTION
- NOTE
- PREPARATION
- ⚠ RISK OF INJURY
- MEAT MINCER
- SAUSAGE FILLER
- KEBBE MAKER
- PREPARATION FOR MEAT MINCER
- PREPARATION FOR SAUSAGE FILLER
- PREPARATION FOR KEBBE MAKER
- USE
- THE FOLLOWING EXAMPLE DESCRIBES USE OF THE BASE ATTACHMENT AS A MEAT MINCER
- SEQUENCE OF FIGURES G
- NOTE (MFW36.../MFW38...)
- △ RISK OF INJURY
- SEQUENCE OF FIGURES H
- CAUTION! (MFW36.../MFW38...)
- SEQUENCE OF FIGURES I
- SEQUENCE OF FIGURES
- → SEQUENCE OF FIGURES K
- NOTES
- CARE AND DAILY CLEANING
- RISK OF ELECTRIC SHOCK
- RECIPES
- KEBBE
- DOUGH POCKETS
- FILLING
- PREPARE THE KEBBE
- MARZIPAN
- TIPS
- USING THE PERFORATED DISCS
- USING THE INSERTS
- DISPOSAL
- GUARANTEE
- SPARE PARTS AND ACCESSORIES
- WARNING! MFW36.../MFW
- BEFORE FIRST USE, READ THE INSTRUCTIONS
- INFORMATION (MFW36.../MFW38...)
- BOSCH SERVICE
- CONTENTS
- SAUSAGE FILLER ATTACHMENT
- BCTABKA KE66E
- → MANIOHOK B
- HACAKA-TEPKA
- HACAKA-COKOBUTNCKAY DJA CNTPYCOBNX
- ELENEMENUYNPABNIHHIA IHDKATOPN
- PROTECTION AGAINST OVERLOAD
- REPLACING THE PROTECTIVE COUPLING
- → FIGURE
- M'ACOPYKA
- WARNING
- → FIGURE D
- INSTRUCTIONS
- RECIPE
- FOR THE TUBES
- PREPARING THE KEBBE
- MARGINALIA
- MEAT GRINDING
- SAUSAGE STUFFING
- GRATER ATTACHMENT
- USING THE STANDS
- CLEANING
- WARRANTY TERMS
- BEFORE FIRST USE
- ELEMENTS OF THE CONTROL PANEL
- MFW
- BUTTON I
- BUTTON O
- BUTTON O/I
- BUTTON 1-2 | REV
- OPERATING STATUS INDICATOR
- DANGER OF INJURY
- ATTENTION
- →FIGURE
- PREPARING THE SAUSAGE FILLING
- PREPARING THE NOZZLE FOR KEBBE
- APPLICATION
- BELOW, USING AN EXAMPLE, THE USE OF THE BASIC ATTACHMENT AS A MEAT GRINDER IS DESCRIBED
- →FIGURE LIST
- SUPPIMER
- FILLING FOR THE ROLLS
- PREPARATION OF THE KEBBE
- MARGINAL
- MEAT
- SAUSAGES
- ATTACHMENT FOR GRINDING
- ATTENTION! MFW36.../MFW
- USE OF ATTACHMENTS
- WARRANTY CONDITIONS
- J
- A12 + A22 + A
- (MFW36.../MFW38...)
- B
- BOSCH
- DE DEUTSCHLAND, GERMANY
- AE UNITED ARAB EMIRATES
- AL REPUBLIKA E SHQIPERISE, ALBANIA
- BA BOSNA I HERCEGOVINA, BOSNIA-HERZEGOVINA
- BE BELGIUM
- BH BAHRAIN
- BY BELARUS, BÉNAPYCB
- CH SCHWEIZ, SUISSE, SVIZZERA, SWITZERLAND
- GR GREECE, ΕΛΛΆΣ
- HR CROATIA
- IE REPUBLIC OF IRELAND
- IL ISRAEL
- IN INDIA, BHARAT
- IS ICELAND
- IT ITALIA, ITALY
- KZ KAZAKHSTAN, KAZAKHSTAN
- LB LEBANON
- LT LIETUVA, LITHUANIA
- LU LUXEMBOURG
- MD MOLDOVA
- ME CRNA GORA, MONTENEGRO
- MK MACEDONIA,MAKEONNA
- MT MALTA
- MV RAAJEYGE JUMHOORIYYAA, MALEDIVES
- NL NEDERLAND, NETHERLANDS
- PL POLSKA, POLAND
- SA KINGDOM SAUDI ARABIA
- SE SVERIGE, SWEDEN
- SG SINGAPORE, SINGAPORE
- SI SLOVENIJA, SLOVENIA
- XS SRBIJA, SERBIA
- ZA SOUTH AFRICA
Brand : BOSCH
Model : COMPACTPOWER MFW3640A
Category : Meat Grinder