
TDA2320 - Iron BOSCH - Free user manual and instructions
Find the device manual for free TDA2320 BOSCH in PDF.
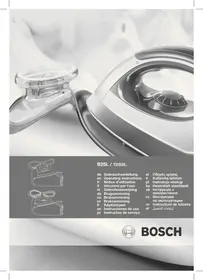



| Product type | Steam generator (iron with steam generator) |
| Brand | Bosch |
| Model | TDA2320 (and variants TDS2510, TDS2515, TDS2520, TDS2530, TDS2540, TDS2545) |
| Power supply | 220-240 V ~ 50-60 Hz, grounded plug 10 A |
| Power | Approximately 2400 W (estimate for steam generator) |
| Water tank capacity | Removable tank (refillable at any time), max level indicated |
| Main functions | Steam ironing, dry ironing, vertical steam, steam gun (models TDS2540/2545) |
| Steam adjustment | Variable via knob (variable steam control) |
| Temperature adjustment | Knob with positions for synthetics, silk/wool, cotton/linen |
| Indicator lights | Steam ready (green), tank empty (red), iron heating |
| Included accessories | Detachable base, steam gun with concentrator, brush, diffuser (depending on model), cord winder, hose clip |
| Recommended water type | Tap water, or 1:1 mixture with distilled water in hard water areas |
| Cleaning and maintenance | Boiler cleaning every 10 uses (empty, rinse with water, no descaling agent) |
| Safety | Automatic shut-off not mentioned, but instructions: do not leave unattended, do not immerse, do not direct steam at people/animals |
| Weight and dimensions | Not specified in the manual (estimate: about 4-5 kg, dimensions ~30x20x25 cm) |
| Spare parts and repairability | Contact authorized service for cord or other parts; do not replace yourself |
| Warranty | According to local distributor terms, proof of purchase required |
| General information | Household use only, international safety standards, recycling according to WEEE directive |
Frequently Asked Questions - TDA2320 BOSCH
User questions about TDA2320 BOSCH
0 question about this device. Answer the ones you know or ask your own.
Ask a new question about this device
Download the instructions for your Iron in PDF format for free! Find your manual TDA2320 - BOSCH and take your electronic device back in hand. On this page are published all the documents necessary for the use of your device. TDA2320 by BOSCH.
USER MANUAL TDA2320 BOSCH
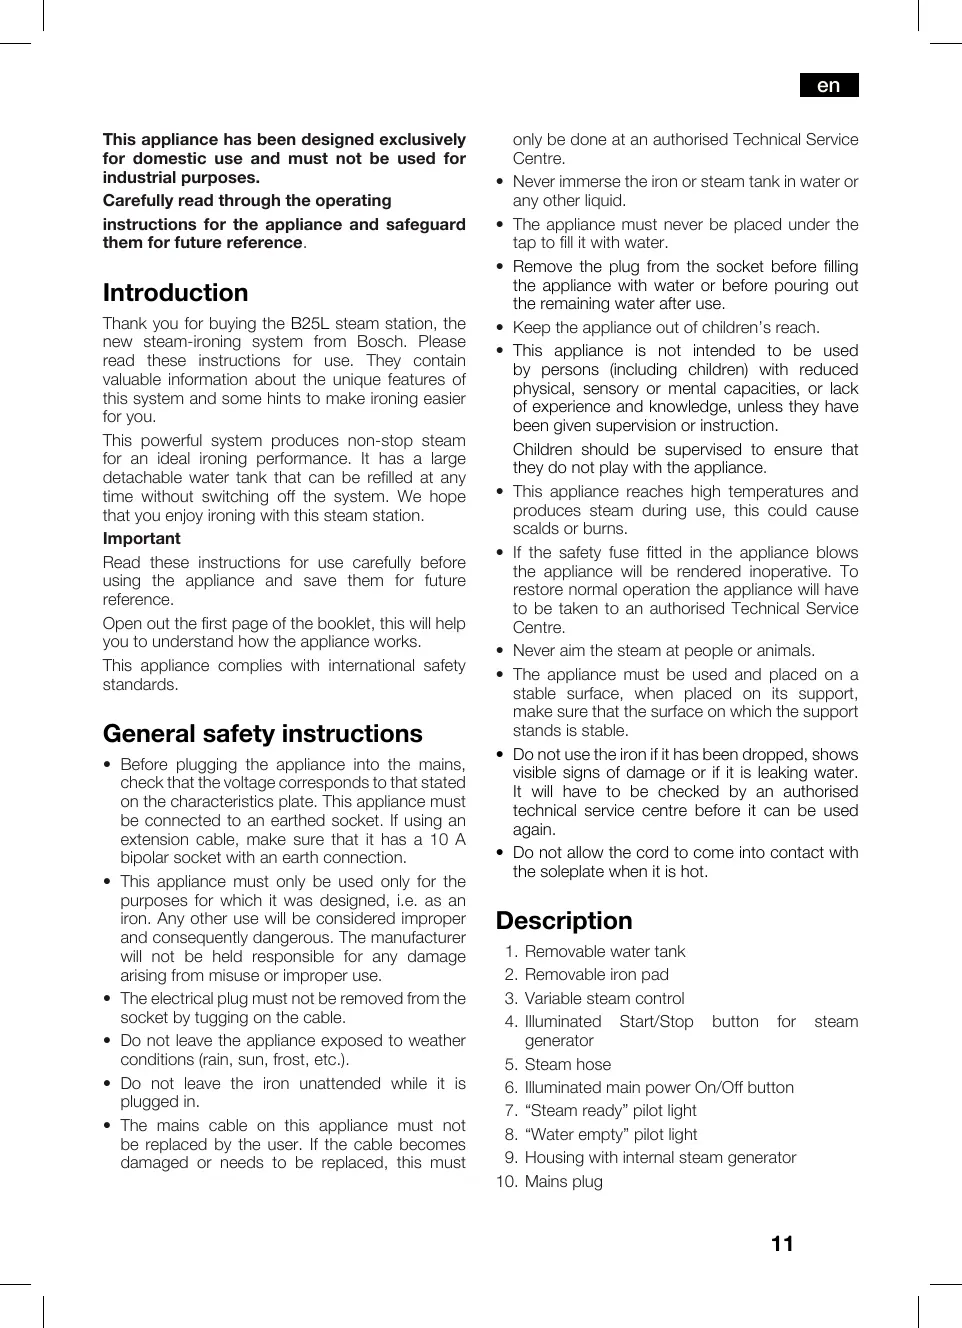
This appliance has been designed exclusively for domestic use and must not be used for industrial purposes.
Carefully read through the operating instructions for the appliance and safeguard them for future reference.
Introduction
Thank you for buying the B25L steam station, the new steam-ironing system from Bosch. Please read these instructions for use. They contain valuable information about the unique features of this system and some hints to make ironing easier for you.
This powerful system produces non-stop steam for an ideal ironing performance. It has a large detachable water tank that can be refilled at any time without switching off the system. We hope that you enjoy ironing with this steam station.
Important
Read these instructions for use carefully before using the appliance and save them for future reference.
Open out the first page of the booklet, this will help you to understand how the appliance works.
This appliance complies with international safety standards.
General safety instructions
- Before plugging the appliance into the mains, check that the voltage corresponds to that stated on the characteristics plate. This appliance must be connected to an earthed socket. If using an extension cable, make sure that it has a 10 A bipolar socket with an earth connection.
- This appliance must only be used only for the purposes for which it was designed, i.e. as an iron. Any other use will be considered improper and consequently dangerous. The manufacturer will not be held responsible for any damage arising from misuse or improper use.
- The electrical plug must not be removed from the socket by tugging on the cable.
- Do not leave the appliance exposed to weather conditions (rain, sun, frost, etc.).
- Do not leave the iron unattended while it is plugged in.
- The mains cable on this appliance must not be replaced by the user. If the cable becomes damaged or needs to be replaced, this must
only be done at an authorised Technical Service Centre.
- Never immerse the iron or steam tank in water or any other liquid.
- The appliance must never be placed under the tap to fill it with water.
- Remove the plug from the socket before filling the appliance with water or before pouring out the remaining water after use.
- Keep the appliance out of children's reach.
- This appliance is not intended to be used by persons (including children) with reduced physical, sensory or mental capacities, or lack of experience and knowledge, unless they have been given supervision or instruction.
Children should be supervised to ensure that they do not play with the appliance.
- This appliance reaches high temperatures and produces steam during use, this could cause scalds or burns.
- If the safety fuse fitted in the appliance blows the appliance will be rendered inoperative. To restore normal operation the appliance will have to be taken to an authorised Technical Service Centre.
- Never aim the steam at people or animals.
- The appliance must be used and placed on a stable surface, when placed on its support, make sure that the surface on which the support stands is stable.
- Do not use the iron if it has been dropped, shows visible signs of damage or if it is leaking water. It will have to be checked by an authorised technical service centre before it can be used again.
- Do not allow the cord to come into contact with the soleplate when it is hot.
Description
- Removable water tank
- Removable iron pad
- Variable steam control
- Illuminated Start/Stop button for steam generator
- Steam hose
- Illuminated main power On/Off button
- "Steam ready" pilot light
- "Water empty" pilot light
- Housing with internal steam generator
- Mains plug
- Mains cable with storage facility
- Cord clip
- Temperature dial
- Iron pilot light
- Steam release button
- Soleplate
- Steam gun
- Steam release button
- Steam concentrator
- Brush extension
- Diffuser extension
- Accessory box
- Protection cap
- Slot position for connection
Preparations (A)
- Remove any label or protective covering from the soleplate.
- Place the appliance horizontally on a solid, stable surface. You may remove the iron pad from the appliance and place the iron on it on another solid, stable, horizontal surface.
- Remove the detachable water tank and fill it, making sure not to pass the level mark.
- Fit the water tank back onto the steam tank.
- Unwind the mains cable fully and plug it into an earthed socket.
- Set the boiler «Start/Stop» button (4) and main power «On/Off» button (6) switches to the «Start/On» position.
- The green "steam ready" indicator lamp (7) will light up after approximately 5 minutes, indicating that the appliance is ready to use.
- This appliance has a built-in water level sensor. The red “refill water tank” indicator (8) will light when the water tank is empty.
Important:
- Normal tap water can be used.
To prolong the optimum steam function, mix tap water with distilled water 1:1. If the tap water in your district is very hard, mix tap water with distilled water 1:2.
You can inquire about the water hardness with your local water supplier.
- The water tank can be filled at any time while using the appliance.
- To avoid damage and/or contamination of the water tank, do not put perfume, vinegar, starch,
descaling agents, additives or any other type of chemical product into the water tank.
- The iron pad (2) can be placed into the specially designed recess on the appliance or somewhere suitable alongside the ironing area.
Never rest the iron on the appliance without the iron pad!.
- During it first use the iron may produce certain vapours and odours, along with white particles on the soleplate, this is normal and it will stop after a few minutes
- While the steam release button is pressed, the water tank may produce a pumping sound, this is normal, indicating that water is being pumped to the steam tank.
Setting the temperature
- Check the ironing instruction label on the garment to determine the correct ironing temperature.
- Select the temperature (13)
● Synthetics ●●● Silk-Wool Cotton-Linen
- The indicator lamp (14) will remain lit while the iron is heating and go out as soon as the iron has reached the selected temperature.
Tips:
- Sort your garments out based on their cleaning symbol labels, always starting with clothes that have to be ironed at the lowest temperatures.
- If you are not sure what the garment is made of, then begin ironing at a low temperature and decide on the correct temperature by ironing a small section not usually seen when worn.
Ironing with steam (B)
- Make sure that there is enough water in the water tank.
- Turn the temperature selector to the steam position, between «●» and «max».
- Set the amount of steam to suit your needs, using the variable steam control (3).
- Press the steam release button to release steam (15).
Important:
- The steam hose may get hot if you are ironing for long periods.
Ironing without steam
- Begin ironing but without pressing the steam release button (15).
Vertical steam (C)
- Set the temperature control to the «●●» or «max» position.
- You can steam iron curtains and hanging garments (jackets, suits, coats...) by placing the iron in a vertical position and pressing the steam release button (15).
Stain remover steam gun
Preparation: (only for TDS2540, TDS2545)
Ensure that the appliance is not connected to the mains. Remove the connection plug for the iron (5) if it is connected. Then lift the cover (23) and insert the connection plug for the steam gun in the correct position - with the slot (22) to the left - Then follow the same steps as for ironing; the indicator lights and switches operate in exactly the same way.
Important:
When the gun is being used, while pushing the steam release button (18), there might be some water drops, but this is normal.
Attention
- Use the steam gun in intervals of no longer than 10 seconds at a time.
- Direct the first steam jets towards a cloth in order to eliminate any possible water condensation residue from the steam tube.
- Never direct the steam jet at garments that are being worn by people or animals.
- Do not use the brush extension for delicate fabrics such as silk or cashmere.
To refresh fabrics
Refreshing garments with the steam gun can lessen creases and wrinkles, although this does not substitute ironing with the iron.
For better results, hang the clothes which you would like to refresh on hangers.
With diffuser (21) the sprayed steam enables superficial fabric creases to be lessened.
Fully insert the accessory into the concentrator (19). Press the steam release button (18) for the steam supply and direct the jet towards the fabric that you
would like to refresh. Maintain a minimum distance of 10 cm to avoid getting the fabric too damp.
To remove fabric stains
The steam gun can help to remove washable, fresh stains.
The concentrator (19) and brush extension (20) supply a concentrated jet of steam that makes it possible to remove certain types of fabric stains.
- If the stain is not fresh, the garment should be washed in a washing machine or hand-washed according to the garment care label.
- For stubborn or non-washable stains, take the garment to a specialist cleaning centre or dry cleaners.
Use the concentrator (19) to direct the steam jet at the stain, in direction from the outer side of the garment into the fabric placing a sponge or cloth underneath it to absorb the dirt. The brush extension (20) can also be used with gentle action to support the cleaning effect.
If the above does not solve the problem, get in touch with an authorised technical service centre.
'Calc'n clean' (E)
Cleaning the Boiler
To extend the life of your steam generator and to avoid any build up of scale, it is essential that you rinse out the boiler after several hours of use. If your water is hard, increase the frequency.
Do not use descending agents for rinsing out the boiler, as they could damage it.
- Check that the appliance is cold and unplugged for more than 2 hours, and that the removable water tank (1) is empty.
- Place your appliance on the edge of your kitchen sink.
- Unscrew the boiler drainage plug located on the bottom of the appliance using a coin.
- Holding your steam generator in upside down position, and using a jug, fill the boiler (in the base unit) with 1/4 litre of water
- Shake the base unit for a few moments and then empty it completely over a sink or bucket. To obtain the best result, we recommend that this operation is done twice
- Important: before re-closing, make sure no water remains in the boiler.
- Replace and tighten up the boiler drainage plug with a coin
Cleaning & Maintenance
- After ironing, pull out the plug and allow the appliance to cool down before cleaning.
- Wipe the housing, handle and iron body with a damp cloth.
- If the soleplate is soiled with dirt or scale, clean it with a damp cloth.
- Never use abrasive products or solvents.
Important:
- Always unplug the appliance from the mains supply before carrying out any cleaning or maintenance operation on it.
Storing the appliance (D)
- Always allow the appliance to cool down before storing it.
- Set the switches for main power and steam boiler to the «Off/Stop» position and disconnect the connection.
- Place the iron on the iron pad, standing on the soleplate.
- Empty the water tank and store the mains cable on the cord rewind facility. Tidy the steam hose on the handle of the iron using the cord clip provided (12). Do not wrap the cords too tight.
Troubleshooting
| Problem | Possible causes | Solution |
| The steam generator does not come on. | ·There is a connection problem. ·The steam tank and/or main power button is not switched on. | ·Check the mains cable, the plug and the socket. ·Press the buttons for main power (6) and steam tank (4) «On/Start». |
| The iron does not heat up. | ·The main power button is not switched on. ·The temperature control knob is set to the «min» position. | ·Press the main power button (6) «On», ·Set the temperature control knob (13) to the desired position. |
| The iron begins to smoke when switched on. | ·During first use: Certain components on the appliance have been lightly greased at the factory and may produce a little smoke when initially heated. ·During later use: the soleplate may be soiled. | ·This is completely normal and will stop after a short while. ·Clean the soleplate according to the cleaning instructions in this manual. |
| Water flows through the holes on the sole plate. | ·The steam function is being used before it has reached temperature. ·The water is condensing inside the pipes because steam is being used for the first time or has not been used for a long time. | ·Reduce the steam flow when ironing at low temperatures (Variable steam control (3)). ·Point the iron away from the ironing area and press the steam release button (15) until steam is produced. |
| Dirt comes out through the sole plate. | ·There is a build-up of scale or minerals in the steam tank. ·Chemical products or additives have been used. | ·Use tap water mixed 50% with distilled or demineralised water. ·Clean the sole plate with a damp cloth. ·Never add products to the boiler water. |
| The iron does not produce any steam. | ·The boiler is not switched on or the water tank is empty. ·The water tank is not fitted onto the steam tank correctly. ·The steam regulator is set to the minimum position. | ·Set the switch (4) to the «Start» position and/or fill the water tank. ·Fit the water tank back onto the steam tank correctly (you will hear a click). ·Increase the steam flow by turning the steam control (3). |
| The ironed garment turns dark and/or sticks to the soleplate. | ·The selected temperature is too high and has damaged the garment. | ·Select a suitable temperature for the material being and clean the sole plate with a damp cloth. |
| The soleplate turns brown. | ·This is a regular consequence of usage. | ·Clean the soleplate regularly with a damp cloth. |
| The appliance makes a pumping sound. | ·Water is being pumped into the steam tank. ·The sound will not stop. | ·This is normal. ·If the sound will not stop, do not use the steam generator and contact an authorised technical service centre. |
| Loss of pressure during ironing. | Steam release button activated during a long period of time. | Use the steam release button (15) with intervals. This improves the ironing result as the textiles will be dried and stay smooth better. |
| Water leakage from the boiler | Drainage plug located at the bottom of the appliance is loose. | Tighten up boiler drainage plug with a coin |
Warranty conditions
The terms of the guarantee for this appliance are in accordance with that stated by our representative for the country in which it is sold. The details of these conditions can be obtained from the retailer from whom the appliance was purchased. The purchase receipt must be presented when making any claims against the terms of this guarantee.
Advice on disposal
Our goods come in optimised packaging. This basically consists in using non-contaminating materials which should be handed over to the local waste disposal service as secondary raw materials. Your local town council can give you information about how to dispose of obsolete appliances.
This appliance is labelled in accordance with European Directive 2002/96/EG concerning used electrical and electronic appliances (waste electrical and electronic equipment - WEEE).
Vertical steam ironing (C)
Reservations for changes.
Disposal
Do not use the device without the water tank in place!
When you first use the iron, it may emit specific odors and steam, and after a while, stains may appear. This is normal and will disappear after a few minutes. When the steam button is pressed, you may hear a pumping sound inside the device. This is normal and indicates that water is being pumped into the steam generator tank.
Temperature adjustment
1. Follow the instructions for ironing on the label to determine the correct ironing temperature. 2. Set the temperature using the regulator (13). 3. The indicator light (14) will illuminate during heating and turn off when the iron reaches the set temperature.
Note:
- Sort the laundry according to the symbols on the labels and always iron items that require a lower ironing temperature first.
uk
If you are unsure about the fabric composition of the laundry, start ironing at a low temperature and set the required heating level by testing on an inconspicuous area of the garment.
General safety instructions
Before plugging the device into the mains, ensure that the voltage matches the value indicated on the device's technical data plate. This device must be plugged into an earthed socket. If using an extension cord, ensure it is equipped with an earth connection. - This device should only be used for its intended purpose, i.e., as an iron. Any other use will be considered improper and therefore dangerous. The manufacturer will not be held responsible
for any damage caused by improper or incorrect use of the device.
The device plug must not be removed from the socket by pulling the power cord. Do not leave the device exposed to weather conditions (rain, sunlight, frost, etc.). Do not leave the iron unattended while it is connected to the mains. - The power cord of this device must not be replaced by the user. If the power cord is damaged or requires replacement, this must be done only at an authorized technical service center. - Never immerse the iron, cord, or reservoir in water or any other liquid. - The device must never be placed under a water tap or filled with water while it is connected to the mains. - Before filling the device with water, unplug it from the socket and empty any remaining water after use. - Keep the device out of reach of children. - This device is not intended for use by persons (including children) with reduced physical, sensory, or mental capabilities, or lack of experience and knowledge, unless they have been given supervision or instruction concerning use of the device by a person responsible for their safety.
Make sure that children do not play with the electric iron.
- During operation, the device reaches high temperatures and generates steam, which can cause burns.
- If the safety devices with which the device is equipped overheat, the device will switch off. To restore normal operation of the device, it will need to be taken to an authorized service center.
- Never direct the steam at people or animals.
- The device must be used on a stable surface. When placing the device on its stand, make sure that the surface on which the stand is placed is stable. Do not use the device if it has fallen, if there are visible signs of damage, or if it leaks water. Before resuming
use of the device, it will need to be checked at an authorized service center.
Make sure that the cord does not come into contact with the base of the iron or with hot surfaces.
Description
1. Removable water tank 2. Removable stand for the iron 3. Steam regulator 4. Steam generator indicator light 5. Steam hose 6. Main power indicator light 7. Ready indicator light 8. No water indicator light 9. Housing with built-in steam generator 10. Power plug 11. Iron 12. Cord storage device 13. Temperature scale 14. Iron indicator light 15. Steam release button 16. Soleplate 17. Steam nozzle 18. Steam release button 19. Steam concentrator 20. Filling funnel 21. Funnel for diffuser 22. Accessory box 23. Protective cap 24. Recess for cord storage
Preparation (A)
- Remove all stickers or protective coating from the soleplate of the iron.
- Place the device horizontally on a firm, stable surface. You can remove the stand for the iron from the device and place the iron on the stand on another firm, horizontal surface.
- Separate the removable water tank from the device and fill it, being careful not to exceed the maximum level mark.
- Then place the water tank back on the steam boiler (press until it clicks). 5. Fully unwind the power cord and plug it into a grounded outlet.
- Set the steam boiler switch (6) and the main power switch (4) to the "On/Start" position (turned on). 7. Approximately 5 minutes later, the green indicator light (3) will turn on, indicating that the appliance is ready for use.
- This appliance is equipped with a built-in water level sensor. When the water tank is empty, the red water level indicator (8) will turn on.
Important:
Tap water can be used.
To maintain optimal steam function, mix tap water with distilled water in a 1:1 ratio. If your local tap water is very hard, mix it with distilled water in a 1:2 ratio.
You can find out about the hardness of your tap water from the water supply organization.
The water tank can be refilled at any time during appliance operation. - To avoid damage and/or contamination of the water tank, do not add perfume, vinegar, starch, anti-scale agents, fabric softener, or any other chemical agents. - The iron rest (2) can be placed in the specially designed recess on the appliance or in any other suitable place near the ironing zone. Never place the iron on the appliance without the iron rest! - During the first use of the iron, some odors and fumes may appear. This is normal and will stop after a few minutes. - During the filling of the water tank, the pump may make a sound. This is normal and indicates that water is being pumped into the steam boiler.
Temperature setting
1. Check the care labels on the garment to determine the correct ironing temperature.
- Select the temperature (13):
Synthetics "•" Silk Wool Cotton Linen
3. The indicator light (14) will remain on while the iron is heating up and will turn off as soon as the iron reaches the selected temperature.
Tips:
- Sort the laundry items according to the care instructions on their labels, always starting with the items that need to be ironed at the lowest temperatures.
- If you are unsure about the material of the garment, start ironing at a low temperature and test on a small, inconspicuous area to determine the correct temperature.
Steam ironing (B)
- Make sure there is enough water in the reservoir. 2. Turn the temperature regulator to the position between "**" and "max".
- Set the amount of steam required for ironing using the steam regulator (3).
- Press the steam release button to start steam output (15).
Steam ironing without steam
- Start ironing without pressing the steam release button (15).
Vertical steam (C)
- Set the temperature regulator to the "●●" or "max" position.
- You can iron hanging curtains and hanging items of clothing (jackets,
suits, coats, etc.) by turning the iron vertically and pressing the steam release button (15).
Steam nozzle for stains
At a distance of at least 10 cm from the fabric to avoid excessive wetting.
With the help of the nozzle, you can remove fresh stains.
With the concentrator (19) and the brush nozzle (20), a concentrated steam jet is formed, allowing you to remove some types of stains on fabric.
- If the stain is old, this item of clothing should be washed in a washing machine or by hand in accordance with the care information on the label of this item of clothing. In case of non-removable or stubborn stains, take this item of clothing to a specialized cleaning center or dry cleaner. With the concentrator (19), direct the steam jet onto the stain from the outside of the item of clothing towards the inside of the fabric, placing a cloth underneath to absorb the stain. You can also use the brush nozzle, making gentle movements to enhance the cleaning effect.
«Calc'n clean» (E)
Cleaning the steam generator
To prolong the life of the steam generator and avoid scale buildup, it is recommended to clean the boiler after every 10 uses. If the water is hard, the steam boiler should be cleaned more often.
Do not use anti-scale products for boilers, as they may damage it.
- Let the appliance cool for more than 2 hours, and make sure the removable water reservoir (1) is empty.
- Place the appliance on the edge of the sink.
- Open the drain plug of the boiler, located in the lower part of the appliance. Use a coin for this. 4. Turn the steam generator over and fill the boiler (through the drain hole) with 1/4 liter of water.
- Shake the base of the steam generator for a while, then empty it completely into the sink or a bucket.
For best results, we recommend performing this operation twice.
- Important: before closing it again, make sure there is no water left in the boiler.
- Put the drain plug back in place and secure it, using a coin.
"Calc'n clean" (E)
1. \ 2n - 1 & if ai = aj = 0 \\ ai < aj & if ai > aj .
j 15
LgWg
(TDS2540, TDS2545):
j 15 bii l i j 15 i 15 u 15 i 15
10jgljgJgJgJgJgJgJgJgJg
∴ PLA
Fig. 1
J 1
a
1
lll alablaal aJall
(13) 2.2
a.sjbs
= 0
jL- jL
Fig. 11 1111111111111111.3
.5i1s 1 s 1 s 1 s 1 s
∴ SΔ = SΔ
JgIgIgIgIgIgIgIgIgIgIgIg
aiaia 1
11 15
(U1j0gJ).8
J 9
LgKlU LgU.10
11
J 12
aJ 13
14
j.15
δ 1 1.16
J 17
J 18
jL 19
δ 20
11 "Start/Stop" (4) 6.6
.On/Start 6
(7)
5 1
.
JUJI.11 UJSSI JUJI.11 JUJI.11 8
Loie Jeoo (8) "Uo joljolal"
.
aLgLoie 1sll
g. jglal yjy 11 bll 11 k waiy 11 gaiy .
ailll aalll
JLwSg=LLJzJzJzJzJzJzJz
1uJzIyIyIyIyIyIyIyIyIyIy
1
Jlbl Jglioe JzjgJglalge Igbal Lai) jzjzjgJglal 12a JzjwJzj 2 gAiaiaiaiaiaiaiaiaiaiaiaiaiaiaiaiaiaiaiaiaiaiaiaiaiaiaiaiaiaiaiaiaiaiaiaiaiaiaiaiaiaiaiaiaiaiaiaiaiaiaiaiaiaiaiaiaiaiaiaiaiaiaiaiaiaiaiaiaiaiaiaiaiaiaiaiaiaiaiaiaiaia
Fallersleber Straße 50
Fleiss-Belzinger Zeissstraße 13
76135 Karlsruhe
Im Mittelfeld 1
40227 Dusseldorf
Oberbilker Allee 270 A
79111 Freiburg
Gündlinger Straße 18
AE United Arab Emirates,
BSH Home Appliances FZE
Round About 13
Plot Nr MO-0532A
Jebel Ali Free Zone - Dubai
Tel.: 04 881 4401
Fax: 04 881 4805
www.bosch-household.ae
CLAYTON, Victoria 3168
Tel.: 1300 368 339
Fax: 1300 306 818
valid only in AUS
mailto:bshau-as@bshg.com
BA Bosna i Hercegovina,
Bosnia-Herzegovina
HIGH d.o.o.
Odobašina 57
71000 Sarajevo
Info-Line: 061 100 905
Fax: 033 213 513
mailto:delicnanda@hotmail.com
BE Belgium
BSH Home Appliances S.A.
Bosch Hvidevareservice
BSH Hvidevarer A/S
Telegrafvej 4
2750 Ballerup
Tel.: 44898985
Fax: 44 89 89 86
mailto:BSH-Service.dk@
BSHG.com
www.bosch-hvidevarer.com
EE Eesti, Estonia
SIMSON OÜ
RAUA 55
10152 Tallinn
Tel.: 0627 8730
Fax: 0627 8733
mailto:teenindus@simson.ee
ES España, Spain
BSH Electrodomésticos
Espana S. A.
www.bshappliancecare.co.uk/
bosch
Service Requests (nationwide)
Tel: 0844 8928979
mailto: mks-servicerequest@
bshg.com
Spares and Accessories
Tel.: 0844 8928921
mailto:mks-spares@bshg.com
Product Advice
Tel: 0844 8928925
mailto:mks-productadvice@
bshg.com
Head office
Tel.: 0844 8928922
Fax: 01908 328670
GR Greece, Ελλάς
BSH Ikiakes Siskeves A. B. E.
Kentriko Ipokastima Service
17 km E.O. Athinon-Lamias &
Potamou 20
145 64 Kifisia
Unit 1&2B, 3rd Floor
North Block, Skyway House
3 Sham Mong Road
Tai Kok Tsui, Kowloon
Hong Kong
Tel.: 2565 6151
Fax: 2565 6252
mailto:bshhkg.service@bshg.com
HR Hrvatska, Croatia
Andabaka d.o.o.
Gunduliceva 10
21000 Split
Info-Line: 021481403
Info-Fax: 021 481 402
mailto:servis@andabaka.hr
IE Republic of Ireland
BSH Home Appliances Ltd.
BSH Appliance Care,
Service Division
Unit F4, Ballymount Drive
Ballymount Industrial Estate
Walkinstown
Dublin 12
www.bshappliancecare.ie/Bosch
Service Requests,
Spares and Accessories
Tel.: 01450 2655
Fax: 01450 2520
Customer Service Centers • Central Service Depots • Service Après-Vente • Servizio Assistenza • Centrale Servicestation • Asistencia Técnica • Servicevaerkter • Apparatservice • Huolto
IL Israel, N
C/S/B Home Appliance Ltd.
Uiel Building
2, Hamelacha St.
Industrial Park North
71293 Lod
Tel.: 08977222
Fax: 08 9777 245
mailto:csb-serv@zahav.net.il
IS Iceland
Smith & Norland hf.
Noatuni 4
105 Reykjavik
Tel.: 0520 3000
Fax: 0520 3011
www.sminor.is
IT Italia, Italy
LT Lietuva, Lithuania
Senuku Prekybos Centras UAB.
Jonavos g.62
44192 Kaunas
Tel.: 0372 12146
Fax: 0372 12165
www.senukai.lt
LU Luxembourg
BSH electromagens S.A.
Building C, 39-43 Apollo Drive
Mairangi Bay, Auckland 1310
Tel.: 094786158
Fax: 094782914
www.bosch.co.nz
PL Polska, Poland
BSH Home Appliances (SEA)
Pte. Ltd.
Chung Hsiao E. Road, Sec. 1
Taipei
Tel.: 02 5556 2556
Fax: 02 5556 1235
www.boschappliance.com.tw
UA Ukraine, Ukraine
Kyiv
CJSC "Trans Service"
Tel.: 044 568 51 50
15 th Rd., Randjespark
Private Bag X36, Randjespark
1685 Midrand-Johannesburg
Tel.: 086 002 6724
Fax: 011 265 7852
mailto:service@bsh.co.za
www.boschappliances.co.za

BOSCH


- INTRODUCTION
- IMPORTANT
- GENERAL SAFETY INSTRUCTIONS
- DESCRIPTION
- PREPARATIONS (A)
- SETTING THE TEMPERATURE
- TIPS
- IRONING WITH STEAM (B)
- IRONING WITHOUT STEAM
- VERTICAL STEAM (C)
- STAIN REMOVER STEAM GUN
- PREPARATION: (ONLY FOR TDS2540, TDS2545)
- ATTENTION
- TO REFRESH FABRICS
- TO REMOVE FABRIC STAINS
- CALC'N CLEAN' (E)
- CLEANING THE BOILER
- CLEANING & MAINTENANCE
- STORING THE APPLIANCE (D)
- WARRANTY CONDITIONS
- ADVICE ON DISPOSAL
- VERTICAL STEAM IRONING (C)
- DISPOSAL
- TEMPERATURE ADJUSTMENT
- NOTE
- UK
- PREPARATION (A)
- TEMPERATURE SETTING
- STEAM IRONING (B)
- STEAM IRONING WITHOUT STEAM
- STEAM NOZZLE FOR STAINS
- CALC'N CLEAN» (E)
- CLEANING THE STEAM GENERATOR
- CALC'N CLEAN" (E)
- N - 1 & IF AI = AJ = 0 \\ AI < AJ & IF AI > AJ
- LGWG
- ∴ PLA
- A
- ∴ SΔ = SΔ
- KARLSRUHE
- DUSSELDORF
- FREIBURG
- AE UNITED ARAB EMIRATES
- BA BOSNA I HERCEGOVINA
- BE BELGIUM
- EE EESTI, ESTONIA
- ES ESPAÑA, SPAIN
- GR GREECE, ΕΛΛΆΣ
- HR HRVATSKA, CROATIA
- IE REPUBLIC OF IRELAND
- CUSTOMER SERVICE CENTERS • CENTRAL SERVICE DEPOTS • SERVICE APRÈS-VENTE • SERVIZIO ASSISTENZA • CENTRALE SERVICESTATION • ASISTENCIA TÉCNICA • SERVICEVAERKTER • APPARATSERVICE • HUOLTO
- IL ISRAEL, N
- IS ICELAND
- IT ITALIA, ITALY
- LT LIETUVA, LITHUANIA
- LU LUXEMBOURG
- PL POLSKA, POLAND
- UA UKRAINE, UKRAINE
- BOSCH
Brand : BOSCH
Model : TDA2320
Category : Iron