UNIVERSALROTAK 650 - Lawn mower BOSCH - Free user manual and instructions
Find the device manual for free UNIVERSALROTAK 650 BOSCH in PDF.
User questions about UNIVERSALROTAK 650 BOSCH
0 question about this device. Answer the ones you know or ask your own.
Ask a new question about this device
Download the instructions for your Lawn mower in PDF format for free! Find your manual UNIVERSALROTAK 650 - BOSCH and take your electronic device back in hand. On this page are published all the documents necessary for the use of your device. UNIVERSALROTAK 650 by BOSCH.
USER MANUAL UNIVERSALROTAK 650 BOSCH
YkpaHcbKa ..CtoPiHa 189
Ka3ak .Ber 200
Romana . 213
MaKeDoHcN.. CtpaHua 235
Srpski Strana 245
Slovenscina Stran 255
www.bosch-garden.com
Warning! Read all safety warnings and all instructions. Make yourself familiar with the controls and the proper use of the product. Please keep the instructions safe for later use!
Explanation of symbols on the garden tool, charger and battery

General hazard safety alert.

Read instruction manual.

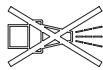
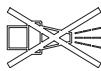
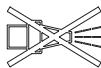
Make sure that bystanders are not injured by foreign objects being thrown away.

Warning: Keep a safe distance to the product when operating.

Caution: Do not touch rotating blades. Sharp blade(s). Beware of severing toes or
fingers.

Switch off and remove isolator switch before adjusting, cleaning and before leaving
the product unattended for any period.

Not applicable.

Wait until all machine components have completely stopped before touching
them. The blades continue to rotate after the machine is switched off, a rotating blade can cause injury.

Do not use the product in the rain or leave it outdoors when it is raining.

Beware electric shock hazard.

Not applicable.

Only use the battery charger indoors.

Battery charger contains a safety transformer.
Do not use a high-pressure washer or a garden hose to
clean the machine.

Carefully check the area where the tool is to be used for wildlife and pets. Wildlife
and pets may be injured while the machine is in operation. Thoroughly check the working area and remove any stones, sticks, wires, bones and foreign objects. When using the machine, ensure that no wildlife, pets or small tree stumps are hidden in the dense grass.
Operation
- Never allow children or people unfamiliar with these instructions to use the product. Local regulations may restrict the age of the operator. When not in use store the product out of reach of children.
- Never allow children, persons with physical, sensory or mental limitations or a lack of experience and/or knowledge and/or people unfamiliar with these instructions to use the machine.
Children should be supervised to ensure that they do not play with the product.
Never work while people, especially children, or pets are nearby.
The user is responsible for accidents or hazards occurring to other people or their property.
Do not wear open rubber shoes or sandals when using the product. Always wear sturdy shoes and long trousers.
Thoroughly inspect the area where the machine is to be used and remove all stones, sticks, wires, bones and other foreign objects.
Before using, always visually inspect to see that the blades, blade bolts and cutter assembly are not worn or damaged. Replace worn or damaged blades and bolts in sets to preserve balance.
Mow only in daylight or in good artificial light.
Avoid mowing in bad weather conditions especially when there is a risk of lightning.
Avoid operating the machine in wet grass, where feasible.
Walk, never run.
- Never operate the machine with defective guards or shields, or without safety devices, for example deflectors and/or grass catchers in place.
We would advise you to wear ear protection for your own convenience.
Never operate the product when you are tired, ill or under the influence of alcohol, drugs or medicine.
Working on banks can be dangerous:
- Do not mow on excessively steep slopes.
- Always be sure of your footing on slopes or wet grass.
- Mow across the face of slopes never up and down.
- Exercise extreme caution when changing direction on slopes.
Use extreme caution when stepping back or pulling the machine towards you.
- Never mow by pulling the mower towards you.
Wait until the blades stop if the machine has to be tilted for transportation when crossing surfaces other than grass and when transporting the machine to and from the area to be mowed.
Do not tilt the machine when starting or switching on the motor.
Switch on the motor according to the instructions with feet well away from rotating parts.
Do not put hands or feet near or under rotating parts.
Always stand clear of the discharge zone when operating the machine.
- Never pick up or carry the machine while the motor is running.
- When storing, make sure that all 4 wheels of the garden tool stand on the ground/floor.
- Only lift the garden tool with the carrying handle. Use the carrying handle with care.
Do not modify the product. Unauthorized modifications may impair the safety of your product and may result in increased noise and vibration.
Leaf Collect
The leaf collect blade has been des- signed to allow you to pick up autumn leaves from your lawn. In order for this functionality to work within optimal parameters, please note the following:
- Only collect leaves with the machine set at maximum cutting height.
- Collect leaves from your lawn only.
- Before collecting leaves inspect the area where the machine is to be used and keep people, pets, glass structures and cars away from use.
Remove the isolator switch:
- Whenever you leave the machine.
- Before clearing a blockage.
- Before checking, cleaning or working on the machine.
- After striking a foreign object. Inspect the machine for damage and change the blade as necessary.
- If the machine starts to vibrate abnormally (check immediately).
Maintenance
Always wear gardening gloves when handling or working near the sharp blades.
- Keep all nuts, bolts and screws tight to ensure safe working with the product.
- Check the grass catcher frequently for wear or deterioration.
Inspect the product and replace worn or damaged parts for safety.
Ensure replacement cutting means of the right type are used.
Ensure replacement parts fitted are Bosch-approved.
Before storing, make sure that the product is clean and free of residue. If necessary, clean with a soft dry brush.
Safety Instructions and Recommendations for Optimal Handling of the Battery
Ensure the garden tool is switched off and the isolator switch is in the off position before the inserting battery. Inserting the battery pack into machines that have the switch on can cause accidents.
- Use only Bosch battery packs intended specifically for the machine. Use of any other battery packs may create a risk of injury and fire.
Do not open the battery. There is a risk of short-circuiting.

Protect the battery against heat (e.g., against continuous intense sunlight), fire, water, and moisture. There is a risk of explosion.
- Keep the battery not being used away from paper clips, coins, keys, nails, screws or other small metal objects, that can make a connection from one terminal to another. Shorting the battery terminals together may cause burns or a fire.
In case of damage and improper use of the battery pack, vapours may be emitted. Ventilate the area and
seek medical help in case of complaints. The vapours can irritate the respiratory system.
Only use the battery with products from the manufacturer. This is the only way in which you can protect the battery against dangerous overload.
The battery can be damaged by pointed objects such as nails or screwdrivers or by force applied externally. An internal short circuit may occur, causing the battery to burn, smoke, explode or overheat.
Do not short-circuit the battery. There is a risk of explosion.
Protect the battery against moisture and water.
- Store the machine and battery only within a temperature range between -20^ and 50^ . As an example, do not leave the battery in the car in summer.
Occasionally clean the venting slots of the battery using a soft, clean and dry brush.
SafetyWarnings for Battery Chargers

Read all safety warnings and all instructions. Failure to follow the safety warnings and instructions may result in electric shock, fire and/or serious injury.
Save all safety warnings and instructions for future reference.
Use the battery charger only when you fully understand and can perform all functions without limitation, or have received appropriate instructions.
- Never allow children, persons with physical, sensory or mental limitations or a lack of experience and/or knowledge and/or people unfamiliar with these instructions to use the battery charger. Local regulations may restrict the age of the operator.
Supervise children at all times.
This will ensure that children do not play with the battery charger.
Charge only Bosch lithium-ion batteries with a capacity above 2.0 Ah (10 battery cells or more). The battery voltage must match the battery charging voltage of the charger. Do not charge non-rechargeable batter
ies. Otherwise there is a danger of fire and explosion.

Keep the battery charger away from rain or moisture. Penetration of water in the battery charger increases the risk of an electric shock.
- Keep the charger clean. Dirt poses a risk of electric shock.
Always check the charger, cable and plug before use. Stop using the charger if you discover any damage. Do not open the charger yourself, and have it repaired only by a qualified specialist using only original replacement parts. Damaged chargers, cables and plugs increase the risk of electric shock. - Do not operate the charger on an easily ignited surface (e.g. paper, textiles, etc.) or in a flammable environment. There is a risk of fire due to the charger heating up during operation.
Do not cover the ventilation slots of the battery charger. Otherwise, the battery charger can overheat and no longer operate properly.
For increased electrical safety, we recommend using a residual current device with a max. tripping current of 30 mA. Before using, always check your residual current device.
Symbols
The following symbols are important for reading and understanding the original instructions. Please take note of the symbols and their meaning. The correct interpretation of the symbols will help you to use the product in a better and safer manner.
| Symbol | Meaning |
| ↑ | Movement direction |
| ↓ | Reaction direction |
| Wear protective gloves | |
| Weight | |
| Switching on | |
| Switching off | |
| Permitted action | |
| Prohibited action | |
| Click! | Audible noise |
| Accessories/Spare Parts | |
Intended Use
The garden product is intended for domestic lawn mowing. The garden product is not intended for hedge cutting, trimming, shredding, etc.
The garden product is intended for lawn mowing at ground level.
Technical Data
| Lawnmower | Universal Rotak 36-550 | Universal Rotak 36-555 | Universal Rotak 36-560 | Universal Rotak 36-590 | Universal Rotak 36-670 | |
| Article number | 3 600 HB9 5053 600 HB9 573 | 3 600 HB9 508 | 3 600 HB9 5063 600 HB9 574 | 3 600 HB9 509 | 3 600 HB9 507 | |
| Rated voltage | V | 36 | 36 | 36 | 36 | 36 |
| Bowl diameter | cm | 38 | 38 | 38 | 38 | 38 |
| Height of cut | mm | 25 - 70 | 25 - 70 | 25 - 70 | 25 - 70 | 25 - 70 |
| Capacity, grass bag | l | 40 | 40 | 40 | 40 | 40 |
| Weight according to EPTA-Procedure 01:2014 | kg | 15.0 | 15.0 | 14.0 | 15.0 | 15.0 |
| Serial number | see type plate on garden tool | |||||
| Permitted ambient temperature | ||||||
| - during charging | °C | 0 ... +45 | 0 ... +45 | 0 ... +45 | 0 ... +45 | 0 ... +45 |
| - during operation | °C | +5 ... +50 | +5 ... +50 | +5 ... +50 | +5 ... +50 | +5 ... +50 |
| - during storage | °C | -20 ... +50 | -20 ... +50 | -20 ... +50 | -20 ... +50 | -20 ... +50 |
| Battery | Li-Ion | Li-Ion | Li-Ion | Li-Ion | Li-Ion | |
18 | English
| Lawnmower | Universal Rotak 36-550 | Universal Rotak 36-555 | Universal Rotak 36-560 | Universal Rotak 36-590 | Universal Rotak 36-670 | |
| Rated voltage | V | 36 | 36 | 36 | 36 | 36 |
| Article number/Capacity | ||||||
| - 2 607 336 913/1 607 A35 02V | Ah | - | - | 2 x 2.0 | - | - |
| - 2 607 336 915/2 607 337 047 | Ah | 4.0 | 4.0 | - | 4.0 | - |
| - 1 607 A35 058 | Ah | - | - | - | - | 6.0 |
| Number of battery cells | ||||||
| - 2 607 336 913/1 607 A35 02V | - | - | 10 | - | - | |
| - 2 607 336 915/2 607 337 047 | 20 | 20 | - | 20 | - | |
| - 1 607 A35 058 | - | - | - | - | 20 | |
All values in this manual are measured for usage below or equal to 2000 meters above nominal sea level.
| Charger | AL 3620 CV | AL 36V-20 | |
| Article number | EU | 2 607 225 657 | 2 607 226 273 |
| UK | 2 607 225 659 | 2 607 226 275 | |
| AU | 2 607 225 661 | 2 607 226 277 | |
| KO | 2 607 225 667 | 2 607 226 279 | |
| Charging current | A | 2.0 | 2.0 |
| Charging period (battery discharged) | |||
| - Battery with 2.0 Ah | min | 65 | 65 |
| - Battery with 4.0 Ah | min | 125 | 125 |
| - Battery with 6.0 Ah | min | 185 | 185 |
| Weight according to EPTA-Procedure 01:2014 | kg | 0.55 | 0.55 |
| Protection class | ☐/II | ☐/II |
Noise/Vibration Information
| Universal Rotak 36-550 | Universal Rotak 36-555 | Universal Rotak 36-560 | Universal Rotak 36-590 | Universal Rotak 36-670 | |
| 3600 HB9 505 | 3600 HB9 508 | 3600 HB9 506 | 3600 HB9 509 | 3600 HB9 507 | |
| 3600 HB9 573 | 3600 HB9 574 |
Noise emission values determined according to EN 60335-2-77.
Typically the A-weighted noise levels of the product are:
| - Sound pressure level | dB(A) | 76 | 76 | 76 | 76 | 76 |
| - Sound power level | dB(A) | 88 | 88 | 88 | 88 | 88 |
| - Uncertainty K | dB | =2.0 | =2.0 | =2.0 | =2.0 | =2.0 |
| Vibration total values ah (triax vector sum) and uncertainty K determined according to EN 60335-2-77 | ||||||
| - Vibration emission value ah | m/s2 | <2.5 | <2.5 | <2.5 | <2.5 | <2.5 |
| - Uncertainty K | m/s2 | =1.5 | =1.5 | =1.5 | =1.5 | =1.5 |
Mounting and Operation
| Action | Figure | Page |
| \(Delivery\ scope^{A)}\) | A | 325 |
| Mounting the handle | B | 326 |
| Adjusting the working height | ||
| Grassbox fitting/removing | C | 327 |
| Setting the height of cut | D | 327 |
| Inserting the battery | E | 328 |
| Operation | F | 329 |
| - Inserting the isolator switch | ||
| - Switching on | ||
| - Mowing | ||
| - Switching off | ||
| - Removing the isolator switch | ||
| Removing the battery | G | 330 |
| Working advice "mowing" | H | 330 |
| Level indicator, grassbox empty/full | I | 331 |
| Blade maintenance/Blade replacement | J | 331 |
| Selecting accessories | K | 332 |
A) Accessories shown or described are not included with the product as standard. You can find the complete selection of accessories in our accessories range.
Starting Operation
For Your Safety
Warning! Switch off, remove the isolator switch and the battery before adjusting or cleaning. The same applies when the cable to the switch in the handle is damaged, cut or entangled.
The blade continues to rotate for a few seconds after the machine is switched off.
Caution: Do not touch the rotating blade.
Charging the Battery
The battery is equipped with temperature monitoring that allows charging only in the temperature range between 0^ and 35^ . In this manner, a high battery service life is achieved.
Note: The battery is supplied partially charged. To ensure full battery capacity, completely charge the battery in the battery charger before using for the first time.
The lithium-ion battery can be charged at any time without reducing its service life. Interrupting the charging procedure does not damage the battery.
The "Electronic Cell Protection (ECP)" protects the lithium-ion battery against deep discharging. When the battery is discharged, the machine is switched off by means of a protective circuit: The garden product no longer operates.
Do not continue to press the On/Off switch after an automatic shut-off of the machine. The battery can be damaged.
Observe the notes for disposal of the battery.
Inserting/Removing the Battery
Note: Using unsuitable batteries can lead to malfunctions or damage the machine.
Insert the charged battery. Ensure the battery is inserted correctly.
To remove the battery from the machine, press the battery unlocking button and pull the battery out.
Charging Procedure
The charging procedure starts as soon as the mains plug of the charger is plugged into a socket outlet and the battery is inserted onto the charger.
Due to the intelligent charging method, the charging condition of the battery is automatically detected and the battery is charged with the optimum charging current, depending on battery temperature and voltage.
This gives longer life to the battery and always leaves it fully charged when kept in the charger for storage.
Meaning of the indication elements on the charger (AL 3620 CV/AL 3640 CV/AL 36V-20)
Rapid-charging Procedure

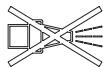
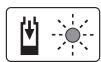
The rapid-charging procedure is indicated by flashing of the green battery charge indicator.
Indication element of the battery: During the
charging procedure, the three green LEDs light up one after the other and briefly go out. The battery is fully charged when the three green LEDs light up continuously. The three LEDs go out again approx. 5 minutes after the battery has been fully charged.
Note: The rapid-charging procedure is only possible when the battery temperature is within the allowable charging temperature range, see section "Technical Data".
Battery charged

Continuous lighting of the green LED indicator indicates that the battery is fully charged.
Additionally, a signal tone sounds for approx.
2 seconds, which acoustically indicates that the battery is fully charged.
Afterwards, the battery can be removed for immediate use. When the battery is not inserted, continuous lighting of the LED indicator indicates that the mains plug is inserted in the socket outlet and that the battery charger is ready for operation.
Battery Temperature below 0^ or above 45^

Continuous lighting of the red LED indicator indicates that the temperature of the battery is not within the allowable charging temperature
range, see section "Technical Data". As soon as the allowable charging temperature range is reached, the battery charger automatically switches to rapid charging.
20 | English
When the battery is not within the allowable temperature range, the red battery LED lights up when inserting the battery into the battery charger.
No Charging Procedure Possible
If a different malfunction of the charging procedure is present, this will be indicated through flashing of the red LED indicator.
The charging procedure cannot be started and the battery cannot be charged (see section Troubleshooting).
Charging Advice
With continuous or several repetitive charging cycles without interruption, the charger can warm up. This is not meaningful and does not indicate a technical defect of the battery charger.
A significantly reduced working period after charging indicates that the battery is used and must be replaced.
Observe the notes for disposal.
Battery Cooling (Active Air Cooling)
The fan control integrated into the charger monitors the temperature of the inserted battery. When the battery temperature is above 30^ , a fan cools down the battery to the optimal charging temperature. The fan generates a ventilation sound when switched on.
If the fan is not running, the battery temperature is within the optimum charge-temperature range or the fan is defective. In this case, the charging time of the battery might be extended.
Working Advice
Battery charge-control indicator
The battery is equipped with a charge-control indicator, which indicates its charge condition. The charge-control indicator consists of 3 green LEDs.
Press the charge-control indicator button to actuate the charge-control indicator. After approx. 5 seconds, the charge-control indicator goes out automatically.
The charge condition can also be checked when the battery is removed.
| LED Indication | Battery Capacity |
| Continuous lighting of 3 green LEDs | ≥ 2/3 |
| Continuous lighting of 2 green LEDs | ≥ 1/3 |
| Continuous lighting of 1 green LED | ≤ 1/3 |
| Flashing of 1 green LED | Reserve |
When no LED lights up after pressing the button, then the battery is defective and must be replaced.
For safety reasons, the charge condition of the battery can only be checked when the garden product is at a standstill.
During the charging procedure, the three green LEDs light up one after the other and briefly go out. The battery is fully charged when the three green LEDs light up continuously. The three green LEDs go out again approx. 5 minutes after the battery has been fully charged.
Temperature Monitoring Indicator of the battery
The red LED of the temperature monitoring indicator signals that the battery or the electronics of the garden product (with battery inserted) are not within the optimum temperature range. When this occurs, the garden product will not operate or not at full capacity.
Temperature Monitoring of the Battery
The red LED flashes when pressing the button or the On/Off switch (with battery inserted): The battery is outside of the permitted operating temperature range.
The battery switches off at a temperature above 70^ until the allowable operating-temperature range is reached again.
Temperature Monitoring of the Garden Product's Electronics
The red LED lights up continuously when pressing the On/Off switch: The temperature of the garden product's electronics is below 5^ or above 75^ .
At a temperature above 90^ , the electronics of the garden product switch off until the temperature is within the allowable operating-temperature range again.
Cutting Capacity (Battery Operating Duration)
The cutting capacity (battery operating duration) depends on lawn properties, such as grass density, moisture content, grass length and height of cut.
Switching the machine on and off frequently during cutting will also reduce the cutting capacity (battery operating duration).
To improve the cutting capacity (battery operating duration), it is recommended to cut more frequently, increase the cutting height and walk at an appropriate pace.
The example below shows the connection between cutting height and cutting capacity with regard to three batteries.
Cutting Conditions
Very thin, dry grass
Cutting capacity
Battery with 2.0 Ah up to 250m^2
Battery with 4.0 Ah up to 500m^2
Battery with 6.0 Ah up to 750m^2
To increase the run time an additional battery can be purchased from an authorised customer service agent for Bosch garden products.
Troubleshooting


| Problem | Possible Cause | Corrective Action |
| Motor refuses to start | Internal wiring of garden tool defective | Contact Bosch customer service agent |
| Battery discharged | Recharge battery | |
| Battery too hot/cold | Allow to cool/warm | |
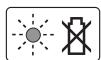
| Grass too long | Max. allowed grass height 30cm on highest height-of-cut setting | |
| Motor protector has activated | Allow motor to cool and increase height of cut | |
| Isolator switch not inserted correctly/fully | Fit correctly | |
| Garden tool functions intermittently | Internal wiring of garden tool defective | Contact Bosch customer service agent |
| Motor protector has activated | Allow motor to cool and increase height of cut | |
| Machine leaves ragged finish and/or Motor labours | Height of cut too low | Increase height of cut |
| Cutting blade blunt | Replace cutting blade (see figure J) | |
| Possible clogging | Switch garden tool off and disengage isolator switch Check underneath the garden product and clear out as necessary (always wear protective gloves) | |
| Blade fitted upside down | Refit blade correctly | |
| Blade not rotating while garden product switched on | Cutting blade obstructed | Switch garden tool off and disengage isolator switch Clear obstruction (always wear protective gloves) |
| Blade nut/bolt loose | Tighten blade nut/bolt (27 Nm) | |
| Excessive vibrations/noise | Blade nut/bolt loose | Tighten blade nut/bolt (27 Nm) |
| Cutting blade damaged | Replace cutting blade (see figure J) |
Battery and charger
| Problem | Possible Cause | Corrective Action |
| Red battery charge in- dicator on charger flashes | Battery not (properly) inserted | Properly insert battery in charger |
| Battery contacts contaminated | Clean the battery contacts (e.g. by inserting and removing the battery several times) or replace the battery | |
| No charging procedure possible | Battery defective | Replace the battery |
| Battery charge indic- ator on charger does not light up | Mains plug of battery charger not plugged in (properly) | Insert mains plug (fully) into the socket outlet |
| Socket outlet, mains cable or battery charger de- fective | Check the mains voltage; have the battery char- ger checked by an authorised after-sales service agent for Bosch power tools |
Maintenance and Service
Battery Maintenance
Warning! Switch off, remove the isolator switch, battery and grass bag before adjusting or cleaning.
Always wear gardening gloves when handling or working near the sharp blades.
Use the following procedures to enable optimum usage of the battery:
- Protect the battery against moisture and water.
- Store the machine and battery only within a temperature range between -20^ and 50^ . As an example, do not leave the battery in the car in summer.
22 | English
- It is recommended that the battery is not stored within the product but stored separately.
- Do not leave the battery in the product in direct sunlight.
- The ideal storage condition for the battery is 5^ .
- Occasionally clean the venting slots of the battery using a soft, clean and dry brush.
A significantly reduced working period after charging indicates that the battery is used and must be replaced.
After-sales Service and Application Service
www.bosch-garden.com
In all correspondence and spare parts orders, please always include the 10-digit article number given on the nameplate of the product.
Great Britain
Robert Bosch Ltd. (B.S.C.)
P.O.Box 98
Broadwater Park
North Orbital Road
Denham Uxbridge
UB95HJ
At www.bosch-pt.co.uk you can order spare parts or arrange the collection of a product in need of servicing or repair.
Tel. Service: (0344) 7360109
E-Mail: boschservicecentre@bosch.com
Ireland
Origo Ltd.
Unit 23 Magna Drive
Magna Business Park
City West
Dublin 24
Tel. Service: (01) 4666700
Fax: (01) 4666888
Australia, New Zealand and Pacific Islands
Robert Bosch Australia Pty. Ltd.
Power Tools
Locked Bag 66
Clayton South VIC 3169
Customer Contact Center
Inside Australia:
Phone: (01300) 307044
Fax: (01300) 307045
Inside New Zealand:
Phone: (0800) 543353
Fax: (0800) 428570
Outside AU and NZ:
Phone: +61 3 95415555
www.bosch-pt.com.au
www.bosch-pt.co.nz
Republic of South Africa
Customer service
Hotline: (011) 6519600
Gauteng - BSC Service Centre
35 Roper Street, New Centre
Johannesburg
Tel.: (011) 4939375
Fax: (011) 4930126
E-Mail: bsctools@icon.co.za
KZN - BSC Service Centre
Unit E, Almar Centre
143 Crompton Street
Pinetown
Tel.: (031) 7012120
Fax: (031) 7012446
E-Mail: bsc.dur@za.bosch.com
Western Cape - BSC Service Centre
Democracy Way, Prosperity Park
Milnerton
Tel.: (021) 5512577
Fax: (021) 5513223
E-Mail: bsc@zsd.co.za
Bosch Headquar
Midrand, Gauteng
Tel.: (011) 6519600
Fax: (011) 6519880
E-Mail: rbsa-hq.pts@za.bosch.com
Armenia, Azerbaijan, Georgia
Robert Bosch Ltd.
David Agmashenebeli ave. 61
0102 Tbilisi, Georgia
Tel. +995322510073
www.bosch.com
Kyrgyzstan, Mongolia, Tajikistan, Turkmenistan, Uzbekistan
TOO "Robert Bosch" Power Tools, After Sales Service
Muratbaev Ave., 180
050012, Almaty, Kazakhstan
Service Email: service.pt.ka@bosch.com
Official Website: www.bosch.com, www.bosch-pt.com
Transport
The contained lithium-ion batteries are subject to the Dangerous Goods Legislation requirements. The batteries are suitable for road-transport by the user without further restrictions.
When being transported by third parties (e.g.: air transport or forwarding agency), special requirements on packaging and labelling must be observed. For preparation of the item being shipped, consulting an expert for hazardous material is required.
Dispatch battery packs only when the housing is undamaged. Tape or mask off open contacts and pack up the battery in such a manner that it cannot move around in the packaging. Please also observe the possibility of more detailed national regulations.
Disposal

The garden product, batteries, accessories and packaging should be sorted for environmental-friendly recycling.

Do not dispose of garden products and batteries/rechargeable batteries into household waste!
Only for EC countries:
According to the European law 2012/19/EU, electrical and electronic equipments that are no longer usable, and according to the European law 2006/66/EC, defective or used battery packs/batteries, must be collected separately and disposed of in an environmentally correct manner.
Battery packs/batteries:
Li-Ion:
Please observe the instructions under Transport.
François
www.bosch-garden.com
Robert Bosch (France) S.A.S.
www.bosch-garden.com
Robert Bosch Argentina Industrial S.A.
Calle Blanco Encalada 250 - San Isidro
B1642AMQ
Calle Robert Bosch No. 405
C.P. 50071 Zona Industrial, Toluca - Estado de Mexico
Tel.: (52) 55 528430-62
Tel.: 800 6271286
Arrefecimento do accumulator (ative Air Cooling)
Accumulador com 4,0 Ah até 500m^2
Acumulador com 6,0 Ah até 750m^2
Paraacularotempodefunctionamento,podeser adquiridoumaccumuladoradicondionalnumcentredeservico pos-vestadorado paraaparelhosdejardinagemBosch.
Busca de erros


www.bosch-garden.com
www.bosch-garden.com
Accukoeling (Active Air Cooling)
www.bosch-garden.com
| - Lydtrykniveau | dB(A) | 76 | 76 | 76 | 76 | 76 |
| - Lydeffektniveau | dB(A) | 88 | 88 | 88 | 88 | 88 |
| - Usikkerhed K | dB | = 2,0 | = 2,0 | = 2,0 | = 2,0 | = 2,0 |
www.bosch-garden.com
Bosch Service Center
Telegrafvej 3
2750 Ballerup
Tlf. Service Center: 44898855
Fax: 44898755
E-Mail: vaerktoej@dk.bosch.com
Transport
www.bosch-garden.com
Bosch Service Center
Telegrafvej 3
2750 Ballerup
Danmark
Tel.: (08) 7501820 (inom Sverige)
Fax: (011) 187691
Transport
De litiumjonbatterier som ingar ar underkastade kraven for farlig gods. Anvandaren kan utan ytterligare forpliktelser transportera batterierna på allman vag.
Endast for EU-lander:
Batteri-avkjoling (Active Air Cooling)
Viftestyringen som er integrt i laderen overvakert temperaturen pa batteriet som er satt inn. Hvis batteriets temperatur er over 30^ , avkjoles batteriet av en ventilator til den optimale ladetemperaturen. Nar viften er pa, hores en ventilasjonslyd.
www.bosch-garden.com
Ved alle forespondsler og reservedelsbestillinger ma du oppgi det 10-sifrede produktnummeret som er angitt pa Produktets typeskilt.
Norsk
Robert Bosch AS
Postboks 350
1402 Ski
Tel.: 64878950
Faks: 64878955
Transport
www.bosch-garden.com
nataiac (Active Air Cooling)
H evomegaTmeVn 0To FOPTiTn MOvda Elambdaou Tou aveiota nntnei Tn 0eepokpaia Tn tooBETneVnc unataiac. O'Tav n 0eepokpaa Tn nataiapac Eenepoei touc 30^ n natapiya xuexai an 0eimotnpaovau v anotktoiaivakn 0eepokpaa O epeyonoueoc aveiotaqac dnuoupei ev a opuo
Eav o aveiopnac de aeitoupye, toe n 0epuokpaia Tnmuataic piketai otnv idavikn nepioxh 0epuokpaoiac
Euvtnpnon kal Service
www.bosch-garden.com
Se oLeC TIC ePWTHOe IC KAI papaYyIe ACVtAAkTIKOW avapepete ONWOBHnote TO 10uNpio KwBIO apiO uMPVA me TnV mivakida tunou Tou npoiovtoc.
EAAaδa
Robert Bosch A.E.
Epxia 37
19400Kopwni-Aθηγα
Tnλ.: 2105701258
Φaξ: 2105701283
Email: pt@gr.bosch.com
www.bosch.com
www.bosch-pt.gr
Metaopoda
Opiepioxoeec natapiec oivtwv laiou unokivtai otic anatnoaeic taw enikivduuvayaoov. O npataiec mnpoov va metapepeoov obikw anto xphonx uupic allouc opouc. 'Otav, owc, n nataopia anootelletai anot ptiouc (x.x. aepontopikw neo wiaac taepiaic taepopow) npeneva tnpoovdaiapocpc iaiatepec anatnaeic yia tonoukeuaia kai ttnanavon. Eeb npenei, ka tynpotoetaaou tou uno
anootohtepaxiou,va ntntheonwohnote kaiououlvocicikouyiaenikivduvaayaθa.
Na anootélambdae TIC eTAVaovopotjoevec mataapieo ovo otav to nepiBnaivai dikto. Na kollate TIC yuvc e npacoc me kollntk taivia kai va oukeuaZeTe Tnv matapia katetoto tpo, oote aut vauynouvieta ma on oukeuaogia.
IpoaeTe npapakalw enionc evdeoxevcn nepaiepω eVikoukavovioouc.
Anoupon

Ta mnyavnata khnou, o npatapiec, ta
Eapntnata kai o uokuaaie npenei va
avakukawovtai me tpo nio pioc to
περιβαλλον.

Mny piEe ta unxavnmuata knou kai tic nataapie,ota anoppmuata tou anitio ouac!
Móvo yia xωpeç tnc EE:
| - Ses basinci seviyesi | dB(A) | 76 | 76 | 76 | 76 | 76 |
| - Gürültü emisyonu seviyesi | dB(A) | 88 | 88 | 88 | 88 | 88 |
| - Tolerans K | dB | = 2,0 | = 2,0 | = 2,0 | = 2,0 | = 2,0 |
www.bosch-garden.com
www.bosch-garden.com
Robert Bosch Sp. z o.o.
www.bosch-garden.com
Bosch Service Center PT
K Vapence 1621/16
692 01 Mikulov
www.bosch-garden.com
V pripe ak'ychkol'vek otazok a objednavok nahrdnych suciastok uvdzajte bezpodmienecne 10-miestne vecné cislo uvedené na typovom stitku vyrobku.
Slovakia
Na www.bosch-pt.sk si moźete objednaf opravu vášho stroja alebo náhradné diely online.
Tel.: +421 248703800
Fax: +421 2 48 703 801
E-Mail: servis.naradia@sk.bosch.com
www.bosch-pt.sk
Transport
www.bosch-garden.com
IaTa I3rOToBHeHn yKa3aHa Ha nocJeHc CTpaHnCe oIoJKN PyKOBoDCTBa.
KoHTaKTHa INΦopMaZIg OTHOCHTbHNO HmNpTepa CoepKITcHa yNaKOBKe.
Cpok cnyk6bni3dennn
Cpok cnkyk6bI n3dennncoctabnreT 7 let. He pekomehnyetc K3KcnpyataunnIO hCTeuehenn5 let xpaehnna C daTbI n3rotoblenHH 6e3 npedBapntelho npOBepkn (aTy n3roTOBHeHn CM. Na 3TKeTke).
Yka3aHbIcPCKcyK6blJeCTBnTeHepnCo6JIeDHN noTpe6BnTeHm Tpe6oBaHn HactoJrero pykoObOCTBA.
Ipeueheb KpTHuecknx OTKa3OB
HeHCNoB3OBAbIpN CnIbHOM NCKpeHH
HeHCNoIb3OBAbPnIOABLeHNN CINbHOB BV6paun
He hCnOJIb3OBAbTc npe6HbIM HnI OOrIeHHbIM 3JIeKTPnueckmKabeneM
- He HcNOpIb3OBA Tb PnI NIOBJIeHn IbIMa HENOCpeICTBeHHO Ⅲ KOPNyca ⅢdEINIA
Bo3moXhIbe oun6oHbIe deIcTBnepcoHana
HeHcIIOb3OBAbTCOBpeXeJeHHoYkoTkoHnIOBpeXeJeHHbIM3aUNTHbIMKoxyXOM
He HcNIOJIb3OBAbT Ha OTKpbITOM IPOCTpaHCTBe BO BpEMa DOXJIA
He BkIIOUaTb npn nonadAHN BOdB b KOpnyc
Kpntepnn ppeelbblx coctoHH
- nepeTepn nnoNIOBpeXdE hneKtpnueckn Kaeb
IOBpeKdEHN KOpNc N3dEInnA
TnH n nepnoHnUHOCTb texHnuecCKo rO 6cbnyxHBaHH
- PekomehnyetcT ONUCTHTb HNCTPymENT OT NbIIN IocJe KaJIOrO HCNOLb3OBaHnR.
XpaHeHne
Heo6xOJIMO XpaHnTb B Cyxom MecTe
Heo6xOJIMO XpaHnTb BdaIOn I NCTOCHKOB NOBblJeH HbIX TempeaTpI IN BO3JeCTBnA COnHehBix Lyuei
- pnp xpaHEnH Heo6xOdHMo H36eRaTb pe3KOro IpePnada TempePaTyp
-xpaenHe 6e3 ynaKOBKn He donyckaetc
- noDpo6HbIe Tpe6OBaHHa K YcNoBnM XpaHeHn CMOtPHTe B FOCT 15150 (YcNoBne 1)
XpaHbByaKOBKe npednpnTna -H3rOToBtEnBaCKlaDcKHX nOmeuenx npi Tempepatye OkpykaIoueCpeblOT +5 do +40^. OTHocHTenbHaBnAxAHOCTb BO3- dYxa He donJkha npeBbIaTaB 80 %.
TpaHcnpTnpoBka
Kateropnueckn He donyckaetcnaeHne HIObIe MekaHne B03dEChTBnHa ynpakOBky npn TpaHCnOpTnPOBKe
- npn pa3rpy3ke/nporpy3ke He donyckaetcnaCnoJIb3OBAHne IIO6oBO Bnda TexHHKn, pa6oTaIOUeN no npHHunny 3aJXIMa yNAKOBKN
- noDpObHbIe Tpe6oBaHnK yCNoBnAM TpaHCnpTnPoBKn cmOTpnte B FOCT 15150 (YcNoBHe 5)
- TpaHcnpTnpoBaT npi TempeNaTyOkpyaIoSe cpeBbI O-T -50°C Do +50°C. OTHocnteNbHa BnaXHoCTb BO3-Dyxa He doJxHa npeBbIaTaTb 100 %.
Yka3aHnno TexHnke 6e30nacHOCTN BHHMaHHe! BHMaTeNbHo npouHa- TaIte cIeDyUoUne yKa3aHn. O3HaKOMbTecb CJIeMeHTAMn UnpaBLeHn H II PraBnIbHbIM NcNoIb3OBAHnE m I3dEInr. CoXpaHnTe pykoBOdCTBO nO 3KcPnyaTaunn dJa DaIb- HeJWeRo NcNoIb3OBAHnA.
He nCpOJIb3yIe n3dEJIne BdoJdb n He IIOBepraIte erO BO3dEiCTBNU DOxJIA.

BepereTecb ydapa 3neKtpn-ueckm TOKOM.

Henpimehnmo.

IcnoJb3yIte 3apJdHoe yCTPOIcTBO TOJIbKO B CyXNX POMeUeHNJx.

3aepnHoe yctpOcTBO Ocha- 3aunTHbIM TpaHcOpMaTopoM.
He nCnoJb3yIte IJI OUHCTKn caIOBOrO INHCTpyMeHTa OUH-
CTHTeIb BblcOKOTo DaBHeHnHaN CaDObbl ⅢlaHr.

Tsqatelbno npoBepaTe yuactOK,Ha KOTOpOM HcPONb3yETcra caOBbI INHCTpyMeHT,
Ha HaJIHnue DnKHX NDOMaUSHNX JNHBOTHbIX.ДИКNE NDOMaUSHNE JNVBOTHbIe MOrTy NOLyUHTb TpaBMbl BO BpEMra pa-60tbl INCTpyMeHTa.TsateIbHo npoBepaIte yUacTOK,Ha KOTOpOM HcNoJIb3YeTc CaOBoBl INCTpyMeHT,INJaIaIte BCE KaMHN,PaIKN,IIPOBODa,KoCTn InpOuNe NOCTOPOHHe ppeDMeTb.IPIMeHRe CaOBoBl INCTpyMeHT CLeDInTe 3a Tem,UTo6bl B rYctOn TpaBe He 6blIO CKpbITbIX DnKHX JNVBOTHbIX,DOMaUSHNX JNBOTHbIX IN He6OJIbShNX PENbKOB.
3Kcnnyatazaia
HnKOrda He N03B0JNte N0lb30BaTbCn3dEJIeM DeTAM NIN JInuam,He 3HaKOMbIM C 3TNIM YKa3aHnAMyn.HauNoHaJIbHbIe IpeDnIcAHnA MOrytOgrpAnuHBt DOnyCTMbI B03paCTonepaTopa.Ecnn n3dEJIne He nC-n0lb3yETcR, XpaHnTe eRo B HeDo-CTynHom dIra DeTei MeCTe.
HnkOrda He IIO3BOJnTe NOpb30BaTbCra CaIOBbIM HNCTpymeHTOM DeTAM,IIuCaM C OrpaHnueHHbIMn Qn3NuYeCKHM,CEHCOPHbIMn IIn yM-CTBeHHbIMN CnOCO6HOCTaMn IInHEIOCTaTOUHbIM ONbITOM N3HaHnMaMn I/INI INzam,He 3HaKOMbIM C3TNIM YKa3aHnA M.
CneIte 3a DeTbMn H He N03B0JrTe mNfpaTb Cn3dEHNEM.
HnkOrda He nOJIb3yI TeCb caIOBbIM HnCTpyMeHToM,ecnI nO6n3OCTn HaxoJrTcA npYrHe IIOu, B OOC6eHHOCTN DeTn, INI DOMaUHne KINBOTHbIe.
OnepaTop nIIN noJIb3OBAteIb OTBeTCTBeHEn 3a HeCuaCTHbIe CInyauN uIep6, HAnEceHHbIyDpyrHM IInuam NII INx IMUyIeCTBy.
He nCnoJIb3yIte OTKpbI TYIO pe3nHOBvIO o6yBb IIN caHdAInn pnpa6oTe c H3dEInm. BcERda HAneBaIte npOuHyIO o6yBb I nnHHbIe 6pIOKN.
TtataTeIbHO OCMOTpHte yuactOK pa-60tbI u6epHTe KaMHn, naKN, npoBOJOKy, KocTH n IpOChne NocToPOnHHne IpeDMETbl.
Ipeed nCNoIb3OBAHnEm BceIa npOBepaIte HOxN, BVHTbI HOxEi H0XeBOy y3eI Ha IpeIMeT N3HOca I NOBpeJdeHn. Bo n36exKaHne Dic-6baIaHcBa CBeIa MeHnTe cpa3y BCE n3HOCSBUnEeCnI INIOBpeJdeHHbIe HOxN INBVHTbI HOxEi.
KocHTe TOnbKO npn DHeBHom CBete IIn6o npn XopoWeM NCKycCTBeHHom OCBeUeHN.
He pa6oTaIe c r30HOKOcHkoB B pIoXyU nOrOdy, B Oco6eHHocTn, KOrda NaBnraeTcraP03a.
IO BO3MOXHOCTN He IIOJIb3yITEcB CaIOBbIM INHCTpyMeHTOM Ha BnJaK-HOJ TpaBe.
IpeBnraTeCb Bcerda CnoKOHO, HNKoRda He 6eHrTe.
HnKoIa He nCNoB3yUte caObBi HNCTpymeNT C NOBpeJdeHHbIMn 3a- UHTbIMN yCTpoiCTBaMn IN KpbIuKa-Mn nn6e3 npedeoxpaHnteJIbHbIX npncno6IeHn, Hnnp., 6e3 De- fKeTopa N/nn TpaBOc6OpHnka.
B ueJx HnHbNduaJIbHOJ 3aUHTbl peKOMeHnyem BcERda HcNoJIb3OBAuTb cpeICTBa 3aUHTbl OpraHOB Clyxa.
He noIb3yIteCb n3dJIeHem, ecn Bby UcTaN nn 60JbHbI, nn HaxOJITecb IOd JeICTBnEM CnIPTHbIX HaNTKOB, HApKOTnuecknx CpeIcTB nn MeiKaMeHTOB.
Pa6oTa Ha cKIOHax MOxET 6bITb ONaCHOH:
- He kocnte Ha ocobehno kpytbIX CKIOHax.
- Ha ckIoHaxиHa MOKpoTpaBe
BCErIa CJIeIITe 3a yBepeHHbIM Ia-ROM.
- Ha haKloHbIX NOBepxHOCTX BceRda pa6oTaIe IonepeK INHKoRda He pa6oTaIe B HAnpaBHeHHBBepxHIN BHN3.
-Будъе ocObeHNO OCTOpoxHbI npi CMeHe HAppaBLeHnHa CKIoHax.
BybTe KpaHHe OCTOpOXHbI,ecnBbI ndeTe cnnHO BpePe nn THeTe caObbl INCHTpymeHT 3a co6oN.
PnCKaUHbHH TpaBbI BcerTaTOLkaIte CaIObIy INHCTpyMeHTpepeD cO6oN HNKoRda He NODTgHBAIte erO K ce6e.
HOJNdoJXHbI 6bITb IONHOCTbIO octaHOBHebl,ecnBam HxKHO Ha-KLOHHTcAoBBi INHCTpyMeHT dJa TpaHCnOpTnPOBKn,pepecey yuaCTOK, He 3aceHHbI TpaBOi, nIn y6paTb CaOBbl INHCTpyMeHT c yuaCTka/npemecNTb Ha yuaCTOK, rDe Bbl npOn3BoDnH/HamepeHbl pOn3BOdntb CkaUBaHne.
HeHaKIOHnTe CaIOBbI HNCTpyMeHT,HaUNHa pa6Otu C Hm HIN3aNyCKaY DBNrataTeb.
BkIIOUHTe caIOBbI INHCTpyMeHT, KaK OINcAHO B INHCTpyKcUNI NO 3KcNlya- taUN, CneIte 3a TEM, UTO6bI BaUN HOrn 6bln Ha DOCTaTOHOM paCtOJHN OT BpaUauOuNXc HOKeJ.
He npnbInxkaTe pyKn HOrn K Bpa- ⅢaUOUMcA cTAm N He POnCTaB- IJIaIte IH NOB BpaUOUIncs aactn.
Pn pa6oTe c caObIIM HNCTpyMeHToM DepxKInTecb Ha pacCTOaHH OTOHbI Bbl6poca.
HnkOgda He IoHnMaIte HnepeHocHTe caIOBbI INHCTpyMeNT npi pa6OtaUoIeM DBNrataTeIe.
Cleinte3aTem,TO6bI npxpaHEnn caOBbI INHCTpyMeHT CToJI BcEMN 4 KOlecamHa 3emNe.
ПоднимаitecaIDOBиИHCTpymeHTToIbKO3apykUДЯпepeHocKn.O6paauTecbCpykoДЯпepeHocKnakKypaTHO.
Hnueo He MehneB H3dennn. Heonptymbie n3MeHenm MOyT ckaatbca Ha 6e30NaCHOCTN H3dennn I npNbOHTb K CnIbHbIM Wymam N Bn6paunm.
Y6opka IInctbeB
Hoxdnyy6opkn nctbeb hmeet opormy, no3BOJnOuIcO6npaTb Ha ra30He OCEHHIO INCtBy. JnI nOlyueHnONITMaJIbHbIX pe3yIbTaTOB HxKHOco6IIOaTb cIeDuOuie:
- Co6npaIte IInCTbIa TOnbKO Ha MaKcHMaJIbHOI BbICOTe CkaUINBaHnI.
- CobpaIte IInCTbI TOnbKO Ha CBOeM yUacTke.
-Прждуемсбираьлпсья, OСМOTРИТЕУЧАСТOK pa6OTы, И HeДОпУSCКайтЕнхЖБДЕНЯHAбИЗ-KOMpacCTOHHINДPyRnxЛЮDEI, ДOMaшнIXЖИВOTHbIX,CTEКЛЯHHbIX ПрEDмETOBи aBTOMaшн.
OTKIIouaIte npepbIBaTeIb 3JIeKTPoIeN
- Bcerda, kOrda ocTaBnaTe caO-BbI INHCTpyMeNT 6e3 npHcMoTpa.
-пенистареньемз actpeBaHHa.
-Перед поверков,оунстков Ии Вылоленем пουчх рабт на садовом Инструментe. - Pocne cToIKNHOBEnn C uXKePOHbIMN IpeDMeTAMN: HeMeIeHNO IpoBepbTe CaIOBbI INHCTpyMeHT Ha IpeDMet IOBpeJxDeHn I npH Heo6XoDmOCTn 3aMeHNTe HOK.
- Ecni caIObI INHCTpyMeHT HaHHeT Heo6bIuHO Bn6pnpObaTb (HeMeJIeHHo IpoBepntb).
Texnueckoe o6cnyxmbaHne
Pfni MaHnPyIaIcx HnI pa6Otax B 30He ocTpbIX HOKeB BcerDa HaedeBaIte caIOBble pyKaBNCuI.
PpOBepaIte Bce raIKN,6oNTbI INBnTbI Ha IpeDMeT npOuHOI nocaKNCzEJIbIO oBeCneueHna 6e3OpacHoRo pa6oUero COCTOHNr N3dennr.
Perynnpno npOBepaTe coCToHne n CTepeh h3HOca TpaBOc6OpHnka.
Поберайтейндении и дя надж-HOCTNЗAMENYTe N3HOCNBUNeCSI INI NOBpeJdeHHbIe DeTaII.
IcnoJIb3yIeToIbKOIpEduCMOTpeHhIEДЯcaIOBOrOINHCTpyMeHTa HOxN.
ДяЗamHeIиСпОь3уИTe opRnHaHbIe 3aIacHbIe yAcTnФИрMbI Bosch.
Ipeed xpaheHnem npOBepbTe, yTO-6bl n3dJIne 6blIO uHCTbIM Ha He He 6blIO oprAHueCKNX OCTaTKOB. Pn Heo6xOJIMOCTH OUHCTHTe erocyXoIeTKoI.
Yka3aHnno TPO TexHnke 6e30nacHOCTn N Yka3aHnno OTHOCHTenbHo ONTmAbhoro 6paueHnna C aKKymyIaTOPHO 6aTaapee
Y6eHntTeCb, yTO caObBHy INHCTpyMeT bIKIOueH npepbBaTeB 3JIeKTPoCEN OTKIOueH, pIeXJe Cem BCTABnIb AkkymyIaTOPHyO 6atapei. UCTaHOBA kKymyIaTOPHO 6atapei BO BKIOUeHHb CaObBHy INHCTpyMeT MOKeT npINBeCTN K HeCsaCTHOmy ClyuAO.
NcnoB3yIteToIbKO npEycmOTpeHHBe IaHaHOro caDobOro HNCTPymeHTA aKKMynATOpHbe 6aTapei npOn3BoCTBa Bosch. NcNoB3OBAHne dpyrHx aKKMynATOpHbX 6aTapei MoKet npNBcTn K TpaBMam YpeBaTO BO3HNKHOBEHEm NOXapa.
He BcKpbIbAaTe AkkymyTApOp. Pn3Tom Bo3HnKaET ONaCHOCTb KOPOTKTO 3AmbKaHn.


3aunuanteakkymyntopOTblicoknx temepatyp (hanp.,OTdntebHOroHarpeBaHHHa coHnue),OHR,BOBbN Bnarn.3To co3daETOnaCHOCTbB3pbIbA.
Depxhte HEnCnOb3yEmbl aKKymIaTOp BdannOT KAnzEJIpcKHXCKPENOK,MOHT,KnIOe,FB03Dei, BNHTOB INpyrHx MeNkHX MetaIIINuecKHX PpeIMTeB, KOTOpBle MOryT Bbl3BaTb 3aMbKaHne KOHTaKTOB. KoPOTKe 3aMbKaHne MEKdy KOHTAKTAMn aKKymIaTOpHOJ 6atapeH moKET npIBeCTN K OXoRan mHn NOxApy.
Pn NOBPEKdENH HnepaBbHbHom HcNoIb3oBaHHn AKKyMnyTApoM MOrY BbIeNpTa cnapbl. PnoBETpe TepnnTopnIO n 6opatntecb K bpaay Pnp nHaunyn Kaanob So coTOnAeZdoOpBaB. BbXbHnea npoB MoKet npBeCTN K p3aPaeKeHIO dblxateJIbHbIX nyTei.
NcnoIbayte aKKymyIaTOphyIO 6aTaPeIO ToIbKO Bn3- DeHHx N3rOToBHTeJI. TOnbKO TaK aKKymyIaTOp 3aun- IueH OT OnaCHO neperpy3kn.
OCTpbIMN npedMeTaMH, KAK HApN., rBO3dEm HIN OTBePTKo, a TAKXe BHeUNHM cHNOBbIM BO3dEChTBMeMOxH NOBpeDHTb AKKymyIaTOpy Ho6aTapeo.3ToMOKeT pINBeCTN K BYTpHeHEm KYOPOTKOM 3aMbKaHIO, BO3rOpAHIO C3aDbMHeHEm, B3pByI IN nepepeby AkKymyIaTOpHO 6aTapeu.
He 3aMbIkaIte hakopoTko aKKymyIaTOp.3To co3daet ONaCHOCTb B3PbIbA.
3aunuainte akkymyantopHy6atapeoOT BO3eICTBn BnaH N BObl.
XpaHnTe caObBiy HNCTpyMeHT N AKKyMnyTOp TOnJIbKO npH TempepatyeOT-20°Cdo 50°C.Hanp., He ocTabIaIte caObBiy HNCTpyMeHT IeTOM B MaUNHe.
BpemrO T BpemEnI npouiAte BeHTnlaIOHhble nppe3n AKKymyTOpa MArKo, CxOHNCTOKNCTOQUKo.
Yka3aHnno TeXnKe 6e30NaChOCTnДЯ 3apAHybIX yCTpoiCTB

IpoHTte Bce yka3aHnno TeXhNke 6e3- onachoctn HnHctpyKuH. YnyueHHne Ipn BbInoJIHeHH nPiBBeEHbIX HnHex HnHCTpyKuH, MOrY BbI3BaTb nopaxKeHne 3NeK
TPOTOKOM, NOXAPn/INI INPUBECTN K TRAKeJIbIM TpaBMam.
CoxpaHnTe 3TuK3aHnNo 6e3oNaChocTH N HNCTpyKnnIy6dyuero.
Pb3yTeB 3apdHbIM yCTpoiCTbOM ToIbKO B TOM Cnyae, ecN BBy B COCTOAHNN IONHOCTbIO OcEHNT bero FyHKUN IN npHBecTH IN B DeICTBNE NIN NONYUHN COOTBEcTBcyUOeYkazHH.
HnkOrda He no3BOLJte NOJIb30BaTbC8 3apRdHbIM yCTPOINCTBOM DeTAM, IINaAM C OrpaHnueHHbIM Nn3N-ueCKHM, CEHCOPHbIM Nn YM-CTBEHNbIM CNOCO6HOCTAMN INnHEIOCTaTOUHbIM ONbITOM N 3HaHnA-MN n/INn IINaAM, He 3HaKOMbIM C3TNIM YKa3aHnA.M. HaIOnHaNbHbIE npEiNcAHn MOyT OrpaHnUHBaTbDOynCTMbI B03pact ONEpaTopa.
He octabnIte Deten6e3 npncmotpa. He noJXHbI paTc 3apdHbIM yCTPOINCTBON
3apjxaiTe TOLbKO LNTn-NOHbIe HNDyKTNHBIe aKkymyJIaTOpHbIe 6aTapeIN Bosch emKocTbIO 2,O A·u (OT 10 3JIemENTOB).HaPjXeHne aKkymyJTopa DOJXHO COOTBeTCTBOBaTb 3apJiHOMy HaPjXeHHIO 3apJiHOrO yCTpoiCTBa. He 3apjxaiTe He3apjXaEMblc aKKymyJIaTOpbl. INaue cyIeCTByET ONaCHOCTb IOnkapa N B3pbIBa.

3aunuata 3apnHoe yctpoCTBO OdoXy H cybPOCTH. PpOHKHOBEHne BOJI B 3aPdHoe yCTPOCTBO NOBIIaET PNC NopaKeHHA 3JIeKTPOTOKOM.
Codepknte 3apAnhoe yctpoBTO B uHCTOTE.B pe- 3yNbTaTe 3aqr3HeHH cyuectByet ONaCHoCTb 3JIeKTPn- ueCKOrO nopaxKeHn.
Kakdbi pa3 neped hcnnonb0baHnem npOBepaTe 3aPraHoe yctpoCTBO, uHyp n uTkep. He hcnnonb3yIte 3apdHoe yctpoCTBO, ecnn o6hApuyKeHbIOBpeKDeHN. He BCKpbBaIte 3apdHoe yctpoCTBO camOcToTebHo, erO pEmoHT pa3peWaeTc BInONHrTa TOnbKO KBaHnΦuHPOBaHOMpy NepcoHany n TOnbKO c HcNObb30BaHHeOpRHaHbNbX 3aYacte. NobpeJdeHHbIe 3apdHbe yctpoCTBA, uHyp n uTkep NOBIIaAOT pNCK IopaxEHnEJIeKTPTOTOKOM.
He nIob3yIte 3apJHoe yctpoCTBO Ha IerKOBocnmaenHOeCn NOBepXHOCTH (HaNP., Ha 6ymare,TKAHx H. ). HIN B NOKApOONacOH cpeE. B CBa3Nc HArpeBaHnEM 3apJHOrO yctpoCTBA BO BpEm 3apJDKU BO3HNKaET ONaCHOCTb BO3rOpAHNA.
He 3aKpbIbAte BcHTnlaHOnHHbIe IeHN 3apdHOrO yctpoiCTBa. BIpOTnBHom CInyae Bo3MoKeH IpepePB 3apdHOrO yctpoiCTBa N BbIXoN i3 CTPOI.
Длг NOBbIeHnE 3IeKtpOBe3oNacHoCTN peKOMeHnyetc HcNoIb3ObA Tb yCTPoI CTBO 3aUHTHOr OTKIOUeHNc MAKC.TOKOM Cpa6aTbIBAHnH 30 mA.IpePe pa6oToB BCErJa nPobepRte yCTpoI CTBO 3aUHTHOr OTKIOUeHN.
CNMBOJIbI
Cleyuohne CmBbOblnI NOMyT Bam npI yTeHN I IOHMaHHN pykoBoDCTBa IIO KcPlyaTuHN.3aONMHHe CmBBObln I Hx 3HaueHne. PpaBNbHOe TOnKOBaHne CmBBOOB NOMOXET Lyuwe I BezOnacHe pa6oTaB cN3dennem.
Nocne aTOMaTHueCKoRb BbIKNoUeHHaNeKtPOnHcTpymenta He haxmaite 60nbwe Ha BbIKNoUaTeInb.AKKyMyJIaTOp MoKeT 6bItb NobpeKdEh.
yUHTbIbAaTe yka3aHnno yTnIn3aunn aKKymnyTopHO6a-tapen.
UctaHOBka/H3BLeueHHe aKKyMylrTopHO 6aTapen
Yka3aHHe: IcnoIb3ObaHHe hecooTBeCTByIOuNX aKKyMnyTopoB MoKET npVBecTH K c6oM B pa6oTe Hn NobpeXdEHHIO HHCTpymEntA.
BCTaBbTe 3apJxHHeHb aKKyMylTOp. Y6eHITecb, UTO aKKyMylTOp BCTaBHeN NOHOCtBu.
UTo6bI n3BLeueb aKKyMnyTOp n3 INCTpyMeHTa, HaxMMTe KHOIIKpa36nOKNpOBKn aKKyMnyTOpH0N 6aTapeu N n3BLe- KInTe aKKyMnyTOp.
Ipocecc3apAkn
ПюцeccЗардкн haunhaetcspa3у nocle BKIOUeHENBUNKshynpa 3apdHOrO yctpoCTBa B wTeNceIbHyIO po3ETky INocIeDyIOSeYCTAHOBKn aKKymIITopaB 3apdHoe yctpoICTBO.
Blaoradapn HntenlneKtyaHbno npoceype 3apAnk 3apAnHoe yctpoictBO aBTOMaTHueckn pacNo3Haet cTeenb 3apA
ДаakKуMЛТОРИи ВьБирaelOTNTHMaJIbHbI TOKЗapЯДКIN 3aBcHmOCTN OT TempeAtpbyи HapяжЕнЯ akKуMЛТО- pa.
3To卍aHIT aKkymIyIop, pHn XpaHEnH N B 3apIaHOM yCTpoIcTBe aKKymIyIop 6laIogApA 3TOMy BCeIa IONHOCTbIO 3apJxKeH.
3NaueHne HndKkATOpNbIX 3JeMeHTOB Ha 3apAnHom ycTpoiCTBe (AL 3620 CV/AL 3640 CV/AL 36V-20)
PexHM 6bIcTpo3aPdKn
O6bIcTpo3aP4Ke CBnTeBCTByET MHaHHe 3eNeHOro INDnKaTopa 3apJa aKKymyIaTopa.
HnDnKaTOpNbI 3eMeENT aKKymyIaTOpa: Bo BpMa IpoUecCa 3apRAnIO NO OpePeI 3aRopAOTcN I BCKope RaCHT 3eNeBbIX CBETOIdoNA. AKKymyIaTOp NOIHOCTbIO 3apRKeH, eCN1 3eBbIX CBETOIdoNA roprI NOCTOHHO. PnIbNtHtBNo CEpe35 MHN IO KOHuaHHN 3apRKn AKKymyIaTOpA 3eBbIX CBETOIdoNA rachyt.
Yka3aHHe: bIcTpa 3apJa Ka 03MoJHa, TolbKO eCIn TemnepeTaPya aKKymyIaTOpHoi 6aTapeH hXoDHTcB N ppeJenax DOynCTMOrO dHaNa3OHa, CM. pa3dEe «TexHnueckNe daHbIe>.
AkkymyItop3apJxhen

HenpepbibHboe Cbeuehene 3eneHoro CBETO- IIOda CINrHaJIIm3npyet O PONHOCTbIo 3apJxehH HOM aKKyMnyAtope.
Yka3aHnI no 3apAdke aKKymyIaTopa
Пин НенирьвIBbIX ИИ MНОТКраTHО NOВТОРЯЕмбIX ZIKKAnx 3ардк 6e3пенирьвIBаЗ зардюгу cTpoCTBO может HaI rpeTbс. 3To, TEm He MeHee, 6e3BpeDnO И NHKaK He yKa3bIBaetHaTexHnueckN DepeKT 3apdHOrO yCTpoCTBA.
3NaHTeBHOe COKpaUHe NpOJOnKHTeBHOCTn paObTb aKKyMnyIaTOH 6bAtepeN oCNe 3apRKn yKa3bBaET Ha TO, cTO aKKyMnyIaTOH 6bAtepeN uCepnAna cBoi pecypc n ee Heo6XoDIMO 3aMeHNTb.
yuntbabaYka3aHnNo ytnn3aun.
OxlaJckdHe nekKymyIaTopa (Active Air Cooling)
HnterpnpobAHnHbA 3apdHoe yctpoiCTBO cHTema ynpabLHeBnEYBeTHINrTOpOM cIeNt3a TEmnepatpyo BCTaBHeHHO n AkkymyIATropHO batapeH. Ecnn Temnepatypa akkymyIATop aPebblaetaet 30^, BeHTINrTOp OXnJaet erdo ONHMAbHNo I daZAPKn Temnepatby. BknOueHnhBBeHTINrTOp CO3daet UyMbBo BPem pa60Tb.
EcnBENTnIaTOp He pa6oTaET,3To 3NaHT, YTO TEMpePaTypa aKKymyIaTOpHOb 6aTapeH haoDITcB O NTmAbHOM dHaana3OHe HIn BENTnIaTOp HeNCnPapBeH. B30m Cnyae Bpem3aPdKn aKKymyIaTOp yBeHnUBaTcR.
Yka3aHnno pa6oTe
HndkaTop 3apda akkymyTropno 6atapen
AkkymyIaTOP ochaueH INHdkaTOpOM 3apJxehHOCTN, KOTOpBiy NOKa3bIbAeT erO CTeneHb 3apJxehHOCTN. INHdkaTOp 3apJxehHOCTN COCTOHT H3 3eJIeHbIX CBEtOJIOHOB.
ДлгakTNBn3aunHнДиКaTopaЗapJKeHHOCTNнжMITE KhoNKу HnDikKaTopa 3apJKeHHOCTn.ПпбЛ.чepe35cekyн INdikKaTOp3apJKeHHOCTn rachet CamOCToTeJIbHO.
CtepeHb 3apJxKeHHoCTn MoXHO IpoBepaTb N Ha N3BneH HOM aKkyMnyTope.
| Сbvetedоюная Иndикадия | Емковственakкумларopa |
| Henpepbivbhoe Сbvetedиме 3 Зелених Сbvetedимов | ≥2/3 |
| Henpepbivbhoe Сbvetedиме 2 Зелених Сbvetedимов | ≥1/3 |
| Henpepbivbhoe Сbvetedиме 1 Зелениог Сbvetedимда | ≤1/3 |
| Миганne 1 зелениог Сbvetedимда | Pezeрев |
Ecnn nocne hakatna KhoNkHe 3aTopaetc Hn OOnh CBToDIO, aKKymyTAPo HncnpaBEN Hn POnJnxTzAmHe.
AkkymyIaTOp Ha 4,0 A·u do 500 m²
AkkymyIaTOp Ha 6,0 A·u Do 750 m²
YtO6bI yBelenHbI pnoDIOJIKHTeNbHOCTb paObTb, MoXHO nC- N0JIb3OBAb TOnONHnTeNbHbI aKKyMnyTOp, pNo6pTeH HbI uepe3 aBTOpH3nPObaHHyU cepBCHyU mactepckyU dJa caOboBix HcTpyMeHTOB Bosch.
Ponck HencnpabHocte


www.bosch-garden.com
IpoKanyiSta, BO CEX 3anpocax n 3aka3ax 3aunacte O6BaTeIbHO yka3bIaIte 10-3naHbI TOBapHbI HOMep no 3aBODcO tabnue HeJdEIny.
Knprn3tah, MoHronna, TaJxNkHCTaH, TypKMeHHCTaH,
y36eknctan
TOO «Робет Боч» (Robert Bosch)
Power Tools noclenpodaaxhoe obcnyxHBaHne
yn. Mypat6aeba, d. 180
050012 AImatb, Ka3axctan
Cnyjke6haa 3n. nouta: service.pt.ka@bosch.com
OΦηηaJIbHbI Be6-caIT: www.bosch.com,
www.bosch-pt.com
TpaHcnpToPbOka
Ha BLOXeHbIe NITHeBcHOHbIbe AKKymyIaTOpHbIe 6aTapeu PaacnOcTpaHbIOTc Tpe6OBaHIn B OTHoUeHHm TpAChNcOpHTPOBkN OAnCbIX rpy3OB. AKKymyIaTOpHbIe 6batapeu MOrTy nepeBOzITbc CaHM NIOb3OBaTeIeM ABTOMbIhBIM TpaHCnOPTom 6e3o6xOdImocTo cO6IIODeHHaONHtTeNbHbIX HOpM.
Pnnpebo3ke c npnbneuehenem TpebHex Nius (Hanp.: camoIometnnTPaHcNpOThbIM 3KcneDHTOpOM) Heo6xoJIMO coBIOaTbOC6bte TpeBOBaHNK ynakOBKe HmApKnPOBKe. B 30m Cnyae pnpnoTROBKe rpya K OTnpBaKe Heo6xOJMo yuaCTHe 3Kcneptra No onaChbIM rpy3Am.
Ipecebilaetaekymnyo6aataeioTobkoB TOMcnyae,ecnKopnyeHOBpejdeh.3akneiteOTkpbblkeKoTHakbyuynakyuteakymnytoHpyo6aataeIOaTObiOHahe bontanacb yynakovbe.CobniouaTe,noxayNycta,TakokeBO3MOXhbleDOnONHHTbIbHeNaHOHaBbIbePepnicaHHN.
YTHNn3aun

CaOboBie INCTpyMeHTbl, aKKyMnyTOpHbIe 6a- Tapei, npHaJnDexKHOCTn uYnaKOBky HUKyHO CdaBaTb Ha EKoIOnrHuCeckn UcSTcyIu peKyuNepa
LNUO.

He bbl6pa2bIaBte caOIOBIE HNCTpyMeHtBI n AKKyMylTOpHbIe 6bATapeH/6bATapeKIN B 6bITOBoM Myc0!
TolbkoДЯСТРан-ЧЕнов EC:
B cootBeTCTBn C eBponeeCKo DnpeKTHBOI 2012/19/EC O tclnyKBWne 3neKtpnuueckne H 3neKtpoHHbIe pni6Opbl n B COOTBeTCTBn C eBponeeCKo DnpeKTHBOI 2006/66/EC noBVPexdHbIe Ih6O oTpaobToHHbIe aKKymyIaTOpbl/batapeHkyuHKHO Co6bpArbTOJdEhNo H cdaBaTb Ha 3KOLOrHuCeCKN uChTuO peKynepauuHIO.
AkkymyIaTopbI, 6aTapeH:
JIHTHEBO-NOHHbI:
Ipojanycta,co6JIoJaTe yka3aHnna pa3dena TpaHCnpTn- pOBka.
yKpaIHcbka
Bka3iBkn 3 texhikn 6e3nekn
Ybara! YbaxHo npoHTaTe hactynhi
Bka3iBkn. O3naHOMtecr 3
eIementamn ynpabInHH i
IpaBnAmn KopncTyBaHH
Bnpo6om. 36epiraTe ihctpykciu 3
ekcnnyataui dIy noaIbwoRo
KopncTyBaHHn HeU.
ПОЯСЕНHA ZOdo CnMbONiB Ha caIobOMy iNcTpymENTi, 3apIaHOMy npIcTpoI ta akymyIaTOPHI 6batapei

3aaraIbHa Bka3iBka npo He6e3neky.

IpounTaTe 1o iNCTpyKciIO 3 ekCnnyataii.

Cπiκуǐte 3a Tɪm, Κιθδ чужόρίдNi Tīna, Κιθ Bɪdnlɪtaɪtɒb, He nopɑhɪnɪ
IIOeI no6n3y.

3aHnHTn CaOBn iNCTpymeNT 6e3 HaTny, BmKHiTb NOrO i BiKnIouiTb p03'EDHyBaay CTpyMy.

He cTocyeTbcra.

Iepsh hixtopkaTHcAdo DeTaleN caOBOrO IHCTpymEnTy,3aueKaITe,
DOKN BCI DeTani He 3yHnHbCn. PicnBnMKHeHH CaIOBOrO iHCTpyMeHTy HOxI Σe npoOBKxyHb o6epTaHcNc iMOxKyTb Pn3BecTn Do nopAHeHb.

He KopnctyntecBnpo6om Bdou,Ha Bpi6 B3araJI He IOBnHe NpndTn DoU.

3axuaiTe ce6e BiD yapyeIeKtpnHm CTpyMOM.

He cTocyeTbcra.

BnKopncToBynte 3apaHnnpnaI nnue y cyxnx npimüeHHx.

3apn npncpti oHaHaHn 3axncnTpaHcOpMaTOPoM.
He BnKOpNcTObuYIe IJy OunHennCaOBOrO
iHCTpymEnTa 6yNb-Якi OuNsUBaui BnCOKOrTo TnCKy a6o caNoBi ShnaHrn.

PeteNbHO nepeBipraHTe
DinHky,Ha kki
BnKOpNCTOByETbCS CaIOBNI
eHT,Ha HaNBHicTb DnKnx i
ix TBapHH. Nkki a6o DomaHi
i MoKyTB 6yTN TpaBMoBaHi nDi
opNCTaHHa CaIOBOrO
eHTa.PeteNbHO nepeBipraHTe
Ha kki
BHKOPNCTOBYBaTHMeTbC8CaIOBNI INCTpyMeH, I NOBHICTU BnDaJIaIte KaMInHЯ, NaKn, dPOTn, KICTKN iHsi CTOpOHHI ppeMetn. Pid yac BHKOPNCTaHHa CaIOBOrO IHCTpyMeHTa cnIdKyIte 3a Tm, Uo6y rCyTIk TpaBi He 6byNo npNXOBaHNx DnKnx a60 DomaShix TBapINu HBeJIKNX PHiB BiD DepeB.
Ekcnnyatauaia
YxOJHOMy pa3i He Do3BOJnTe KOpNCTyBaTnCBAHPO6OM dITaM i Oc06am, 1o He 3HaONi 3 cIMN Bka3iBkAmn. HauioHaIbHi npuNCS MoXytb 6mExyBaTH DOnyCTUmN BIK onepaTopa. JkIo He npaIOe 3 BnPo6OM, 36epiraTe Ioro BV HeIOCTynHomy dIra DiTe Micci.
HikonHeO3BOJTeIITM,OC6am3OBmExKeHNmΦi3nHNM,ceHCOPHMn a6o p03yMOBmN3i6HOCTaMn a6o OC6am,JaM6paKyeDOSBiDyTa 3HaHb,i/a6o OC6am,JaKe 3HaHOMi 3zIMNBka3IBKaMn,KOpNCtYBaTNCaDOBM iHCTpyMeHTOM.
DOrIaIte 3a IITbMn, IO6 nepekoHaTncr, IO BOH He rpaIoTb 3 cIM Bnpo6om.
HikonHe KOpncTyItecCaIOBm iHCTpyMeHToM, KOJI no6n3y 3HaXoJaTbCЯ nOJn, 3OKpeMa dItn, a6o DomauHi TBapuHn.
KopncTyBauchce BiINoBIaIbHicTb 3a HeuacHi BnapKn, TineChi ykoJKeHHi HxNIOJe i NOkOKeHHyXKO MaHa.
He BnKOpNCTOBuYTe BiDkPnte rymoBe B3yTTa a60 caHdani, KOJI npaioTe 3 BnPo6om. 3aBxdi MaTe Ha co6i MiUHe B3yTTa i DOBri UHTAH.
YBaJxHo OrIaHbTe IInaHky,Ha JaKi Bn 36npaTeCpaIouBaTn,i npi6epiTb KaMInHn,IpOuKn,IpoTn, KICTKn iInsi UyXopiDi npeDMeTn.
Ipeed KOpNCyBaHHaM ra30HOKOCAPKOIO 3aBXdI npOINBIAI TeCc, YN He 3HocnIncI i nn He NpIKoJXeHi HOxI, TBnHTn HOxIB I HoxOBn By3oI. Lio6 yHnKHyTN DnC6aHaHCy, HOxI I TBnHTn HOxIB, 103HocnIncA a6o POnKoJXeHi, 3aBXdI MInYte ycip a30M.
CkOuYTe TpaBy InIe npN DeHOMy CBiTJI a6o npN do6pOMy uTuyHomy OCBITJIeHHI.
He npaioTe 3 ra3oHOKocapKoIO B noraHy nOry, oO6JIbBO, KOIN 3bnpaCTbcra rpo3a.
3a MOxJIHBOCTi He KOpNCtUHTecraCaoBmIHCTpymENTOM Ha MOKpiTpaBi.
3aBxN NdiTb CnOKiHm KpOKOM, HIKON He 6ixitb.
HikonHeKopnCTyIeTcSaIOBIM IHCTpyMeHTOM3POsKOJKeHIMN 3axNCHMnPnCtPoAMnIKpnsKamna6o6e33anobixKnHexPnCtpoIB,JHKanp.,6e3deΦneKTopaTa/a6o6e3 KOuNkaDnCKoUeHOITpaBN.
Для осobистоь 6e3nekn pekomehnyeMo BnKOpHCTOByBaTH 3axnct opraHIB cnIxy.
HeKOpnctuYteCByBnpo6om,JaKUo Bn cTOMneHia6oXbopi,a6o 3HaXoIHTeCnPiDnIcIcIO CnInrTHnx HanoiB,HapKOTnKiB a6o Iikiv.
CkOuBaHnTpaBnHaKocoropax MoKe 6yTu HBe3neuHm:
- Heckoшуйte TpaBy Ha 3aHaTTo KpyTnx CxHnax.
- Ha cxnax Ta ha MOKpii TpaBi 3aBXdN CnIDKyuTe 3a TmM, 106 CTiIKo CTOATn Ha Horax.
- Ha cxnlaux 3aBXdN KociTb ra3OH nonepek, a He Brropy-BHn3.
-Працюочи на схилax,бydteoc6o6nBO obepexkhi Na IOBOPoTax.
BybTe OcO6nBO O6epeXHi, KOJI 3aKyuTe a6o T8HHeTe caIOBNI IHCTpyMeHT 3a co6oI.
PnCKOuBaHHI TpaBn 3aBXJn
TTOBXaIte caOBn iHCTpyMeHT
noneped ce6e i hikoN He TaRHiTb
NoRo Do ce6e.
HaxnIaTn caObN iHcTpymeHT dIy INoI nepeBe3eHH, npeB03ntn INoI uepe3 roJI dIINHKn, a TaKoX do Micu,Je 3bnpaETecr cKOswBaTH TpaBy, a6o 3 taKOro MiczI D03BOJRAETbcra NIISe, KOJI HOKi He pyxaiOTbcra.
He haxnlaIte caIOBni iHCTpyMeHT nIq yac NOrO 3aNycky i BMNKaHHN dBNrHyHa.
BmkaTe caOBn iHcTpyment,Яk OncaHO B iHctpyKu3 eKcnnyataui,
i cnidkynte 3a Tm, 0o6 Bawi Hn6yni Ha doctaTHi BiCTaHbI HOxIB, 10 o6epTaIOtbcra.
He niDCOByIe pyKn i HOrn nIaI deTani, 1o oBeptaIOTbcra, I He TpMaIte ix 6iJa TaKnx DeTanei.
TpMaITecHa BicTaHi BiD BnKdHOi 30Hn, KOJI npaOeTe i3 caIOBm IHCTpyMeHTOM.
HikonHe nDImaTe i He nepenocbTe caOBn iHCTpyMeHT, KOJI npaTOE MOTOp.
CπiДкуIte 3a THM, ΜΟБ πιД уac 3берігань садови iHCTpymehT CTOB BCIMa 4 KOlecamn Ha 3eMJI.
Пдимаite садови iHCTpymert nIwe 3a рук. ПОвдьтеся 3 рукою обержно.
Hiuoro He mInaTe y Bnp6i.
Heo3BoJeHi 3MiHN MoKyTb BnHHTn Ha 6e3neKy Bnpo6y i np3BeCTn DO NocHHeHx UymiB i Bi6paui.
36npaHNaJIncTЯ
Hixd36npanhna nctmae fopmy, 3aBnki BIn ni6npaε nctra ha ra30hi.ДлdoCyrHeHHOnTImaIbHnx pe3yIbTaTIB Tpe6a DoepKByBatncr TaKOrO:
- 36napaTe Inctra InuIe Ha MaKcMaJIbHiN BVCOTi CKOuYBaHHa.
- 36napaTe InCTraIHe Ha CBOEmy ra30Hi.
-пегд поатkom роботи огяньту робочу дянку i trmaite inushx
JIIOJeI, TBaPInH, CkJIaHI IpeMTeN i MaUHH Ha BiDCTaHI.
BidmkaTe po3'edHyBauchpymy
BcTpOMJIHHa/BHMaHHa akymyIaTropHOI 6aTaapei
Pnmitka:BnKOpNCTaHn3He npDAtHMn
akymyIaTOpHMn 6aTapeAMyMOKe pN3BcTeN Do 36oIB y
po60ti a60 NowkOJKeHHIcTpMentA.
YcTpOMITb3apJxKeHy akymyIaTOpy 6bTapeIO.
IpekoHaJIteC8, 00 akymyIaTOpy 6bTapeR BCTpOMHeHa NOBHICTIO.
Ioo6 BnHnTn akymyIaTOphy 6atapeo 3 eneKtpoiHCTpymenta, HATNCHTb Ha KHONk ypo36bLOkyBaHHa akymyIaTOphOi 6atapei i BNTaHHTb akymyIaTOphy 6atapeo.
3apdkaHn
Ipoce3apJxKaHHNoUHHeTcBcK, KOJI MepeKHN WTeNCb 3apJnHO pIncTPOIO 6yde BCTpOMJeH N B po3Etky i akymyIaTOpHa 6aTaPeR 6yde BCTpOMeHa B 3apJNHI npIcTpi .
3aBnKn iHTeKeKtaynbHcNCTem3apdKaHHCTynIb 3apJxKHeHn akymyTnTOPOiBaTapei ABOTMATuHO pO3ni3HaTeBCTa 3apJxKaHH 3diChiOEtCBn OTNMaJIbHM CTpyMOM y 3aJeKHoCTi Bi TEmpepatyp Ta HAnpyr AnkyMnyTAToPA.
Lc36epirae acymyantopny 6atapeio, i npri 36epexeHHi y 3apdHOMy npictpo BOHA 3aBxdi 6yde NOBHCIO 3apdKeHa.
Функцii iHДнkaTopiB (AL 3620 CV/AL 3640 CV/ AL 36V-20)
WBnKe3apJkaHnn

Ipo WbNKe 3apJkaHn CBiDHTb 6nMaHHa3eNoI hNkAtopa 3apJkeHHaKMyTTopHOi 6atapei.
IIndkaTopnien eelenent Ha akymyntopoi: Pid qac 3apdxaHnnbWbNIO 3aIopRHTbc OINH 3a OHNH iOTIM raChTyB Tpr 3eNeHi CBITIOIOJ. AkymyntopHa 6ataper NobHCTIO 3apdXHe, kAIO 6e3nepePBHO CBITTbC TPr 3eNeHi CBITIOIOJ. PInbN. UpeE3 5xBINH NICrTo, Ra akymyntopHa 6ataper 6JYe NOBHCTIO 3apdXHe, TPr 3eNeHi CBITIOIOJ 3HOBy raChTyB.
Pnmitka: 3a4mKHeM0KHe, nIe KIO TEMepaTpya akymyTOpHoi 6aTapei 3haxOuTbc B Mekax DOnyCTMOro TEMepaTpHoro dIana3OHy 3apJKaHH, INB. po3dIN «TexhiHi daH».
AkyumyIaTOp 3apaJxKeHn

Be3nepepbhe cBirHHa 3eJeHoro
CBITIOIOIHOI INHINKATOPA CBIHTB IPO TE, IO akymyIATOPHa 6aTpeNobHcTIO
3apdunacn.
IdoataKOBO npoTgOM np6bn.2cekyndnoaetcb3BvKOBNI cnHnA, kynCBiDnHTb npo NobHy 3apJxHeHCTb akymyIaTOPHO6atapeii.
Iicna zbofo akymyTOpHy 6aTapeIO MOxHa BnHrTNI Odp3ay JX BnKOpNCTOByBatN.
Ksqo akymnyTopha 6aTape He BCTpOMnHa,
6e3nepepbhe cbitinHcBtIIOJIOHOro iINKaTopa CbiuHb npTo Te, IIO wTeNceNb BCTpOMLeHn y po3eTKy i 3apdHn npICTPi rotOBn do pOboTH.
Temnepatypa akymyntopho6aatapei Hxchua 0^ a6o Bnua 45^

IocHHe CBiEHHa YepBoHO rHnKaTOpa 3apJxHeHH akyMnyTOpHO6bTaapei CBiDHTb npTe,10c TEMpePaTypa akyMnyTOpHO
6atapei3haxoJntbCra 3a Mekamn DOnyctmNOrO TemepatypHoroDianao3OHy,INB. po3dIn «TexhiuH daH|. Iicna toro, kK TempepatyaDocarHne DOnyctmNOro TemepatypHoroDianao3OHy,zaPndn npcStpi ABOTAMNUHO nepEMKaCTbCra Ha WBIDKe zapdKaHHa.
Kkyo temepa typa akymnylTopho 6batae 3naoxodtbca 3a
mexamn doynctmoro dna 3apxkannh diaanaohy, npn
BCTPOMLHHi akymnylTopho 6batae iB 3apndn npncptpi
3aoropertcbcyeboHH cblnoiojod 6batae.
3apJxKaHnHaMeOxJIInBe

Ypa3i iHnIX HenlonaOK i3apJxHaHmMnrae YepBOHn CbITNOIOHN iHnKaTOP.
Ipouec 3apaJxKaHnHe MoKe po3noaTncsAkyMylrTopHo6Baapei HEmOxJIbE (INB. YK HeCnpabHocTe).
Bkaizbkn zo do 3apjxahnna
ypaizociiHHxuKlB3apJxHnA60TaKnx,10 6e3nepepBHO NOBTOHObCOnH3aOHNMeKeIbKa pa3iB,3apJHnPiNCTpi MoKe Harpitnc. OndakCe He e
He6e3neuHm I He CbIqHTb Ipo TexHiHy HecnpaBHiCTb 3apdHoro npIcTpoIO.
3naHcno ckopoueha Tpmbanictb ekcnnyatauiicnla 3apxkannha CBiuntb npTo, uO akymyantopHa 6atapeB Bvhepnpala CbiPecypc iTpeBa nomHIn.
3BaKaIte Ha BkazIBKU ⅢOTo yTnIi3aui.
OxonodxeHHa kymyIaTropho6aTaapei (Active Air Cooling)
IHTerpoBaHa B3apdHn npctpi CnCTema ynpaBnHnBeHTNlAToPOM CnDKyE 3a TempeaTPOIO BCTpOMnHOIakymyIaTOPOI batapei. JxuO TempeaTPOa akymyIaTOPOIbatapei npeBnUe 30^, akymyIaTOPA batapei OXoONJxEybca BeHTNlAToPOM DO ONTIMaJIbHOITempeaTPOnApdXkaHn.YBIMKHeHHn BeHTNlAToPCTBOHOp EWM nID cac poBots.
Kkuo BeHTnIaTOp He npauoe, TempeatypakymIaTOpHoi 6aTaapei3haxOodIbCBA ONTMalbHOMy dianaoHi a60 BeHTnIaTOp HecnpabHm. y Takomy pa3i TpBanictb 3apJxKaHHa kymIaTOpHO 6aTaapei 36InbUyeTbcN.
Bka3iBkn 0o0p060tn
IIndkaTOp 3apJxKeHHa kymyIaTOpHoI6aTaapei
AkymyIaTOp 6oIaHaHnIHdNkaTOpOM CTaHy akymyIaTOpHOIbataPe, IaHn Noka3ye CTyniHb 3apJxKeHocTi akymyIaTOp. IHdNkaTOp CTaHy akymyIaTOpHOIbataPe iCknAeTbc3 3 3eIeHnx CBITNOIOIB.
HaTnCHiB Ha KHOIky IHNkATOpa CTAhy aKymyIaTOpHoi 6bataei, iO6 aKTHyBaTHi INdNkaIio CTHy aKymyIaTOpHoi 6bataei. Ipn6bl. Uepe3 5 cekHyIH iNDNkATOp 3apJxHeHocTi aKymyIaTOpHoi 6bataei rache camoCTiHo.
Ctynih 3apJxKeHocT moKHa nepeBiprTaTakOx i KOLn aKymyIaTOp BInHraTn.
| СbvтлODIOДнй iIndикатор | Емnicteь akумлátора |
| Посстий Сbvченя 3 Зelenнх СbvтлODIOДВ | ≥ 2/3 |
| Посстий Сbvченя 2 Зelenнх СbvтлODIOДВ | ≥ 1/3 |
| Посстий Сbvченя 1 ЗelenHoro СbvтлODIOДa | ≤ 1/3 |
| Блиманни 1 зelenною сbvтлODIOДa | Pezeрв |
JkiO nicna haNTCKAHHa Na KhoNky JoODn CbITNOiD He 3aoropaeTcA, AkymyIaTOp BnWIOB 3 naNy i InoTo Tpe6a NOMIHATN.
Akymnytropha 6aTapeHa Do 750 m² 6,0 A-rod.
36 36 36 36 36 36 36 36 36 36 36 36 36 36 36 36 36 36 36 36 36 36 36 36 36 36 36 36 36 36 36 36 36 36 0b07n, MoKHa npuD8aTn D0aTkoBy akyMylTOpHy batapeo B MaHCTepHI, ABtopN3OBaHIN dna caObHX eNeKTpOInCTpymEnTIB Bosch.
Nouyk HecnpaBHOcTei


www.bosch-garden.com
Пи BCIX DoJAtKOBx 3aJIntaHnX Ta 3aMOBNeHHI 3aJIuactNH, 6yIb IacKa, o6OB'J3KOBO 3a3aHuaiTe 10-3NaUHn HOpem JIЯЗТAMOBNeHHaBeHeHn Ha 3aBOJcKi T a6JInuZI npOdyKTy.
TapaantiHe 6cbnyrobyaHHI pemont eeneKtpoiHcTpymEny 3diChIOtbcB iDIOBIIDHO DO BmOR I HOPM BnTOBIObAua Ha terpToPi BCIX KpaIH Nluee y fipMOHX a6o ABTopHNBOAHx cepBicNHx ceHTpax fipMN «Po6epT BouH. PONPEJXEHH! BkOpNCtAnHa KOnTPaKaTHOi npOyuKii He63neue H Eeknpyataci i Moke MaTHaERaBHHa HacNikn dIzdoPob'Y.BrTOBnENH I po3NOBcIodKeHNK KOthpaKaTHOI npOdyKUJI nepeCNIyEcb3a 3aKOHOM B adMIHICTpaTHBOMY I KPMImHaNBOMY nopAky.
YkpaHa
Bos Cepbicn LcHtp enektpoHCTpymentiB
Byl. KpaHn 1
02660 KIIB 60
Ten.: +380 44 490 2407
ΦaKc: +380 44 512 0591
E-Mail: pt-service@ua.bosch.com
www.bosch-professional.com/ua/uk
Adebeca PeriohaIbHnX rapaTtiHnX cepBicHnX MaIcTepeHb 3a-3HaueHa B HaclioHaIbHomy rapaTtiHmOy TaHOi.
TpaHcnpTyBaHHa
Ha Idoahi NiitieBO-ioHHI akMnyTOpHi 6aTapei
pO3IOBIOJXyIObCSBc MNOHr IOoTO TpaHCNOpTyBAHn
He6e3neuHNs BaHTaxiB. AkMnyTIOpHi BAteepi MoKxyTb
pepeHO3NTCHc KOpNCYBaChem ABTOMo6JIbHM TpaHCNOpTOM
6be3HO6xIHocTI BHKOHHnD oDaTkoBHX HOPm
IpnnepecnlntpTeimnoc6amn(Hanp.: nobitpaHmnpaHcnpotomab0tpaHcnpotnhmekCnePeHTOpOM)notpi6hoDopepxbyatncOC6bHNBXBmORUOdoynakOBKN TaMapkyBaHH.BzomyBnAnkyprnpNiIroTobu npocnKnOBnHeHpnMnatyuaCTbeKcnept3he6e3neuHxBaHTaKIB.
BicnnaTe akymnyTopHy 6atapeo nHne 3 HENOIOKJXENM KOPNYCOM. 3aKeTIte BIXKPNTI KOHTN Ta 3aNaKyTe akymyIaTOpHy 6atapeo TAK, uOb BOHa He COBAJIbBy aynakOBJI. DToPmYItec, 6yNb IaNcA, TAOK MOxNBIHX DoDAtKOBIHX HaioHOHbNX npHnnciB.
Ytunlaia

CaObi iHCTpyMeHTn, akymyIaTOpHi 6aTapei, npnaJa i ynakOBky Tpe6a3daBAtn Ha ekOJIorUHO uCTy NOBTOPhy nepeo6Ky.

He BVKnJaTe CaOBoi iHCTpyMeHTu Ta akymyIaTOpHi 6batapei/6bataeKn B no6byoBe CMITr!
Пишдя краин EC:
BidiNobiDIO do EbponeecbkoI dnpkeTbnu 2012/19/EC Ta BbponeecbkoI dnpkeTbnu 2006/66/EC BiDnpaCbobahi eNeKtpo- n eEkpOHHI INCTPmuENTn, NpOkiDxKeHNI abO BiDnpaCbobAHi akymyIaTOPhi 6bataei/6bataeKn NOBHNHi 3dabaTHCOKpEmo iYtNiI3yBaTbnc BekONOrIHO uChtn cnoci6.
Akymyntopn/6aTapeKn:
JliriEbo-oHHi:
Bydna Iacka, 3BaJkaIte Ha BkA3iBKn B po3dini TpaHcnpotyBaHH.
Kazak
Eypa3nJaKoHOMKaJIbIK OdaftbHa (KeJeH OdaftbHa) Mywe MemNeKeTTep ayMaftbHa KOnDaHbIaNbl
HdipyuiHIn Hm yuiH KapactbipFaH naIaIaHy KkaTatbpHbH KpyamblHa naIaIaHy KHeHderi Ocb IyckayIbK, cohBIme 6ipre KocbIMwapap da 60ny MyMKH. CKeKTiPactay kaiNbI aknapat KocbIMwaIa6ap.
Ohimdi Ohdpireh Memkeet TypaibaknapaehHmHiKopnycbHnaJxHe KocbIMwadaKepcetinreH.
EHdipinreH mep3iHi HcykaybIK MykaabcbIH COHfbi 6eirHe KcpctinreH.
MmnpotrepKaTbCTb6aHaNbAcKnapaTeHIM KaTAmacbHnA KePcetIInrE.
Thimni naanda hy mep3imi
HIMHIKb3MetetyMep3iM7 KbI. HdipinreH mep3ImHe bactan (eHdpy KyHi 3aybi TaKaTHaCbHnJa Ka3bInFaH) icTeNei 5 KbI cKaTaFAHHaOH, eHIMdi TeKcepyCi (cepBcTIK TEKcepy) naJdaNaHy YcbHbIMaiDbI.
KepcetinreH Kbl3met ety Mep3imi TybIHybI ataIbIHyckayIbIKbIh TaIanTapbIH opbIHaJ Ha KaFdaHaKaapaMbI 60ana.
Ictehyce6entepihitizimi
KeIyIbIKbIH IbIKca, naIaIaIaHaBaHbI3
KaTbI Dipin Ke3iHne naHdaHaBaHb3
- TOKcblmb6y3bIJaH Hemece OKuaynaycb3 601ca, naaanaHaBb3
EHIM KOpnycbHaH TIKeNeI TYtIN 乌Kca,naJaIaNbAbaB3
TainanahnyubihbMymkIn kateiiktepi
TytKacbMeH Kopnycbl 6y3bIfah 60lanca, HIMdi naDaalh6aHb3
- kaybH -saabH Ke3iHne cbipta naananaHaB3
Koprnyc iwihe cy kipce KypblfHbI Kocybl 60maHb3
Uekri kyn 6enrinepi
- TOK, CBMbHbIH, TO3ybl HeMeCe 3aKbIMDaHybl
- ΘHIM KOpNyCbIhIh3aKbIMdanybl
Kb3MeT Kepcety Tpyi MeH XmIniri
- np naiaaahydaH coh eHimTa3anay ycbHbnaBbl.
CaKray
KpyfakKepeCaTay KepeK
KOFapbI TEMpepaTpya Ke3iHe HKeH KHy CaynepePiH 0cepH anbc CaTay KepeK
- caKtay Ke3iHne TempepaTypaHbIn KeHET ayblTkybHaN Kopray KepeK
- opamacb3 caTay MymKih EMEC
- caKTay wapTapbl Typalbl KocbIMaa knapaTany ywiH MEMCT 15150 (wapT 1) KyktaBH KapaBb3
+5-den +40°C-Ka deiH TempepatypacbHa KaMada eHdpuywHIn KaTAMcBHa DaCaTaHb3. CaNbIcTbIpMaIbblfAdbIbIK 80%-daH acnaybl Tnic.
TacbImaJay
TacbImaIay Ke3iHne 0HIMd KyNaTyfKaHe Ke3 KeIReH MexaHnKanblk bIKnAe Tetye KaTaH TbBbIM CaIbHaDbI
- 6ocaty/xykTey Ke3iHne naKetTI KbIcTaBn MauHaHaapDbn NaIdaIaNHyf pyKcat BepimmeiDi
- TaçbıMaIyay Üpaṭṭapbı TanaṭapbIH MEMCT 15150 (5 Üpaṭ) KʌŋKaTbIH OKbɪHbɪz
Kopwafrn opta tempepatypacbl-50°C-tan+50°C-ka DeiH TaBImaNday pykcat etinr. CanbIcIbpMaIbblfamblbIK 100%-daH acnaybl Tnic.
Kayinci3diK HycKaynapbI Eckepty! TemeHderi HycKaynapdbIH 6apNbIFbIH MyKnTneH Okbln 7bIFbIHbI3. BaK 3neKtp 6yNbIMbIHbIH, 6ackapy 3JeMeHTTepi MeH OHbl HycKaynbIKKa caH Typde KOndaHy 6oBbIHwa mAnimetTepiH OKblbI3. Ocbl HycKaynbIKtBi KeiH KOndaHy ywiH XofaNTna CaKTan KypiH3.
BaK 3NeKtp6yBbIMbIHdaFbl, KyaTtAHdbIpy KypaIbIHdaFbl JxHe aKKymyIaTOPdaFbl 6eIrinepeHmAfblHaIapbl

KayinTep 6oBbHua xaJIbnbl HyCKaynap.

KoIpaHy HvCKayNbblH 0KbHbI3.

KaBbH TypFaH aamap 1aMbipbIaTbH 6e
JapaKaattaH6aybHa Ha3ap aydapbl3.

CaKaTaNDbIpy: BaK3JIeI
6yibmbickeKocblbn
TpyFaHda OFaH Kayin-KaTepci3
apalbikTaTypbihB13.

Ha3apbIbI3da 60ncblH:
AinHabIn TpyaTbIn
TbIaKaTapbIH TpyTneH3.
BiyibMHbIHPiIiHaKTapblEeTKip.AaK
XHe KOI CayCaKaTapLnApHbHaH
aIbIpblNydaH CaKTahHbHb3.

BaK 3JIeKTp6yIbIMbIH JxHdey Hemece Ta3aJay aJbHaH, Hemece OHbl KblcKa yaKbIT
yushi De 6aKbIaycbI3 KaIdbIpy aIbHaH aIbIMeH 6aK
3JNeKtp6yHbIMbIH eWipin, TYbIKTaIFaH TYiCiHIH TOKtaTkbIbIH 6OcaTbIN aXbIpaTbIHbI3.

KoIaHaBbIMMaHdbl.

BaK 3JIeKTp6yHbIMHbIH 6eIWeKTePiYcTay aIbIHaH OIapDbIH TOIbIFbIMeH 6dEh
TOKTaTbIbIn TpybHa DeiH KyTiHi3.
3πeKtp6yHbIMdbI eWipin iCTeH 3bIfapFaHda Da 3πeKtp6yHbIM
nblaKaTapbl ani de aHaIbIn Typa 6epin, japaHnyfa anapa anaIbI.

3neKtp 6yHbIMdbI kaybIH kaybIN Typfahda
KoJIaHa6aHbI3 HeMece OHbI
XaybIH aTbIHda KaIbIPMaHb3.

3JIeKTpcoKbIaH CaKaTaHbIbI3.

KoIaHbIImaMaiDbI.

3neKtp KyaTTaHdbipfbIWBih TEK KaHa KypFaK 6eImeJepDe KOJaHaHbIHbI3.

3neKtp KyaTaNbIPfblbI kayinci3dk TpaHcfoPMaTopbImeH
Ja6IbIKTaIFaH.
BaK əJIeKTp6yIbIMbIH Ta3aIay yIiH eIkaIaH XOFapbl
JeHRei KbcBIMMeH ICTeHTa3aay KypblfblapbH Hemece 6aK UHaHrIepiH KOJaHa6aHbI3.

BaK KpaIbI KOJaHbIaTbIH
JepDe KaHyapnap JKeHe
KaabIbI aHapdbH JOK
6onybIH MyKnT TeKcepin aIbIbI3.
3JIeKTp KypaI KOJaHaBbIbIN JkaTkaHda
Jahyapnap XaHe JkaBaIbI aHdap
JapaKaTbHbIN KaNybl MyMKIn. KypaI KOJaHaBbIaTbIH aMaKTbIMyKnRT
TeKcepIn, OHda 6oNaTbIH tac, TaRk,
cbIMdAp, cyKeTpexHe 6eRde
3aTTapDbIH bapNbIFbIH OCbl aMakTaH
aIbIn TactaHbI3. KypaIdbI KOJaHy
6abbcHda KaIbIH weApacbIHDa
aHdap, Jxhyapnap Hemece IaFbIH
aFaW TomapshaIapbl 6oNa aIaNtblHbIH
eCKepin JxypiH3.
Backapy
Ocbl 3neKtp 6yHbIMdbI eWkaaHaN 6baIanap Hemece ocbl HcyayIbIKTapMeH TaHbIC 60lanFaH TyIfapanp TapaBbIHn KOndaHbIH pyKcat EtneH3. Kypal KOndaHbIbIN
JxatKaH enderi yIITbIK 3aHap MeHepexeJIepi apKblbl KOJaHaHyblJXacblIH weKTenyi MymKiH.3JeKtp6YnbIM icKe KocblMa, KOJaHa6aTpyFaH yaKblTa OHbl 6aIaNapKOJaApbl XeTe aImaHTbIH KbblnCaKaTaHbl3.
BanaIapFa,JeHEniK,ceHCopnbIK Hemece aKn-0n Ka6ilneTepi IeKeTenReH aamdapFa Hemece OcbHdaN KypaIdApMeH XyMbIC Toxipn6eci XeTKiNikci3 6oNfAH XHe/Hemece 6iImi XeTKiNikci3 6oNfAH XHe/Hemece 0cbI KOndaHy HcayIbIKpeh TaHbIC 6oMaFAH aamdapFa eKkaHaH 0cbI 6ak 3NeKtp 6yIMbImeH XyMbIC icTeye re pyKcat etnEHI3.
BaIaIapdbIH 3JIeKTp KypaIbIMeH OiHaMaybIH KaMTaMaCbI3 eTy yIiH BaIaIapra Kapan JypyiHi3 Kepek.
BaKəJIeKtp6yIbIMbIJaHbIHda TyIfapanap,acipece 6aIanap,Hemece JaHyapnap 6ap 6oIFaHda OHbl eKkaaHaN KOnDaH6aHbI3.
3neKtp6yIbIMneciHemece KOJaHyUbIcbl6aKa aJaMdApDbIH DeHCayIbIFbHa Hemece OcbIaPdbIH MyJIrIHe TycKeH anaTap Hemece UbIFbIHp yuH jayanbl6oJabl.
3NeKtp 6yIbIMdbI KOJaHy
6apbIcbIHda eWbip aMbIK pe3eHkeJI
aIK KIMiH HeMece caHaJ aIK
KNiMH KIN JxypMeHi3. OpKaJAH
TypaKbI aIK KIMdepi MeH y3bH
7aIbap KIn JxypiH3.
Ⅱeπ Ⅲa6bⅡaTbI H Jepi MyKnI T ekcepi aIbI, ocbI Jepde 6ap 6oJIFaH TaC, TaK, CbIM, cyIeK JxHe 6acka 3aTTapbI H aIbI H aIa JxHan IblfapbI aIbIHbI3.
KoIdaHy aIbIHHaH apKauaH 3JIeKTp6yIbIMbIH, PbIwaKTapbIHbIH, PbIwaK 6ypaHdaIapbIHbIH, XHe KecetIH KypactbIPbIFaH TOITapbIHbIH,TO3bIN HeMece 6y3bIFaH KaIbINTa 60ImaybIH TeKcepIn aIbIHbI3. TeHrepIMHi, 6y3blvBH 6OJbIPmay ywiH TO3bIN Hemece 6y3blbIN KaIFaH PbIwaKTap MeH PbIwaK 6ypaHaIapbIH apKaHaH TOIbIK XINHaKTaMaCbIMeH aybICTbIPbIHbI3.
IeTeK KaHa KHyI3ri JapbIKTa HeMece XacaHdbI XapblfblHbIH XeTkiNtKi KyuHne 6oJFaHda FaHa 7a6blHbI3.
Aya paBbHaawap 6oIFaH JaaFdaJa, acipece 6opAH MeH Ha3aFai 6actaIahBIn DeI JkaTKaHJa KOraIIaIbKbIuPEN JxMbIC icTeyRe 6oImaIbI.
LJen cyIbI Hemece bINfaIaBkAJIbITa 6oJIFaHda 6aK3JIeKTp6yIbIMbIH MymKiHdiIiHWeKOJIaHa6aybIbI3 Ja3bIM.
ΘpkaaHaJa 6aay Jyprin, eUkaaH Te3 JyprMeHi3.
BaK 3aKbIMdaIFaH He 6y3bIIFAH KaIbITa 60IFAH KOpFay KyIeIepiMeH, XaIKbIITapMeH HemeC KayinciIK KypblfblapbIMeH, MbICaJIbI
COKbIaH KopFaHTbIH KyNecimHe
XaHE/Hemece 70n YCTaHTbIH
ce6etImeH, KOndaHbaHb3.
ΘειHizH Kayinci3diRiH3 yuH KopFay KyaKaJuaIapbH KIn Jxypin KMyBic iCTeyiH3 na3bIM.
ΘeH3 shapuaFaH KaIbInTa 6oJIfAHbIHbI3da HeMece aybIpBIn JyprEHIi3de, HeMece aIKoRoiB, eciptKi He dəpi-IdpMeKTepe ocepiaCTbIHda 6oJIfAHbIHbI3da 6yI KypaIdbI KOJaHa6aHbI3.
ΘлeктбуньIMыb6aypaиарда
Колдану eTe kayiInti 60nybl MymknH:
-Aca KynamaIbe hicTepeHne Wen waannhbl3.
-
Knfaaw Jxepnepde Hemece cyblxHe bInfam wen yctiHne apkaaah TypaKbI Kayinc3 Typde kype anyblb13Fa Ha3ap aydapblb13.
-
Kɪnfəʊʌŋeɪpɪeərɪkɑːwən Kece
Kɔŋdɛhɪn ʌθɪn ʌaʊbɪhɒl3, eɪsɪkɑːwən
Xɔfəpɪbɪfa XɔːHe Təmehre Kapaɪn ʌθɪn
ʌuʌnnaHɒl3. -
KynamaJIbI eHicTepe 6aft E3reptyIH3de aca bary xHe MkyKnrt ApeKeT etIH3.
Apka kapa JyprHi3ne Hemece 6aK 3JIeKTp6yIbIMbIH TaPTKaHbIHbI3da aca bary XHe MyKnT apeKeTeiHi3.
Ⅲeπшankah yaKbITa 6ak ΘneKTp6yHbIMbIH bINfN aIfKa paai NTpe OTbIPbIN JypiH3, OHbl eWkaaH DeHeH3re Kaapn TaPTNaHbI3.
Bak 3neKtp6yHbIMbIn TacbImaIay yuH enKeTkeHiizde, Hemece yCTiHne wen Jok KepJIepDeH oTKeHiizde, XHe 6ak 3neKtp6yHbIMbIn WEN Wa6bIaNtbiH JepRe JAne WEN Wa6bIINFaH KepDeH TaCbIMaIJaFaHbIHbIZda 3neKtp6yHbIM PbIshaTapbl TOKtaBbIN, IcKe KocblMaJ KaIbIITa BoNybl TnIC.
Ko3faJIITkbIbI icKe KocKaHda Hemece JyprI3e 6aCTaFaHbIHbI3da 6aK əJIeKTp 6yMbIMbIH aydapMaHbI3.
Bak 3eKtp6yHbIMbIn KOJaHy HcayIbIfbIHda KepCetIJIReHdei icKe Kocbln, 3iHizdIn aKTapblb3dbIn KypalDbIn aHaNbIn TypaTbIn 6eJWeKTepeHn y3aK apalbKaTa 60nybHa Ha3ap ayapblb3.
KoIaPbIHbI36eH aKaTapbIHbI3dIaHaJIbIN TpyaTBH 6eIWeKTepiHe KaBbIH HeMeCe OApDbIH aCTbIHFbI KaFbIHDa YcTaMaHbI3.
Bak 3eKtp6ynbIMbIMeH xymblc icTeReHHi3de OHbIH sbIFapy 6oIweiHe kapaJxetkiikTi apaJIbIKTa TypbIHbI3.
Ko3faNTkbIbI icTe 60nbTpyfah 6aKa 3neKtp6yNbIMbIH eWkaWah KOTepMeH3 HemeCe TaCbIMaHbI3.
BaK 3JIeKTp 6yIbIMbIH CaTay yaKbITbIHJa OHbIH 4 aJKTapbIHbIH 6apNbIFbIXepDe TypFaHbHa Ke3 JeTKi3iHi3.
BaKəJIeKTp 6yIbIMbIH TEK KaHa OHbIH TaCbIMaJday TYTKacbIHaH YCTan
KoTepeiH3. TaCbIMaIay TyTKaCbIH a6aHJIaN Otblpa KOnJaHaBbHbI3.
БуиьIMdbI Θ3repy 60иbIHwa e6ip JyMbICTapbIH Θ6acbHb36eH OTKi36eHi3. PkyKat etinmeRcH Θ3repy JyMbICTapbI 6aK, əJIeKtp 6yNbIMbIHb3DbIH Kayinci3diH 3akbIMdAn, 7yblnap MeH Bn6paunapDbH ecIn KUweiTinyiHe anapa anadbl.
XanbipakTapdbI XHHay
XaNbIpaKaTapDbI XnHay yuHIn apHaIFaH
NbIuaFbI Ky3deI XaNbIpaKaTapDbI
e3iH3iH rYn3apbHb3DaH XnHaI
aIaNbIHdaJ KbIbIN DaMbITbIbIN
UbIFapbIHaH. OcbI cyHKcIyHbIH eH
OHTaIbI HHTnxKeIepHe JTe aNybl
yuiH TeMeHderinepre caHapeKet
ETyiHi3 Ia3blM:
- XaNbIpaKaTpIbI TeK KaHa KypaIbIH MaKcHMaIbIK Kecy 6nIKTIInHe XINHaHbI3.
- XanbIpaKTapDbI TeK KaHa 03iH3diH ryn3apbHb13da XnHaHb13.
- XaIbIpaK XnHay aIbIHJa aIbIMeH KymbIC aIaNbIH TeKcepIn aIbIN, aIaNdapDbI, yM MaIaNpBIn, OHeKTeH XacaIFaH 6yNbIMApDbI XHe KJIkTePdi OcbI JepDeH Y3aKTa YCTaHbI3.
3neKtp Ti36ek TOKtaTkbIuBbIH 6ocatbIn aXbIpaTy
-
BaKaJNeKTp6yHbIMdbI 6aKbIaycbI3 KaIDbIpbI IN KeTyIHi3 KepeK 6oJIbIN KaIFaHJa aPkaJHaH.
-
Byfataaynapdbi KeTipin Xoio anDbHaH.
- BaKəJIeKtp6yHbIMbIH TeKcePReHi3I3e, Ta3aJIaFaHbIHbI3Ja HEmec eJIeKtp6yHbIM 60IbIHwa JxMbICTapDbI OTKi3ReHi3I3e.
- BaKa 3aTTapMeH cOKbIbI IN KaIFaHHan KeiIN; 6aK 3NeKTp6yNbIMbIHda 3aKbIMDaHfAH He 6y3bIINFaH JepJIepiHn NaIDa 6oIFaH 6oImaFahbIH Depey TeKcePIn,KepeK 6oNca PbIaFbIH aybICTbIPbIN aNbIHbI3.
- BaKəJIeKtp6yIbIMbI KaIbITaFbIdaI emec iipinde 6actaca (pepey TeKcepi anblHbI3).
Kypan Kytimi
ΘTkip nbIwaKaTap aMmafbInHa apeket etin Hemece xymbic icTei JxypreHii3e Opkawan apHaib6aK KONFaTapbH KInxypiHi3.
BaK 3JekTp 6yHbIMbIMeH Kayinci3 TpyDe JyMbIC ICTeyIH KaMTaMaCbI3 eTe any yuH comdap, 6ypaHaMaIap MeH 6ypaHaIapbIbIH 6apblfbl TypaKTbl Tpyde 6ekitirreHIN Tekcepin aIbIHbI3.
Uen yctay ce6etinHe To3bIn KeTIn KeTneHIn JepnepiHbap He JOK 6onybH YdaBt Tekcepin JypiH3.
BaK əJIeKTp 6yIbIMbIH TeKcepIn, T03bIN Hemece 6y3bINbIN KeTKeH 6oJIweKTePIn Kayinci3iK ce6eNTepiHe aybICTbIPbIHb3.
TeKaHa OcbI 6aK 3JIeKTp6YbIMbl yuH apHaHa KecetIH nbIwaTapbIH KOJaHaBbIbI3.
AbyicbipbIaTbIH 6oJIeKTepi BoW
HnPmacbIHbIH 6yIbIMdapbl
6oJIfAHbHa Ha3ap aydapblb3.
CaTayf aIO aIbHaH aIbImeH 6aK 3JIeKTp 6yIbIMHbIH Ta3a JxHe KaIbIKTapCbI 3 KaIbIITa 6oIFaHbIH TeKcepIn aIbIHbI3.KepeK 6oIca, KymCaK KyPfA KblIshaKneH Ta3aIaHbI3.
Kayinci3diK Hycckaynapbl MehnakKymyIaTOpDbI OHTaIIbI Typde naDanaHy 6oBbIHwa Hycckaynap
AkkymyIaTOpbl kypanFa eHri3y anDbIHan andbImen 6aK 3neKtp6bIMhBn 0ipipin KoJIbFAHn XHe 3neKtp Ti36eK TKtAtkbHbIb 6ocatblInn Axbpatbln KOBiIFAHbN TEKcepin anlbIb3.AkkymyIaTOpbl Kocbln typrAh 6ak 3neKtp6bIMbHa eHri3y anattpra anapa anala.
TeKaHaOcbl6aK3eKtp6yHbIMbIyuiH apHaHan ahaHb Bosch akkymyTOpnapbIH KOndaHbHbI3. BacaTyprniakkymyTOpnapbl KoHaHy KaapanaHyKeHe eT KayiBiHe anapa anadbl.
AkkymyTopdbiaawnab3.Kbicka Tynbiktany Kayini 6ap.


AkymyTOpdbI bICTbIKTaH (MbICaIbI, y3aK yaKbIT 6oBbI KYN caynenenHyine)OTTAH cydAn XeHe bINFaIaN H KopFaHbI. KApblny kayibi 6ap.
KoJaHaBnMaFaH aKKyMnyTOpDb KaFa3 KblCTbIPfBtWtapDaH, TbHlDapDaH, KInTTepDeH, HnepeDen, 6pyaHdapanadH HeMece KOHTAKTTPaF 6eRt eTe anTaBH 6acka MeTAn 3aTppDaH anbc Jxepde caKaTaHbI3. AKKyMyrTOpDbIH KOHTAKTbpI apacbHdaFb KbiCKa Mep3IMdi TYhIKTAY ce6eBiHeH KyiN KaIy HeMece eP TaJa da Bonyb MykHiN.
AkkymyIaTpa3akbIMdaHanJxepnepi6ap BonFaHa Hemece on Dpybc naiDanaH6arAnKafdaima 6y 8bIfby MymKIn. BykafdaJaXyMbc ayMaBfHaTa3a aya Kipriin, WabfMdp an60ca, dApirepre XyRhiH3. By TbHbC any KOndapBtiTIpKEHdPyi MymKIn.
Byn akkymnytorpbl TK kana ocbl ehipywi eHIMdepinnde naDanaHbIb3. Co npkblnbl akymnytorpbl Kayinti, aptBk KKTeydene caKaTaNbI3.
WerheHemec6bpybIChKtblyUItbl3aTapHemece cbITkblcEApkBilblAkkymynlTOp3AkBIMdaHybl MymKin. ByI KbiCKa TylbIaYf aIbn Kein, akKymynlTOp XaHybl, TyTIH bIbFapbl, JkapblNyHemec Kbi3blN KETyi MymKin.
AkkymyIaTOpdbH KbICKa TybIKaTanybH etKi36eH3. Kapbny Kayi6i 6ap.
AkkymyIaTOpbl cybIKbIKTapdaH KHe bINFaIbIKTaH KopfAn KypiH3.
Bak3neKtp6yHbIMbIH TEmpeaTypa ayMaftb-20°C KHe 50°C apalbIbHa da 6onFaH Jepnepde fHa caKaTaHb3. BAK 3neKtp6yHbIMbIH, MbCaNbI, Ka3da KeIKe TaNDbPMAHb3.
AkkymyTOpBbHJKeIeTy CaHbIaynapbH KymCaK, Ta3a JxHe Kypfak KbIIaKaNeH aHa-da-CaHdMyKnT Ta3anAn KypiH3.
KyaTtAnDbIpy KypanIapbl ywiH Kayinci3dk HycKayIbIKTapbl

Kayinci3ik 6oibHwa HcyapbI meh caTahdbypnapbIb6apbIfbH OkblbI3. Kayinci3ik 6oibHwa HcyaybIKTapbI meh caTahdbypnapbH yctah6ay He opbiHaMay
3NeKTP COKkBICbHa, oT PbIFyBaHx KHe/Hemecae ayblp KaKaTTaHyFa anapa anbyi MymkiH.
HcykaynbikTap men caKaTaNdbypynapbH 6apnbFbH Kenewek yuih caKan xypiH3.
KyaTaNbpy KypanbIe TK KaHa ONbIH 6apblk
fynKnnaIapbHbIbTOblfBImeH 6aFaan, onApdbI eW6ip
weKeTeyC3 opbHdai anaTbHbHb3Fa ceHIMdi 6oJFaHbHb3da
Hemece oCb KypaI bObHbHa naBbKTbI HcckaybIKTapdbI
aflFaHda naJaDanaHybHb3 Na3bIM.
Balaanapfa, dieHeiik, ceHcOpIbIK Hemece akbl-oi kaibineTepi IeKTeIenrH aamdapra Hemece OcbIHdaa KypalnapMeH JyMbIC Toxipnbeci KeTKiIKC3 6oIfAH XHe/Hemece 6iImi XeTKiIKC3 6oIfAH XHe/Hemece 0cbI KOJaHy HcyaylbKnepn TaHbc 6oMaFAH aamdapra eWkaaH ocbl 6ak 3JeKtp 6yIMbIMeH JyMbIC icTeyre pyKcat etneH3. Kypal KOJaHaTbIH enDeeri yTTbIK 3aHap MeH epexenepi apKblbl KOJaHysbI JxacblhH,weKTenyi MymKiH.
Bananapra kapan, onapdbi 6aKbIan JxypiH3. OcbIhblH
apKaCbIHda 6aIaIapDbIH KyaTaNbIpy KypalbMeH OHaMaby KaMTaMacbl3 etineTIH 6oJaBl.
TeKaHa KaYaTbI 2,0Ah Bosch nHTnHOnDbIK aKKyMylrTopnapbIH (10 AhDaH zoFapbipak 6oJFaHdaaKKyMylrToplbIK yAusbikTapbIH)KyaTaNdbipbIH3.AKKyMylrTopKepeHeyi KaYaTaNdbipy KypalbIHnAKKMylraTopDbI KyaTaNdbipy KepeHeyiHe cai bOlybl KaXeT. KaYtaKyaTaNdbpa aBbIN6aNtBuHaKKyMylrTopnapbIH KyaTaNdbipMaHbI3.ByI ePT HeMeceJapbiny Kayi6iHe anapa anaDbI.

Kyaattandbipy KypaunbH XaH6bip Hemece cbI3 Tye cAmaHtBIn Jxepnpe caKaTbI3.
KyaTtAnDbpy KypaIbIhIn iWine cy Kipyi 3Nektp ToBf COy Kayi6iH apTbIpaIbI.
3apraTay KypaIbIH Ta3a YcTaHbI3. KypaIbIH NaCTaHybl TOK COYbI KayinIH TyIH DaTadbl.
əp naianahydah anbih 3apdTay Kypanblh, Kaebdi xhe aibipdb Teckepiiz. Akaydb 6aikacab3 3apdTay Kypanbln naiaanha6b13. 3apdTay Kypanbln e3iiz aunpaHb, bHI TK 6bnkrti Mamanfa Xane Tynhckanb 6bnweKtepmen XeHdeti3. 3a,bimdaHaT 3apdTay Kypanbl, Kaeb Jxhe aibp 3JeKTP TOBbHb INCOY KAYIN apTTbpaDb.
3apTay KpaBih Kocybl Kyte OaH KaHaTbH 6eTepin (Mbicbl, KaFa3, Mata XHe T.6).YcTe He KoMaHbI3 Hemece XaHbIi 3aTAPbIH XaHbIH naIdanaH6aHbI3.3apTay KezInHe 3apTay KpaBihKbl3ybl Ce6beIne ept Kayni naJa 6oJabl.
KyaTAnDbipy KypanbHbH, XeNdety caHbInaynapBn XannabH3. ByI KyaTAnDbipy KypanbHbH, KbI3bln, DpybIC Kymbic icTeMei KaanybHa anapa anaBl.
3neKtpnik Kayinci3diirin apTbipay any yuiH MAKcMmAnIbIK axbipaty TOfbl 30MA6oIraH dIepepeHuaNlBk TOK KypaBH KOJaHaHybHbIa3bIM. KopraHbIcTBk axbipay KypaBH eP KOJaHaY aIbIHANepKaawH TeKcepH3.
Benrinep
TMeHderi 6enrinep kondahy HcckaybIbH Oky KHe TyciHy yuH MaHbIaIbI. BEnrinep MeH Oanapbln MafblacbiE cTe caKaTaHbI. BEnrinepi dYpbic TcyiHy Kypalbl dypbic epi OaH da ceHimdpieKTyppe naJaandahyFa KEmek 6oanaIbI.
| Бени | Марын |
| Козгалыс 6аьыты | |
| Peakцяя 6аьыты | |
| Кор广泛关注 КОЛГАБИН КИП JУРИЗ | |
| Салмагы | |
| Icke Косу | |
| Өшіру | |
| √ | PyкCat etiIngen КОлдану оpekeTTepi |
| X | PyкCat etiIngen КОлдану оpekeTTepi |
| CLICK! | Естinentишүлүдөрүдүрүрүлүдүрүлүдүрүлүдүрүлүдүрүлүдүрүлүдүрүлүдүрүлүдүрүлүдүрүлүдүрүлүдүрүлүдүрүлүдүрүлүдүрүлүдүрүлүдүрүлүдүрүlүдүрүлүдүрүлүдүрүлүдүрүлүдүрүлүдүрүлүдүрүлүдүрүлүдүрүлүдүрүлүдүрүлүдүрүлүдүрүлүдүрүлүдүрүлүдүрүлүдүлүдүрүлүдүрүлүдүрүлүдүрүлүдүрүлүдүрүлүдүрүлүдүрүлүдүрүлүдүрүлүдүрүлүдүрүлүдүрүлүдүрүлүдүрүлүдүрүлү徳 |
TaraibHdany 6oBbHwa KOnDaHbInybl
Bak 3eKtp6yMbIy Jxeké TpyMbIc XepnepiHde yN3apda wen waby JxymbIcTapbl yWIn MaKcaTTaIraH.
Bny 6ak3neKtp6yHbMbl 6ytanapdpkecy, terictey xhe t.6. yin makcaattalmafah.
Ocb6ak 3eKtp6yIbMbI gyI3apdaBfI uENTI xep TOnbIpaK deHreInHe deiH Kecy yuH apHaIraH.
TexHnKaIbIK MOniMeTTeP
| Keramshankbiss | Universal Rotak 36-550 | Universal Rotak 36-555 | Universal Rotak 36-560 | Universal Rotak 36-590 | Universal Rotak 36-670 | |
| Фаним Немperi | 3 600 HB9 505 | 3 600 HB9 508 | 3 600 HB9 506 | 3 600 HB9 509 | 3 600 HB9 507 | |
| 3 600 HB9 573 | 3 600 HB9 574 | |||||
| Атыль керneyi | В | 36 | 36 | 36 | 36 | 36 |
| Пышak Турковский | 38 | 38 | 38 | 38 | 38 | |
| Енi | СМ |
Ka3ak | 207
| Keranшankbii | Universal Rotak 36-550 | Universal Rotak 36-555 | Universal Rotak 36-560 | Universal Rotak 36-590 | Universal Rotak 36-670 | |
| Kecy binktiri | MM | 25 - 70 | 25 - 70 | 25 - 70 | 25 - 70 | 25 - 70 |
| Шенистay себетин, келемi | л | 40 | 40 | 40 | 40 | 40 |
| "EPTA-Procedure 01:2014" кужатыни сай салмавi | Кг | 15,0 | 15,0 | 14,0 | 15,0 | 15,0 |
| Серийкинемірі | бak залктбуійсыні takтыасьнда караныз | |||||
| сырTKы Temператусыні уй�арыді Deиг'rei | ||||||
| - куattандіру барысында | ℃ | 0 ... +45 | 0 ... +45 | 0 ... +45 | 0 ... +45 | 0 ... +45 |
| - icke кocьліп, колдан falанda | ℃ | +5 ... +50 | +5 ... +50 | +5 ... +50 | +5 ... +50 | +5 ... +50 |
| - садтay кеінде | ℃ | -20 ... +50 | -20 ... +50 | -20 ... +50 | -20 ... +50 | -20 ... +50 |
| Аkkуmunлітор | ПNTМ NOHДБИК | ПNTМ NOHДБИК | ПNTМ NOHДБИК | ПNTМ NOHДБИK | ПNTМ NOHДБИK | |
| Атульі керneyi | В | 36 | 36 | 36 | 36 | 36 |
| Θнім Німіri/Kуасы | ||||||
| - 2 607 336 913/ 1 607 A35 02V | Ah | - | - | 2 x 2,0 | - | - |
| - 2 607 336 915/ 2 607 337 047 | Ah | 4,0 | 4,0 | - | 4,0 | - |
| - 1 607 A35 058 | Ah | - | - | - | - | 6,0 |
| Аkkуmunлітор ушыктарынcapsы | ||||||
| - 2 607 336 913/ 1 607 A35 02V | - | - | 10 | - | - | |
| - 2 607 336 915/ 2 607 337 047 | 20 | 20 | - | 20 | - | |
| - 1 607 A35 058 | - | - | - | - | 20 | |
Ocby KOndany HcyckaynbfbHnda 6epinre MmHepin Hbapnblfbi TeH3 deHReiHHe TEmeHipeK HeMece TeH3 deHReiHEn 2000 M 6nIKtke Kondany yuH eHneHin 6epinre.
| Kyaattanbipy KypaBí | AL 3620 CV | AL 36V-20 |
| Öhimi HemiPI | EU | 2 607 225 657 |
| UK | 2 607 225 659 | |
| AU | 2 607 225 661 | |
| KO | 2 607 225 667 | |
| Kyaattanbipy ToBí | A | 2,0 |
| Kyaattanbipy yakuBí (aKKymyIaTOp KyaTcbl3daHbIn KaIgAnDa) | ||
| - KyaTbI 2,0 Ah aKKymyIaTOplaRda | MHN | 65 |
| - KyaTbI 4,0 Ah aKKymyIaTOplaRda | MHN | 125 |
| - KyaTbI 6,0 Ah aKKymyIaTOplaRda | MHN | 185 |
| "EPTA-Procedure 01:2014" kχkaTbHa cai cajlMaFbI | Kr | 0,55 |
| CaKTbIK cblbIbI | II | |
UybIn XaHe DipinDey 6oBbHwa mAnimetTep
| Universal Rotak 36-550 | Universal Rotak 36-555 | Universal Rotak 36-560 | Universal Rotak 36-590 | Universal Rotak 36-670 | |
| 3600 HB9 505 | 3600 HB9 508 | 3600 HB9 506 | 3600 HB9 509 | 3600 HB9 507 | |
| 3600 HB9 573 | 3600 HB9 574 |
UbyIeMnCCsR MaHepi EN 60335-2-77 HopMaCbHa cai BeNrlneHren
KypalbIn“A”KbInB 6bnBn 8nBn 8nBn 8nBn 8nBn 8nBn 8nBn 8nBn 8nBn 8nBn 8nBn 8nBn 8nBn 8nBn 8nBn 8nBn 8nBn 8nBn 8nBn 8nBn 8nBn 8
| -Дыбыс Кысымы денигий | дБ(A) | 76 | 76 | 76 | 76 | 76 |
| -Дыбыстык Куат денигий | дБ(A) | 88 | 88 | 88 | 88 | 88 |
| -“K” онлайн dэнсиздагi | дБ | =2,0 | =2,0 | =2,0 | =2,0 | =2,0 |
Ah jannbI ter6eny mHI (yH 6afttbH BektopbIK KocbIHbcbl) XHe "K" danci3diI EN 60335-2-77caHapTbHa caI 6benrinehen
| - a_i-terbólmeni эмнCSSЯ мэни | M/c² | <2,5 | <2,5 | <2,5 | <2,5 | <2,5 |
| - "K" олшey дэлсíздіri | M/c² | =1,5 | =1,5 | =1,5 | =1,5 | =1,5 |
Kypactbipbin opHaTbIybl MeH KOJaHbIybl
Ha3apbIbIzda 6oNcbIh: AaHaNbItn TpyaTbIH Kecy nbIaFbIH TpytneH3.
AkkymyIaTOpdbI KyaTbIbIpy
AkkymyIaTOp, TemnepaTypa DeHReHHIn TeK O°C MeH 35°C
apacbIHaFa KyaTtAnDbIpyDbI MymKIN etetIH TEmnpaTypa
baKbIayBxJyNecimEn JkAbDItKaTfAH. OcbHbI
apKbICbIhAaKKymyIaTOpdbH JyMbIC YaKbITbY3ak60nyb
kaMaTaMaCbIeTIneDi.
Kcay: AkkMyIop JxapTbIaJ KaTtAnDbIpblfA
KaIbITaCatbIIn He xetki3inin bepinei. AkkMyIaTOp
XyMbICbHbT ToBk KENemH KaMTaMaCbI3 ety YIiH OHb
anFaIKKpET naiJaHy AnDbHaH anDbIMeH ToIbFbIMeH
KyaTTaHDbPbI naiBbI3.
JIITH-NHOHBk AKKMyIaTOpDbI ePkAshaN KyaTTaHbIbIbO bTy60aNdbI,6yONbIH naIaIaNHy Me3IMIN eWbip TyPeKbICapTnAbI. KyaTTaHbIpy 6abbcH y3y aKKMyIaTOpDbI 3akblMaHaBbHa anapMaNbIb.
IInTH IOHNbIK akKymyTOp "Electronic Cell Protection (ECP)" kYneci apKbIbI terep KyaTcb3aHaDAn KopranfA. AkKymyTOp TOnbIFbIMe KyaTcb3aDaBn KAIFaH KaFdaJaOn on Kypan Kopfay kYneci apKbIbI eWipinin KoBlaNbI: BaK, 3NeKtp6bYbIMbI kYmbic I cTeMeN Typ.
KypanbH ABOMaTbI Tpye ewiipirehen KeiH Kockbi/ewipriu TuMeewirin KaTia 6acnab13. By aKKyMJIrTOpBdH 3aKbIMdaybHa anapbyi MymkIH.
AkkymyIopIbI KaIeRe JapAty TypaIbI HycKaynapbIe cKepeiH3.
AkkymytaTopdbOpHaTy/mbiFapbIn any
Hcyay:Naibktsb60mfaHaakKymyIaTOpnapbl KOnlaHy KpaanH,dypbicictemeyiHe Hemece 3aKbIMdahyHa anapa anaabl.
KyaattandbipfahakkymyIaTOpdbiehri3iH3.
AkkymyIaTOpdbIH TOnbIbImeH eHri3iIN KOblfHaBH TeKcepiH3.
AkkymyIaTOpDbI KpaIaNbI WbIFapBIn any YwIH, aKkymyIaTOpDbI 6yFaTTah WbIFapY TmMeWirH 6acbln, aKkymyIaTOpDbI WbIFapBIn anbHb3.
KyaTtAnDbipy 6apbcbi
KyaTaNdbpy 6abcbkypaandbh jxeni ayibpb3nektp po3etkacbHa eHri3in, aKKymyop KyaTaNdbpy KpaBbHa eHri3inre cTte 6actana.
"KyaattnBpye aDici apkacbHda aKKymyTOpdbH KyaattnBpye Kyi abTomaTbI type 6enrInehin OtbipIn, aKKymyTApTe TmepaTpaCbl MeH KepeHyIe KapaOnbIpa OHtaNbl Type KaTtAnDbipy TObl TaHdNbIOnbIpbNaBl.
OcbHbHApKacbHda aKKyMylTOp KOpFaJIbIn, KyaTTaHdbpy KypalbHaCaKaTaHaHa aPkaUaH ToIbIfMeH KyaTTaHaH KaanbHda Kana bepedi.
KyaTAnDbpy KypaIbIHdAfbl KepcetKiu 3JIeMeHTepiHmAfblHaCbl (AL 3620 CV/AL 3640 CV/AL 36V-20)
KbIJaM KyaTaNDbipy 6apbcbi
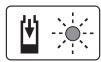
KbIaam KyaTaNbpy 6abcbl aKKyMnTOpDbIH KyaTaNbpy KepcTeKiUHIN Kacbl TycneH Te3 XbInbKan Tpyb apKbIbI
6inipinezi.
AkkymyIaTOpDbH KepcTeKiU 3JemeHbI: KyaTaNbIpy KeiHneY WxKacbl TycI JxapBk DNOD Wamdpbl daiKeTI TpyDe XaHbIN, KlcCa yakblTaN KeiH oWeDi. YX Wxacbl TycI JxapBk DNOD Wamdpbl Y3iNicC3 XaHbIN TpyBi AkkymyIaTOp TLbIFbEMe HcyTaTaNbDpblbN 6oFaHbIN B1nIpeDi. AkkymyIaTOp TLbIFbEMe KyaTaTaNbDpblbN KOiBnFAH CAtTEH WAMAMEH 5MHyT eTKHeH N KeIH Xacbl TycTI KaBPbK DNOD Wamdpbl KaTadaH e3E3epimEn oWeDi.
Hcykay:KbIJaM KyaTaNbIpy FyHKUraCbI TeK aKKMyJrTop TempepatypaBihN naBikTbI yIrapbHbI deHreJe 6oIFaBHaDa faha KOJaBaHbIa anbHaDb, "TexHHKaBbIK mAniMeTep" tapayh KaPaHb3.
AkkymyTOp KyaTtAnDbIbPbInDbI

AkkymyIaTOpdbHxapbIKDIOdTbIK KyaTtAnDbpy KepcTeKlWiHxacbl TycnEn TypakTbIXaHByI aKKymyIaTOpdbH
TolbIfBImeKyattaHdbipbIbn KoyblfHaHbH 6inipei.
CohImeKatap,waamamEn 2ckyHd6oHbAkkymyIaTOpdbH TOnbIfMeH KyataHaDbIpbIraFahHbI 6iDipetIH dbIbCTbIK CnHaHdbk 6enrici 6epinI typaIb.
OcbiAn KeiH AkKymyIaTOp Depey naIaHaY yuHIn KyaTaHbpy KypaBbHaN bIfapblbIn aIbHa aIaBl.
IiHHe aKkymyTOp eHri3iIMeRrJXaFdaJa
aKKyMnTOpDblH XapblK,IIOuTbI KyaTtAHbipy KepcTeKluiHIn TYpaKtblXaHyblXeNi aBipblHIn 3neKtp po3EKacbHa eHri3in, KyaTtAHbpy Kypanbl icKe Kocy yuH daBbH bObn typrAhb6iDipei.
AkkymyIaTOp TEmnepaTypaCbHbI 0°C TeH ToMeH Hemece 45^ TEH XoFapbl 6onybl

AkkymyIaTOpdbHxapbIKDIOdTbIK KyaTtAnDbpy KepcTeKlHiH KbI3blTVcneH TypakTbIXaHByIaKKymyIaTOpdbIH
TemnepaTpaCbI yHapbIHb KyaTTaHdbpy TemnPepaTpaBbIK aymafBHnabTbc BonfahBn bHbDipeJI, "TexnKabIK MmimETTep" TapaybIH KapaHbI3. YHapbIHbI TemnPepaTpaDeHRei OPhaTbIHaCtten KeiH KyaTTaHdbpy KypaBbABOTMaTbTIypeJXbIaNdAM KyaTTaHdbpy BapbICbHa aybIcAbI.
AkkymyIaTOp TemnepatypacbI yIaFapbIHbI KyaTtAnDbipy Temnepatypa DeHreIneH TBc aMyaftbHaDa 6oNfaHda, KyaTtAnDbpy KypaIbI eHr3iInReHne AkkymyIaTOpdbH Kb3bl TcyTI kaBkIDNOdTBK WAmbI KaHaTbH 6oNadbl.
Kyaattandbipy 6apbcibc etkizine anbHbaTbH JkaFdainap

KyaTaNbpy6apbcbHda6acKa 6eTe naiDa 6oIHaJa,ocb6eTe KyaTaNbpy KpaIbHbI HJapblDnOdbTkwaMbHbH Kb3bl TcneH
XbInbIKTan XaHbIn Tpybl apKbInbl KepcTeiJIeI.
Bny kafdaIya KyaattanbIpy 6apbcIb 6aCTana anMaJxHe aKKyMnTOpdbIy KyaattanDbIpyIa anMaIbTbI 60JaDbI ("KATEnp MeH 6eTeTepdi 6enriny" tapayibn OKbH3).
Kyaattandbpy 60bihna HycKaynap
Aca y3ak yakblb0ybl kyaattahdbpy hemece kyaattahdbpy uknIaapbHbH b6ipiHEn KeIH BipIn Kaeta biphewe pet ewbip 3y1ncc3 9tkiyApkblb kyaattahdbpy KpaIbKb3bNKeTyI MymkIn. OcbHdAn kyaattahdbpy bapbCTapb Ewbp Tpyde kaynti 6onMaib, kyaattahdbpy KpaIbHaTe xHHKaIbIK aKaybHbHbap 6oynbBinDipmeNi.
KyaTaNbIpbNfAhbIH KeiH Kymblc ZIKnIapbIbH aITapNbIKTaNbICkapbIN KaNYbAkkMyIaTOPdbN To3bl NkAFbH IN XHE ONbI ayBCTbpy KepeKTirH biJipedi.
Kādēre jxapaty 6oibihwa hcyckaynapbH yCTaHbHbI3.
AkkymyTopbI cyby (Active Air Cooling)
Kyaattandbipy KypalnbHa KaypactbplfaH Jeienetkiu
6bacnyb Kyneci AkkyMnyaTpordbI TmemepatypacBn
6bakbnIaupaI. AkkymylnTop TmemepaTpaBcI 30 C
deHreHHKeXoarbp6bOla, on Jeienetkiu apkblb OhtaN
Kyaattandbipy TempepaTpaBHa DeiH cytbblkoN KOblbl
TpyaBH 6oanaI. IcKe KocblbIn TypHaN XeJIeKII WxEnJeTy db6bIcAtpBn WbIFapBn TypaBn.
KeNdtKlWtH icke KocbImaTpybI aKKymyIaTOp TEmnepaTypaCbHbIN OHtaaBbI aykbMda 60FaHbIN Hemece KeNdtKlWtH 63bbln kanybH 6inDipei. ByJnaFdaJa aKKymyIaTOpDbI KyatTaHdbpy yakblT y3apaTbH 60aIbI.
Painanany 6oBbHwa HycKaynap
AkkymyIaTOPdbIH KyaTTaHdbIpbIy KyyIH KepcETki
AkkMyIaTOp e3iHIn KyattAnDbIbIbIn JxKaTaN KaIIbN KepcTeTI KyaTaNDbIbIy KyHH KepcTeKlSiMeH Ka6DbIKaTaNFaH. KyattAnDbIpy KyHH KepcTeKlSi 3Xacbl Tcyti KaPbIK DnOtBk WAmdapbIH TaPaBl.
Kyaattandbipy KyinH KepcetinyiH 6bceneHipy yiwH Kyattandbipy KyinH KepcetkiW TymeuirH 6acbHbI3.
Ulamameh 5 ckyHtAH Kein H Kyattandbipy KyinH
KepcetkiWi e3-e3imEn win KanabI.
AkkymyIaTOpdbH KyaTbHaDbIpyN KyIH AkkymyIaTOp Kypandan h bIfapblbnKoHbIFaH da TeKcepye 60ala.
www.bosch-garden.com
CypakTapbHbI3db KoifahbHbI3da JxHe KocalKb6bnueKtepre Tancbpbc6 beprheni3de apkaan MIndettTtpre EhIMH3aybITbIK TaKaTaAsCbHdaFb10-caNbEHHemipihXa3blH3.
Hdiyui taanTapbMeH HopMaapbIbIH CaKtanybIme
JIeKtp KpaBIn JKeHDey KeHe KeiNdi Kbi3MeT KepCteTy
6apBbIK MemkeTeP ayMaftbHaTe KopepToBoi"
HPMaBik HeMece aBTOpn3a4muaHanfah Kbi3Met KepCteTy
opTaBkTapbHdaOpbHdanaDb. ECKEPT! 3aHcb3 XoJlmEn
KeiHReh OHIMdepri naDanaHy kayint, deHCaylbFbHb3Fa
3HN HKeTIpy MyMmIKH. OhIMpeprl 3aHcb3 Xacay XeH
tapaty ekimwiniKxHe KblmbCTbIK Teprin BoBHwa
3aHMeN KydanaHaDb.
Ka3aKCTah
TytbHybIbIapFaKeHec6epyKaHeIaFbIMApIbI Ka6blday optaIbIFbl:
"PoBept Boi" (Robert Bosch) XUJC
AJMaTbI K.
Ka3aKCTaH Pecny6nIkaCbI
050012
Mypa76aEBK.,180y
"Tepemc"50,7ka6aT
Ten.: +7 (727) 331 3100
a c: + 7 (727) 2330787
E-Mail: ptka@bosch.com
CepBnCTIK KbI3MeT KpEcTeY optaIbIKTapbl MeH Ka6blIay nyHKTePiH MekH-KaJIb TYpaJIb TOnJIb KxHe 03eKTI aknapaTIb Ci3: www.bosch-professional.kz pecMn caTTan ana anaIacbI3
TacbImanay
BynIINH-NOHbIK aKKymyTApnap Kayinti TAYapnapfa KOblnTaBH TanaTnPaFca Bonybl KepeK. NaIaNAnHybI aKKymyTApnapdbI KSeJeDE KocbIMwa KJXaTTapcb3 TaBImanDa anaDbI.
Yiuihui tyuflanap (Mbicalb, aye KeNiri Hemece Xiibepy) opamafx KAnHe mapkanaipfa KoBnIaTbH apHaai TanaTAPdb CaKtay Kepe. XiibepyRe daBihday Ke3iHne KayinT JyKTePdi TacMaJday MAmHbEm Hen xabapnacy Kepek.
AkkymyIaTOpdbi KOpNcbl 3aKbMdaIaFah 6oNa faha
Xi6ePi3. Ausbk TynCnepeDi xenImDeH3 xHe
aKKMyIaTOpbl opamada Ko3FaMaTbHdai opaHb3.KaKeT
6oNa, KocBIMHa yTTbIK epeKeepeDi caKaTHb3. KaKeT
6oNa, KocBIMHa yTTbIK epeKeepeDi caKaTHb3.
Kadere kapaTy

3NeKtp KypanapbI, AKKyMnyTOpnap, KepeKJkapaTap MeN KaNTama MaTePnaIapbI 3KOLOHnBik TpyfBdaH NaBkTbT pyDne KdEre
JapaTbIybyTnic.

3NeKrtp KpyapdApbl JxHe
aKKyMnyTOpnapbl/6aTapeynapbl
TyPbICTbIK KOkblCTapFa apHaIHaH
KOHTeHepnepre TactamaHbI
Tek kaha EO endepi yuhi:
Eyponanbik 2012/19/EU dinepektnbacbina cai, kolndahyfa
japamcb3 60bnipkanfah 3neKtp xhe 3neKtpoHnka
6yibimdpabI MeH Kpyalnpbl, xhe 2006/66/EC
dnepkTmbacbHa cai, 6y3blnfa Hemece kOlaDyFA
japamcb3 60bnipkanfah eckia aKKymnyTopnap/batapennap
6bekeipktenin xinhana, Kopuafan optafa 3nHn
KeTIpiJImeTINDee KaNTa ENeSy yWIn KdEre TaNcBpblNybl
Tnic.
AkkymyIaTOpnap/6aTapeHnnap:
Li-woh:
TacbMaIay TapaybHdaFbl HcyKaayapbHa Ha3ap aydapbHb3.
Româna
| Accumulator de 4,0 Ah | până la 500 m2 |
| Accumulator de 6,0 Ah | până la 750 m2 |
www.bosch-garden.com
Service scule electric
Strada Horia Macelariu Nr. 30-34, sector 1
013937 Bucuresti
He ce OTHacrdo HactoIeNEKTPONHCTpymEnT.

Ipei Da dOpHpaTe rpaHnC-KnEeKTPoHnCTpymENT, n3-yaKaIte BCNUKITe My NOD
BnXHn eIeMeHTn Da CnpaT Da Ce DnBxat. Cnei n3KlIOUBaHe HOxOBTe npoDbJxBaT Da CE BbPrtT NO INHepuN MoRaT Da npeDn3BnKaT HapaHraHna.

He n3noI3BaIte rpaIHHcKnI eIeKTPoIHcTpymEHT npH IbXd; He ro n3JaIaIte Ha
ДьЖД.

IpeiNa3BaIte ce OT TOKOB yIap.

He ce OTHacrdo HactoIeNEKTPOHHCTpymENT.

I3noI3BaIte 3apJNDTo yCTPOIcTBO cAmO B cyXn NOME-

3aPAnHTo yCTpoiCtBO e cboOpbKeHo C npEJa3eN TpaHcΦopMaTOp.
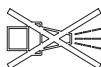
3a nouHCTBaHe Ha rpaHnC-KKna eNEKTPoHHCTpymeHT He TE BODOCpyHa MaSHHa Hn

BHHMaTeHNo nperIeJkaIte 3a DnBn IDOMaUHn XNBOTHN 3OHaT, B KOrTo rpaDnHcKnT
eNeKtpoHHCTpyment 7e 6bde IOn3- BaH. IIO BpeMe Ha pa60Ta Ha MaunHa-
TaДИВИДOMaUSHINJINBOHTNMOrAT Da 6bDat HapaHEn. BnHMaTeHNO perpIeXJaIte 30HATA, B KOYTO MaSHHaTAt Ⅲe pa6OTn, I OTCTpaHЯBaIte KaMbHN, ⅡbHepN, TEL, KOKaJI N IpyrN UyKdI npEiMeTn. Iprn NOJ3BaHe Ha MaUSHHaTb BnHMaBaIte B IbCTaTApTeBa Da He OCTaBAt CkPHTN Ipe6HIn DINBV JINBOTHN, DOMaUSHIN JINBOTHN IN MaJIKN DbHepN.
06cnyxbaHe
B HnkaBb CnyaH He DonyckaIte c To3n rpaHnckn eJeKTPoHnCTpyMeHT da pa60Tt Deca nll nla, He3aNo3- HaTHc yka3aHnraTa 3a pa60Ta C Hero. Bb3MOxH0e NauHOaHn HopMaTHBn NdoKmEHn Da oPaHnuaBaT Bb3- pactHa pa60TeuNc rpaHnckn eJeKTPoHnCTpyMeHT. Korato eJeKTPoHnCTpyMeHTbT He ce n3POn3Ba, Ro CbxpaHbBaIte Ha MeCTa, HeDocTbHN 3a Deca.
He donyckaTte To3n rpaHcKn eIektpoHHCTpymeHT da 6bde nol3- BavOn OTeCa, Iuca c OgrapHueHn 3uueCKN, CEN3OPHN IIN dyWeBn CnOCO6HOCTn IIN IInca C HeIOCTaTbUHN I03HaHn I ONIT N/IIIN IInca, KOHTO He Ca 3aNo3HaTHn C Te3N yKa3aHn.
Deza Tp86Ba Da 6bDaT NOI NOCTOHN Ha3Op, 3a Da CE ppeIoTbpaTHOnaCHocTTa DA INrpaT C rpaHncknEeKTPoHHCTpyMEnT.
B HnkaKbB cnyaH He n3no3BaIte rpaDHcKna eJeKTpOHHCTpyMeH,
aKOB6n30CTceHaMnpaTdecaHINDOMaUHNJNBOTHN.
OTROBOPEN 3a TpaBMn Ha npyH Inuca nn 3a MaTePnaIHH uetne paBoTe- uHNT C rpaHnHcKnEJeKTPoHnHCTpyMENT.
He pa6oTeTe c rpaHnckna eIeKtpOnHCTpyMeHT,doKaTo CTEc DkaNaHKn nn caHaJI. HocTe BnHaRn Cta-6nHn PbTHO 3aTBOpEHn ObyBkn n Dblr NaHTaJHO.
FrnKInBO npOBepaBaiTe npeiBapntenHO o6pa6oTbaHaTa pIoUs OTCtpaHraBaiTe KaMbHn, PpbUKN, KOKaJIu N dpyrN cyJxN TeJa.
BnHaHn npeDn ynoTpe6a npoBepaBaiTe, daHn HOxOBeTe, 3aCTOpopraBaIte BnHTOBe n peKeIyT MoynHe ca NOBpeHn IINn H3HOceH. 3aMeHnTe n3HOceHn IINn POBpeHn HOxOBe n 3aCTOpopRAuN BnHTOBe BnHaRn BV KOMPLeKT, 3a Da n36eHete 6neHe no Bpeme Ha pa6ota.
Kocete BnHaHn Ha DHeBHa CBETnHa HIN pN MHOTo Do6po N3KyCTBeHO OCBETJIeHne.
He n3noJI3BaIte TpeBOKocauKaTa npn louH MeTeOpOIoRnuHn ycNoBn,OCo6eHO DbXd Cbc CnJeH Btbp.
ПО Вьзможноct He ПОЛЗВайтграДИнСКИ ИНСТРУМЕNT, KOraTO TpeBa-Та e Влajхна.
Pa6oTeBnHaHn CbC CnOKoEH XoI, HNKORA He XoJeTe 6bp30.
Hnkora He pa6oTeC rpaHnckn HnCTpyMeHT, aKO npEpa3HnTe My
cbojxehn nn Kaanca n ca NOBpeDeHn nn C dEmoHTnpaHn npedna3HN cbojxehn, Hap. npedna3eHekpAHnn KOW.
-
Прениваме за Вашита на paбOTиTe сшу мозаглuyштели (aHTnФОн).
He n3noJ3BaIe rpaHnckn eJeKTpOHHCTpyMeHT, KOraTO cTe yMOpEHn nn 6oHN nn KOraTO cTe NOd Bb3-DeiCTBHeTo Ha aIKOXOn, HApKOTuN nn IeKapCTBa.
Pa6oTata nO hepaBEn TepeH MoXe da 6bNe onaCha: -
He kocete oco6eHcTpbMHn cknHOBe.
- Ha ckloHOBe Hnnpn BnaJHa TpeBa BHMaBaIe BNHaI Da CTe CtBnBaTe Cta6HIO.
-По habлонен Терен Кocete BnHaHинрechуно Habaknoha,нкога Надolyи Hafope.
-Приобравиане на посокату надвижени по слкове бдente осбенов Вимателни.
KoratoXoIHTeHa3aIuINDbpNaTe rpaHnHcKnIHHCTpyMeHT6bJeTeN3KJIIOUHTeHOBHMAteHN.
Korato KocHTe, BnHaTn 6yTaIte rpa- dHcNIA HnCTpyMeH Tnpei, Hko- ra He ro DbpNaTe KbM TAnOTO cH.
Korato Bdngate rpaHnckn HnctpyMeHT,3a da ro npeneceTe,Korato npecnuatae ploun,He3acetnc TpeBa N KOrato 3aHaCte nnBpBuaTe rpaDHNCKN INCHPTyMeHT DO nIN OT PNO
IHTe, KOHTo Ie KOCHTe, HOXOBETepaDa ca HeNoDvIXHN.
IopBpeMeHa BkIIOUBaHeHII npi pa3BbPtaHe Ha eIeKtpoDVBnrgaTeJI He HauKlaHJaTe rpaIINHcKnEneKtpoHNCTpyMeHT.
BkIIOUBaIte rpaHnHcKnI INHCTpy-MeHTI NO HauHa, OINsAH B pBkoBOJ-CTBOTO 3a ekCnloaTaun, KaTO BnMabate KpaKaTa Bn Da ca Ha 6e3o-NaCHO pa3CTOJHne OT BbpTJUnte Ce 3BeHa.
He nocTaBraIte pBcTe Hn KpaKaTaCn B6n3OCT Hn NpD BbPTruCe enEMeHTn.
IokaTo pa6oHTte c eIeKtpOnHcTpymEnTa, ceIpbXTe Ha 6e3OpaCHOpa3CTOaHHe OT 30HaTa Ha N3XBpIa-He.
Hnkora He noBnraTe,peCn.He npehacrTe rpaHnckn eJeKtpoHCTpyMeHT,doKaTo eJeKtpoDbVaTeIaT pa60tn.
Korato npn6puate 3a cxbxpaHBAhe rpaHnckn eJeKTPOHCTpymENT BnMaBaIte Da e CTbHnHa 3eMraTc BCnKHTe cn 4 KOlena.
ПовдигаиTe eNeКТрОнHCTуМЕNTa cAmO KaTo rO ДьрЖиTe 3aДрБЖКaT a 3aпpeнасяHe.ОТнасяTe ce BHHMa-TeIHO KbMДрБЖКaT a 3aпpeнасяHe.
He n3BbPwBaIe npOMeHn no KOHCTpyKcIyTa Ha rpaDHcKn yEkeTpOHcTpymEn. HeOpNyCTmN n3-MeHnMaT Da hapuWat cnyp-HocTTa Ha BaSna rpaDHcKn ekeKT
ponHCTpymEnI Da npEiN3BnKaT 3aCnJIeH shyM n yBelenueHn Bn6paun.
Cb6npaHeHaIyMa
HoxbT 3a cb6hpae Ha 7yMa e CbCcneuane HnpoФnI, N03BOLRAu Cb-6hpaeTo Ha eceHna 7yMa oT TpeBnI pIoU. 3a da 6bJe pe3yJTAbT OTo Ta3NФyHKcIg ONTHmAleH, Tp8Ba Da ce Cpa3BaT cIeDnHTe PpaBnla:
- c6bnpaIte IyMa cAmO KOraTo TpeBOKocauKaTa e HacTpoEHa Ha MaKcIMaJIHa BnCOUHHa Ha p3aHe.
- Cb6npaIte 7yMa cAmO OT TpeBn nnloun.
-Ппедида започente сбира themselves Haшуma поверяbaite орботBaHaTa ПLOОИДржte Ha 6e30-NaCHO pa3CTOЯнneхopa,ДOMaшниЖИВOTHIn,СтБКЛЕНпpeДмETи aBTOMO6nII.
N3KIIouBaIte npeKbCBAuHa eIeKtpnueckaT a Bepura
- KOraTO ce OTdAneuBaTe OT rpaHCKnEeKToHcTpyMeHT.
-Преши OTстранявае на селемен,блоралmaшинata. - Korato npobepaBe, nouchBaTe NnN n3BbPwBaTe texHnuecko o6cIyXBaHe Na rpaHnHcKn eJeKtpOnHCTpyMeHT.
-
CnéД пonaдане на чуж do тяло. BeDHara npOBepeTe rpaHnckn eIektpoHHcTpymEnT 3a NOBpeNi n prn Heo6xOIMocT ro npedaiTe 3a peMOHT.
-
Ako rpaAnHcKnT eNeKtponHCTpyMeHT 3aNoUHe Da Bn6pnpa Heo6nKHOBeHo (n3BbPseTe He3a6abHa npOBepka).
TexHHuecko 06cnykBaHe
Korato Tp86Ba Da n3BbPWBate DeHocTN B 6n30CT Do HOXOBete, pa6oTe BnHaN C npedna3Hn Pb-KaBnCn.
3aДабьдe rapaHTnpaHO 6e3OpaCHO pa6OTHO CBCTOЯHne Ha rpaINHcKn INHCTpymENT, ce yBepraBaITe, ye BCNUKN RaIKN, UINΦTOBE N BUNTOBe ca 3aTeHaN.
Перношино поверяBaite далкоштза Трева He ce e n3HocnilДали He e NOBpehen.
PpOBepTe rpaHnckn eJekTponHCTpyMeHT n 3a IIO-TOJMA cNHyPHOCT 3aMeHeTe N3HOceHN HIN NOBpeHn DeTaJIH.
H3noI3BaIte caMo HOxOBe, npedHa3NaueHn CpeuHaJIHO 3a rpaIHHKnI INCTpyMeHT.
YBepaBaiTe ce, ye pe3epBHNte qacTn, KOHTO NocTabrTe, ca npOn3BeEHNOT Boi.
Прени прибиране за сбхраняваенье уверяваши, чу градинскneyт eелектоинструмент упост и бeз заамьрсаяни. Ако e Heoobxodmo, Го поочтete сбс суха Meka уетka.
Yka3aHna 3a onTmAnHa pa6Ota c akymynaTopHaTa 6aTepeHn
PpeHn da nocTabte akymnatopnata 6atepna,ce ybepaBaeTe,Ye rpaHncknT eneKtponhctpyment e H3Knluen. NocTabraHTo Ha akymnatopHa 6atepna B
IpaHnCKNeEKeTpOHNCTpyMeHT, KOITe BKNIOueH, MOKeJa IpeH3BnKa 3NoIOnyKn.
Използайтсамаakymу latopн 6atepin Ha Boi,прдьндаенизаTo3n mojen Гадинcke nektpoHHCTpymeHT.ИзползайенetoHa npугнakymu latopн 6atepinMOKEДЯпeнizВикa пожари И hapяBaHIN.
He OTBAPRnTe akymnatopHata 6aTePn. CbIeCTByBa ONaCHOCT OT Bb3HNKBaHE Na KbCO CbeDInHeHne.


Ipeia3BaIte akymnatopnIte 6atepnH ot nperepaBe, HAp. CbIoN O T npOdbJnxTeINHO Bb3JeCTBHe NaPRAKc CbHueBa CBETInHa,OTOBH,BOAIOBlaXHraBe. CbIeCTByBa OAnachOCT O EKCIIIO3Ia.
DpbjTe HEn3NoI3BaHn AkymyIaTOpHn 6BateHn HanaJeUOT MetaIHH KIamePH, MOHeTH, KJIIOUObE, INHOHN, BHTOBe NpyrN MaIKN MetaIIH NpeDMeTH, KOHTOMaT Da IpeDn3BnKAT KbCo CbeINHeHne MEXdy KOHTAKTNe. KbCO CbeINHeHne MEXdy KOHTAKTNe MoKe da npedn3BnKa n3rapAHH nnnoXap.
PnnoBpeHa HnHnepaBnHO n3non3BaHe Ha akymy-natopnHTe 6aTePHN OT TxA MoRt Da ce OTdEnrT npn. POBetpe NomeuEHHeto, a npn OnilKaBnHn noTpbcTe lekap. NapHe MoRat Da npeDn3BnKAT Bb3NaJIeHne Ha dHexATEHnnte nbTuHa.
3n03BaTe akymnatopHata 6aTepeHra cMo B npOdyKTH Ha pOn3BODHTe. CaMo taka T e npedna3eHa OT ONaCHO 3a He r peToBapBaHe.
Akymyatahopnata 6atepna Moke da 6bde Nobpeenda OHOTcnp npedmetn, HAp. nipoHn Hn OTBepTKn, HN OT cnnH ydapn. Moke da 6bde npedn3BnKaHO BbTpeuHO KbcO CbeDHeHne H akymyatahopnata 6atepna Moke da ce 3aapan, da 3aanyu, da ekcnnoipa nn da ce nperepee.
BHHMABaIe Da He IpeH3BbKATE Kbco CbeHHeHmexkdy Klemte Ha akymyataophata 6atepna. CbuecTByBA ONaCHOCT OT EKCIIIO3NIA.
PpeiNa3BaIte akymyNatopHata 6atepna OT BnaJxHocT IN BOJa.
CbxpaHbBaIte rpaHnHckn eEnkTPOHHCTpMeHTcMoB TEMpePATyPnHdIaHsOHTo 20^ Do 50^ .HaNP. He octabHTe rpaHnHckn eEnkTPOHHCTpMeHT pE3JIaTOTO B KONA.
PernoiHNo nouchBaTBe BHTnuaHOnHHTe OTBOpHa akymaTOpHa7 batepnc mKeA uCTa n cyxa YeTa.
Yka3aHnna 3a 6e30napha pa6oTa cbc 3apAHH yCTpOHTBa

Ipouyete BCnKHybTBaHnN yka3aHna 3a 6e3oNaChpa6Ota C MaunHata. Hecna3BaHETO Ha yka3aHnTa 3a 6e3oNaChpa6Ota NHa yTbTaBnHrTa MoKe Da Ipden3BnKa TOKOB
yap,pojkap H/nn TeKkN TpaBMN.
CxbxpanhaBte BCNUKN yka3aHnna 3a 6e3oNa cpa6oTa n ylbTBaan 3a non3BaNe B 6bJeue.
I3noI3BaIte 3apIaHTo yctPoIcTBo cmoA aKO pa3bIpaTe Ido6pe H MOKETe Da yypaBIABe BCuKIne My fYHKUnn HnI Cte IOnyUHN HynKHTe Yka3AHn 3a TOBa.
HeIOnyUcKaIe TOBa 3apJdHOb yCtpoiCTBO Da 6bJe PON3BaHO OT Deca, IInCa C OgraHnueHn Qn3NueeCKn, CEN3OpHN IIN DUYSeBHN CNOco6HoCTN IIN IInCa C HeIOCTaTbUHN IOn3HaHH N ONHT N/IIIN IInCa, KOHTO He Ca 3a- IOn3HaTHn C Te3N Yka3AHn. Bb3MoXHO e HaUNoHaJIH N HopMaTHBHN DOKUMeHTN Da OgraHnUaBAT Bb3pAcTTa Ha pa6OteuHc rpaAnHcKn eNeKTPOHHCTpymeHt.
Ha6bIouaBaiTe deca.Taka ce rapaHTnpa,ye Deuata HMa da ngpaTcBc 3apdHOTO yCTPOICTBO.
3apejdaIte cmo IHTneBO-IOHn aKymyIaTOPnHa bATEPNHa B0w c KaIpaIeT 2,0Ah (OT 10 aKymyIaTOPn HKeIeKn).HomHaJIHOTo HaPpeJcHne Ha aKymyIaTOPHaTa 6aTEPNr Tp6Ba Da CbOTBETCTBa Ha 3apJdHOTo HaPpeJcHne Ha 3apJdHOTo YcTpoIcTBo. He ce OINTBaIte Da 3apeJdTe ObIKHOBeHn (HeakymyIaTOPn) 6aTEPNr. Ppr 3apeJdaHe Ha dpyrHaKymyIaTOPn Ha bATEPNnCb- IeCTByBa ONaCHOCT OT NooJap N/IIe KcPiNo3n.

IpeJnBaIte 3apHnO yctPoIcTBo O TbXdN OblaXHbAe. IpoHnKBaHeTo Ha BOda B 3apJHOTo yCTpoIcTBo YBeJIuHaBa OnacHOCTTa OT TOKOB yIap.
PoiBpKaIe 3aApHIOto yCTPOHCTBO UHCTO.CbIeCTByBa ONaCHOCT OT TOKOB YIap BCNEICTBHe Ha 3aMbpcBA-He.
BnHaH npeHn non3BaHe npOBepBaHTe 3apHnOto yctpoIcTBO, Ka6ena N uenCena. Ako yctaHOBe NT BPeHn He nON3BaTe 3apHnOto yctpoIcTBO.He ce ONtBAte camn Da OTBapHe 3apHnOto yctpoIcTBO; DOnyckaHte pEmOHn DA b6DaT H3BbPbAHn CAMo OT KBaHnΦHnpAHn TEXHHn H cMo C h3No3BaHe Ha
OpHnHaHH pe3epBHN qactN. NObpeHEn 3apJHn yctpoiCTBa, Ka6eHn IeencelN yBeHnUaBt onacHocTta OTOKOB ydap.
He octabnIte 3apJHOTO yCTPOHCTBO Ja pa60TH Bbpyx neCHo3anANIMA NOBbPXHOCT (hnp. XAPTHN, NpTAt H.T.),pecn.BNEChO3anANIMA cpea. Iopadn HaqrpaBaHETo Ha 3apJHOTO yCTPOHCTBO No Bpeme Ha pabota cb-ueCTByBa onaCHOCT O TNOXAp.
He nokpmbaite BENTHnauznoHHnte OTbOpn ha 3apn Hoto yctpochTBo. B npToHBEN cnyaJ 3apnHOTo yCTpoHCTBO MOJE da npErpee N da npectaHe da FyHKUHOHa HopMaJIHO.
3a no-toIma eneKtpnuecka cnHyrphoc ce npenopbUba da 6bJe BkIIuoyen DeefekTHOTOKOB npekbvau C MaKC. TOK Ha 3aJeCTBaHe 30 mA. BInHaN npEi3aOnuBaHe ha pa-60ta npOBePraBte DeefekTHOTOKOBn ppekbvau.
CHMBOJIH
CmBONITE no-dony ca BaxHN npuYeTeHTo n 3a pa3bnpa-heto Na pbkoBDCTBOTO 3a ekCnloatau. MoJ, 3anOMHete CmBONITE n TAXHOTo 3NaueHne. PpaBnHOTo INTEpnpetpane Ha CmBONITE ne Bu NOnOHe da hNOn3BaTe Baunna npDyKT no-dO6pe n no-CnryPno.
3a Bawaata cnryphnoct
BHHMaHHe!Ppei Da nouchbate HnHa da N3BpWbATE texHuecko 06cnyXBaHe, H3KnIOuBaIte rpaHmckna eNEKtpoHnCTpyMeT, H3KnIOUbaIte ppeKcbaHa na eNEKtpuHcckata Bepra H n3BaXdaIte akyMynaToP hata 6aTepr. CbIoTO Baxn Iako Ka6eIb7 bde Nobpehen, nppeRzahnn ycykhan.
CnEi KaTo rpaHnckHrTe nEnKtpoHnCTpyMeHT 6bHe n3- KIOUeH, HOXOBete npOdbJIkaBaT da Ce BbPTaT HAKONKO cekyHnNo HHepuHa.
BHMaHHe: He donnpaTte BbptTnca ce HOK.
3apekdaheHaakymyataopnata6atepna
Akymnyatopnata 6atepna HMa TempepaTyeN KOHTpon, KoTo IO3BOJRA 3apeXdaHeto cMoB Dnana3OHa MeJdy O°C n 35^ . Taka ce yBeInuBa DblroTaPainHocTt.
YnbTbAe: AkymyNaTopHata 6aTepeNc ce doCTabY vacTHUHO 3apeDeHa.3a da ce doCTHHe PbLNHn KanaunET Ha AkymyNaTopHata 6aTepeN, npEi PbBOTO nO3BaHe Ha eNEKtpOnHC TpyMeHTa 3apeDeTe akymyNaTopHata 6aTepeNdoKpaB 3a- pRdHOTo yCTpOHTBO.
Лтпгбо-ионната akymуларopa 6ateря може дбдe заpeхдаhabвьсеки MOMENT,6e3TObaД haHamЯBaДblIOTpaHnOCTTЯ.П配电ьсаве наЗ配电�данeto HeВpeNi.
Литhevо-ионнataбатерияспразаэвOTдлбokopoраpeхдае OT систематa „Electronic Cell Protection (ECP)“.
Пин ИЗTOSUHa aKymunaTOpHa 6aTePnHa eNekTPOINHCTpMehTb Tc H3KJIQUBa C NOMOuTa Ha npeIpaIeH npeKbCBaU: RaDINHCKNAT eNekTPOINHCTpMeh cInpa I He MeOKe Da 6bIeBKNIOUeH.
Cnei abTOMaTHUHO n3KJIIOUBaHe Na eNEKtPOnHCTpyMeH Ta He npOdbJXkBaAte Da HATNCKATE NcKOBn IpeKbcBau. Moke da nobpeinte akymylatopHata 6atepna.
CnzaBaIte yka3aHnIa 3a n3XbPnIe Ha aKymnaTopHnTe 6aTePN.
IocTaBHe/H3BaXJaHe Ha akymyNaTopHaTa 6aTePn
YbTaBe: Ako ce n3no3BaT heNoDxOJaUaKymaTOpHn 6aTePm, TOBa MoKeJa IpeN3BnKa He npabInHo fYHKuHn HnpAne HIN NOBpexJaHe Ha MaunHata.
Ioctabete 3apehenata akymnatopha 6aTepeHyBepetce, ye akymnatopnata 6aTepeH e Bna3na do6pe.
3a nBaxJaHe na akymnataOpHaTa 6aTePnO t MaunHata HaTnChete 6yToHa 3a OCBo6oxDaBaHe na akymnataOpHata 6aTePnI r n3DbpaNte.
3apexdane
IpocebT ha 3apejxdane 3anaOba BeDnHa cIeN KaTo IeIeCenbT ha 3aepdHOTo yCTPOINCTBO 6bJe BKNIOUeH B KOHTAKa N akymyNatOPHATA 6aTePnB 6bJe NOCTaBeH B 3apdHOTo yCTPOINCTBO .
Благораренье На Иntелгентня поцес На зapекданe сьстонnetо на akymу latopнata 6ateperna ce pa3no3haba n ТЯ се зapекда с оптималнию тok 3a Tekyuite TN TemnepaTy- pa и haplexенie.
Taka JxNBOtHa akymnataOpHata 6aTepe nce yIbJkaBa, a npn CbXpaHnBaHe Bbpxy 3apnHOTo yCTpoCTBO T e BNHaHn HnIHO 3apeHn.
3haueHne Ha HnDnKaTOpHTe Ha 3apdHOTO yctpoiCTBO (AL 3620 CV/AL 3640 CV/AL 36V-20)
Бьрзо зapекданe

IpoceBt Ha 6b3o 3apeXdahe Ce CnHahn3Ha pa Ype3 MHaHe Ha 3eHHe CBToOnOHa akymyataopnata 6aTePna.
CBeTInHeHnDnKaTOp Ha akymyNaTOpHata 6aTepeRn:NoBpeMeHa npoceca Ha 3apeXdane Tprte 3eIeHN CBETOnHOda CBeBTat NoceIeOBaTeHNo H cIeT OBA γacBaT. Korato TpIte 3eIeHN CBETOnHOda 3aONuHaT Da CBETAT HeIpeKbCHaTO, AkymyNaToPHTa 6aTepeRn e 3apeEHa. PnIb.5MnHytn cIeNd KATO akymyNaToPHTa 6aTepeNc ce 3apeDNn Hapblno Tprte 3eJIeHN CBETOnHOda yraCBaT.
YtBtBaHe: Pekmbl Ha 6bp3o 3apeKdahe Ce BKNIOUba cAmO aKO TempeaTypaHa akyMylaatopHata 6atePnE e BOnycTMMH DaNa3OH, BkTe pa3dena TexHnueckn daHH.
Akymnyatopnata 6aTepeHa3apeDeHa

Henpekbcato CBetse3eennCBToND 3a 3apejdahe Ha akymnaTophata 6atepna noka3Ba, ye Ta e HanbIHO 3apeHa.
B DoTbHHeHne B npOdbJxKeHne Ha npi6n. 2 cekyHn Ce yUba 3ByKOB CnHaN, KOITo Yka3Ba NbHnHO To 3apeXda He Ha akymy- latopHata 6atePna.
Bénhara cnei TOBA akymynatopnHa 6aTeprna MoKe Da 6bDe n3BaDeHa, 3a Da 6bNe non3BaHa.
Henpekcbato CBeTeHe Na CBeToNDoJa, KOrTaO HMa NocTabeHa akymyIaTOPHa 6aTePnI, NOKa3Ba, Ye IeIeNcIbT eBkIouHEn B 3axpaHbAaTa MpeKa N 3apJdHOT O yCTpoIcTO Bo erotOBO 3a pa60ta.
Tempepatpata ha akymnatopnata 6atepna e noa 0^ nnHn 45oC

Henpekcbchatoto CBetene Ha chpeBENn CBeToTIOND nok3Ba, Ye temepaTypata Na akymyIaTOPHATA 6atePnE en3BbN dOnyCTHMn Da
na30n 3a 3apejdahe, BnXte pa3den TexHnueckn daHN. KoTATO temnepaTypata DoCTNHe DOnyCTMnH INTEpBaN 3a 3apejdahe, 3apJnHOTo yCTpoiCTBO Ce BKJIIOvBa aBtOMaTHUHO B pexm 3a 6bp3o 3apejdahe.
Ako TemnepaTypata Ha akymyNatOpHata 6atepna e n3BbN dOnyctmMn HtpeBaI, pni NocTaBHe B 3apdHToO yCTpoiCTBO CBeTBA YepBHeNt CBetOndHa akymyNatOpHata 6atepna.
He b3MOxHo 3apeXdahe

IpytnpObIeMn npn3aPekDahe c yka3BAt ue3 Mrrane Ha cepBeHnCBEToDnO.
Ipouecbt Ha 3apeXdahe He MoKe da 3aNoUHe
I 3apeKdaHeTo ha akymyataOpHaTa batepeHn e HeBb3MOxHO (BIXTe OTrpaHbAbe Ha deFeKeTn).
Yka3aHn 3a 3apeXdane
Pn HnpeKbchato 3apeXdahe, pecn. npn HeKoIkoKpaTHO nocleIOBaTeHNO 3apeXdahe Ha akymaTOpHn 6aTePHn 6e3 npkeCbAHe 3apdHOTo yctpoCTBO MOKeJa ce Harpee.To
Ba e HOpMaHIO n He yKa3Ba 3a HaJIuHneTo HaTexHueeCKn De-ΦeKT Ha 3apAДHOTo YCTpoIcTBO.
CbueCTBeHcBkPaTeHo BpeMe 3a pa6oTa cneI PbInHO 3apeKdane NOKa3Ba, ye akymyNaToPnHaT a6aTePnE n3xa6eHaN Tp8Ba Da 6Be 3aMeHeHa.
CnzaBaIte yka3aHnTa 3a 6paKaYBaHe.
OxnaXdaHe Ha akymyataopHata 6aTepeRn (Active Air Cooling-AkTHBHO B3duuho oxnaXdaHe)
BrrpaedHTo B 3apAHHoYcTPOINCTBO eNEKTPONHO ynpabne Hn Ha BENTnIaTOPa CneiN TEMpePAtypa Hn NOCTABeHATA acymyIaTOPHa 6aTePn. AKO TmpePAtypa Ha akymyIaTOPHa 6aTePn E nAD 30^ ,akymyIaTOPHa 6aTePn ce OXnJaDo ONTNMaHHTa TMpePAtypa 3a 3apeKdahe c NMOuTa HA BENTnOp. Pa6oteuHrBENTnIaTOP cb3daba YUM OT VB3dyuHaTAt cypy.
Ako BeHTnIaTOPbT He pa60TH, Tempepatypata Ha akymynatophata 6atepnea E B ONTMaHINr Dnana3OH HnBentnATOpbTe NOBpehen. B nocneHNr Cnyauh BpeMeTo 3a 3apejda-he Ha akymynatophata 6atepnea ce ydbnKaba.
Yka3aHn3a pa6oTa
CBeTnHEn HnDnKaTop 3a cbCToHNHeTo Ha akymyNatopHata 6atepna
AkymlyaTOPnHa 6atepna e cbopbkeHa cbc CBtINHEN HINdkaTOp, yka3BaUc steneHTa Ha 3apeJeHOCT. CBeTIHHNAT INDkAtOp ce cbCTOn OT 3eJIeHN CBETOINOJa.
HaTnCHETe 6yToHa 3a CTeneHtA Ha 3apeDeHocT Ha akymnaTopHata 6aTePnI, 3a Da BKIOuHTe CBETINHHN HNDKATOp. CnE Ipn6I.5cekyHnCBETINHHNr HNDKaTOp n3racBa aBTOMaTHNO.
CbctoHHnToHa akymnatOpHata 6atepe MoKe Ja 6bJe npOBepeBaHO I KOrato TRe H3BaDeHa.
| Сbvetoiodи | КаразитET ha akymylatop-nata 6aTERIA |
| 3 зelenи Сbvetoiodиа СbvetЯнрекьсато | ≥ 2/3 |
| 2 зelenи Сbvetoiodиа Сbvetянрекьсато | ≥ 1/3 |
| 1 зelenи Сbvetoiodид Сbvetи нрекьсато | ≤ 1/3 |
| 1 зelenи Сbvetoiodи Мига | pezeрва |
Ako cnei haTnCKaHe Ha 6yToHa He CBETn HHTO eINH CBeTOND, akymynatopHata 6aTePnE nOBpeHa n Tp8Ba Da 6bde 3aMeHeHa.
Iopadn Cbobpaxhenna 3a cnpyhocnpnoBepkata 3a cTepeHa h3apeJeHocnt Ha akymylatopnHaTa 6atePnMoKe da Ce H3BpWbA camo KOrato rpaHncknT eNeKtpOnHCTpyMeHTe B NOKO.
По врeme на пpoцета на зapекдане Трпге Зеленсветондona CBETВAT Nocleodobatenno И сдд тoba yracBat. KoratoТрпге Зеленсветондда azochnat DA CBETHнресьсанTo, akymnatopnata 6ateperna eЗар dedha. Пибл. 5MHNY
Cnei KaTo akymyataopnata 6aTepeHc 3apeHn HantbHnTO Tn-Te 3eNeHn CBToOnOda yTaCBaT.
OCTpaHbAhe Ha depeKTH


www.bosch-garden.com
Molna, npn Bbnpocn n npn npopbUbaHe nape3epBnu qactn BnHaN nocOuBaIte 10-uaPpeHn KaTALoxeH HOMep, n3PiNcAH na Tabenkata na ypea.
Блгаря
Robert Bosch SRL
Service scule electric
Strada Horia Macelariu Nr. 30-34, sector 1
013937 Bucuresti, Romania
TeN.: +359(0)700 13667 (Быларскн)
ΦaKc: +40 212 331 313
Email: BoschServiceCenterBG@ro.bosch.com
www.bosch-pt.com/bg/bg/
TpaHcnopTnpaHe
BkIIOUeHNTBe BOKOMPJIeKTOBkata NITHeBO-IOHNn AkymyIyTAPOHN 6bATEpHH Ca B 06XBaTa H3NcKBaHrTa H HopMaTHBnHE DOKYMHTn, KAcaeu npOdyKTn C NOBNIeHa ONaCHOCT. AkymyIaNToPHTHe 6bATEpHH Moat da 6bDat TpaHCnpOTpanH OT OTOpe6HTeJIa H p6bUNH MeCTa 6e3 DoNtBnHInTeHN paapeWHTeHNH.
Пи РтанснортураноЕОТТРЕТСТРАН(HANP.пгИВьздушЕТРанCSNORNTИИОПЗБАЕНКУРHEРСКYNCYLITNY)ИМССЕДИANHI3NCKBAHAJIKBMONAKOBAHETOибОЗHAчаваHETOIM.3a ZePTAппОДТROBOKАТСнАКЕТAPHETOCEKOKCYNTPaJIte CekSNEPTCBOTBETHATAобlaCT.
I3npaaiTe akymnatopnH 6atepnn cmo aKO kOPnycBt IM He e NOBpeH. I3OInpaTte KOHTAKTHTE KEmn C 30JINp-6aHd H onakobaiTe akymnatopHata 6atepnr Taka, ye da He MOKeJa cE npemecTBa B onakOBkata. MoJIa, cna3BaIte n I3NCKBAHNrTa Ha MeCTHOTo 3aKOHoDaTeNCTBO.
БракуВанe

「raHHcknAT eNEKTPOHNCTpymENT,akymna-tOpHnTE 6bAePNN ANDbHnTeIhNIte npncocobJIeHn TpRbBA da 6bDat npedabAHn 3a
ОплзтВоряВане На Сьдьржашит eС bTЯСуровини.

He 3XbPnIe rpaHnck eneKtpOnHcTpymENTn AkymynatOpHn nH oBKnHOBeHn 6aTePnn npn 6ntOBnTe OTnabu!
Cama 3a ctpaHn ot EC:
Cbflacno Ebponecka dnpektnBa 2012/19/EC oTHocnH3-
Ia3la ot ynoptpe6a eeneKtpueecka n eeneKtpoHH a anapatypa
ncBflacno Ebponecka dnpektnBa 2006/66/EO akymyata
topHN nnobNKHOBeHn 6aTePHN, KOHT He MOrAT da ce n3-
non3BaT nobYe, Tp8Ba Da ce cb6Hp aTOnENo Ida 6bDat
noDnaarHn H noDxOJaI npepa6oTKa 3a onoNtBopraBaHe Na cbDbpKaunTe Ce B TxA cyPOBHN.
Akkus/Batterien:
JIHTHEBO-NOHHN:
Mona, cna3BaIte yka3aHnIa Tpa3dena TpaHcnpTupaHe.
MaKeDoHcKn
6e36eHocnHaNoMeHn
PpeynpeyBahe! Be monme npouhtajTe rH cIeHNBe yNaTCT
3an03hajte ce co KOHTpOInTe n npabHnHaTa ynoTppe6a Ha
npOn3BOIoT. CyBaJTe ro yNaTCTBOTO 3a nDn KOHcUInTaun.
ToKyBaIbe Ha cHm6oJIte Ha ypeIOT, nonHaQOT n 6aTeprnjata

OpiTn 6e36eHocn npaBnla.

He ynoTpe6yBaJTe ro npOn3BODOT KOra BpHe n He octaBaJTe rHa DoXd.

UyBaJTe ce oI eJIeKTpIueH yIap.

He npimMeHnBO.

Ponhaot ynoTpe6yBajTe ro camo BO cyBN npocToPi.
IoiHaOT e onpeMeH co 6e36eHocen TpaHcΦopMaTOp.

3a uHCTeHeHa ypeoT He ynoTpe6yBaJTe
BnCOKoPHTNCSHa IepaJIka NIII rYmEHO UpeBO.

BHHMaTeJIHO npOBepeTe ro IonoTo Ha KoEto Ke pa6oTu ypeOTo Da Hema DnBu nIi
ДOMaшнЖИВOTи.ДИВHTe I DOMaSHHTe JxIBOTn MoXaT Da 6nDaT
IIOBpeHn 3a BpeMe Ha ynoTpe6a Ha MaunHa. IpoBepTe ro DeTaHNO IoJeTo Ha paOta Ha MaunHaTa n OTcpaHeTe rN CHTe KaMeBa, rpaHKn, XnCi, Kockn ndpyrnpedMeTn. Pn paKyBaHbeto Co MaunHaTa BHMAbajTe BO rYCTaTa TpeBa Da HeMa cKpneHn DnBn lnn Domaun HxHBOTn, KaKO Hn CTe6na.
PakyBaBe
HnkoraaHneI03BOJyBajTe Hm Ha DeuHaJIyfe KOn He ce 3aNo3HaeHN Co OBHe HnCTpyKcN Da rO KOpNCtATypeoT. IokalHnte npOnnc MoKaTa Da ja OrpaHuaT Bo3pacta Ha paKyBaOT. UByajTe rO npOn3BOJOT BOHdoat Ha Deca KOr He rO ynotpe6yBaTe.
HeIo3BOJyBajTe Hm Ha Deca, IINuHOCTn CO OrpaHnueHn FIn3NcKN, CEHN3OPHN IINI PCNXNUKn OrpaHnUyBaHa N/INn HeIOCTaTOK Ha 3HaEHe IINn Ha IINuHOCTn HE3aNo3HaEHn CO OBa yNaTCTBO Da rO yNtpe6bYBaAT ypeDTo.
Deuata Tpe6a da 6nDat noi ha30p Da He cn nrgpaT co ypeoT.
HnkoraaHe ynoTpe6yBajTe ro ypeoT Bo 6n3Ha Ha nua, a noce6Ho Deca N KVBOTHN.
PaKyBaUoTe oOIOBOpEN 3a IHTeTata HaHeceHa HaIpyrN Lyre HnH MOT.
He KopncTeTe OTBopeHn YeBn HnCaHdaHn Kora ITo KopncTnte UpeDoT. Hocete KpytN ObyBKn NdoJrNaHTOJIOHN.
Детано перледajte ro tepehOT Kaide wTO Ke ja KOpncTHTe KocauKaTaH OTCTpaHeTe rN CHTe KaMeHa, CTaIOBn, JNcN, KCKN n DpyrN npedmetn.
Cekoraw nped ynoTpe6a npoBepete da He ce OwTeTeHn Hn NcTpoWeHn ceuHa, HocauHe Ha CeuHa Ta nn cKIOPKaTa 3a CeueHe. 3aMeHeTe rN NcTPOWeHn Te Hn OwTeTeHnTe CeuHa n Hocau 3a Da ja oDpXnTe paMHOTexKaTa Ha KocalKaTa.
Kocete camo nO dHeBHa cBeTnHa nnI IOdIO6poOCBetnyBaHbe.
H36eRhyBajTe KocSeIepnIoShn BpeMeHcN yCIOBn,Ha npImep KOra NOCTO pN3NK OJ rPMOTeBNuN.
Mo moxhoct, He ynoTpe6yBajTe ja Kocaykata Ha BnaJHa TpeBa.
Onde noleka, He tpuajte.
He KopncTeJe ja KocaykaTa co OwTeTeHn 7tHTNcHn nn 6paHnCn, nn 6e3 3a7tHTHa ONpeMa, Ha npIMep COoDBeTeH 7tHT nn KOHTejHep 3a TpeBa.
ПреничуВамедаюснтушankизаЗаштпаHaСлухOT.
He ynoTpe6yBaJTe ro ypeIoT aKO cTe 6oJIHn Hn IoD BnJaHne Ha anKoxO, npora nn neKOBn.
YnOTope6aTa Ha KocauKaTa Ha Kocn NOBpUHH MoKe Da 6nDe ONaCHO: -He KocTe Ha npemHory CTpmHn PaDHH. -Ha Kocn NOBpUHH nIn Ha BnaJHa TpeBa oBe36eJeCTa6nJIeHn
CnIypen Yekop.
- Ha kocn noBpHnH n CeKOraW KocTe IeBO-DeCHO, a HNKOraI rOpedony.
-Бидete ocobeho BnmaTeHn KOra ja MeHyBaTe Hacokata Ha KoceHbeto.
БидTe MHOу BHHMaTeJIHn KOra OndTe HaHa3aД ИИЯ ВlueTe KocayKaTа.
He kocete Bneuejkn ja kocaukata kon cebe.
CTonnpajTe rH ceyHnata Kora Tpe6a da ja npeneceTe MaunHaTa, npeky NOBpHHN KOHTo He Ce TpeBa N KORA ja HocHTe MaunHaTa Do I Od MecTO Ha KOCEHeTO.
He hauBéHnyBajTe ro ypeIOT npn BkIyUyBaHBe nII IdoKeMa MOTOpT pa6Otn.
MoTOpOT NcKluyyBajTe ro cToejKn CO cTaIaIata IOnaJIeKy oD potnpaKnte ceuHa.
He dobnjybaje rnpaute n cTanaata do potnpaukte deIOBn.
Kora KocHTe, CTOnTe UTo e MOxHo Noidaleky OJ KocauKaTa.
He hocete ja KocaukaTaN He BneueTe ja doJaKa MOTOpOT pa60TN.
При складираье на уретOT, Bнмавajte Toj Да CTОн На пдOT co спт 4 Тркалa.
YpeoT HocTe ro caMo 3a paKaTa 3a HocHe. PaKyBaJTe BnMaTeHNO co paKaTa.
He BpweTe npomEnHa ypeDoT.
HeoblaacteHnte MoDnФkaun MOxat Da IOBeaT Do HapuSyBaIbe
Ha 6e36eHocTa Ha KocauKaTa Hn Da ja 3rOleMaT 6yuaBaTa Hn Bn6paunTe.
Co6npahe nncja
Ceyniloto 3a co6npahe Incja e taKa npoeKtnpaHO, 3a co HeRo Da MoXaT da ce co6npaat eceHcKn cyBn Incja. 3a da Ce NoCTnIrHe MaKcHMaJIe H eΦeKT Ha OBaa yHKuJa, HapBaTe ro CneiHOBO:
- CobnpajTe Incja npn nopeceHocT Ha MaKcImMaHa BnCnHa Ha KocHe.
Co6npaJTe Incja caMo Ha TpeBHNK.
-Прелдя поочete co co6ираье на лис Juda,пргледajte на теренот да HeMa ly're,ЖИВOTни,прелmetи od CTakLo n aВТOMOБил.
Hcknyuete ro ypeod oC tpyja
- Cekoraш kora ja octaBaTe Kocaukata 6e3 Hnd3Op.
- Ppei OToCTpaYBaHbE Ha npeuKa.
- Ppei nperIeIyBaHbe, uIcTeHbe I nonpaBka Ha MaunHaTa.
- BeDHaH no yDnpaHbe BO TBpI npEiMeT. BeHauH no OwTeTyBaHbe npErlaeJaMaunHaTa n 3BpWeTe rH HeOpXoDHNTe nonpaBKn.
- Ako kocaukaTa loyHe da Bn6pnpa HeKoHTpoJIpaHo (npOBepTe BeDHa).
OdpxkyBaBe
Cekoraш Hocete 3awtntn paKaBnCn Kora pa60nte co Owtpn ceuHa Nn BO HNBHa 6JIn3nHa.
Пювере сит e habrtkn, noДLOшКИ n 3aВrtkn Da ce CBpCTO npuCBpCTeHn co ueI 3a 6e36eHa pa6ota co ypeIoT.
PeIOBHO IPOBepyBajTe ja coCToJbata Ha KOpnata 3a TpeBa Oa6eHe N OwTeYBaHa.
PeoBno npereyBaJTe ro ypeoT n 3aMeHyBaJTe rN BeHaW OwTeTeHnTe nn N3a6eHnTe DeIOBn.
Kora rH MeHyBaTe CeuHaTa, HOBHTe ceuHa Tpe6a Da 6nDaT COoDBeTHn Ha ypeDoT.
CekoraaKopncTeTe Bosch opnHaHn pe3epBn DeIOBn.
Ппед складираье урedingтpe6а дбидесувичс.TIoNotpe6aИсчеткajTe ro co cyBa,MekaЧeТka.
Бe36eHocn HAnOmeHn 3a onTmMaJIHo KOpNCTeBe Ha 6aTepeHnte
Ochrypajte ce deka ypeodet 3rachat n Ncknyuen OJ Hanojybahe nped da ja ctabnte 6atepnjata.
CtabaheToHa batepejatadoeKa ypeoTpaobtn Moje da npedn3BnKa Hecpeka.
YnOtpe6yBaJte cAmo BoW 6aTeepHHaMeHEnTH 3a OOjypeN.YnOtpe6ata Na HeKOn dpyrH 6aTeepHHMOKe da npedn3BnKa NOpeDa HnNoXap.
He ja oTbopajte 6aTepejna. IocToI onacnoct OK patoK cnoj.
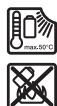
3aHTte ja 6atepnjata od TOnnna,Ha np.
OD dONTOPTajno nIOXyBaBe Ha cOnueBn
3paun,Oran,BoJa nBnara.IocToI onaNoct
O ekCnNo3nja.
Kora he ja kopncntte 6atepnjata,uybajre ja nohactpna ha on napuKN, cnojybanKn, knyeBn, wajkn, 3aBPKN ndpyrn MeTANH npedMeTH uTO
Mozat da HanpaBat cnoj od eHnOT do pyrhot non.
KpatoK cnoj meY dBaT a nOa moKe da npedn3BnKa
noxap nnI 3ropeHnU.
Dokonky ce owtetn 6atepnjata nHHe ce kOpncTH npabHHo, od Hea moKeJa n3ne3e npea. BHeceTe CBxw Bo3dyX uDokonky mHa noBpeDeHN nobapajTe NOMOw oJ nekap. PapeTa moKeJa rH naHapraHH dHnHnTE naHTWtA.
Kopnctete ja 6atepnjata camo BO npon3bodn od npon3bodntelot. Camo ha toj hauin 6atepnjata ke ce 3aunTtN on onacho npeontobapyBahe.
Batepnjata Moje da ce ouTeTn od occtphtpe npedMeTH KAKO Ha np. KINHnI Hn ODBPTyBauchn CO HABBOPEsho BInJaanHe. Moje da oJne do Bnatpehen KpatoK cnoj batepnjata moje da ce 3anaIa, da npuTn qad, da ekCnloNIPA nn da ne pnerpee.
He npn3Bkybajte kpaTOK cnoj ha 6atepnjata. Nhaky, nocto onachoCT oEcknno3na.
3aunTeTe ja 6aTepeHjata od Bnara n Boda.
CklaIpaJte ja 6aTePnJaTo BO rpaHnIHa TEMpePaTypa oJ ^-20^ bis 50^. He ocTabJte ja 6aTePnJaTa Ha npImep Bo aBtOMobHn Ha neTo.
Повресно ченте ГИОТВОРпerte за поветрува набатерида со мека,чNTа и сува уетка.
Бe36eHocn HapomeHn 3a noJIhaun

IpountajTe rncnte 6e36ednocnnpdynpeybaHa HnyaTc7Ba.
HenoptyBaHToHa 6e36eHocnHte npdeynpeyBaHa n ynaTCTBa MoKe da DoBeDe
do enektpnueh ynap, nokap n/nn cepno3n nobpei. 4ybaje r n cte 6e36eHNOCHn ppeynpeyBaHa u npaTcBA 3a nDn KOChyntaun.
KopncTeTe rnonHauOT cAmO OTkako Ke rnpoyuHte cHTe cyHKunn mOKe da rnpimHeNTe HCTne 6ez orpaHnuBaHa nIIN OTkako Ke rN do6Hete Notpe6Hnte ynatCTBa.
HeIo3BOJyBajTe HnHa Deca, IInuHOCTn CO OrpaHnueHn FIn3NucKn, CEN3OpHN nIIN PCNXuCKn OOrpaHnUyBaHa/Inn HeIOCTaTOK Ha 3HaEHe nIIN Ha IInuHOCTn HE3aIIO3HaEHn CO OBA yNaTCTBO Da rO yNoTpe6yBaat UpeDTo. DpXaBHnTe npoNcH MoKt da ja oRaHnuaT BO3pacta Ha paKyBaOT.
Hadrnelybajte rne decaTata. TakaKe ce OcnrgypaTe Deka DecaTa Hema da cn nIgpaAT CO NOLHaOT.
POnHeTe cAmo Bosch IInTnym-JoHcKn aKymyIaTOPn CO KanaIeT OJ 2,0 Ah (OJ 10 aKymyIaTOPcKn KeIi).HaNoHOT Ha 6aTePnJaTa MOpa Da OndroBapa Ha HAnOHOT 3a POnHeBe Ha 6aTePnJaTa Ha POnHaUOT. He np6bVajTe da POnHITe 6aTePnKoI He ce POnHJIbN. Bo cnpOTnBHO, nocToI pN3NK OJ IOXap N OJ EKcPiO3nJa.

Nonhaot dpjxete ro nodaeky oddojn Bna. HabneryaheToHa BOa BO nonhaOT ro 3rOlenMyBa pniNkOT o eneKtpuH ydap.
OdpKyBaJte jaHcTotaHa nonHaOT.10KoKny ce n3BaJIka, noCTOn OAnCHoc T od eneKtpuH yIap.
Ppe cekoe Kopnctehe, npoBepeTe rH nonHaOT, Ka6enot n pnnKnyOket. He ro Kopnctete nonHaQT, Dokonky 3a6eneXnite OotetyBaHa. He ro OTbopajte camn nonHaQT o octabeTe rHa nonpabKa kaj KBaHHKnkyBaan CTpyEn nepcoan Koj Ke KopnCTn cAmo opnHnAHH pe3epBHN denOBn. OHTeHnOT nonHaau, Ka6en H npKnyOKe 3rOlenemyBa pn3nkOT 3a eNeKtpuH en yapd.
He ro Kophctete NoIHaCyOt Ha IeCho 3aanaHbna oDnOra (Ha np. XapTHJa, TeKCTNl NTH.) Odn. Bo 3aanaHbna OkOnHb. NocToI onaNochOt od noXap 3apaN 3aToPnyBaBeTo H a ypeDoT lTo npOn3JeBya pni PONHeBTo.
He nokpmbajte OTBOPHTa npoBETpyBahe Naonhaot.Инaky nolnaOT moKe da ce pnerpee n da HeФункционрapnpabINHO.
3a 3rrolemeha enektpnha 6e36ednoct, npenopaybame ynotpe6a hyaepd3a pezndyana hctpyja co maks. jaunna ha ctpya oD 30mA Cekoraan ppoBepete ja 3aHTHATA cknonka nped ynotpe6a.
O3HaKn
CneDnHTe CmB60HcCeBaJXH3aUHTaHe npa3bHpaHe na ynatCTBOTo 3aynotpe6a.Be moNIme npoyuyeTe rH CmB60HtNe HNBHOTo 3NaueHe. TOnHaTnHTepPpTaunJa hA CmB60HtNe Ke Bn POMOHe NpOBoH nNo6e3BeHDo da ro KOpRCTHe yPeDT.
| Ознaka | Значné Зпавец на движени |
| Правец на peakциja | |
| Ознaka | Значныe |
| Носete заштитни рakавици | |
| Текина | |
| Вкneysувае | |
| Искneysувае | |
| ✓ | Дозволега Функушиja |
| Ознaka | Значnébe |
| X | Збразец по akци |
| CLICK! | Чуда на сунеа/peзервни.Deелови |
| O O | ДODаТа onрема/peзервни.Deелови |
Ynotpe6a co cooDbetHa HameHa
KocauKaTa e HameHe 3a yNTope6a Ha dOmuaHn TpeBnUe.
YpeTe He e HameHET 3a pExeHe i NtKacTpBaHe oRpaIi.
YpeTe e HameHET 3a KoeHe Ha BcInHa n PoJIoRaT a
3emJa, TpeBa.
Texnukn noDaToCu
| Kocachka 3a TrpeBa | Universal Rotak 36-550 | Universal Rotak 36-555 | Universal Rotak 36-560 | Universal Rotak 36-590 | Universal Rotak 36-670 | |
| Бpoj на arтник | 3 600 HB9 505 | 3 600 HB9 508 | 3 600 HB9 506 | 3 600 HB9 509 | 3 600 HB9 507 | |
| 3 600 HB9 573 | 3 600 HB9 574 | |||||
| Hominaleh hapon | V | 36 | 36 | 36 | 36 | 36 |
| Шрпна на куштetedо на сechлOTO | CM | 38 | 38 | 38 | 38 | 38 |
| Висна на косенье | MM | 25 - 70 | 25 - 70 | 25 - 70 | 25 - 70 | 25 - 70 |
| Волимен, торб за TrpeBa | I | 40 | 40 | 40 | 40 | 40 |
| Текина согласно EPTA-Procedure 01:2014 | Кг | 15,0 | 15,0 | 14,0 | 15,0 | 15,0 |
| Серскпбpoj | ||||||
| ДовOLTЕна Temnéратуна на okолината | ||||||
| - по поныe | °C | 0 ... +45 | 0 ... +45 | 0 ... +45 | 0 ... +45 | 0 ... +45 |
| - по уnotреса | °C | +5 ... +50 | +5 ... +50 | +5 ... +50 | +5 ... +50 | +5 ... +50 |
| - по скадирathе | °C | -20 ... +50 | -20 ... +50 | -20 ... +50 | -20 ... +50 | -20 ... +50 |
| Батериja | Пинums-JOHCа | Пинums-JOHCа | Пинums-JOHCа | Пинums-JOHCа | Пинums-JOHCa | |
| Hominaleн hapон | V | 36 | 36 | 36 | 36 | 36 |
| Бpoj на arтник/KanaцитET | ||||||
| - 2 607 336 913/1 607 A35 02V | Ah | - | - | 2 x 2,0 | - | - |
| - 2 607 336 915/2 607 337 047 | Ah | 4,0 | 4,0 | - | 4,0 | - |
| - 1 607 A35 058 | Ah | - | - | - | - | 6,0 |
| Бpoj на батерскп keли | ||||||
| - 2 607 336 913/1 607 A35 02V | - | - | 10 | - | - | |
| - 2 607 336 915/2 607 337 047 | 20 | 20 | - | 20 | - | |
| - 1 607 A35 058 | - | - | - | - | 20 | |
CteBpeHnOCTBO OBA yNaTcTbO ce n3MepeHn pni yNTope6a np 2000 metprn HAdMopcKa BVCHa.
| Полnahу | AL 3620 CV | AL 36V-20 | |
| Броча на arтник | EU | 2 607 225 657 | 2 607 226 273 |
| UK | 2 607 225 659 | 2 607 226 275 | |
| AU | 2 607 225 661 | 2 607 226 277 | |
| KO | 2 607 225 667 | 2 607 226 279 | |
| Ladestrom | A | 2,0 | 2,0 |
| Врееме на польенье (празда на bateprija) | |||
| - Батериja co 2,0 Ah | Мин | 65 | 65 |
| - Батериja co 4,0 Ah | Мин | 125 | 125 |
| - Батериja co 6,0 Ah | Мин | 185 | 185 |
| Текина соглесно EPTA-Procedure 01:2014 | Кг | 0,55 | 0,55 |
| Клaca на зашита | ☐/☐ | ☐/☐ | |
Hhopmaun 3a 6yuaBb/Vb6paun
| Universal Rotak 36-550 | Universal Rotak 36-555 | Universal Rotak 36-560 | Universal Rotak 36-590 | Universal Rotak 36-670 | |
| 3600 HB9 505 | 3600 HB9 508 | 3600 HB9 506 | 3600 HB9 509 | 3600 HB9 507 | |
| 3600 HB9 573 | 3600 HB9 574 |
YTBpEnH BpeHocTn Ha eMncnja Ha 6yUaBA EN 60335-2-77
I3mpeHToA HnBO Ha 6yUaBA I3HeCyBa 06uHo:
| - 3bvyen priniticosok | dB(A) | 76 | 76 | 76 | 76 | 76 |
| - 3bvyha jauchina | dB(A) | 88 | 88 | 88 | 88 | 88 |
| - Hecinrgpnoct K | dB | =2,0 | =2,0 | =2,0 | =2,0 | =2,0 |
Bkyhnte BpeHocn Ha Bn6paunah (BeKTopcN 36op Ha Tpnte Hacok) n HecnHyptnoct KdaenCe BO CoIaHocT co
EN 60335-2-77
| - Вreiendnoct ha emncija ha Bnbroaqui an | m/s2 | < 2,5 | < 2,5 | < 2,5 | < 2,5 | < 2,5 |
| - Hecinrgyropocst K | m/s2 | =1,5 | =1,5 | =1,5 | =1,5 | =1,5 |
MONTsKa N KopnCTeBe
| Цел на корисьeto | Слива | Сtrпан |
| Обем на Incлорakaa) | A | 325 |
| Мо趟ралье на рачкata | В | 326 |
| Прин导航ва bene на работна висна | ||
| Мо趟ралье и OTстрадува bene на kopлata за Трева | C | 327 |
| Поседува bene на висна на Косецbe | D | 327 |
| Вметунва bene на бateриJA | E | 328 |
| Уnotреса | F | 329 |
| - Вмет Hedge go eilektprinuhoit | ||
| празковский | ||
| - Влочete | ||
| - Кoscete | ||
| - Исклоуete |
| Цел на корпесеньeto | Слива | Стана |
| - Изваде т go eлькtripиниотп配电ичыч | ||
| Ваденые на батерида | G | 330 |
| Прedingуpe_Dуваши рри работ „ковся" | H | 330 |
| Сvetи заим.kot за корпata за трава празна/полна | I | 331 |
| Одожьва bene/замени на сецниoto | J | 331 |
| Бираные на орера | К | 332 |
A)Ииусторана淘汰ионша на орема не селд CTандарнотовсян ha cnopaka.伦ocната орема можда ja haJaTeDe BO hauata Погрма за орема.
BknyuBahe
3a Bawa 6e36eHnocT
PnpdypduBahe: NcknyeTe ja kocaukata, n3baTeer o Knyot 3a n0launja n6atepijata nped cekoe npnilarodyaBahe nHn uHCTeHe. HcTOTO Baxn n ako Ka6enot e OwTeTeH, npeKnHAT nn CnNETkAH.
IIO NCKnyuBaBeTo Ha KocauKaTa, CeHnlaTbPtat yUte HeKoNkY cekyn.
PpeynpeyBahe:BHHMaHHe-HeDOnnpaJte rpoTnpaKHTe ceHna.
TolheHa6atepnjata
BaTepejatae onpemeHa co Tempeatypen MOHtOp KoJ 03BOyBa IOnHeBe cAmo Ha Tempepatyn oD 0^ do 35^ CTeneHH. Taka ce obe6eBu dIoIroptajnoct ha BaTepejata.
Cobet: BaTePnjata ce nCnpaUyBa nOly-HanOnHeta. 3a da ja haonHnIte cenocho baTePnjata, nped npBata yNtpe6a CTabe ja ha nonHaDoeka He ce HanoHnIeNoCHO.
Литун-юнскite 6atepinMoKeJa ce haHanoHnat BO cekoeВрeme,6e3da ce hamajn HNBHnot Pok Ha yNtpe6a.
Ipeknhot npn nonhebeTo he u haustetyBa Ha 6aTepnjata.
Литум-юнсата 6аетериja e заштейта од длбинско npазнебе со „Electronic Cell Protection (ECP)“.Дokолукь 6аетерида e празна,[elektpruунот apanat с ecnkунуba co 3аштейtenпекиунвач: Машината nobeke he paobotи.
IIO ABTomatckoto HCKnyuBaBe Ha ypeDoT, He npTnKcajTe Ha npeKnHyBaUOT 3a BkNvyBaBe/
NcknyuBahe. BaTepnjata MoKe da ce OwTeTH.
BHHMabajte Ha HanomeHnTe 3a OToTpaHyBaHe Ha 6aTepeHnTe.
BmetyBaBe/BaDebe Ha 6aTepnjata
Cobet: KopncTeheTo ha HecooDbetHb 6aTeepn Moje da IOBBeDo IIOrpeHNO fynKcHOnHpaHe Hn Do OWTeYBaHe Ha ypeDToT.
IIOBTOHNO CTABete ja HANONHETATA 6atepija. IPOBepet e daIIb 6atepijatae npaBnIHNO BKnIoneHa.
3aBaTeHeHa6atePnJaTaOypeoT, npHTncHete ro KOJIeTO 3a BaTeHe Ha 6atePnJaTa H3BaTe ja 6atePnJaTa.
Ponhebe
Ako TemnepaTypaHa 6atepnjata He e BOdo3BolneHOT oncer, npn BMeTHyBaHe Ha 6atepnjata Bo nOHaHT CBETHYBa UpBeHOT CBeTIO.
He bO3MOxEN pOucec Ha nonHebe

Ako nocToH nekKaBra rpeKa npn noJIHebeto, Tpenka uPBHeo CBetno.
IopoHeTo Ha 6aTePnJa He MoKe Da nOuHe H
6aTeprjata He MoKe Za Ce NOnHn (BnN Bo DeNoT, OTrpaYBaHe Ha rpeuKu").
Cobetn 3a nonhebeTo
PnKoHTHnHypaHn HnN oCneJeOBaTeHNn ZIKNyCSHa nOJIHeBe 6e3 pIeKN, nOJIhaOT MOnge Da ce 3aTOnPi. OBa e 6e3OpNaCHO He 3NaU DeKa NocToN TexHnKu DeΦeKT Ha nOJIhaOT.
CkpaTeHTo BpeMe Ha pa60Ta nO pONHeIeTo NOKaJyBa DeKa 6aTepiJa t eNtpoSeHa n MopA da ce 3aMeHn.
BHHMabajte Ha HANOMeHTe 3a OCTpaHyBaHe.
Jaedehe ha 6atepnjata (Active Air Cooling)
BrpadeHnOT BeHTnIaTOp BO NolHaOT ja KOHTpOInpa Tempepatypata Ha BMethaTnO akymylatop. Jokonky
Tempepatypata Ha 6atepnjata e nad 30^ ,BeHTnlatopot Ke ja nlaNi 6atepnjata Idoeka He je IocTHrHe Tempepatypata Ha noIHeBe. BknyeHnot BeHTnlatop Co3daBa 3ByK Ha npOBetpyBaHe.
Дokолу В entnlatopot He paobTo, Temnepatypata Ha 6aTeprjata e BO ONtmaHInte rpaHnI HA TEMpepatya Ha nonHebe nII IN BENTnlatopot e deFekTeH. Bo OoJ cnuyaj ce npdoOnyBa BpeMeTo Ha nonHebe Ha 6aTeprjata.
Cobetn npa6oTeheTo
Pnka3 3a HanoHEToCT Ha 6atepnjata
BaTepnjata e onpemeHa co HnDnKaTOp KoJ ro pnpkaKyBa HnBOTO Ha hanoHHeTOc Ha baTepnjata. HnDnKaTOpTo Ha hanoHHeTOc ce cOToN oD 3eelen neIe cnJIaHKn.
PnHTNCHETe ro KOnUeTo 3a HAnOJIHeTOc 3a da rO akTbIpuate npKakJyBaHeto Ha HNBOTo Ha HAnOIHeTOc Ha 6aTepNJata. I0 OKoLy 5cekyHdIn HnDnKaTopoT ce rache cam.
HnBoto Ha hanoJIHeTOcT MoKe Da Ce IpoBepn H No BaDeHBe Ha 6aTePnJa.
| LED-nprikaaz | Kanaцитета ha 6atepujata |
| Постоюно с Bretење на 3 зelenи лед сигнани | ≥ 2/3 |
| Постоюно с Bretење на 2 зelenи лед сигнани | ≥ 1/3 |
| Постоюно с Bretење на 1 зelenи лед сигнани | ≤ 1/3 |
| Трени нае на 1 зelenи лед сигнани | Pezeрва |
Dokolny no BknyuBaHeto He CBETn LED cnjaNkata, 6aTepnjata e deEeKTHa n Mopa da ce zameHN.
Iopadn 6e36ednocn npuynnn, HNBOTo Ha HAnOpNHeToc Ha 6aTeprjata MoKe Da ce npOBepyBa cAmO KORA KocauKaTa e BO MnpyBaBe.
3aВрemeHa npoecot Ha nolnebe Tprte 3eeleni LED CBetna CBeTHyBaAT eHONOpDpyro n ce racat 3a KpaTko. Batepnjata e qenocho HanoNHTa,doKoNkTy Tprte 3eeleni LED CBetna NoctoJaho CBeTat. Okony 5 MmHytn OTKako Ke ce hanoNtIeNoCHO Batepnjata, Tprte 3eeleni LED CBetna NOBTOPHo Ce racat.
Ipnka3 ha 6atepnjata npn npeuekopybahe ha temnepaTypata
LpBHeHnOT neIc nRHaI cRHaIIIm3npa IeKa 6aTePnJa tnn enEeKToPHNKATA h KocauKata (co CTabeHa 6aTePnJa) He ce
Ha onTImaJIHa TeMnepaTpya. Bo OoJ cIyauj KocauKaTa He pa6Ou HmHema Da pa6Ou co nonH kanaUHTet.
Pnka3 Ha tempepatypaHa 6atepnjata
Ako npn npntncKahe Ha npkeHyBaoy3a BknyBaHe TpeKna cPbeHata cnJauNka (npn BMteHata 6aTePiJa): BaTePiJa t e HApBOp od rpaHnIte Ha pa6OHa TEMepaTypa.
Ha TemnepaTpa npeky 70^ 6atepnjata ce racehe ce dokeka nobTOpHO He ce noCTHHe ONTMAnHATA TempeTa.
KoHTpOHa Ha tempepaTpaHa eNeKtpOnHkata Ha KocauKaTa
Ako npn npntnckahe Na npkeinyBaoy 3a BknyuBaBe CBETn upeHata CjajnUka noctoJHo: TemnepaTpyata Ha eneKToHHKaTa H KaocakTa e NoHsKa o5 ^ C nnn nobucoka od 75^
Пит Мп新股а рура NOВСОКа OД 90°C eNEKTPOHнкATA Na KOKaЧа се rache,doNeKa NOВТОРно He ce BOCNoCTaBN ONTmMANHa Tм新股араз.
Kocha noBpuHnHa (TpaeHe ha 6aTeepnjaTa)
Kochata noBpHnHa (tpaHbeto Ha 6atepnjata) 3abncn od yCNOBHTe Ha TpeBnKOT, rYCTnHATA, BnaTAtu NdoJxHnAte Ha TpeBaT, KAKO N OD BxCnHATA HA KOceHe.
Co yectn BknyuBaHa nNCKnyuBaHa Ha KocaKaTa ce HamaIyBa npoceuHATA MOKHOCT (tpaeHeTo Ha batepnjata).
3a da noctnHHeTe ONTHMaJIHa MoKHOCT (TpaHe Ha 6aTePnJa), NOIgHHeTe rCeuNata u Kocete co pa3ymHO TEMNo.
Долнnotnpimep ja nokajyBa b3aemHocta ha ycNoBHTe Ha TpeBnKOT n tpaheTo ha 6atepnjata.
YcNoBz 3a KoCeBe
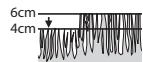
Mnory cna6a, cyBa TpeBa
BucnHa Ha KocHe
BaTepeJa co 2,0 Ah do 250m^2
BaTepejna co 4,O Ah do 500m^2
BaTepejna co 6,0 Ah do 750m^2
3a da ro pnooJnKHe BpeMeTpbaHToHa paBoTa, moKeTe da KynIte doNoJIHHTenHa 6atePja npeky ObnaTe h CepBc.
OtctpaHyBaHe rpewkn


| СимпTom | Можна пчина | Помош |
| МOTOPOT He ce ВКлучва | Енсправни Ватрешини Исталцини BO Косачkaça | Оьразе ce bo Bosch сныжба за корисни |
| Симпом | Можна ручна | Помош | ||
| Празна 6ateprija | Налочete ja 6ateprijaata | |||
| Бateprijata e npemhory topla/načha | Пуштete 6ateprijataда ce 3a rpee/олади | |||
| Травata e pnevвсoka | Мakc. дзвolyера висна на trpebatae 30 cm co нajгolema висна на косеъe | |||
| Актураза ha 3aштита на motopot od прergebaьe | Пуштete за ce олади motopot и рoudигнete Г сецлatable | |||
| Клчот за ИЗолаци ще e npавлино/потпално стaven | Сtabete ro павлино | |||
| Косачкatingа работи с осякин | Енспавни ватрешии Исталаци в босачкatinga | Осыретe ce bo Bosch сдужба за корисни | ||
| Актураза ha 3aштита на motopot od прergebaьe | Пуштete за ce олади motopot и рoudигнete Г сецлatable | |||
| УreedOT kOSI нерамнор悔ю и/ини MOTOP pабOTи тешко | Сецлatingа постavenи рechиско | Погигнete Г сецлatable | ||
| Тano сецло | Заменete Г сецлatinga (Видд с比利ка J) | |||
| Можно залшваьe | З ragнete ro уreedOTи Искльчete Г од наною.... п探测ete по косачкatinga и по по trade... Искльчete ja (секогаш посete ЗаштITHN ра��ы... и) | |||
| СецлOTO монитрано нао... <|im_start|>assistant | Пю вklуваьeto ha Косачka治病а сецлOTO не се врtni | Сецлoto e заллесkano co trpeba | З ragнete ro уreedOTи Искльчete Г од наною.... Остtrainete ja ручkata (секогаш посete ЗаштITHN р��ы...) | |
| Лабаь habrtka/-Завrtka | Загнete ja habrtkata/-Завrtkata (27 Nm) | |||
| Jakni вибраци/n/ бухаьa | Лабаь habrtka/-Завrtka | Загнete ja habrtkata/-Завrtkata (27 Nm) | ||
| СецлOTO e oштeteho | Заменete ro сецлOTO (Видд с比利ka J) |
BaTepuJa n noHaau
| ПюбLEM | Можна ручна | Помош |
| Ha уpeeот trpenka црвениot синhalа 3a нанол�тост ha 6atepnjata | Батурида не e (правлино) ветната | Вметнete ja basteprида правлино bo уpeeот |
| Конт艺术品 на baтурида сизалкани | Иссан'tete Ги конт艺术品 на baтурида; на有很大 по breaste joа 6atepnjata, по поразеба заменete joa | |
| He e ВOSTMOжень птоес на полесе | Дебъдься ветрида | Мениваъе на baтурида |
| Ha уpeeот He с Bretа синhalитe за нанол�тost ha 6atepnjata | Сtrульnot ручлочьк на полочьот не e (правлино) ветмат | Сtrульnot ручлочьк (цelen检онo) e ветмат bo sindathа дозна |
| Sindnata дозна, strульnot kaбел полочь ce Deфъдьи | Проберete roстульnot нано, a полочь octabete ro на поberрка BO воротзираны сервисна служба за Bosch-елек triчни поати |
OdpKyBaHe n cepBnC
OdpKyuBaBe Ha 6atepHjata
PnpynpeyBaBe! Ncknyute ja kocaukata, n3BaAeTe ro Knyot 3a H3oNauJa, 6atepnjata n Kopnata 3a TpeBa nped ceKoe uHCTeHe n OndpxyBaBe.
CekorauHocete3aunTHn paKaBnKorpa6oHTe co oUtpn CeHHn HN BO HNBHa 6nn3nHa.
3a da noctnHtHe OINMaHa yNtpe6a Ha 6aTepnjata CneTe rCNEdHnTe yNaCTBa H MepKn Ha npetna3nBOCT:
- 3aunTeTe ja 6aTeepnjata od BnaI a NbOda.
- CknlaHpaJte ja 6aTepeJnata Bo rpaHnIu Ha Temnepatypa od -20°C bis 50°C. He octabaje ja 6aTepeJnata Ha npImep BO aBtOMobnHa neTo.
-Бatepnjata nonHete ja oDBoeHO,a He Idoeka cTOn BO ypeoT.
He octabajte ja 6atepjuata BO Kocaukata N3IOXeHa Ha DnpeKHa COUHeBa CBETInHa.
-Оптималната Temперараза 3a чуваье на batepnjata n3hecyba5℃.
Повремену чincte Г NTВОРИТЕ за поветрувае набатерида с meka, chstа и cyba cheka.
CkpaTeHTo BpeMe Ha paBoTa nO noNJIHeBTo NOKaKyBa DeKa 6aTepiJa t e NtpoWeHa mOpa da Ce 3aMeHn.
CepBncha cnjx6a n coBeten npn KopnCTeIbe
www.bosch-garden.com
3a cnTe npaaHbHa n HapaKn Ha pe3epBn DeNoBn,Be MoIIMHe habeTe ro 10-umpehenot 6poj od CneuФнKaunOHATA nIOUka Ha npOn3BODOT.
CseBepHa MaKeDoHnja
Д.Д.Енковский
CabaKobayeBn47H,6poj3
1000 Ckonje
E-nowta: dimce.dimcev@servis-bosch.mk
Инт elect: www.servis-bosch.mk
Ten./dakc:02/2467610
Mo6.:070595888
Д.П.T.Y "POJKA"
JaHnyKpOBcKn 66;T.LA BtOKOMaHaJn oKaI 69
1000 Ckonje
E-nowta: servisrojka@yahoo.com
Ten: +389 2 3174-303
Mo6: +389 70 388-520, -530
TpaHcnpT
IInThym-jOhcknte 6atepnn noJnxkat Ha 6apaHbata Ha 3aKOHOT 3a onachn MaTepnjann. Batepnnte MoKe Da c TpaHCnOpTnpaat Camo od CtpaHa Ha KopncNkOT, 6e3 Notpe6a Od oDOnonHnTeJIHN KBaIIHnФkaqnn.
PnnpneHoc Ha nCTHe Oc CTpaHa Ha TpTeH NlaCa (Ha np. BO3dyuWeH TraHcNOpT HnI WneDmUJha) HeoNxoJHO e da Ce BHIMaBa HA cNeuJaHIne HaNOMeHN Ha aMbaJAKATA oO3NaKHe. Bo TakOB Cnyaj, pno NDroTobKaHa Ha npaTkata MopA da Ce NobiKa ECKnej 3a ONaCHyCnTahu.
TpaHcnpOpTnpaJte rN batepHnnte cAmO doKoIky KyKnHteto e HeoHTeTeHO.3aJIenete rN OTBOPeHnTE KOHTAKn i cnakyBaJte ja batepjata Ha ToJ hauHH nTo Hema da ce dBXNs BO a6bAnakata. Be MOImE BHMAbajte Ha eBEHTaYnHnTe DOONHnENTn HauNoHaNHN npONHCn.
OTctpaHyBaHe


EneKtpnHnTe ypeNi, 6aTePnTe, onpMaTa n am6aIaxnTe Tpe6a da ce coptpaat 3a peuKnaja.
He pnajTe n eneKtpnHte ypeu n 6aepnte BO domaunata kahta 3a rype!
Cama 3a 3emjn BO paMKn Ha EY
CnpoeE Bvponckata dIpeKTHBa 2012/19/EU eNektpnHata n eNektpoNcKaT aOnpema wTo BeKe h e yOnTp6bNba, KaKo n Cnpoe E Bpvonckata dIpeKTHBa 2006/66/EC HEnCnpaBnHTe n NotpoWHeNTe aKymyLaTOpn i bAtePn Mopa da ce SoCbnaP aO dBHO e O KOMyHaNHiOT OTnAd n da Ce Odnaraat Ha NaunH To He e WTeTeH no OKOniHaTata.
Batepni:
Линтум-юнcka:
Ipoountajte ngynaTbata BO nornabneto TpaHcnopt.
Srpski
Sigurnosne napomene
Pažnja! Pažljivo pročitajte sledeća
uputstva. Upoznajte se sa
upravljačkim elementima i
namenskom upotreptom proizvoda.
Molimo spremite uputstvo za
upotrebu na sigurno mesto radi
buduće upotrebe.
Obja砷jenje symbola na bastenskom uredaju, punjaču i akumulatoru


Opste uputstvo o opasnosti.
Pročitajte uputstvo za rad.
Pazite na to da izbačena
strana tela ne povrede ljude
koji se nalaze u blizini.

Upozorenje: Održavajtesigurnu udaljenost odproizvoda kada on radi.

Oprez: Ne dirajte noževe koji se okreceu. Noževi su oštri. Postoji opasnost od gubitka
prstiju na nogama i rukama.

Iskljucite bastenski uredjat i otpustite prekida strujnog kruga pre izvodenja radova
Akumulator sa 6,0 Ah
do 750m^2
Da biste produzili vreme rada, mozte da nabavite dodatni akumulator preko ovlascenog predstavnika za Bosch bastenske uredaje.
Rešavanje problema


| Simptom | Moguci uzrok | Rešenje |
| Motor se nePokrece | Interni kabeli baštenskog uredaja su u kvaru | Obratite se korisničkom servisu firme Bosch |
| Akumulator je ispražnjen | Napunite akumulator | |
| Akumulator je prehladan/pretopao | Pustite akumulator da se zagreje/ohladi | |
| Trava je previsoka | Maksimalna dozvoljena visina trave je 30 cm sa najvećom postavkom visine rezanja | |
| Motorna zašita se aktivirala | Pustite motor da se ohladi i podesite veću visinu rezanja | |
| Prekidač strujnog kruga nilje ispravno/nije potpuno uložen | Prvilno ga uložite | |
| Baštenski uredaj radi sa prekidima | Interni kabeli baštenskog uredaja su u kvaru | Obratite se korisničkom servisu firme Bosch |
| Motorna zašita se aktivirala | Pustite motor da se ohladi i podesite veću visinu rezanja | |
| Baštenski uredaj ostavlja nepravilan | Visina rezanja je preniska | Podesite veću visinu rezanja |
| Nož je tup | Zamenite nož (vidi sliku J) |
254 | Srpski
| Simptom | Mogući uzrok | Rešenje |
| uzorak rezanja i/ili motor radi otežano | Moguća su blokiranja | Isključite baštenski uredaj i OTPustite prekidača strujnog krugaProverite donju stranu baštenskog uredaja i po potrebi ga oslobodite (uek nosite baštenske rukavice) |
| Nož je pogrěsno montiran | Pravilno montirajte nož | |
| Nakon uključivanja baštenskog uredaja nož se ne okrece | Trava ometa nož | Isključite baštenski uredaj i OTPustite prekidača strujnog krugaOdstranite začepljenje (uek nosite baštenske rukavice) |
| Navrtka/zavrtanj noža je labav | Pritegnite navrtku/zavrtanj noža (27 Nm) | |
| Jake vibracije/buka | Navrtka/zavrtanj noža je labav | Pritegnite navrtku/zavrtanj noža (27 Nm) |
| Nož je oštećen | Zamenite nož (vidi sliku J) |
Akumulator i punjač
| Simptomi | Moguçi uzrok | Rešenje |
| Treperi crveniPokazivač punjenjaakumulatora napunjaču | Akumulatoricates noj (pravilno)uložen | Stavite akumulator pravilno na punjač |
| Kontakti akumulatoras su zaprljani | Očistite kontakte akumulatora; nth. tak da višeputa utaknete i izvadite akumulator, po potrebi zamenite akumulator | |
| Postupak punjenja nijemoguć | Akumulator je u kvaru | Zamenite akumulator |
| Pokazivači punjenjaakumulatora ne svetlena punjaču | Mrežni utikač punjača nije (pravilno) utaknutUtičnica, mrežni kabel ili punjač su u kvaru | Utaknite mrežni utikač (potpuno) u utićnicuProverite mrežni napon, po potrebì zatražite odovlašcene korisničke službe za elektrICIne alate firme Bosch da proveri punjač |
www.bosch-garden.com
Molimo da kod svih pitanja i porucivanja rezervnih delova neizostavno navedete broj articla sa 10 brojcanih mesta prema tipskoj ploci proizvoda.
Srpski
Bosch Elektroservis
Dimitrija Tucovića 59
11000 Beograd
Tel.: +381 11 644 8546
Tel.: +381 11 744 3122
Tel.: +381 11 641 6291
Fax: +381 11 641 6293
E-Mail: office@servis-bosch.rs
www.bosch-pt.rs
Keller d.o.o.
Ljubomira Nikolica 29
18000 Nis
Tel./Fax: +381 18 274 030
Tel./Fax:+38118531798
E-Mail: office@keller-nis.com
www.bosch-pt.rs
www.bosch-garden.com
Akumulator sa 6,0 Ah
do 750m^2
www.bosch-garden.com
Prilikom narucivanja rezervnih dijelova i kod svih upita molimo svakako navedite 10-znamenkasti broj articla prema označnoj pločici proizvoda.
Hrvatski
Robert Bosch d.o.o PT/SHR-BSC
Kneza Branimira 22
10040 Zagreb
Tel.: +385 12 958 051
Fax: +385 12 958 050
Akujahutus (active air cooling)
www.bosch-garden.com
Palume paringutele ja varuosatellimumele markida tingimata 10-kohaline totekood, mille leiate toote tuubisildilt.
Eesti Vabariik
Mercantile Group AS
www.bosch-garden.com
Pieprasot konsultacijas un pasutot rezerves dalas, noteiktipazojiet 10 zimju izstradajuma numuru, kas noradits uzizstradajuma markejuma plaksnites.
Latvijas Republika
Robert Bosch SIA
Bosch elektroinstrumentu servisa centrs
Mukusalas iela 97
LV-1004 Riga
Tār.: 67146262
Telefakss: 67146263
E-pasts: service-pt@lv.bosch.com
Pärvietošana
www.bosch-garden.com
aI I aI I aI I aI I aI I aI I aI I aI I aI I aI I aI I aI I aI I aI I aI I aI I aI I aI I aI I aI I aI I aI I aI I aI I aI I aI I aI I aI I aI I aI I aI I aI I aI I aI I aII aII aII aII aII aII aII aII aII aII aII aII aII aII aII aII aII aII aII aII aII aII aII aII aII aII aII aII aII aII aII aII aII aII aII aII aII aII aII aII aII aII aII aII aII aII aII aII aII aII aI g llg
aJlglgogllg
.adoI jbs abdo
JwI I J 0
aI psc Ic wJd Jgai I gai I gai I gai
.ooJIbIOJIaJJI
aIwO Ic bIa:J JJI 1c Jdaiol .uWll Si


wJ:WJ.ogJUJNkWU WJU .OJU JKUWU .Jg pJUJU
Jg aai jq gab I g JyjI jIJI gI bI gJbJU Iloc Jd
jLg jJw CIs n! gI cbbil
Uk gl dQJl Jo Jg DdJ
.Boq Jg
Jl lal sddwJl g JdI UgJn kswll Jls
Jl Icogog Jkswll Ujswl. aJU gJ aSLquwo
Jn kswll pab Jol S lo1
Jn kswll UJgPab Lg J
JkwhaJUgJ aSLguWJ
. uJglU JlaL jBjU JolS
gJbQyUwCJU Q
aclubxJlgJgJgJl
uJjabwUg Joo 4
duaiuI u gJbU UgSlo sic
sic loWg dJ
.ogJ
Jd aai Jq Joo W .alu uuc wlc u J u Lx 8g laI s g jwll jy .1j d cww jwll
Jl I Jg p 1
gl aI gll Uj 1
Uj 1 g gl aI IaBc
gl/g p 1
. Uw cA Gd A
Gw aIg lJjL wu li
.aaWl aIg
LwJoo CIs n! jgJl o dssuW 4
JUo CIs n! gI Lsjo g
gI OJrdsall gI Ugsll
.ugS
Ic Jao ll gljo n!
:OjBpbsnogkTg OJrdsiaI
UJrdsiaIy IwCkI y-
.1JNkI O dyswll
UwGgll lc wJal-
OJrdsiaIy GbWll lc loil s
.duall uwCg
WJI J.
山
Lgaw gI gI gI gI gI gI gI gI gI gI gI gI gI gI gI gI gI gI gI gI gI gI gI gI gI gI gI gI gI gI gI gI gI gI gI gI gI gI gI gI gI gI gI gI gI gI gI gI gI gI gII.
Lo sic Igauo c Iy
.
UgaiuagaiuagaiuagaiuagaiuagaiuagaiuagaiuagaiuagaiuagaiuagaiuagaiuagaiuagaiuagaiuagaiuagaiuagaiuagaiuagaiuagaiuagaiuagaiuagaiuagaiuagaiuagaiuagaiuagaiuagaiuagaiuagaiuagaiuagAI
gaii y
gaii y
gaii y
gaii y
gaii y
gaii y
gaii y
gaii y
gaii y
gaii y
gaii y
gaii y
gaii y
gaii y
gaii y
gaii y
gaii y
gaii y
gaii y
gaii y
gaiiy
gaii y
gaii y
gaii y
gaii y
gaii y
gaii y
gaii y
gaii y
gaii y
gaii y
gaii y
gaii y
gaii y
gaii y
gaii y
gaii y
gaii y
gaii y
gaii y
gaii Y
Jlqll Jy Bg 4
dagawu jI Iy
g jIJI JloI Ic IuIw jG
aI I OJU JI S G
. UJlJzXlg
aIg I gI gI gI gI gI gI gI gI gI gI gI gI gI gI gI gI gI gI gI gI gI gI gI gI gI gI gI gI gI gI gI gI gI gI gI gI gI gI gI gI gI gI gI gI gI gI gI gI gI gI gIIgIIgIIgIIgIIgIIgIIgIIgIIgIIgIIgIIgIIgIIgIIgIIgIIgIIgIIgIIgIIgIIgIIgIIgIIgIIgIIgIIgIIgIIgIIgIIgIIgIIgIIgIIgIIgIIgIIgIIgIIgIIgIIgIIgIIgIIgIIgIIgIIgIIgII
JlWgJgJgJgJgJgJgJgJgJgJgJgJgJgJgJgJgJgJgJgJgJgJgJgJgJgJgJgJgJgJgJgJgJgJgJgJgJgJgJgJgJgJgJgJgJgJgJgJgJgJg
g gglgglgglgglgglgglgglgglgglgglgglgglgglgglgglgglgglgglgglgglgglgglgglgglgglgglgglgglgglgglgglgglgglgglgglgglgglgglgglgglgglgglgglgglgglgglgglgglgglgglggl
J 1 J 1 J 1 J 1 J 1 J 1 J 1 J 1 J 1 J 1 J 1 J 1 J 1 J 1 J 1 J 1 J 1 J 1 J 1 J 1 J 1 J 1 J 1 J 1 J 1 J 1 J 1 J 1 J 1 J 1 J 1 J 1 J 1 J 1 J
aJll aia 10 pssjll pssjll lcc jll 11 11 11 11 11 11 11 11 11 11 11 11 11 11 11 11 11 11 11 11 11 11 11 11 11 11 11 11 11 11 11 11 11 11
J 1 J 1 J 1 J 1 J 1 J 1 J 1 J 1 J 1 J 1 J 1 J 1 J 1 J 1 J 1 J 1 J 1 J 1 J 1 J 1 J 1 J 1 J 1 J 1 J 1 J 1 J 1 J 1 J 1 J 1 J 1 J 1 J 1 J 1 J
aIgll pKl kJ J gJ 1
.0000000000000000000000000000000000000000000000000000000000000000000000000000000000000000000000000000
JbIJI JgJgJgJgJgJgJgJgJgJgJgJgJgJgJgJgJgJgJgJgJgJgJgJgJgJgJgJgJgJgJgJgJgJgJgJgJgJgJgJgJgJgJgJgJgJgJgJgJgJgJg
aioJI UliJI
| Universal Rotak 36-670 | Universal Rotak 36-590 | Universal Rotak 36-560 | Universal Rotak 36-555 | Universal Rotak 36-550 | الإستعمالالله |
| 3 600 HB9 507 | 3 600 HB9 509 | 3 600 HB9 5063 600 HB9 574 | 3 600 HB9 508 | 3 600 HB9 5053 600 HB9 573 | من الحرفية |
| 36 | 36 | 36 | 36 | 36 | الإستعمالالله |
| 38 | 38 | 38 | 38 | 38 | عانيمات |
| 70 – 25 | 70 – 25 | 70 – 25 | 70 – 25 | 70 – 25 | من الحرفية |
(3620 CV/AL 3640 CV/AL 36V-20
gJwJdA
J0 pssssssssssssssssssssssssssssssss
jai jao1g jwgo Ula

aLac:Jl:psjll JcJwly jiaic
gl aaii |aaiiaaiaiai iaiagai
psjll jaw pj agSy. algJ lobui p
Jaaa aaiia aaiia aaiia aaiia aaiia aaiia aaiia aaiia aaiia aaiia aaiia aaiia aaiia aaiia aaiia aaiia aaiia aaiia aaiia aaiia aaiia aaiia aaiia aaiia aaiia aaiia aaiia aaiia aaiia aaiia aaiia aaiia aaiia aaiia
Jjgallabig ggej Jaiuua kuiy aii
JolS JsWpSjll jw w aaii
.5
b@g jwll jwll aLoc |j| jS:abgalo
aJ 100000000000000000000000000000000000000000000
aaiiuluiuolg jwllj
gaaa aJll
JgJgJgJgJgJg
psjll jaw pj dil jla
JolS JUs
jIgdoJgogOjLw!glbJcJd
JsawpSjllnawp aai 1yuiu
JolS
.5gall oaiwU uJ jSALI JJ
JauuJIgJU UePjU PJI JU
JUaIbui jai dai JI Juaa Juaa Juaa
jla jalwll jlg g uaaJy aulgSJI aSklw
U
山
| 325 | A | \( {}^{\left( A\right) } \) |
| 326 | B | \( {}^{\left( B\right) } \) |
| 327 | C | \( {}^{\left( C\right) } \) |
| 327 | D | \( {}^{\left( D\right) } \) |
| 328 | E | \( {}^{\left( E\right) } \) |
| 329 | F | \( {}^{\left( F\right) } \) |
| 330 | G | \( {}^{\left( G\right) } \) |
| 330 | H | \( {}^{\left( H\right) } \) |
| 331 | I | \( {}^{\left( I\right) } \) |
| 331 | J | \( {}^{\left( J\right) } \) |
| 332 | K | \( {}^{\left( K\right) } \) |
oJgJgJgJgJgJgJgJbI JnAaX (A
liolj g aloLJI gll Jd gJooJI g]
g
山
LdolwJ
"Le! p. (Electronic Cell Protection/(ECP
aJall aaw
LaaJ J
blal
1 JJJUaolg ggo
gall jaiy jayo jwuljuyi yu
aJll o 1 jbl jia jic o bJI
gJ. pLw lK uL u! b0 pSjllp sii
Jy 2 cajp aol jg agwsoal J
U! a@LxI aIbgl pLxI oIcI JyJyJI
.
aJyI J 10
aai jbjj 0j
aabjcbolloIgglg pJolIg
g g jb jc aull ao
UJUJI/0sIJIg aJooj
aaijiaiuiiai


:baa gjgJsljLgJ
aJgjSg jgjSg jgs
/2012/19 1gjgl gjjll jssw
g aaiu 1 uui /pJUe U
www.bosch-garden.com
aagllaggulall gj jj
Uulb gI UJluwaiu aJ UJuwjAic qiaalgio
Jucg
JJI
Ugla 1aJall gusu Uugl sIg
1J 1 J 1 J 1 J 1 J 1 J 1 J 1 J 1 J 1 J 1 J 1 J 1 J 1 J 1 J 1
j j j j j j j j j j j j j j j j j j
Sgwh JyJyJg. .uJyJyJyJyJyJyJyJyJyJyJyJyJyJyJyJyJy
JJJJwOlsW J. JyJyJyJyJyJyJyJyJyJyJyJyJyJyJyJyJyJyJyJyJyJyJyJyJyJyJy
JjI jS JJJ 1.
jI I JIJIJIJIJI K bU UUg g Ld Uu dUg
g gg uulg. sJL JIiS 1 k p ooi cui jn ooo 1 k bua .sigw oai jolkss jI jI g uia S 10kssu 10g dS ,si w gjbj Ia plwajlW g nlgai 10kwa dksis k .dik lla 10g nlg a o o o o w L JI JdAOW 10kws L JI 10c JdAOW L JI 10


口

wJ
JI JI JI JI JI JI JI JI JI JI JI JI JI JI JI JI JI JI JI JI JI JI JI JI JI JI JI JI JI JI JI JI JI JI JI JI JI JI JI JI JI JI JI JI JI JI JI JI JI JI JI
JjI gJ Ioo Jg jIg jIw oLkss JIcI
Logoc slw
11 laiml 5 d j. slgbl qil s d s k c plwla laaw s j gaoo ooh


.ajg
I J I J S pK :J
J G aL dL jLcL
.


JgLddu:blal .uji cws kJU Lg .suiu jI Ld
CwSgIjIuSjI jIabJLo .Sblal g
J J J J J J J J J J J J J J J J J J J J J J J J J J J J J J J J J J J J J J J J J J J J J J J J J J J J J J J J J
Jg 1 J 1sgl
d jy slq y L 10 d2j, uWkU
ugc JolS jgb d l oogw j
.
jg j j j j g j j b a j .d k l .g | u w li o 1g o n g y o o o o o o o o o o o o o o o o o o o o o o o o o o o o o o o o o o o o
J J 1 J 1 J 1 J 1 J 1 J 1 J 1 J 1 J 1 J 1 J 1 J 1 J 1 J 1 J 1
Jj jilpjlgao .siS J
Jj j J 1
L WgW,0sUwI bJgLo 1o Jlo j
lglgJgJbW gUj.
joglc dS puiS o duogj 4 jui iai! iw gj | uaw iai| .uis o laiwi
J Lg Jd 1
JgJgJgJgJgJgJgJgJgJgJgJg
JgJ Ld gJ JL 1:duuJbI J slj dgljU SwJW - .sikj joo
L aS aGbW GgJ JSL pLsi - P L 1aobo Ugbjo .dJU
a oJgaw a gbw (s9j- 9 dik jn jgo oo .uLgXu UoO du dU uW Jd pK - .uS buiol lol L
LS
Jl jI Jw I Jlc S d Jj 1 JI OJIOWI OJI L W I J
JU Joo .Jd J U Goo
JJG JQ JgS Jd Bgjo
. DSS gDoo JpJL J
Goi OlaWl Ugoo JI dJli
JWJWJJgJnJds
JlJUw g JsGg d jS 4
Gaw g Gg JSLaWls JI
d Li liw I d jyds Li
WgjI eIbI ngs wla
Jljl OLaWol jLJL
.
Lsiu bju dy uksg Lgil dS gwh Jla liab1.iiS Gai SjUg
UgJgJgJgJgJgJg
Lj j Jl g L j SgS .Si o laaw
JlJwLgJyJyJyK 1gswSLoI yJyJ .Wy
sLgwsUgsuSjJSLpSio
uos.ugwU SIO JjU w
sIjglwSgPsoJLS
.Sw g
dJlJSg2gbsw dSj,gsiw daa g jsL wJy JIgaiwIgawI .siI Jd jao plwJiS aawo slawl jg 9 dji yds iS diS wjy jlaaWg Iw .siwJ0syy
L. d. 5|g Jw J LjI .siiS jwjj
3Jg
LgSd Sd
JgJjJyUySd
. dS U g J
JgO gJ Lw
JgO dUu D
:LaJ dGg -
JgU J L-
JiJ iJ U u U
. jgJ gJ U
I J gJ gJ Uu U
. JgJ gJ
JgU gJ Uu U
JgU gJ Uu U
JgU gJ Uu U
JgU gJ Uu U
J 1 J 1 J 1 J 1 J 1 J 1 J 1 J 1 J 1
wU 1sJL CwU JkSoo Lgj
g 1 JlJlJlJlJn .
jI juuiu uuuaiauuiuuiuui
.
jbs.sis sjsggsjuloglwal j1
Jgjai
aaiu uuguggjulj sjjw
.1jIbgoa 1gjjg
oogdoJgjglgdsijsjjw
JjSjui. 5iC050JC020-
.1j3j jwlo j jliu
a 1
.1sS 1000000000000000000000000000000000000000
sIgJgW
jjw LqMkww
IlaimJgiajI Jgwsdow
pjcjUwUwUwU.ajlgay
uw|JSAoGiaiUjgwuS JcLc
Lw ggagw. g
.1gaw 15
sijl jI L lo laimlj g oJgws do
.5s 5j1g6j g
aJdS JjS Jj S jI jJJw oIoo
Jolg gduwuyog yjSlaoc logj
Glaiaa g 1s oiiu y s
.duu oJc uJU JpJ
JlJgSgSj
Gaaag G a9j slaikwls
du LgLiWl Lyd jgLy
gjI 1blj gJy Jai
jI oJlaW| oJla|SJLS
JJoo. 1JJJJw oLsw
jglglo jgusdo bgo
.iiS gdo IJ JSL Jw
Uoljoguugw
0sgoo jJlK jjgoo
jss jI oJgao jdd
.
Loo ojo jg poao j1
g u g w jabo Lg
JUgua 1y jia
.JJJ
jll joo 1gJoo Jbwo
JSSSg gss
.
g uis Ujiss lJ Ugs
uwwl o gwj (slaowg
jagj jliab1gJ0s
.
dij jbi j sldojjb0g
o slawl jlucljJlU 0
.
LobdAsgwhjabo
.1iWb g j 2
jajl jui jSjAqjI j
g
jg0J. uS Jolla liabI
p g s uu yu yu l kol
.
L aig jL sI J LlaioiJ
sJw sJy
jI jg gogolj gplgla j
jg. gw jiaaba bjo jg g jlu
wul jssn wgjiljIjI JsJy
aJgJgUcU
jI sI 0ooh j6 JbJ slgjli jI g
.1sS 0 Ss Ugsso jI Jai g CwJ sO slaii
| مإستعمال | الترجمة |
| سليم ب这种方式 | ↑ |
| سليم ب这种方式 | ↓ |
| سليم ب这种方式 | ↓ |
| سليم ب这种方式 | ↓ |
| سليم ب这种方式 | ↓ |
| سليم ب这种方式 | ↓ |
| سليم ب这种方式 | ↓ |
| سليم ب这种方式 | ↓ |
| سليم ب这种方式 | ↓ |
| سليم ب这种方式 | ↓ |
| سليم ب这种方式 | ↓ |
| سليم ب这种方式 | ↓ |
| سليم ب这种方式 | ↓ ↓ |
| سليم ب这种方式 | ↓ |
| س,NoNoNoNoNoNoNoNoNoNoNoNoNoNoNoNoNoNoNoNoNoNoNoNoNoNoNoNoNoNoNoNoNoNoNoNoNoNoNoNoNoNoNoNoNoNoNoNoNoNoNoNoNoNoNoNoNoNoNoNoNoNoNoNoNoNoNoNoNoNoNoNoNoNoNoNoNoNoNoNoNoNoNoNoNoNoNoNoNoNoNoNoNoNoNoNoNoNoNoNoNo No | |
| س,NoNoNoNoNoNoNoNoNoNoNoNoNoNoNoNoNoNoNoNoNoNoNoNoNoNoNoNoNoNoNoNoNoNoNoNoNoNoNoNoNoNoNoNoNoNoNoNoNoNoNoNoNoNoNoNoNoNoNoNoNoNoNoNoNoNoNoNoNoNoNoNoNoNoNoNoNoNoNoNoNoNoNoNoNoNoNoNoNoNoNoNoNoNoNo No | |
| الترجمة | ↓ |
| الترجمة | ↓ |
| الترجمة | ↓ |
| الترجمة | ↓ |
| الترجمة | ↓ |
| الترجمة | ↓ |
| الترجمة | ↓ |
| الترجمة | ↓ |
| الترجمة | ↓ |
| الترجمة | ↓ |
| الترجمة | ↓ |
| الترجمة | ↓ |
| الترجمة | ↓ |
| س,NoNoNoNoNoNoNoNoNoNoNoNoNoNoNoNoNoNoNoNoNoNoNoNoNoNoNoNoNoNoNoNoNoNoNoNoNoNoNoNoNoNoNoNoNoNoNoNoNoNoNoNoNoNoNoNoNoNoNoNoNoNoNoNoNoNoNoNoNoNoNoNoNoNoNoNoNoNoNoNoNoNoNoNoNoNoNoNoNoNoNoNoNo No | |
| الترجمaire | ↓ |
| الترجمaire | ↓ |
| الترجمaire | ↓ |
| الترجمaire | ↓ |
| الترجمaire | ↓ |
| الترجمaire | ↓ |
| الترجمaire | ↓ |
| الترجمaire | ↓ |
| الترجمaire | ↓ |
| الترجمaire | ↓ |
| الترجمaire | ↓ |
| الترجمaire | ↓ |
| الترجمaire | ↓ |
| س,NoNoNoNoNoNoNoNoNoNoNoNoNoNoNoNoNoNoNoNoNoNoNoNoNoNoNoNoNoNoNoNoNoNoNoNoNoNoNoNoNoNoNoNoNoNoNoNoNoNoNoNoNoNoNoNoNoNoNoNoNoNoNoNoNoNoNoNoNoNoNoNoNoNoNoNoNoNoNoNoNoNoNoNoNoNoNoNoNoNoNoNoNo.No |
olissjIoslaowJg0
jbj jgaoa bao juj jao g jiuclj jui
.ωl oδw aigjS
Jolk Jow Jll Jd (Protection (ECP
()jj jg jllu jg j.ugw coabolao
:gaw Go wgola Jibla dUw goy
CwI jgJyjJW CwO g JyJU 1 yJyJU JyJU JyJU CwO g dS 51 JJJ W EJ3 SJJ W CwO JyJU JyJU CwO g JyJU JyJU CwO g .CwI JyJU JyJU JyJU CwO g JyJU JyJU CwO g JyJU JyJU CwO g .CwI JyJU JyJU CwO g JyJU JyJU CwO g JyJU JyJU CwO g
www.bosch-garden.com
g SjIjUjLwU g Ulgaw aigSgUy
UoUJxUgJ OUsiOJow laia, Ulaeio
. 1
U
wJyUjTJyUjUjUjUjUjUjUjUjUjUjUjUjUjUjUjUjUjUjUjUjUjUjUjUjUjUjUjUjUjUjUjUjUjUjUjUjUjUjUjUjUjUjUjUjUjUjUjUjUjUjU
.ogw dəb 3 oJaw ,uJyJLo uJiaaiW 1994834571 uJq 9821+ 42039000 :uJl
Jai g Jaa
1sIgJgJgJgJgJgJgJgJgJgJgJgJgJgJgJgJgJgJgJgJgJgJgJgJgJgJgJgJgJgJgJgJgJgJgJgJgJgJgJgJgJgJgJgJgJgJgJgJgJgJg
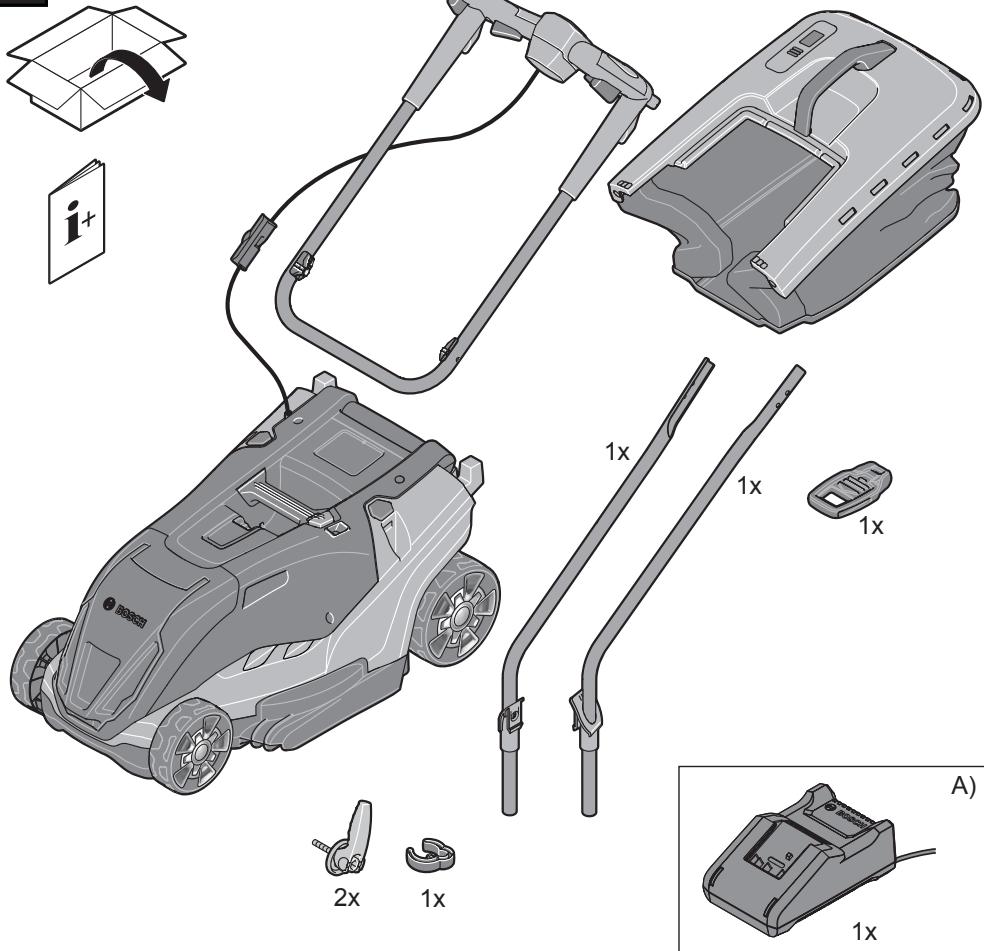
A
UniversalRotak 36-560
UniversalRotak 36-550
UniversalRotak 36-555
UniversalRotak 36-590
UniversalRotak 36-670
(2x) 36V 2.0 Ah

36V 4.0 Ah
36V 6.0Ah
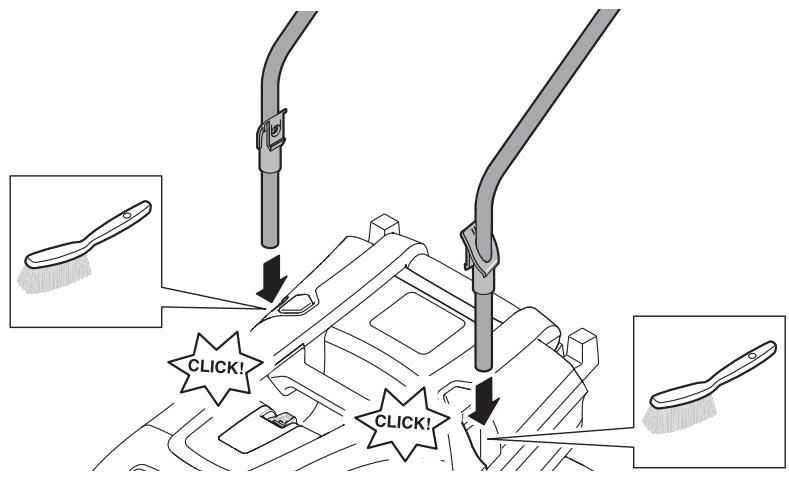
B
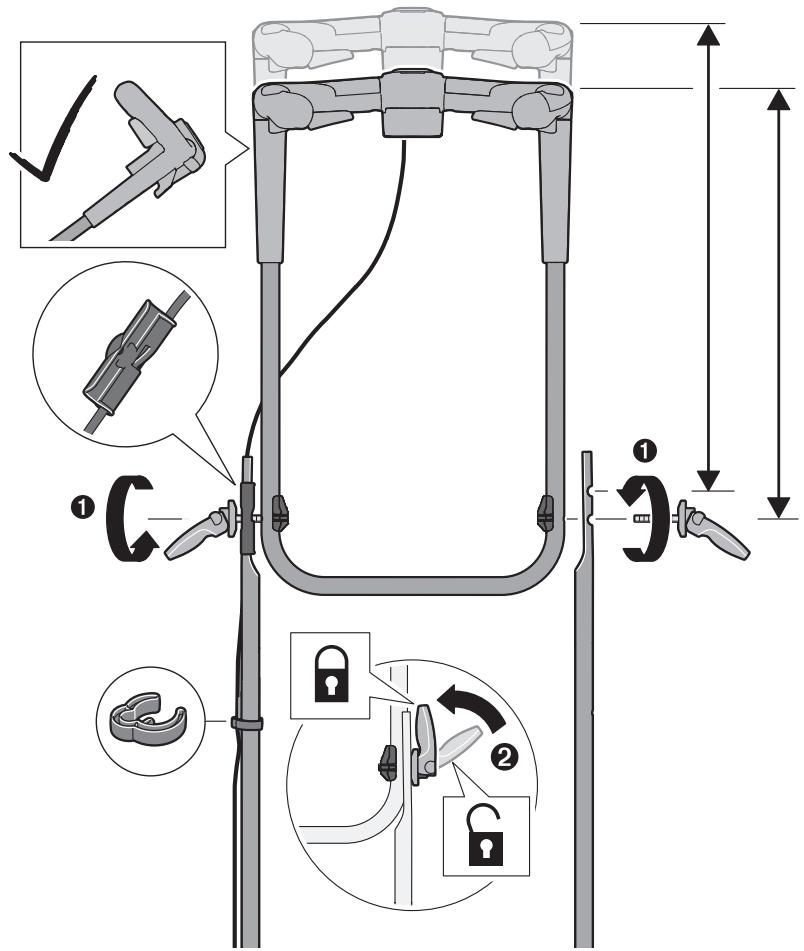

C

D
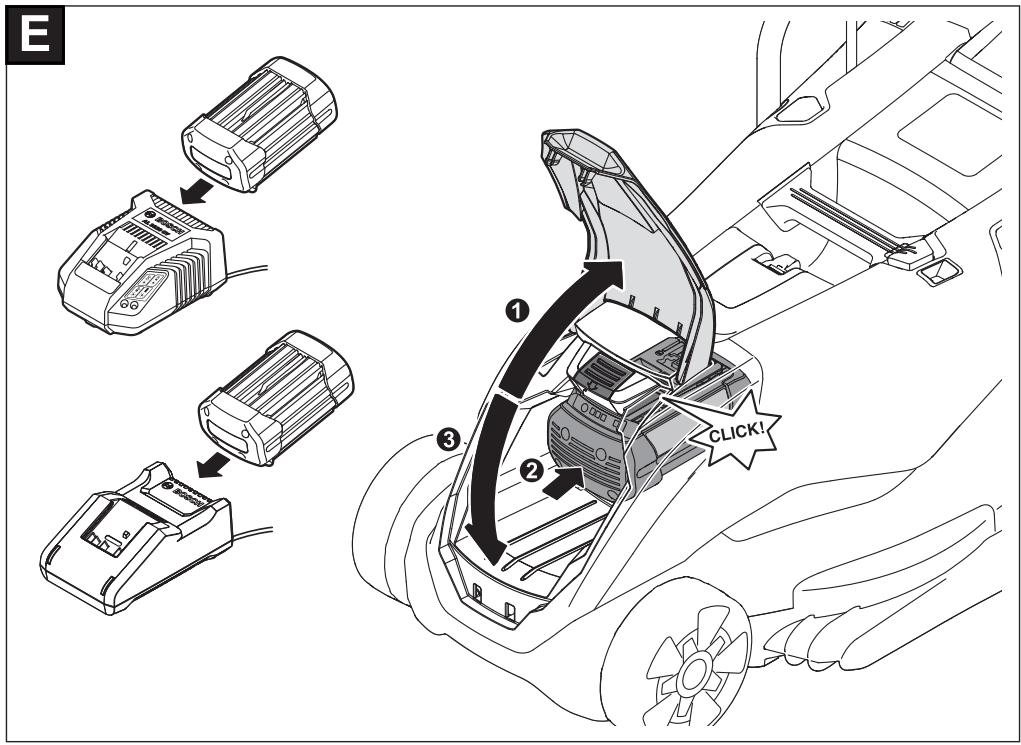
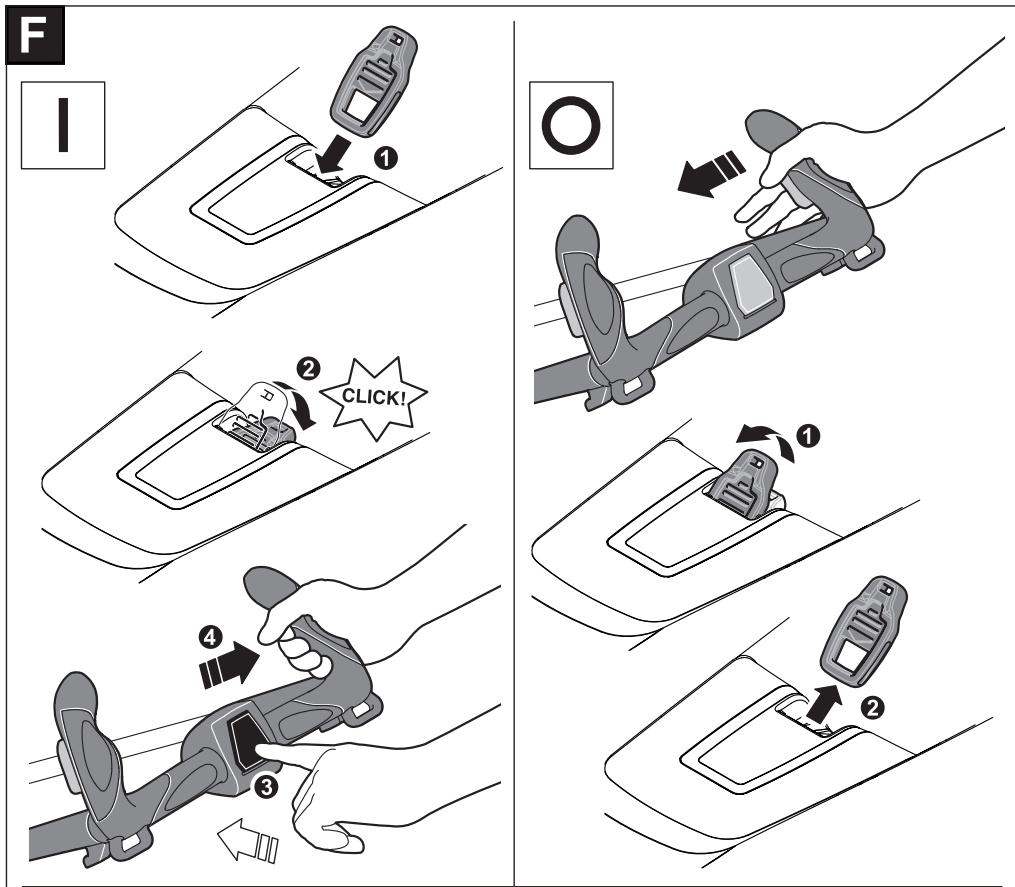
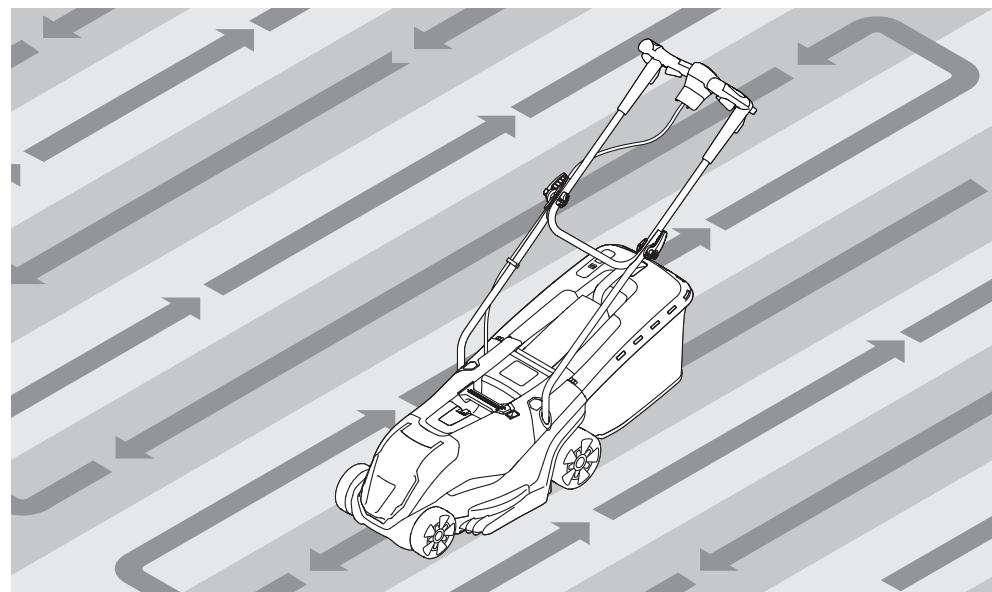
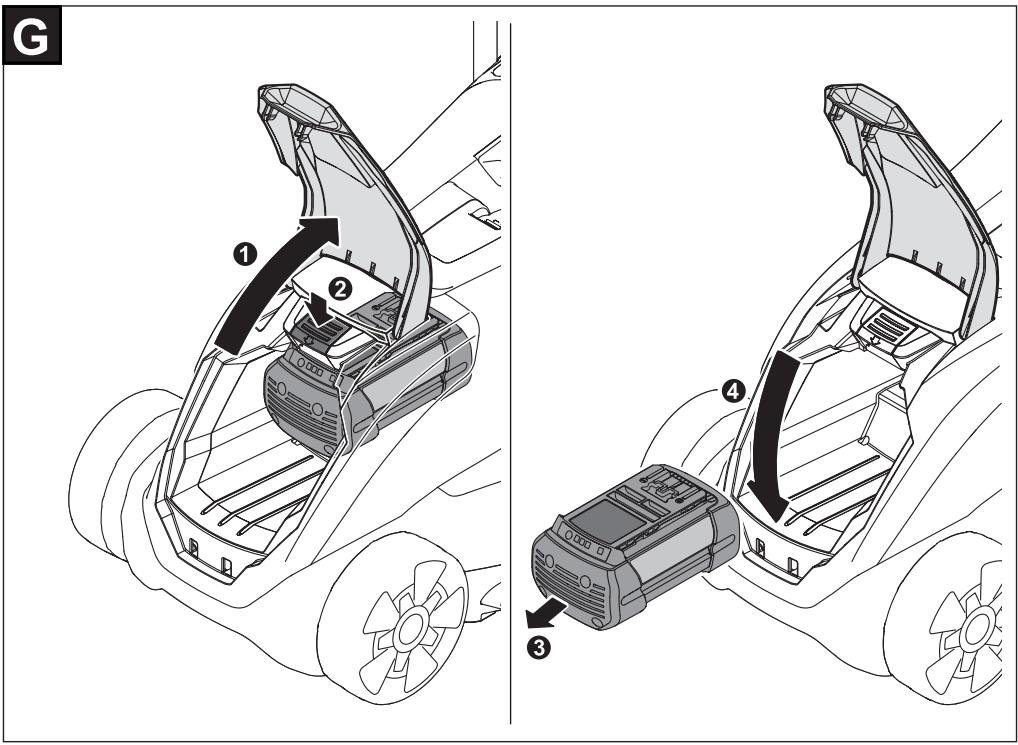
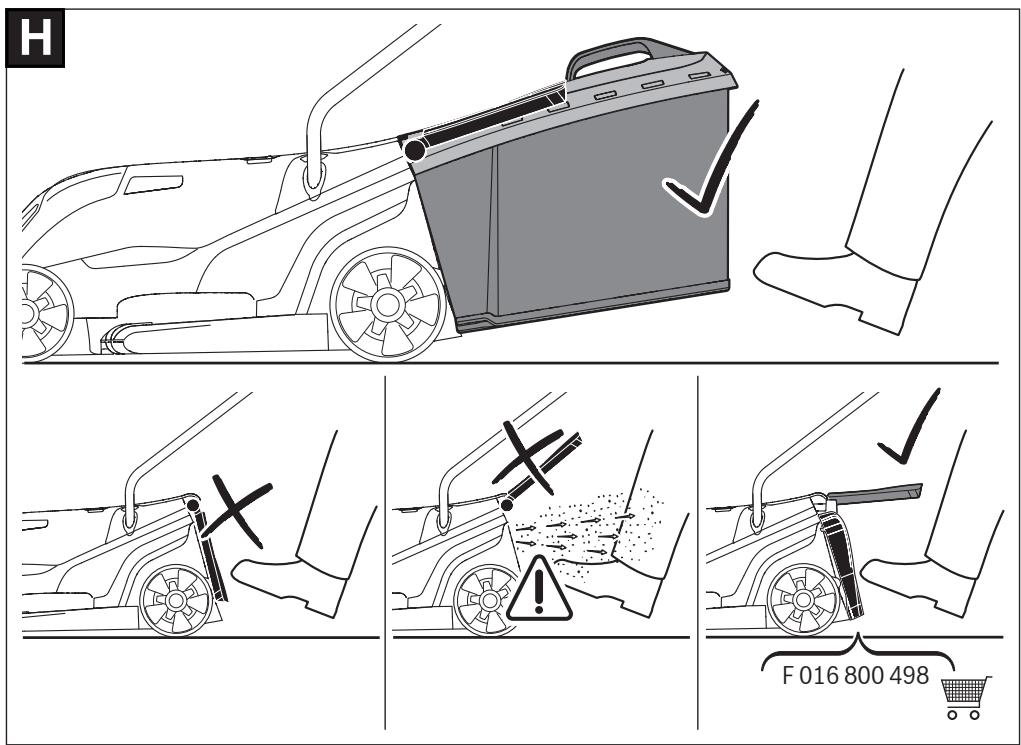
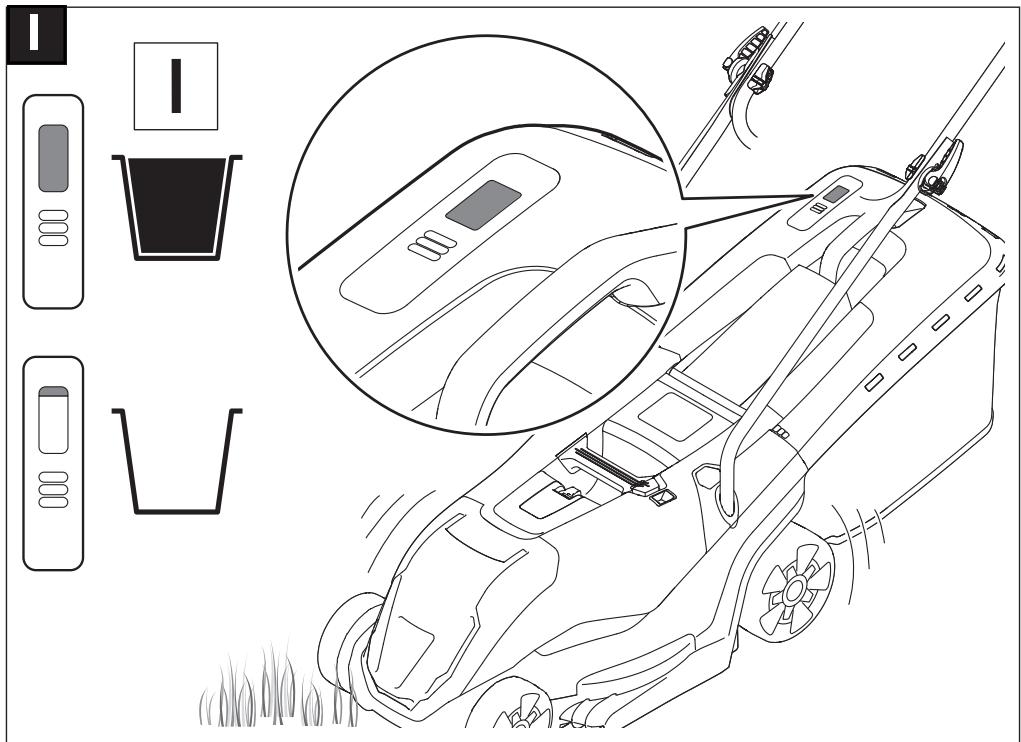
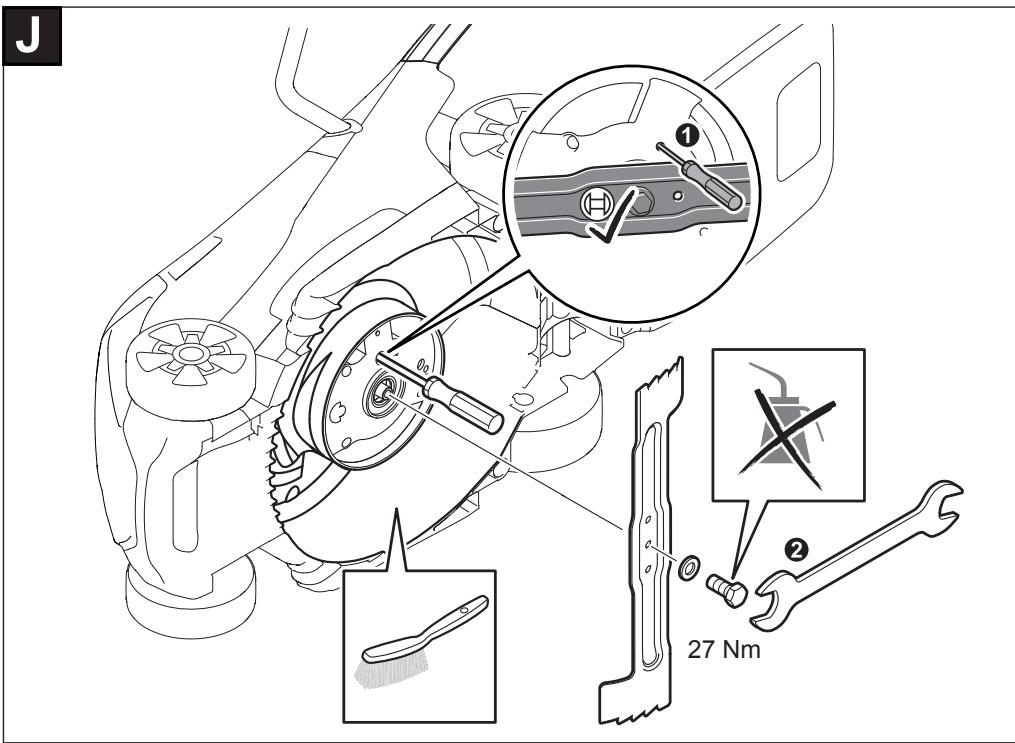


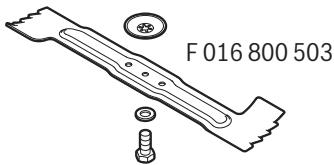
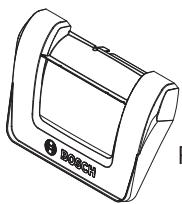
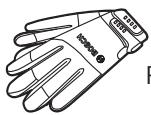
F016800498
F016800292
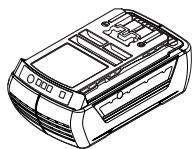
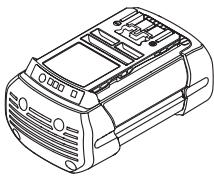
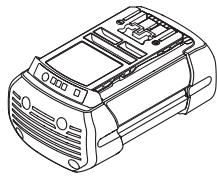
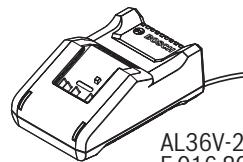
AL36V-20
F016800584
2.0 Ah
2607336913/
1607A3502V
4.0 Ah
2607336915/
2607337047
6.0 Ah
1607A35058
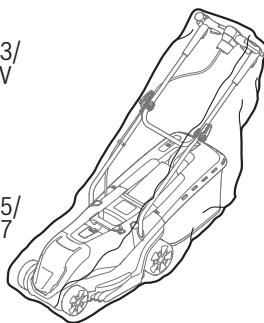
F016800497
1
C
| de | EU-Konformitätserklärgung | Wir erklären in alleiniger Verantwortung, dass die genannten Produkte allen einschlädigten Bestimmungen der nachfolgenden aufgeführten Richtlinien und Verordnungen entsprechen und mit folgenden Normen übereinstimmen. | |
| Rasenmäher | Sachnummer | ||
| en | EU Declaration of Conformity | We declare under our sole responsibility that the stated products comply with all applicable provisions of the directives and regulations listed below and are in conformity with the following standards. | |
| Lawnmower | Article number | ||
| fr | Déclaration de conformité UE | Nous déclarons sous notre propre responsiveness que les produits décrites sont en conformité avec les directives, règlements normatifs et normes écumentés ci-dessous. | |
| Tondeuse | N° d'article | ||
| es | Déclaración de conformidad UE | Declaramos bajo{nuestra exclusiva responsiveness, que los produits nombrados cumplen con todas las dispositions correspondientes de las Directivas y los Reglandos Mentionados a continuación y están en conformidad con las sigüentes normas. | |
| Cortacésped | No de articulo | ||
| pt | Déclaration de Conformidade UE | Declaramos sob{nossa exclusiva responsiveness que os produits Mentionados cumprem todas as dispositions e os reguladores indicados e está em conformidade com as seguides normas. | |
| Corta-relvas | N.° do produit | ||
| it | Dichiarazione di conformità UE | Dichiariamo sulla notre piena responsabilità che i prodotti indicati sono conformi a tutte le dispositions pertinenti delle Diretive e dei Regolamenti elencati di seguito, nonché alle seguenti Normative. | |
| Tosaerba | Codice prodotto | ||
| nl | EU-conformiteitsverklaring | Wij verklaren op eigen verantwoordelijkheid dat de genoemde producten voldoen aan alle desbetreffende bepalingen van de hierna genoemde richtlijnen en verorderingen en overeenstem-men met de volgende normen. | |
| Gazonmaaier | Productnummer | ||
| da | EU-overensstemmelseserklæring | Vi erklær someneansvarlige, at det beskreνne produkt er i overensstammelse med alle gældende bestemmelse i følgende direktiver og forordering og opfylder følgende standarder. | |
| Plæneklipper | Typenummer | ||
| sv | EU-konformitetsfürklaring | Vi föklarar under eget ansvar att de námnda Produktterna uppfyl-ler kraven i alla gällande bestämelse i de nedan angivna direk-tiven och fororderingarnas och att de stämmer överens med föl-jande normer. | |
| Gräsklippare | Produknummer | ||
| no | EU-samsvarserklæring | Vi erklær under neansvar at de nevnte Produktene er i overensstammelse med alle relevante bestemmelse i direktivene og fororderingene nedenfor og med følgende standarder. | |
| Gressklipper | Produknummer | ||
| fi | EU-vaatimustemmukaisuusvakuutus | Vakutamme tën, etta mainitut tuotteet vastaavat kaikkia seu-raavien direktivien ja asetusten asiaankuluvia vaatimuksaia ja ovat seuraavien standardien vaatimusten mukaisia. | |
| Ruohonleikkuri | Tuotenumero | ||
| el | Δηλωση μοτότητας EE | Δηλωνουμε παπολειοική μας ευθύνη, δή τα αυφερόμενα προίουτα αντιοιούνιν Εδέλες Καχετίκες διατάξεις των πό κατωναναφερόνων σθημών και κανονιομών και ταυτίζουνται με τα ακόλουθα πρότυμα. | |
| Xλookomikik μηχανή | Aρίθμος ευρετηρίου | ||
| tr | AB Uygunluk beyani | Tek soruamu olarak, tanımlanan ürünün aşağidaki)yönetmelik ve direktifilerin geleçeri bil—butün hülçumlerine ve aşağidaki standartlara uygun olduğunu beyan ederiz. | |
| Çim biçme makinesi | Ürün kodu | ||
| pl | Deklaracja zgodnosci UE | Oświadczamy z peł-na odpowiedzialnoscia, ze ninejsze produkty odpowiadaj wszystkim wymaganiom poniżj wyszczegól-nionych dyrektyw i Rozporzędźń, oraz ze są zgodne z nastepuja-cymi normami. | |
| Kosiarka | Numer katalogowy | ||
| cs | EU prohlášeni oshodě | Prohlasujeme na vyhradnízodpovednost, ze uvedeny výrobek splüŋje všechna príslužná ustanovení niže uvedenych směrnica anafízení aje vsouladu snásledujćími normami:* | |
| Travní sekačka | Objednaci Číslo | ||
II
C
| sk | EU vyhlasenie ozhode | Vyhlasujeme na vyhradnú zodpovednost, ze uvedený vyrobok splína vsetky príslušné ustanovenia nižsie uvedenych smernić anariadeni ale vsúlade snasledujúcimi normami: | |
| Kosačka na trávu | Vecné Číso | Egyedüli felelósègge kijelentjuk, hogy a megnevezett termékek megfelelnek az alábbiakban felsorolársa kerülõ irányelvek és ren-deletek valamennyi idevágó elöirásainak és megfelelnek a kõvet-kező szabványoknak. | |
| hu | EU konformítasi nyilatkozat | Egyedüli felelósègge kijelentjuk, hogy a megnevezett termékek megfelelnek az alábbiakban felsorolársa kerülõ irányelvek és ren-deletek valamennyi idevágó elöirásainak és megfelelnek a kõvet-kező szabványoknak. | |
| ru | Завленье о cootbvetstbп EC | Мы завленье по нашиу[equinochunhyo OTBETCTBEHNOCTb,ЧToНазваньные песоркы COOTBETCTBYOT BCEM Deястуцим Рождисань NMнжеша Замын DIFREKTINВИ ралби ВIDПОБИДАЛТУСМУHIM ПОLOЖENHM NИSUOZHAчEDENHД MИSUOZHAчEDENHД MИSUOZHAчEDENHД MИSUOZHAчEDENHД MИSUOZHAчEDENHД MИSUOZHAчEDENHД MИSUOZHAчEDENHД MИSUOZHAчEDENHД MИSUOZHAчEDENHД MИSUOZHAчEDENHД MIGUHOM | |
| uk | Завва по bіdnoвідісь EC | Мизавва мій нашиу о дноошову Bід noobідільісь, сіо нашиоти віробіи Bід noobідідійы усіm ChHHM ПОLOЖENHM NИSUOZHAчEDENHД MИSUOZHAчEDENHД MИSUOZHAчEDENHД MИSUOZHAчEDENHД MИSUOZHAчEDENHД MИSUOZHAчEDENHД MИSUOZHAчEDENHД MИSUOZHAчEDENHД MИSUOZhaHOM | |
| kk | EO сөйсятik маглүдамасы | Өз кayалкешүлінкен 63а atalган оөмдер төмende жөлүganдіртіларьларьларьларьларьларьларьларьларьларьларьларьларьларьларьларьларьларьларьларьларьларьларьларьларьларьларьларьларьларьларьларьларьларьl | |
| ro | Declaration de conformitate UE | Declaram pe proprie raspundere сä produselementionate core-spund tuturor dispositіŋlor relevante ale directivelу sì regle-mentărilor enumerate in cele ce urmează sì sunt in conformitate cu urmâtoarele standarde. | |
| bg | EC дөлараша за сботьvetstbп | С пьлна отвогорост 힍дөларираме, чу пооченип рordукту OTВОВAPRT Na CBИКИ BAVIДИ NIIСКВANЯ на дөртIKВNTI и разпоребп'tо-DOLNY и сбOTВETCTBA на сөднITE CTANДАРТИ. | |
| mk | EU-Nizaba за сботьvetstbп | С оrelocna odtrOBOPHOC TИЗJBAYBAME, Deka опишанite розвдпспспспспспспспспспспспспспспспспспспспспспспспспспспспспспспспспспспспспспспспспспспспспспспспспспспССССССССССССССССССССССССССССССССССССССССССССССССССССССССССССССССССССССССССССССССССССССССССССССССССССCSСССССССССССССССССССССССССССССССССССССССССССССССССССССССССССССССССССССССССССССССССССССССССССССССССССC | |
| sr | Kocáчka за трава | Бөр на дөр/эрпөр. | |
| sl | Izjava o skladnosti EU | Izjavlamo pod izključno odgovornostjo, da je omenjen izdelek v skladu z vsemi relevantnimi dolovi direktiv in uredb ter ustreza naslednjim standardom. | |
| hr | EU izjava o skladnosti | Pod punom odgovornosti izjavlujemo d navedeni proizvodi odgovaraju svim relevantnim odredbama direktiva i propisima navedenima u nastavku i da su skladni sa sljedecim normama. | |
| et | EL-vastavusdeklaratsion | Kinnitame ainuvastutajatena, et nimetatud tooted vastavad jär-gnevalt loetletud direktiviqa maäruste kõikidele asjaomastele nõuetele ja on kooskilas järgmiste normidega. | |
| lv | Deklaracija par atbilstibu ES standartiem | Mës ar pilnu atbildibu pazinojam, ka šeit aplūkotie izstrādājumi atbilst visiem tālak minētajās direktīvās un rikojumos ietvertajām saistōsajām nostādnēm, kā ari sekojišem standartiem. | |
| lt | ES atitikties deklaracija | Atsakingai pareiškiame, kad išvardty gaminiai atitinka visus pri-ivalomus Žemiaiu nurodytu direktvyu ir reglamentu reikalavimus ir šiuos standartus. | |
| Žoliapjové | Gaminio numeris | ||
C
III
UniversalRotak 36-560 3600 HB9 506 EN 60335-1:2012+A11:2014+A13:2017
3600HB9574 EN60335-2-77:2010 EN55014-1-2017
UniversalRotak 36-590 3600 HB9 509 EN 55014-2:2015
UniversalRotak 36-670 3600 HB9 507 EN 50581:2012
IV
C
Conformity assessment procedure in accordance with annex VI. Product category: 32
Notified body: DEKRA Certification B.V. Meander 1051, 6825 MJ Arnhem, Netherlands, Nr.0344
Technical file at: