
GD60LM46HP - GD60LM46SPK4 - GD60LM51SPK4 - Cordless lawn mowers GREENWORKS - Free user manual and instructions
Find the device manual for free GD60LM46HP - GD60LM46SPK4 - GD60LM51SPK4 GREENWORKS in PDF.
| Brand | GREENWORKS |
| Models | GD60LM46HP, GD60LM46SPK4, GD60LM51SPK4 |
| Product Type | Cordless Lawn Mower |
| Cutting Width | 46 cm |
| Cutting Height | 25 mm - 80 mm |
| Rotation Speed | 2800 rpm |
| Sound Pressure Level | 73 dB(A) (K=3.0) |
| Measured Sound Power Level | 84.8 dB(A) |
| Vibration Level | ≤2.5 m/s² (K=1.5) |
| Grass Box Capacity | 55 L |
| Net Weight | 24.5 kg |
| Power Source | Lithium-ion battery (not included) |
| Compatible Battery Models | 2918307 / 2918407 |
| Charger Model | 2918507 |
| Replacement Blade | 2920407 |
| Main Features | Mulching, side discharge, cutting height adjustment, collection bag |
| Safety | Safety key, lock button, power lever |
| Maintenance | Dry cleaning, lubrication not required, regular blade replacement |
| Warranty | 2 years |
| Included Accessories | Grass box, mulching accessory, side discharge deflector, battery key, manual |
Frequently Asked Questions - GD60LM46HP - GD60LM46SPK4 - GD60LM51SPK4 GREENWORKS
User questions about GD60LM46HP - GD60LM46SPK4 - GD60LM51SPK4 GREENWORKS
0 question about this device. Answer the ones you know or ask your own.
Ask a new question about this device
Download the instructions for your Cordless lawn mowers in PDF format for free! Find your manual GD60LM46HP - GD60LM46SPK4 - GD60LM51SPK4 - GREENWORKS and take your electronic device back in hand. On this page are published all the documents necessary for the use of your device. GD60LM46HP - GD60LM46SPK4 - GD60LM51SPK4 by GREENWORKS.
USER MANUAL GD60LM46HP - GD60LM46SPK4 - GD60LM51SPK4 GREENWORKS
English (Original Instructions)
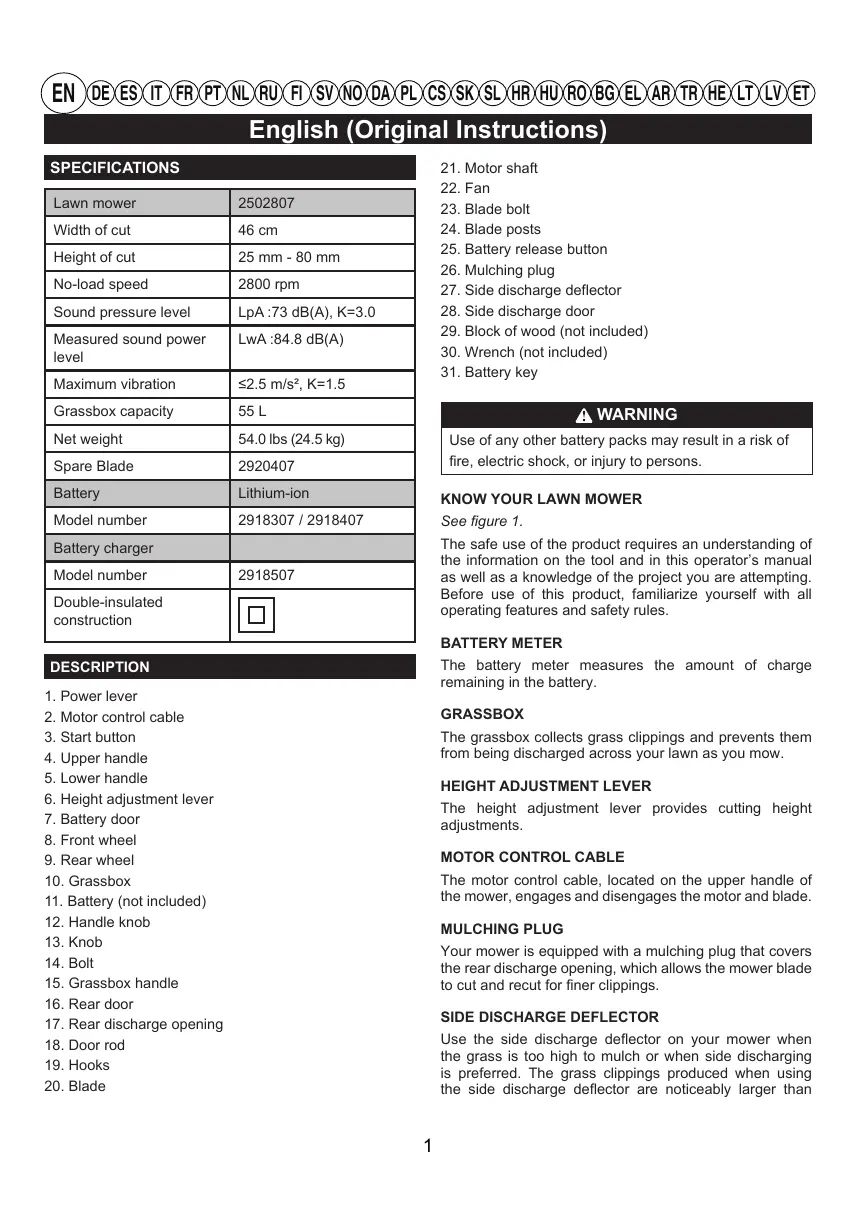
SPECIFICATIONS
| Lawn mower | 2502807 |
| Width of cut | 46 cm |
| Height of cut | 25 mm - 80 mm |
| No-load speed | 2800 rpm |
| Sound pressure level | LpA :73 dB(A), K=3.0 |
| Measured sound power level | LwA :84.8 dB(A) |
| Maximum vibration | ≤2.5 m/s², K=1.5 |
| Grassbox capacity | 55 L |
| Net weight | 54.0 lbs (24.5 kg) |
| Spare Blade | 2920407 |
| Battery | Lithium-ion |
| Model number | 2918307 / 2918407 |
| Battery charger | |
| Model number | 2918507 |
| Double-insulated construction |
DESCRIPTION
- Power lever
- Motor control cable
3.Start button - Upper handle
- Lower handle
- Height adjustment lever
- Battery door
- Front wheel
- Rear wheel
- Grassbox
- Battery (not included)
- Handle knob
- Knob
- Bolt
- Grassbox handle
- Rear door
- Rear discharge opening
- Door rod
- Hooks
-
Blade
-
Motor shaft
- Fan
- Blade bolt
- Blade posts
- Battery release button
- Mulching plug
- Side discharge deflector
- Side discharge door
- Block of wood (not included)
- Wrench (not included)
- Battery key
WARNING
Use of any other battery packs may result in a risk of fire, electric shock, or injury to persons.
KNOW YOUR LAWN MOWER
See figure 1.
The safe use of the product requires an understanding of the information on the tool and in this operator's manual as well as a knowledge of the project you are attempting. Before use of this product, familiarize yourself with all operating features and safety rules.
BATTERY METER
The battery meter measures the amount of charge remaining in the battery.
GRASSBOX
The grassbox collects grass clippings and prevents them from being discharged across your lawn as you mow.
HEIGHT ADJUSTMENT LEVER
The height adjustment lever provides cutting height adjustments.
MOTOR CONTROL CABLE
The motor control cable, located on the upper handle of the mower, engages and disengages the motor and blade.
MULCHING PLUG
Your mower is equipped with a mulching plug that covers the rear discharge opening, which allows the mower blade to cut and recut for finer clippings.
SIDE DISCHARGE DEFLECTOR
Use the side discharge deflector on your mower when the grass is too high to mulch or when side discharging is preferred. The grass clippings produced when using the side discharge deflector are noticeably larger than
English (Original Instructions)
those produced when using the mulching plug and side mulching plate.
SIDE DISCHARGE DOOR
Your mower is equipped with a door that covers the side discharge opening, which allows the mower blade to cut and recut the grass for finer clippings if the mulching plug is engaged, or otherwise sends the grass clippings to the collection bag.
ASSEMBLY
UNPACKING
This product requires assembly.
- Carefully remove the product and any accessories from the box. Make sure that all items listed in the packing list are included.
WARNING
Do not use this product if any parts on the packing list are already assembled to your product when you unpack it. Parts on this list are not assembled to the product by the manufacturer and require customer installation. Use of a product that may have been improperly assembled could result in serious personal injury.
Inspect the product carefully to make sure no breakage or damage occurred during shipping.
- Do not discard the packing material until you have carefully inspected and satisfactorily operated the product.
If any parts are damaged or missing, please call your Greenworks tools service centre for assistance.
PACKING LIST
Lawn mower
Battery key
Grassbox
Mulching plug
Side discharge deflector
Operator's manual
Knobs
Bolts
WARNING
If any parts are damaged or missing do not operate this product until the parts are replaced. Using a product with damaged or missing parts could result in serious personal injury.
WARNING
Do not attempt to modify this product or create accessories not recommended for use with this product. Any such alteration or modification is misuse and could result in a hazardous condition leading to possible serious personal injury.
WARNING
Do not insert battery key until assembly is complete and you are ready to mow. Failure to comply could result in accidental starting and possible serious personal injury.
WARNING
To prevent accidental starting that could cause serious personal injury, always remove the battery pack from the product when assembling parts.
WARNING
Never operate the mower without the proper safety devices in place and working. Never operate the mower with damaged safety devices. Operation of this product with damaged or missing parts could result in serious personal injury.
UNFOLDING AND ADJUSTING LOWER HANDLE
See figure 2.
Pull and rotate the handle knobs 90^ on both sides to loosen the lower handles on both sides.
- Move the lower handles to the operating position. You may raise or lower the handle to a position comfortable for you. There are 3 positions for you to choose. Release the handle knobs to lock the lower handle into position.
NOTE: Ensure both sides are set at the same position for proper assembly.
INSTALLING THE UPPER HANDLE
See figure 3.
Align the mounting holes on the upper handle and the lower handle. Insert the carriage bolts and use the knobs to tighten them. Repeat the operation on the
English (Original Instructions)
other side.
INSTALLING THE GRASSBOX
See figure 4.
- Lift the rear discharge door.
- Lift the grass catcher by its handle and place under the rear discharge door so that the hooks on the grass catcher are seated on the door rod.
- Release the rear discharge door. When installed correctly, the hooks on the grass catcher will extend through the openings on the rear discharge door.
INSTALLING THE MULCHING PLUG
See figure 5.
- Lift and hold up the rear discharge door.
- Grasp the mulching plug by its handle and insert it at a slight angle, as shown.
Push the mulching plug securely into place.
Lower the rear discharge door.
INSTALLING SIDE DISCHARGE DEFLECTOR
See figure 6.
NOTE: When using the side discharge deflector, do not install the grassbox. The mulching plug should remain installed.
- Lift the side discharge door.
Align the hooks on the deflector with the hinge rod on the underside of the door.
Lower the deflector until the hooks are secured on the mulch door hinge rod. - Release the deflector and side discharge door.
SETTING BLADE HEIGHT
See figure 7.
When shipped, the wheels on the mower are set to a low-cutting position. Before using the mower for the first time, adjust the cutting position to the height best suited for your lawn. The average lawn should be between 38mm and 51 mm during cool months and between 51 mm and 70 mm during hot months.
To adjust the blade height
To raise the blade height, grasp the height adjustment lever and move it toward the back of the mower.
To lower the blade height, grasp the height adjustment lever and move it toward the front of the mower.
OPERATION
WARNING
Do not allow familiarity with products to make you careless. Remember that a careless fraction of a second is sufficient to inflict serious injury.
WARNING
Always wear eye protection. Failure to do so could result in objects being thrown into your eyes resulting in possible serious injury.
WARNING
Do not use any attachments or accessories not recommended by the manufacturer of this product. The use of attachments or accessories not recommended can result in serious personal injury.
WARNING
Always inspect mower for missing or damaged parts and blade for damage, uneven, or excessive wear prior to use. Using a product with damaged or missing parts could result in serious personal injury.
- Do not tilt the lawn mower when starting the engine or switching on the motor, unless the lawn mower has to be tilted for starting. In this case, do not tilt it more than absolutely necessary and lift only the part which is away from the operator.
- Do not start the engine when standing in front of the discharge chute.
- Do not put hands or feet near or under rotating parts. Always keep clear of the discharge opening.
For complete charging instructions, refer to the operator's manual for the battery packs and chargers listed in the specifications section.
TO INSTALL BATTERY PACK
See figure 8.
- Lift and hold up the battery door.
Align the battery with the mower's battery port.
Make sure the battery release button snaps in place and that battery is fully seated and secure in the mower before beginning operation.
Insert the battery key.
If the machine is not going to be used immediately, do not insert the battery key
English (Original Instructions)
Close the door.
TO REMOVE BATTERY PACK
See figure 8.
- Release the power lever to stop the product.
- Open the battery door to access the battery compartment.
Remove the battery key.
Press the battery release button on the mower. This will cause the battery to raise out of the tool slightly.
Remove battery pack from the product.
STARTING/STOPPING THE MOWER
See figure 9.
Press and hold the safety lock-out button.
Pull the power lever upward to the handle to start the mower and release the safety lock-out button.
To stop the mower, release the power lever.
NOTE: A high-pitched noise and sparking may occur as the electric motor decelerates. This is normal.
MOWING TIPS
Make sure the lawn is clear of stones, sticks, wires, and other objects that could damage the lawn mower blades or motor. Do not mow over property stakes or other metal posts. Such objects could be accidentally thrown by the mower in any direction and cause serious personal injury to the operator and others.
For a healthy lawn, always cut off one-third or less of the total length of the grass.
- Do not cut wet grass, it will stick to the underside of the deck and prevent proper bagging or mulching of grass clippings.
New or thick grass may require a narrower cut or a higher cutting height.
- Clean the underside of the mower deck after each use to remove grass clippings, leaves, dirt, and any other accumulated debris.
- When cutting long grass, reduce walking speed to allow for more effective cutting and a proper discharge of the clippings.
NOTE: Always stop mower, allow blades to completely stop, and remove the battery key before cleaning underneath the mower.
SLOPE OPERATION
A WARNING
Slopes are a major factor related to slip and fall accidents that can result in severe injury. Operation on slopes requires extra caution. If you feel uneasy on a slope, do not mow it. For your safety, do not attempt to mow slopes greater than 15 degrees.
Mow across the face of slopes, never up and down. Exercise extreme caution when changing direction on slopes.
Watch for holes, ruts, rocks, hidden objects, or bumps which can cause you to slip or trip. Tall grass can hide obstacles. Remove all objects such as rocks, tree limbs, etc., which could be tripped over or thrown by the blade.
Always be sure of your footing. A slip and fall can cause serious personal injury. If you feel you are losing your balance, release the power lever immediately.
Do not mow near drop-offs, ditches, or embankments; you could lose your footing or balance.
- Stop mower, allow blade to completely stop, and remove battery key.
Lift the rear door. - Lift the grassbox by its handle to remove from mower.
Empty grass clippings. - Lift the rear door and reinstall the grassbox as described earlier in this manual.
MAINTENANCE
WARNING
Before performing any maintenance, make sure the mower battery and battery key are removed to avoid accidental starting and possible serious personal injury.
WARNING
To prevent accidental start-up or unauthorized use, the cordless lawn mower is equipped with a removable safety key. To completely disable the mower, the safety key should be removed and kept in a place away from the mower and out of the reach of children.
English (Original Instructions)
WARNING
When servicing, use only authorised replacement parts. Use of any other parts may create a hazard or cause product damage.
WARNING
Keep the motor and battery compartments free from grass, leaves or excessive grease. This will help reduce the risk of fire.
GENERAL MAINTENANCE
Before each use, inspect the entire product for damaged, missing, or loose parts such as screws, nuts, bolts, caps, etc.
Tighten securely all fasteners and caps and do not operate this product until all missing or damaged parts are replaced. Please call Greenworks tools customer service for assistance. Avoid using solvents when cleaning plastic parts. Most plastics are susceptible to damage from various types of commercial solvents and may be damaged by their use. Use clean cloths to remove dirt, dust, oil, grease, etc.
WARNING
To reduce the risk of damage and danger, never clean the tool with pressure washer or under running water.
WARNING
Store indoors only. Always remove the battery from mower and charger when cleaning or storing the tool.
WARNING
Do not at any time let brake fluids, gasoline, petroleum-based products, penetrating oils, etc., come in contact with plastic parts. Chemicals can damage, weaken, or destroy plastic which may result in serious personal injury.
Periodically check all nuts and bolts for proper tightness to ensure safe operation of the mower.
Wipe the mower clean with a dry cloth occasionally. Do not use water.
LUBRICATION
All of the bearings in this product are lubricated with a sufficient amount of high grade lubricant for the life of the unit under normal operating conditions. Therefore, no further bearing lubrication is required.
A WARNING
Always protect hands by wearing heavy gloves and/or wrapping the cutting edges of the blade with rags and other material when performing blade maintenance. Contact with the blade could result in serious personal injury.
WARNING
Do not lubricate any of the wheel components. Lubrication may cause the wheel components to fail during use, which could result in serious personal injury to the operator and/or mower or property damage.
REPLACING THE CUTTING BLADE
See figure 11-12.
NOTE: Only use authorised replacement blades. Replace worn or damaged blades and bolts in sets to preserve balance.
- Stop the motor and remove the battery key. Allow blade to come to a complete stop.
Remove the battery pack.
Turn the mower on its side. - Wedge a block of wood between the blade and mower deck to prevent the blade from turning.
- Loosen the blade bolt by turning it counterclockwise (as viewed from bottom of mower) using a 27mm wrench or socket (not provided).
Remove the blade bolt and blade. - Place the new blade on the shaft. Ensure blade is properly seated with shaft going through center blade hole and the two blade posts on the fan inserted into their respective holes on the blade. Make sure it is installed with the curved ends pointing up toward the mower deck and not down toward the ground. When seated properly, the blade should be flat against the fan.
Thread the blade bolt on the shaft and finger tighten.
Torque the blade bolt down clockwise using a torque wrench (not provided) to ensure the bolt is properly tightened. The recommended torque for the blade bolt is 62.5 71.5 kgfcm (350-400 in.-lb.).
ENVIRONMENTAL PROTECTION
Environmental protection should be a priority of considerable importance when using the machine, for the benefit of both social coexistence and the environment in which we live. Try not to cause any disturbance to the surrounding area.
- Scrupulously comply with local regulations for the disposal of packaging, deteriorated parts or any
English (Original Instructions)
elements with a strong environmental impact; this waste must not be disposed of as normal waste, it must be separated and taken to specified waste disposal centres where the material will be recycled.
- Scrupulously comply with local regulations for the disposal of waste materials after mowing.
At the time of decommissioning, do not pollute the environment with the machine, but hand it over to a disposal centre, in accordance with the local laws in force.
TROUBLESHOOTING
| Problem | Possible cause | Solution |
| Handle is not in position. | Carriage bolts are not seated properly. | Adjust the height of the handle and make sure the carriage bolts are seated properly. |
| Mower is not starting. | Battery is low in charge. | Charge the battery. |
| Battery is either inoperable or will not take a charge. | Replace the battery. | |
| The battery key is not inserted. | Insert the battery key. | |
| Mower is cutting grass unevenly. | Lawn is rough or uneven or cutting height not set properly. | Move the wheels to a higher position. All wheels must be placed in the same cutting height for the mower to cut evenly. |
| Mower is not mulching properly. | Wet grass clippings are sticking to the underside of the deck. | Wait until the grass dries before mowing. |
| Mower is hard to push. | High grass, rear of mower housing and blade are dragging in heavy grass, or cutting height too low. | Raise the cutting height. |
| Mower is not bagging properly. | Cutting height is set too low. | Raise the cutting height. |
| Mower is vibrating at higher speed. | Blade is unbalanced, excessively or unevenly worn. | Replace the blade. |
| Motor shaft is bent. | Stop the motor, remove isolator key and battery, disconnect the power source, and inspect for damage. Have it repaired by an authorised service center before restarting. | |
| Motor stops while cutting. | Cutting height is set too low. | Raise the cutting height. |
| Battery has no power. | Charge the battery. |
If these solutions do not solve the problem contact your authorised service dealer.
DIE INSTALLATION DES OBEREN GRIFS
Siehe Abbildung 3.
TEXHINHECKNE XAPAKTEPNCNTNKN
TEXHUNHECKOE O5CJNYXNBAHNE
A OCTOPOXHO
Ipepe npOBeHnEM TexHnueckOrO 6cNynBaHHaYbEduTeCb, Yo 0bapera raOHOKoINKn INpEdoxpanHntelbHbI KIOU H3BNeHuEBO N36eXaHHe CnuHnHO 3aNyCa n cepbe3HbTxPabM.
A OCTOPOXHO
ДлпnpedOTbpaueHnCnyaHOrO nyca nHn HecaHKUHOHPOBaHHORN cNcNoIb3OBaHnH bEsCpOBoDHaNra RaOHOKOCINKa OCHaSeHc CbEMHbIM npedoxpanHeJIbHbM KJIYChOM. YToBbI pONHoCTbIO BbKlIOuHTb RaOHOKOCINKy, HeOBxOdIMo I3BVeB npedoxpanHeJIbHbI KJIHyO XpaHInI bE rDaJIb OT raOHOKOCINKn B HeIOCTyHOM ДЯDETe MeCTe.
OCTOPOXHO
Ipi npoBeDeHn TexHnueCKOrO 6cNpyKBaHnna IcNoJIb3yIte ToJIbKO peKOMeHIOBaHnble 3aNCACTI. IcNoJIb3OBAHnne IIObIX dpyrnx qactey MoKeT cozdaBabTo anachOCTb INI pNpHHaTb NobpeXdHeHn 3dEJIIN.
OCTOPOXHO
OuHauTe DnuratEn b OTCek AkKymyTApTOHO 6batapeoT TpaBbl, NcTbeB N LInUHe CMa3Kn. 3To nOMOXET CHN3NTb ONaCHOCTb BO3rOpAHH.
OBUCEE OBCJYKUBAHNE
Ipepe kaxdbim nCnoB3oBaHmE npOBepbTe IHCTpyMeHT na OTCYCTBnE NobPexDeHn, HeIOCTaOuXnx IINOCnabxN Detanei (BnHTbl, raink, 60NTbl, KpblxN t.n. NaExJHO 3aTnHTE Bce KpEeHnA n KpbIckn Hne Nob3yIteCBnCTpyMeHToM Do 3aMeBnBCex YTepaHHbxI INn NobPexDeHbX Detanei. 3a KOHCynbTaunieO6baaIaeTcB C Jny6by pa 60bTI kIne HTacMN KompanAHn Greenworks tools. Pnp OChCTke pactMaccBObIX Detanei He DOnyckaetcN cNoB3oBaTb pactBOpHTen. BonblHnCTBO nPaCTMaCC BOCPnIMMuHBO, QTO6bl NOpeDnTbcr OT pa3nUHbIX TIOB KOMMepueckNX pactBOPHTenE n MoKET bbl NobPexDeHO INcNoB3oBaHmE. Ipn OChCTKn OT pr8n, PbII, MaCnA, Cma3Kn I.T.n. NcNoB3yIte npOTnpOCHyTOprkky.
Pycckni (IpebeoN3 nepBOHaayJIbHbIX nHCTpyKcN)
A OCTOPOXHO
TObbCHN3NTbPnCK NOBpeKdEHHa N BO3HKnHOBeHHa ONaCHOcHTyaLm, HNKoTda He OChuAte YCTPOCTBO BOIOI IOD DaBHeHMe IIN IOI pTOOHOH BOIOI.
OCTOPOXHO
XpaHnTb TOnIbKO B NOMeUeHmN. Bcerda n3BNeKaJTe
aKkMyJrTOp n3 rAzoHOKOcInKn n 3apRdHOrO
yCTPOJCTBa nepeD ONUCTKo I XpaHeHEm
HHTCPymeNTa.
A OCTOPOXHO
He donyckaite B3aHMOeIcTBnA TopMo3HbIX
XnKIOCTe,6EH3nHa,HeFTeNPoDyKTOB,pnpNTOCHbIX
MaceN T.I.C pIaTMcCOBbIMn DeTaJIaMn. XmNKaTbI
MOrYT NOBpeINtB,OCNaOHTb IIN pa3pyuINb
PIIaTMcACy, YTO MOKeT npNBecTn K TjAKm TEneChbIM
NOBpeXJeHnAM.
PepnoDnueckn npoBepaB BCE 60NTbI n 3aDbMKNn dnn HADnEaenn pNTOHcTN, TTObI rapaHTnpOBaTb 6e3onapChoe DeiCTBME KocInKn.
BbItnpaTb KocuNky, YnCToI n cyxO TkaHbIO INOrda. He IcNoJIb30BaTb BOy.
CMA3bIBAHNE
BceOTHOSeHnB3TOMN3DeJIN-CMA3aHbICDOCTaOHTHBIM KOIJIueCTBOM CMA3KN BblCUEFO KaueCTBa IJRA XIN3HN eINHnIbI NOD HOPMaJIbHbIM 3KCNJIyatauONHHbIM pexmAMn. P03ToM, NIKAKA DaJIbHeJsa CMA3Ka OTHOSeHnE, He Tpe6yETc.
A OCTOPOXHO
Bcerda 3aunntb pykn, HadeBa Tjxekblte nepyatkn n-1n OeptlbBra J3BmTprkamn N Dpyrnm MATEpnaonm np BblnoHneHm OcJnyKBAHn J3Bn. B pe3ynbTa KOTAKta C pexuyim J3BmE MoXHO nonynbT cepbe3Hyu TpaBMY.
A OCTOPOXHO
He Cma3bIbA Tb HnKaKoN 13 KOMNoHErTOB KOJcA. Cm3a Ka MoEeT npIBeCTn K c6OHO B pa6Ote KOMNoHErTOB KOJcA BO BpEma CTpnXkU, YTo MOKeT npIBeCTn K cepEbeHOr TpABMe OpeaTopa N/Inn NOBpeXdEHNO raOHIOKOCINIK INI DpyTOrO IMYueCTBa.
3AMEHA COKPAUJAIOJIERO JIe3BnA
CM.puc.11-12.
IPMMEYAHHE: NcnoB3yTe TOnbKO pa3peWHeHbIe 3aNaChIbe pExyUne Ne3BnI. 3aMeHNrte I3HOseHHbIe IIN NOpBeKdHeHbIe pExyUne Ne3BnI n BoNTbI B KOMPNeKeTc, yTObI obecNtB baHaHcnPOBky.
OctahOBITE DBRatteN N 3BNEKITnpedoxpaHntelbNbKnIOU. DoxTeCb noHoro octaHOpeXyUeIeroJe3Bry.
CHIMITE aKcymyTOpHyo 6aTapeio.
IIOBepHytb KocNIky Ha ee cTopoHy.
BtncHyb 6nok dpBeecInbI MeXy Ie3BnEIM nanyBoKocnIKu, YTObI ppeoTbpaTb Ie3Bne O npebpaueHn.
IcnoJb3yra KIOUHa 27 MM (He BXOJNT B KOMNKeT NOCTABK), OcnaB6te 6oNT NINbHORO DnCKa NOBOPOT mPONIB YACOB0C TpeJIck, ECNI CMOTpeTb C HIXKHeJ ChACTn Ra3OHOKOcNIKK.
CHIMITE 6oTn PInbHoro Dncka n cam Dnck.
YCTAHOBITE HOBBI NINHBHII DnCK Ha BAN. Y6eINTecB, YTO NINbHbN DnCK npABINbHO CnHT Ha BABy, nPOXoJaIeUmeYe3 ZeHTpaJIbHOEOTBPcTne NINbHorO DnCKa, INBa WtBIpRA HA BeHTNIATope BCTABHeHb BO CootBTCTBHyOJIne OTBEpCTNHa NINbHOM DnCKe. Y6eINTecB, YTO OH YCTAHOBNeH C 3aHTyTbIMM KOHAMN BBEPx B CTOPOHY OCHOBAHNA ra3OHOKOCINiK, a He BnH3 K 3emJNE. Ppi npABInbHOM paMaeeHHn HapRotVB BEHTNIaTopa DoJnxHa HaxODNTcb PnOckA qACTb DnCKa.
HaxNBITE 60NT NINbHoro DnCKa Ha BaJI N 3aTHeIe nablcaM.
3aTAHIne raKy peKyuIero ne3Bnra raeHbIM KIOUOM (He npinaraetc), BpaAaNo YacOBoi CTpeNke, yTObI o6ceNHTb HAdEkaUy 3aTAKky BoNTa. PekomeHdyEmbki KyTAAm MOMENT npN 3aTARINBAHN raIK peKyuIero ne3Bna coCTabJIeT 62,5~71,5 Krc-CM (350-400 dIOHMoB/phiNT).
OXPANA OKPYXAIIOJIEN CPEIbI
OxpaHa OkpykaUoIeI cpebl DoJlnKha YBJIbTbCBy CyueCTBeHHbIM I nepBOoOpePdHbIM acNEKToM npINb3OBaHN MaunHO, BO 6Lnaro YelNoBeecckoRo O6IeCTBa I OKpykaUoIeI cpebl, B KOTOpO MblKJBEM. CtapaiTeB He beCnOKoHTb OkpykaOnix.
Ctporo coBnIouaIte MeCTbIe HOpMbI NO yTINH3aunu ynakOBKIM, MAcEN, 6EHNHa, fNbIbTPOB, NOPBKeJdEHbIX qAteh IIN NIObXbI ZIEMeHTOB CO 3NaHTeJIbHbIM BInJHmHc MaOKpyKaHOUy CpeDy; 3TN OTXObl He DOnJHXbl BbIbpaCbIbTaBcRc C bIbTOBbIM MycopoM, aCoBupatbcr OTeJbnHO n IpePeJaBaTbCS B CneuaIaNbIbHe ceHTpbI c6opa OTXoob, BInONJIraUxne nxpepeabotkY.
Ctporo coBIOdaTe DeIcTByIOUne Ha MeCTHOM yPOBHe npaBnla no BbIO3y OTXoOB pa6Obl.
Iocne 3aBepseHnna cpoKa cnkybMaMHHe Bb6paCbBaIe ee,a o6paTntecb B ceHTp C6opa OTXoOB B COOTCTBmC DeNCTBYOUM MeCTHbIM 3aKHOODaTeNbCTBOM.
Pycckni (IpebeoN3 nepBOHaayJIbHbIX nHCTpyKcN)
ПОИСКΗЕЦПавноcteɪ
| ПюбLEMа | Возможные пленnersы | Реценье | |
| Ручка не в hyжном поожени. | Бочь с Квашиат的基础上 Рожимовский садл.Tондгшема obразсм. | Оtrepingурий.Tу bucoу руковские и убадпесь, что必将 Квашиат的基础上 Рожимовский садл.Tрразсм. | |
| Газонокосник не залуckaetс. | Низкий уравень зарая батер. | Зардente Батер. | |
| Батерся посторгий посторгий Батер. | ЗаменITE akку муларогун Батер. | ||
| Пробхантынький клич Н Вставл end. | Вставл Тождоста рожимовские Клич. | ||
| Газонокосник несявно Стrelжет Trаву. | Трава raэда щек_STКУ Или Н electвна лобо Н electвны Вьбрана ВьсOTа Стrelжки. | Пелемосте Кoleca в поалей Кссokoe рожимени. Ддя обесения ровий Стrelжки СЕчыпег Кoleca raэoshokosлдддддддддддддддддддддддддддддддддддддддддддддддддддддддддддддддддддддддддддддддддддддддддддддддддддд徳. | |
| Газонокосник позвдит Мульчировке Нэндөхашил образсм. | Орешик мокрий trавы пленлaitотс похш� STОТОЛС OCHOHOBAHЯ Газонокослк. | Прождце чим.Tраву, похдоста Chry.Ду. Ду. Ду. Ду. Ду. Ду. Ду. Ду. Ду. Ду. Ду. Ду. Ду. Ду. Ду. Ду. Ду. Ду. Ду. Ду. Ду. Ду. Ду. Ду. Ду. Ду. Ду. Ду. Ду. Ду. Ду. Ду. Ду. Ду. DA. DA. DA. DA. DA. DA. DA. DA. DA. DA. DA. DA. DA. DA. DA. DA. DA. DA. DA. DA. DA. DA. DA. DA. DA. DA. DA. DA. DA. DA. DA. DA. DA. DA. DA. DA. DA DA DA DA DA DA DA DA DA DA DA DA DA DA DA DA DA DA DA DA DA DA DA DA DA DA DA DA DA DA DA DA DA DA DA DA DA DA DA DA DA DA DA DA DA DA DA DA DA DA DA | Зелочь.Tу buceь. Ду. Ду. Ду. Ду. Ду. Ду. Ду. Ду. Ду. Ду. Ду. Ду. Ду. Ду. Ду. Ду. DA DA DA DA DA DA DA DA DA DA DA DA DA DA DA DA DA DA DA DA DA DA DA DA DA DA DA DA DA DA DA DA DA DA DA DA DA DA DA DA DA DA DA DA DA DA DA DA DA D DA DA DA DA DA DA DA DA DA DA DA DA DA DA DA DA DA DA DA DA DA DA DA DA DA DA DA DA DA DA DA DA DA DA DA DA DA DA DA DA DA DA DA DA DA DA DA DA DA D. DA DA DA DA DA DA DA DA DA DA DA DA DA DA DA DA DA DA DA DA DA DA DA DA DA DA DA DA DA DA DA DA DA DA DA DA DA DA DA DA DA DA DA DA DA DA DA DA DA MA DA DA DA DA DA DA DA DA DA DA DA DA DA DA DA DA DA DA DA DA DA DA DA DA DA DA DA DA DA DA DA DA DA DA DA DA DA DA DA DA DA DA DA DA DA DA DA DA DA MALEHKA. DA DA DA DA DA DA DA DA DA DA DA DA DA DA DA DA DA DA DA DA DA DA DA DA DA DA DA DA DA DA DA DA DA DA DA DA DA DA DA DA DA DA DA DA DA DA DA DA DA BA DA DA DA DA DA DA DA DA DA DA DA DA DA DA DA DA DA DA DA DA DA DA DA DA DA DA DA DA DA DA DA DA DA DA DA DA DA DA DA DA DA DA DA DA DA DA DA DA DA NA DA DA DA DA DA DA DA DA DA DA DA DA DA DA DA DA DA DA DA DA DA DA DA DA DA DA DA DA DA DA DA DA DA DA DA DA DA DA DA DA DA DA DA DA DA DA DA DA DA DMA DA DA DA DA DA DA DA DA DA DA DA DA DA DA DA DA DA DA DA DA DA DA DA DA DA DA DA DA DA DA DA DA DA DA DA DA DA DA DA DA DA DA DA DA DA DA DA DA DA DM DA DA DA DA DA DA DA DA DA DA DA DA DA DA DA DA DA DA DA DA DA DA DA DA DA DA DA DA DA DA DA DA DA DA DA DA DA DA DA DA DA DA DA DA DA DA DA DA DA DN DA DA DA DA DA DA DA DA DA DA DA DA DA DA DA DA DA DA DA DA DA DA DA DA DA DA DA DA DA DA DA DA DA DA DA DA DA DA DA DA DA DA DA DA DA DA DA DA DA DNA DA DA DA DA DA DA DA DA DA DA DA DA DA DA DA DA DA DA DA DA DA DA DA DA DA DA DA DA DA DA DA DA DA DA DA DA DA DA DA DA DA DA DA DA DA DA DA DA DA DR DR DR DR DR DR DR DR DR DR DR DR DR DR DR DR DR DR DR DR DR DR DR DR DR DR DR DR DR DR DR DR DR DR DR DR DR DR DR DR DR DR DR DR DR DR DR DR DR DR GR GR GR GR GR GR GR GR GR GR GR GR GR GR GR GR GR GR GR GR GR GR GR GR GR GR GR GR GR GR GR GR GR GR GR GR GR GR GR GR GR GR GR GR GR GR GR GR GR GR FR GR GR GR GR GR GR GR GR GR GR GR GR GR GR GR GR GR GR GR GR GR GR GR GR GR GR GR GR GR GR GR GR GR GR GR GR GR GR GR GR GR GR GR GR GR GR GR GR GR DR DR DR DR DR DR DR DR DR DR DR DR DR DR DR DR DR DR DR DR DR DR DR DR DR DR DR DR DR DR DR DR DR DR DR DR DR DR DR DR DR DR DR DR DR DR DR DR DR Dr DR DR DR DR DR DR DR DR DR DR DR DR DR DR DR DR DR DR DR DR DR DR DR DR DR DR DR DR DR DR DR DR DR DR DR DR DR DR DR DR DR DR DR DR DR DR DR DR DR dr DR DR DR DR DR DR DR DR DR DR DR DR DR DR DR DR DR DR DR DR DR DR DR DR DR DR DR DR DR DR DR DR DR DR DR DR DR DR DR DR DR DR DR DR DR DR DR DR DR R DR DR DR DR DR DR DR DR DR DR DR DR DR DR DR DR DR DR DR DR DR DR DR DR DR DR DR DR DR DR DR DR DR DR DR DR DR DR DR DR DR DR DR DR DR DR DR DR DR D DR DR DR DR DR DR DR DR DR DR DR DR DR DR DR DR DR DR DR DR DR DR DR DR DR DR DR DR DR DR DR DR DR DR DR DR DR DR DR DR DR DR DR DR DR DR DR DR DR DL DL DL DL DL DL DL DL DL DL DL DL DL DL DL DL DL DL DL DL DL DL DL DL DL DL DL DL DL DL DL DL DL DL DL DL DL DL DL DL DL DL DL DL DL DL DL DL DL DL DR DR DR DR DR DR DR DR DR DR DR DR DR DR DR DR DR DR DR DR DR DR DR DR DR DR DR DR DR DR DR DR DR DR DR DR DR DR DR DR DR DR DR DR DR DR DR DR DR HR 100% HR 95% HR 90% HR 85% HR 75% HR 65% HR 55% HR 45% HR 35% HR 25% HR 20% HR 15% HR 10% HR 8% HR 6% HR 5% HR 4% HR 3% HR 2% HR 1% HR 0% HR 0% HR 0% HR 0% HR 0% HR 0% HR 0% HR 0% HR 0% HR 0% HR 0% HR 0% HR 0% HR 0% HR 0% HR 0% HR 0% HR 0% HR 0% HR 0% HR 0% HR 0% HR 0% HR 0% HR 0% HR 1% HR 1% HR 1% HR 1% HR 1% HR 1% HR 1% HR 1% HR 1% HR 1% HR 1% HR 1% HR 1% HR 1% HR 1% HR 1% HR 1% HR 1% HR 1% HR 1% HR 1% HR 1% HR 1% HR 1% HR 1% HR 0% HR 0% HR 0% HR 0% HR 0% HR 0% HR 0% HR 0% HR 0% HR 0% HR 0% HR 0% HR 0% HR 0% HR 0% HR 0% HR 0% HR 0% HR 0% HR 0% HR 0% HR 0% HR 0% HR 1% HR 0% HR 0% HR 0% HR 0% HR 0% HR 0% HR 0% HR 0% HR 0% HR 0% HR 0% HR 0% HR 0% HR 0% HR 0% HR 0% HR 0% HR 0% HR 0% HR 0% HR 0% HR 0% HR 0% HR 20% HR 20% HR 20% HR 20% HR 20% HR 20% HR 20% HR 20% HR 20% HR 20% HR 20% HR 20% HR 20% HR 20% HR 20% HR 20% HR 20% HR 20% HR 20% HR 20% HR 0% HR 0% HR 0% HR 0% HR 0% HR 0% HR 0% HR 0% HR 0% HR 0% HR 0% HR 0% HR 0% HR 0% HR 0% HR 0% HR 0% HR 0% HR 0% HR 0% HR 0% HR 0% HR 0% HR 0% HR 0% HR 0% HR 0% HR 0% HR 0% HR 0% HR 0% HR 0% HR 0% HR 0% HR 0% HR 0% HR 0% HR 0% HR 0% HR 0% HR 0% HR 0% HR 0% HR 0% HR 0% HR 0% HR 0% HR 0% HR 0% HR100% HR100% HR100% HR100% HR100% HR100% HR100% HR100% HR100% HR100% HR100% HR100% HR100% HR100% HR100% HR100% HR100% HR100% HR100% HR100% HR110% HR110% HR110% HR110% HR110% HR110% HR110% HR110% HR110% HR110% HR110% HR110% HR110% HR110% HR110% HR110% HR110% HR110% HR110% HR110% HR100% HR100% HR100% HR100% HR100% HR100% HR100% HR100% HR100% HR100% HR100% HR100% HR100% HR100% HR100% HR100% HR100% HR100% HR100% HR120% HR120% HR120% HR120% HR120% HR120% HR120% HR120% HR120% HR120% HR120% HR120% HR120% HR120% HR120% HR120% HR120% HR120% HR120% HR120% HR110% HR110% HR110% HR110% HR110% HR110% HR110% HR110% HR110% HR110% HR110% HR110% HR110% HR110% HR110% HR110% HR110% HR110% HR110% HR120% HR120% HR120% HR120% HR120% HR120% HR120% HR120% HR120% HR120% HR120% HR120% HR120% HR120% HR120% HR120% HR120% HR120% HR120% HR180% HR180% HR180% HR180% HR180% HR180% HR180% HR180% HR180% HR180% HR180% HR180% HR180% HR180% HR180% HR180% HR180% HR180% HR180% HR180% HR120% HR120% HR120% HR120% HR120% HR120% HR120% HR120% HR120% HR120% HR120% HR120% HR120% HR120% HR120% HR120% HR120% HR120% HR120% HR160% HR160% HR160% HR160% HR160% HR160% HR160% HR160% HR160% HR160% HR160% HR160% HR160% HR160% HR160% HR160% HR160% HR160% HR160% HR160% HR180% HR180% HR180% HR180% HR180% HR180% HR180% HR180% HR180% HR180% HR180% HR180% HR180% HR180% HR180% HR180% HR180% HR180% HR180% HR160% HR160% HR160% HR160% HR160% HR160% HR160% HR160% HR160% HR160% HR160% HR160% HR160% HR160% HR160% HR160% HR160% HR160% HR160% HR120% HR120% HR120% HR120% HR120% HR120% HR120% HR120% HR120% HR120% HR120% HR120% HR120% HR120% HR120% HR120% HR120% HR120% HR120% HR140% HR140% HR140% HR140% HR140% HR140% HR140% HR140% HR140% HR140% HR140% HR140% HR140% HR140% HR140% HR140% HR140% HR140% HR140% HR140% HR160% HR160% HR160% HR160% HR160% HR160% HR160% HR160% HR160% HR160% HR160% HR160% HR160% HR160% HR160% HR160% HR160% HR160% HR160% HR140% HR140% HR140% HR140% HR140% HR140% HR140% HR140% HR140% HR140% HR140% HR140% HR140% HR140% HR140% HR140% HR140% HR140% HR140% HR120% HR120% HR120% HR120% HR120% HR120% HR120% HR120% HR120% HR120% HR120% HR120% HR120% HR120% HR120% HR120% HR120% HR120% HR120% HR130% HR130% HR130% HR130% HR130% HR130% HR130% HR130% HR130% HR130% HR130% HR130% HR130% HR130% HR130% HR130% HR130% HR130% HR130% HR130% HR140% HR140% HR140% HR140% HR140% HR140% HR140% HR140% HR140% HR140% HR140% HR140% HR140% HR140% HR140% HR140% HR140% HR140% HR140% HR150% HR150% HR150% HR150% HR150% HR150% HR150% HR150% HR150% HR150% HR150% HR150% HR150% HR150% HR150% HR150% HR150% HR150% HR150% HR150% HR180% HR180% HR180% HR180% HR180% HR180% HR180% HR180% HR180% HR180% HR180% HR180% HR180% HR180% HR180% HR180% HR180% HR180% HR180% HR140% HR140% HR140% HR140% HR140% HR140% HR140% HR140% HR140% HR140% HR140% HR140% HR140% HR140% HR140% HR140% HR140% HR140% HR140% HR180% HR180% HR180% HR180% HR180% HR180% HR180% HR180% HR180% HR180% HR180% HR180% HR180% HR180% HR180% HR180% HR180% HR180% HR180% HR150% HR150% HR150% HR150% HR150% HR150% HR150% HR150% HR150% HR150% HR150% HR150% HR150% HR150% HR150% HR150% HR150% HR150% HR150% HR160% HR160% HR160% HR160% HR160% HR160% HR160% HR160% HR160% HR160% HR160% HR160% HR160% HR160% HR160% HR160% HR160% HR160% HR160% HR150% HR150% HR150% HR150% HR150% HR150% HR150% HR150% HR150% HR150% HR150% HR150% HR150% HR150% HR150% HR150% HR150% HR150% HR150% HR140% HR140% HR140% HR140% HR140% HR140% HR140% HR140% HR140% HR140% HR140% HR140% HR140% HR140% HR140% HR140% HR140% HR140% HR140% HR130% HR130% HR130% HR130% HR130% HR130% HR130% HR130% HR130% HR130% HR130% HR130% HR130% HR130% HR130% HR130% HR130% HR130% HR130% HR180% HR180% HR180% HR180% HR180% HR180% HR180% HR180% HR180% HR180% HR180% HR180% HR180% HR180% HR180% HR180% HR180% HR180% HR180% HR130% HR130% HR130% HR130% HR130% HR130% HR130% HR130% HR130% HR130% HR130% HR130% HR130% HR130% HR130% HR130% HR130% HR130% HR130% HR160% HR160% HR160% HR160% HR160% HR160% HR160% HR160% HR160% HR160% HR160% HR160% HR160% HR160% HR160% HR160% HR160% HR160% HR160% HR130% HR130% HR130% HR130% HR130% HR130% HR130% HR130% HR130% HR130% HR130% HR130% HR130% HR130% HR130% HR130% HR130% HR130% HR130% HR150% HR150% HR150% HR150% HR150% HR150% HR150% HR150% HR150% HR150% HR150% HR150% HR150% HR150% HR150% HR150% HR150% HR150% HR150% HR130% HR130% HR130% HR130% HR130% HR130% HR130% HR130% HR130% HR130% HR130% HR130% HR130% HR130% HR130% HR130% HR130% HR130% HR130% HR120% HR120% HR120% HR120% HR120% HR120% HR120% HR120% HR120% HR120% HR120% |
Ecn npednaeraMbe Mebp He npBIOaT K yCTpaHEnIO HncnPaBHOCTN, obaaaiTeCb BynoHMOueHHbI cepBnCHbI ceHTp.
TOMMING AV GRESSBOKSEN
Se figure 10.
IS/ETNING AF GRAESBOKSEN
Sefigur4.
TOMNING AF GRESBOKSEN
Sefigur10.
INSTALACJA KOSZA NA TRAWE
Zobacz rysunek 4.
CIELUNΦUKALIMN HA IPODYKTA
IocbT 3a perynipaHe Ha BncoNuHaTa CnyKn 3a perynipaHa He BncoNuHaTa Ha p3aHe.
KABEL3A YNPPABLHEHNE HA DBNIGATEJIY
KaBeBt 3a npaBnHeH Na DnBnATen, KoITo ce HAmnpa B rOpHaTa pKoXBaTka Ha KocaKhata, AKTNbpu N DeakTNbpu DnBnTeJN OCTPNeTO.
1u 1s 1s 1s 1s 1s 1s 1s 1s 1s 1s 1s 1s
a
UJU1
1u 1u u 1u u 1u u 1u u 1u u 1u u 1u u 1u u 1u u 1u u 1u u 1u u 1u u 1u u 1u u 1u u 1u u 1u u 1u u 1u u 1u u 1u u 1u u 1u u 1u u 1u
212 1j
gssu 12 uabufo 1ufo uuaa ausu
C
1s jUe sJue e Jus 1s Jus Jus Jus Jus Jus Jus Jus Jus Jus Jus Jus Jus Jus Jus Jus Jus Jus Jus Jus Jus Jus Jus Jus Jus Jus
()
U
Wc
JU
suluolupuscelejso.
1 24
A
Uuue uuuuue uuuuuuuuuuuuuuuuuuuuuuuuuuuuuuuuuuuuuuuuuuuuuuuuuuuuuuuuuuuuuuuuuuuuuuuuuuuuuuuuuuuuuuuuuuuuuuuuuuuuuuuuuuuuuuuuuuuuuuuuuuuuuuuuuuuuuuuuuuuuuuuuuuuuuuuuuuuuuuuuuuuUU
JU Cua pa pa Ue Ue cu cpa Ue Ls o Uaiau
G C 15000000000000000000000000000000000000000000000000000000000000000000000
1515
1
auiicuiuuiu
1
1
L
P
A
C 10000000000000000000000000000000000000000000000000000000000000
A
11 111111111111111111111111111111111111111
A
JU 1 JU 1 JU 1 JU 1 JU 1 JU 1 JU 1 JU 1 JU 1 JU 1 JU 1 JU 1 JU 1 JU 1 JU 1 JU 1 JU 1 JU 1 JU 1 JU 1 JU 1 JU 1 JU 1 JU 1 JU 1 JU 1
A
U 11111111111111111111111111111111111
A
11 Cg 11 L 11 L 11 L 11 L 11 L 11 L 11 L 11 L 11 L 11 L 11 L 11 L 11 L 11 L 11 L 11 L 11 L 11 L 11 L 11 L 11 L 11 L 11 L 11 L 11 L 11
1111111111111111
UJU2.
E uuueuuuueuuuuuuuuuuuuuuuuuuuuuuuuuuuuuuuuuuuuuuuuuuuuuuuuuuuuuuuuuuuuuuuuuuuuuuuuuuuuuuuuuuuuuuuuuuuuuuuuuuuuuuuuuuuuuuuuuuuuuuuuuuuuuuuuuuuuuuuuuuuuuuuuuuuuuuuuuuuuuuuuuuuuuuuuuuuuuuuuuuuuuuuuuuuuUU
J 1
Jusla Jucie Uuaa jao Jauo Jue Jua Juae Juae Jua
L 1 L 1 L 1 L 1 L 1 L 1 L 1 L 1 L 1 L 1 L 1 L 1 L 1 L 1 L 1 L 1 L 1 L 1 L 1 L 1 L 1 L 1 L 1 L 1 L 1 L 1 L 1 L 1 L 1 L 1 L 1 L 1 L 1 L 1 L
U
A
- 1s 1u 1u j 1u j u 1u j 1u j 1u j
1
1Jie uuiyue 1uuiuuiuuiuuiuuiuuiuui
34
Ue Ue Ue Ue Ue Ue Ue Ue Ue Ue Ue Ue Ue Ue Ue
w
A C
sususususususususususususususususususususususususususususususususususususususususususususususususususususususususus
UuUs Uus Uus Uus Uus Uus Uus Uus
E uuus e uuuuue uuuu uuuu uuuu uuuu uuuu uuuu uuuu uuuu uuuu uuuu uuuu uuuu uuuu uuuu uuuu uuuu uuuu uuuu uuuu uuuu uuuu uuuu uuuu uuuu uuuu uuuu uuuu uuuu uuuu uuuu uuuu uuuu uuuu uuuu uu
()
1
TNTNnONNNINN NNOYNIINN 117, nTTNNIINNNIINN NNNN NNNN.
n nn nn nn nn nn nn nn nn nn nn nn nn nn nn nn nn nn nn nn nn nn nn nn nn nn nn nn nn nn nn nn nn nn nn nn nn nn nn nn nn nn nn nn nn nn nn nn nn nn nn nn nn nn nn nn nn nn nn nn nn nn nn nn nn nn nn nn nn nn nn nn nn nn nn nn nn nn nn nn nn nn nn nn nn nn nn nn nn nn nn nn nn nn nn nn nn nn nn nn nn
nnnnn nn nnnnnnnnnnnnnnnnnnnnnnnnnnnnnnnnnnnnnnnnnnnnnnnnnnnnnnnnnnnnnnnnnnnnnnnnnnnnnnnnnnnnnnnnn
77 77 77 77 77 77 77 77 77 77
n nn nnnnnnnnnnnnn.
yynnnn nn nynnnn ynnnnn nn no nnnn nn.
noon noihn
777 8.
n nn no nnnnnnnnn
nno no nno no nn no nn no nn.
17 17 17 17 17 17 17 17 17 17 17 17 17 17 17
nno nnn no
Xn Xn nn nnnnnnnnnnnnnnnnnnnnnnnnnnnnnnnnnnnnnnnnnnnnnnnnnnnnnnnnnnnnnnnnnnnnnnnnnnnnnnnnnnnnnnnnnnnnnnnnnnnnnnnnnnnnnnnnnnnnnnnnn
OJNNT
nno
777 8.
n nn nnnnnnnnnnnnnnnnnnnnnnnnnnnnnnnnnnnnnnnnnnnnnnnnnnnnnnnnnnnnnnnnnnnnnnnnnnnnnnnnnnnnnnn
n nn no n no n no n.
n nn no nnn
nynynnnn noannnnnnnnnnnnnnnnnnnnnnnnnnnnnnnnnnnnnnnnnnnnnnnnnnnnnnnnnnnnnnnnnnnnnnnnnnnnnnnnnnnnnnnnnnnnnnnnnnnnnnnnnnnnnnnnnnnnnn
1
nann
77 9.
nynnnnnnnnnnnnnnnnnnnnnnnnnnnnnnnnnnnnnnnnnnnnnnnnnnnnnnnnnnnnnnnnnnnnnnnnnnnnnnnnnnnnnnnnnnnnnnnnnnnnnnn
n nn nnnnnnnnnnnnnnnnnnnnnnnnnnnnnnnnnnnnnnnnnnnnnnnnnnnnnnnnnnnnnnnnnnnnnnnnnnnnnnnnnnnnnnnnnnnnnnnnnnnnnnnnnnnnnnnnnnnnn
Tn nn nnnn, nnnn nn.
11X 11X 11X 11X 11X 11X 11X 11X 11X 11X 11X 11X 11X 11X 11X 11X 11X 11X 11X 11X 11X 11X 11X 11X 11X 11X
nui nnn nn nnn, on nnn nn nn nn nn nn nn.
N7 NON TNN NNI YIN "TNTNNI YTN NIOIN IYN KN N'OIN NNN N'OIJI.
TUNNTYJNYYIINNNNIIN
yann (naxnn nyn)
n nn nnnnnnnnnnnnnnnnnnnnnnnnnnnnnnnnnnnnnnnnnnnnnnnnnnnnnnnnnnnnnnnnnnnnnnnnnnnnnnnnnnnnnnnnnnnnnnnnnnnnnnnnnnnnnnnnnnnnnnnnnnnnnnnnnnnnnnnnn
JIN JIN TUN NIN, NIN NIN NIN NIN NIN NIN. JIN JIN 19700000000000000000
n nn nnnnnnnnnnnnnnnnnnnnnnnnnnnnnnnnnnnnnnnnnnnnnnnnnnnnnnnnnnnnnnnnnnnnnnnnnnnnnnnnnnnnnnnnnnnnnnnnnnnnnnnnnnn
y
Ammn
y 1000000000000000000000000000000000000000000000000000000000000000
on nn wio, y no nn nnn. nnnn
n nn nnnn, nnnn, 070, nn nnnn nn nnnn nn nnnn nn nnnn nn nnnn nn nnnn nn nnnn nn nnnn nn nnnn nn nnnn nn nnnn nn nnnn nn nnnn nn nnnn nn nnnn nn nnnn nn nnnn nn nnnn nn nnnn nn nnnn nn nnnn nn nnnn nn nnnn nn nnnn nn nnnn nn nnnnn nn nnnn nn nnnn nn nnnn nn nnnn nn nnnn nn nnnn nn nnnn nn nnnn nn nnnn nn nnnn nn nnnn nn nnnn nn nnnn nn nnnn nn nnnn nn nnnn nn nnnn nn nnnn nn
y 1
n7 nON nT NvD,nuN Xi TIN nIi;Nn yH 7Xn nn nT NxN nn nIi nVy.
TnNTX
10.
n nn nnn, nn nn nn nn nn nn nn nn.
1
n nn n nn nn nn nn nn nn nn nn nn nn nn nn nn nn nn nn nn nn nn nn nn nn nn nn nn nn nn nn nn nn nn nn nn nn nn nn nn nn nn nn nn nn nn nn nn nn nn nn nn nn nn nn nn nn nn nn nn nn nn nn nn nn nn nn nn nn nn nn nn nn nn nn nn nn nn nn nn nn nn nn nn nn nn nn nn nn nn nn nn nn nn nn nn nn nn nn nn nn nn nn
1
n nn nnnnnnnnnnnnnnnnnnnnnnnnnnnnnnnnnnnnnnnnnnnnnnnnnnnnnnnnnnnnnnnnnnnnnnnnnnnnnnnnnnnnnnnnnnnnnnnnnnnnnnnnn
nnr
Ammn
nnnnnnnnnnnnnnnnnnnnnnnnnnnnnnnnnnnnnnnnnnnnnnnnnnnnnnnnnnnnnnnnnnnnnnnnnnnnnnnnnnnnnnnnnnnnnnnnnnnnnnnnnnnnnnnnnnnnn
A
ywnynnnn nn nnnn nn nnnnnnnnnnnnnnnnnnnnnnnnnnnnnnnnnnnnnnnnnnnnnnnnnnnnnnnnnnnnnnnnnnnnnnnnnnnnnnnnnnnnnnnnnnnnnnnnnnnnnnnnnnnnnnnnn
A
yN 17, nnN NnN nNnN. nnN nnN
A
yni yni ni n noi nni nni nni nni nni nni nni nni nni nni nni nni nni nni nni nni nni nni nni nni nni nni nni nni nni nni nni nni nni nni nni nni nni nni nni nni nni nni nni nni nni nni nni nni nni nni nni nni nni nni nii
nnnnn
77777777777777777777777777777777777777777777777
n7 n7 n7 n7 n7 n7 n7 n7 n7 n7 n7 n7 n7 n7 n7 n7 n7 n7 n7 n7 n7 n7 n7 n7 n7 n7 n7 n7 n7 n7 n7 n7 n7 n7 n7 n7 n7 n7 n7 n7 n7 n7 n7 n7 n7 n7 n7 n7 n7 n7 n7.
A
TNTNNOONNNNNOONN NNNNNNNNNNN
A
nno nnnn nn nnnn nn nnnn nn no nnnn nn nnnnnnnnnnnnnnnnnnnnnnnnnnnnnnnnnnnnnnnnnnnnnnnnnnnnnnnnnnnnnnnnnnnnnnnnnnnnnnnnnnnnnnnnnnnnnnnnnnnnnnnnnnnnn
A
77 77, 77 77 190, 77 77 190 77 77 190 77 77 190 77 77 190 77 77 190
Tn nnnn nn nnnnnnnnnnnnnnnnnnnnnnnnnnnnnnnnnnnnnnnnnnnnnnnnnnnnnnnnnnnnnnnnnnnnnnnnnnnnnnnnnnnnnnnnnnnnnnnnnnnnnnnnnnn
1
#
n nn nnnnnnnnnnnnnnnnnnnnnnnnnnnnnnnnnnnnnnnnnnnnnnnnnnnnnnnnnnnnnnnnnnnnnnnnnnnnnnnnnnnnnnnnnnnnnnnnnnnnnnnnnnnnnnnnnnnnnnnnn
yann (nynnnn)
A xmmn
n nn nnnnnnnnnnnnnnnnnnnnnnnnnnnnnnnnnnnnnnnnnnnnnnnnnnnnnnnnnnnnnnnnnnnnnnnnnnnnnnnnnnnnnnnnnnnnnnnnnnnnnnnnnnnnnnnnnnn
A xmmn
n nn nnnnnnnnnnnnnnnnnnnnnnnnnnnnnnnnnnnnnnnnnnnnnnnnnnnnnnnnnnnnnnnnnnnnnnnnnnnnnnnnnnnnnnnnnnnnnnnnnnnnnnnnnnnnnnnnnnnnnnnnnnnnnnnnnnnnnnnnn
nannnn
11-12.
ynnn nn nnnn nn nnnn nn nnnn nn nnnn nn nnnn nn nnnn nn nnnn nn nnnn nn nnnn nn nnnn nn nnnn nn nnnn nn nnnn nn nnnn nn nnnn nn nnnn nn nnnn nn nnnn nn nnnn nn nnnn nn nnnn nn nnnn nn nnnn nn nnnn nn nnnn nn
n nn nnn nn nn no nnn nn nn nn nn nn.
n nn no7n.
n nn nnonn nn.
n nn nnnnnnnnnnnnnnnnnnnnnnnnnnnnnnnnnnnnnnnnnnnnnnnnnnnnnnnnnnnnnnnnnnnnnnnnnnnnnnnnnnnnnnnnn
n nn nnnnnnnnnnnnnnnnnnnnnnnnnnnnnnnnnnnnnnnnnnnnnnnnnnnnnnnnnnnnnnnnnnnnnnnnnnnnnnnnnnnnnnnnnnnnnnnnnnnnnnnnnnnnnnnnnnnnnnnnnnnnnnnnnnnnnnnnnnn
n
n nn nnnn nn nnnn nn nnnn nn nnnn nn nnnn nn nnnn nn nnnn nn nnnn nn nnnn nn nnnn nn nnnn nn nnnn nn nnnn nn nnnn nn nnnn nn nnnn nn nnnn nn nnnn nn nnnn nn nnnn nn nnnn nn nnnn nn nnnn nn nnnn nn nnnn nn nannn nn nnnn nn nnnn nn nnnn nn nnnn nn nnnn nn nnnn nn nnnn nn nnnn nn nnnn nn nnnn nn nnnn nn nnnn nn nnnn nn nnnn nn nnnn nn nnnn nn nnnn nn nnnn nn
n nn nnnn nn nnnn nnnn
n 62.5-71.5"an/om (350-400 y/).
n nn no n
y
nynnnnnnnnnnnnnnnnnnnnnnnnnnnnnnnnnnnnnnnnnnnnnnnnnnnnnnnnnnnnnnnnnnnnnnnnnnnnnnnnnnnnnnnnnnnnnnnnnnnnnnnnnnnnnnnnnnnnnnnnnnnnnnnnnnnnnnnnnnnnnnn
nuy nynnnn nn nnnn nn nnnn nn nnnn nn nnnn.
yynnnn nn, x7 nnnnnnnnnnnnnnnnnnnnnnnnnnnnnnnnnnnnnnnnnnnnnnnnnnnnnnnnnnnnnnnnnnnnnnnnnnnnnnnnnnnnnnnnnnnnnnnnnnnnnnnnnnnnnnnnnnn
yann (nynnnn)
y
All new Greenworks Tools machinery is supplied with a 2 year parts and labour warranty from original date of purchase. A 30 day warranty is available for machines used professionally as Greenworks Tools are designed primarily to be used by DIY consumers.
This warranty is non-transferable.
LIMITATIONS
This warranty applies only to defective parts/components and does not cover repairs due to:
- Normal wear and tear.
- Routine tune up or adjustment.
- Damage caused by improper handling/abuse/misuse or neglect.
- Overheating due to lack of maintenance.
- Damage due to fittings/fasteners becoming loose/detached through lack of maintenance.
- Damage caused by cleaning with water.
- Machines serviced or repaired by non-authorised Greenworks Tools service centres.
- Machines incorrectly assembled or adjusted.
- Damage caused by improper use of the machine.
- Damage caused by improper winterisation (pressure washers)
- Items considered as consumable parts are not normally covered by the warranty, including but not limited to:
Batteries
Electric cables
- Blade and blade assemblies
- Belts
- Filters
- Chucks and tool holders
- Certain products may contain components such as engines, transmissions from an alternative manufacturer, these items will be subject to the appropriate manufacturer's warranty policy except where Greenworks Tools Europe GmbH agrees to underwrite any claims outside the said manufacturer's warranty period.
- Second hand goods are not covered under this warranty policy.
- The fitting of spares, replacements or extra components which are not supplied or approved by Greenworks Tools Europe GmbH.
Warranty
To claim a warranty on any product under this policy a proof of original purchase is required. Credit card statement do not qualify as sufficient proof of purchase. In the first instance of a warranty event occurring the consumer should return the product to the original place of purchase with their proof of purchase. The machine will be sent to our central service facility and an inspection made. If the machine be found to be at fault it will be repaired and sent back to the address of the consumer free of charge. Machines that retail for less than €100 euros including sales taxes will generally be replaced.
If the central service facility finds that machine is not found to be at fault then the consumer will be advised they will need to pay for the cost of the repair.
This warranty policy is subject to change from time to time to accommodate the needs of new products. A copy of the latest warranty policy will be available at www.greenworkstools.eu.
GoojoooGreenworks Tools (DIY)
psu
Ug590
uU uue uue uue uue uue uue uue uue uue uue
1.UuUcUcU.
2.UUU,UcU
3. UdoUdoUdoEdu/10001/10001/10001/10001
4.1jUplo uuua Uusl.
5.1uuiuuiuue uudai/uauiuuiuuiuuiuuiuuiuuiuuiuuiuui
6. UJUJUJUJUJUJUJUJUJUJUJU
7. UUUUUUUUUUUUUUUUUUUUUUUUUUUUUUUUUUUUUUUUUUUUUUUUUUUUUUUUUUUUUUUUUUUUUUUUUUUUUUUUUUUUUUUUUUUUUUUUUUUUUUUUUUUUUUUUUUUUUUUUUUUUUUUUUUUUUUUUUUUUUUUUUUUUUUUUUUUUUUUUUUUUUUUUUUUUUUUUUUUUUUUUUUUUUUUUUUuuuuuuuuuuuuuuuuuuuuuuuuuuuuuuuuuuuuuuuuuuuuuuuuuuuuuuuuuuuuuuuuuuuuuuuuuuuuuuuuuuuuuuuuuuuuuuuuuuuuuuuuuuuuuuuuuuuuuuuuuuuuuuuuuuuuuuuuuuuuuuuuuuuuuuuuuuuuuuuuuuuuuuuuuuuuuuuuuuuuuuuuuuuuuuuuuuuuuuuu uu
8.1U1UcUcysuCuaSOLiJusol uusfo
9.1uWvWvWvEoUwvEeEgUwVvSdUvS.
10. UuUuuuue uuuuuuuuuuuuuuuuuuuuuuuuuuuuuuuuuuuuuuuuuuuuuuuuuuuuuuuuuuuuuuuuuuuuuuuuuuuuuuuuuuuuuuuuuuuuuuuuuuuuuuuuuuuuuuuuuuuuuuuuuuuuuuuuuuuuuuuuuuuuuuuuuuuuuuuuuuuuuuuuuuuUU
11. UusuUsususususususususususususususususususususususususususususususususususususususususususususususususususususususususus
JUJUJUJUOJUO
U
( xt^2 + x) a + bt^2 = 0
·
15.2.1.1.1.1.1.1.1.1.1.1.1.1.1.1.1.1.1.1.1.1.1.1.1.1.1.1.1.1.1.1.
12. vua Uucuie 5u cua uudul uue uuuu uuuu uuuu uuuu uuuu uuuu uuuu uuuu uuuu uuuu uuuu uuuu uuuu uuuu uuuu uuuu uuuu uuuu uuuu uuuu uuuu uuuu uuuu uuuu uuuu uuuu uuuu uuuu uuuu uuuu uuuu uuuu uuuu uuuu
13.11
14. 1234567890123456789012345678901234567890123456789012345678901234567890123456789012345678901234567890123456789
U. ϕρι
Uulu uuupu eus uue uua uuuu uuuu uuuu uuuu uuuu uuuu uuuu uuuu uuuu uuuu uuuu uuuu uuuu uuuu uuuu uuuu uuuu uuuu uuuu uuuu uuuu uuuu uuuu uuuu uuuu uuuu uuuu uuuu uuuu uuuu uuuu uuuu uuuu uuuu uu
- 100000000000000000000000000000000000000000000000000000
Lc: 150000000000000000000000000000000000000000000000000000000000000000000000000000000000000000000000

Greenworks Tools Kendin Yap Makinerleri Garanti Policesi
GARANTI SÜRESI
EC DECLARATION OF CONFORMITY FOR MACHINERY
Manufacturer:Changzhou Globe Co., Ltd.
Address: No.65 Xinggang Road Zhonglou Zone Changzhou, Jiangsu 213000
P.R.China
Name and address of the person authorised to compile the technical file:
Name: Gary Gao Naixin (Director of Outdoor Power Equipment)
Address: Greenworks Tools Europe GmbH
Wankelstrasse 40.
50996 Koln
Germany
Herewith we declare that the product
Category CORDLESS MOWER Model .2502807
Serial number. See product rating label Year of Construction. See product rating label
-
is in conformity with the relevant provisions of the Machinery Directive (2006/42/EC)
-
is in conformity with the provisions of the following other EC-Directive
2014/30/EU (EMC-Directive), and
2000/14/EC (Noise-Directive) incl. modifications (2005/88/EC)
And furthermore, we declare that
- the following (parts/clauses of) European harmonised standards have been used
Measured sound power level
Guaranteed sound power level
LWA: 84.8 dB(A)
88 dB(A)
Conformity assessment method to Annex V/ Directive 2000/14/EC
EC type approval to 2000/14/EC: Intertek Testing & Certification Co., Ltd. (NB0359)
Place, date: Changzhou, 22/07/2016
MIET) Vice president of Engineering
Signature: Gary Gao Naixin (BEng, CEng,


Endereço: No.65 Xinggang Road Zhonglou Zone Changzhou, Jiangsu 213000 China
Naam: Gary Gao Naixin (Director of Outdoor Power Equipment)
Adres: Greenworks Tools Europe GmbH
Wankelstrasse 40.
50996 Kln
Germany
Aüpec: No.65 Xinggang Road Zhonglou Zone Changzhou, Jiangsu 213000
China
IIMn aDpec IInua, OTBeTCTBENHO 3a NOIroTOBky TeXHnueCKOrO paJIa:
- 6bIIN INCNoJIb3OBaHbI CNeDyUOJIne YactN IINI CTaTbN EBPOJneCKNX
CORNAOBaHHbIX CTaHdapTOB
EN 60335-1, EN60335-2-77
EN 62233, EN ISO 3744; EN 55014-1;
EN 55014-2, ISO 11094
I3mepenHHb ypOBeHb 3ByKOBo M O u HOCn
IapaHTnpyEmbI ypOBeHb 3ByKOBo MOUHOCTN
OueHka cooTBeCTbna npoeHa corIaChNo pnpIoXeHnIO V / K dIpuKeTtBe 2000/14/EC
CepTnФикaци coOTBcTcTBn EC 2000/14/EC:
Intertek Testing & Certification Co., Ltd. (NB0359)
MecTo, data: Changzhou, 22/07/2016 Повпсь: Gary Gao Naixin (BEng, CEng,
MIET) Bnue-npe3nIeHT no pa3pa6oTkAm


LAITTEIDEN EY:N VAATIMUSTENMUKAISUUSVAKUUTUS
Namn: Gary Gao Naixin (Chef for Outdoor Power Equipment)
Adress: Greenworks Tools Europe GmbH
Wankelstrasse 40.
50996 Koln
Germany
EC type approval to 2000/14/EC : Intertek Testing & Certification
Co., Ltd. (NB0359)
Sted, dato: Changzhou, 22/07/2016 Signatur: Gary Gao Naixin (BEng, CEng,
DEKLARACJA ZGODNOSCWE DLA MASZYN
Producent: Changzhou Globe Co., Ltd.
Adres: No.65 Xinggang Road Zhonglou Zone Changzhou, Jiangsu 213000 P.R.
Chiny
Potpis: Gary Gao Naixin (BEng,
CEng, MIET) Potpredsjednikin*enjeringa


EK GEPESZETI MEGFELEOSEGI NYILATKOZAT
Gyartó: Changzhou Globe Co., Ltd.
Cim: No.65 Xinggang Road Zhonglou Zone Changzhou, Jiangsu 213000, Kina
TOnHa Ha Ipn3BODCTBO .BnKTe eTuKeta C HOMHaJIHInTe cToHOCTH
-
OTROBAPRA Na CbOTBeTHNte pa3nope6n Ha NdupeKTHBaTc OTHOCHO MaUNHInTe 2006/42/EC
-
OTROBAPRA Ha pa3nope6nTe Ha cneHnTe dpyrN DnpeKtNBn Ha EO
2014/30/EU (Диеректiva 3a EMC) n
2000/14/EC (I3nbYbAH ym OT MaunHn n cbOpBXeHn, KOnto pa60rT ha OTkPnTO)
BKNIOHTeHNO npOMeHNTe (2005/88/EC)
Ocben ToBa DeKnapnpaMe, Ye
ca cna3eHn (uaTn/KIay3n OT) cJeHnTe o6uHte ebPoneckn CTaHdaptN
I3MepeHO HnBO Ha Wym
LWA: 84.8 dB(A)
TapaNTnpaHO HnBO Ha 乌M
88 dB(A)
MetoHa OueHbAe Ha CbOTBcTbIeTo CbO6pa3No npJIOXeHne V ot DnpeKtBa
2000/14/EC
TnIOBO Oo6peHne Ha EO B cBc0TBcTcBne C 2000/14/EO: Intertek Testing &
Certification Co., Ltd. (NB0359)
MЯсто, Дata: Changzhou, 22/07/2016
Подпс: Gary Gao Naixin (BEng, CEng, MIET)
Buienpe3ndeHT,
MaSHINHOCTpoEHe

EL H H YMMOP H E K
Kaataaekuaotn; Changzhou Globe Co., Ltd.
uuvon: No.65 Xinggang Road Zhonglou Zone Changzhou,
Jiangsu 213000 P.R.China
Ovoua ka iai dieuohuvan atoou eouoiodotmuevou va ouvtaleov texivko akelao:
Ovoa: Gary Gao Naixin (Aieuthetavntc uTaiotou nKtpoivnTou eoTlioou)
Address: Greenworks Tools Europe GmbH
Wankelstrasse 40.
50996 Koln
Germany
Aia Tou Tnapovtoc oIawoume otTto Tpoiov
Katnyopia MHXANH KOYPEMATO2I PAASIIOY
Movélo 2502807
ApiOoC oEipac ..Bλ. EIKeTa Poiovto
EtoC kataoKeunc .Bλ. EtikéTa a o n TpoioVTOC
MeptnEvO eTtEo EvtaOn nXou
L: No.65 Xinggang Road Zhonglou Zone Changzhou,
Jiangsu 213000 P.R.China.
U:Gary Gao Naixin (p
Greenworks Tools Europe GmbH
Wankelstrasse 40.
50996 Koln
Germany
JU
2502807
U.
..
- 2006/42/EC
EC-Directives
2014/30/EU (w
2000/14/EC (UCC UCC UCC UCC UCC UCC UCC UCC UCC UCC UCC UCC UCC UCC UCC UCC UCC UCC UCC UCC UCC UCC UCC UCC UCC UCC UCC UCC UCC UCC UCC UCC UCC UCC UCC UCC UCC UCC UCC UCC UCC UCC UCC UCC UCC UCC UCC UCC UCC UCC UCC
J 1
Ugol (UjCjI/ Uuug) UUUGo g oJ UpUwUc Uggluog So Ugso
V/ Directive 2000/14/EC
2000/14/EC: Intertek Testing &
Certification Co., Ltd (NB0359)
U: 22/07/2016
s
JUJUJUJUJUJU

TR AT UYGUNLUK BEYANI
Uretici: Changzhou Globe Co., Ltd.
Adres: No.65 Xinggang Road Zhonglou Zone Changzhou,
DIOIINNNTNOINNNIINNN
:GaryGaoNaixin (nunnuu
Address: Greenworks Tools Europe GmbH
Wankelstrasse 40.
50996 Kln
X
P
2502807
no' o' n' ...
y
- yintan 2006/42/EC
yintnncnncnncnECniosin
200/14/EC: Intertek Testing & Certification
Co., Ltd. (NB0359)
nni, nni: ynnn, 22/07/2016
ninn: Gary Gao Naixin
(BEng, CEng, MIET) ond" nton


LT EKIRENGIMU ATITIKTIES DEKLARACIJA
Gamintojas: "Changzhou Globe Co., Ltd."
Adresas: No. 65 Xinggang Road Zhonglou Zone Changzhou, Jiangsu 213000 P.R.
Kinija
2014/30/EU (EMC-directkyva), in
2000/14/EK (Triukšmo direktyva) jskaitant pakeitimus (2005/88/EK).
Razotajs: Manufacturer:Changzhou Globe Co., Ltd.
Adrese: No.65 Xinggang Road Zhonglou Zone Changzhou, Jiangsu 213000 P.R.China
Personas, kas pilnvarota sastadit tehnisko dokumentaciju, vards, uzvards un adrese:
Vards, uzbards: Gary Gao Naixin (Lauka iekartu dalas direktors)
Adrese: Greenworks Tools Europe GmbH
Wankelstrasse 40.
50996 Kln
Germany
Ar so mēs pazinojam, ka prece
Kategorija ZALESPLAUJMASINA
Modelis 2502807
Serijas numurs Skatit preces specifikaciju etiketi
Uzbuvesanas gads .Skatit preces specifikaciju etiketi
-
atbilst attiecigajiem Mechanismu direktivas noteikumiem 2006/42/EC
-
atbilst attiecigajiem citu sekojsu EK direktivu noteikumiem
2014/30/EU (Elektromagnetiskas abilstibas (EMC) direktiva), un
2000/14/EK (Direktiva par trokşnu emisiju), ieskaitot grozijumus (2005/88/EK)
Turklat, mēs pazinojam, ka
Aaddress: No.65 Xinggang Road Zhonglou Zone Changzhou, Jiangsu 213000
P.R.China