LRS 400 - Sander FESTOOL - Free user manual and instructions
Find the device manual for free LRS 400 FESTOOL in PDF.
User questions about LRS 400 FESTOOL
0 question about this device. Answer the ones you know or ask your own.
Ask a new question about this device
Download the instructions for your Sander in PDF format for free! Find your manual LRS 400 - FESTOOL and take your electronic device back in hand. On this page are published all the documents necessary for the use of your device. LRS 400 by FESTOOL.
USER MANUAL LRS 400 FESTOOL
EC-Declaration of Conformity: We declare at our sole responsibility that this product is in conformity with the following standards or standardised documents:
EN 792-8 in accordance with the regulations 98/37/EC (until 28 Dec. 2009), 2006/42/EC (from 29 Dec. 2009).
Head of Research, Development and Technical Documentation
REACH for Festool products, their accessories and consumables - REACH is a European Chemical Directive that came into effect in 2007. As "downstream users" and product manufacturers, we are aware of our duty to provide our customers with information. We have set up the following website to keep you updated with all the latest news and provide you with information on all the materials used in our existing products.
| K = 2,0 m/s2 | |
| Zusatzhandgriff | ah= 4,0 m/s2 |
| K = 2,0 m/s2 |
Compressed air orbital sander
| Technical data | LRS 400 | |
| Drive | Compressed-air vane motor | |
| Operating pressure (flow pressure) | 6 bar | |
| Sanding shoe | 400 x 80 mm | |
| Speed | 5,500 - 7,000 rpm | |
| Working strokes | 11,000 - 14,000 rpm | |
| Sanding stroke | 4 mm | |
| Air consumption at nominal load | 390 l/min | |
| Weight | 2.3 kg | |
The specified illustrations can be found at the beginning of the operating instructions.
Symbols

Warning of general danger

Read the Operating Instructions/Notes!

Wear ear protection!
1 Intended use
The tools are designed for sanding wood, plastic, composite materials, paint/varnish, filling material, metal and similar materials. Materials containing asbestos must not be processed.

The user is liable for damage and injury resulting from incorrect usage!
2 Safety instructions
2.1 General safety instructions
Warning! Before setting up, using, repairing and servicing this air tool or replacing accessory parts, you must have read and understood all safety instructions and information. Ignoring warning notes and instructions may result in serious injuries.
Keep all of the attached documents and pass on the documentation if the machine changes ownership.
a. Keep your place of work tidy. Untidiness in working areas increases the risk of an accident.
b. Please take your surroundings into consideration. Do not leave pneumatic tools out in the rain. Keep work area well lit.
Never use pneumatic tools in the vicinity of flammable liquids or gases.
c. Keep away from children. Do not allow others to touch the pneumatic tool or the compressed-air hose.
Keep others away from your work area.
d. Store your pneumatic tools safely. Unused pneumatic tools should be stored in a dry, inaccessible or locked location, out of the reach of children.
e. Use the correct pneumatic tool. Do not use the pneumatic tool for purposes for which it was not intended.
f. Wear suitable work clothes. Do not wear loose fitting clothing or jewellery. They can get entangled in moving parts.
Rubber gloves and non-slip footwear are recommended for outdoor work. Long hair should be protected with a hair net.
g. Wear safety goggles. You should also wear a face mask for work which produces dust.
h. Connect a dust extractor. Make sure that available dust extraction equipment is connected and used correctly.
Observe the regional safety regulations for hazardous dusts and vapours.
Operate and service the air tool as described in the recommendations included in these instructions and use accessories and attachments from Festool to minimise the release of dust and vapours into the atmosphere.
In dusty environments, make sure that the dissipation of exhaust air does not disturb the dust.
i. Do not use the compressed-air hose for purposes for which it was not intended. Never carry the pneumatic tool by the compressed-air hose.
Protect the compressed-air hose from heat, oil and sharp edges.
Never direct the air flow towards yourself or other persons.
j. Secure the workpiece. Use clamping devices or a vice to hold the workpiece firmly.
These clamp the workpiece more securely than with hands and also allow both hands to be free to operate the pneumatic tool.
k. Avoid abnormal postures. Maintain a safe stance and keep your balance at all times.
l. Take care of your tools. Keep your tools clean and sharp for safe and efficient work. Follow the maintenance instructions and tips on changing tools. Check the compressed-air hose regularly and if it becomes damaged, have it replaced by an approved specialist. Keep handles dry and free of oil and grease.
m. Disconnect the compressed-air hose from the compressed-air supply. If the pneumatic
tool is idle, prior to maintenance and when changing tools such as saw blades, drill bits, cutting tools.
n. Remember to remove keys. Check that the key and adjustment tools have been removed before switching the tool on.
o. Avoid unintentional starting. Do not carry a pneumatic tool that is connected to a compressed-air supply with your finger on the trigger. When connecting the compressed-air hose to a compressed-air supply, make sure that the switch is not activated.
p. Stay alert. Keep your eyes on your work. Use common sense. Do not use the pneumatic tool if you are not able to concentrate properly. Operating and maintenance personnel must be physically strong enough to handle the size, weight and power of the machine.
q. Check the pneumatic tool for possible damage.
Before continuing to use the pneumatic tool, carefully examine safety devices and slightly damaged components and make sure that they function correctly and as specified.
Check whether moving components function correctly and do not seize, and whether any components are damaged.
All components must be fitted correctly and meet all requirements to ensure that the pneumatic tool operates correctly.
Damaged safety devices and parts should be repaired or replaced by an authorised service centre unless otherwise specified in the operating instructions. Damaged switches must be replaced by an authorised service centre.
Do not use pneumatic tools with faulty switches (machine cannot be switched on or off).
r. Caution! Only use accessories and auxiliary devices that are listed in the operating manual or that are recommended by the manufacturer (catalogue).
Using other tools or accessories can pose a risk of injury.
s. Have your pneumatic tool repaired by a qualified specialist. This pneumatic tool corresponds to the relevant safety regulations. Repairs should only be carried out by a qualified specialist. The operator is otherwise at risk of an accident.
t. Only trained and qualified persons are permitted to set up, adjust and operate this air tool.
Persons without the relevant qualifications and training are more likely to cause accidents.
u. This air tool may not be modified. Modifications may reduce the effectiveness of safety devices and pose a greater risk to operating personnel.
v. Hold the machine correctly. Prepare to counteract normal or sudden movements - hold the machine with both hands.
2.2 Machine-related safety instructions
- The manufacturer's handling and processing instructions must be observed without fail if explosive or self-igniting dusts are likely to occur during sanding.
- If dust dangerous to health is produced during sanding, the machine should be connected to an appropriate extraction device and the safety regulations that apply to the working material should be observed.
- The operating pressure should not exceed 6.5 bar.
- The machine should only be operated with sandpaper. Grinding wheels and parting grinder discs are not permitted.
- Only work with correctly processed compressed air. Using the Festool service unit VE guarantees this.
- Only use original Festool accessories.
- Wear suitable protection such as ear protection, safety goggles, a dust mask for work which generates dust, and protective gloves when working with raw materials and when changing tools.
- The permissible rotational speed of the accessory must be at least as high as the maximum speed specified on the machine. Accessories that rotate faster than the permissible level can rupture.
- Proceed with caution in unfamiliar surroundings that may contain electricity or other supply cables that harbour hidden dangers. Make sure that there are no electrical cables, gas pipelines or similar that, if damaged, could pose a hazard when the machine is used.
2.3 Residual risks
In spite of compliance with all relevant design regulations, dangers may still present themselves when the machine is operated, e.g.:
- Workpiece parts being thrown off,
- Parts of damaged tools being thrown off,
- Noise emission,
- Sawdust emission.
3 Noise and vibration information
The typical values determined in accordance with EN ISO 15744are:
Sound pressure level 80 dB(A)
Noise level 91 dB(A)
Measuring uncertainty allowance K = 3 ~dB

The noise level can exceed 85 dB(A) during operation. Wear ear protection!
Vibration emission level a_h an uncertainty K measured in accordance with EN ISO 8662:
Handle a_b = 4,5m / s^2
$$ \dot {K} = 2, 0 \mathrm {m} / \mathrm {s} ^ {2} $$
Auxiliary handle a_b = 4,0 ~m / s^2
$$ \dot {K} = 2, 0 \mathrm {m} / \mathrm {s} ^ {2} $$
The emission values specified (vibration, noise) were measured in accordance with the test conditions stipulated in EN ISO 15 744/EN ISO 8662 and are intended for machine comparisons. They are also used for making preliminary estimates regarding vibration and noise loads during operation. The emission values specified refer to the main applications for which the air tool is used. If the air tool is used for other applications, with other tools or is not maintained sufficiently prior to operation, however, the vibration and noise load may be higher when the tool is used. Take into account any machine idling times and downtimes to estimate these values more accurately for a specified time period. This may significantly reduce the load during the machine operating period.
4 Compressed-air supply and commissioning

Make sure that the pneumatic tool is switched off when you connect the compressed-air supply.
4.1 Compressed-air processing
The Festool service unit VE should always be used to ensure that Festool pneumatic tools function correctly. Consisting of a filter, control unit, condensation drain and lubricator, the service unit cleans and lubricates the compressed air and keeps it free of condensation. Here, the lubricator should be set so that a drop is applied to the compressed air approx. every 7-10 minutes.

Damage that occurs as a result of incorrect compressed-air processing is excluded from warranty claims.
We recommend a service unit with a 3 / 8" connector, when up to two Festool pneumatic tools are used. A compressor that supplies at 500 l/min and at an operating pressure of 6 bar should be used to supply compressed- air. The diameter of the piping system must be sufficiently large (at least 9 mm).
4.2 IAS 2 hose connector
The sander is a pneumatic tool for connection to the Festool IAS 2 system. This hose system combines three functions in one hose:
- Compressed air supply [3-1]
- Exhaust air extraction [3-2]
- Dust extraction [3-3]
Connection and disconnection - see Fig. 2.
4.3 Commissioning
Switch [1-1] serves as an On/Off switch (I = On / 0 = Off).
5 Machine settings

The machine should always be disconnected from the compressed air supply before any work is carried out on the machine.
5.1 Speed adjustment
You can regulate the speed steplessly between 5,500 and 7,000 min-1 using the adjusting wheel [1-2]. This enables you to optimise the cutting speed to suit the material.
5.2 Dust extraction
The sanding dust is extracted directly through the extraction channels in the sanding shoe directly at the point of sand-ing.
To guarantee optimized dust extraction, we recommend using Festool extractors with automatic switch-on/switch-off device for compressed-air machines.
5.3 Attaching sanding material
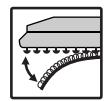
Self-adhesive abrasives such as Stickfix sandpaper and sanding fleeces can be attached to Stickfix sanding shoes.
The abrasives are simply pressed onto the sanding shoe [1-3] and pulled off after use.

Always use original Festool sanding materials!
Use only sanding shoes with undamaged Velcro coatings.
6 Maintenance and care

The machine should always be disconnected from the compressed air supply before any work is carried out on the machine.
All maintenance and repair work which requires the motor casing to be opened may only be carried out by an authorised service centre.
6.1 Vanes
We recommend that the vanes on the motor be replaced after approx. 500 operating hours.
6.2 Lubrication
If the machine is not used for longer periods, e.g. for a weekend, introduce 1 or 2 drops of lubricating oil into the compressed-air supply [2-1] on the machine prior to use.
6.3 Replacing the silencer
The silencer on the IAS 2 connecting piece must be replaced at regular intervals to maintain the power of the pneumatic tool.
7 Accessories, tools
Use only original Festool accessories and Festool consumable material intended for this machine because these components are designed specifically for the machine. Using accessories and consumable material from other suppliers will most likely affect the quality of your working results and limit any warranty claims. Machine wear or your own personal workload may increase depending on the application. Protect yourself and your machine, and preserve your warranty claims by always using original Festool accessories and Festool consumable material!
The order numbers of the accessories and tools can be found in the Festool catalogue or on the Internet under "www.festool.com".
8 Disposal
Do not throw the tool in your household waste! Dispose of machines, accessories and packaging at an environmentally responsible recycling centre. Observe the valid national regulations.
9 Warranty
For our tools, we give warranty for material and production defects in accordance with the locally applicable legal provisions, but in any case for at least 12 months. Within the EU member states, the warranty period is 24 months (verification through invoice or delivery note). Damage caused by, in particular, natural wear, overloading, incorrect handling, or damage caused by the operator, or damage caused through use of the equipment contrary that specified in the operating manual, or damage which was known at the time of purchase, is not covered by the warranty. Furthermore, damage caused by the use of non-original accessories and consumable materials (e.g. sanding pads) is also excluded. Complaints can only be recognised if the tool is returned while still assembled to the supplier or an authorised Festool Customer Service workshop. Keep the operating manual, safety instructions, spare parts list and purchase receipt in a safe place. Otherwise the respective, current warranty conditions of the manufacturer shall apply.
Note
We reserve the right to make changes to the technical data contained in this information as a result of ongoing research and development work.
4.2 Raccordement Tuyau IAS 2
7 Accessoires, outfits
Varning for allman risk!

3 DaaHbIe no uMy n Bn6paunn
4.3 BbO B 3KcNpyaTauH
BbIKIouateIb [1-1] cIyJNIT IJIa BKIIOueHnI/Bbl-KIIOUeHnI (I = BkI. / 0 = BbIKI.).
5 HacTpoiKa MaunHbI

Ipeed nauJom IIO6bIX pa6oT c MaunHOJ o6raTeJIbHo OTCoeDnHITe ee OT KOMnpcecCOPHOyCTaHOBKn.
5.1 Perylnipovka uncla o6opoToB
YncIIO o6oTOB MoXHO nIaBHO n3MeHЯrTb npI pOMOuN peUInpoBOvHOrO KOleCnKa [1-2] B dHa- nA3OHe ot 5.500 do 7.000 o6/MnH. B pe3yIbTaTe 3TOrO cKOpocTb pe3aHnM MoXHO ONTImaJIbHO nO-dOrHaTb K COOTBeTCTByIoUSeMy MaTePnAny.
5.2 OTCacbIBaHne nbIIN

Bo3nkaioa npi pa6ote wlnfoBaIb-Ha nbl cpa3y jke oTcabsBaetcyepe3 KaHabl nbIeYdaJeHnB WlnfoBaIbHOIpoOsbVe.
[ K = 2,0 \mathrm{~m} / \mathrm{s}^{2} ]
Uchwyt dodatkowy a_b = 4,0m / s^2
[ \mathrm{K} = 2.0\mathrm{m}/{\mathrm{s}}^{2} ]