
ULTIMATE 3 EN 1_22700-56 - Kitchen appliance RUSSELL HOBBS - Free user manual and instructions
Find the device manual for free ULTIMATE 3 EN 1_22700-56 RUSSELL HOBBS in PDF.
| Product Type | 3-in-1 kitchen appliance: juicer, citrus press, and blender |
| Brand | RUSSELL HOBBS |
| Model | ULTIMATE 3 IN 1 22700-56 |
| Power Supply | 220-240 V, 50/60 Hz |
| Power | 700 W (estimated) |
| Main Functions | Juicer (fruit/vegetable juice), citrus press (citrus fruits), blender (smoothies, soups, etc.) |
| Multi-function Bowl Capacity | Approx. 1 L (estimated) |
| Speeds | On/Off and Pulse function (@) |
| Materials | Plastic, stainless steel (blades and strainer) |
| Maintenance and Cleaning | Removable parts hand washable or dishwasher safe; motor unit wiped with a damp cloth |
| Safety | Do not operate for more than 2 minutes continuously; do not immerse motor unit in water; use the pusher, never fingers |
| Included Accessories | Pusher, lid, strainer, juicer separator, pulp collector, cone, filter, citrus press separator, connector, multi-function jar, blade unit, resealable lid |
| Warranty | 2 years (standard) |
| Country of Origin | China (estimated) |
Frequently Asked Questions - ULTIMATE 3 EN 1_22700-56 RUSSELL HOBBS
User questions about ULTIMATE 3 EN 1_22700-56 RUSSELL HOBBS
0 question about this device. Answer the ones you know or ask your own.
Ask a new question about this device
Download the instructions for your Kitchen appliance in PDF format for free! Find your manual ULTIMATE 3 EN 1_22700-56 - RUSSELL HOBBS and take your electronic device back in hand. On this page are published all the documents necessary for the use of your device. ULTIMATE 3 EN 1_22700-56 by RUSSELL HOBBS.
USER MANUAL ULTIMATE 3 EN 1_22700-56 RUSSELL HOBBS
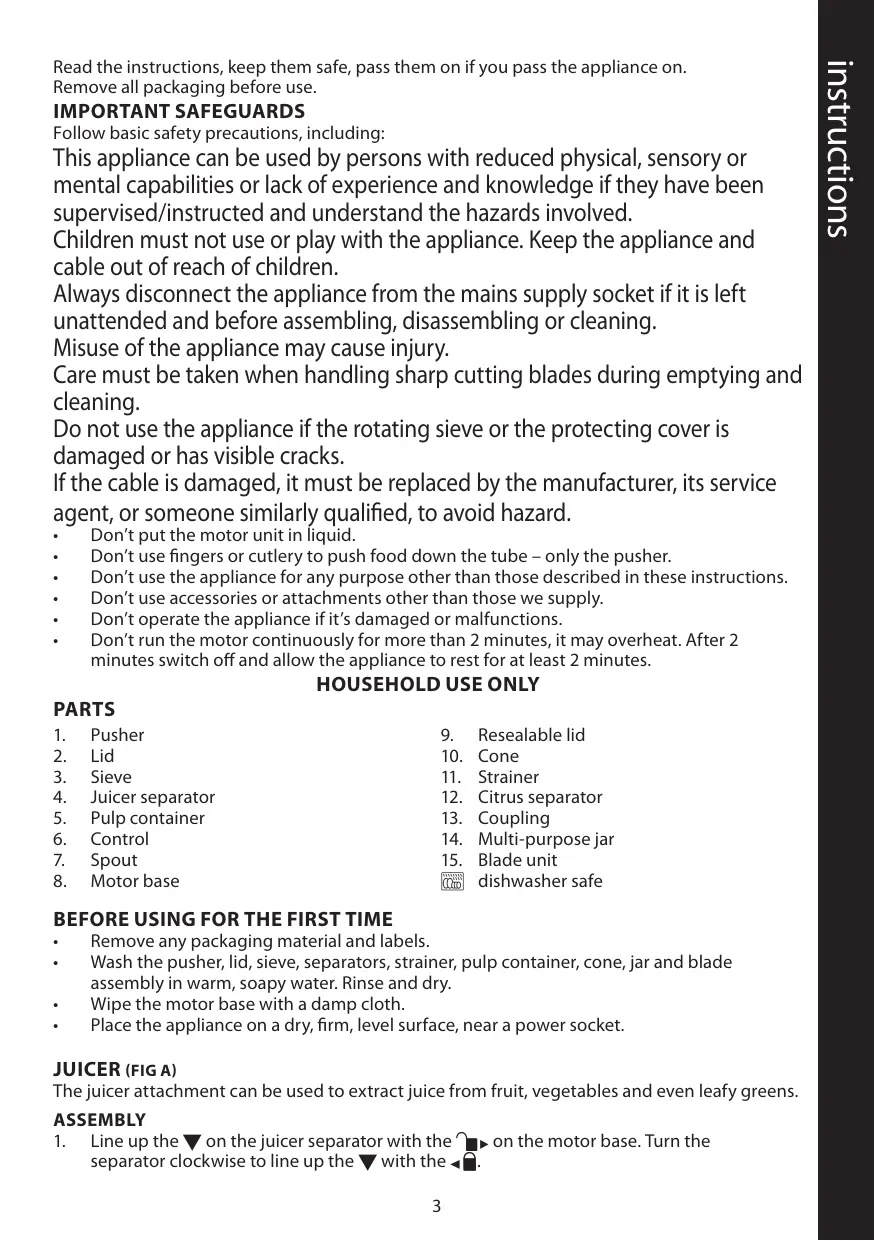
Read the instructions, keep them safe, pass them on if you pass the appliance on.
Remove all packaging before use.
IMPORTANT SAFEGUARDS
Follow basic safety precautions, including:
This appliance can be used by persons with reduced physical, sensory or mental capabilities or lack of experience and knowledge if they have been supervised/instructed and understand the hazards involved.
Children must not use or play with the appliance. Keep the appliance and cable out of reach of children.
Always disconnect the appliance from the mains supply socket if it is left unattended and before assembling, disassembling or cleaning.
Misuse of the appliance may cause injury.
Care must be taken when handling sharp cutting blades during emptying and cleaning.
Do not use the appliance if the rotating sieve or the protecting cover is damaged or has visible cracks.
If the cable is damaged, it must be replaced by the manufacturer, its service agent, or someone similarly qualified, to avoid hazard.
- Don't put the motor unit in liquid.
- Don't use fingers or cutlery to push food down the tube - only the pusher.
- Don't use the appliance for any purpose other than those described in these instructions.
- Don't use accessories or attachments other than those we supply.
- Don't operate the appliance if it's damaged or malfunctions.
- Don't run the motor continuously for more than 2 minutes, it may overheat. After 2 minutes switch off and allow the appliance to rest for at least 2 minutes.
HOUSEHOLD USE ONLY
PARTS
- Pusher
- Lid
- Sieve
- Juicer separator
- Pulp container
- Control
- Spout
-
Motor base
-
Recessible lid
- Cone
- Strainer
- Citrus separator
- Coupling
- Multi-purpose jar
- Blade unit
dishwasher safe
BEFORE USING FOR THE FIRST TIME
- Remove any packaging material and labels.
- Wash the pusher, lid, sieve, separators, strainer, pulp container, cone, jar and blade assembly in warm, soapy water. Rinse and dry.
- Wipe the motor base with a damp cloth.
- Place the appliance on a dry, firm, level surface, near a power socket.
JUICER (FIG A)
The juicer attachment can be used to extract juice from fruit, vegetables and even leafy greens.
ASSEMBLY
-
Line up the on the juicer separator with the on the motor base. Turn the separator clockwise to line up the with the .
-
Put the sieve into the separator and press it down onto the drive shaft.
- Line up the on the lid with the on the motor base. Turn the separator clockwise to line up the with the .
- Fit the pulp container under the left hand side of the lid.
- Put the multi-purpose jar under the spout to collect the juice.
- Fit the pusher into the tube.
USING
- Check that the appliance is switched off (O).
- Put the plug into the power socket.
- Turn the appliance on (I).
- Remove the pusher and drop the ingredients down the tube.
- The tube is wide enough for most whole fruits and vegetables but larger ingredients may need to be cut to fit.
- Replace the pusher and use it to push the ingredients gently down the tube.
- Once finished, turn off your juicer (O).
- The spout can be turned to face upwards to prevent dripping when you have finished using the appliance.
- You can fit the resealable top to the multi-purpose jar if desired for storage or to use the jar as a drinking bottle.
TIPS
- Buy organically grown produce whenever you can.
- Remove stones from fruit like peaches, plums, mangoes, etc.
Use good quality, fresh, ripe fruit and vegetables. Soft vegetables or overripe fruit can make the juice thick and cloudy. - Wash all fruit and vegetables. Use a brush on the harder ones. Remove the outer leaves on non-organic produce. Peel any non-organic or waxed fruit or vegetables. Cut out and discard bruises and blemishes as these may affect the taste of the juice.
- Don't juice anything strong or pungent, like onions or garlic. No matter how well you clean your juicer, you'll never get rid of the taste.
- Bunch up leafy greens, parsley, wheat grass and beansprouts into a small tight ball and push it down the tube with the pusher.
WARNING! Rhubarb leaves are poisonous, they contain oxalic acid. They mustn't be juiced or eaten.
CITRUS PRESS (FIG B)
The citrus press attachment can be used to press juice out of oranges, grapefruit, lemons, limes, etc.
ASSEMBLY
- Fit the coupling onto the drive shaft.
- Line up the on the citrus separator with the on the motor base. Turn the separator clockwise to line up the with the .
- Fit the cone onto the coupling.
- Put the multi-purpose jar under the spout to collect the juice.
USING
- Check that the appliance is switched off (O).
- Put the plug into the power socket.
- Turn the appliance on (I).
- Using one half-fruit at a time, place the cut (flesh) side on top of the cone and press it down.
-
Once finished, turn off your juicer (O).
-
The spout can be turned to face upwards to prevent dripping when you have finished using the appliance.
- You can fit the resealable top to the multi-purpose jar if desired for storage or to use the jar as a drinking bottle.
TIPS
Use good quality, fresh, ripe, citrus fruit.
- Wipe the fruit. Turn the fruit on its side and cut in half with a sharp knife.
BLENDER (FIG C)
The versatile blender attachment has a number of different uses including blending soups, smoothies and purées.
ASSEMBLY
- Add the ingredients to the jar. Do not fill past the max mark.
- Screw the blade unit on to the top of the multi-purpose jar.
- Check that the appliance is switched off (O).
- Turn the jar upside down then line up the on blade unit with the on the motor base. Turn the blade unit clockwise to line up the with the .
USING
- Put the plug into the power socket.
- Turn the appliance on (I). For precise control use the pulse function.
- Once finished turn the appliance off then twist the blade unit anti clockwise to line up the on blade unit with the on the motor base and remove it.
- Turn the jar the right way up and unscrew the blade unit.
- You can fit the resealable top to the multi-purpose jar if desired for storage or to use the jar as a drinking bottle.
COMBINING USES
Because the multi-purpose jar is also used when juicing or citrus pressing, you can combine these functions for increased versatility. For example, when making a smoothie:
- Use the citrus press or juicer attachment to extract juice into the jar.
- Add the rest of the smoothie ingredients to the jar.
- Fit the blade unit (see BLENDER section).
- Blend the ingredients to create a 100% natural, home-made smoothie.
Most smoothie recipes require some liquid in the form of juice. By using your own home-made juice you can ensure that your smoothies are 100% natural without any of the additives or preservatives that could be found in commercially produced juices.
CLEANING
- Switch the appliance off (O) and unplug it.
- Dissassemble the appliance.
- To remove the sieve, first turn the separator anti clockwise to line up the with the . then tip the sieve out of the separator.
- Wipe the outside of the motor unit with a clean damp cloth.
- Wash the removable parts in warm soapy water, rinse well, drain, and air dry. If the sieve is clogged, hold it under a running tap and brush along the surface of the mesh with a nylon washing up brush. Don't try to poke the bristles through the mesh - you'll break it.
You may wash these parts in a dishwasher.
If you use a dishwasher, the harsh environment inside the dishwasher will affect the surface finishes. Damage should be cosmetic only, and should not affect the operation of the appliance.
To avoid environmental and health problems due to hazardous substances in electrical and electronic goods, appliances marked with this symbol mustn't be disposed of with unsorted municipal waste, but recovered, reused, or recycled.
JUICER RECIPIES
SPARKLING EYE POTION
In order to maintain healthy, shiny eyes our bodies require plenty of B vitamins, as well as vitamins C and E and beta-carotene. Try this juice drink now and again as a refreshing and tasty vitamin enriched drink.
3 carrots
2 green apples
- 12 broccoli
- 12 red pepper
APPLE AND STRAWBERRY
250g strawberries
3 green apples
1 small piece ginger, peeled
- Serve over ice.
ENERGY DRINK
Fruit and vegetables have natural sweetness and make excellent energy drinks.
2 carrots
- 3 apricots, stone removed
2 apples
50ml milk
- 5g wheatgerm
- 5ml honey
Juice the fruit and vegetables. Stir in the milk, wheatgerm, and honey.
VITAMIN DRINK
This drink is high in B group vitamins, vitamin C, and the mineral calcium.
1 parsnip
12 green pepper
1 broccoli
2 carrots
1 sweet potato
1 stick celery
For a sweeter taste, add more carrot or parsnip.
SUMMER DRINK
3 tomatoes
- 12 cucumber
1 stick celery
- 1 / 8 lime
SAVOURY COCKTAIL
2 carrots
1 handfulwatercress
3 tomato
- 1 bunch coriander or basil leaves
1 stick celery
- 12 red pepper
- A few drops of Tabasco or Worcestershire sauce (optional)
CARROT AND PARSLEY
6 carrots
- 5 sprigs parsley
CABBAGE, CELERY AND CARROT
- 12 green cabbage
2 stick celery
3 carrots
VEGETABLE TONIC
1 handfulSpinach
4 sprigs parsley
4-6 carrots
SUNSHINE COCKTAIL
2 apples
100g strawberries
PASSION COCKTAIL
- 50g strawberries
14 pineapple
1 bunch black grapes
PINEAPPLE AND GRAPEFRUIT
1 / 2 grapefruit
1 / 4 pineapple
LEMONADE
- 4 apples
1/4 lemon - Serve over ice.
PINEAPPLE, STRAWBERRY AND APPLE
1 apple
14 pineapple
100g strawberries
BLENDER RECIPES
LEEK AND POTATO SOUP
75g leeks
- 75g potatoes
1 stock cube
400ml water
salt and pepper
Process the leeks and potatoes for 2 seconds.
Transfer to a large pan. Add the water and stock cubes. Bring to the boil, stirring. Reduce the heat. Cover the pan. Simmer for 20 minutes. Remove from the heat. Cool for 30 minutes. Process till smooth. Bring to serving temperature (don't let it boil). Adjust the seasoning. Serve with bread. For Vichyssoise, add a couple of chives to the leeks and potatoes, add a knob of butter to the pan before heating, cool the soup instead of re-heating it, and whisk in 75ml of cream before serving it cold.
SPICY PUMPKIN SOUP
450g pumpkin
15ml vegetable oil
1 leek
1 garlic clove
450ml chicken/vegetable stock
2.5g ground ginger
15ml single cream/creme fraiche
2.5g ground coriander
1 bunch coriander leaves
salt and pepper
Peel, deseed, and cut the pumpkin into chunks. Heat the oil in a pan. Add the leeks, garlic and spices. Stir for 3 minutes. Add the stock and pumpkin. Bring to the boil, stirring. Reduce the heat. Cover the pan. Simmer for 20-30 minutes. Remove from the heat. Stir in the coriander and cream. Cool for 30 minutes. Process till smooth. Bring to serving temperature (don't let it boil). Adjust the seasoning. Serve with bread.
CORIANDER PESTO
- 2 handfuls coriander leaves
2 cloves garlic - 60g pine nuts
125ml olive oil - 60g Parmesan, grated
Process the coriander, garlic, pine nuts and half the oil till smooth. Transfer to a large bowl. Stir in the Parmesan. Add oil to adjust the consistency: For a dip: thick. For a topping: medium. For pasta sauce: thin.
FRUITY SMOOTHIES
Process everything till smooth.
60ml yogurt
200ml milk
30g oatmeal
1 banana
30ml honey
2 apples, cored
170g chocolate ice cream
300g orange juice
150g hazelnut yogurt
1 banana
200ml milk
300ml chocolate milk
2 pears, cored
200ml yogurt
1 mango, stone removed
200ml milk
5ml honey
300ml milk
1 banana
12 strawberries
360ml lemonade
125g vanilla ice cream
70g blueberries
400ml milk
1 banana
20ml honey
10ml vanilla extract
300ml orange juice
300ml cranberry juice
1 banana
4 halves of tinned apricot
80ml apricot juice (from tin)
2 peaches, stone removed
60ml yogurt
200ml milk
10ml honey
600ml apple juice
1 mango, stone removed
Kohl,SELLERIE UNDMOHREN
12 Grunkohl
2 Stangen Sellerie
3 Karotten
MIXER-REZEPTE
LAUCH-KARTOFFEL-CREMESUPPE
150g hazelnootyoghurt
1 banaan
200ml melk
300ml chocolademelk
2 ontpitte peren
200ml yoghurt
1 onptitte mango
200ml melk
5ml honing
300ml melk
1 banaan
12 aardbeien
400ml melk
1 banaan
20ml honing
10ml vanille-extract
360ml limonade
125g vanille-iii
70g Bosbessen
300ml sinaasappelsap
300ml cranberrysap
1 banaan
ZUPPA DI ZUCCA SPEZIATA
APENAS PARA USO DOMÉSTICO
PEÇAS
COUVE, AIPO E CENOURA
1/2 couve verte
2 talos de aipo
3 cenouras
TONICO VEGETAL
1 punhado de espinafres
4 raminhos de salsa
4-6 cenouras
COCKTAIL RAIOS DE SOL
2 macas
100g de morangos
COCKTAIL DA PAIXão
- 50 g de morangos
1/4 ananas
1 quantidade很小的或小的Uvas pretas
ANANÁS E TORANJA
12 toranja
1/4 ananas
LIMONADA
4 macas
1 limao
Sirva sobre gelo.
ANANÁS, MORANGOSE MAÇA
1maca
1/4 ananas
100g demorangos
RECEITAS PARA A LIQUIDIFICADA
SOPA DE BATATA E ALHO FRANCÉS
75g de alho-francs
1 cubo de caldo de carne
75gdebatatas
400 ml de agua
sale pimenta
150g hasselnodde-youghurt
1 banan
200ml maelk
300ml kakaomaelk
2 pærer, udkernede
200ml yoghurt
1 mango, uden sten
200ml maelk
5ml honning
300ml maelk
1 banan
12 jordbær
400ml maelk
1 banan
20ml honning
10ml vaniljeekstrakt
360ml limonade
125g vaniljeis
70g bläbaer
300ml appelsinjuice
300ml tranebaarjuice
1 banan
TEHOSEKOITINRESEPTIT
PURJOPERUNAKEITTO
BAXKhIe MEPbI IpeIOCTOPOXHOCTN
CneyuTe OCHOBbIM INHCTpyKcIyM NO 6eONaCHOCTN, BKIOUoya CneDuOuIe:
IcnojIb3OBAHnE daHHoro yCTpoiCTBa IuIzamN C OrpaHnueHHbIMN
Φn3nueeCKMn, ceHCopHbIMn UIn yMCTBeHHbIMn CnOco6HOCTaMn,
HeOCTaTKOM ONbIta 3HaHn DOnyckaetc npu yCNoBn KOHTpOJa nn
NHCTpykTaJaN OCO3HaHnB CBA3aHHbIX PNCKOB.
IeTAM 3aIpeSeHO nCIOJIb3OBAbYCTPOINCTBO IIN INrpaTb C HIM. IepKInTe YCTPOINCTBO IN SHHyp BHe DOcRAeMOCTn DeTei.
Ecnu yctpoiCTBO octaetc 6e3 npncmoTpa, a TaKke neped c6opko,
pa360pKoI nn OunchKoB BceRda OTKIOUaHTe UcTPOINCTBO OT 3JneKTPOCETn.
HenpaBnIbHoe nCNoJIb3OBAHne npIbopa MoXeT npINBeCTN K TpaBMe.
YTo6bI n36ExKaTb TpaBm, 6yIbTe OCTOpOxHbI npN o6paueHn C HoxaMn, ONyCToUeHn KpyKkN OuNCtKe.
He nCnoJIb3yIte npI6Op, ecn CeTcAtbI ΦIbTp IIN KpbIaKa TpeChyI INI NOBpeJKeHbl.
EcnKabEnbnopeJdeH,OndoJKeH6bITb3aMeHeH npOn3BODnteIeM, cepBnchbIM aReHTOM nIn dpyrMM KBaINΦuNpOBaHHbIM JIncOM dJa
PpeDToBpaueHnOaCHOCTN.
He norgykaTe 6Jok dBnIaTeTb KnIkoCTb.
He nCnoIb3yIte naIbIy IIN KUxOHHbIe HOXn IJI npOtaJIKbBaHn IHHpeJeHTOB - ToIbKO npo6Ky-ToNkataIb.
HnKOrIa He nCnONb3yIe YcTpoiCtBO IaIIObIX INbIX cIeNe.
IcnoB3yTe ToJbKO npHaJnEJXHOCTN HacaKn OT npOn3BODHTeJ.
He ncpnoIb3yIte np6Op,ecn OH nobpeKdEn nn pa60TaTc npe6oamN.
- BniratbdoJxKeH pa6oTaB He nppeBbHc H 60e2 MHyT, HNaue Bo3MoKeH nepepeB. Ype3 2 MHyTb BbIKIOHTe pnp6p n KpaIHeMpe Ha 2 MHyTb, UTo6bl DaTb emy OCTtB.
TOLbKOДЛЯБblTOBOrOИСПОЛьЗOBAHNY
JIIOCTPAUN
- Ipo6ka-ToIkaTeIb
- Kpbioka
- Φιλτρ
- Pa3diennten dJy coka
- EMKoCTbДЯ MяKOTN
- Perynatop
- HocNK
-
BLOK DBNrataTeIa
-
Tepmetn3npuyoaa Kpbilka
- KoHyc
- CuTo
- Pa3dienTeIb Ira nItpycobIx
- Btynka
- Mhorocebeo KyBunH
- BLOK HOXA
MOXHOMbITbBIOCYDOMOeHOMMaSHHe
NEPEI NEPBbIM IcNoJIb3OBAHHeM
3TOT HANITOK COdePjNT BbICOKN IpoceHT BtAMINHOB rpynnbl B, BtAMINC n KaIbciN.
1 nactepHaK
1% 3eJehoro nepua
16pokkoI
2 MOPKOBN
16aata
1 cte6eIb ceIbpepe
YTo6bl Bkyc 6bl cnae,doabBbTe MOpKOBb nIIN NaCTepHaK.
ПИКАТНБИKOKTEйь
2 MOPKOBN
1 ropctb kpecc-cajata
3nomnidaopa
1nyOK KINH3bl NII INCTbeB 6a3NlNka
1 cte6ebcebdepeea
1½KpaCHOIpeua
HeckoJIbKO kaneJIb Ta6aCKO nIIN ByCTepcKOrO coYca (no JKeJaHnIO)
MOPKOBb I NETPYUKA
6 UT. MOPKOBI
5BeToueK neTpuykN
KANYCTA, CEJIbDEPEH MOPKOBB
123eJehoN KaNyctbl
2cTe6JIceIbIepeIa
3 MopKOBN
OBOUHOI TOHIK
1 ropctb uHHaTa
4 Betooukni neTpuyukn
4-6 4T.MOPKOBN
PEUENTbIДЛЯБLEHDEPA
CYNI3 KAPTOΦEJIY JLYKA-IOPEJ
75 ngK-nopei
16yIbOHHbIeKy6nKn
400MnBoda
75rKapToΦeNb
Cobnipepu
B TeuHne 2 cekyHn n3MeIbuaIte B KOM6aIne lyk-nopei n KapToΦeIb. IpepeLoXnTe nOlyueHHyIO maccy B 60nbSyUo KaCTPLOIO. DObabTe BOy u 6ynbONHbIe Ky6uKn. DoBeaIte DO KIneHn, NOMeunBaJy6abTe OROh. 3aKpOte KaCTPLOIO KpbIshKo. KInaTnte Ha MeIeHNOM ORHe B TeuHne 20 MNHT. ChmMTE COrH. OctYkaTe B TeuHne 30 MNHT. N3MeIbUHnTE Bce B KOM6aIne do OndopOHOCTn. POnDorPeIte DO TempeaTypbl POnaHn HA CTOL (He DoBOdIte DO KIneHn). DObabTe cneuN IO BKcU. POnaBaIte C XLe6OB. UTo6bl pInrOToBntb cyn BUnncya3, DObabTe K Lyky-nopeu N KapToΦeIIO npay LykOBuN LnyCaCKOpOdbI (INL, KA ero eEse Ha3bBAIoT, SHNT-TNyKa), B KAcTPOII NOpei HArpeBaHem NIOLOxNTE KycOK MaCNa, BMEcTO NOBtOPHO HArpeBaHn OXlaIDTe CyN INoDaBaIte Ero XOLOdNbIM, PpeDbapITbHo 3aNpaBIV 75mI cnBOK.
TbIKBEHHBcCynCINPRAHOCTaM
2.5 r moJIOtBn NM6npb
15 mI pactnteBHOe MacNo
450TbIKBa
15 MЛ сивк/сmetаHa
450 mк kypинь/Овоцио 6ульбоH
1nyk-nopei
1CBa3KaIINCTbKOpNaHpa
2.5 r monotbik KopnaHdp
13y60KuecHOK
Cobnipepu
OuHCTnTe TBkBy,OTJeIInTe cEmeHa n IopexKbTe Kyckamn.Pa3oRpeMeB KacTpIOne MacNo.1o6abTe lyk-nopei,ueChOK n Cpeunn.IomeuINBaIte B TeueHne 3 MmHT.1o6abTe 6yJbON H TBkBY. 1oBeIInTe DO KInENHn, NOMEuINBaY.6aBBTe OROhB. 3aKpOIte KAcTPOJIIO KpbIshKoN.KnIaTIte Ha MeJEnHOM orHe B TeueHne 20-30 MNHT.CHMnTE COrH.No6abBe TKePuaHnp n CnIBKn.OcTuXkaIte B TeueHne 30 MNHT.N3MeJIbUHTe BCE KOMbAHe Do OJHpOAnHOCTn.IoDorpeMeTdo TEMpePaTypbl POnaHn HA CTOL (He IOBOdIte DO KInENH). 1o6abBe TceuHN PO BKCy.PoJaBaIte CxJle6om.
COYC NECTO IV3 KOPNAHDA
2 ropctbIncTbKopnaHnpa
23y60kUeCHOK
60rkeipoBbIe opexn
125MЛОИВКOBOEMACLO
60 r napMe3aH, TepTbI
U3MeIbYnTe B KOM6aHne HnN 6JIeHdpe KopnaHdp,
ueChOK, KeJPOBbIe opExn I NIOBOHNy Yka3aHNOrO
KoINuCeCTBa OINVBKOBOrO MaCna Do OOnHOPOdHOCtN.
IpePOnXnTe NOnyuEnHHy Maccy B 6OJIb7uO yauy.
DobabBe NapMe3aH. DObabJrTe MaCNo Do
IOnyuEHHa HyxHoi KOHCnCTeHcUn:ДЯ COyCa-
dIna: rCytaA.ДЯ TOnPiHra: cpeHne rCyToTbI.ДЯ
COyCa K nacte: XnDKaJ.
ΦPYKTOBbie KOKTEJIN
I3MeJIbUHTe BcB 6JIeHJpe EINKyXOHHOM KOM6aIHe Do ODHOpOHDocTn.
60 mJ noypt
200 MЛ MOЛOKO
30 rOBcHbIe XJIOBbIa
16aHaHbI
30MmMe
2ЯблOKи cудаленнос срдцевноI
170 r wokoladHoe mopoxeHoe
300MJI aneIbcNHObBI COK
150 r yorypT cJeChbIMn opexaMn
16aHaHbI
200 mM MOLOKO
300 ml ① wokoladnoe moko
2 rpyu cn ydaJIeHHoI cepdueBnHOI
200 mni orypt
1 MaHro C BbIHyTOK OCTOcKO
200 MЛ MOЛOKO
5 ml me
300 mM MONOKO
16aHaHbI
12 Kny6Hnka
400 ml MOJOKO
16aHaHbI
20 mI Mei
10Mn BaHnIbHbI ΘKCTpaKT
360 MЛIMMOHaI
125 r BaHnJIbHOe MOpOxHeOe
70ruepHnka
300 mI aIeJIbCSINHOBbI COK
300 MЛ KJIIOKBeHHbI COK
16aHaHbI
2 jabuke
100g jagoda
STRASTVENI KOKTEL
- 50 g jagoda
1/4 ananasa
1 grozd crnog grozda
ANANASIGREJP
12 grejpa
14 ananasa
LIMUNADA
4 jabuke
1/4 limuna
- Prelijte led.
IPIN AIO THN IPQTH XPHSE
150g findikli yogurt
1muz
200ml sut
300ml cikolatali suti
2 armut, cekirdekli
200ml yogurt
1 mango, seksirdegi seksarilmis
200ml sut
5ml bal
300ml sut
1muz
12 cilek
400ml süt
1muz
20ml bal
10ml vanilya esansi
360ml limonata
125g vanilyali dondurma
70g bogurtlen
300ml portakal suyu
300ml yabanmersini suyu
1muz
300ml elma suyu
90g ahududu
12çilek
POTIUNE PENTRU OCHI AGERI
IpiroJeH 3a MHeB CbDOMnHa MaunHa
PNEIINbPBATAYNOTPE6A
- OtctpaheTe onaKOBbHnMaTePnaI n etKeTnte.
I3mInTe n36yTbaua, KaNaka, CNTOTO, pa3dJIInTeJIInTe, ceJkaTa, KOHTeHepa 3a cypOBnHa, yHnra, KaHata N6yHkepa C Hox B TOnJa, CaynHeHa BOda. I3pNaKHeTe n OCTaBeTe da n3CbXHe.
I36bpeTe 3aDbNkBaun6Jok C BlaJkHa Kbpna.
IocTaBeTe ypeHa ha cyxa, cta6nHa n paBHa NOBbpxHOCT B 6n3OCT DO KOHTAKT.
COKON3CTNCKBAUKA (ФИГ.А)
jz jz jz jz jz jz jz jz jz jz
Jilu jgjgall gai
aaiiiaaii
Cillalill 8o jjoo joc oJc Jglll piaiui
jess
a
- jieill i 1
法一:
baai jiall Jaauiu
Clogswjll
jlll jllc b.9
b_aj = a .10
m = 311
Ciyioooj Jolal .12
j.13
14
15
alllll 1
m = 311
m = 311
3
jLiaJiJus 4
111 5
ai a ai 的最小值为 k .
7
8j 3( p - 1) ( p - 2) ·s p
aJg 1
a
cfo 1
S AOB = S COD + S_ BOC
a a a a a a a a a a a a a a a a a a a a a a a a a a a a a a a
2
a 1
.2
Aealw yacolg jLall .yjgall sclg 3
aillllllll C uaiai B
1j 1
1
j2 2
ol( 1 + p) = 70 + p100
· S = 2c = 1
j j j j j j j j j j j j j j j j j j
.
a1b1g
Cui jiu xia jia xia jia bao la li Cui jiu xia xia
.
j2 2
gjjgjia juaa 3
2
50
ab = 72
Jus jil 5
j 1
JuaJIgabJzJI
Jyulilu Jus
2
100
S OBC = S COD + S BOC - S BOC
50
wiliilai 1
gai icgai 1
Lg 1
在 Rt ABD 中:
J 1
0g
4
1 1
Cai jia li gao jiali yu li
4.4.1 1
J1 1
100
C. ( x,y) = ( ab + 1,2)
2
Saaa 2
1 1
1
2
a_ij = 1
abla 3
1 1
÷ s · t = 1
y_a = 12( ax - 1) + b ( a > 0)
JgSswy
(5)
abobcb 3
y1 ÷ y2 = 12
÷ 2 = 2
1/8
gjz
6
5
jzllg aajlgl gai
jusd 1
2 = 1
3
j
1
4
山j>4-6