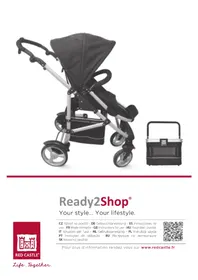
WHIZZ - Stroller RED CASTLE - Free user manual and instructions
Find the device manual for free WHIZZ RED CASTLE in PDF.
| Product type | Compact 3-wheel stroller |
| Brand | RED CASTLE |
| Model | WHIZZ |
| Recommended age | From 6 months (up to 15 kg); from birth with compatible carrycot or car seat |
| Maximum supported weight | 15 kg for child + 5 kg in basket |
| Safety standards | Compliant with EN 1888:2003 |
| Safety harness | 5-point harness, height adjustable |
| Brake | Foot-operated parking brake on rear wheels |
| Front wheel | Swivel or fixed (locking under footrest) |
| Tires | 3 inflatable wheels; recommended pressure 1.4 to 1.8 kg (20-25 PSI) |
| Seat positions | 3 positions: upright, reclined, flat (via zippers) |
| Canopy | Removable with detachable ventilation panel |
| Footrest | Height adjustable |
| Handlebar | Height adjustable |
| Basket | Removable soft basket, max load 5 kg |
| Included accessories | Maintenance kit (2 inner tubes, pump, spare valve caps), rain cover, sun cover, safety strap |
| Maintenance | Clean metal parts with damp cloth; hand wash textiles, no machine washing except seat cushion (gentle cycle) |
| Car seat compatibility | Compatible with RED CASTLE / RECARO Group 0+ car seat (up to 13 kg) and RED CASTLE carrycot (up to 9 kg) |
| Folding | Compact fold with locking hook; remove seat/carrycot and empty basket before folding |
Frequently Asked Questions - WHIZZ RED CASTLE
User questions about WHIZZ RED CASTLE
0 question about this device. Answer the ones you know or ask your own.
Ask a new question about this device
Download the instructions for your Stroller in PDF format for free! Find your manual WHIZZ - RED CASTLE and take your electronic device back in hand. On this page are published all the documents necessary for the use of your device. WHIZZ by RED CASTLE.
USER MANUAL WHIZZ RED CASTLE
You've asked the difficulties au piage :
The WHIZZ Stroller meets the Standard EN 1888:2003 and conforms to the security requirements. It has been laboratory tested according to the decree 91-1992 (December 1991).
WARNING: READ these instructions carefully BEFORE USE and keep them for future reference. YOUR CHILD'S SAFETY MAY BE AFFECTED if you do not follow these instructions.
WARNING : This seat unit is not suitable for children under 6 months.
WARNING: Your child's safety is your responsibility.
WARNING: Ensure that all locking devices are engaged before use.
WARNING: It may be dangerous to leave the child unattended.
WARNING: When using your stroller, under any circumstances, ensure your child is attached with the 5-point safety harness correctly adjusted to fit him. Always use the crotch strap with the safety harness, even when using a footmuff in the stroller.
WARNING: Any load attached to the handle affects the stability of the pushchair.
WARNING: This seat is not suitable for running or skating.
WARNING: Always use the rear foot brake to immobilise your stroller.
WARNING: Every time, check that the pram body, or seat unit attachment devices are correctly engaged before use.
WARNING: Ensure that all levers, nuts and washers are firmly screwed on the wheels to avoid any risk of small parts being swallowed by the child. The pump must also be kept out of children's reach.
WARNING: Always use the crotch strap in combination with the waist belt.
WARNING: Use a harness as soon as the child can sit up alone unaided.
WARNING: Keep children well away from the pram/pushchair while opening or folding it.
GENERAL INSTRUCTIONS
- This stroller is intended to transport a child from age 6 months up to a maximum weight of 15~kgs , as well as an additional weight of 5~kgs in the basket below the stroller.
- From birth, use the stroller with the RED CASTLE / RECARO car seat up to 13 kgs, OR with the RED CASTLE carrycot up to 9 kgs.
- From birth, use the stroller with the RC 2 Car Seat up to 9 kgs, it conforms to the security requirements. It has been laboratory tested according to the decree 91-1992 (December 1991).
- Never transport more than one child in the WHIZZ stroller.
-
The correct assembly of this stroller is essential. Neither RED CASTLE FRANCE nor their distributors can be held responsible should this not be the case. Please note that incorrect use of the stroller could damage the stroller and be dangerous for your child.
-
Never use the textile stroller seat before your child is able to sit up alone unaided (from 6 months old).
- Do not use replacement parts or accessories other than those recommended by RED CASTLE FRANCE.
- To avoid the risk of suffocation, keep all plastic bags away from and out of the reach of children.
- Always attach your child with the 5 point safety harness correctly adjusted to fit him whenever you use the stroller.
- Children should always be kept clear of detachable parts when adjustments are made and when opening and closing the stroller.
- You can attach an extra safety harness onto the D-rings. Check that the harness conforms to the EN 13210 standard.
- When the stroller is folded, keep children clear to avoid their being injured should the stroller fall.
- Should the stroller be used by someone unfamiliar with it, always show them the correct way to use it.
- To avoid the risk of strangulation, NEVER attach strings, ribbons or cords onto the stroller or onto your child.
- The stroller should always open and close without difficulty. If it doesn't, do not force the mechanisms and refer to the Instruction manual.
- Ensure that all safety mechanisms are engaged before use and that they are used correctly.
- For optimal stability, check the tyre pressure regularly. The ideal pressure is 1,4 kgs on flat surfaces and up to 1,8 kgs on very stony grounds.
- Never lift up the stroller by the Infant car seat or the carrycot but by the chassis only.
- Overloading, incorrect folding and the use of accessories non-approved by the manufacturer may seriously damage or break the stroller (in particular the use of buggy boards).
- Never place any item on the stroller hood.
- Never place a load on the foot-rest.
- Never allow children to stand on the foot-rest.
- Do not use the raincover indoors, during warm weather, when it is sunny or near a source of heat. Your child may become too hot.
- The sun screen has been designed to reduce the sun's glare and limit the effect of UV rays. The use of this sun screen does not exempt you from the need to protect your child. We recommend the systematic use of a sun cream. Regularly check that your child has enough to drink.
- Always take your child out of the stroller when going up or down stairs, or when using an escalator.
- Step over obstacles (pavements etc...) with care. Bumping it up and down repeatedly may damage your stroller.
- Never use the stroller if it is damaged or broken.
Instructions for use
1.UNFOLDING
- Open the locking hook on the side of the chassis and raise the handlebar (1 and 2).
- When using for the first time, attach the seat straps around the chassis. Don't make them too tight. (3).
WARNING: Make sure that the handlebar and the chassis are secured firmly in place (click heard).
2.WHEELS
FRONT WHEEL
- The stroller comes with the front wheel fitted.
- To remove it, unscrew the plastic caps from the front wheel axle, then unscrew the screws from both sides of the axle (4).
REAR WHEELS
- Both wheels will block into place automatically. (click heard) (5).
- To remove them, pull on the grey lever, removing the wheel at the same time (6).
3. PARKING BRAKES
- Pushing down on the horizontal bar with your foot will lock the rear-wheels (7).
WARNING: It may be dangerous to leave your child alone and unattended in the stroller, even if the parking brake is on. Check that the wheels are securely locked.
- To unlock, lift up the horizontal bar with your foot (8).
4. ADJUSTMENTS
FRONT WHEEL SWIVEL OR FIXED
SWIVEL POSITION:
- Lift up the foot rest (see FOOT REST paragraph)
- Lift up the lever lock located below the foot rest to lock it in place (9).
FIXED POSITION:
Lower the lever lock as shown (10).
WARNING: This product is not suitable for running or skating.
WARNING: The swivel wheel allows greater manoeuvrability of the stroller. Over rough grounds (sand, snow, stones, mud...), it is strongly recommended that the front wheel be used in the fixed position.
THE SEAT BACK
The seat back has 3 positions: sitting, reclining and lying down. To change positions just open the 2 (or 4) zips on either side of the seat back.
PLEASE NOTE! The zips must be fully opened in order to avoid breaking them.
- Sitting position = zips closed (11)
-Reclining position = 2 zips open (12) - Lying down position = 4 zips open (13)
- Use the Velcro bands inside the seat, one on either side, to attach or detach the pleats in the fabric (14).
HOOD and INNER NETTING HOOD
The hood fits on easily:
- Position the brackets as shown (15). Check that they are correctly in place, clip them on (to the hole on either side of the chassis) then secure them in place (16).
- To remove them, inverse the procedure.
- When the seat back is in the lying down position, close with the velcro strips located at the back of the hood and/or the inner netting hood (17).
- For better air circulation during warmer weather, the rear of the hood unzips and detaches revealing an inner netting hood for finer weather (18).
- Hood down: levers on hood pushed flat (18a).
Hood up: levers on hood raised (18b).
HANDLEBAR
It is height adjustable.
- Press on the large buttons located either side of the handlebar and keep them pressed to the required height then release them (click heard) (19).
5 POINT SAFETY HARNES
- Place your child in the stroller and attach (click heard) (20a) the waist straps and the shoulder straps to the crotch strap. To open (20b).
- To adjust the 5 point harness to fit the child's size, slide the harness adjusters A, B and C to lengthen or shorten the straps (21).
The shoulder straps are height adjustable.
To adjust their height: remove the shoulder pads located on the shoulder straps, open the rear of the seat back, position the straps at the required height by passing them also through the stiffener (22). To do so, turn the buckle at an angle.
You can attach an extra safety harness onto the D-rings. Check that the harness conforms to the EN 13210 standard.
WARNING: The crotch strap must ALWAYS BE USED when attaching the safety harness.
WARNING: Use a safety harness as soon as the child is able to sit up unaided.
WARNING: Never remove the stiffener from inside the seat back.
FOOT REST
It is height adjustable.
- Press in the button as shown then release it when at the desired height (23).
WARNING: Never let children climb onto or sit on the foot rest.
5. ACCESSORIES
REMOVABLE, ADJUSTABLE BUMPER BAR
HOW TO ATTACH THE BUMPER BAR:
- Detach the seat flaps from the chassis by undoing the press studs. Position the bumper bar at the places provided on either side of the chassis. Position it in place, push on it, it clips into place. (24).
SECURING IT IN PLACE:
- Secure the brackets in place (click heard) (25).
- Close the press studs.
It is height adjustable.
- Press on the buttons at the side, keep them pressed to the required height then release them (click heard) (25a).
SEAT CUSHION (Optional)
It is reversible (one cotton side and one fleece side).
- Slip the straps of the safety harness and the crotch strap through the slits in the cushion (26). Secure the cushion in place with the Velcro bands located behind the back of the seat (27).
BASKET
- For easy access, open the zip fastenings on either side (28). Detach the Velcro fastenings to remove it.
WARNING: The maximum load in the basket should not exceed 5 kg.
WARNING: The maximum load in other compartments should not exceed 0, 5 kg.
WARNING: Only use compartments provided for storage and do not go over and above the recommended weight.
SAFETY WRIST-STRAP
It is already attached to the handlebar of your stroller. It is essential to use the safety wrist-strap when on steep slopes.
- Slip your wrist through the wrist-strap then hold the handlebar firmly (29).
PROTECTION AGAINST COLD, WIND AND RAIN
Unfold the rain cover and place it on the hood.
- Fasten with the Velcro strips as shown (30a, b, c).
SUN SCREEN PROTECTION
How to attach the sun screen protection:
- Place it on the hood and position the elastics as shown (31).
-To pull it taut, attach the buckles below the foot rest (32).
MAINTENANCE KIT
- Contains an inner-tube and extra press studs.
A bike pump is included in the basket of the stroller.
- Press down on the security latch (on the right-hand side) with your thumb and squeeze and hold the levers on either side of the handlebar (33).
- Push down on the handlebar, release the triggers, close the locking hook (34 and 35).
WARNING: Always remove the Infant Car Seat or the carrycot before folding the stroller.
WARNING: Empty the basket completely BEFORE folding the stroller
PLEASE NOTE! Make sure that the foot rest is in the lowest position.
PLEASE NOTE! Fold back the hood before folding the stroller.
7. MAINTENANCE
- This stroller should be regularly checked by the person using it.
Clean the metal parts of your stroller with a damp cloth and dry them immediately. Use only mild cleaning products.
The textile parts should be wiped clean with a damp cloth. Use only a mild detergent. DO NOT MACHINE WASH
Regularly check screws, rivets and bolts and replace any parts which may have become worn.
The seat cushion is machine washable (on a low cycle). DO NOT USE BLEACH. Do not dry in direct sunlight.
Prolonged exposure to direct sunlight may prematurely discolour the stroller fabric.
PLEASE NOTE! After using your stroller on the beach or on a snowy/salted pavement, always rinse the parts in contact with the salt and the sand, in particular the wheels, the springs and the rivets.
PLEASE NOTE! We do not recommend taking this stroller into the sea.
WARNING : Only use parts recommended by the manufacturer.
WARNING: Never use the stroller if it is damaged or broken.
8. PRACTICAL ADVICE
TYRES
Check the tyre pressure regularly.
If the tyre pressure is not the same in all 3 tyres, it may be difficult to push (minimum 1,4kg / 20 PSI; max. 1,8kg / 25 PSI).
If you get a flat tyre:
- The tyres are repaired as for bike tyres.
- Remove the inner tube and repair it with a patch.
- Run your finger round the inside of the tyre to ensure no sharp object (e.g. the tip of a thorn) remains stuck in the tyre.
- Replace the inner tube, then the wheel and pump up the tyre.
If the inner tube is too damaged, replace it. (A new one is included in the maintenance kit).
When walking on rough, stony ground or in the countryside, watch out for thorny bushes.
If you often get a flat tyre, it may be that you need to increase the pressure in the tyres. You can pump them up to a pressure of 1,8 kgs.
- Check that all 3 tyres are at the same pressure.
You find it hard to fold your stroller:
After cleaning the catches (36), (seen on the inside of the aluminium chassis when folding) apply some drops of silicone or liquid spray (available in DIY shops) as shown.
FONTOS:ÁLTALÁNOS BIZTONSÁGIE LEOÍRÁSOK
NONEMAMA, REGULEJAMA BUFERJOSLA
BUFERJOSLAS UZSTADISANA:
5-TOUeyHbIe PEMHN B3OJNACHOCTN
- YcaIte pe6eHka B KOJIaCKy I coeINHte (IO ueJka) (20a) pemnHa TaIIu, IIeueBbIe n naXOBle (20b).
-ДлгTOrO,UTo6bI 5-ToUeHbIe peMHn6e3OpaNCHocTN COOTBcTcTBoBaII npa3Mepype6eHa,pepeBnHbTe perynpyIOueyeCTpoiCTBOA,BuCДЯ yDInHeHnIyKopauBaHnIpeMHe(21).
-ПлесевыpeMHnperynipyIOTcnoBbICote. PerynpOBkA BbICOTb: CHIMITE IMeUHneCnHa ПлесевыхpeMHnx NOdyuKn, OTKpoiTe 3aHIOU qaCTb CnINHKn CnDEhBy, UCTaHOBVte peMHn Ha JekelaMyIO BbICOTy, pOdoBnx Ypee3 CmblKy, npndaIoUy JOeCTKOCTb (22).
Дялгото држnte пражку pod углom. Вь можete пикpenntb долнтельhoe ремнс 6e3oNaChoctnв кolyd D. Y6eInTeCb,чTo pemHn OTbeaIoT CTahdapTy EN 13210.
PNEpyPExkDEHHe:peMeHb, npoxoJusm meKdy hG, BCEgIa DIOJIKeH bblTb 3akpenneH.
PNEpyPExKDEHNE: nCnoJb3yIte peMHn 6e3oNaChOCTn, ecn pe6eHOK yMeet cnTe b caMOCToTJIbHo.
ПЕДУПЕЖДEHNE:нИКОГДА He CHIMAJTe Cмычky, пидаюшюжECTKOCtB, CO CпИНКСиDEHBJ.
IIOCTABKAДЯHOr
HeoDxOIM npi cnYckax c KpyTbIx yKLOHOB.
-ПepeknHbTe neTIO 6e3OpaNcHocTn BOKpyr 3aIaCTbI, KpeIKO npIepKuBaIte pyUky KOJIaCKn (29).
JOXJDEBVK,3AUNIQUOUIOTXOLODA, BETPA UNOXXJIA
Pa3BepHnTe DoXDeBnK nIOMeCTnTe eO Ha KaIIHOOH.
-3aKpeiTe JInyUkAm, KaK NOKa3aHo Ha pncyHke s (30a,b,c).
3AHTAOTCOJHLCA
KAK 3AKPENITb 3AUHTy OT COJHLA :
- YctahOBInTe Ⅲmpy Ha DyroOo6pa3HbI Kynon I npKpePiTe pe3nHKo, KaK poka3aHo HapncyHke (31).
-Для 60ьшero NaTЯжен, 3aCTeRHTe npJxKn noI noIcTaBKOДля Hor (32).
KOMPJIeKT Dnla YXODA 3A KOJIaCKOJ
KOMPJIeKT dIy yXoJa 3a KOJIaCKo CoJepKIn: KaMepy dIy KOJIeCa, 3aIaChbIe KHOJIKN I KIaIKN cINIIKOH. HAcO dIy KOJIeC hAxOJntcB KOp3nHe dIy NOKyIPOK.
6. CKlaIbIBAHNE KOJIaCKN
-BoIbIIMnJIbIeHnJaBInTeHa3AMOK 6e3OJNaCHOCTN (C npabOIN CTOPOHbl), OndHOBpeMeHHo HaxImaN yUdepXINBaPByAxxK, paCpNOJoxKeHHbeNo oBeIM CTOpOHam pyKn (33).
- HanaBHTe Ha puKy, oCbo6oJnte pbluaKn, 3aKpOte 3amOueK (34 et 35).
PNEpyPExKDEHHe: nepecklaabibaHnem KOJcKN, CHIMITE CpaMbI JIOJIbky IINa ABTOKpeCNO.
PNEyPExKDEHNE: BbHbTe BCE n3 KOp3nHbI dIy Nokynok IPEEd TEM, KaK cNoXHTb KOJcKy.
OBPATITE BHIMAHNE! Y6eIITecb, yTO NOCTaBkAДЯ HOH HAXOДNTCBA CAmOM HIXKHEM NOJIOXeHIN.
OBPATITE BHIMAHNE!пepedcklaadbibaHnEM KOLRACKN, cLOXHTe ChauJa KaIIOUOH.
7.yXOa
JaHHa KOLIcKa DOnJHa peYIpaHOp npOBepaTbCnNoJIb3ObaTeJeM.
-MetaJIuueckne JETaJI KOLJCKN CNeJyET npOTnpaTb BnaxKHO TpIKNO H CpA3y BbITnpaTb HaCyxo. IcNoIb3OBaTb TOJIbKO HeITpaNbHbIe YIcTaeIe cpeDCTBa.
TeKCTnIbHbIe DeTaIIN npOTnpaTb BlaJXHOITpIKnO. IcNOpIb3OBaTb TOJIbKO HeITpaJIbHbIEUcTAAuIe cpeIcTBa. HE CTIPAYTE BCTIPALbHOIMAUINHE
Peyraepno npobepaTe wpynb, 3aklenkn n 60ntb i 3ameHnTe BCE n3HOCBWneCn deTaN.
- Матpacин На сидение BOЗМожно CTирабь В STИрально Maшине (В ржиме ДЕЛИКаTHОД CTирки). HE OTБЕЛIBATь. He cyшпь по BOЗдевICTBием Рямбix COЛнechьх Лучел.
Bpe3yIbTaTe CnIshKOM DoJIrOTo HaxoJdeHnIOI npRmblMc COJIeHbIMn LyuamTkaHN KOLaCKN MOrYT BbIroPeTb paHbSe BpemeHn.
OBPATITE BHIMAHNE! nocne noxoda C KOJIaCKo Hn PIIJK NIN NO CHEXHO/ nOcblNaHHo COJIbIO DOpore Bcerda ONOJaCKBaIte DeTANI, COpNIkacabWneC r neckOM n CHEROM. Oco6eHNO Koneca, npyKinbln 3aKJIeKNi.
OBPATITE BHUMAHNE! He pekomeHnyeTcNcNoIb3OBAbKOJIaCKy B MOpCKoB OBe.
ПЕДУПЕЖDEHNE: nCNoJIb3yIte TOnJIbKO DeTaJI, peKOMeHDoBaHHble npOuN3BOdnteJIeM.
PNEyPExEHN H N B KOEM cnuyae He nOJIb3yIteCb KJOLaCKoI, eCNI OHa NOBpeXeHa nLI CNOMHa.
8. ПАКТИСЕСКЕ COBETы
LINHbl
IocToaHNO npOBepaTe daBleHne BO3dyxa B KOJecax.
- Ecnn daBneHne BO3dyxa BO BCex 3 uHHax He OINHaKOBOE, KOJNCKy CTAHet TpydHee TOkKaTb (MHNmym 1,4 Kf, MaKcImym 1,8 Kf).
Ecnn uHa npcta:
- 山Hb MOXHO NOUHNITb TaK JKe, KaK BENOUCINeHbIe.
- CHIMITE KaMepu INoCTaBbTe Ha Hee 3aJIpaTky.
-Пювенте пальем по BHTpeHHe CTopoH e HnHbI, yTO6bI y6eINTbcra, yTO BHTpN He OCTaJocb OCTpbix OBeKToB (HaPpImep, BetKN).
-ПocTaBbTe KaMepy, 3aTeM KOleCo, HakaayTe UINHy. - Ecnn KaMepa CnNtKOM CnIbHO NOBpeXdHa, 3aMeHnte ee (B KOMIIeK T nla yxoJa 3a KOJACKO BxOJNT 3aNaCha KaMepa).
Ecnn Bbl rnyeTe no HepOBHOMy, kamehctommy rpyHTu nn No 3emne, o6paaaiTe BHIMaHne Ha KOJIouyne KycTapnKn.
- Ecnn ⅢnHa CnIuKOM qacto CnyckaETc, MoKeT POnAIO6NtBcR NOBbIWeHne DaBLeHnB O3DyXa B WInHe. Bbl MoKeTe HakaunBaTb WInHy Do 3NaueHn1,8 Kf.