DR 3280 - Steam cleaner CLATRONIC - Free user manual and instructions
Find the device manual for free DR 3280 CLATRONIC in PDF.

User questions about DR 3280 CLATRONIC
0 question about this device. Answer the ones you know or ask your own.
Ask a new question about this device
Download the instructions for your Steam cleaner in PDF format for free! Find your manual DR 3280 - CLATRONIC and take your electronic device back in hand. On this page are published all the documents necessary for the use of your device. DR 3280 by CLATRONIC.
USER MANUAL DR 3280 CLATRONIC
natural_image
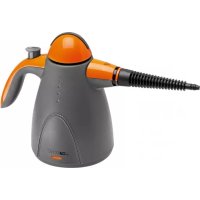
Exterior view of a modern electric vacuum cleaner with black cord and white body (no text or symbols visible)DEUTSCH
Inhalt
WAARSCHUWING: Verbrandingsgevaar!
Thank you for choosing our product. We hope you will enjoy using the appliance.
Symbols in these Instructions for Use
Important information for your safety is specially marked. It is essential to comply with these instructions in order to avoid accidents and prevent damage to the appliance:

WARNING:
This warns you of dangers to your health and indicates possible injury risks.

CAUTION:
This refers to possible hazards to the appliance or other objects.

NOTE: This highlights tips and information.
General Notes
Read the operating instructions carefully before putting the appliance into operation and keep the instructions including the warranty, the receipt and, if possible, the box with the internal packing. If you give this appliance to other people, please also pass on the operating instructions.
- The appliance is designed exclusively for private use and for the envisaged purpose. This appliance is not fit for commercial use.
- Do not use it outdoors. Keep it away from sources of heat, direct sunlight, humidity (never dip it into any liquid) and sharp edges. Do not use the appliance with wet hands. If the appliance is humid or wet, unplug it immediately.
- When cleaning or putting it away, switch off the appliance and always pull out the plug from the socket (pull the plug itself, not the lead) if the appliance is not being used and remove the attached accessories.
- Do not operate the appliance without supervision. If you leave the room you should always turn the appliance off. Remove the plug from the socket.
- The appliance and the mains lead have to be checked regularly for signs of damage. If damage is found the appliance must not be used.
- Use only original spare parts.
- In order to ensure your children's safety, please keep all packaging (plastic bags, boxes, polystyrene etc.) out of their reach.

WARNING:
Do not allow small children to play with the foil.
There is a danger of suffocation!
Special Safety Instructions for this Appliance Symbols on the Appliance

Danger of scalding due to escaping steam!
The filling hole must not be opened during use.

For your safety, this lock features a release mechanism. If the pressure in the boiler is still too high, the lock cannot be opened.

WARNING: Danger of burns!
Do not touch the hot surfaces. If you would like to change the accessories, please wait until the appliance has cooled down.
- The appliance must not be used if it has fallen down, shows obvious signs of damage or is leaking.
-
The appliance must not be left unattended when connected to the mains.
-
Keep the appliance out of reach of children when switched on or cooling down.
• Children shall not play with the appliance. - This appliance can be used by persons with reduced physical, sensory or mental capabilities or lack of experience and knowledge if they have been given supervision or instruction concerning use of the appliance in a safe way and understand the hazards involved.
- Never point the steam jet at persons or animals!
- The steam jet must not be pointed at electric appliances and equipment containing electric components (e. g. interior of ovens).
- During operation the appliance must not be tilted through more than 45^ . Boiling water might otherwise escape together with the steam.
- Always disconnect the mains plug after use and before filling in water.
- Do not overfill! Do not exceed the maximum filling level for the water!
- Only operate the appliance with water in the tank.
- Do not repair the appliance on your own. Always contact an authorized technician. If the supply cord is damaged, it must be replaced by the manufacturer, its service agent or similarly qualified persons in order to avoid a hazard.
- This appliance is not designed to be immersed in water during cleaning. Please follow the instructions that we have included for you in the chapter on “Cleaning”.
Overview of the Components
1 Hose
2 Temperature control lamp (orange)
3 Power lamp (red)
4 On/off switch
5 Carrying handle
6 Safety lock / Filling aperture
7 Kettle/watertank
8 2 extension tubes
9 Accessories compartment
10 Non-woven cloth
11 + 12 Round brush attachments
13 High-pressure nozzle
14 Adapter for window wiper / round brushes / high-pressure nozzle
15 Measuring beaker
16 Funnel
17 Jointed adapter for floor brush
18 Floor brush nozzle
19 Window wiper
20 Steam pistol
21 Steam switch on the connecting head
22 Lock ON or OFF / LOCK
Unpacking the Appliance
- Remove the appliance from its packaging.
- Remove all packaging material such as plastic films, filler material, cable ties and cardboard packaging.
- Check the content for any missing parts.
- In the event that the packaging content should be incomplete or if damages are noticeable, do not operate the appliance. Return it to the dealer immediately.
i NOTE:
There may be dust and production residue on the appli- ance. We recommend cleaning the appliance as described under "Cleaning".
Initial Operation
Filling up the Heating Boiler before Use!
Before the tank cap is opened it must be ensured that the appliance is not under any pressure. Please proceed as follows:
- Remove the plug from the socket.
- Turn the lock (22) on the steam pistol (20) to ON (Fig. B1).
- Press the steam switch (21) on the steam pistol (Fig. B2). Point the steam nozzle at a surface which is allowed to become wet.
i NOTE:
After prolonged periods of non-use it is normal for a small quantity of condensation to come out of the steam pistol at first.
WARNING:
- If the appliance is still warm after an interruption to its use there is a danger of injury!
-
Please open the safety lock (6) only when no more steam comes out of the nozzle.
-
Turn the lock in an anticlockwise direction.
-
Shake any residual water out of the kettle (7). Fill freshwater from the measuring beaker (15) into the kettle. Take care of water splashes that might come out of the boiler. In order to avoid water spray, please use the funnel supplied (Fig. C). The water should be filled in slowly.
i NOTE:
- The maximum filling capacity is 1.5 litres. Use the measuring cup provided.
- Recommendation: Use distilled water to prevent calcification.
CAUTION:
Do not use battery water, water from tumble dryers or water with additives such as cleaning agents, alcohol, fabric softener or other chemicals. They could cause hazards or damage to the appliance.
- Re-tighten the safety lock (6) in a clockwise direction.
Attachment of the Individual Accessories
It is possible to attach the individual nozzles directly to the steam pistol (20) of the hose (1):
- Plug the adapter (14) onto the steam gun until it clicks into place.
• To detach the adapter again, press the button on the steam gun. - Keep the button pressed and pull out the adapter.
Or extend the nozzle attachments with one or two extension tubes (8):
- Please insert the sections of the 2-part extension tube one inside the other until it locks into place (Fig. E). Then attach it to the steam pistol (20).
- Attach the floor brush (18) to the extension tubes: press the jointed adapter (17) on to the floor brush and turn it tightly through 180°.
- If you would like to use the non-woven cloth, attach it to the floor brush with the help of the clips (Fig. F).
- In order to release the extension tube, please press the button on the steam pistol.
i NOTE:
Various attachments can only be used in conjunction with the adapter (14). Check that everything is properly connected!
| NozzleAdapterUse | ||
| Floor brush (18) | Jointed adapter (17) | • for large floor surfaces (Fig. H)• with non-woven cloth: for sensitive surfaces (Fig. I) |
| Round brushes (11) | with adapter (14) | • for joints, fittings, grill grid etc. or• for difficult-to-access areas (Fig. G and J) |
| High-pressure nozzle (12) | with adapter (14) | • for concentrated, high steam pressure (Fig. K) |
| Window wiper (19) | with adapter (14) | • for windows or shower partitions |
WARNING: Danger of injury!
Never attach or remove the accessories if the steam switch (21) is pressed in! Wait until the appliance has cooled down.
Electrical Connection
Before inserting the plug into the socket. Make sure that the mains voltage to be used matches that of the appliance. You can find this information on the nameplate.
Connected Wattage
The station has a total maximum wattage of 1500 W.

CAUTION: Overload!
- If you use extension leads, these should have a cable cross-section of at least. 1.5 ~mm^2 .
- Do not use any multiple sockets, as this appliance is too powerful.
Using the Appliance

CAUTION:
Before you begin cleaning you should test the materials to be cleaned as to their suitability for cleaning with steam. Do not hold the steam nozzle for too long and too close in one position.
After you have filled the kettle with water and selected a cleaning attachment, please proceed as follows:
Lock the steam switch (21) to prevent pressing it inadvertently.
- Turn the lock (22) on the steam pistol (20) to OFF / LOCK without the steam switch (21) pressed in (Fig. A).
- Connect the appliance to a duly installed protective contact socket.
- Press the on / off switch (4) (Fig. D). The red control lamp (3) lights up. The temperature control lamp (2) shows that the appliance is heating up.
- After approx. 12 min the steam temperature has been reached and the temperature control lamp (2) goes off. The appliance is ready for operation. During use this control lamp shows that the water is being heated up again.

WARNING:
If the steam switch is pressed while the orange lamp is on, it is possible for hot water to be ejected from the nozzle.
-
For the purposes of cleaning turn the lock (22) on the steam pistol (20) to ON (Fig. B1).
-
Point the steam nozzle at the surface to be cleaned and press the steam switch (21) (Fig. B2).

NOTE:
During operation please ensure that the hose does not become twisted or squashed.
Filling up the Water Boiler when Using the Appliance
If there is no more water inside the kettle no steam is emitted when the steam switch (21) is pressed. The water has to be filled up as follows:
- Press the on / off switch (4). The red control lamp goes off.
- Remove the mains plug from the socket!
- Release the residual pressure with the steam switch (21) (see "Initial Operation", points 2 and 3).

WARNING: Danger of Injury!
Please open the safety lock (6) only when no more steam comes out of the nozzle.
- Slowly open the safety lock (6) and wait a few seconds before opening it completely until the overpressure has been released.
- Fill freshwater from the measuring beaker (15) into the kettle. Take care of water splashes that might come out of the boiler. In order to avoid water spray, please use the funnel supplied (Fig. C). Fill the water in slowly. Do not overfill! Max. water capacity: 1.5 litres.
- Fasten the safety lock again.
- Reinsert the plug into the socket and switch on the appliance using the on / off switch.
When You Have Finished Using the Appliance
- Press the on / off switch (4). The red control lamp goes off.
- Remove the mains plug from the socket!
- Release the residual pressure with the steam switch (21) (see "Initial Operation", points 2 and 3).
- Allow the appliance to cool down for approx. 1 hour before you put it away.
Cleaning

WARNING:
- Before cleaning, always remove the mains plug and wait until the appliance has cooled down.
- Do not immerse the appliance in water. Otherwise this might result in an electric shock or fire.

CAUTION:
- Do not use a wire brush or any abrasive items.
-
Do not use any acidic or abrasive detergents.
-
Before the appliance is put away or cleaned it must have completely cooled down.
- The appliance and accessories should only be cleaned with a slightly damp cloth.
- In order to ensure that the appliance will function correctly for a long time, approximately 15 litres of water should be passed through it in order to rinse out lime residues from the boiler. You should only use clean water for this. Max. water capacity: 1.5 litres.
Technical Data
Model: DR 3280
Power supply: 230 V\~, 50 Hz
Power consumption: 1500 W
Protection class: I
Operating pressure: 4 bar
Max. water capacity: 1.5 litres
Net weight: ....approx. 5.2 kg
The right to make technical and design modifications in the course of continuous product development remains reserved.
This appliance complies with all current CE directives, such as electromagnetic compatibility and low voltage directive and is manufactured according to the latest safety regulations.
Disposal
Meaning of the "Wheelie Bin" Symbol

Take care of our environment, do not dispose of electrical appliances via the household waste.
Dispose of obsolete or defective electrical appliances via municipal collection points.
Please help to avoid potential environmental and health impacts through improper waste disposal.
You contribute to recycling and other forms of utilization of old electric and electronic appliances.
Your municipality provides you with information about collecting points.