
TDC 3432 - Steam cleaner CLATRONIC - Free user manual and instructions
Find the device manual for free TDC 3432 CLATRONIC in PDF.
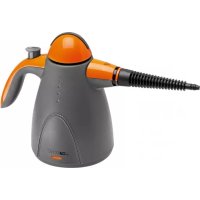
| Product type | Steam cleaner steamer |
| Brand | Clatronic |
| Model | TDC 3432 |
| Power supply | 230 V~, 50 Hz |
| Power | 1500 W |
| Net weight | 4.6 kg |
| Water tank capacity | Approximately 1 L |
| Heat-up time | Approximately 45 seconds |
| Steam type | Continuous steam |
| Usage | Vertical and horizontal |
| Included accessories | Nozzle, lint brush, pants support, foldable hanger, telescopic tube, steam hose |
| Recommended water type | Distilled water |
| Maintenance | Clean with dry cloth, descale monthly with vinegar/water solution |
| Main functions | Vertical and horizontal steaming, wrinkle removal, brush to remove lint |
| Safety | Do not direct towards people or animals, do not use without water, unplug before filling |
| Recycling | Compliant with WEEE directive |
Frequently Asked Questions - TDC 3432 CLATRONIC
User questions about TDC 3432 CLATRONIC
0 question about this device. Answer the ones you know or ask your own.
Ask a new question about this device
Download the instructions for your Steam cleaner in PDF format for free! Find your manual TDC 3432 - CLATRONIC and take your electronic device back in hand. On this page are published all the documents necessary for the use of your device. TDC 3432 by CLATRONIC.
USER MANUAL TDC 3432 CLATRONIC
Overview of the Components.. 3
Instruction Manual.. Page 32
Technical Data.. 35
Disposal.. Page 35
JEZYK POLSKI
Spis tresci
Przeglade elementów oblsugi....Strona 3
WAARSCHUWING: Verbrandingsgevaar!
Consommation: 1500 W
Thank you for choosing our product. We hope you enjoy using the appliance.
General Safety Instructions
Read the operating instructions carefully before putting the appliance into operation and keep the instructions including the warranty, the receipt and, if possible, the box with the internal packing. If you give this device to other people, please also pass on the operating instructions.
- The appliance is designed exclusively for private use and for the envisaged purpose. This appliance is not fit for commercial use.
Do not use the appliance outdoors. Keep it away from sources of heat, direct sunlight, humidity (never dip it into any liquid) and sharp edges. Do not use the appliance with wet hands. If the appliance is humid or wet, unplug it immediately. - When cleaning or putting it away, switch off the appliance and always pull out the plug from the socket (pull the plug itself, not the lead) if the appliance is not being used and remove the attached accessories.
- Do not operate the machine without supervision. If you leave the room you should always turn the device off. Remove the plug from the socket.
- The device and the mains lead have to be checked regularly for signs of damage. If damage is found the device must not be used.
- Do not try to repair the appliance on your own. Always contact an authorized technician. To avoid the exposure to danger, always have a faulty cable be replaced only by the manufacturer, by our customer service or by a qualified person and with a cable of the same type.
- Use only original spare parts.
- Pay careful attention to the following "Special Safety Instructions".
Symbols in these Instructions for Use
Important information for your safety is specially marked. It is essential to comply with these instructions in order to avoid accidents and prevent damage to the machine:

WARNING:
This warns you of dangers to your health and indicates possible injury risks.

CAUTION:
This refers to possible hazards to the machine or other objects.

OTE:
This highlights tips and information.
Children and Frail Individuals
- In order to ensure your children's safety, please keep all packaging (plastic bags, boxes, polystyrene etc.) out of their reach.

WARNING!
Caution! Do not allow small children to play with the foil as there is a danger of suffocation!
- This device is not intended to be used by individuals (including children) who have restricted physical, sensory or mental abilities and/or insufficient knowledge and/or experience, unless they are supervised by an individual who is responsible for their safety or have received instructions on how to use the device.
- Children should be supervised at all times in order to ensure that they do not play with the device.
Special Safety Instructions for this Machine
Symbols on the unit

Risk of burns from escaping steam

WARNING:
Choose a safe storage area for the unit! The surface must be level and stable.

WARNING: Danger of burns!
Do not touch the hot surfaces. If you would like to change the accessories, please wait until the device has cooled down.
- Never direct the steam at people, animals, and electrical equipment (for example into the oven tube).
- Always pull the electric plug from the socket when refilling.
- Operate the unit only with a full tank.
- This unit may not be used to clean electrical appliances or installations.
- Use only distilled water.
- Battery water, water from a clothes dryer, and water with additives (such as starch, perfumes, fabric softeners, or other chemicals) must not be filled into the water tank.
Overview of the Components
1 Holder for nozzle and hangers
2 Nozzle
3 Handle
4 Steam hose
5 Telescopic tube
6 Connection piece
7 Water tank
8 Valve cap
9 Cap nut
10 On/Off switch
11 Mains lead
12 Drain plug
13 Brush attachment for nozzle
14 Clothes hanger, foldable
15 Trouser hanger
Before First Use
Unpacking
- Remove the main unit and the accessories from the box.
- Remove any packaging material.
- Check the scope of delivery.
Assemble the unit
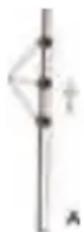
- Extend the telescopic tube completely (Fig. A):
- Loosen the clamp.
- Extend the tube completely.
- Close the clamp.
- Repeat these steps for the other sections.

NOTE:
During use of the unit, the telescopic tube must be extended completely to ensure an unimpeded flow of steam through the steam hose.
- Align the tabs of the bracket and the recesses in the telescopic tube with each other and set the bracket to the telescopic tube (Fig. B).
- Insert the telescopic tube into the holder in the unit (Fig. C).
- Turn the telescopic tube so that the holder for the nozzle points to the rear of the unit. This increases the stability of the unit when a garment is hung on the hanger.
- Tighten the cap nut.
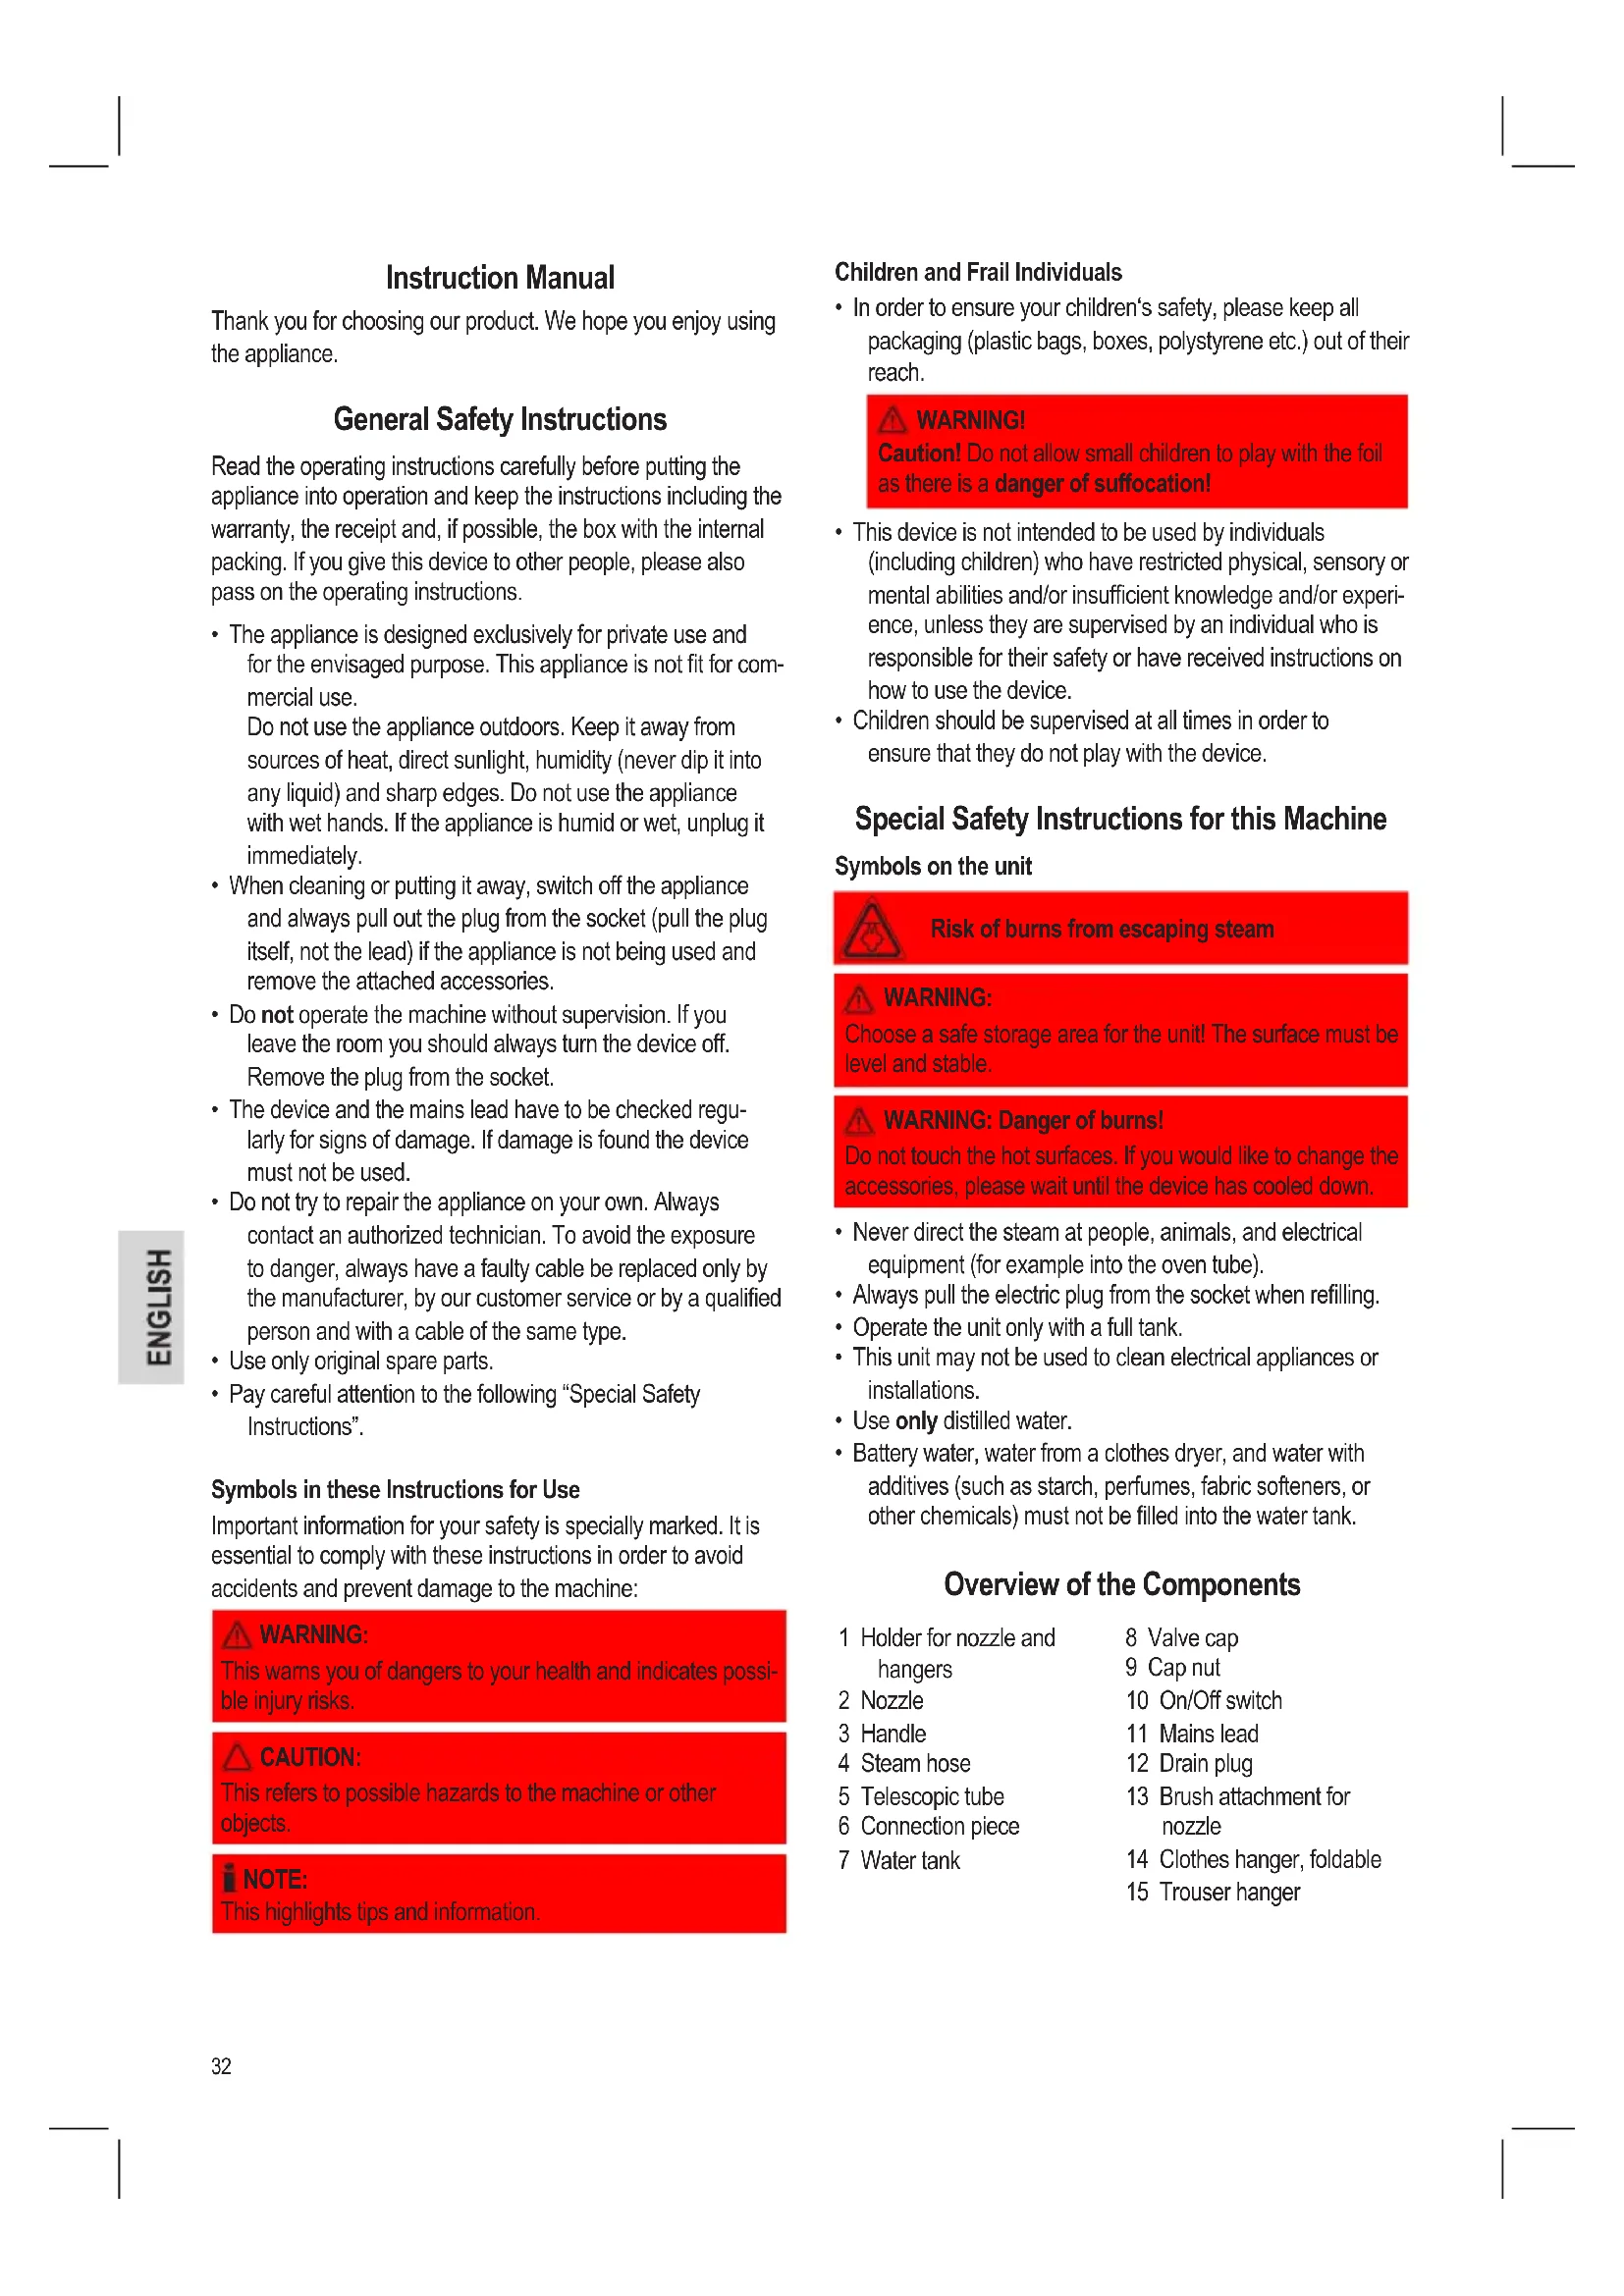
- Connect the connection piece to the unit (Fig. D). The arrow on the connection piece must point to the unlock symbol on the unit.
- Turn the connection piece clockwise until the arrow points to the lock symbol.
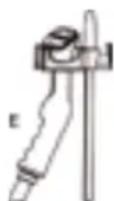
- Hang the nozzle in the holder (Fig. E).
- Attach the brush attachment to the nozzle. The brush attachment is used to remove as lint, hair, or loose threads.
- Set the hanger to the bracket.
- Pull both ends of the hanger outward until they lock.


WARNING:
- Always suspend the nozzle from the holder when it is not used, in order to avoid injuries or damage to surfaces from escaping steam.
- Do not place the steam hose on the ground to avoid condensation and thus unwanted water droplets in the steam.
CAUTION:
Make sure that the steam hose is not stretched, squashed, or kinked. Do not operate the unit with a damaged steam hose.
Electrical connection
- Make sure that the iron voltage (see name plate) and the line voltage match.
- The mains plug should only be inserted into a correctly installed 230V 50Hz socket with earthing contact.
Connected Wattage
The unit can draw a total power of 1500 W. With this connected load a separate supply line protected by a 16 A household circuit breaker is recommended.
CAUTION: Overload!
- If you use extension leads, these should have a cable cross-section of at least 1.5 ~mm^2 .
- Do not use any multiple sockets, as this device is too powerful.
Operation
Operate the unit
- Remove the water tank from the unit, turn it over, and unscrew the valve cap.
NOTE:
Use distilled water to increase the lifespan of the unit.
- Fill water into the water tank and seal the tank again with the valve cap.
NOTE:
Use only the supplied water tank.
- Replace the water tank in the unit. For a short while, water flows into the unit.
CAUTION:
Never operate the unit without water. This can damage the unit.
- Plug the power plug into a correctly installed safety socket for 230V 50Hz
- Set the On/Off switch to "ON". The pilot lamp in the switch lights up. Steam is available after approximately 45 seconds.
- To straighten your clothes, hold the nozzle at the handle and aim the steam towards the clothes.
- After use, set the On/Off switch to "OFF".
Ironing with steam
- To smooth a piece of clothing with steam, hang it on the hanger or attach it to the bottom of the hanger. Set the hanger to the holder. For horizontal work, place the clothes on a clean, flat surface.

CAUTION:
- When using the clothes hanger, take care not to pull too much on the clothes. The unit may tip over.
-
Hot steam could escape from small holes in the fabric.
-
Hold the nozzle at the handle and keep the nozzle in the lower part of the clothes. The steam will rise both the inside as well as on the outside and will remove wrinkles. Move the nozzle slowly from the bottom up over the fabric.

NOTE:
Make sure that the steam hose is not kinked.
- Remove the nozzle from the fabric and smooth it by hand.
- Repeat the steps 2 and 3 until all wrinkles have been removed.
- For horizontal application, hold the nozzle at a distance of approximately 10cm above the fabric.
- To remove wrinkles on towels, handkerchiefs, or napkins, hang them over a rod or a towel holder and smooth them gently.
- Heavy fabrics require repeated steaming.
- To eliminate larger wrinkles, treat both sides of the fabric with steam.
- The brush attachment can also be used to remove larger wrinkles.
When you have finished
- Set the On/Off switch to "OFF". The pilot light in the switch goes out.
- Unplug the power cord.
- Wrap the steam hose once around the telescopic tube and set the nozzle into the holder.
- Loosen the two upper clamps of the telescopic tube and collapse the telescopic tube.
- Roll the unit to a suitable storage place.
Cleaning

WARNING:
Always remove the mains lead before cleaning!
- Wait until the machine has cooled down completely!
- Under no circumstances should you immerse the device in water for cleaning purposes. Otherwise this might result in an electric shock or fire.

CAUTION:
- Do not use a wire brush or any abrasive items.
-
Do not use any acidic or abrasive detergents.
-
Clean the casing with a slightly damp cloth.
Preparing for long-term storage
We recommend performing the following steps once a week. When distilled water is used, cleaning is not required as often and the life of the unit increases.
- Disconnect the steam hose and the telescopic tube.
- Place the unit over a drain.
- Remove the water tank and empty it. Rinse the tank with fresh water and empty it completely.
- Empty the unit completely. Either remove the drain plug or pour the water out of the unit.
-
To rinse the unit, fill fresh water into the water inlet and the hose connection and empty the unit completely.
-
Replace the tank on the unit.
- Install the steam hose and the telescopic tube.
- Wrap the steam hose once around the telescopic rod and set the nozzle into the holder.
- Loosen the two upper clamps of the telescopic tube and collapse the telescopic tube.
- Roll the unit to a suitable storage place.
Dscaling
A common problem with steam appliances are lime deposits when hard water is used. Lime residue in the internal lines and the heater can lead to intermittent steam discharge or in some cases to a complete stop of steam output.
NOTE:
To reduce or prevent lime deposits, we recommend the use of distilled water.
If you cannot use distilled water, we recommend that you perform descaling once a month. Proceed as follows:
- Disconnect the steam hose and the telescopic tube.
- Place the unit over a drain.
- Remove the water tank and empty it. Rinse the tank with fresh water and empty it completely.
- Empty the unit completely. Either remove the drain plug or pour the water out of the unit.
- To rinse the unit, fill fresh water into the water inlet and the hose connection and empty the unit completely.
-
Prepare a solution with 50% vinegar and 50% water. In most cases, 2 cups of this solution will be sufficient.
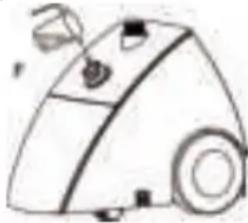
-
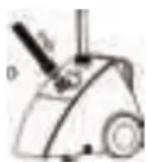
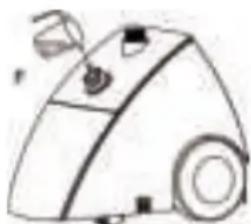
Pour this solution slowly into the tube connection of the unit (Fig. F), until the water tank of the unit is about half full.
-
If the filled-in solution does not become visible in the inlet of the unit, fill the hose connection completely. Additionally, pour
solution into the water inlet, until the water tank of the unit is about half full.
-
Let the solution at for 40 minutes.
-
Empty the unit completely.
- Rinse the hose connection as well as the water tank with fresh water, until all vinegar residue has been removed.
- Connect the steam hose and the telescopic tube.
Trouble-shooting
| Problem Possible cause Remedy | ||
| No steam is put out and the pilot light in the On/Off switch does not light. | Mains plug not plugged in. Plug in the mains plug. | |
| Mains circuit breaker tripped. Close the circuit breaker. | ||
| No steam is put out and the pilot light in the On/Off switch is lit. | Lime deposits in the unit. Descale the unit. | |
| The water tank is empty. Fill with water. | ||
| Water drips from the nozzle Condensation | n the steam hose Pull the steam hose straight up so the water can flow back into the unit. | |
| Strong bubbling in the hose and in the nozzle | Condensation in the steam hose Slight bulb | bling is a normal effect of the steam process. In case of strong bubbling, pull the steam hose straight up so the water can flow back into the unit. |
| Steam output is interrupted. Lime deposits | n the unit. It is normal that the steam output is interrupted periodically for a few seconds during operation. In case of longer interruptions, descale the unit. | |
Technical Data
Model: TDC 3432
Power supply: 230 V~, 50 Hz
Power consumption: 1500 W
Protection class:
Net weight: 4,6 kg
Subject to technical changes without prior notice!
This device has been tested according to all relevant current CE guidelines, such as electromagnetic compatibility and low voltage directives, and has been constructed in accordance with the latest safety regulations.

Disposal
Meaning of the "Dustbin" Symbol
Protect our environment: do not dispose of electrical equipment in the domestic waste.
Please return any electrical equipment that you will no longer use to the collection points provided for their disposal.
This helps avoid the potential effects of incorrect disposal on the environment and human health.
This will contribute to the recycling and other forms of reutilisation of electrical and electronic equipment.
Information concerning where the equipment can be disposed of can be obtained from your local authority.
Instrukcja obstugi
IpeBipTe, yu shaanr gnnapn He 3iHnyTm.
- 3a6epiB coIIO 3TKAHHH i BIPIBHnTe II pykoIO.
- BvkoHaTe 3a3NaHEni II 2-3 pa3n, DOnOKn CKnAdKn He 6yJe yCyHyTo.
5.Плд acrnpn30anbHOro BiDnapOBaHHy yTpmyTe cOnno Ha BiDCTahi np6n3HO 10 cm NaT KaHHOIO. - Дя Видалени Кскадок на рушнкех, Нocobикх посерbetкх, повicьтейх на пankу почимаши рушни вякib i akypatho BiДnapte.
- BaxkTIkaHHn noTppe6yHb HeoHopa3OBOro BiInapoBaHn.
8.Ду yCyHeHЯ BénKIX CknaOk, BiDnapTe obuDbI CTOpOHn TKAHNH.
9.Ду усун He Hn Be nKnx CKnDOK MoXHa TakoB BnKOpncTo- ByBaTn Hacay 3i 1tKOIO.
3aikHnHn npaui
- BctaHObitb nepemHKaay yBIMKHeHHy/BIMKHeHHy y noJIOXKeHH "OFF".BIMKHeTbcra KOHTpoJIbHa IamNoUka Ha nepemHKaYi.
- Bi'deHaHte KaebJIb XnBHeHHa.
- Odn pa3 obMotaTe ImaHr Ipn Napn HABKOno TeNeckO-nHIOI Tpy6kn IBCTaHOBITb CONNo HA TpIMaH.
- BiKpyTb DBA BepXHi 3aTnCKaHi TeneckOniHoi Tpy6Kn i CknaDItb TeneckOniHy Tpy6Ky.
- BiKoTItb npicTpriy y BiNobiDHe MicCe dIa 36epiraHnA.
OuHcHn
TONEPEDKEHH
-П配电TМЯКПОЧТУОчиЕнгпpackI,cniD.обOB'яЗКОВВИТЯнHTNВИКY3pO3eTm!
-Почекайт,поки пимлд He досягHeHopmaьhoi Tempepatypi!
- KaTeROpHNO 3a6bOpOHcTbCnOnyckaTn npuIaD B Body, uOb OChCTnTn Noro. Lc MoKe npu3BecTn Do ydApy eJIeKTPnHHM CTpymOM a6o Do noKexi.
YBAGA.
Дяоишени He 3aocobyTe uTkn 3 npOty a6o iuMi MaTepiann, lo MoKyTb NnKoNDn NOBepxHIO.
He 3actocobyTe 3acobn IJra OunueHHaKiMiCTb iDki abo abpa3uBhi cKlaIoboi YactnuH.
OuHuaTe KOpNyc 3a DonomorOIO cyXoI TkaHHN.
PpuroTyBaHHnI TpHbAIOro 36epirAHn
PekomeHIOBaHO BIKOHyBaTN OINCAHI HIXKHe II p3 Ha TIXKDeHb. JIIO BIKOPNCOTByEbCSI NCTINbOBaHa BOda, YNCTNTNOtpi6HO He TaK cAto I TepMih po60n IpNCPTo npoDobKyETbCra.
- Bic'dnaiTe 7naHr dna napi iteneckoniuHy Tpy6ky.
- NocTaBte Bnpi6 NaI dIpeHaXHO CnCTeMOIO.
- 3HIMITb 6aOK IJIy BOI i CnopoXHITb Ioro. CnOIOCHITb 6aOK CBIXOHO BOHO, TOni BUNINTe BCHO BOY.
4.ПовсICTO cnoPoXHITb Bnpi6.3HIMITb 3nHBHy npo6ky a60 BnInIte BOy 3 Bnpo6y. - 106 cnoiochTu Bpi6, Hainite CbiKy BoY BOY BOTBIOI BOIN3EHNHn IuaHry, nicra YOROBINITE BCHOBOY.
- BctaHOBiB 6aOH Ha MicJe.
- BctahOBiB tIaHr dI npI TeNEckOniHy Tpy6kY.
- 06motaTe WnAHr Dnnapn Ondn pa3 HABKOno TeNecko-niHOI WtAHr n BCTaHOBt cNo Ha TpIMaY.
- ПослбSte Два Берхи 3аTNCKaHi TelenckonIHHOI Tpy6kn i po36epiTb Tpy6ky.
- Biikotitb npictpiy B iDnOBiHe Micue dna 36epirHnA.
YcHyENHnHaKnIy
TnnoBa np6nema dny yic npabnx npnctroB-BiiknaedeHHaKnny y pa3i BnkopncTaHH JokcTKoI Bodn. 3aNiluKn Hakiny Ha BHyTpichx YacTHnax i HarpibalbHomy enemeHTI MOxytb npns3BeCTN Do nepepeBvatoi noaHi nap, a B OKPemix Bnndkax Do NobHoro pinnHHeHH nOaHi nap.
NPMMITKA
3MeHHTn a60 yHKHyTn BdknaedHHaKmny, peKoMeHDoBAHO BkOPMCTOByBaTn DCNTNbOBAHy BOy.
KJIO DCNTNIBOBAH BOda HeIOCTyHa, peKOMeHIOBaHO uNCTTN Bnpi6 BiD hAKmny pa3 Ha Mica. BIKoHaTe nOaHi daJI BkazIBKn.
- Bic'dnaiTe 7aHr dna napi i teneckoniuHy Tpy6ky.
- NocTaBtBe Bnpi6 NaI dApHeaKaHIO CnCTeMoHO.
- 3HIMITb 6aOK IЯ BOI i cIopoxKHITb Ioro. CnIOnCHITb 6aOK CBIXOBOHO, TODI BUNINTE BCHO BOY.
4.ПовсICTHСнорхНВИРБ.3HIMITb 3NINBHy np6ky a60 BnInTe BOy 3 Bnpo6y.
5. 106 cnloochytn Bupi6, hainite cbiKy BOY B OTBIP Dn BOHN i3'EDHaHnR Wnahry, nCJRA YORO BUNITE BCIO BOY
6.ПригOTунTe розин 50% ouTu i 50% BODu.Y6iNbIwoCTi
BnnaKIB 2aWok po3HHy 6yde DoCTaTHbO.
7.Повьлбн Виьаве розинВ OTbipДпяпд'еданнТубки На Виробi (MaI.F),покБачok ДЯ BODI He HANOBHITbcrdo ПОЛOBИИ.
8.Якpo3HHy He BnDHO Ha BxOdi BnO6y, nobHcTIO HanOBHITb cMHiCTb.Ha DoTaOK BnBaTe po3HH B OTBip dIa BOuN, NOK 6aQK dIa BOUHe HANOBHITcB DO NOOBHN.
9. 3aJIIMTe po3uHn Ha 40 XBINIH.
10. IOBHICTO CNPOOXHITb Bnpi6.
11. CnoJIOCHITb Mlue PiEiHaHnIaHa, a TAKoK 6aOcK dIy BOIN CBIXOIO BOIOHO,POK He 6yJe yCyHyTo yci 3aIIuIKN OUY.
12.Пд'энайтшангдяпари i ТелескогуТубky.
YcyHeHHH HeCnpaBHOcTei
Yka3bIbaet Ha BO3MOKHyU ONaCHOCTb IJIa N3DeNIA IN dpyNX OKpyKAIOUxN IpeDMETOB.

PUMEYAHIM:
Jaet coBebti MHDPOMALIO.
TeHn nIuca HuykdaiooueceB npncmOTpe
- I3 coobpaxehn 6e3oNaChocTn DnI dTeH He ocTabnIte JexKaTb ynaKOBky (PiNactIKOBbie MeuKN, KaTOH, NeHOIIaCT n T.D.) 6e3 npNCMOTpa.

PPEQYNPEXDEHNEI
He no3B0JIte DetmIrpaTb c nonIaTIeHOBoi nnH- KO. OnachocTb yduJb!
3TOT np6bOp He npEHa3HaueH IINI NOIb3OBAHnIuCaAMN (BKNIOaJ DeTei) C ORpAHueHHbIMN fN3UeCKIMN, CEHCOPHBIMN INI yMCTBEHHbIMN cNOcO6HOCTaMn INI NluaAMN, HE IMeEOUIMN ONbITa N/INI NEo6XoDnMbIX 3HaHN. NcKNIQUHeH CoCTABJrOT CnyAan, KOrDa OHN HAXOJrTCNoI pncmOTpOM IIna, OTBeTCTBeHHoro 3a INx 6e3OnaCHOCTb, INI KOrDa OT 3TOrO JInca NoIyHeHbI Yka3aHnR No NOnb3OBAHnIO np6bOpM.
Heo6xoJIMO npncMaTpNbTa 3a DeTbM, YTo6bI y6eHITbCBA TOM, YTO OHN He INPpaOT C pnp6Opom.
CneuHaBHeIyka3aHnI NO 6e3oNaChocTn DnA 3TOrO np6opa
CIMBOJIbHaN3deJIN

Onachoctb oxora ort ctpynapa

NPEUYPEXDEHNE:
Bb6epnte 63oNaHoe MeTo dIy XpaHeHn yCTpoiCTBa!
PiBepxHOCTb DOJIKHa 6bITb POBHOn I yCTOHNBOI.

PENEUPPEXDEHNE:Onachocb oxora!
He npikacaiTeB KtopaHMM DeTaJIbM. Ppeed cMeHOH HacaDOK daIte 3eKTPoPnBOpby nOHOCTbIO OCTbITb.
HnKorda He HanpaBnaIte CtpyIO npa Ha IIOeJ, XNBOHTbIX n3JIeKTpOo6OpdyOBaHne (HanpIMep, Ha 3JIeKtpoNeYb).
-Пи Добавлесни Вовы Bустюctв Всегда OTоевиняп
Te Stentencelb OT He3da.
- ΕΚΟΝΙΥΑγιργήτη Μεγτροίνισθό ΚιλύκΟς Κιπήνιμρεερβγαρορόν.
-Данhoe yctpoiCTBO HeIb3I NCIOB3OBaTb IINI YNCTKN 3JIeKTPuYeCKNX pN6OpOB INI YCTAHOBOK.
-ИспόньутTeTOJBKOДИСТИПЛINIPОВАHHYIO BODY.
- Pe3epByap HeIb3aIOpIHaTb BODo I3 aKKymJrTOPOB, cyuINIOK dIpy 6eIbA, BODO C Do6aBkAMN (TaKIMn KaK KpaxMaI, dyXn, CMyHTeTI NKAHN ININ DpyrNe XIMMueckne BeUcctBa).
063op detae np6opa
1 DepeKaTeIb Iyra conna n KpOkoB
2 Conno
3 Pyka
4 ⅢnHr nIy npaunnpa
5 Teneckonnecka Tpy6ka
6 CoeHHntbHaJ TaJIb
7 PeεeRbVap nIa BOdbI
8 KonnaK BeTnna
9 Kolnaukobarra
10 BkIIOuATEJIb/BbIKIOUaTeJIb
11 WHyp 3JNeKTPoNTaHn
12 CnBna np6ka
13 电toHoe npncno6ne Hne dna coonna
14 KpOuOK dIg OeKdbI, CKlaADHOI
15 Beuapanka dnn 6pok
IpeepnepBbIM nCNoJIb3OBAHneM
PacnaKobka
1.ИЗВЕКЛТУСТРОДСТВОИ ПИΝHAДПЕKHHOCTN ИЗΚΟΡОБКИ.
2. YdaNITE BCE ynaKOBOChbIe MaTePmaJIbI.
3. Поверп Te KOMПЛЕКТHOCTb NOCTaBKN.
C6opka yctpoiCTBa
- PJIHOCTbIO BbITrHHTe TEJIeCKONHHeCKyIO Tpy6Ky (pnc.A):
Ocna6bTe 3aKIM.
ПОЛНOCТьЮ ВБITЯнITE ТPyБК. - 3akpoIte 3aKIM.
-Повторе STишагдядрунхск。
I PIMMEAHNA:
Bo bpema pa60tby yctpoiCTBa TeleckoNuecka TpybKa doJXha 6bItb nonHOCTbO BbITryTo, YTObI ObecneHTb 6ecnpenATcBeHHoe npoxKeHne nToKa npa Upe3 shnhr.
- CoBmecTne Dpyr C npyrom BbICTynbHa KPOHHTeHne N yrrny6JIeHnHa TeNECKONHecko Tpy6Ke n YcTaHOBInTe KPOHHTeHnHa Tpy6Ky (Pnc.B).
3.BCTaBbTe TeneckOniNeckyU Tpy6ky B DePkaTeNb Ha Kopnyce yCtpoiCTBa (pnc.C). - NOBEPHNTe TeneckonuYeCKyU Tpy6ky TaK, YTO6bI DEpKaTeB Dnra CoNna 6bln Ha-NpaBHeH HbTbInbHyIO UcTaB yCTpoiCTBa. 3TO NOBbIaEYT yCTOuINBOCTb yCTpoiCTBa, KOrDa IpeMTe ODeXDbI BydET NOBEWeH Ha KPHoK.
- 3aTAHNTe KOJInaHcKObYIO rAky.
6.ПодсоeINHITe coeINHITeBHyIO DeTaNb KустpoiCTBy (pnc.D).Стрелka Ha coeINHITeBHOI DeTaNДОЛЖHa yKa3bIBaTB Na CIMBOI pa36NOKIpOBKN Ha Kopnyce ySTPOIcTBa.


- NOBEPHNTe CoeINHTeBHyIO DetaJIb TaK, YTO6bl CTpeJIka YKa3bIbAha CIMBOI 6JOKIPOBKN.
8.Подевсы солно на держateел (pnc.E).
9.ПисоединiteшетонпсncocobneHNEKcOnny.HToCHOE npncocobneHnCNoIb3yETcRdYydaJIeHnC OdeJdbIMeKnx YactNU, TaKx KaK NyX, BONocblJIN HHTKn. - YctaHOBNTe KpOK Ha KpoHJTeH.
11.ПOTЯНITEоба кОнца КрОКа НApУжТAK, YTO6bI OHI 3aФИКСИРОВАПСБ.
NPEDYNPEXDEHNE:
Bcerda chImaTe cOnIO c depkaTeJIa,ecn OHO He IcNoIb3yeTcayTo6bln36exaTb TpaBM nIN NOBpeJdeHnNOBepXHOCTeOT BixOJaero napa.
He KnaDHTe IshaHr Ha 3emIIO, YTObIu36ExaTb KOHDcauN I, TAKIM Oba3OM, HeXeTaTeBHO rOraBneHn KaJIb BODI B nape.
BHIMAHNE:
Y6eHITcB, YTOIJIaHrI IJIIOaHi npa He paacHyT, He nepeKsat HHe nepeKpyeH. He 3KcIIyATnpuyte yctpoiCTBO C NOBpeXdHHbIM IJIaHROM dJIIOaHi npa.
3NeKtpocetb
- Y6eIITecb B TOM, YTO HApJxKeHHe NITaHnYyTHOra (CMOTpu TaBJIuKyu Ha HeM) COOTBeTCTByET HApJxKeHnBOAWei CETn.
BCTaBnIe CeTeBOI uTeKeP IINb B MOHTnpoBaHHyO coTnACHO ppeHnCaHnM uTeNCeMbHyIO po3Etky 230 B\~ 50 rC 3aUHTbIM KOHTAKTOM.
Iotpe6nemma Mouhoctb
IoiHna MoUHocTb yCTpoNCTBa moXeT 6bITb 1500BT. TaKyo Hapry3ky peKOMeHNyETcra NODKJIIOuATbYepe3 OTdEnbHyO 3JEKTPOPBOOky, OCHASeHHyO aBtOMaTOM OTKJIIOueHnHa Ha 3JEKTPOTOK 16 A n yCTpoNCTBOM TOKOB 3aunTbl.
BHIMAHNE:Ipeperpyka!
- Пи пььзованудимпельим Кабелян седиTe 3a Tem,чтоби пonepeуне сеуне Кабеляью MMHIMyM 1,5 MM².
He noIb3yItecb pa3BeTbNTeJIbHbIMn UTeNCJIbHbIMn po3eTKaMn, TAK KaK 3OT np6Op IMeET CNIuKOM BbICOkyIO MOnHOCTb.
06cnyxmbHne
Pa6ota yctpoNCTBa
1.ИЗВЕКИТе peЗерByap ДЯ ВОДы ИЗ устpoиCTBa,пенивсHTte,I OTBHTNTE KONNAчOK BEHTINJ.
IIPIMEUYAHNA:
VcnoIb3yIte dIcTmIIIpOBAHHyIO BDO yIaYbEInHeHnepoKa cIyX6bl yCTpOHTBa.
- HanonHnTe pe3epByap Boo, n ChOba 3akynopbTe erO KOJINaUcKOM BEHTINJ.
IIPIMMEYAHNA:
IcnoIb3yIe ToIbKO IMeIOUmCra B KOMnJIeKTe pe3epByap IJRABObl.
- BCTaBtpepeepByap B yCTpoIcTBO. B TeeHne KopoTkoI npomexyTKa BpeMeHI BOJa 3aJIbEtCra B yCTpoIcTBO.
BHUMAHNE:
Hikorda He 3cKpIyatnpuyte yctpoiCTBO 6e3 BObl. 3tOMoKet NOBpeiNb yctpoiCTBO.
4.BCTaBbTe UHTenCeJIb UHypa 3IeKTPoNtAnHn B NcnpaBHyOp0eTky 230B\~,50Tq.
5. YctahOBHTe nepeKIOHATeNB BkIOHATeNB/BbIKIOHATeNB B noIOXKeHne "ON". Ha nepeKIOHATeNE 3arOpNTcKoHTpOJBHa JAMNa. Nap 6yET DoCTyPeH dIra NcNoB3OBAHn IpiMepHO Uepe3 45 cekyHd.
6. TTo6bI pa3rnaTb OeJy, Bo3bMITE conNo 3a pyky HappaBte Ctpyo npa Ha oJekdy.
7. Nocne nCnoJIb3OBAHnI yCTaHOBHTe nepeKNIouateIb BkIIOu-ayTeIb/BbIKNIOUaTeIb B NOJNOKeHne "OFF".
TnaxKeHne cnapom
- YTo6bI pa3MaYnTb YaCTb OeXJbI C NOMOu bI npa, NOBBeCbTe cOnIO 3a KpOK IINI PnICoEiMHITe erO K HIXKHeJyactn KpIoka.YcTAHOBITE KpOK Ha depKataIb.IIpa60TbIB rOpN3OHTaJIbHOM NIOJOKeHH, NIOJOKeTIe OeKdNyHa YIcTByIOPOBHyIO NOBepxHOCTb.
BHUMAHNE:
- PnI NcNoJIb3OBAHmN KpIOKa IJyI OeJkbI He HabeUBaIte CnMxKOM MHOrO OeJkbI. YcTpoIcTBo MOKeT nepeBepHyTbCra.
- Topnyn nap MoKet BbIpbBaTbCn 3 Hepe3 He6oJIbShne OTBepCTN BTKaHn.
2.Bo3bMnTe coNIO 3a pyuKy u yedePKnBaIte erO B HxKHeJ Yactn OdeXdbI. Nap 6ydet kak C hapxHoi, TAK n C BHyTpEHNe CTOpONbl TKAHN i pa3rJaNT ee. MeJeHNO nepemEuAte CoNllo CNH3y BBepx BDoJI TKAHN.
PIMMEAHNA:
Y6eHITcB, YTO IaHr DnI noaHn npa He nepeKpyHe.
- OTBeDITe cOnnO ot TkaHn pa3rIaIbTe ee pykoJ.
-
NobtopaTe warr 2 n 3 do Tex nop, noka BCE cknadKn He 6ydyr pa3najaKeHbI.
-
Пи рабoteВ ГориотальнOM NOLOжEHN DePJKTe coNTIHa paacctoHnпрIMepHo 10cM NaT KaHbIO.
- Tro6bI y6paTb CknaKn Ha noJIoTeHua, nlaTkax nn CanpeTkaX, NOBcTe nx, nepeKInHy B uepe3 peKy nn DePkaTeNb DnI NaNoTeHa, n OCTOpOxHo pa3MaYrHTe TkaHb.
- Tякельы tkани Требут NOВТОн НБабOTКИ napOM.
- UTo6bI ydaIITb KpyINbIe cKlaIKN, oBa6oTaIe napOM oBe cTOpHbI TKAHN.
- ⅢeTOHoe npncnOc6bHeHne TaKHe MoKet 6bITb NcTOnB-30BaHO DnIyUdAJIeHn KpyINhBIX CKJaDOK.
OKOHuaHne pa6oTbI
- UctahOBHTe nepeKIOUaTeIb BkIOUaTeIb/BbIKIOUaTeIb B NOIOXHe "OFF". KoHTpOJIbHaJaMNoHka Ha nepeKIOUaTeIe norachET.
- OToeDHHTe UHyp 3nEeKTPoNITAHNA.
3.ObepHnTe Odnn pa3 uanH dnn nOaH npapa Bokpyr TeneckonuueckoT py6kn UyCTaHOBnTE CONIO B depkaTeJIb. - Ocna6bTe DBA BepxHnx 3aXIMMa TeIECKOINuecko Tpy6kn I cNOKHTe ee.
- ПocТаБTe yCtpoIcTBoВ nOxOJaUe eДЯханeMeCTO.
UncTka
IPEUYTPEJKDEHNE:
- Pered uichKoB BcEgDa BbHIMaTe BnIky n3 po3eTkn!
Jaire 3eKtponpnbopy nonHoctbIO octbIb!
HnB KOem cnyae He okyHaIte IJnCtKn np6op B BOy. 3To MoKeT 6bItb npuHoi 3JeKtpueeCKoro ydapa nIIN noKapa.
BHUMAHINE:
He nncnoIb3yIte npoBOUHbIe 1eTkn nnDpyme capa-naioune npedMeTbl.
He nconb3yTe cnBhIe nn zapanaouue ynctraue cpndTba.
- PnOtpnTe KOpnyc cyxOn TpRAnKoN.
IpoTROBka K dInTeNbHomy XpaHeHHIO
PeKOMeHdyETcBbINOJIHTb CLEyIOUHe WAn ODN Hpa3 B He-DeIIO.EcnnncnObl3yeTcNCTmIIINPOBaHHaBOda,CHCTKa HE Tpe6yETcN, IN cPOK cnYk6bl yCtpoiCTBa YBEInuHBAeTcN.
- OToeMHInTe ⅢaHr IpaI npaI npaI TepeckOnnHeCKyIO Tpy6ky.
- PacnoIoxnTe yCTpoIeTBO NaI paKOBHNoI.
3.ИЗБлЕКИТе peЗерByap ДЯ NOДы И ONOPОЖНITE erо.Ipo-пОЛЮЧТe peЗерByap CBEXEи BOДи И NOПНOCью CпeITe ee.
4.Плнocью onopoxHnTe yctpoiCTBO.LI6o ydaJInte cIINBHyIO np6kY,JI6O BbIeIte BOy n3 yctpoiCTBa. -
Yto6bI npoJIoCKaTb yCTpoiCTBO, 3aJIeTIe CBExkyIO BODY B ODoONpHMeMHIK MyOITy DnIaHa, I NOJIHOCTbIO ONOpoxHNTE yCTPOIcTBO.
-
YctaHOBnTe pe3epByap nIy BoDbl obaTHO.
- YctaHOBInTe IJIaHr IJIaIIOJaHn npa N TeNeckOnuHeckyU Tpy6ky.
- 06epHnte oDnH pa3 IaHaN dIy Ipa aIpa Bokpyr TeleckonuHeckoTpyKInBCTaBbTe CoIIOB DepeKaTeJIb.
- Ocna6bTe DBA BepxHnx 3aKIma TeJIeCKONUHecko Tpy6Kn n CNOXnTe ee.
- NocTaBbTe yCTpoiCTBO B noDxOJaIe eIy XpaHene MecTo.
YdaJIeHHe NaKInn
N3BecTKOBbIe OTIOXeHnA — 3TO O6UaJ npo6NeMa BCex napOBbIX yCTPOiCTB, ECIN NcONlb3yeTcJ XEcTKaB Oda. OTIOXeHnIA3BcTIN BO BHyTpEHm KOHTpeHa HaRapeBaTeJIbHOM 3JIEMHe MOKET pINBeCTIn K IpepbIBnCTOn NOaJe napa, INI B HEKOtOpBX cIyuaX K IONHO OCTaHOBKe NOdaHnnapa.

IPIMMEYAHNA:
UTo6bI yMeHbUHTb HIN PpeIOBpaNTb OTNOKeHnI N3BeCTN peKoMeHdyETc HcNoJIb3OBAbD INCTnIIIMPOBaHHyIO BODy.
EcnncnOJIb3OBaTbDcTnIINPObAHHyIOBdyHETBO3MOKHOCTN,peKOMeHNyETcnpOBoNDtbydaneHHeHaKNIOOHNpa3BMecra.BbINOHNteCneDyOuueJeCTBna:
- OToeDInHTe ⅢJIaHr IJnIIOaHn npa n TeNeckOnuHeckyIO Tpy6ky.
- PacnoIoxnTe yctpoCTBO HAD paKOBHNOH.
3.ИЗВЕКИТе peЗерByap ДЯ ВОДы И ONOPOKHNTe erO.Ipo-пОПОЛТe peЗерByap CBEXKe BODои И ПОПНOCью CNeIte ee.
4.Плнocью onopoxHnTe yctpoIcTBo.Ln6o ydaJIte cIINBHyIO np6Ky,Лn6O BblneIte BOy n3 yctpoIcTba.
5. Tto6bI nponolocKaTb yCTpoiOCTBO, 3aJIeTIe CBexkyIO BODY B BOIDONPIeMHNK IN MyD TY DIA JINaHra, IN NOIHOCbIO ONOPOXHNTE yCTPOICTBO.
6.ПоДг罗БьTe pactВор,coCTO甲 Ha 50%иУкуcaи 50% BOДы.ВбОЛьшИNCTBe CNYaAeB,2ЧаSEK STOrO paC-
TBopa 6byet DOCTaTOH.
- MeDJIeHHO 3aINBaIte 3TO TpaCTBOp B yCTpoIcTBO Yepe3 Tpy6Hoe CoeHNHeHne (pnc. F), noka pe3epByap He 6ydet 3aONHeH npIMepHo HANO-BNHy.
- Ecni 3aIntbI pactBop He 6yIeT BnIeH uepe3 BnycKHOE OTBepCTne Ha yCTpOJCTBE, NIOHOCtBu HAnOIHNTE CoedINHITeNbHyO MyfTy dIra IlaHaRa. Kpome 3tOro, 3aIMBaIte BOy uepe3 BnycKHOe OTBepCTne, noka pe3epByap He 6yIeT 3aONlHeH npImepHo HAnONOBHy.
- OctabTe paTbOp BHTPNIpIMePno Ha 40 MNHT.
- NohctbO onopoxHnTe yCTpoIcTBO.
11.Прпллошпte MyФу ДЯshанга,a taKpe3epeByap, YICTO BODOn TAK,ТTObI BCE OCTaTK yKcyca 6bln ydaJIeHbl. - Ппсоевинiteшандя поданашиу.TeileckonneckkyTOtp6ky.
YcTpaHHe HEnCnpaBHOCTe
| Поблеса Воримочая почима Deяп. | Вия | |
| Из с的对象 He bixoditnap, И контrolь- ная ламочьka Na bixkniuchateteile Bkiuoya- телb/ыкючateile Ne 3aropaetcra. | Штени Бе bctablen B pOZeTKy. BCTABte Ye Stencelb B pOzEeKу. | |
| Сразотал сетеву BviKluoyateile. 3amknHte KeTakMb Byikluoyateile. | ||
| Из с对象 He bixoditnap, Ho kON- trрльна ламочьka Na bixkniuchateteile Вкючateile/ыкючateile Cbetntcra. | ИзвесковыЕ OTLOXeHnA BHyTpN yCtpoi- ctBa. | Удалite НakINь BHyTpN yCtpoiYCTBa. |
| Рezервар ДЯ BODI pyct. HanonHnite peЗервар Bodoi. | ||
| Из с对象 Кадаert Вoda KoNDehcaua Blan | В ШангдЯ no- dauH napa | БыTGнITE ShlaHR дЯ подачни пара BBERXТak, YTObBi BODa 3aTeKlna obpaTHO B UcToPrcSTBO. |
| Интусвhoe образованные рузibeя в шалге и сponп | Конданcaиь Blanr B shanhrдя no- dauH napa | Образование HeboLShoro KOLUYeCTBa puzbIrpeyЯВЯЯТСЯ HoprMaJIbHbIMЯЛe- нем рир pa6ote c napOM.В с acquae Интусвhoe образованные рузibeя, ВыTGнITE ShlaHR dЯ подачни пара ВBERX Тak, YTObBi BODa 3aTeKlna obpaTHO B UcToPrcSTBO. |
| Пробныстая пода на пара. Извесковыe | OTLOXeHnA BHyTrpN yCtpoi- CTBa. | Если пода на пара п探测ables п探测ables Na HeCKoJIbKO SeKyHd, 3TO HoprMaJIbHo.Если п探测ables BoJee Дпinteьныe, удалite НakINь BHyTpN uCToPrcSTBa. |
TexHnueckne daHHbIe
MoeB: TDC 3432
3JIeKtpoNTaHHe: 230B\~,50T
Iotpe6JIeMaMoUHocTb: 1500 BaTT
Klacc 3aunTbI:
Bec HETTO: 4,6
MblOCTabJREm 3a co6oI npaBO Ha TEXHnueckne H3MeHeHnI
3ToI3dJIeHHe IpoIIO BCE Heo6XODMbIe I aKTuaIbHbIe npOBepKn, IpEaINcaHbIe DnpeKtmbO CE, K npIM. Ha 3JNEKTPOMaHTHyIO COBmecTImOCTb I COOTBeTCTBne Tpe6oBaHnM K H3KOBoNbTHoI TexnKe, OHO 6blIO TaKke COKHcTpynpOBAHO I NOCTpOeHO C yEtOM IocJeDnIX Tpe6oBaHn I IO TexnKe 6e3OpacHoctn.
GARANTIE-KARTE
CTC
CIATRONIC
INTERNATIONAL GMBH
CTC
CLATRONIC
INTERNATIONAL GMBH
D-47906 Kempen/Germany - Industriering Ost 40
Internet: http://www.clatronic.de · email: info@clatronic.de


- JEZYK POLSKI
- Spis tresci
- WAARSCHUWING: Verbrandingsgevaar!
- General Safety Instructions
- Symbols in these Instructions for Use
- WARNING:
- CAUTION:
- OTE:
- Children and Frail Individuals
- WARNING!
- Special Safety Instructions for this Machine
- Symbols on the unit
- Risk of burns from escaping steam
- WARNING: Danger of burns!
- Overview of the Components
- Before First Use
- Unpacking
- Assemble the unit
- NOTE:
- Electrical connection
- Connected Wattage
- CAUTION: Overload!
- Operation
- Operate the unit
- Ironing with steam
- When you have finished
- Cleaning
- Preparing for long-term storage
- Dscaling
- Technical Data
- Disposal
- Instrukcja obstugi
- 3aikHnHn npaui
- OuHcHn
- TONEPEDKEHH
- YBAGA.
- PpuroTyBaHHnI TpHbAIOro 36epirAHn
- YcHyENHnHaKnIy
- NPMMITKA
- PUMEYAHIM:
- TeHn nIuca HuykdaiooueceB npncmOTpe
- PPEQYNPEXDEHNEI
- CneuHaBHeIyka3aHnI NO 6e3oNaChocTn DnA 3TOrO np6opa
- Onachoctb oxora ort ctpynapa
- NPEUYPEXDEHNE:
- PENEUPPEXDEHNE:Onachocb oxora!
- 063op detae np6opa
- IpeepnepBbIM nCNoJIb3OBAHneM
- PacnaKobka
- C6opka yctpoiCTBa
- I PIMMEAHNA:
- NPEDYNPEXDEHNE:
- BHIMAHNE:
- 3NeKtpocetb
- Iotpe6nemma Mouhoctb
- BHIMAHNE:Ipeperpyka!
- 06cnyxmbHne
- Pa6ota yctpoNCTBa
- IIPIMEUYAHNA:
- IIPIMMEYAHNA:
- BHUMAHNE:
- TnaxKeHne cnapom
- PIMMEAHNA:
- OKOHuaHne pa6oTbI
- UncTka
- IPEUYTPEJKDEHNE:
- BHUMAHINE:
- IpoTROBka K dInTeNbHomy XpaHeHHIO
- YdaJIeHHe NaKInn
- IPIMMEYAHNA:
- TexHnueckne daHHbIe
Brand : CLATRONIC
Model : TDC 3432
Category : Steam cleaner