Comfort 40 E - Lawn mower AL-KO - Free user manual and instructions
Find the device manual for free Comfort 40 E AL-KO in PDF.

User questions about Comfort 40 E AL-KO
0 question about this device. Answer the ones you know or ask your own.
Ask a new question about this device
Download the instructions for your Lawn mower in PDF format for free! Find your manual Comfort 40 E - AL-KO and take your electronic device back in hand. On this page are published all the documents necessary for the use of your device. Comfort 40 E by AL-KO.
USER MANUAL Comfort 40 E AL-KO
natural_image
Line drawing of a lawn mower with ladder and wheels (no text or symbols)| ∅ | ∅K |
| GB | S |
| NL | N |
| F | FIN |
| E | EST |
| P | LV |
| I | LT |
| SLO | RUS |
| HR | UA |
| SRB | BG |
| PL | RO |
| CZ | GR |
| SK | MK |
| H | TR |
INFORMATION | MANUALS | SERVICE
ELEKTRO-RASENMÄHER
Betriebsanleitung


470 620_a | 08/2009

GB: Operating Instructions 14
natural_image
Technical illustration of a vehicle chassis with a highlighted component and a separate view of the lower body (no text or symbols)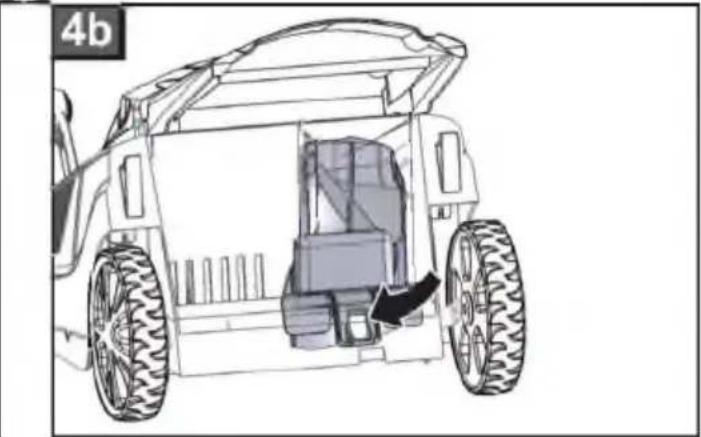
natural_image
Technical line drawing of a vehicle chassis with visible wheels and internal components (no text or symbols)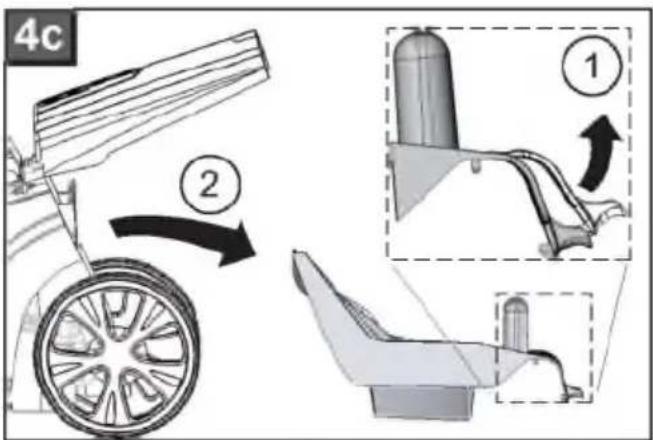
text_image
4c ② ①
natural_image
Line drawing of a hairdryer with attached cable and stand (no text or symbols)
natural_image
Technical line drawing of a mechanical device with no visible text or symbols
text_image
6a 6b
text_image
7 ① ②
text_image
7 ① ②Zu diesem Handbuch
text_image
Technical diagram of a lawn mower with numbered parts for identification
text_image
Diagram of a medical or laboratory device with numbered parts labeled 1, 3, and 4
- Read through these operating instructions before starting up the machine. This is a prerequisite for safe and trouble-free working.
■ You should save these instructions, and also pass them on to any subsequent users.
■ Observe the safety and warning signs on the machine.
Pictogram description

Caution!
Strict following of these warning alerts can prevent injury to persons and/or materials.

Special information for better understanding and handling.

The camera symbol refers in illustrations.
Contents
About this handbook....14
Product description....14
Safety instructions....16
Assembly 17
Operation....17
Work instructions....18
Storage....19
Repairs 19
Maintenance and care....19
Troubleshooting....20
Warranty 21
Disposal 230
Product description
This documentation describes electric lawn mowers with grass collection boxes. Some models are also suitable for mulching.
Identify your model with the aid of the product illustrations and the description of the different options.
Designated use
This machine is intended for non-commercial mowing of lawns and must only be used on dry grass.
Using this machine for any other or additional purpose is considered contrary to its designated use.
Possible misuse
This lawn mower is not for use in public areas, parks, sports facilities, agriculture or forestry.
■ Any safety equipment present must not be removed or bypassed, e.g. by tying the safety bar to the bar.
■ Do not use the machine in the rain or on wet grass.
■ The machine must not be used commercially.
Safety and protective equipment

Danger - risk of injury!
Safety and protective equipment must not be disabled!
Safety bar / safety handle
Depending on the version, the machine is fitted with either a safety bar or a safety handle. In case of danger, simply release it. The motor and blade are stopped.
Baffle
The baffle protects against objects flying out.
Product overview
text_image
Technical diagram of a lawn mower with numbered parts for identification
text_image
Diagram of a medical or laboratory device with numbered parts labeled 1, 3, and 4
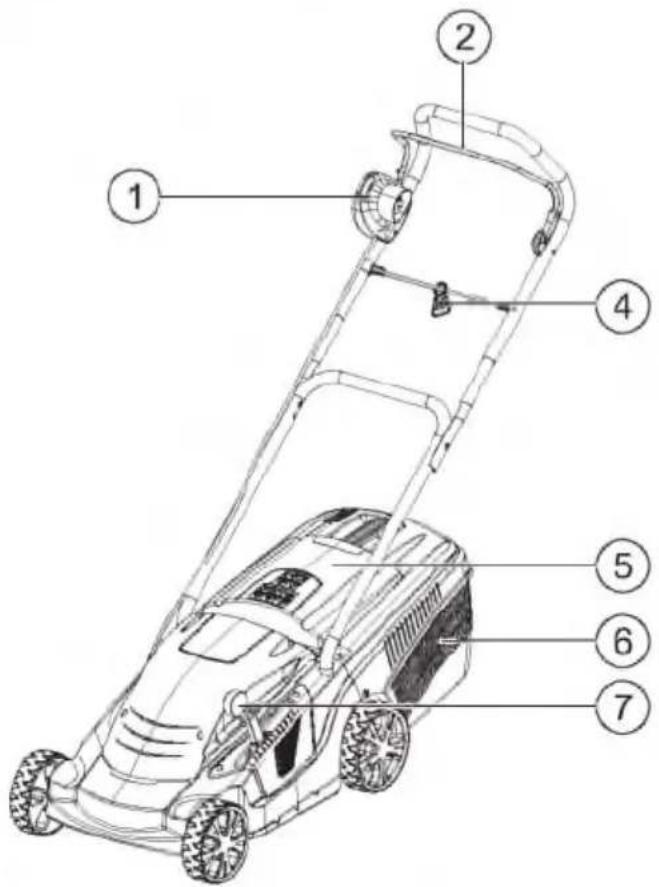
| 1 | Switch/connector combination* | 5 | Baffle |
| 2 | Safety bar* | 6 | Grass collection box |
| 3 | Safety handle* | 7 | Central cutting height adjustment* |
| 4 | Cable strain relief | 8 | Operating instructions |
* depending on the version
Symbols on the machine
 | Caution! Handle carefully. |  | Always disconnect the machine from the mains before commencing maintenance work or if the cable is damaged. |
 | Read instruction manual before starting up the machine! |  | Do not reach into the cutting parts. |
 | Danger! Keep hands and feet away from cutting parts! |  | Keep away from the danger area. |
 | Caution! Sharp blade! |  | Keep away from the connecting cable. |
 | Keep the connecting cable away from the blade! |  | Keep the connecting cable away from blades. |
 | Keep third parties away from the danger area! | ||
Safety instructions
The machine operator or user is responsible for accidents involving other persons and their property.

Caution!
Use the machine and extension lead only if they are in faultless technical condition!
Safety and protective equipment must not be disabled!

Danger - risk of injury!
Safety and protective equipment must not be disabled!
Electrical safety

Danger from electric current!
Danger from contact with live parts!
Immediately disconnect the plug from the mains if the extension lead is damaged or severed!
The domestic mains voltage must match the mains voltage specifications in the technical data; do not use any other supply voltage.
■ Use only extension leads designed for use outdoors - minimum cross-section 1.5 mm ^4 .
■ Damaged or brittle extension leads must not be used.
■ Always check the condition of your extension lead before operating the machine.
■ Always use the special cable strain relief for the extension lead.
■ Always keep cables out of the cutting area and routed away from the machine.
■ Never run over the extension lead with the lawn mower.
■ Protect the machine against moisture.
Safety instructions for operation
■ Children and other persons who are unfamiliar with these operating instructions must not operate the machine.
■ Observe local regulations regarding minimum age requirements for operating the machine.
■ The machine must not be operated if the operator is under the influence of alcohol, drugs or medication.
■ Always check the machine for damage before using it and have any damaged parts replaced.
■ Carefully check the entire area to be mown and remove all foreign bodies.
■ Wear appropriate working clothes:
Long trousers
Sturdy, non-slip shoes
■ Always ensure stability when working.
- Keep third parties away from the danger area.
- Keep body, limbs and clothing away from cutting parts.
■ Only work if there is sufficient daylight or artificial lighting.
■ Always unplug from the mains and wait until the machine has stopped:
in the event of faults or unusual vibration of the machine.
■ before releasing blockages.
■ before unclogging the machine.
■ after contact with foreign bodies.

After contact with foreign bodies, check the lawn mower for damage. Carry out the necessary repairs before restarting and working with the lawn mower.
■ The operator must take particular care when turning the lawn mower or pulling it towards himself.
■ Do not mow over obstacles (e.g. twigs, tree roots).
■ Only remove cut grass when the motor is stopped.
■ Switch of the motor if it is necessary to cross an area other than the area to be cut.
■ Never lift or carry the machine with the motor running.
■ Do not leave the operational machine unattended.
Assembly
Follow the enclosed assembly instructions.

Caution!
The machine must not be operated before assembly work has been completed!
Operation

The camera symbol refers to illustrations on pages 4/5.
Adjusting the cutting height

Danger - risk of injury!
Only adjust the cutting height with the motor switched off and the blade stationary!
The method for adjusting the cutting height depends on the specific model.
Central adjustment a
- Turn handle approximately 30° clockwise (☐ 1a).
For shorter grass, push the handle down.
For longer grass, pull the handle up.
- Turn handle anti-clockwise, while moving it slightly up or down until it locks into the desired position.
Central adjustment b
- Disengage the lever by pushing it to the side and holding it there (☐ 1b).
For shorter grass, push the lever towards the front wheel.
For longer grass, push the lever towards the rear wheel.
- Release the lever and push it slightly forwards or backwards until it locks into the desired position.
Axle adjustment

Always adjust both axles to the same cutting height.
- Keep the button on the front wheel pressed while pulling the wheel off the axle (☐ 1c).
- Pull out the axle with the remaining wheel and insert it at the desired cutting height (1d).
- Push the removed wheel back on. The wheel must click into place.
- Repeat the procedure with the 2nd axle.
Wheel screw

Always adjust both axles to the same cutting height.
- Unscrew the wheel screw by turning it anti-clockwise and pull the wheel off the axle (1e). If necessary, hold onto the second wheel.
- Pull out the axle with the remaining wheel and insert it at the desired cutting height (☐ 1f).
- Push the removed wheel back on and carefully screw on the wheel screw. Do not over-tighten.
- Repeat the procedure with the 2nd axle.
Attaching the grass collection box

Danger - risk of injury!
Only remove or attach the grass collection box with the motor switched off and the blade stationary.
- Lift the baffle and insert the grass collection box into the holder.
Level indicator (option)
During mowing, the level indicator is pushed upwards by the airflow (☐ 2a). If the grass collection box is full, the level indicator touches the box (☐ 2b). The grass collection box must be emptied.
Emptying the grass collection box
- Lift the baffle (3).
- Lift the grass collection box out of the holder and backwards to remove it.
- Empty the grass collection box.
- Lift the baffle and insert the grass collection box back into the holder.
Plug into mains
- Plug mains connector of the machine connecting cable into the switch/connector combination (☐ 5).
- Secure machine connecting cable with cable strain relief (☐ 6).
The loop of the mains cable must be long enough for the cable strain relief to slide from one side to the other.
Switching on the motor
Only start the lawn mower on even ground and not in long grass. The ground must be free of foreign bodies, such as stones. Do not lift the lawn mower to start it.
- Press the start button on the switch/connector combination and hold it down (☐ 7).
- Pull the safety bar / handle against the bar and hold it there (107).
- Release the start button.
Switching off the motor
- Release the safety bar / handle.
- Wait until the blade has stopped moving.
Work instructions

Comply with local regulations regarding operation of lawn mowers.
■ Carefully check the entire area to be mown and remove all foreign bodies.
■ Only operate the lawn mower if there are no third parties in the danger area.
■ Only mow if visibility is good.
■ Only operate the machine at walking pace.
■ Only operate the mower if the blade is sharp.
■ Do not mow over obsta (e.g. twigs, tree roots).
■ On sloping terrain, always mow across the slope. Do not mow uphill or downhill or on slopes where the inclination exceeds 20^ .
■ Exercise particular care when changing direction on sloping terrain.
Tips for mowing
■ Start mowing as close as possible to the power socket.
■ Always keep the extension lead on the section of lawn than has already been mown.
- Maintain a constant cutting height of 3–5 cm; do not shorten the grass to less than half its original height.
■ Do not overload the lawnmower! If the motor speed drops perceptibly due to long, heavy grass, increase the cutting height and mow several times.
■ Mow in the morning or late afternoon to prevent the freshly cut grass from drying out.
■ During phases of strong growth, mow twice weekly; in periods of low rainfall, increase intervals between mowing accordingly.
Mulching with the mulching kit (option)
In the case of mulching, the cut grass is not collected, but left on the lawn. The mulch protects the ground against drying out and provides it with nutrients. The best results are obtained by cutting the grass regularly to a height of approx. 2 cm. Only young grass with soft leaf tissue rots quickly.
■ Gras height before mulching: max. 8 cm
■ Gras height after mulching: min. 4 cm

Adapt walking pace to the mulching; do not walk too fast.
Fitting the mulching kit

Danger - risk of injury!
Only fit or remove the mulching kit with the motor switched off and the blade stationary.
-
Remove the grass collection box (☐ 3).
-
Lift the baffle and insert the mulching kit into the ejection channel (☐ 4a).
The mulching kit must click into place (☐ 4b).

If the mulching kit does not click into place, both the mulching kit and the blade may be damaged.
Removing the mulching kit
- Lift the baffle and release the lock on the mulching kit (☐ 4c /1).
- Pull out the mulching kit (☐ 4c /2).
Storage
■ Always unplug the machine from the mains for storage.
■ To save space during storage, fold down the upper bar.
■ Store the machine in a dry condition and out of reach of children and unauthorized persons
Repairs
■ Repair work may only be carried out by AL-KO Service Centres and authorized specialist workshops.
■ To prevent loss of balance, cutting tools and fastening bolts must be exchanged together.
Maintenance and care

Danger - risk of injury!
Always unplug from the mains before commencing any maintenance or preventive maintenance work!
Always wear protective gloves when carrying out maintenance or preventive maintenance work on the blade!
Unbalanced blades cause strong vibrations and damage the mower.
■ Regularly check the grass collection system for correct operation and wear.
■ After mowing, clean the machine thoroughly with a brush or cloth. Dirt not removed from the underside of the machine may have a detrimental effect on its performance.
■ Do not spray the machine with water! The switch/connector combination and the electric motor may be destroyed if water gets into them.
■ Regularly check the blade for damage. Only have blunt or damaged blades sharpened or replaced at an AL-KO Service Centre or authorized specialist workshop. Resharpened blades must be balanced. Tightening torque of the blade screw 15 Nm +5

Caution!
The blade and the motor shaft must not be aligned!

After maintenance work on insulated parts (e.g. exchanging a blade), an insulation protection check must be carried out in accordance with VDE Guideline 701.
■ Professional inspection required:
■ after collision with an obstacle
■ after sudden stoppage of the motor
■ if the blade is bent
■ if the motor shaft is bent
Troubleshooting

Danger - risk of injury!
Always unplug from the mains and wait for the blade to stop moving before commencing any maintenance or preventive maintenance work!
| Fault | Possible cause | Solution |
| Motor does not start | No power supply | Check fuse / extension lead. |
| Machine cable defective | Contact AL-KO Service Centre / authorized specialist work-shop. | |
| Blade jammed | Clean ejection channel / housing; the blade must rotate freely.Start on low grass or on the section of lawn that has already been mown; correct the cutting height. | |
| Loss of motor performance | Too much grass in the ejection channel or housing | Clean ejection channel / housing.Correct the cutting height |
| Blade blunt | Contact AL-KO Service Centre or authorized specialist workshop and have the blade sharpened/replaced. | |
| Grass collection box does not fill up sufficiently | Lawn wet | Allow the lawn to dry. |
| Grass collection box clogged | Clean the grid of the grass collection box. | |
| Too much grass in the ejection channel or housing | Clean ejection channel / housing.Correct the cutting height | |
| Blade blunt | Contact AL-KO Service Centre or authorized specialist workshop and have the blade sharpened/replaced. |

For faults not listed in this table, or which you cannot resolve by yourself, please contact our customer service.
Warranty
If any material or manufacturing defects are found during the statutory customer protection period, we will either repair or replace the equipment, whichever we consider the more appropriate. This statutory period may vary according to the legislation in force in the country where the equipment was purchased.
Our warranty is valid only if:
■ The equipment has been used properly
■ The operating instructions have been followed
■ Genuine replacement parts have been used
The warranty is no longer valid if:
■ The equipment has been tampered with
■ Technical modifications have been made
■ The trimmer was not used for its intended purpose (for example, used for commercial or communal applications)
The following are not covered by warranty:
■ Paint damage due to normal wear
■ Wear parts identified by a border XXX XXX (X) on the spare parts list
Combustion motors – these are covered by a separate warranty from the manufacturer concerned
To make a claim under warranty, please take this statement of warranty and proof of purchase to the nearest authorised customer service centre. This warranty does not affect the usual statutory rights of the customer relative to the seller.
Over dit handboek
text_image
Technical diagram of a lawn mower with numbered parts for identification
text_image
Diagram of a medical or laboratory device with numbered parts labeled 1, 3, and 4
text_image
Technical diagram of a lawn mower with numbered parts for identification
text_image
Diagram of a medical or laboratory device with numbered parts labeled 1, 3, and 4
text_image
Technical diagram of a lawn mower with numbered parts for identification
text_image
Diagram of a medical or laboratory device with numbered parts labeled 1, 3, and 4
text_image
Technical diagram of a lawn mower with numbered parts for identification
text_image
Diagram of a medical or laboratory device with numbered parts labeled 1, 3, and 4
text_image
Technical diagram of a lawn mower with numbered parts for identification
text_image
Diagram of a medical or laboratory device with numbered parts labeled 1, 3, and 4
text_image
Technical diagram of a lawn mower with numbered parts for identification and reading instructionstext_image
Technical diagram of a lawn mower with numbered parts for identification
text_image
Diagram of a medical or laboratory device with numbered parts labeled 1, 3, and 4
| 1 | Kombinacija prekidač-utikač* | 5 | Zaklopac |
| 2 | Sigurnosni stremen* | 6 | Košara za travu |
| 3 | Sigurnosna drška* | 7 | Centralno namještanje visine košenja* |
| 4 | Prekidač za popuštanje kabela | 8 | Upute za rad |
* ovisno o izvedbi
Oznake na uređaju
text_image
Technical diagram of a lawn mower with numbered parts for identification
text_image
Diagram of a medical or laboratory device with numbered parts labeled 1, 3, and 4
text_image
Technical diagram of a lawn mower with numbered parts for identification
text_image
Diagram of a medical or laboratory device with numbered parts labeled 1, 3, and 4
text_image
Technical diagram of a lawn mower with numbered parts for identification
text_image
Diagram of a medical or laboratory device with numbered parts labeled 1, 3, and 4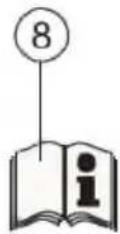
text_image
Technical diagram of a lawn mower with numbered parts for identification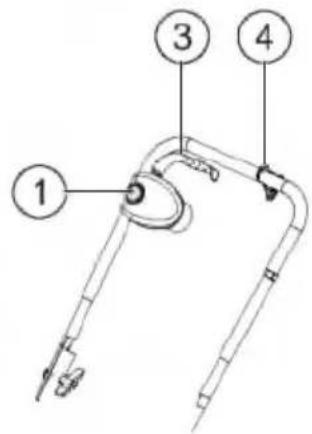
text_image
Diagram of a medical or laboratory device with numbered parts labeled 1, 3, and 4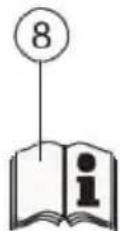
text_image
Technical diagram of a lawn mower with numbered parts for identification
text_image
Diagram of a medical or laboratory device with numbered parts labeled 1, 3, and 4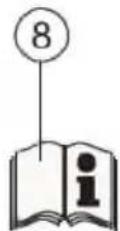
text_image
Technical diagram of a lawn mower with numbered parts for identification
text_image
Diagram of a medical or laboratory device with numbered parts labeled 1, 3, and 4
text_image
Technical diagram of a lawn mower with numbered parts for identification
text_image
Diagram of a medical or laboratory device with numbered parts labeled 1, 3, and 4
text_image
Technical diagram of a lawn mower with numbered parts for identification
text_image
Diagram of a medical or laboratory device with numbered parts labeled 1, 3, and 4
text_image
Technical diagram of a lawn mower with numbered parts for identification
text_image
Diagram of a medical or laboratory device with numbered parts labeled 1, 3, and 4
text_image
Technical diagram of a lawn mower with numbered parts for identification
text_image
Diagram of a medical or laboratory device with numbered parts labeled 1, 3, and 4
text_image
Technical diagram of a lawn mower with numbered parts for identification
text_image
Diagram of a medical or laboratory device with numbered parts labeled 1, 3, and 4
text_image
Technical diagram of a lawn mower with numbered parts for identification
text_image
Diagram of a medical or laboratory device with numbered parts labeled 1, 3, and 4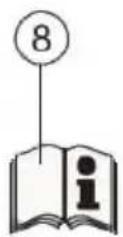
text_image
Technical diagram of a lawn mower with numbered parts for identification
text_image
Diagram of a medical or laboratory device with numbered parts labeled 1, 3, and 4
text_image
Technical diagram of a lawn mower with numbered parts for identification
text_image
① ③ ④
text_image
Technical diagram of a lawn mower with numbered parts for identification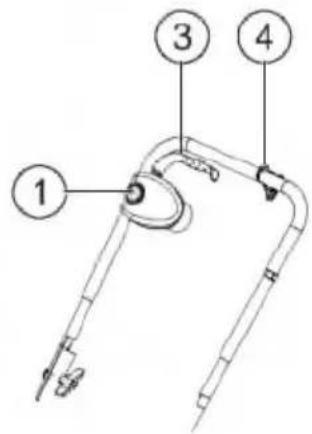
text_image
Diagram of a medical or laboratory device with numbered parts labeled 1, 3, and 4
text_image
Technical diagram of a lawn mower with numbered parts for identification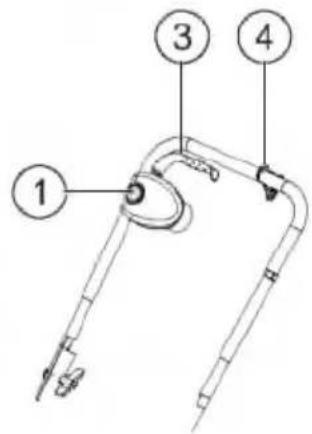
text_image
Diagram of a medical or laboratory device with numbered parts labeled 1, 3, and 4
text_image
Technical diagram of a lawn mower with numbered parts for identification
text_image
Diagram of a medical or laboratory device with numbered parts labeled 1, 3, and 4
text_image
Technical diagram of a lawn mower with numbered parts for identification
text_image
Diagram of a medical or laboratory device with numbered parts labeled 1, 3, and 4
text_image
Technical diagram of a lawn mower with numbered parts for identification
text_image
Diagram of a medical or laboratory device with numbered parts labeled 1, 3, and 4
Do not dispose of old equipment, batteries or accumulators as household waste!
Packaging, machine and accessories are manufactured using recyclable materials and must be disposed of accordingly.