
Digilab 3D45 - 3D Printer DREMEL - Free user manual and instructions
Find the device manual for free Digilab 3D45 DREMEL in PDF.


| Product Type | 3D Printer |
| Brand | Dremel |
| Model | Digilab 3D45 |
| Printing Technology | Fused Deposition Modeling (FDM) |
| Build Volume (L x W x H) | 255 x 155 x 170 mm |
| Layer Thickness | 100 microns (0.10 mm) |
| Filament Diameter | 1.75 mm |
| Maximum Extruder Temperature | 280 °C |
| Maximum Build Plate Temperature | 100 °C |
| Heated Build Plate | Yes, with tempered glass plate |
| Build Plate Leveling | Automatic with sensor |
| Connectivity | WiFi, Ethernet, USB (flash drive), USB for computer |
| Display | 4.5-inch color IPS touchscreen |
| Internal Memory | 8 GB |
| Built-in Camera | Yes, for remote monitoring |
| Power Supply | 100-240 V, 47-60 Hz, 0.85-2.3 A |
| Weight (without spool) | 19.4 kg |
| Dimensions | 515 x 406 x 394 mm |
| Compatible Materials | PLA, ECO-ABS, Nylon, PETG (Dremel filaments) |
| Software | Dremel Digilab 3D Slicer (Windows/Mac) |
| Warranty | Limited, according to local regulations |
| Safety | Filament runout sensor, RFID detection, automatic stop |
| Maintenance | Nozzle cleaning, firmware update via USB flash drive or OTA |
Frequently Asked Questions - Digilab 3D45 DREMEL
User questions about Digilab 3D45 DREMEL
0 question about this device. Answer the ones you know or ask your own.
Ask a new question about this device
Download the instructions for your 3D Printer in PDF format for free! Find your manual Digilab 3D45 - DREMEL and take your electronic device back in hand. On this page are published all the documents necessary for the use of your device. Digilab 3D45 by DREMEL.
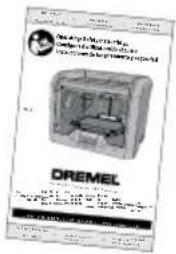
USER MANUAL Digilab 3D45 DREMEL
natural_image
Technical illustration of a DREMEL DIGILAR printer internal structure (no text or symbols on the device itself)GB Original instructions 2
DE Übersetzung der Originalbedienungsanleitung 37
FR Traduction de la notice originale 72
ES Traducción de las instrucciones originales 107
PT Tradução das instruções originais 142
IT Traduzione delle istruzioni originali 177
NL Vertaling van de originele gebruiksaanwijzing 212
DA Oversættelse af betjeningsvejledning 247
SV Översättning av originalinstruktioner 282
NO Oversettelse av originalinstruksjonene 317
FI Käännös alkuperäisistä ohjeista 352
HU Eredeti utasítások 387
RU Перевод оригинальных инструкций 422
CN 原厂说明书 458
EL Μεταφραση των πρωτοτυπων οδηγιων 491
TR Orijinal yönergelerin çevirisi 526
PL Tłumaczenie oryginalnej instrukcji 561
AUS Original instructions 596
AR
تيّلصُألا تاميّل عُتلا قمجرت 633

Please note that the contents of the Quick Start Guide and Instruction Manual may change and evolve over time. You can access the most up-to-date version online at www.dremel3d.com.

GENERAL SAFETY WARNINGS

WARNING
READ ALL INSTRUCTIONS IN THIS MILIARIZE YOURSELF L 3D45 BEFORE SETUP
AND USE. FAILURE TO COMPLY WITH THE WARNINGS AND INSTRUCTIONS MAY RESULT IN FIRE, EQUIPMENT DAMAGE, PROPERTY DAMAGE, OR PERSONAL INJURY. SAVE ALL WARNINGS AND INSTRUCTIONS FOR FUTURE REFERENCE

Please note that the contents of the Quick Start Guide and Instruction Manual may change and evolve over time. You can access the most up-to-date version online at www.dremel3d.com.

WORK AREA SAFETY
a. Keep work area clean and well lit. Cluttered or dark areas invite accidents.
b. Do not operate Dremel 3D45 in the presence of flammable liquids, gases or dust. Dremel 3D45 creates high temperatures which may ignite the dust or fumes.
c. Store idle 3D45s out of reach of children and other untrained persons. Injury can occur in hands of untrained users.
ELECTRICAL SAFETY
a. Always use the Dremel 3D45 with a properly grounded outlet. Do not modify Dremel 3D45 plug. Improper grounding and modified plugs increase risk of electric shock.
b. Do not use Dremel 3D45 in damp or wet locations. Do not expose Dremel 3D45 to rain. Presence of moisture increases risk of electric shock.
c. Do not abuse the cord. Never use the cord for pulling or unplugging the Dremel 3D45. Keep cord away from heat, oil, sharp edges or moving parts. Damaged or entangled cords increase the risk of electric shock.
d. Avoid using this product during an electric storm. There may be a remote risk of a power surge from lightning that may result in an electric shock.
e. In case of emergency unplug Dremel 3D45 from outlet.
PERSONAL SAFETY
a. Stay alert, watch what you are doing and use common sense when operating a Dremel 3D45. Do not use Dremel 3D45 while you are tired or under the influence of drugs, alcohol or medication. A moment of inattention while operating Dremel 3D45 may result in personal injury.
b. Use personal protective equipment. The use of protective equipment such as heat resistant gloves and safety glasses will reduce the risk of personal injuries.
c. Dress properly. Do not wear loose clothing or Jewellery. Keep your hair, clothing and gloves
away from moving parts. Loose clothes, Jewellery or long hair can be caught in moving parts.
DREMEL 3D45 USE AND CARE
a. Before every use check Dremel 3D45 for misalignment or binding of moving parts, breakage of parts and any other condition that may affect the Dremel 3D45's operation. If damage is suspected then have the Dremel 3D45 repaired by an authorised Dremel service centre before use. Use of Dremel 3D45 when damaged may result in poor quality of object creation, further equipment damage, property damage or personal injury.
b. Do not touch the extruder tip or heated build platform during Dremel 3D45 operation or until it has cooled down to at least 60°C (140°F). Contact with the extruder tip or heated build platform during or after operation before tip has cooled may result in personal injury.
c. Set up the Dremel 3D45 in a well-ventilated area. Place Dremel 3D45 printer on flat nonflammable surface and away from flammable material. Provide at least 8 inches of unobstructed spacing around Dremel 3D45. Dremel 3D45 melts plastic during building. Plastic odours emitted during Dremel 3D45 operation may irritate eyes and airways. Locating Dremel 3D45 close to surrounding objects prevents proper ventilation.
d. Do not reach inside the Dremel 3D45 while it is in operation. Contact with Dremel 3D45 moving parts during operation may result in poor build quality, equipment damage or personal injury.
e. Prevent untrained individuals accessing the 3D45 during operation. Use of Dremel 3D45 by persons unfamiliar with these warnings and instructions may result equipment or property damage and personal injury.
f. Use only DREMEL filament. Use of filament not authorized by Dremel may result in equipment, property damage or personal injury.
g. Do not adjust extruder/nozzle setting to exceed the maximum rated temperature of the filament type being used. Heating filament above recommended range can cause emissions that may result in personal injury.
h. Ensure small objects created by Dremel 3D45 are not accessible to young children. Small objects are potential choking hazards for young children.
i. Do not create illegal or inappropriate objects using Dremel 3D45.
j. Do not use Dremel 3D45 to create objects intended for use with candles, liquid fuels, and other heat sources. Plastic may melt when exposed to fire or other heat sources. Such use of objects created by Dremel 3D45 may result in fire, property damage and personal injury.
k. Do not use Dremel 3D45 to create objects intended for food or drink applications such as preparation, decoration, storage, or consumption. Such use of objects created by Dremel 3D45 may result in illness or personal injury.
I. Do not use Dremel 3D45 to create objects intended with use with electrical components or housings of electrical components. Dremel filament is not suitable for electrical applications. Such use of objects created by Dremel 3D45 may result in property damage and personal injury.
m. Do not put plastic objects in or around your mouth. Dremel filament is not suitable for food or drink preparation and food utensils. Such use of objects created by Dremel 3D45 may result in illness or personal injury.
n. Do not use Dremel 3D45 to create objects intended for chemical storage. Dremel filament is not suitable for chemical storage. Such use of objects created by Dremel 3D45 may result in property damage and personal injury.
o. Do not modify Dremel 3D45 or alter factory settings. Modifications may result in equipment and property damage, and personal injury.
p. Do not expose Dremel 3D45 to temperatures exceeding 70°C (158°F). Dremel 3D45 may become damaged. Dremel 3D45 is intended to operate in temperature between 16-29°C (60 - 85°F).
q. Do not move or bump Dremel 3D45 or the extruder during operation. The object may build incorrectly.
r. Do not change filament spool unless the building process is completed, stopped, or paused. Changing the filament during building will cancel the object and may damage the extruder.
s. Do not pull the filament out until instructed by the touch screen. Doing so may damage the extruder.
t. Use extra care not to damage the extruder tip when clearing debris. Dremel 3D45 will not work properly with damaged extruder tip and will require replacement.
u. Before every build make sure that the build platform is covered with Dremel specified glue. Use of improper glue may result in equipment damage and poor object build quality.
v. Be aware of your body position when using hand tools to remove objects from the build platform. Sudden tool slip and improper body position during object removal from the build platform may result in personal injury.
w. Avoid scratching the build platform when removing objects. Scratches in the build platform will result in improper object creation.
x. Do not drop the build platform. Tempered glass plate may break and result in personal injury.
y. Do not remove tempered glass plate from plastic holder. Contact with tempered glass plate edge may result in personal injury.
z. Do not twist or bend the build platform while removing objects. Tempered glass plate may separate from plastic holder and result in personal injury.
aa. Dremel is not responsible for structural integrity or utility of objects created using Dremel 3D45. Structural models created by inexperienced designers may result in property damage and personal injury.
SERVICE
a. Always unplug Dremel 3D45 from its power before performing any service procedures.
Failure to do so may result in personal injury and equipment damage.
b. Have your Dremel 3D45 serviced only by an authorized Dremel service centre using only Dremel replacement parts. This will ensure that proper operation and safety of Dremel 3D45 is maintained.
c. Use only Dremel approved components. Use of components other than genuine Dremel® components may void warranty.
d. Use only Dremel approved filament. Use of filament other than Dremel ^® approved filament may void warranty on extruder.
TABLE OF CONTENTS
General safety warnings ......2
Table of contents....3
Used symbols....4
Information on Intellectual Property......4
Functional Description and Specifications ..... 4
3D45 Resources .... 5
Glossary of Terms......6
Getting to know your 3D45....8
Introduction....10
Kit Contents*......10
Touch Screen....12
Touch Screen Icons ....17
Initial Setup....18
Remote 3D Printing via Local Area Network Connection using Dremel DigiLab 3D Slicer ...19
Getting Ready to Build....21
Building 27
Removing Your Object....30
Using the Camera 31
Best Practices ....31
Maintenance....32
Maintenance and Service....34
Firmware & Open Source Software ....35
Dremel ^® Consumer Limited Warranty......36
USED SYMBOLS
| Symbol Name Designation/ | Explanation | |
 | Safety alert symbol | It is used to alert you to potential personal injury hazards. Obey all safety messages that follow this symbol to avoid possible injury or death. |
 | Read manual symbol | Alerts user to read manual |
| DANGER | Danger symbol | indicates a hazardous situation which, if not avoided, will result in death or serious injury |
 | Warning symbol | indicates a hazardous situation which, if not avoided, could result in death or serious injury. |
| CAUTION | Caution symbol | indicates a hazardous situation which, if not avoided, will result in minor or moderate injury. |
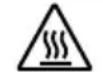 | Hot surface hazard symbol. | Contact may cause burn. Allow to cool before servicing. |
 | UL US symbol | This symbol designates that this tool is listed by Underwriters Laboratories, to United States and Canadian Standards. |
WARNING THIS IS A CLASS A PRODUCT. IN A DOMESTIC ENVIRONMENT THIS PRODUCT MAY CAUSE RADIO INTERFERENCE IN WHICH CASE THE USER MAY BE REQUIRED TO TAKE ADEQUATE MEASURES.
INFORMATION ON INTELLECTUAL PROPERTY
The Dremel 3D45 is intended for 3D printing objects from digital files that you create or own, or have the right to print using the Dremel 3D45. When making objects using the Dremel 3D45, it is your responsibility to ensure that you do not infringe any third party intellectual property rights or violate any applicable laws or regulations, such as U.S. or foreign intellectual property laws. The Dremel 3D45 may not be used to make objects protected by intellectual property rights owned by third parties without such third parties' permission. Using the Dremel 3D45 to do any of the following may require the permission of third parties: to make a duplicate or facsimile (in whole or in part) of any object not created by you, to make an object from a digital file you do not own, or to make an object from a scan of a physical object that you did not create. It is your responsibility to obtain such permission. In some cases, you may not be able to obtain such permission.
Where such permission cannot be obtained, you should not 3D print such object, or you do so at your own risk. You may not modify, reverse engineer, decompile, or disassemble the Dremel 3D45 or its software or firmware, except as permitted by applicable law. If you use the Dremel 3D45 in any way other than as recommended and described in these Operating/Safety Instructions, you do so at your own risk. Using the Dremel 3D45 to make objects that infringe any intellectual property rights owned by third parties could result in civil or criminal prosecution and penalties, and you could be liable for money damages, fines, or imprisonment.
FUNCTIONAL DESCRIPTION AND SPECIFICATIONS
BUILDING
Extruder: Single extrusion Extruder temperature: Up to 280°C (536°F) Build Platform Temperature: Up to 100°C (212°F) Operating Interface: 4.5" full color IPS touch screen Maximum Build Volume: 10" x 6" x 6.7" (255mm x 155mm x 170mm) Layer Thickness: 100 microns | 0.10 mm Filament types and colors: See dremel3d.com Internal Storage: 8GB External Storage: USB Flash Drive
WEIGHT & DIMENSIONS
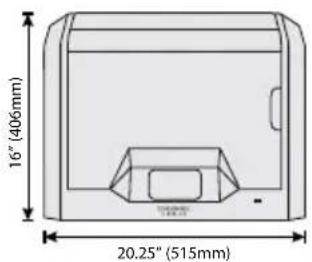
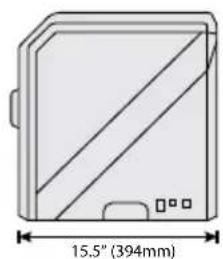
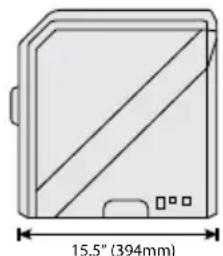
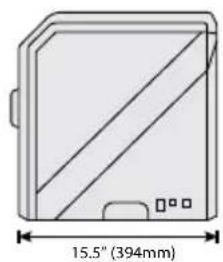
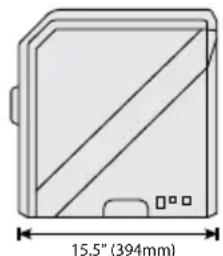
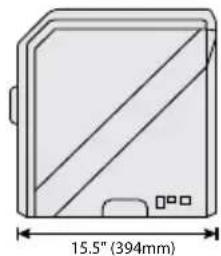
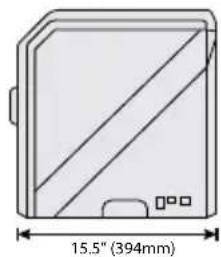
Weight (without spool): 19.4kg (42.8lbs) Dimensions: 20.25" x 16" x 15.9" (515mm x 406mm x 394mm)
FILAMENT
Works with Dremel 1.75mm filament
FILAMENT STORAGE
All polymers degrade with time. Do not unpack until filament is needed. Filament should be stored at room temperature: 16-29°C (60-85°F) and in dry conditions.
SOFTWARE
Dremel 3D45 comes with complimentary file slicing software for Windows and Mac OSX. This application converts your 3D digital files into buildable files.
• CPU: 64-bit processor (32-bit not supported)
• Memory: 3 GB RAM (4 GB or more recommended)
- Disk space: \~2 GB free disk space for installation
- Display card: 1,024 MB GDDR RAM or more.
Microsoft® Direct3D® 11 capable graphics card or higher
- Pointing device: Three-button mouse
ELECTRICAL REQUIREMENTS
3D45 input rating: 100-240V, 47-60Hz, 0.85-2.3Amps
OPERATING ENVIRONMENT
Room Temperature: 16-29°C (60 - 85°F)
Level workspace
Dry workspace environment
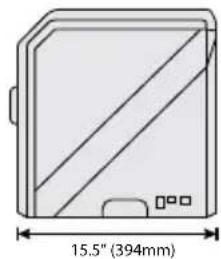
natural_image
Technical drawing of a rectangular device with diagonal stripes and a 15.5" height dimension (394mm), no text or symbols present.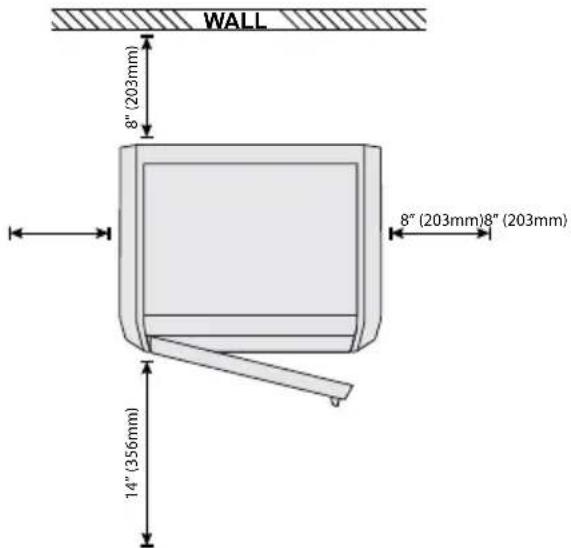
3D45 RESOURCES
| Resource | Description Location | |
| Quick Start Guide | Provides illustrated walk through of how to un-box your 3D45 and start building out of the box. | Printed version of the Quick Start Guide is located in the carton with the printer. It is also available on www.dremel3d.com |
| Dremel 3D Website | Provides the latest 3D45 software, product information, customer support, and 3D model and project downloads. | www.dremel3d.com |
| Dremel 3D Customer Support | Contact Dremel for product support, maintenance, and service. | www.dremel3d.com |
| File Slicing Software | Allows you to upload, edit, and build 3D files. | Install from www.dremel3d.com or from USB flash drive provided with the Dremel 3D45. |
GLOSSARY OF TERMS
| Term Definition | |
| Build Platform The flat surface used by your Dremel 3D45 to build objects. The build platform is comprised of a tempered glass plate with a plastic holder. | |
| Build Platform Clips | Clips located at the front of the build platform base that are used to secure the build platform in place. |
| Build Volume The three dimensional (3D) amount of space that an object will use once it is completed. Your Dremel 3D45 has a maximum build volume which means that objects with a larger build volume cannot be built unless they are resized or broken into subobjects. | |
| Door Your Dremel 3D45 has a door located on the front panel. This allows for easy access to the build platform, extruder, filament, and your objects. This door is made with a transparent material so you can monitor the progress of your objects while keeping the build environment stable. | |
| ECO-ABS Natural thermoplastic that provides users with durable and impact resistant parts. | |
| Ethernet Port A local area wired networking technology that allow electronic devices to communicate. | |
| Extruder An assembly that uses gears to pull filament through the extruder intake, heat the filament to the build temperature, and push the heated filament out of the extruder tip. | |
| Extruder Fans Fans used to cool the outer assembly of the extruder and gear motor. | |
| Extruder Fan Baffle | A plastic piece that directs air from the extruder fan onto the build platform to assist in cooling the active build. |
| Extruder Intake An opening located at the top of the extruder where filament is inserted for building. | |
| Extruder Lever A lever located on the side of the extruder that is used to loosen the grip of the extruder gear motor. | |
| Extruder Tip A nozzle located at the bottom of the extruder where heated filament is forced out for building. | |
| Filament A threadlike strand of plastic material. | |
| Filament Guide Tube | A plastic tube that guides the filament from the spool holder to the extruder of the printer, preventing any snags. |
| Filament Runout Sensor | A sensor in the extruder intake that pauses your printer if it runs out of filament during a build. |
| Filament Spool A cylindrical piece on which a long strand of filament is wound for storage and continuous use. | |
| .g, .gcode, .g3drem | A buildable file format compatible with your Dremel 3D45. |
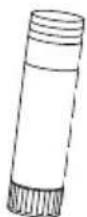
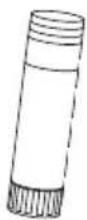
| Glue Stick | Non-toxic and acid-free stick of glue that is applied to the build platform to help prints stick. |
| Leveling Knobs | Knobs located under the base of the build platform that allow users to easily level the build platform before each print. |
| Leveling Sensor | A sensor that detects the height of the build platform and assists in proper leveling. |
| Lid | Your Dremel 3D45 has a pivoting lid on the top. This allows for more access to the build platform, extruder, filament, and objects when necessary. |
| Needle Nose Pliers | Common tool used to hold small objects and to grab excess material that may be too hot to touch directly. |
| Nylon | Synthetic polymer that provides strong and flexible prints with heavy wear resistance. |
| OBJ File | A common digital file format used in a wide range of 3D model software. This file is created in 3rd party 3D software or downloaded from Dremel3d.com. |
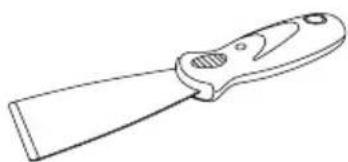
| Object Removal Tool | A tool used to separate your objects from the build platform. |
| PLA. A bioplastic derived from renewable resources such as corn starch | |
| PETG | A thermoplastic filament that combines flexibility, strength and durability similar to Nylon but is easier to print, similar to PLA |
| Spool Holder | A plastic piece located to the left of the build platform inside your Dremel 3D45 build area that is designed to hold a filament spool. |
| Spool Door | A removable door which locks the filament spool to the spool holder. |
| Stepper Motor | A brushless DC electric motor used to drive the guide rails and extruder gears. |
| .STL File | A common digital file format used in a wide range of 3D model software. This file is created in 3rd party 3D software or downloaded from Dremel3d.com. |
| Touch Screen | Full color display that is touch activated. It allows you to monitor your Dremel 3D45 and objects while also providing commands directly to your Dremel 3D45 without the use of a computer. |
| USB Flash Drive | A portable memory card used on a wide array of devices. |
| WIFI | A local area wireless networking technology that allow electronic devices to communicate. |
| X-Axis Guide Rails | A set of rails on either side of the extruder that allow a stepper motor to move the extruder to the left or right side of the build area. |
| Y-Axis Guide Rails | A set of rails on either side of the build area that allow a stepper motor to move the extruder to the front or back of the build area. |
| Z-Axis Guide Rails | A set of rails located at the back of the build area that allow a stepper motor to move the build platform up or down. |
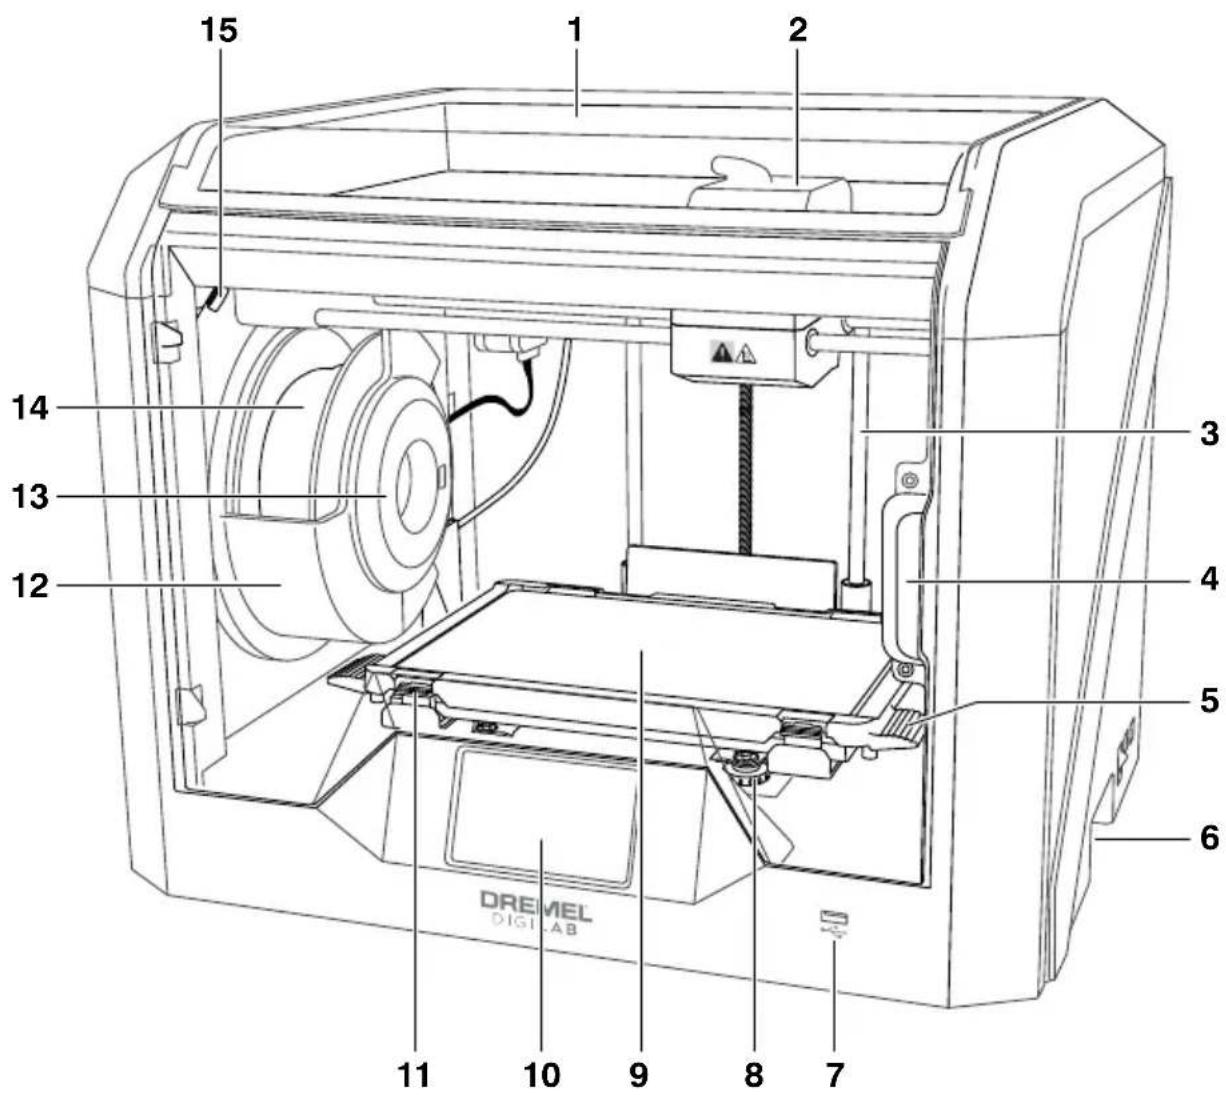
- Lid
- Extruder
- Z-Axis Guide rail
- Door
- Build Platform Tabs
- Gripping Handles
- USB A Port
- Leveling Knobs
- Build Platform
- Touch Screen
- Build Platform Clips
- Filament Spool Holder
- RFID Reader
- Filament Spool
- Camera
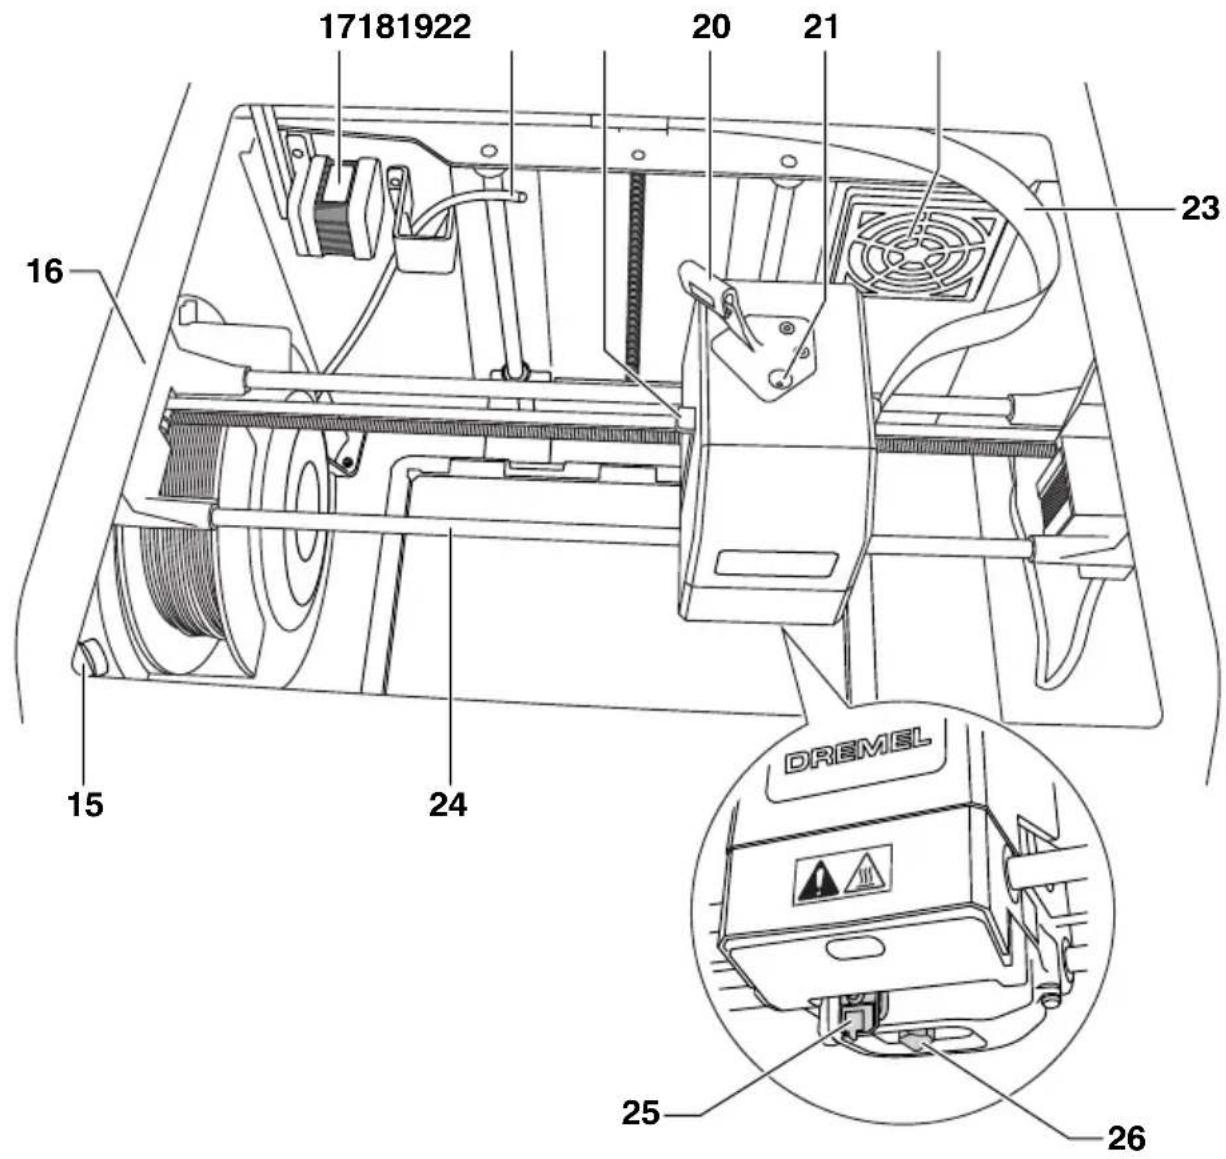
-
Y-Axis Guide Rail
-
Stepper motor
- Filament Guide Tube
- Extruder Lever
- Filament Guide Clip
- Extruder Intake
- Chamber Fan (With optional filtration hook-up)
- Ribbon Cable
- X-Axis Guide Rail
- Leveling Sensor
- Extruder Tip
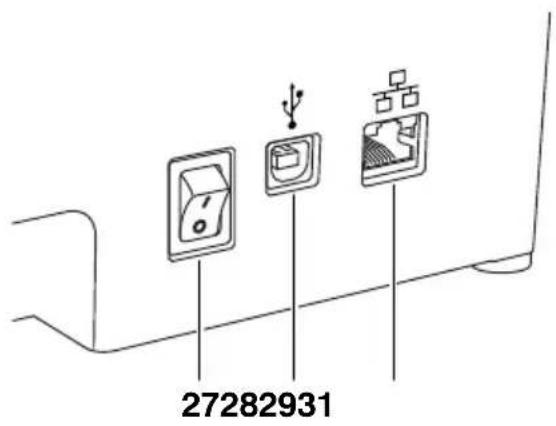
- Power Switch
- USB B Port
- Ethernet Port
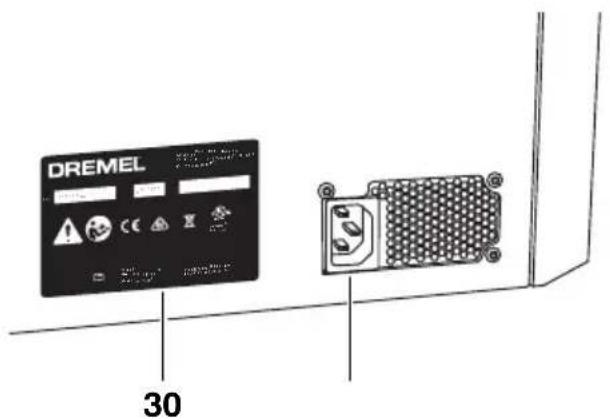
- Nameplate
- Power Input
INTRODUCTION
Welcome to the world of Dremel Digilab. Our mission is to mentor you through the digital fabrication process and share best practices for bringing your ideas to life. 3D building is a process that will involve experimentation and persistence. Thankfully, the Dremel experts are here to make your job easier with online tips and support. Dremel 3D45 brings new functionality, such as network connectivity and remote 3D printing via local area network connection. To get started with 3D45 follow the initial setup routine on the touch screen.
KIT CONTENTS\*
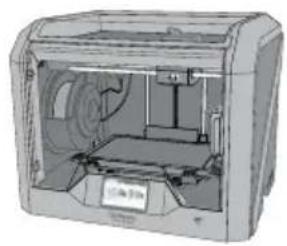
natural_image
Illustration of an open industrial machine with internal components (no visible text or symbols)Dremel 3D45
Instruction Manual
Quick Start Guide
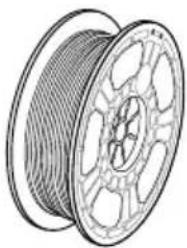
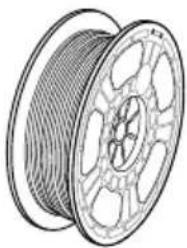
natural_image
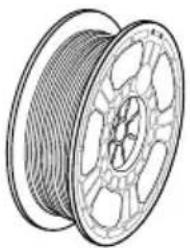
Illustration of a coiled cable or wire spool with no visible text or symbols(2) Filament Spool**
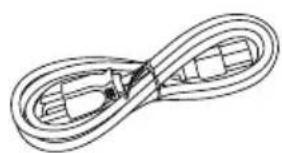
natural_image
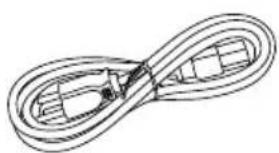
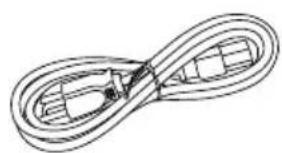
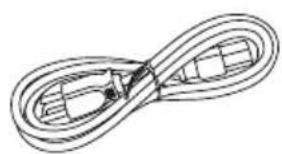
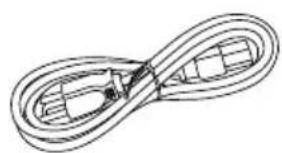
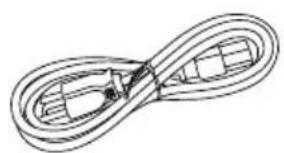
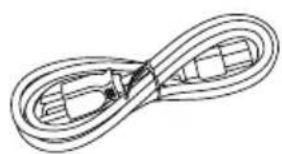
Pure diagram of a coiled cable or wire with no text, numbers, or symbolsPower Cable
natural_image
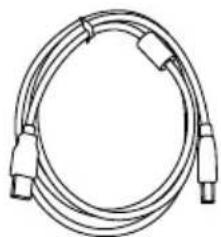
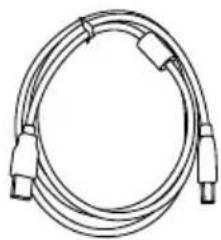
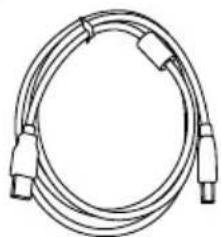
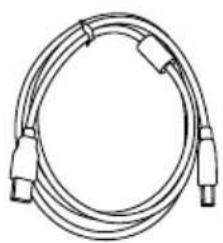
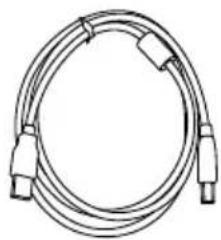
Coiled cable or connector with two connectors and a central connector (no text or symbols visible)USB Cable
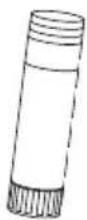
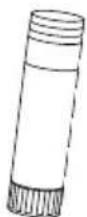
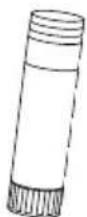
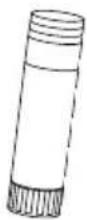
(2) Glue Stick
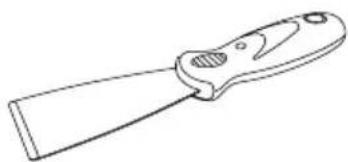
natural_image
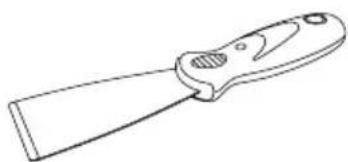
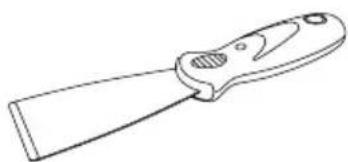
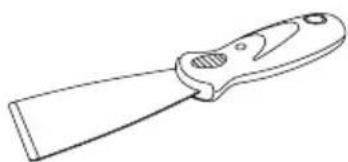
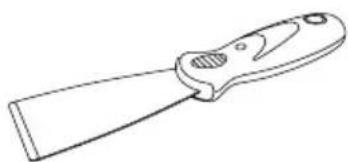
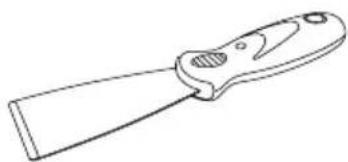
Line drawing of a folding knife (no text or symbols)Object Removal Tool
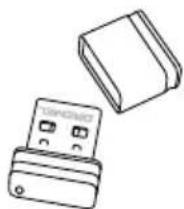
natural_image
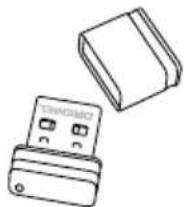
Line drawing of two electronic components: a rectangular block and a USB flash drive (no text or symbols)USB Flash Drive
* Quantities may vary depending on kit.
**Do not store in moist or hot environment.
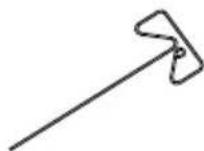
Unclog Tool
UNPACKING
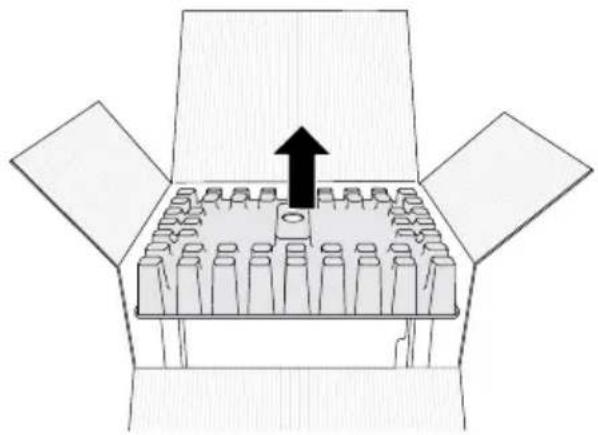
- Place box on table, cut tape, and open.
- Remove top insert.
natural_image
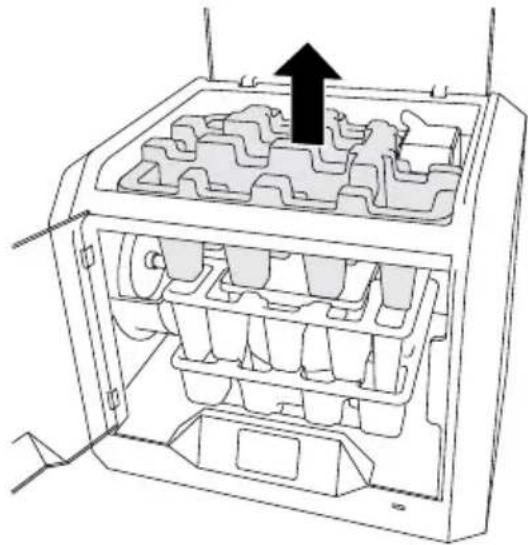
Diagram of a box with multiple test tubes and an upward arrow, no text or symbols present- Remove 3D45 and place on table.
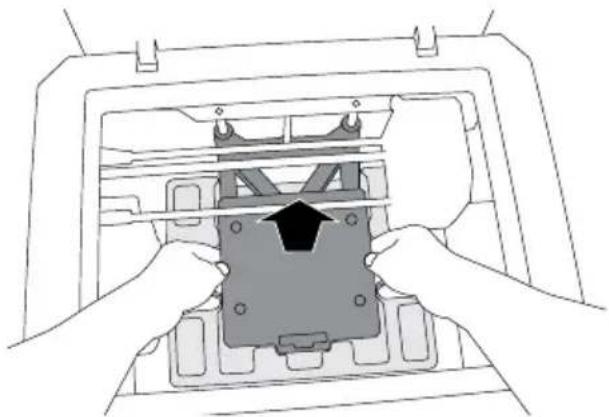
- Open lid and remove top insert.
natural_image
Technical line drawing of a mechanical device interior with internal compartments and a black arrow indicating upward motion (no text or symbols)- Raise build plate by lifting from both sides.
natural_image
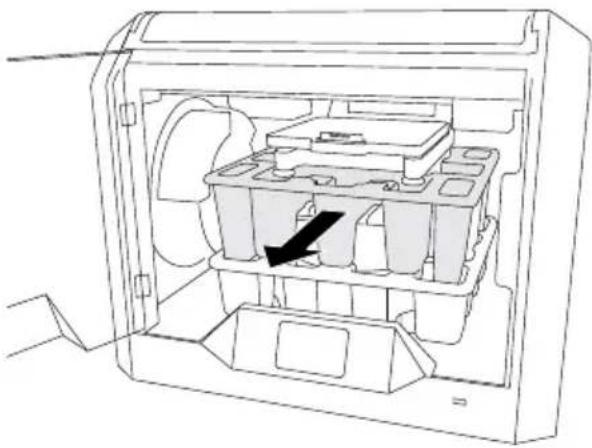
Line drawing of hands installing a component into a device frame (no text or symbols visible)- Open door and remove middle insert.
natural_image
Technical line drawing of an open computer case with internal compartments and a black arrow indicating a specific component (no text or symbols present)- Remove bottom insert.
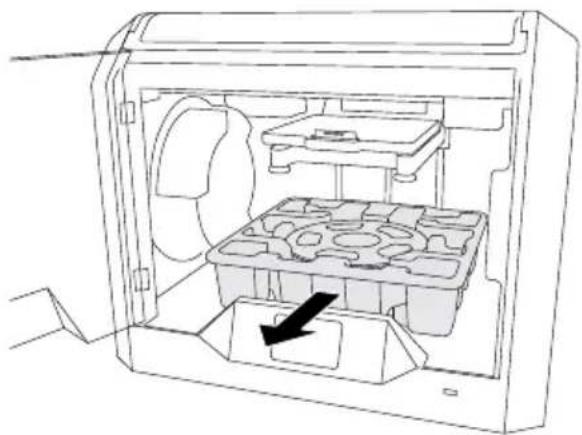
natural_image
Technical line drawing of an open mechanical device with internal compartments and a black arrow indicating a component (no text or symbols present)Tip: Keep packaging for future transportation and storage.
TOUCH SCREEN
Using your Dremel 3D45 without a computer is easy with the onboard software and full colour touch screen. Before building your model we want to familiarize you with the touch screen menu structure and options.

WARNING
OBSERVE ALL PROVIDED WARNINGS AND SAFETY INSTRUCTIONS WHEN USING THE DREMEL 3D45. FAILURE TO DO SO MAY RESULT IN FIRE, EQUIPMENT DAMAGE, GE OR PERSONAL INJURY.
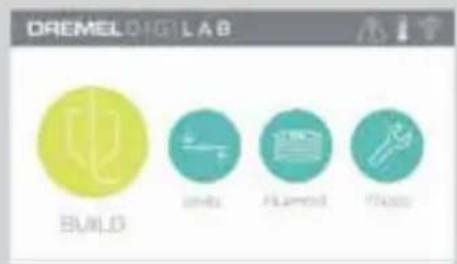
BUILD
Tap to select a 3D model and begin build process. (See page 27 for detailed build instructions)
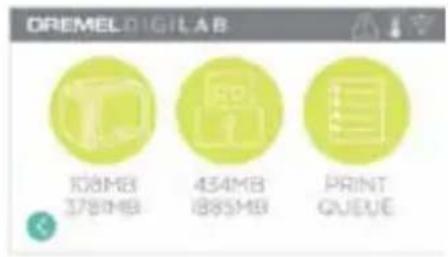
BUILD MENU
Tap Printer, USB Flash Drive, or Print Queue to choose the destination of your desired file.
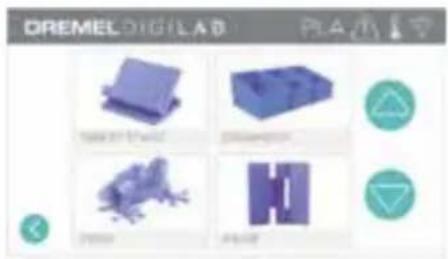
MODEL MENU
Tap to select the desired model or use arrows to scroll through pages to find your model.
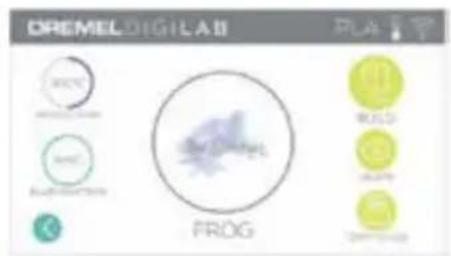
FILE DETAILS
Nozzle and plate temperatures settings referenced for the current build.
BUILD – Tap to begin build process.
DELETE – Tap to remove model file from on- printer storage or USB flash drive.
COPY TO PRINTER – From USB flash drive, tap to copy model file to on-printer storage.
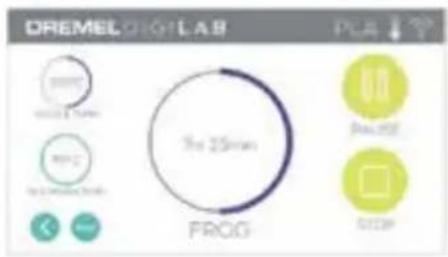
BUILD STATUS
STOP - Tap to cancel the current build process.
PAUSE/PLAY – Tap to pause or resume the current build process. Pause will allow you to access the filament button.
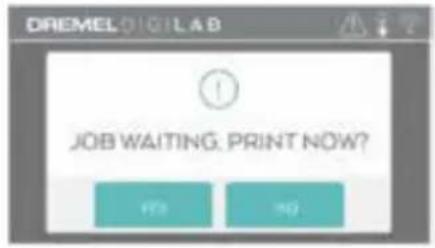
PRINT QUEUE NOTIFICATION
YES – Proceed to print file.
NO – Cancel printing of file.
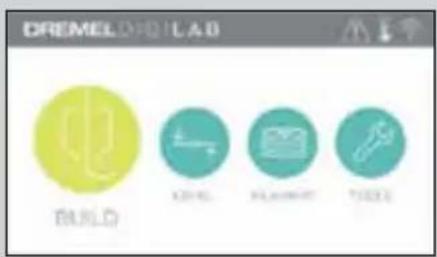
FILAMENT
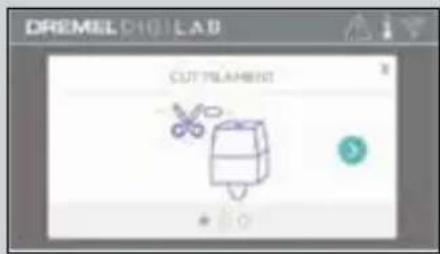
Tap to begin heating and start filament load/change process. (See page 21 for instructions on filament load/change process)
LEVEL
Tap to begin build platform leveling process. (See page 26 for instructions on leveling the build platform)
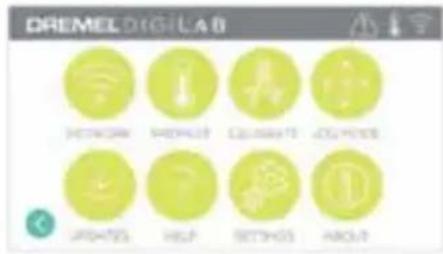
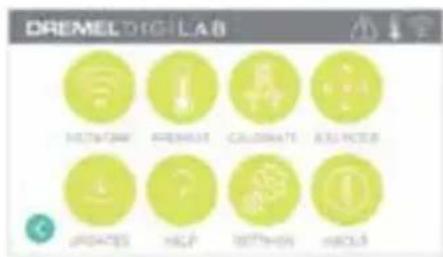
TOOLS
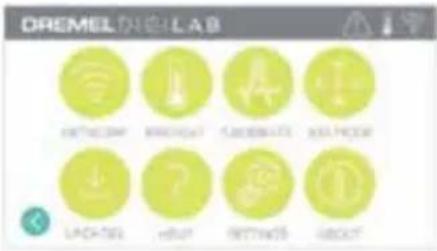
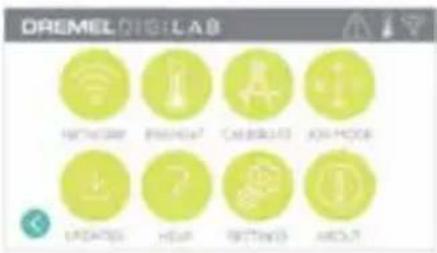
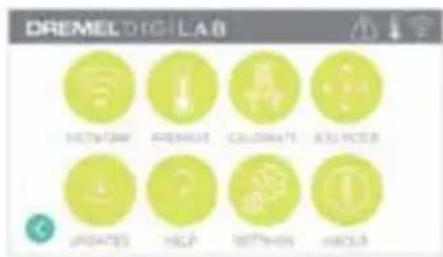
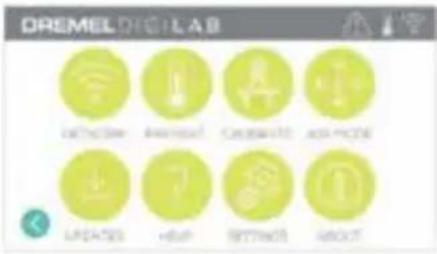
Tap to access the following individual printer functions and settings.
SERVICE
Tap to enter service menu to see customer service contact information.
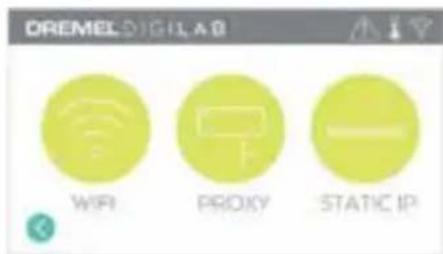
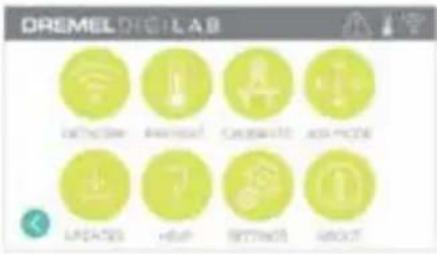
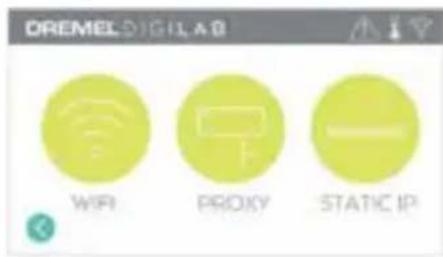
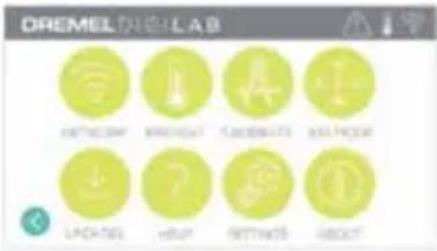
NETWORK
Tap to enter Network menu to connect or disconnect WiFi and Set Proxy. CONNECT WIFI – Tap to connect to WiFi. SET PROXY – Tap to set manual proxy. SET STATIC IP – Tap to setup static IP.
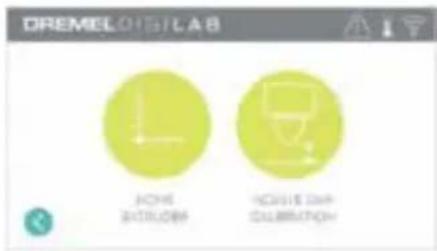
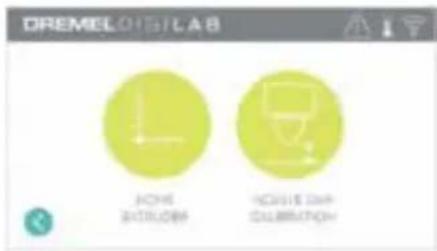
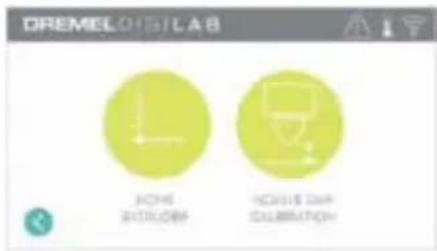
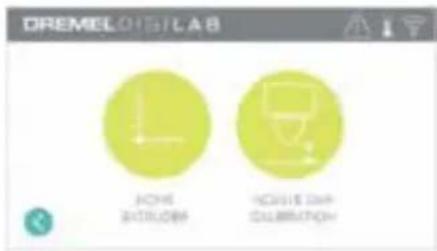
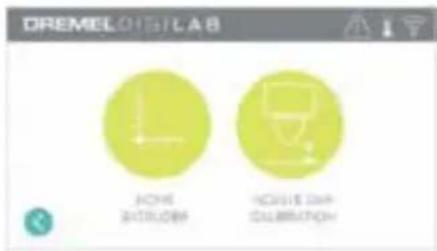
CALIBRATE
Tap to move extruder and build platform to zero position.
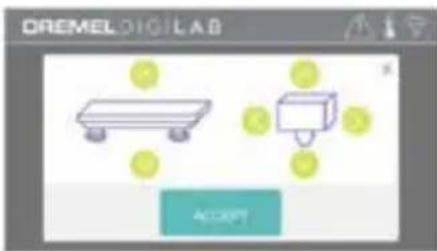
JOG MODE
Tap to display options to move extruder and build platform along the X, Y, and Z-axis.
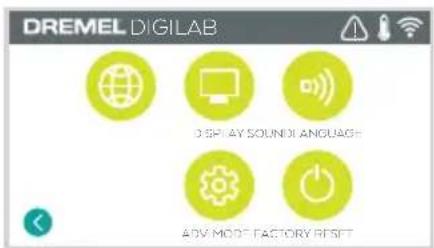
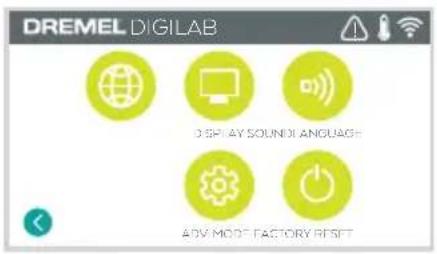
SETTINGS
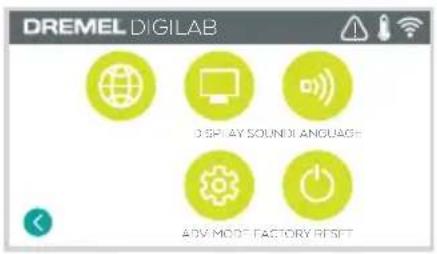
LANGUAGE – Tap to pick alternate menu language.
DISPLAY – Tap to customize cabinet LEDs or main menu hotkeys.
SOUNDS – Tap to turn 3D45 sounds On/Off.
ADVANCED MODE – Tap to manually prioritize GCode settings.
FACTORY RESET – Tap to remove all information stored on 3D45 and return it to factory defaults.
PREHEAT
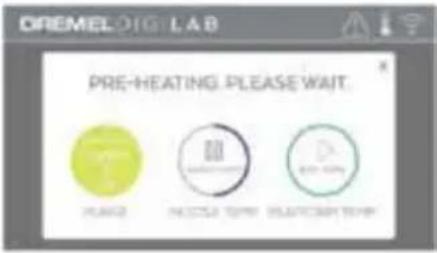
Tap "Nozzle Temp" to automatically begin preheating the extruder for building or removing excess debris. Once your optimal temperature is achieved, tap "Platform Temp" to begin preheating the build platform.
PURGE – Once extruder is hot, tap to manually extrude filament.
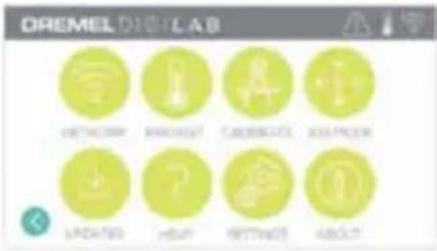
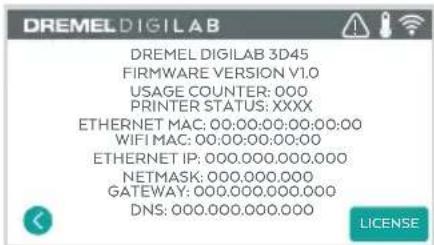
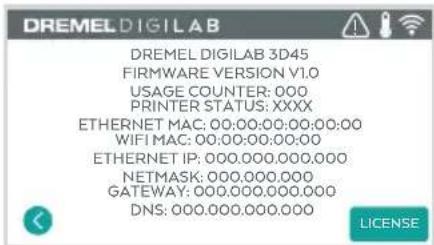
ABOUT
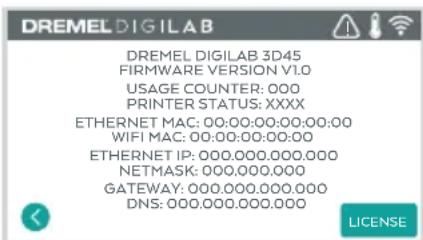
Tap to see 3D45 information such as firmware version, usage counter, printer status, and MAC address.
TOUCH SCREEN ICONS

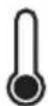
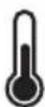
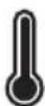
Indicates that there is an error such as filament empty or door open.
Indicates that Ethernet is connected.
Indicates WiFi signal strength and if connected to WiFi symbol will be blue.
Indicates that the extruder and build platform are cool.
Indicates that the extruder and build platform are warm.
Indicates that the extruder and build platform are hot.
INITIAL SETUP
The first time you power on your Dremel 3D45 you will be prompted to perform an initial setup of network. Completing this process will give you access to features such as remote 3D printing via local area network connection, notifications of firmware updates, and printer status monitoring. You will then be walked through how to loading your first roll of filament and how to properly level the build platform.
- To complete initial setup, tap "Start" when prompted on the initial setup screen. If you decline this setup you can always setup network later.
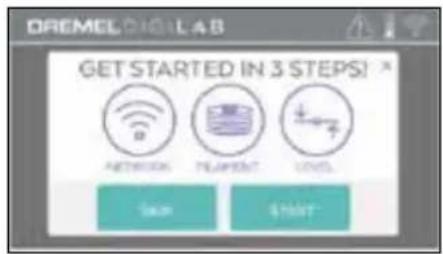
- If you choose "Start", 3D45 will automatically connect to your ethernet or search for available wireless networks.
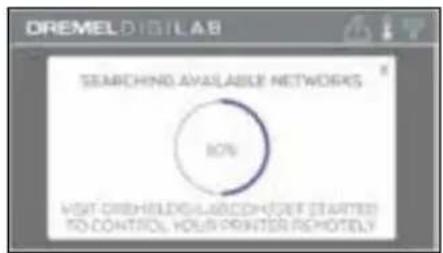
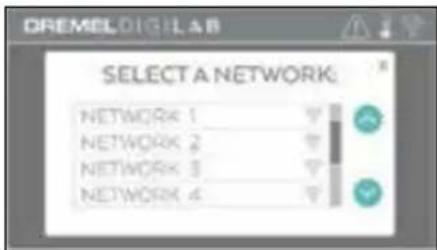
- Choose your wireless network using the touchscreen. Use the arrows to scroll through the list of available wireless networks. Tap on your network name to accept it.
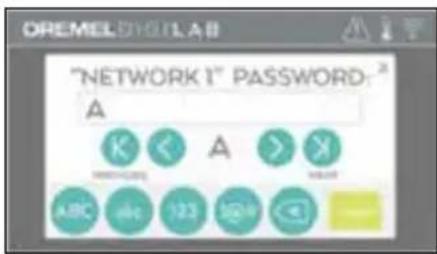
- Enter your wireless network password and tap "Done".
REMOTE 3D PRINTING VIA LOCAL AREA NETWORK CONNECTION USING DREMEL DIGILAB 3D SLICER
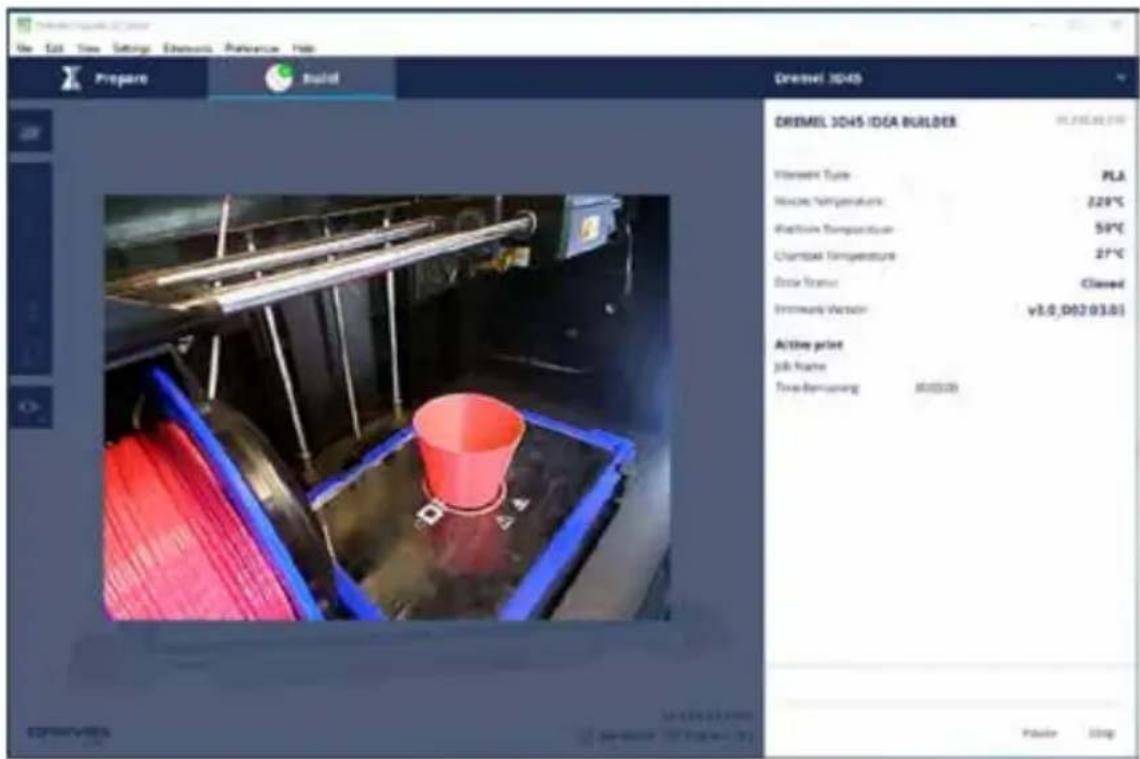
Dremel Digilab 3D Slicer allows you to upload, edit, and build 3D files and connect to your 3D45 (requires wireless or Ethernet connection). In the software, you can view models and projects, send, pause and cancel builds, monitor build status, receive push notification updates, and more. You can install Dremel Digilab 3D Slicer from www.dremel3d.com or from USB flash drive provided with the Dremel 3D45.
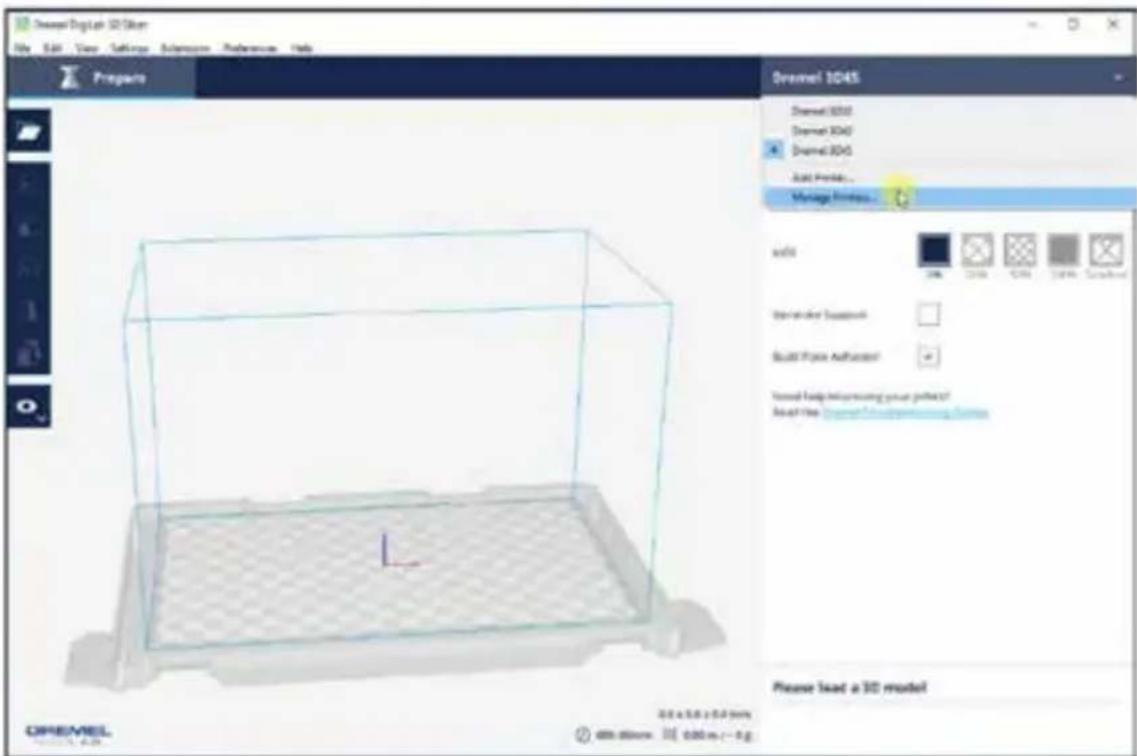
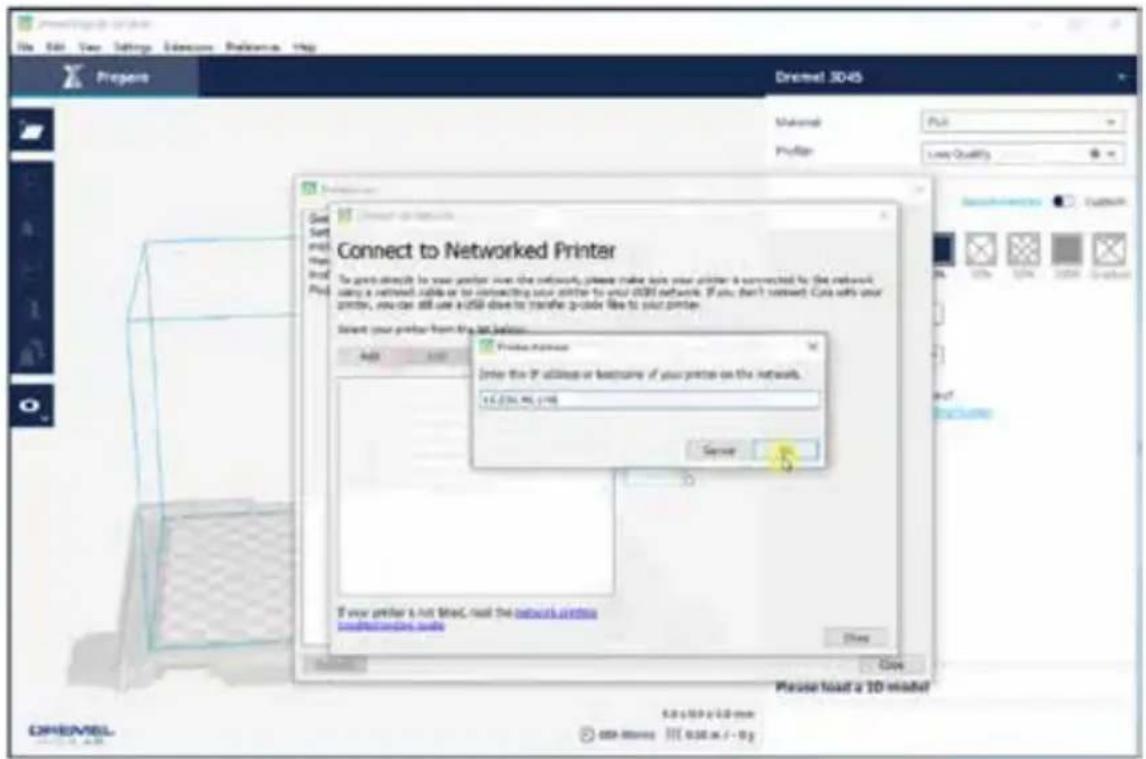
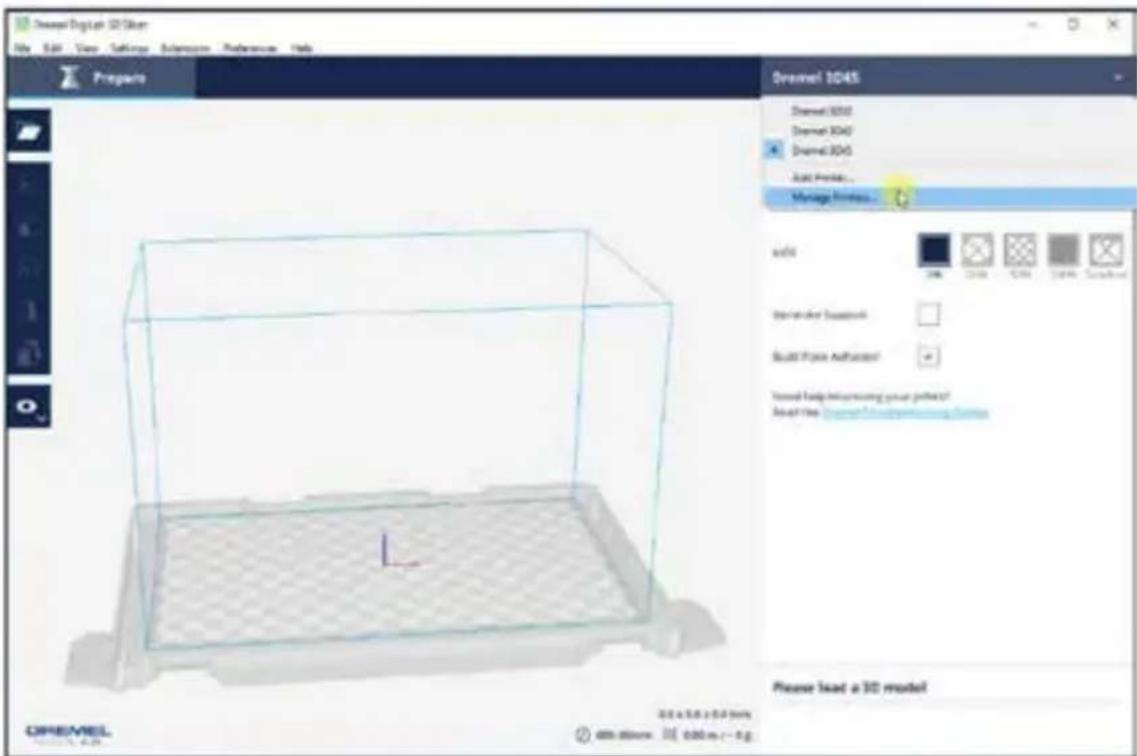
- Open the Dremel slicer, click the printer name in the top right corner and click Manage Printers
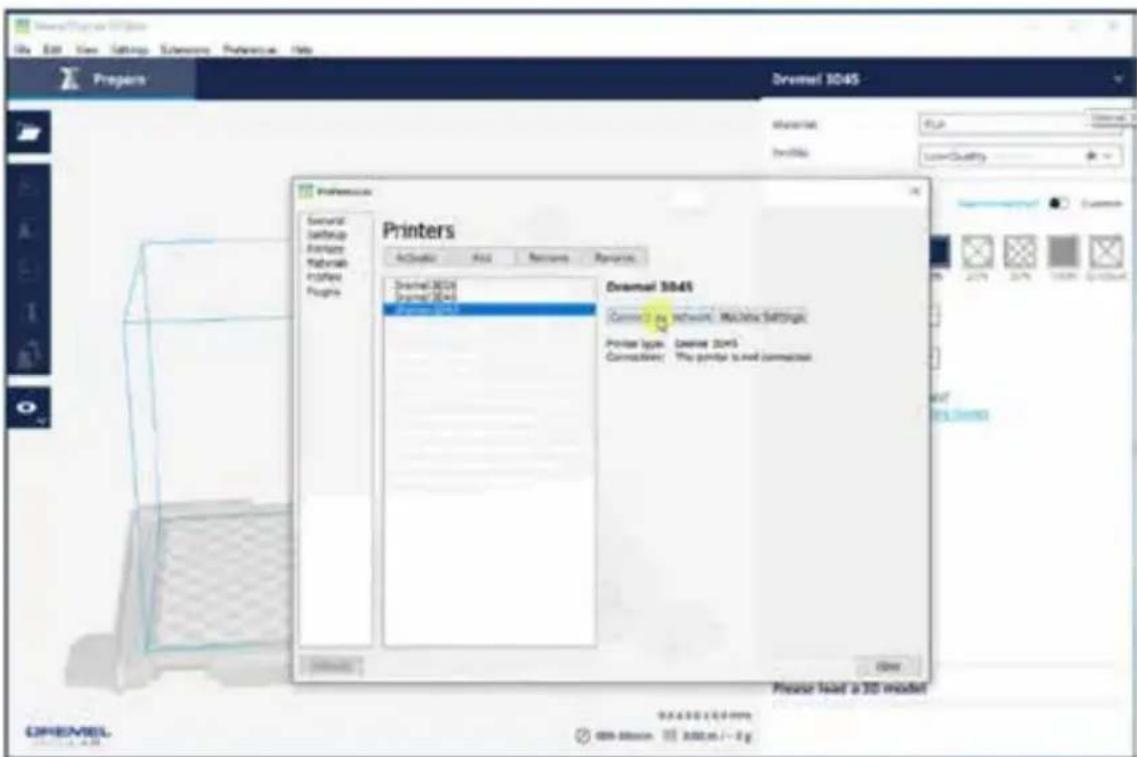
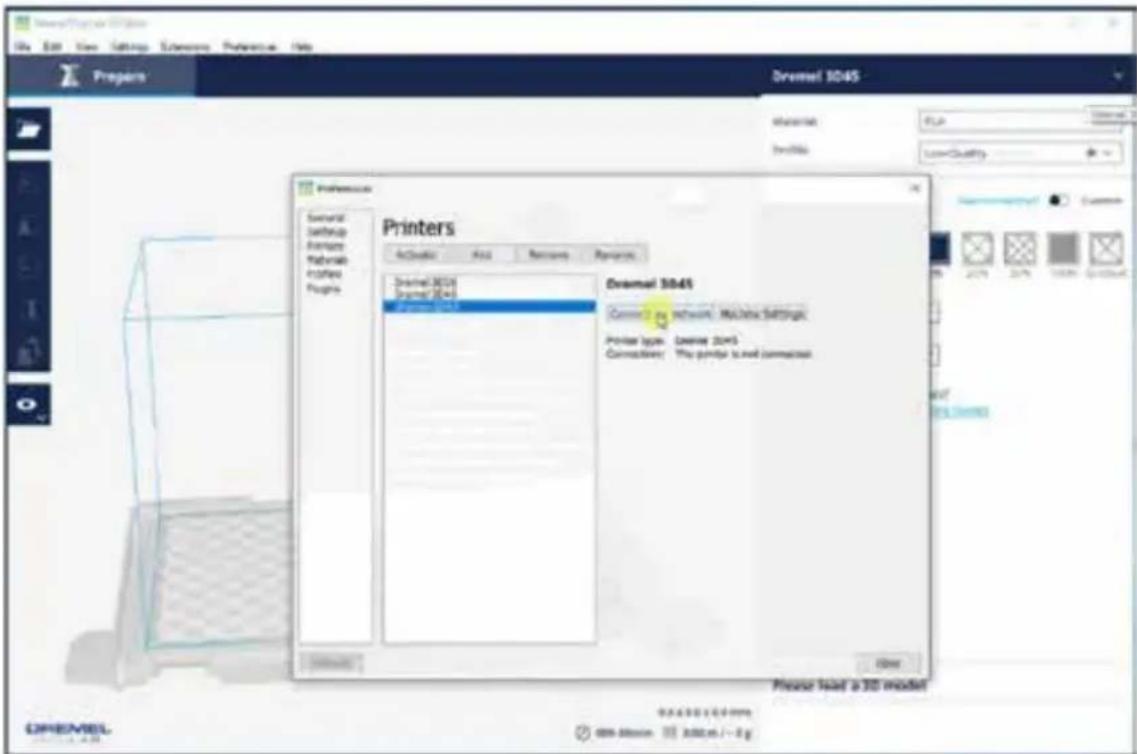
- Select your Dremel 3D45 and click Connect via Network
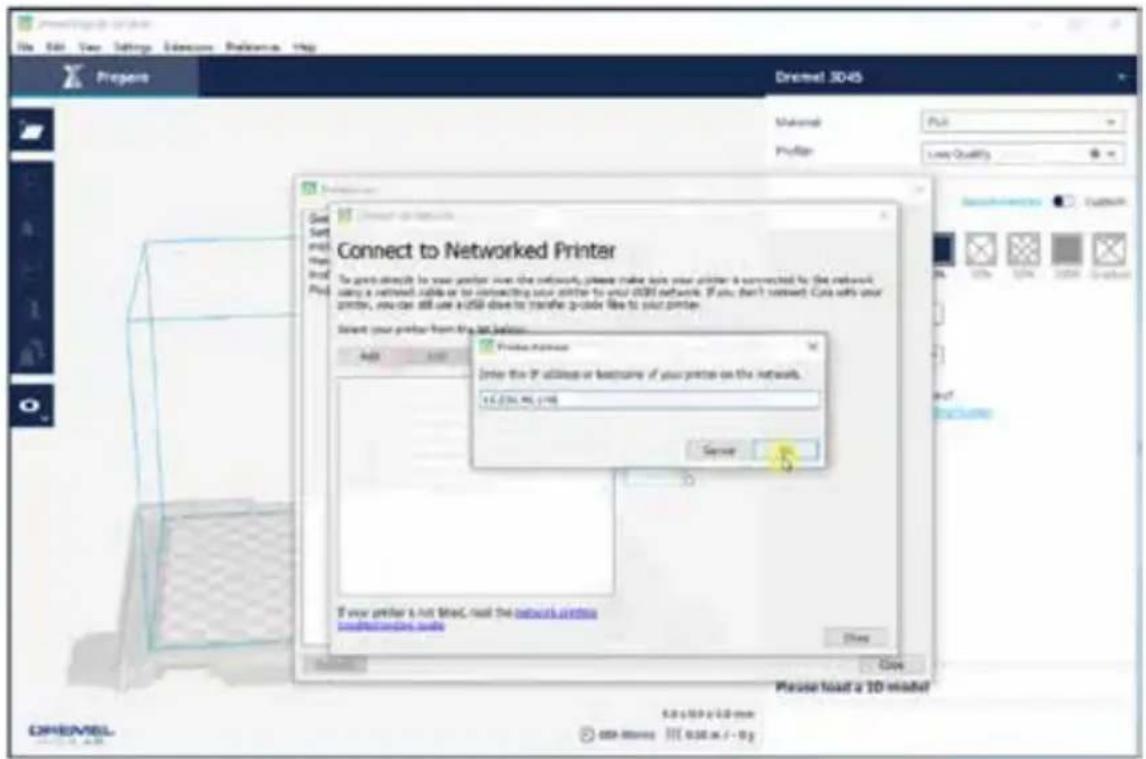
- Click Add and type in your printer's IP address
- Click OK then Connect
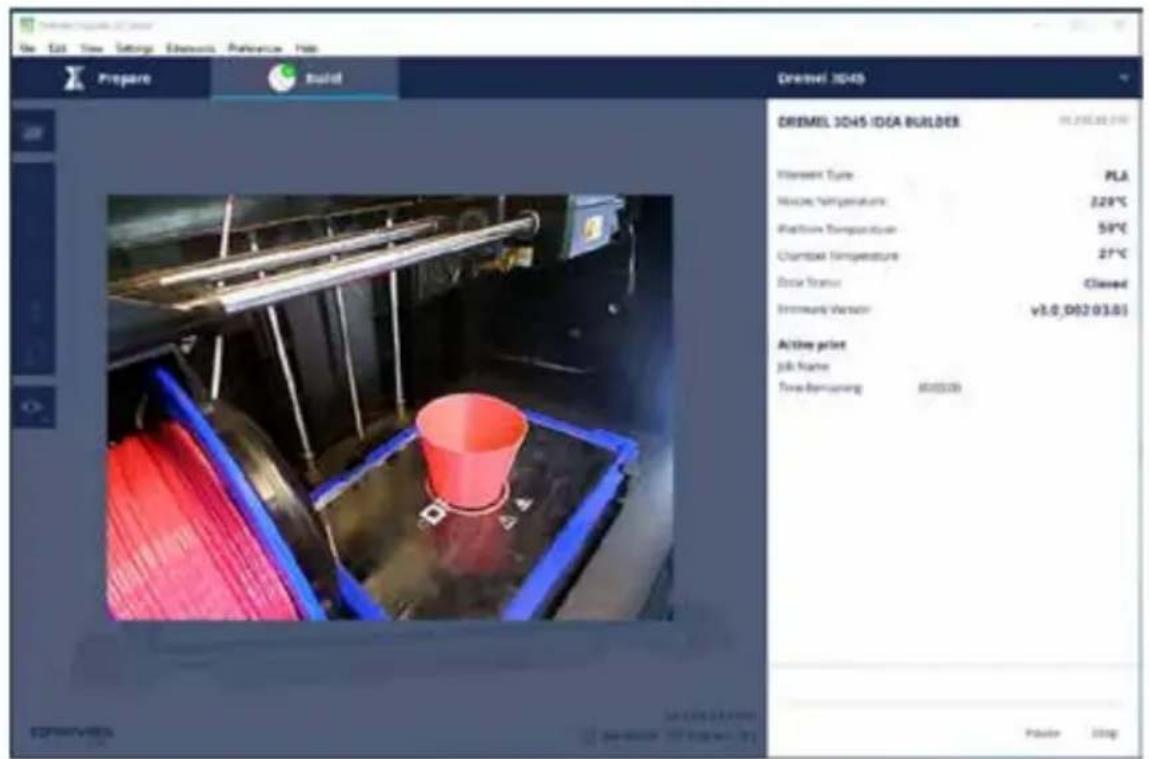
- Close out the settings windows. You should now see a green check on the Build screen button indicating you are successfully connected.
- Clicking the Build button will display the live camera feed for your printer.
- You can manage your build using pause and stop buttons on this screen.
GETTING READY TO BUILD

WARNING
OBSERVE ALL PROVIDED
WARNINGS AND SAFETY
INSTRUCTIONS WHEN USING THE DREMEL 3D45.
Failure to do so may result in fire, equipment damage, property damage or personal injury.

WARNING
DO NOT TOUCH THE EXTRUDER TIP OR HEATED BUILD
PLATFORM DURING DREMEL 3D45 OPERATION OR UNTIL IT HAS COOLED DOWN TO AT LEAST 60°C (140°F). Contact with the extruder tip or build platform during or after operation before tip and build platform has cooled may result in personal injury.

WARNING
USE ONLY DREMEL FILAMENT.
Use of filament not authorized by
Dremel may result in equipment, property damage, or personal injury.

WARNING
DO NOT ADJUST EXTRUDER
SETTING TO EXCEED THE
MAXIMUM RATED TEMPERATURE OF THE FILAMENT
TYPE BEING USED. Heating filament above
recommended range can cause emissions that may result in personal injury.

CAUTION
DO NOT PULL THE FILAMENT
OUT. Doing so may damage the
extruder.
LOADING/CHANGING FILAMENT
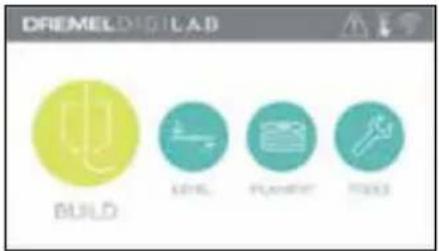
- Start filament load/change process by tapping
"Filament" button on touchscreen. Extruder will move to front right corner of print area and extruder tip will begin to heat.
-
After extruder stops moving, open the 3D45 Lid for better access to extruder.
-
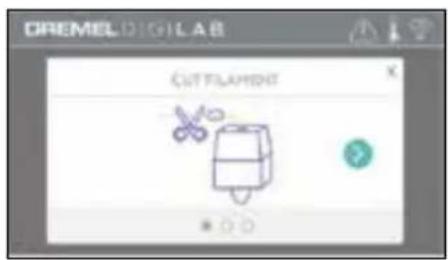
If existing filament is loaded, cut existing filament near extruder intake and tap the arrow button on touchscreen.
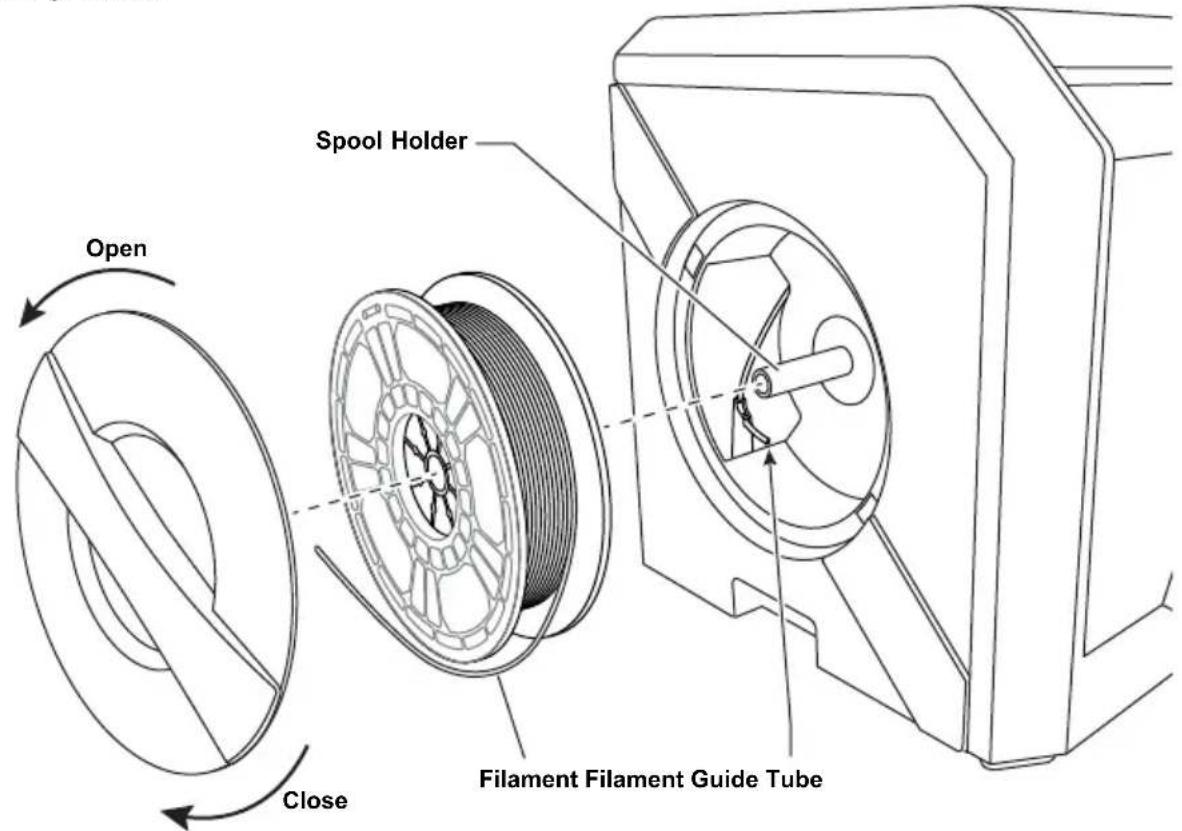
- Remove Spool door by rotating it counter clockwise and remove existing spool if one is present, see figure1.
FIG. 1
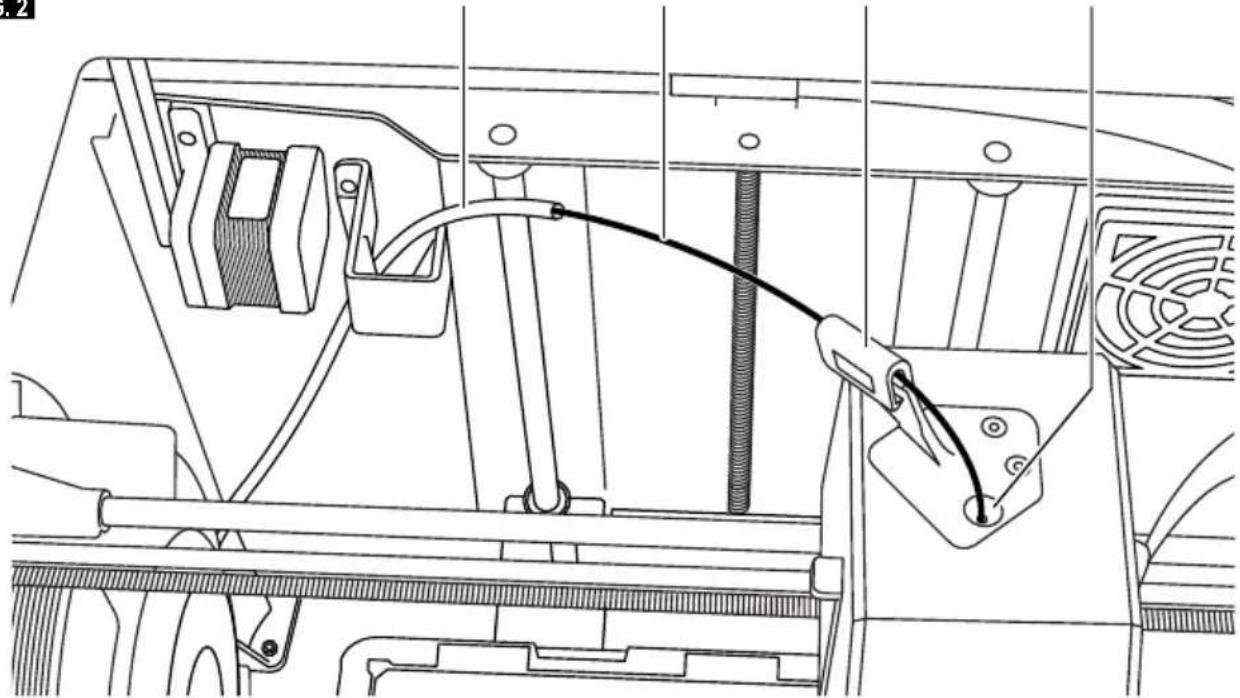
Guide Tube Filament Filament Guide Extruder intake
FIG. 2
natural_image
Technical line drawing of a vehicle chassis with attached cable and fan (no text or symbols)-
Thread tip of new filament through guide tube, place spool on spool holder, replace spool door by aligning locking tabs and rotating clockwise, see figure 1.
-
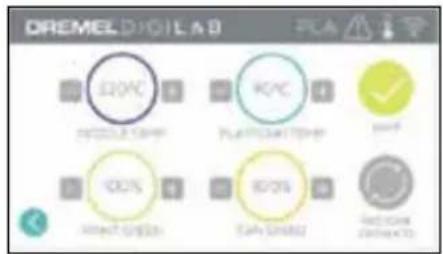
When you place a roll of Dremel filament into the spool holder, the printer will auto-recognize the filament type and adjust the printer settings to be optimized for the filament you are using. (This will bypass any print settings loaded in your sliced file). NOTE: You have the option to enter advanced printer mode to manually alter print settings after you change filament. Please check all settings (if manually entered) as improper settings may cause prints to fail, property damage, or personal injury, see "Filament Type and Settings" chart on page 23 or on dremel3d.com for the latest chart. NOTE: You also have the option to enter advanced printer mode, which allows you to pull print settings from the saved sliced file. This will prevent the printer from altering its print settings. Please check all settings prior to printing as improper settings may cause prints to fail, property damage, or personal injury.
-
If changing existing filament, 3D45 will automatically purge existing filament.
-
When Feed Filament screen appears, tap the arrow on touchscreen and thread filament coming from guide tube into extruder intake until extruder feeds through on its own, see figure 2.
NOTE: Ensure the gears inside of the extruder have properly grabbed the filament before you finish the filament change. You will feel a tug and see the filament start to feed itself into the extruder when this occurs.
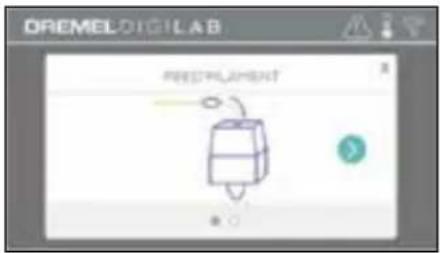
- Filament will be drawn into the extruder and begin to exit from the hot extruder tip. NOTE: Your Dremel 3D45 was tested by building objects before leaving the factory. These test objects may have been made with a different filament color than you are using. Therefore, a small amount of filament may be remaining in the extruder.
- When new filament appears from extruder tip, tap "done" on touchscreen to complete filament load process, return to main menu, and calibrate extruder. Carefully remove excess filament without touching hot extruder tip. If necessary, carefully remove debris from extruder tip with needle nose pliers.
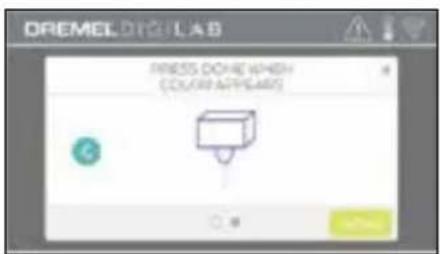
CAUTION
USE EXTRA CARE NOT TO DAMAGE THE EXTRUDER TIP
WHEN CLEARING DEBRIS. DREMEL 3D45 WILL NOT WORK PROPERLY WITH A DAMAGED EXTRUDER TIP AND WILL REQUIRE REPLACEMENT.
- Close 3D45 lid and door.
FILAMENT TYPE AND SETTINGS
| Filament Type PLA ECO-ABS Nylon PETG | ||||
| Nozzle Temperature Range | 190 - 230 °C | 190 - 230 °C | 220 - 280 °C | 230 - 260 °C |
| Optimal Nozzle Temperature | 220 °C | 220 °C | 255 °C | 250 °C |
| Build Platform Temperature Range | 0 - 60 °C | 0 - 70 °C | 0 - 100 °C | 0 - 80 °C |
| Optimal Build Platform Temperature | 35 °C | 45 °C | 100 °C | 70 °C |
| Print Speed Multiplier | 10 - 300% | 10 - 300% | 10 - 300% | 0 - 100% |
| Recommended Speed Multiplier | 100% | 100% | 90% | 100% |
| Fan Range | 0 - 100% | 0 - 100% | 0 - 100% | |
| Object cooling fan setting | 100% | 100% | 50% | 100% |
NOTE: Please check website dremel3d.com for latest filament settings.
PREPARING BUILD PLATFORM
WARNING DO NOT TOUCH THE EXTRUDER TIP OR HEATED BUILD PLATFORM DURING DREMEL 3D45 OPERATION OR UNTIL IT HAS COOLED DOWN TO AT LEAST 60°C (140°F). Contact with the extruder tip or build platform during or after operation before tip and build platform has cooled may result in personal injury.
WARNING DO NOT DROP THE BUILD PLATFORM. Tempered glass plate may break and result in personal injury.
WARNING DO NOT REMOVE TEMPERED GLASS PLATE FROM PLASTIC HOLDER. Contacting with tempered glass plate edge may result in personal injury.
CAUTION BEFORE EVERY BUILD MAKE SURE THAT THE BUILD PLATFORM IS COVERED WITH GLUE FROM THE SUPPLIED GLUE STICK. If glue is not used, it may cause poor object build quality.
-
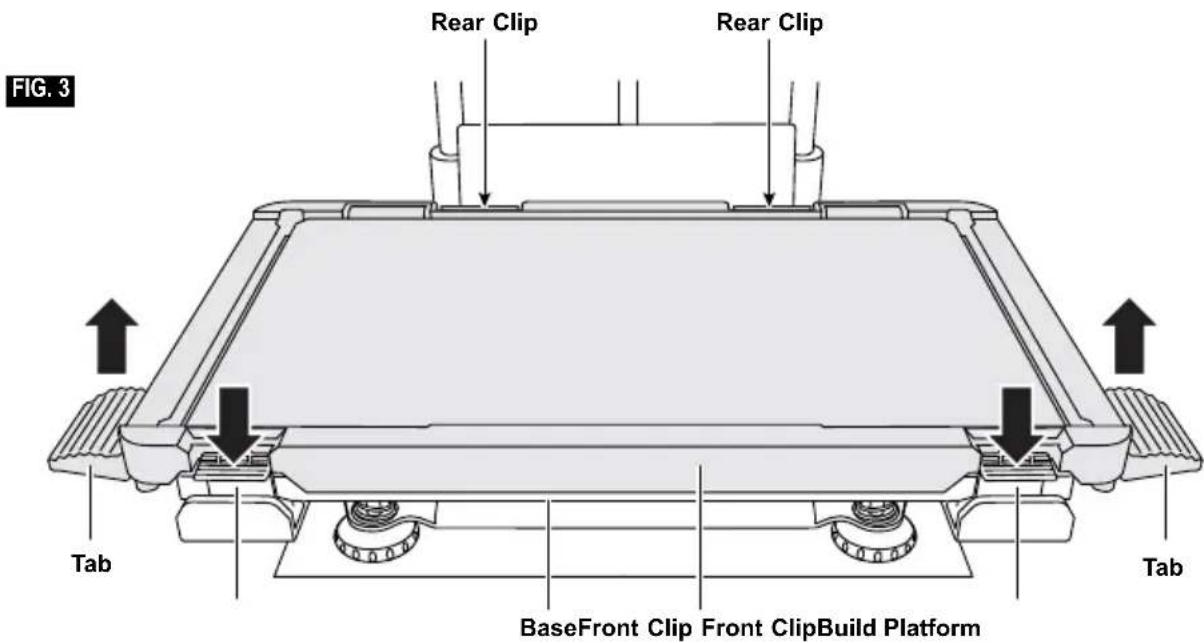
Remove build platform by first pressing down and releasing the two clips located at the front of the build platform, then lift the build platform off the base using the build platform tabs (figure 3).
-
For best results, apply a thin layer of glue with the provided glue stick to the build platform, figure 4. Please check the "Glue Application Instructions" for detailed information.
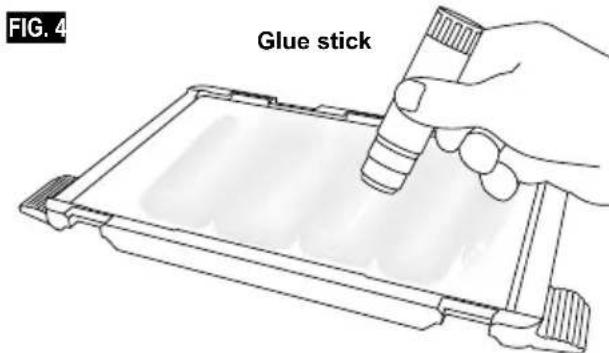
NOTE: To clean the build platform, rinse the platform with warm water and dry with a towel.
- Install the build platform by first inserting the rear of the platform onto the rear clips, then press down on the front of the platform until it snaps in place.
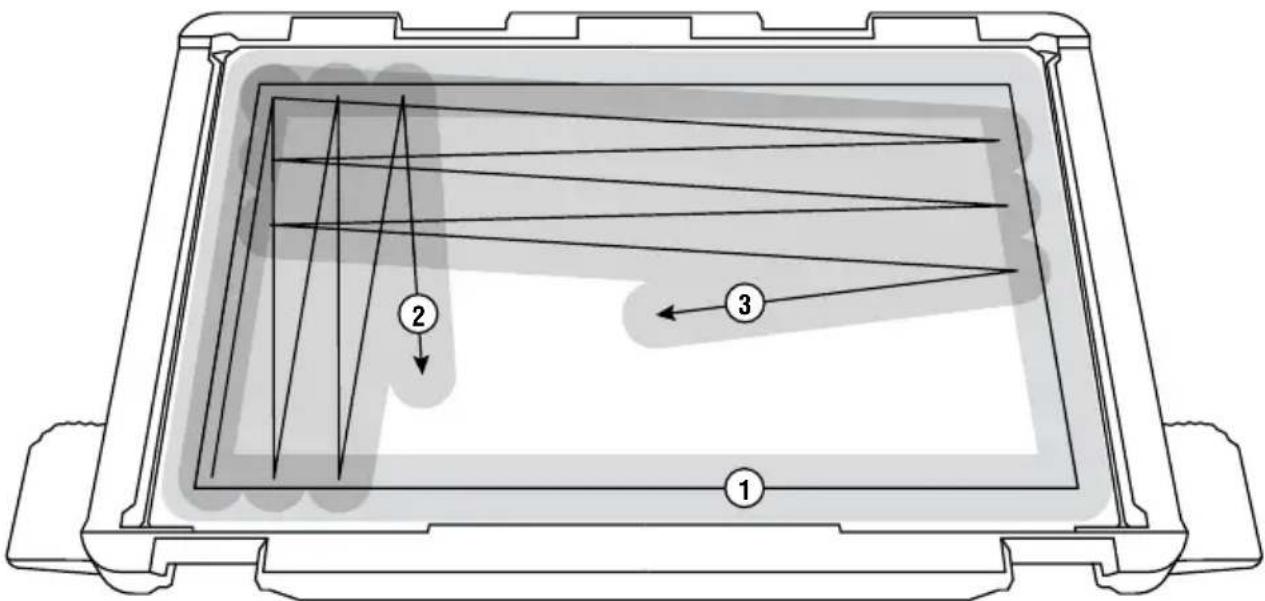
It is important to ensure that the 3D45 build platform is covered with Dremel specified glue before each build. A properly maintained glue layer helps parts adhere to the build plate during prints and prevents warping and curling, especially in large prints.
You should apply a layer of glue every 1-3 prints. When you apply glue, make sure you apply it to the whole area of the bed where the part will print. Make sure that the build plate is cool before removing it or applying glue.
Each time you apply glue, make sure to apply two overlapping layers. You can apply the glue to the perimeter of the print area first (1), and then zigzag up and down while overlapping over the entire area (2). Wait for 10 seconds and then apply another layer zigzagging left to right (3). This ensures a uniform layer over the entire build area.
Allow the glue to dry before leveling or starting a print. Preheating the build plate can help speed up this process.
Every 7-10 glue applications, or if the glue layer becomes uneven, you should completely clean the build platform. You can do this in one of two ways:
Option 1: Remove the build platform from the printer. Wet the platform in water, by holding it under warm water for a few seconds. Make sure not to get the warning label on the front of the build plate wet. After that, you should easily be able to scrape or wipe the glue off. Make sure the build platform is completely dry before putting it back in the 3D45.
Option 2: Remove the build platform from the printer. Use the scraper to scrape the glue off the entire surface of the build plate. You can scrape from left to right and then from up to down to ensure that all the glue has been removed. Make sure to remove the build platform from the printer before scraping as glue dust can get sucked into the filter and clog it.
Apply two full layers of glue to the clean build plate allowing the first layer to dry in-between. Once the second layer has dried, re-level the platform before starting your next print.
WARNING DO NOT TOUCH THE EXTRUDER TIP OR HEATED BUILD PLATFORM DURING DREMEL 3D45 OPERATION OR UNTIL IT HAS COOLED DOWN TO AT LEAST 60°C (140°F). Contact with the extruder tip or build platform during or after operation before tip and build plate has cooled may result in personal injury.
It is important you level the build platform every time you reinstall the build platform to ensure that the build platform is evenly spaced from the extruder head. Not leveling the build platform may cause objects to not build properly.
- Tap "Level" on 3D45's touchscreen.
-
The extruder and build platform will move into position to level the build platform. 3D45 will first check level at the back center of the build platform. The two knobs under the build platform are used to raise and lower the build platform on the left and right. The extruder contains a sensor that detects if the bed is level, no additional tools are necessary.
-
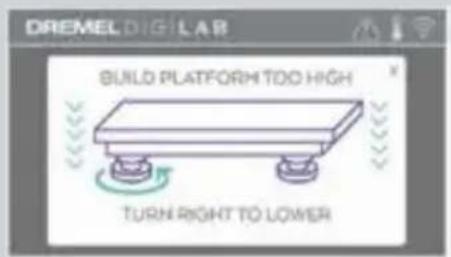
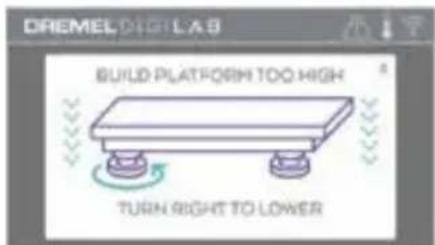
The touchscreen will indicate if your build platform is too high or too low. If the build platform is too high, adjust the appropriate knob by rotating right until you hear a "beep" and the touchscreen indicates that it is ready to verify that the bed is level.
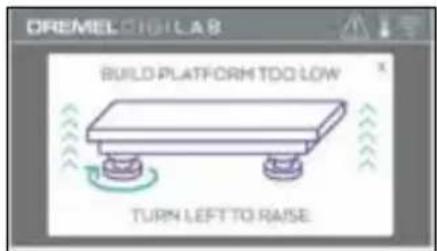
- If the build platform is too low, adjust the knob by rotating left until you hear a "beep" and the touchscreen indicates that it is ready to verify that the bed is level.
- Tap "Verify" to check the bed level. If further adjustment is needed the touchscreen will indicate the direction, if the level is correct, the extruder will move to the next point and the level process can be repeated.
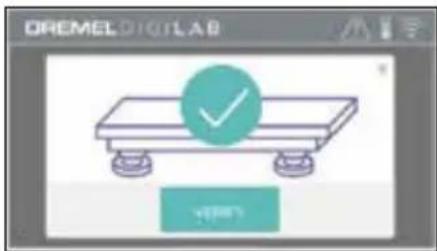
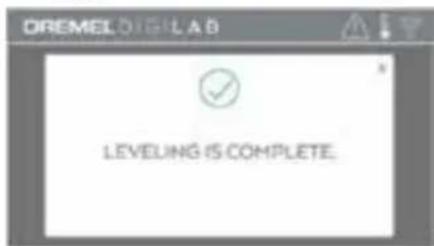
- Repeat steps 3-5 for the second position, when the bed is fully level the extruder will automatically move to the calibration position and complete the leveling process.
CONNECTING USB CABLE
- Ensure 3D45 power switch is in the off position.
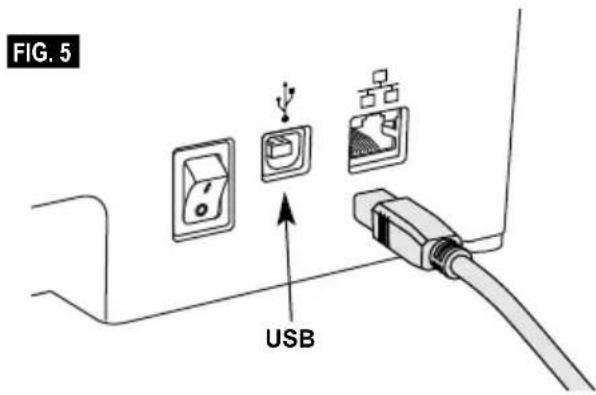
- Connect the included USB cable to your 3D45 and computer, figure 5.
- Open software.
- Turn your Dremel 3D45 on using the power switch to sync your computer to your Dremel 3D45.
CONNECTING ETHERNET
- Ensure 3D45 power switch is in the off position.
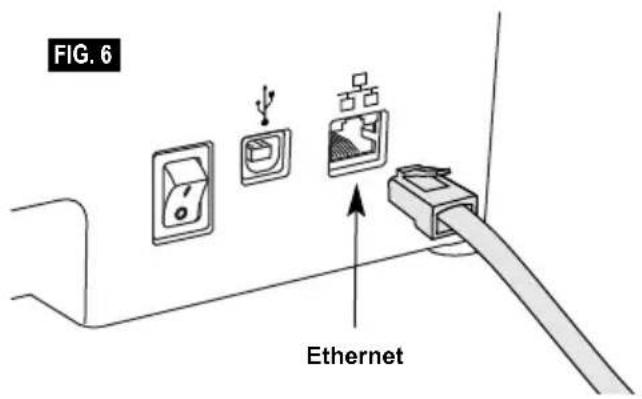
- Plug ethernet cable into your 3D45, figure 6.
- Turn your Dremel 3D45 on using the power switch. Ethernet connection should be detected automatically. Tap "Accept" to confirm connection.
BUILDING
OBSERVE ALL PROVIDED WARNINGS AND SAFETY
INSTRUCTIONS WHEN USING THE DREMEL 3D45.
Failure to do so may result in fire, equipment damage, property damage or personal injury.
DO NOT REACH INSIDE THE DREMEL 3D45 WHILE IT IS IN
OPERATION. Contact with Dremel 3D45 moving parts during operation may result in poor build quality, equipment damage or personal injury.
NOTE: Your Dremel 3D45 will build test objects before leaving the factory. These test objects may have been made with a different filament color than you are using. Therefore, a small amount of filament may be remaining in the extruder. The start of your first object may have some of this filament color until it transitions over to your filament color.
You have several options when building on your 3D45:
1) On-Printer Storage
2) USB Flash Drive
3) Computer
BEFORE YOU BUILD
- Ensure an adequate amount of filament is loaded (see page 21). If 3D45 runs out of filament during a build, it will pause until more filament is added.
- Ensure glue is applied, build platform is level and clear of objects.
- Ensure the extruder and build platform temperature is set according to the filament type used, see page 23 for details.
BUILDING FROM ON-PRINTER STORAGE
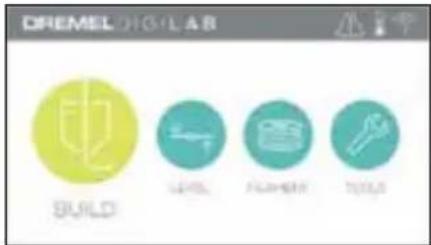
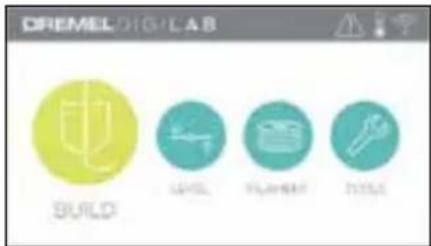
- On the main menu tap "Build".
- On the build menu tap the printer icon.
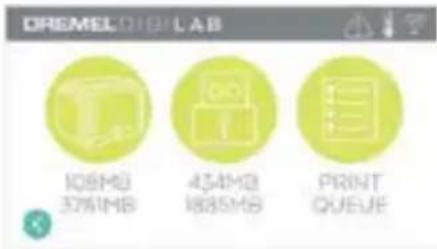
- Tap the model file you would like to build. (Use arrows to scroll through pages)
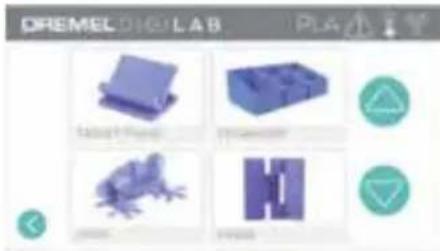
- In the model detail page tap "Build" to begin building process.
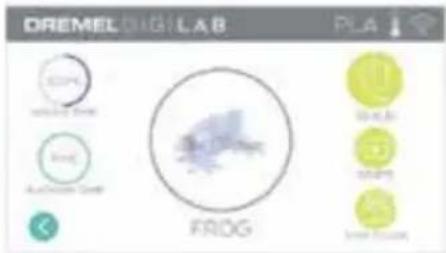
- Your 3D45 will first align the extruder and build platform to their zero positions then the level sensor will lightly touch the build platform to complete alignment. Your extruder tip and build platform will begin to heat which may take a few minutes. Once the proper temperature is reached your model will begin to build.
- Once your object is finished your 3D45 will automatically align the extruder and build platform to their calibration positions and cool the extruder tip and build platform.
- Wait until the touch screen indicates that the extruder and build platform are "cool" to remove your object. See section "Removing Object from Build Platform" for object removal instructions.
BUILDING FROM USB FLASH DRIVE
- On main menu tap "Build".
- Tap USB icon to access contents of USB flash drive.
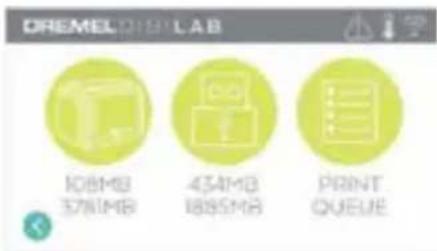
- Follow steps 3-7 from Build from On-Printer storage to complete build from USB flash drive.
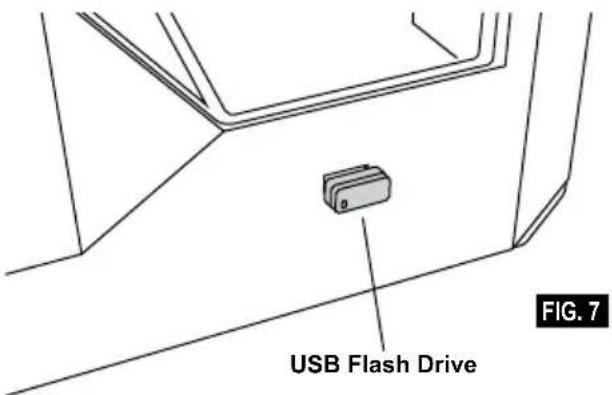
BUILD FROM COMPUTER
Dremel 3D45 is compatible with Dremel Digilab 3D Slicer and Simplified 3D. Follow the instructions that came with this software to complete a Build from your computer.
CANCELING YOUR BUILD ON 3D45
To cancel your object during preheating or building, tap "Stop" on the touch screen. If you confirm "Yes" the extruder and build platform will move to their calibration positions.
REMOVING YOUR OBJECT FROM THE BUILD PLATFORM

WARNING
DO NOT TOUCH THE EXTRUDER TIP OR HEATED BUILD
PLATFORM DURING DREMEL 3D45 OPERATION OR UNTIL IT HAS COOLED DOWN TO AT LEAST 60°C (140°F). Contact with the extruder tip or build platform during or after operation before tip and build plate has cooled may result in personal injury.

WARNING
USE PERSONAL PROTECTIVE EQUIPMENT. The use of
protective equipment such as heat resistant gloves and safety glasses will reduce personal injuries.

WARNING
BE AWARE OF YOUR BODY POSITION WHEN USING HAND
TOOLS TO REMOVE OBJECTS FROM THE BUILD PLATFORM. Sudden tool slip and improper body position during object removal from the build platform may result in personal injury.

WARNING
DO NOT DROP THE BUILD PLATFORM. Tempered glass plate
may break and result in personal injury.

WARNING
DO NOT TWIST OR BEND THE BUILD PLATFORM WHILE
REMOVING OBJECTS. Tempered glass plate may separate from plastic holder and result in personal injury.

CAUTION
AVOID SCRATCHING THE BUILD PLATFORM WHEN REMOVING
OBJECTS. SCRATCHES IN THE BUILD PLATFORM WILL RESULT IN IMPROPER OBJECT CREATION.
- Wait for the extruder to cool before removing your object.
- With the object still attached, remove build platform from the build area.
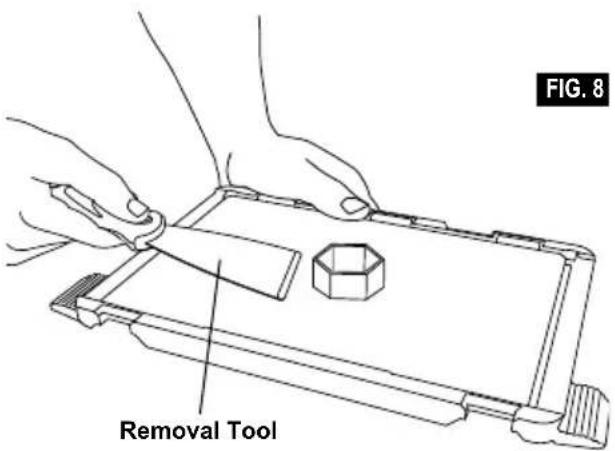
- Peel your object from the build platform. If needed, gently use the object removal tool to remove object from build platform (figure 8).
REMOVING SUPPORTS (IF REQUIRED)
Use needle nose pliers to remove supports that are inside your object or hard to reach.
USING THE CAMERA
Your 3D45 is equipped with a camera that can be used to remotely monitor prints as long as your printer is connected to a network. There are two ways to access the camera: through the Dremel Digilab 3D Slicer (see page 19) or directly via a web browser.
DIRECT THROUGH WEB BROWSER
- Make sure the device you want to view the camera on is connected to the same network as the 3D printer. This could be via Wi-Fi or via Ethernet.
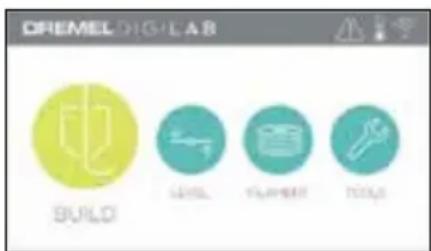
- On the main menu of your 3D45 tap "Tools"
- In the tools menu tap "About"
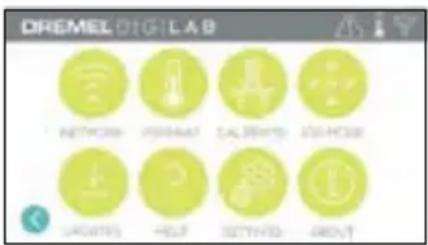
Locate the IP address of your printer. If your printer is connected to the network via Ethernet, this is the address next to "Ethernet IP". If it is connected via Wi-Fi this is the address next to "WiFi IP". It will be a sequence of three or four numbers separated by dots.
- Open any web browser on the device you want to view the camera on.
-
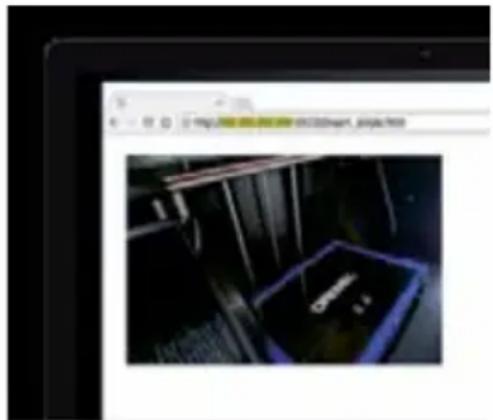
In the address bar, enter the string: http://IPADDRESS:10123/stream_simple.html For example, http://000.000.000.000:10123/stream_simple.html
-
Press enter and you will see a screen with a view of the camera as below.
natural_image
Interior view of a server room with black equipment and a glowing display (no visible text or symbols)BEST PRACTICES
- ALWAYS USE PROVIDED GLUE STICK.
- Ensure your build platform is level before every print.
- For proper adhesion of filament to the build platform, regularly wash the glue from the build platform with warm water, dry the build platform, re-apply a fresh layer of glue and re-level.
- Ensure spool is installed properly and can rotate freely.
- When using your Dremel 3D45 for the first time or after changing filament, allow Dremel 3D45 to extrude until material is consistent with the installed filament color.
- It is important to watch your Dremel 3D45 begin building objects. Your object is most likely to experience difficulty in the beginning. Thankfully, this is also the most convenient time to cancel the object, clean the build platform, and start your object again. Remain near the Dremel 3D45 during the building process.
- It is important to save your Dremel 3D45 packaging as it will make re-boxing and transporting your Dremel 3D45 easier.
- Ensure that you store filament spools in an environment that is not moist or too hot. It is recommended that you do not remove the filament spool from its airtight packaging until use.
- Use object removal tool gently to avoid damaging the build platform or object.
- Whenever possible, it is best to locate your object in the center of the build platform. Using the best orientation for your object is critical. Ensure that your object is located on the build platform and that you are using the best orientation for building.
- For steep overhangs (Less than 45 degree angle) it is recommended to build with support.
- Always remove the build platform before removing the object.
UNCLOGGING THE EXTRUDER
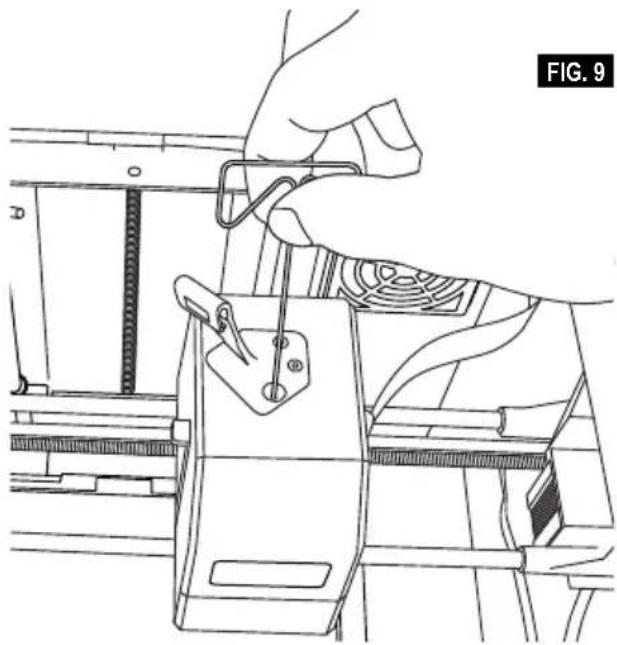
Use the unclogging tool to clean the extruder and unclog built up filament, fig 9.
- Click on the filament change button on the screen and wait for extruder to heat up. As filament starts to purge, insert the unclog tool into the extruder intake (top).
- Clogged debris will be pushed down and will extrude from the extruder tip. You should push the unclog too all the way down to ensure all filament is purged. You do not need to push with excessive force, as this may damage the extruder.
natural_image
Line drawing of a hand using a tool to adjust or install a component, no text or symbols presentUPDATING FIRMWARE VIA NETWORK
If your 3D45 is connected to WiFi, it should check for firmware updates each time it boots up. You can also update its firmware directly from the touchscreen. To update firmware:
- Tap "Tools", then tab "Updates".
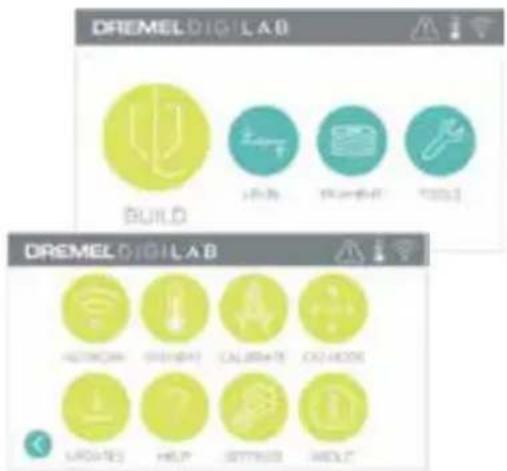
- Your 3D45 will check to see if it has the latest firmware installed and ask if you would like to update if one is needed.
- Choose accept to download and install the latest firmware.
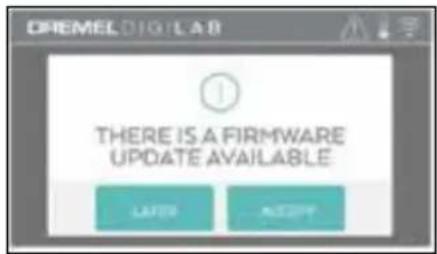
- When the 3D45 starts up and returns to the Home Screen, firmware update is complete.
UPDATING FIRMWARE MANUALLY
If your 3D45 is not connected to a network, you can update firmware directly from a USB Flashdrive.
- On your web browser go to www.dremel3d.com and download the latest 3D45 firmware file.
- Add the 3D45 firmware file to an empty, FAT32 formatted, USB flashdrive.
- Turn off your 3D45 using the ON/OFF switch.
- Insert the USB flashdrive into the USB-A port.
- Turn on your 3D45 and it should automatically detect and install the new firmware.
- Turn your 3D45 OFF, remove the USB flashdrive, and turn ON again to complete the update.
CLEANING THE EXTERIOR
Clean the 3D45's exterior with a lint free cloth. Clear the outer surfaces of any debris that is visible. To avoid damaging your Dremel 3D45 do not use water, chemicals or other cleaners on the 3D45.
CLEANING THE EXTRUDER TIP

CAUTION
USE EXTRA CARE NOT TO DAMAGE THE EXTRUDER TIP
WHEN CLEARING DEBRIS. DREMEL 3D45 WILL NOT WORK PROPERLY WITH DAMAGED EXTRUDER TIP AND WILL REQUIRE REPLACEMENT.

WARNING
DO NOT TOUCH THE EXTRUDER TIP OR HEATED BUILD
PLATFORM DURING DREMEL 3D45 OPERATION OR UNTIL IT HAS COOLED DOWN TO AT LEAST 60°C (140°F). Contact with the extruder tip or build platform during or after operation before tip and build plate has cooled may result in personal injury.
Using small needle nose pliers, pull away any plastic debris from the extruder tip. If the debris is stubborn, the extruder may need to be heated.
Wipe the touch screen with the soft, lint-free cloth. Do not spray cleaners on the touch screen.
| Problem Cause Corrective Action | ||
| Filament is not extruding or sticking to the build tape properly. | This can be caused by the build platform not being level with the extruder head. | Leveling the build platform will align the extruder head and ensure a better object quality. Cancel your object, clear build platform, level the build platform, and restart the object. |
| Dremel 3D45 froze before my object started. | Dremel 3D45 may have received conflicting commands. | Turn power switch off, wait 30 seconds, and turn power switch on. |
| Support material does not break away during cleaning and results in decreased quality of the final object. | Orientation of the part is not optimized. | Reorient the position of the 3D file in your slicing software to minimize the support material or place the support material on a non-critical surface. |
| Spaghetti mess at end of build. A layer of your object did not stick properly, model was saved with minimal surface area contacting the build platform, or object was built floating above the build platform with no support selected. | Use the preview feature in your slicing software to see the first layer height and position. Build with supports when necessary. | |
| Z-Gap offset may not be correct and the extruder tip is not properly spaced with the build platform. | ||
| Part only built halfway. Filament ran out. | Replace filament and resume build. See “No filament coming out”. | |
| No filament coming out. Clogged extruder. Contact customer service. | ||
| Filament not properly loaded. Try running a filament change again to ensure the extruder gears have properly caught the filament. | ||
| Extruder will not home. Contact customer service. | ||
| Stringy or fraying plastic layers on steep overhangs. | Object overhangs are too far apart or too steep (<45 degree angle). | Build with supports. |
| 3D45 will not find my Wi-Fi network. | Printer too far from wireless router. | Reposition 3D45 to be closer to your router. Connect to network with Ethernet. |
| 3D45 will not connect to my network. | Printer too far from wireless router. | Reposition 3D45 to be closer to your router. |
| Network password or SSID incorrect. | Re-enter your password/SSID or verify your password with your network owner. | |
| Build did not start when sent over network. | Filament ran out. Load additional filament and resume build. | |
| Doors open. Doors must be closed to start builds over your network, start build from print queue. | ||
| Model was already building The build plate must be clear to start a build over your network, clear the build plate and start build from print queue. | ||
Firmware Updates
Dremel recommends that firmware be updated whenever Dremel provides an update.
Dremel will provide firmware updating to improve performance and add additional features for the Dremel 3D45 throughout the life of the product. There are two ways of updating the Dremel 3D45: (1) Download update from dremel3d.com and install using USB memory drive. (2) Connect the Dremel 3D45 to the internet and update from the Dremel 3D45 touch screen.
Open Source Software used in this Dremel product
This product contains software components that are licensed by the holder of the rights under any version of the GNU General Public License (GPL), GNU Lesser General Public License (LGPL) or any other open source software license which requires that source code be made available. You can receive a complete machine-readable copy of the corresponding source code by sending a written request to:
Dremel
Attn: Open Source Software Officer
P.O Box 081126
Racine, WI USA 53408-1126
Your request should include: (i) the name of the Dremel product, (ii) the serial number (if applicable), (iii) the software version (if applicable), (iv) your name, (v) your company name (if applicable) and (vi) your return mailing and email address (if available).
We may charge you a nominal fee to cover the cost of the physical media and distribution.
You may send your request (i) within three (3) years of the date you received the product that included the software which is subject of your request or (ii) in the case of code licensed under the GPL version 3 for as long as Dremel offers spare parts or customer support for that product.
Warranty regarding further use of the Open Source Software:
DREMEL provides no warranty for the Open Source Software programs contained in this device, if such programs are used in any manner other than the program execution intended by DREMEL. The licenses listed below define the warranty, if any, from the authors or licensors of the Open Source Software. DREMEL specifically disclaims any warranties for defects caused by altering any Open Source Software program or the product's configuration. You have no warranty claims against DREMEL in the event that the Open Source Software infringes the intellectual property rights of a third party. Technical support, if any, will only be provided for unmodified software.
DREMEL® CONSUMER LIMITED WARRANTY
This DREMEL product is guaranteed in accordance with statutory/country-specific regulations; damage due to normal wear and tear, overload or improper handling are excluded from the warranty.
In the event of the product fails to conform to this written warranty, please take the following action:
- DO NOT return your product to the place of purchase.
- Please contact customer service via www.dremel.com for further instructions.
DISPOSAL
The machine, accessories and packaging should be sorted for environmental-friendly recycling.
ONLY FOR EC COUNTRIES
Do not dispose of power tools with household waste!
According the European Guideline 2012/19/
EC for Waste Electrical and Electronic
Equipment and its implementation into national law, power tools that are no longer usable must be collected separately and disposed of in an environmentally-correct manner.
CONTACT DREMEL
For more information on the Dremel product range, support and hotline, go to www.dremel.com.
Dremel, Konijnenberg 60, 4825 BD Breda, The Netherlands.
natural_image
Diagram of a rectangular device with diagonal stripes and a 15.5" height dimension label (394mm), no readable text or symbols beyond the measurement.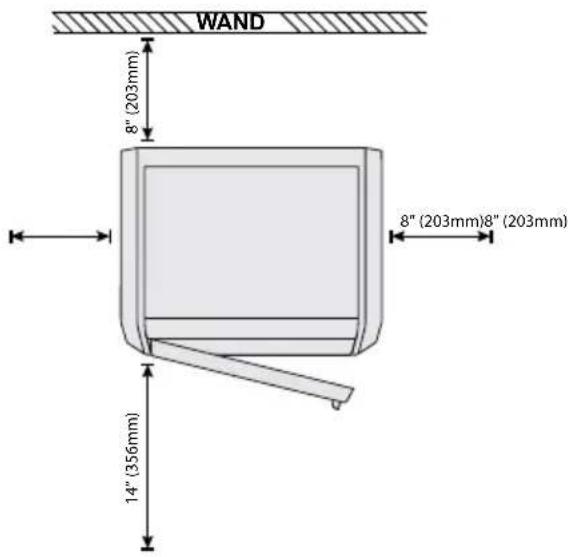
natural_image
Interior view of a computer printer showing internal components (no visible text or labels)Dremel 3D45
Betriebshandbuch
Kurzanleitung
natural_image
Illustration of a coiled cable or wire spool with no visible text or symbols(2) Filamentspule**
natural_image
Pure line drawing of a coiled cable or wire with no text, numbers, or symbolsNetzkabel
natural_image
Coiled cable with connectors and connectors (no text or symbols visible)USB-Kabel
(2) Klebestick
natural_image
Line drawing of a folding knife (no text or symbols)natural_image
Diagram of a container with rows of test tubes and an upward arrow, no text or symbols presentnatural_image
Technical line drawing of a mechanical device interior with internal compartments and a black arrow indicating upward motion (no text or symbols)natural_image
Line drawing of hands assembling a mechanical component (no text or symbols visible)natural_image
Technical line drawing of an internal device housing with a black arrow indicating a component (no text or symbols present)natural_image
Technical line drawing of an open mechanical device with internal compartments and a black arrow indicating a component (no text or symbols)FILAMENT
REPARATUREN
KALIBRIEREN (CALIBRATE)
POSITION (JOG MODE)
3D-FERNDRUCK ÜBER LOCAL-AREA-NETWORK-VERBINDUNG MIT DREMEL DIGILAB 3D SLICER
natural_image
Technical line drawing of a vehicle chassis with attached cable and fan (no text or symbols)ACHTEN SIE VOR JEDEM DRUCK DARAUF, DASS DIE
natural_image
Interior view of a server room with illuminated equipment and a central display unit (no visible text or symbols)TIPPS
natural_image
Line drawing of a hand using a tool to adjust or install a mechanical component, no text or symbols presentFIRMWARE-UPDATE ÜBER DAS NETZWERK
Attn: Open Source Software Officer
PO Box 081126
Racine, WI USA 53408-1126
natural_image
Technical drawing of a rectangular device with diagonal stripes and a 15.5" height dimension (394mm), no text or symbols present.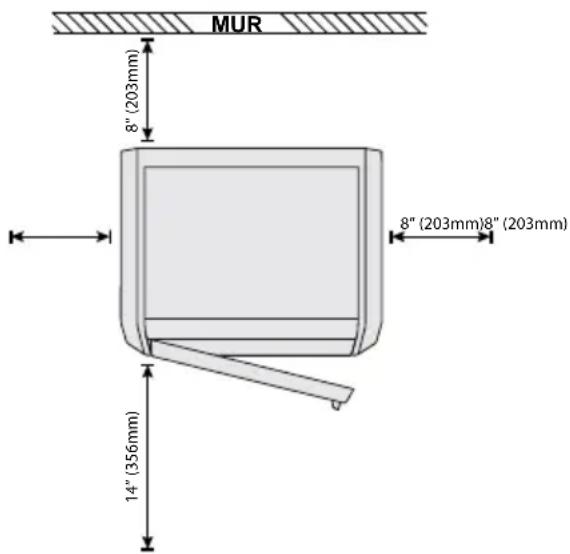
Ressource Description Emplacement
natural_image
Interior view of a computer printer showing internal components (no visible text or labels)Dremel 3D45
Mode d'emploi
natural_image
Illustration of a coiled cable or wire spool with no visible text or symbols(2) Bobine de filament**
natural_image
Pure line drawing of a twisted rope or cable with no text, numbers, or symbolsnatural_image
Coiled cable with connectors and connectors (no text or symbols visible)Câble USB
(2) Bâton de colle
natural_image
Line drawing of a folding knife (no text or symbols)natural_image
Diagram of a container with rows of test tubes and an upward arrow, no text or symbols presentnatural_image
Technical line drawing of a mechanical device interior with internal compartments and a black arrow indicating upward motion (no text or symbols)natural_image
Illustration of hands installing a device into a machine frame (no text or symbols visible)natural_image
Technical line drawing of an open computer case with internal compartments and a black arrow indicating a specific component (no text or symbols present)natural_image
Line drawing of an open refrigerator interior showing internal compartments and a black arrow indicating a location (no text or symbols)DÉTAILS DU FICHIER
FILAMENT
REPARATION (SERVICE)
CALIBRER (CALIBRATE)
MODE JOG (JOG MODE)
IMPRESSION 3D À DISTANCE VIA UNE CONNEXION À UN RÉSEAU LOCAL À L'AIDE DE DREMEL DIGILAB 3D SLICER

AVERTISSEMENT
FAITES PARTICULIÈREMENT ATTENTION DE NE PAS
ENDOMMAGER LA POINTE DE L'EXTRUDEUSE LORSQUE VOUS NETTOYEZ LES DÉBRIS. L'ÉQUIPEMENT DREMEL 3D45 NE FONCTIONNERA PAS CORRECTEMENT SI LA POINTE DE L'EXTRUDEUSE EST ENDOMMAGÉE ET IL FAUDRA LA REMPLACER.
CONSTRUCTION
ATTENTION
OBSERVEZ TOUS LES
natural_image
Interior view of a server room with illuminated equipment and a dark floor (no visible text or symbols)MEILLEURES PRATIQUES
natural_image
Line drawing of a hand using a tool to adjust or install electronic components (no text or symbols visible)MISE À JOUR DU FIRMWARE PAR LE RÉSEAU
Attn: Open Source Software Officer
P.O Box 081126
natural_image
Interior view of a computer printer showing internal components (no visible text or labels)Dremel 3D45
natural_image
Illustration of a coiled cable or wire spool with no visible text or symbols(2) Bobina de filamento**
natural_image
Pure line drawing of a coiled cable or wire with no text, numbers, or symbolsnatural_image
Coiled cable with connectors and connectors (no text or symbols visible)Cable USB
(2) Barra de cola
natural_image
Line drawing of a folding knife (no text or symbols)natural_image
Diagram of a box containing multiple test tubes with an upward arrow indicating a process or operation (no text or symbols present)natural_image
Technical line drawing of a mechanical device interior with internal compartments and a black arrow indicating upward motion (no text or symbols)natural_image
Illustration of hands installing or adjusting a device into a mechanical frame (no text or symbols visible)natural_image
Technical line drawing of a mechanical device interior showing internal components and a black arrow indicating a specific part (no text or symbols present)natural_image
Technical line drawing of an open mechanical device with internal compartments and a black arrow indicating a component (no text or symbols present)DETALLES DE ARCHIVO
SERVICIO
CALIBRAR (CALIBRATE)
MODO DE DESPLAZAMIENTO (JOG MODE)
CONSTRUCCIÓN
ATENCIÓN
HAGA CASO DE TODAS LAS ADVERTENCIAS E
natural_image
Interior view of a server room with black equipment and a glowing drive (no visible text or symbols)MEJORES PRÁCTICAS
natural_image
Line drawing of a hand using a tool to adjust or install a component, no text or symbols presentAttn: Open Source Software Officer
P.O Box 081126
Racine, WI USA 53408-1126
DigiLab 3D Slicer ....159
Firmware e software open source ....175
Garantia limitada do consumidor Dremel ^® .....176
SÍMBOLOS UTILIZADOS
Peso (sem bobine): 19.4 kg (42.8 lbs)
Dimensões: 20,25" x 16" x 15,9" (515 mm x 406 mm x 394 mm)
natural_image
Cutaway view of an open industrial machine showing internal components (no text or symbols visible)Dremel 3D45
natural_image
Line drawing of a coiled cable or wire spool (no text or symbols)(2) Bobine de filamento**
natural_image
Pure diagram of a coiled cable or wire with no text, numbers, or symbolsCabo de alimentação
natural_image
Coiled cable or connector with two connectors and a central connector (no text or symbols visible)Cabo USB
Bastão de cola
natural_image
Line drawing of a folding knife (no text or symbols)Espátula extratora de objetos
Pen USB
natural_image
Diagram of a test tube rack inside a box with an upward arrow indicating compression or movement (no text or symbols present)natural_image
Technical line drawing of a mechanical device interior with internal compartments and a black arrow indicating upward motion (no text or symbols)natural_image
Illustration of hands installing a mechanical component into a device frame (no text or symbols visible)natural_image
Technical line drawing of an open computer case with internal compartments and a black arrow indicating a specific component (no text or symbols present)natural_image
Technical line drawing of an open mechanical device with internal compartments and a black arrow indicating a component (no text or symbols present)MENU DE MODELOS (MODEL)
COPIAR PARA IMPRESSORA (COPY TO
ASSISTÊNCIA (SERVICE)
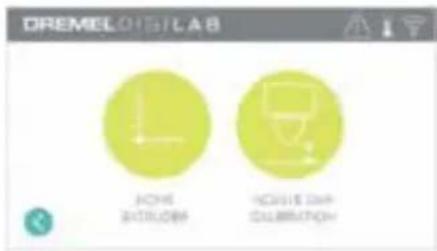
CALIBRAR (CALIBRATE)
MODO REGULAR (JOG MODE)
SOBRE (ABOUT)
IMPRESSÃO 3D REMOTA VIA LIGAÇÃO A UMA REDE LOCAL (LAN) UTILIZANDO O DREMEL DIGILAB 3D SLICER
LIGAR O CABO USB
ANTES DE CONSTRUIR
natural_image
Interior view of a dimly lit server room with illuminated drive bays and a monitor displaying 'CPU' (no readable text or symbols)BOAS PRÁTICAS
natural_image
Line drawing of a hand using a tool to adjust or install a mechanical component, no text or symbols presentATUALIZAR O FIRMWARE ATRAVÉS DE UMA REDE
A/C Open Source Software Officer
P.O Box 081126
Racine, WI USA 53408-1126
APENAS PARA PAÍSES DA CE
Procedure consigliate....206
Manutenzione....207
Firmware e software Open Source ....210
natural_image
Technical drawing of a rectangular device with diagonal stripes and a 15.5" height dimension (394mm), no text or symbols present.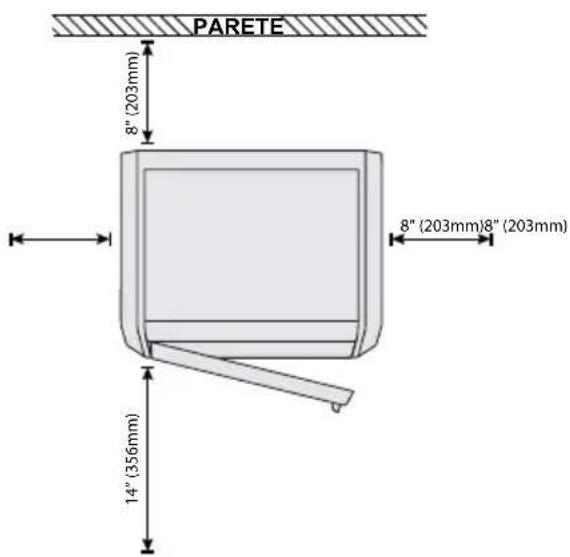
natural_image
Interior view of a computer printer showing internal components (no visible text or labels)Dremel 3D45
natural_image
Illustration of a coiled cable or wire spool with no visible text or symbolsnatural_image
Pure line drawing of a coiled cable or wire with no text, numbers, or symbolsnatural_image
Coiled cable with connectors and connectors (no text or symbols visible)Cavo USB
natural_image
Line drawing of a folding knife (no text or symbols)natural_image
Diagram of a box containing multiple test tubes with an upward arrow indicating a process or operation (no text or symbols present)natural_image
Technical line drawing of a mechanical device with internal compartments and a black arrow indicating upward motion (no text or symbols)natural_image
Line drawing of hands installing or adjusting a mechanical component inside a device frame (no text or symbols visible)natural_image
Technical line drawing of an open computer case with internal compartments and a black arrow indicating a specific component (no text or symbols present)natural_image
Technical line drawing of an open mechanical device with internal compartments and a black arrow indicating a component (no text or symbols present)MENU MODELLO (MODEL)
ASSISTENZA (SERVICE)
CALIBRARE (CALIBRATE)
MODALITÀ SBALZO (JOG MODE)
STAMPA 3D IN REMOTO TRAMITE CONNESSIONE ALLA LAN CON DREMEL DIGILAB 3D SLICER
CREAZIONE
natural_image
Interior view of a server room with black equipment and a blue-lit box (no visible text or symbols)PROCEDURE CONSIGLIATE
natural_image
Line drawing of a hand using a tool to adjust or install a mechanical component, no text or symbols presentAGGIORNAMENTO DEL FIRMWARE DALLA RETE
Attn: Open Source Software Officer
P.O Box 081126
Racine, WI USA 53408-1126
SOLO PER I PAESI DELLA CE
VEILIGHEIDSWAARSCHUWINGEN

LET OP
LEES ALLE GEBRUIKS-EN VEILIGHEIDS-
INSTRUCTIES IN DE HANDLEIDING EN ZORG DAT U VERTROUWD RAAKT MET
DE DREMEL 3D45 VOORDAT U HET APPARAAT INSTALLEERT EN GEBRUIKT. HET NIET IN ACHT NEMEN VAN DE WAARSCHUWINGEN EN INSTRUCTIES KAN BRAND, SCHADE AAN HET APPARAAT, MATERIÈLE SCHADE OF PERSOONLIJK LETSEL TOT GEVOLG HEBBEN. BEWAAR ALLE WAARSCHUWINGEN EN INSTRUCTIES ALS REFERENTIEMATERIAAL

PRODUCT. IN EEN HUISELIJKE
OMGEVING KAN DIT PRODUCT RADIOSTORING VEROORZAKEN. IN DAT GEVAL KUNNEN
natural_image
Technical drawing of a rectangular device with diagonal stripes and a 15.5" height dimension (394mm), no text or symbols present.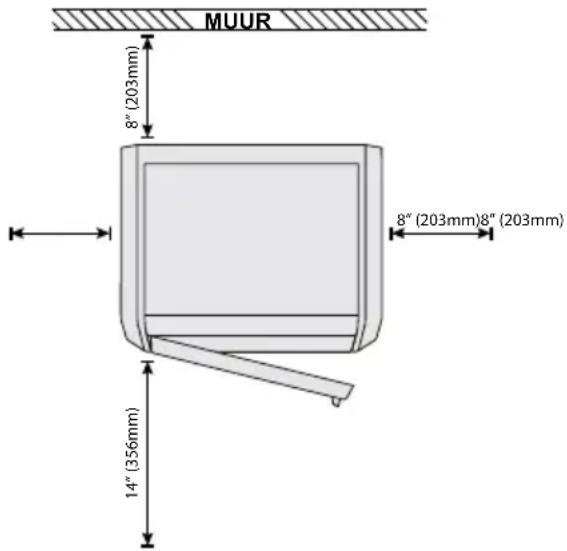
natural_image
Interior view of a computer printer showing internal components (no visible text or labels)Dremel 3D45
Handleiding
natural_image
Illustration of a coiled cable or wire spool with no visible text or symbols(2) Filamentspoel**
natural_image
Pure line drawing of a coiled cable or wire with no text, numbers, or symbolsVoedingskabel
natural_image
Coiled cable with connectors and connectors (no text or symbols visible)USB-kabel
(2) Lijmstick
natural_image
Line drawing of a folding knife (no text or symbols)Objectgrijper
USB-stick
natural_image
Diagram of a container with rows of test tubes and an upward arrow, no text or symbols presentnatural_image
Technical line drawing of a mechanical device interior with internal compartments and a black arrow indicating upward motion (no text or symbols)natural_image
Line drawing of hands installing a component into a device frame (no text or symbols visible)natural_image
Technical line drawing of an open computer case with internal compartments and a black arrow indicating a specific component (no text or symbols present)natural_image
Technical line drawing of an open mechanical device with internal compartments and a black arrow indicating a component (no text or symbols present)BOUWSTATUS
FILAMENT
SERVICE
POSITIE (JOG MODE)
INSTELL. (SETTINGS)
3D PRINTEN OP AFSTAND VIA LAN-VERBINDING MET DREMEL DIGILAB 3D SLICER
- Selecteer uw Dremel 3D45 en klik op Verbinden via Netwerk (Connect via Network)
natural_image
Technical line drawing of a vehicle chassis with attached cable and fan (no text or symbols)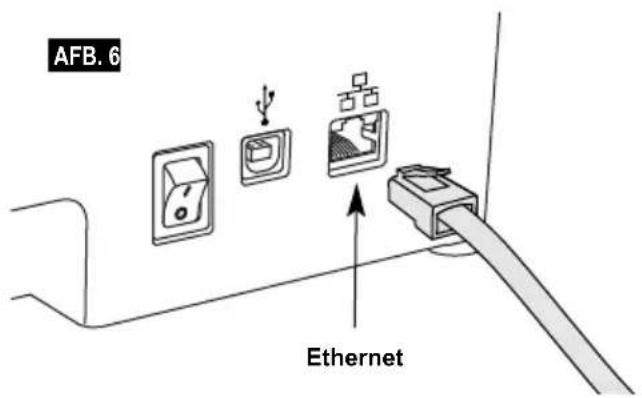
BOUWEN
BOUWEN VANAF COMPUTER
natural_image
Interior view of a server room with server racks and a monitor displaying 'Dialal' (no visible text or symbols on main subject)GEBRUIKERSTIPS
natural_image
Line drawing of a hand using a tool to adjust or install a mechanical component, no text or symbols presentFIRMWARE UPDATEN VIA HET NETWERK
Attn: Open Source Software Officer
P.O Box 081126
Racine, WI USA 53408-1126
Firmware & Open source software ....281
DETTE ER ET KLASSE A PRODUKT. I HJEMLIGE
OMGIVELSER KAN DETTE PRODUKT FORÅRSAGE RADIOINTERFERENS, I HVILKET TILFÆLDE BRUGEREN KAN VÆRE N∅DT TIL AT TRÆFFE PASSENDE FORANSTALTNINGER.
INFORMATION OM INTELLEKTUEL EJENDOMSRET
natural_image
Simple line drawing of a rectangular device with diagonal stripes and a 15.5" height dimension (394mm), no text or symbols present.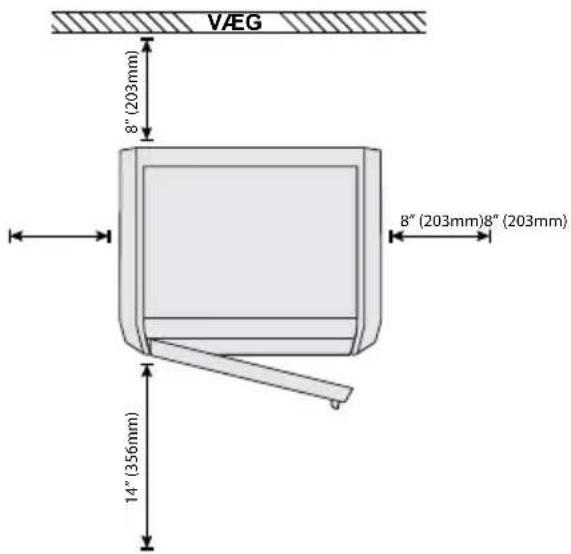
3D45 RESSOURCER
natural_image
Cross-sectional diagram of a printer showing internal components (no text or symbols)Dremel 3D45
Instruktionsmanual
Quick start guide
natural_image
Line drawing of a coiled cable or wire with no text or symbols(2) Filamentspole**
natural_image
Pure line drawing of a twisted rope or cable with no text, numbers, or symbolsStrømkabel
natural_image
Coiled cable with connectors and connectors (no text or symbols visible)USB-kabel
(2) Limstift
natural_image
Line drawing of a folding knife (no text or symbols)natural_image
Diagram of a box with multiple test tubes and a black arrow pointing upward (no text or symbols)natural_image
Technical line drawing of a mechanical device interior with internal compartments and a black arrow indicating upward motion (no text or symbols)natural_image
Illustration of hands installing a component into a device frame (no text or symbols visible)natural_image
Technical line drawing of an open computer case with internal compartments and a black arrow indicating a specific component (no text or symbols present)natural_image
Technical line drawing of an open mechanical device with internal compartments and a black arrow indicating a component (no text or symbols present)BYGGESTATUS [BUILD STATUS]
FILAMENT [FILAMENT]
SERVICE [SERVICE]
Tryk for at komme ind i servicemenen for at se kundeservicens kontaktinformation.
NETVÆRK [NETWORK]
INDSTIL PROXY [SET PROXY] – Tryk for at indstille manuel proxy.
INDSTIL STATISK IP [SET STATIC IP] – Tryk for at indstille statisk IP.
KALIBRÉR [CALIBRATE]
JOG TILSTAND [JOG MODE]
Tryk for at få vist mulighederne for at flytte ekstruderen og byggeplatformen langs X, Y og Z-aksen.
INDSTILLINGER [SETTINGS]
SPROG [LANGUAGE] – Tryk for at vælge et alternativt menusprog.
DISPLAY [DISPLAY] – Tryk for at tilpasse kabinettets lysdioder eller hovedmenuens genvejstaster.
FJERNBETJENT 3D-UDSKRIVNING VIA LOCAL AREA NETWORK FORBINDELSE VED HJÆLP AF DREMEL DIGILAB 3D SLICER
Dremel Digilab 3D Slicer gør det muligt at uploade, redigere og opbygge 3D-filer og oprette forbindelse til din 3D45 (kræver trådløs eller Ethernet-forbindelse). I softwaren kan du se modeller og projekter, sende, pausere og annullere bygning, overvåge byggestatus, modtage push-meddelelser om opdateringer og mere. Man kan installere Dremel Digilab 3D Slicer fra www.dremel3d.com eller fra det USB-flashdrev, der følger med Dremel 3D45.
- Åbn Dremel Slicer, klik på printernavnet øverst til højre og klik på Administrér printere
- Klik på Tilføj og indtast din printers IP-adresse
- Klik OK, så Tilslut
G∅R KLAR TIL AT BYGGE
ADVARSEL OVERHOLD ALLE GIVNE ADVARSLER OG SIKKERHEDS-ANVISNINGER, NÄR DREMEL 3D45 BRUGES. Manglende overholdelse kan føre til brand, beskadigelse af udstyr, materiel skade eller personskade.
natural_image
Technical line drawing of a vehicle chassis with attached cable and fan (no text or symbols)
ADVARSEL
OVERHOLD ALLE GIVNE ADVARSLER OG
BYGNING FRA USB-FLASHDREV
BYGNING FRA COMPUTEREN [BUILD FROM COMPUTER]
Dremel 3D45 er kompatibel med Dremel Digilab 3D Slicer og Simplified 3D. Følg de instruktioner, der fulgte med denne software for at afslutte bygning fra din computer.
ANNULLERING AF DIN BYGNING PÅ 3D45
natural_image
Interior view of a server room with illuminated equipment and a dark floor (no visible text or symbols)GODE RÅD
natural_image
Line drawing of a hand using a tool to adjust or install a mechanical component, no text or symbols presentOPDATERING AF FIRMWAREN VIA NETVÆRKET
RENG∅RING AF DEN BER∅RINGSF∅LSOMME SKÆRM
Att.: Open Source Software Officer
P.O Box 081126
Racine, WI USA 53408-1126
INNEHÅLLSFÖRTECKNING
natural_image
Technical drawing of a rectangular electronic device with diagonal stripes and a 15.5" height dimension (394mm), no text or symbols present.3D45-RESURSER
natural_image
Illustration of an open industrial machine with internal components (no visible text or symbols)Dremel 3D45
Bruksanvisning
Snabbstartguide
natural_image
Illustration of a coiled cable or wire spool with no visible text or symbols(2) Filamentspole**
natural_image
Pure diagram of a coiled cable or wire with no text, numbers, or symbolsElsladd
natural_image
Coiled cable or connector with two connectors and a central connector (no text or symbols visible)USB-kabel
(2) Limpatron
natural_image
Line drawing of a folding knife (no text or symbols)natural_image
Line drawing of two electronic components: a rectangular block and a USB flash drive (no text or symbols)USB-flashminne
natural_image
Diagram of a box containing multiple test tubes with an upward arrow indicating a process or operation (no text or symbols present)natural_image
Technical line drawing of a mechanical device interior with internal compartments and a black arrow indicating upward motion (no text or symbols)natural_image
Line drawing of hands assembling a mechanical component into a housing (no text or symbols)natural_image
Technical line drawing of an open computer case with internal compartments and a black arrow indicating a specific component (no text or symbols present)natural_image
Technical line drawing of an open mechanical device with internal compartments and a black arrow indicating a component (no text or symbols present)FILAMENT
SERVICE
JOGG-LÄGE
INLEDANDE INSTALLATION
FJÄRRUTSKRIFT I 3D VIA LOKAL NÄTVERKSANSLUTNING MED DREMEL DIGILAB 3D SLICER
natural_image
Technical line drawing of a vehicle chassis with attached cable and fan (no text or symbols)FÖRBEREDA BYGGPLATTAN
WARNING
VIDRÖR INTE EXTRUDERSPETSEN ELLER
BYGGA FRÅN MINNET I SKRIVAREN
BYGGA FRÅN USB-FLASHMINNE
natural_image
Interior view of a server room with server racks and a highlighted storage unit (no visible text or symbols)METODTIPS
natural_image
Line drawing of a hand using a tool to adjust or install a component, no text or symbols presentUPPDATERA FIRMWARE VIA NÄTVERK
Att.: Open Source Software Officer
P.O Box 081126
Racine, WI USA 53408-1126
SIKKERHET FOR ARBEIDSOMRÅDET
DigiLab 3D Slicer ....334
ADVARSEL DETTE ER ET KLASSE A-PRODUKT. DETTE
PRODUKTET KAN F∅RE TIL RADIOFORSTYRRELSER I ET HUSHOLDNINGSMILJ∅, NOE SOM KAN F∅RE TIL AT BRUKEREN MÅ SETTE I VERK PASSENDE TILTAK.
INFORMASJON OM ÅNDSRETT
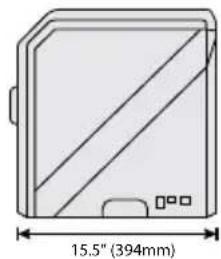
natural_image
Technical drawing of a rectangular device with diagonal lines and a 15.5" height dimension (394mm), no text or symbols present.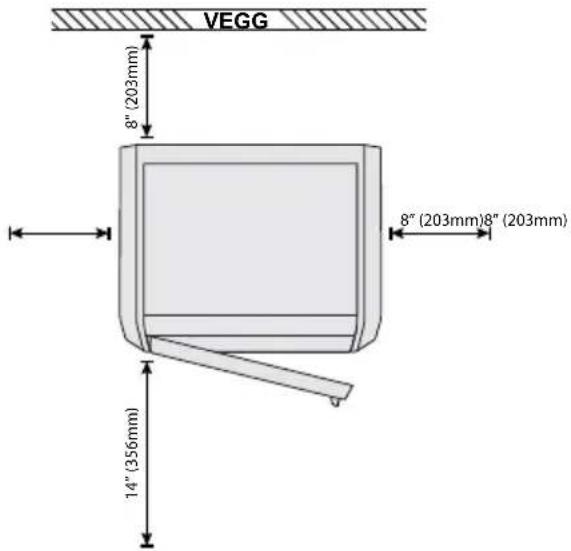
3D45-RESSURSER
natural_image
Illustration of an open industrial machine with internal components (no visible text or symbols)Dremel 3D45
Instruksjonshåndbok
Hurtigstartguide
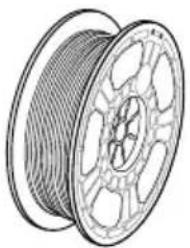
natural_image
Illustration of a coiled cable or wire spool with no visible text or symbols(2) Filamentspole**
natural_image
Pure line drawing of a twisted rope or cable structure without any text, numbers, or symbolsStrømledning
natural_image
Coiled cable with connectors and connectors (no text or symbols visible)USB-ledning
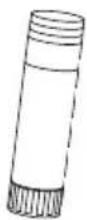
(2) Limstav
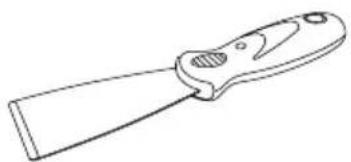
natural_image
Line drawing of a flat tool with a pointed tip and handle (no text or symbols)Objektfjerningsverktøy
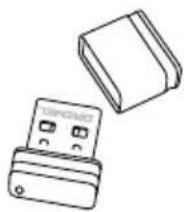
natural_image
Line drawing of two electronic components: a USB card and a rectangular block (no text or symbols)USB-flash-stasjon
natural_image
Diagram of a box with multiple test tubes and a black arrow pointing upward (no text or symbols)natural_image
Technical line drawing of a mechanical device interior with internal compartments and a black arrow indicating upward motion (no text or symbols)natural_image
Illustration of hands installing a component into a device frame (no text or symbols visible)natural_image
Technical line drawing of an open computer case with internal compartments and a black arrow indicating a specific component (no text or symbols present)natural_image
Technical line drawing of an open mechanical device with internal compartments and a black arrow indicating a component (no text or symbols present)FILAMENT
SERVICE
STILL PROXY (SET PROXY) – Trykk for å stille proxy manuelt.
OPPRETTINGSMODUS (JOG MODE)
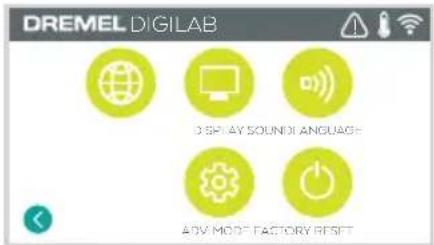
INNSTILLINGER (SETTINGS)
3D-FJERNUTSKRIFT VIA LOCAL AREA NETWORK (LAN)-TILKOBLING VED BRUK AV DREMEL DIGILAB 3D SLICER
natural_image
Technical line drawing of a vehicle chassis with attached cable and fan (no text or symbols)- Lukk 3D45-deksel og dør.
| FILAMENTTYPE OG INNSTILLINGER | ||||
| Filamenttype PLA ECO-ABS Nylon PETG | ||||
| Dysens temperaturspenn | 190 - 230 °C | 190 - 230 °C | 220 - 280 °C | 230 - 260 °C |
| Optimal dysetemperatur | 220 °C | 220 °C | 255 °C | 250 °C |
| Byggeplattformens temperaturspenn | 0 - 60 °C | 0 - 70 °C | 0 - 100 °C | 0 - 80 °C |
| Optimal byggeplattformtemperatur | 35 °C | 45 °C | 100 °C | 70 °C |
| Utskriftshastighetsmultiplikator | 10 - 300 % | 10 - 300 % | 10 - 300 % | 0 - 100% |
| Anbefalt hastighetsmultiplikator | 100 % | 100 % | 90% | 100 % |
| Vifteområde | 0 - 100% | 0 - 100% | 0 - 100% | 0 - 100% |
| Vifteinnstilling for nedkjøling av objekt | 100 % | 100 % | 50% | 100 % |
BYGGING
ADVARSEL
OVERHOLD ALLE
MEDF∅LGENDE ADVARSLER OG SIKKERHETSINSTRUKSJONER NÅR DU BRUKER DREMEL 3D45. Hvis ikke disse følges kan det resultere i brann, skade på utstyr, skade på eiendom eller personskade.
ADVARSEL
IKKE STIKK FINGRE/HENDER INN
I DREMEL 3D45 MENS DEN ER I
natural_image
Interior view of a server room with illuminated equipment and a dark tray (no visible text or symbols)BESTE PRAKSISER
natural_image
Line drawing of a hand using a tool to adjust or install a mechanical component, no text or symbols presentOPPDATER FATSVARE VIA NETTVERK
OPPDATERER FASTVARE MANUELT
Hvis 3D45 ikke er koblet til et nettverk, kan du oppdatere fastvaren direkte fra en USB-flash-stasjon.
Att: Open Source Software Officer
P.O Box 081126
Racine, WI USA 53408-1126
Din forespørsel bør inneholde: (i) navnet på Dremel-produktet, (ii) serienummeret (hvis aktuelt), (iii) program-vareversjonen (hvis aktuelt), (iv) ditt navn, (v) firmanavnet (hvis aktuelt) og (vi) postadresse og e-postadresse (hvis du har en).
TOIMINNAN KUVAUS JA TEKNISET TIEDOT
RAKENTAMINEN
Pursotin: Yksi pursotus
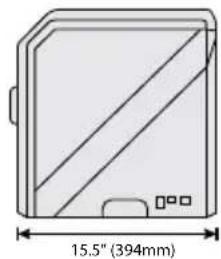
natural_image
Technical drawing of a rectangular device with diagonal stripes and a 15.5" height dimension (394mm), no text or symbols present.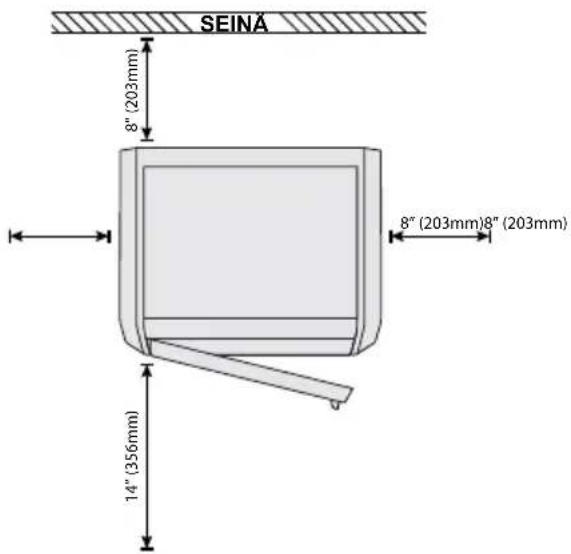
3D45:N TUKIRESURSSIT
natural_image
Cutaway view of an open industrial machine showing internal components (no text or symbols visible)Dremel 3D45
Käyttöopas
Pikaopas
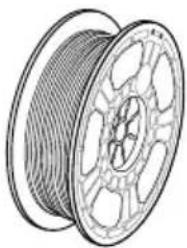
natural_image
Illustration of a coiled cable or wire spool with no visible text or symbolsnatural_image
Pure diagram of a coiled cable or wire with no text, numbers, or symbolsVirtakaapeli
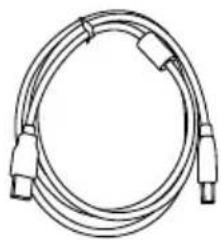
natural_image
Coiled cable or connector with two connectors and a central connector (no text or symbols visible)USB-kaapeli
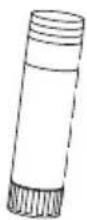
(2) Liimapuikko
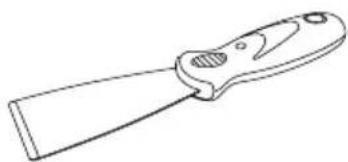
natural_image
Line drawing of a folding knife (no text or symbols)natural_image
Line drawing of two electronic components: a USB card and a rectangular block (no text or symbols)USB-asema
natural_image
Diagram of a box with multiple test tubes and an upward arrow, no text or symbols presentnatural_image
Technical line drawing of a mechanical device interior with internal compartments and a black arrow indicating upward motion (no text or symbols)natural_image
Line drawing of hands installing a component into a device frame (no text or symbols visible)natural_image
Technical line drawing of an open computer case with internal compartments and a black arrow indicating a specific component (no text or symbols present)- Poista alatuki.
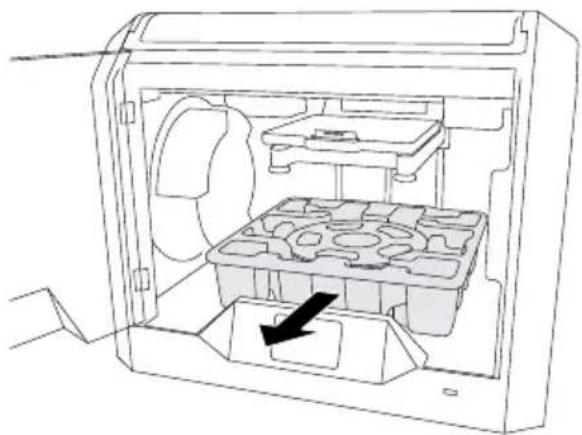
natural_image
Technical line drawing of an open mechanical device with internal compartments and a black arrow indicating a component (no text or symbols present)MALLI (MODEL) -VALIKKO
FILAMENTTI
HUOLTO
JOG-TILA (JOG MODE)
3D-ETÄTULOSTUS LÄHIVERKON KAUTTA DREMEL DIGILAB 3D SLICER -OHJELMISTOA KÄYTTÄEN
natural_image
Interior view of a server room with black equipment and a glowing blue tray (no visible text or symbols)PARHAAT KÄYTÄNNÖT
natural_image
Line drawing of a hand using a tool to adjust or install a mechanical component, no text or symbols presentLAITEOHJELMISTON PÄIVITTÄMINEN VERKON KAUTTA
Attn: Open Source Software Officer
P.O Box 081126
Racine, WI USA 53408-1126
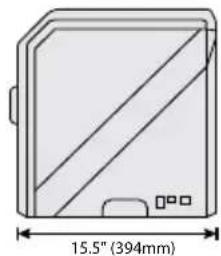
natural_image
Simple line drawing of a rectangular device with diagonal stripes and a 15.5" height dimension (394mm), no text or symbols present.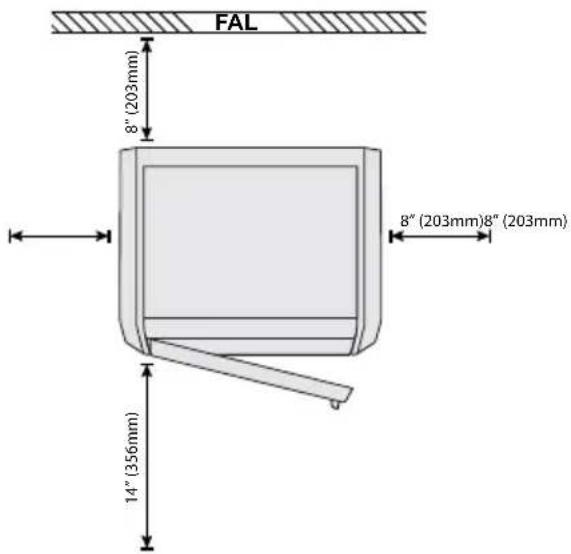
3D45 RESOURCES
Forrás Leírás Hely
natural_image
Illustration of a 3D printer internal structure (no text or symbols visible)Dremel 3D45
Kezelési utasítás
natural_image
Line drawing of a spool of cable or wire (no text or symbols)natural_image
Pure line drawing of a coiled cable or wire with no text, numbers, or symbolsTápkábel
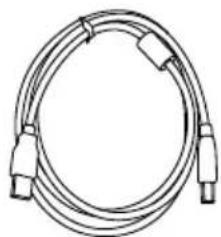
natural_image
Coiled cable with connectors and connectors (no text or symbols visible)USB kábel
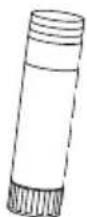
(2) Ragasztó stift
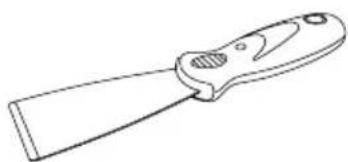
natural_image
Line drawing of a flat tool with handle and blade (no text or symbols)natural_image
Diagram of a box containing multiple test tubes with an upward arrow indicating a process or operation (no text or symbols present)natural_image
Technical line drawing of a mechanical device interior with internal compartments and a black arrow indicating upward motion (no text or symbols)natural_image
Line drawing of hands installing or adjusting a mechanical component inside a device frame (no text or symbols visible)natural_image
Technical line drawing of an open computer case with internal compartments and a black arrow indicating a specific component (no text or symbols present)natural_image
Technical line drawing of an open mechanical device with internal compartments and a black arrow indicating a component (no text or symbols present)Service (SZERVIZ)
JOG MODE (LÉPTETŐ MÓD)
TÁVOLI 3D NYOMTATÁS HELYI HÁLÓZATI KAPCSOLATON KERESZTÜL, A DREMEL DIGILAB 3D SLICER SZOFTVERREL
natural_image
Interior view of a server room with illuminated equipment and a dark floor (no visible text or symbols)LEGJOBB GYAKORLATOK
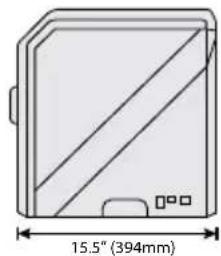
natural_image
Technical drawing of a rectangular device with diagonal stripes and a small protrusion, shown with a dimension label (15.5" (394mm))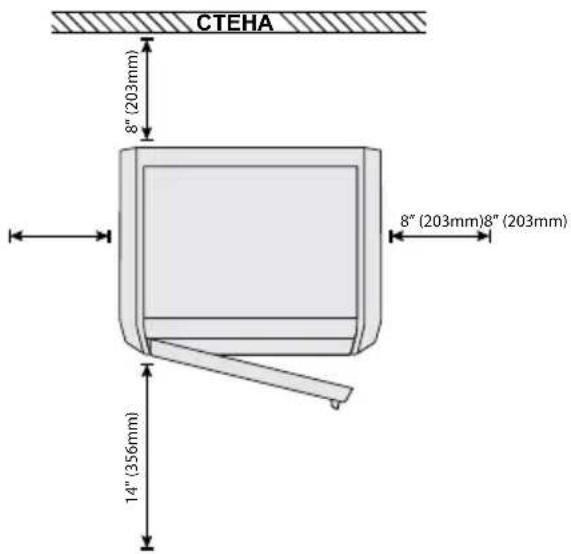
РЕСУРСЫ 3D45
natural_image
3D rendering of an open industrial machine with visible internal components (no text or symbols)Dremel 3D45
Инструкция
natural_image
Line drawing of a coiled cable or wire spool (no text or symbols)natural_image
Pure line drawing of a twisted rope or cable with no text, numbers, or symbolsКабель питания
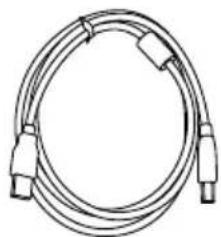
natural_image
Coiled cable with connectors and connectors (no text or symbols visible)Кабель USB
natural_image
Line drawing of a flat tool with a pointed tip and handle (no text or symbols)natural_image
Diagram of a box with multiple test tubes and an upward arrow indicating movement or process (no text or symbols)natural_image
Technical line drawing of a mechanical device interior with internal compartments and a black arrow indicating upward motion (no text or symbols)natural_image
Illustration of hands installing a device into a container (no text or symbols visible)natural_image
Technical line drawing of an internal device housing with a black arrow indicating a component (no text or symbols present)natural_image
Technical line drawing of an open refrigerator interior showing internal compartments and a black arrow indicating a component (no text or symbols present)SERVICE (СЕРВИС)
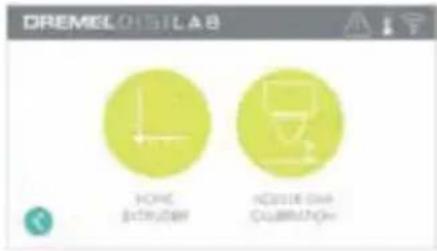
CALIBRATE (КАЛИБРОВКА)
УДАЛЕННАЯ 3D-ПЕЧАТЬ ЧЕРЕЗ ЛОКАЛЬНУЮ СЕТЬ С ПОМОЩЬЮ DREMEL DIGILAB 3D SLICER
natural_image
Interior view of a server room with illuminated equipment and a dark tray (no visible text or symbols)natural_image
Line drawing of a hand using a tool to adjust or install a mechanical component (no text or symbols visible)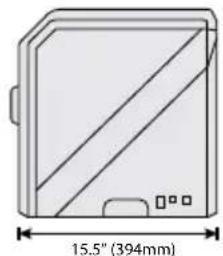
natural_image
Technical drawing of a rectangular device with diagonal stripes and a 15.5" height dimension (394mm), no text or symbols present.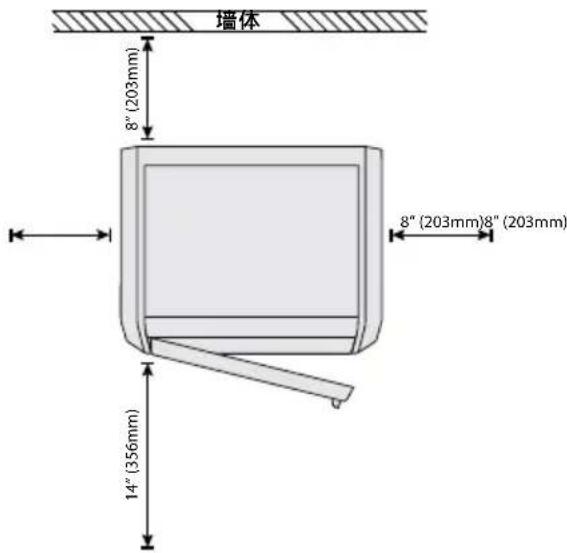
3D45 资源
资源说明路径
natural_image
3D rendering of an open industrial machine with internal components (no visible text or symbols)Dremel 3D45
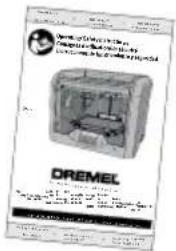
说明手册
快速启动指南
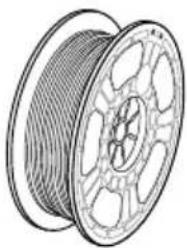
natural_image
Line drawing of a coiled cable or wire spool (no text or symbols)(2) 打印线盘**
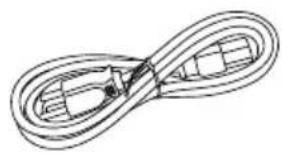
natural_image
Pure line drawing of a twisted rope or cable with no text, numbers, or symbols电源线
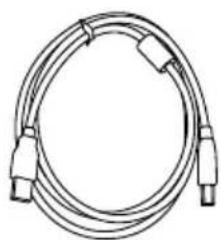
natural_image
Coiled cable with connectors, no text or symbols visibleUSB 线缆
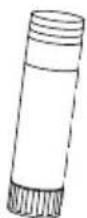
(2) 胶棒
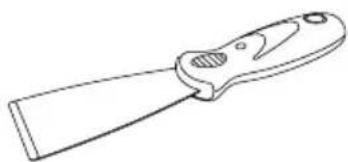
natural_image
Line drawing of a folding knife (no text or symbols)模型移除工具
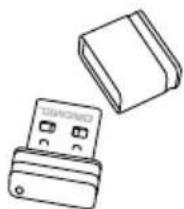
USB 闪存驱动器
natural_image
Diagram of a box with multiple test tubes and an upward arrow, no text or symbols presentnatural_image
Technical line drawing of a mechanical device interior with internal compartments and a black arrow indicating upward motion (no text or symbols)- 从两侧抬起打印平台。
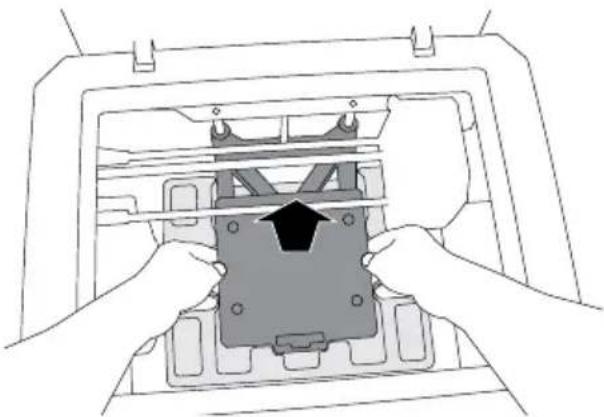
natural_image
Illustration of hands installing a component into a device frame (no text or symbols visible)- 打开前门,移除中部内衬。
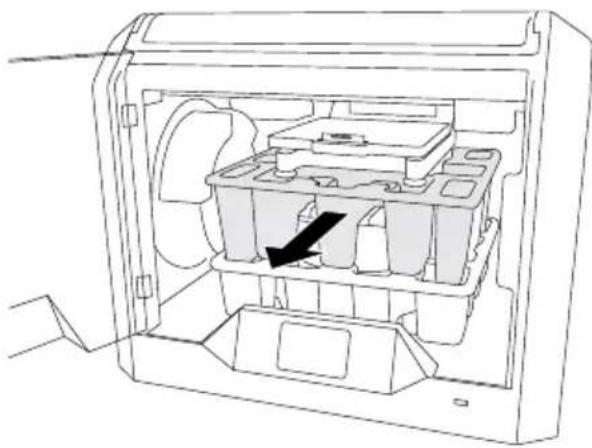
natural_image
Technical line drawing of an open computer case with internal compartments and a black arrow indicating a specific component (no text or symbols present)- 移除底部内衬。
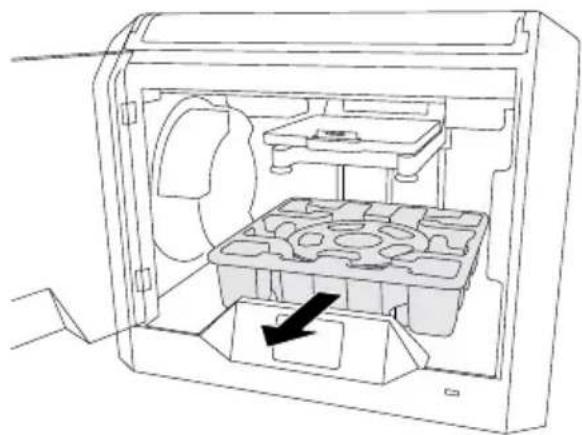
natural_image
Line drawing of an open industrial machine casing with internal compartments and a black arrow indicating a component (no text or symbols)打印线材
轻击开始加热并启动线材载入/更换过程。
服务 (SERVICE)
JOG 模式
natural_image
Technical line drawing of a vehicle chassis with attached cable and fan (no text or symbols)natural_image
Interior view of a server room with server racks and a highlighted storage unit (no visible text or symbols)最佳实践
natural_image
Line drawing of a hand using a tool to adjust or install electronic components (no text or symbols visible)通过网络更新固件
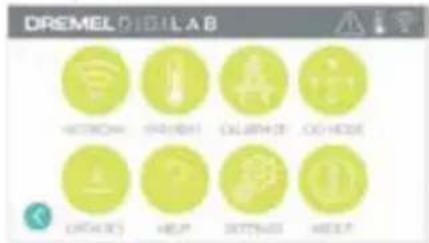
Electrical and Electronic Equipment) "的欧
natural_image
3D rendering of an open industrial machine with visible internal components (no text or symbols)Dremel 3D45
Εγχειρίδιο οδηγιών
natural_image
Line drawing of a coiled cable or wire spool (no text or symbols)natural_image
Pure line drawing of a twisted rope or cable with no text, numbers, or symbolsΚαλώδιο ρεύματος
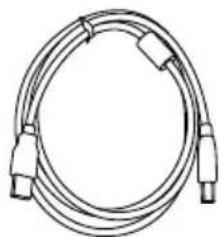
natural_image
Coiled cable with connectors, no text or symbols visibleΚαλώδιο USB
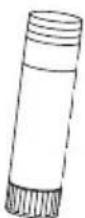
(2) Ράβδος κόλλας
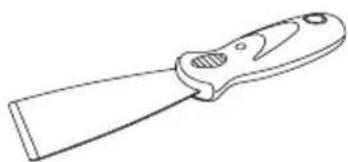
natural_image
Line drawing of a flat tool with a pointed tip and handle (no text or symbols)natural_image
Diagram of a box containing multiple test tubes with an upward arrow indicating a process or operation (no text or symbols present)natural_image
Diagram of a mechanical device interior showing internal compartments and a black arrow indicating upward motion (no text or symbols)natural_image
Illustration of hands installing or adjusting a device into a container (no text or symbols visible)natural_image
Technical line drawing of an open computer case with internal compartments and a black arrow indicating a specific component (no text or symbols present)natural_image
Line drawing of an open refrigerator interior showing internal compartments and a black arrow indicating a location (no text or symbols)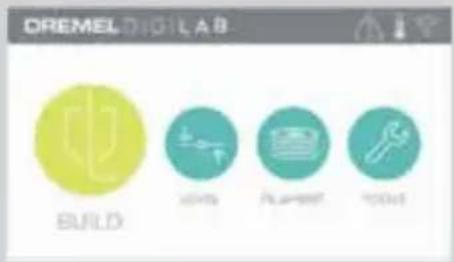
ΟΡΙΖΟΝΤΙΩΣΗ
ΣΕΡΒΙΣ
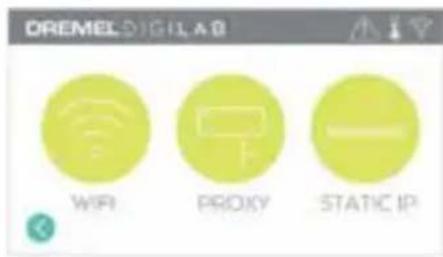
ΔΙΚΤΥΟ
ΚΑΤΑΣΤΑΣΗ ΩΘΗΣΗΣ
natural_image
Line drawing of a hand using a tool to adjust or install a mechanical component, no text or symbols presentENHMEPΩΣH TOY FIRMWARE MEΣΩ ΔΙΚΤΥΟΥ
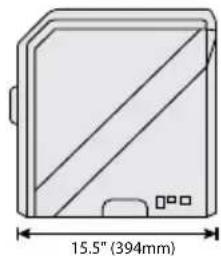
natural_image
Technical drawing of a rectangular device with diagonal stripes and a 15.5" height dimension (394mm), no text or symbols present.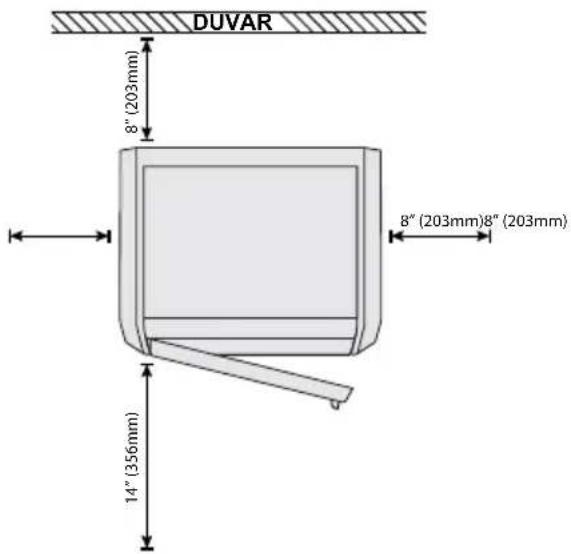
3D45 KAYNAKLARI
natural_image
Cutaway view of an open industrial machine showing internal components (no text or symbols visible)Dremel 3D45
Kullanım Kılavuzu
natural_image
Illustration of a coiled cable or wire spool with no visible text or symbolsnatural_image
Pure diagram of a coiled cable or wire with no text, numbers, or symbolsGüç Kablosu
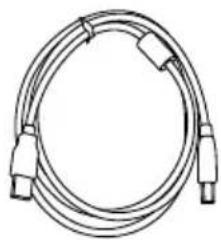
natural_image
Coiled cable with connectors and connectors (no text or symbols visible)USB Kablosu
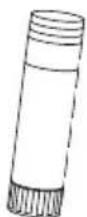
(2) Tutkal Çubuğu
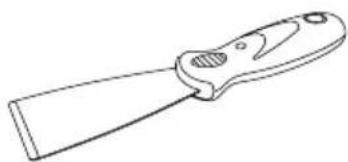
natural_image
Line drawing of a folding knife (no text or symbols)Nesne Çıkartma Aleti
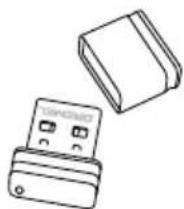
USB Bellek Çubuğu
natural_image
Diagram of a box with multiple test tubes and an upward arrow, no text or symbols presentnatural_image
Technical line drawing of a mechanical device interior with internal compartments and a black arrow indicating upward motion (no text or symbols)natural_image
Illustration of hands installing a component into a device frame (no text or symbols visible)natural_image
Technical line drawing of an open computer case with internal compartments and a black arrow indicating a specific component (no text or symbols present)natural_image
Technical line drawing of an open mechanical device with internal compartments and a black arrow indicating a component (no text or symbols present)BUILD STATUS (YAPIM DURUMU)
FILAMENT (FİLAMENT)
SERVICE (SERVİS)
JOG MODE (JOG MODU)
DREMEL DIGILAB 3D SLICER KULLANILARAK YEREL ALAN AĞI BAĞLANTISI ÜZERINDEN UZAKTAN 3D YAZDIRMA
natural_image
Interior view of a server room with rows of equipment and a monitor displaying a device (no visible text or symbols)EN İYI UYGULAMALAR
natural_image
Line drawing of a hand using a tool to adjust or install a mechanical component (no text or symbols visible)BELLENİMİN AĞ ÜZERİNDEN GÜNCELLENMESİ
Attn: Open Source Software Officer
P.O Box 081126
Racine, WI USA 53408-1126
TO JEST PRODUKT KLASY A. W ŚRODOWISKU DOMOWYM
MOŻE ON POWODOWAĆ ZAKŁÓCENIA RADIOWE. W TAKIM PRZYPADKU MOŻE BYĆ NIEZBĘDNE PODJĘCIE ODPOWIEDNICH KROKÓW PRŻEZ UŻYTKOWNIKA.
INFORMACJE O WŁASNOŚCI INTELEKTUALNEJ
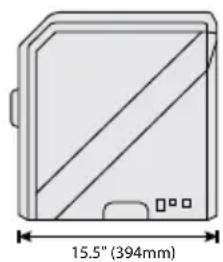
natural_image
Technical drawing of a rectangular device with diagonal stripes and a 15.5" height dimension (394mm), no text or symbols present.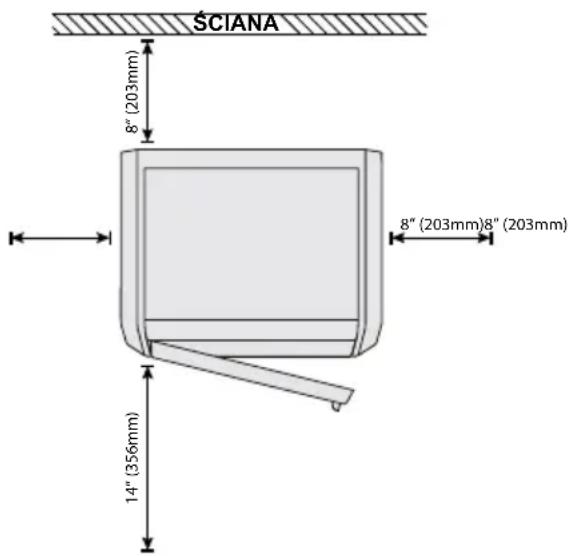
natural_image
Interior view of a computer printer showing internal components (no visible text or labels)Dremel 3D45
Instrukcja obsługi
natural_image
Line drawing of a spool of cable or wire (no text or symbols)(2) Szpula filamentu**
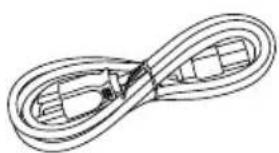
natural_image
Pure line drawing of a twisted rope or cable with no text, numbers, or symbolsPrzewód zasilania
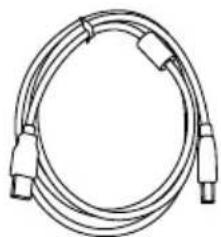
natural_image
Coiled cable with connectors and connectors (no text or symbols visible)Kabel USB
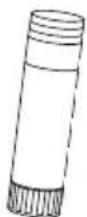
(2) Sztyft kleju
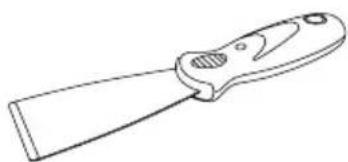
natural_image
Line drawing of a folding knife (no text or symbols)natural_image
Diagram of a tray with multiple test tubes and an upward arrow, no text or symbols presentnatural_image
Technical line drawing of a mechanical device interior with internal compartments and a black arrow indicating upward motion (no text or symbols)natural_image
Illustration of hands assembling a mechanical component with a black arrow indicating assembly (no text or symbols present)natural_image
Technical line drawing of an open industrial device casing with internal compartments and a black arrow indicating a component (no text or symbols present)natural_image
Line drawing of an open industrial machine casing with internal compartments and a black arrow indicating a component (no text or symbols)DRUK
SZCZEGÓŁY PLIKU
SERWIS
TRYB RE CZNY
ZDALNE DRUKOWANIE 3D Z POZIOMU SIECI LOKALNEJ ZA POMOCA DREMEL DIGILAB 3D SLICER
natural_image
Interior view of a server room with rows of equipment and a monitor displaying a device (no visible text or symbols)NAJLEPSZE PRAKTYKI
natural_image
Line drawing of a hand using a tool to adjust or install a mechanical component (no text or symbols visible)Attn: Open Source Software Officer
P.O Box 081126
Racine, WI USA 53408-1126
AND USE. FAILURE TO COMPLY WITH THE WARNINGS AND INSTRUCTIONS MAY RESULT IN FIRE, EQUIPMENT DAMAGE, PROPERTY DAMAGE, OR PERSONAL INJURY. SAVE ALL WARNINGS AND INSTRUCTIONS FOR FUTURE REFERENCE

Please note that the contents of the Quick Start Guide and Instruction Manual may change and evolve over time. You can access the most up-to-date version online at www.dremel3d.com.

WORK AREA SAFETY
a. Keep work area clean and well lit. Cluttered or dark areas invite accidents.
b. Do not operate Dremel 3D45 in the presence of flammable liquids, gases or dust. Dremel 3D45 creates high temperatures which may ignite the dust or fumes.
c. Store idle 3D45s out of reach of children and other untrained persons. Injury can occur in hands of untrained users.
ELECTRICAL SAFETY
a. Always use the Dremel 3D45 with a properly grounded outlet. Do not modify Dremel 3D45 plug. Improper grounding and modified plugs increase risk of electric shock.
b. Do not use Dremel 3D45 in damp or wet locations. Do not expose Dremel 3D45 to rain. Presence of moisture increases risk of electric shock.
c. Do not abuse the cord. Never use the cord for pulling or unplugging the Dremel 3D45. Keep cord away from heat, oil, sharp edges or moving parts. Damaged or entangled cords increase the risk of electric shock.
d. Avoid using this product during an electric storm. There may be a remote risk of a power surge from lightning that may result in an electric shock.
e. In case of emergency unplug Dremel 3D45 from outlet.
PERSONAL SAFETY
a. Stay alert, watch what you are doing and use common sense when operating a Dremel 3D45. Do not use Dremel 3D45 while you are tired or under the influence of drugs, alcohol or medication. A moment of inattention while operating Dremel 3D45 may result in personal injury.
b. Use personal protective equipment. The use of protective equipment such as heat resistant gloves and safety glasses will reduce the risk of personal injuries.
c. Dress properly. Do not wear loose clothing or Jewellery. Keep your hair, clothing and gloves
away from moving parts. Loose clothes, Jewellery or long hair can be caught in moving parts.
DREMEL 3D45 USE AND CARE
a. Before every use check Dremel 3D45 for misalignment or binding of moving parts, breakage of parts and any other condition that may affect the Dremel 3D45's operation. If damage is suspected then have the Dremel 3D45 repaired by an authorised Dremel service centre before use. Use of Dremel 3D45 when damaged may result in poor quality of object creation, further equipment damage, property damage or personal injury.
b. Do not touch the extruder tip or heated build platform during Dremel 3D45 operation or until it has cooled down to at least 60°C (140°F). Contact with the extruder tip or heated build platform during or after operation before tip has cooled may result in personal injury.
c. Set up the Dremel 3D45 in a well-ventilated area. Place Dremel 3D45 printer on flat nonflammable surface and away from flammable material. Provide at least 8 inches of unobstructed spacing around Dremel 3D45. Dremel 3D45 melts plastic during building. Plastic odours emitted during Dremel 3D45 operation may irritate eyes and airways. Locating Dremel 3D45 close to surrounding objects prevents proper ventilation.
d. Do not reach inside the Dremel 3D45 while it is in operation. Contact with Dremel 3D45 moving parts during operation may result in poor build quality, equipment damage or personal injury.
e. Prevent untrained individuals accessing the 3D45 during operation. Use of Dremel 3D45 by persons unfamiliar with these warnings and instructions may result equipment or property damage and personal injury.
f. Use only DREMEL filament. Use of filament not authorized by Dremel may result in equipment, property damage or personal injury.
g. Do not adjust extruder/nozzle setting to exceed the maximum rated temperature of the filament type being used. Heating filament above recommended range can cause emissions that may result in personal injury.
h. Ensure small objects created by Dremel 3D45 are not accessible to young children. Small objects are potential choking hazards for young children.
i. Do not create illegal or inappropriate objects using Dremel 3D45.
j. Do not use Dremel 3D45 to create objects intended for use with candles, liquid fuels, and other heat sources. Plastic may melt when exposed to fire or other heat sources. Such use of objects created by Dremel 3D45 may result in fire, property damage and personal injury.
k. Do not use Dremel 3D45 to create objects intended for food or drink applications such as preparation, decoration, storage, or consumption. Such use of objects created by Dremel 3D45 may result in illness or personal injury.
I. Do not use Dremel 3D45 to create objects intended with use with electrical components or housings of electrical components. Dremel filament is not suitable for electrical applications. Such use of objects created by Dremel 3D45 may result in property damage and personal injury.
m. Do not put plastic objects in or around your mouth. Dremel filament is not suitable for food or drink preparation and food utensils. Such use of objects created by Dremel 3D45 may result in illness or personal injury.
n. Do not use Dremel 3D45 to create objects intended for chemical storage. Dremel filament is not suitable for chemical storage. Such use of objects created by Dremel 3D45 may result in property damage and personal injury.
o. Do not modify Dremel 3D45 or alter factory settings. Modifications may result in equipment and property damage, and personal injury.
p. Do not expose Dremel 3D45 to temperatures exceeding 70°C (158°F). Dremel 3D45 may become damaged. Dremel 3D45 is intended to operate in temperature between 16-29°C (60 - 85°F).
q. Do not move or bump Dremel 3D45 or the extruder during operation. The object may build incorrectly.
r. Do not change filament spool unless the building process is completed, stopped, or paused. Changing the filament during building will cancel the object and may damage the extruder.
s. Do not pull the filament out until instructed by the touch screen. Doing so may damage the extruder.
t. Use extra care not to damage the extruder tip when clearing debris. Dremel 3D45 will not work properly with damaged extruder tip and will require replacement.
u. Before every build make sure that the build platform is covered with Dremel specified glue. Use of improper glue may result in equipment damage and poor object build quality.
v. Be aware of your body position when using hand tools to remove objects from the build platform. Sudden tool slip and improper body position during object removal from the build platform may result in personal injury.
w. Avoid scratching the build platform when removing objects. Scratches in the build platform will result in improper object creation.
x. Do not drop the build platform. Tempered glass plate may break and result in personal injury.
y. Do not remove tempered glass plate from plastic holder. Contact with tempered glass plate edge may result in personal injury.
z. Do not twist or bend the build platform while removing objects. Tempered glass plate may separate from plastic holder and result in personal injury.
aa. Dremel is not responsible for structural integrity or utility of objects created using Dremel 3D45. Structural models created by inexperienced designers may result in property damage and personal injury.
SERVICE
a. Always unplug Dremel 3D45 from its power before performing any service procedures.
Failure to do so may result in personal injury and equipment damage.
b. Have your Dremel 3D45 serviced only by an authorized Dremel service centre using only Dremel replacement parts. This will ensure that proper operation and safety of Dremel 3D45 is maintained.
c. Use only Dremel approved components. Use of components other than genuine Dremel® components may void warranty.
d. Use only Dremel approved filament. Use of filament other than Dremel ^® approved filament may void warranty on extruder.
TABLE OF CONTENTS
General safety warnings ....596
Table of contents....597
Used symbols....598
Information on Intellectual Property 598
Functional Description and Specifications .... 598
3D45 Resources ....599
Glossary of Terms......600
Getting to know your 3D45....602
Introduction......604
Kit Contents*......604
Touch Screen....606
Touch Screen Icons 611
Initial Setup....612
Remote 3D Printing via Local Area
Network Connection using Dremel
DigiLab 3D Slicer ....613
Getting Ready to Build 615
Building 621
Removing Your Object....624
Using the Camera 625
Best Practices 625
Maintenance....626
Maintenance and Service....628
Firmware & Open Source Software ....629
Warranty 630
USED SYMBOLS
| Symbol Name Designation/ | Explanation | |
 | Safety alert symbol | It is used to alert you to potential personal injury hazards. Obey all safety messages that follow this symbol to avoid possible injury or death. |
 | Read manual symbol | Alerts user to read manual |
 | Danger symbol | indicates a hazardous situation which, if not avoided, will result in death or serious injury |
 | Warning symbol | indicates a hazardous situation which, if not avoided, could result in death or serious injury. |
 | Caution symbol | indicates a hazardous situation which, if not avoided, will result in minor or moderate injury. |
 | Hot surface hazard symbol. | Contact may cause burn. Allow to cool before servicing. |
 | UL US symbol | This symbol designates that this tool is listed by Underwriters Laboratories, to United States and Canadian Standards. |
WARNING
THIS IS A CLASS A PRODUCT. IN A DOMESTIC ENVIRONMENT THIS
PRODUCT MAY CAUSE RADIO INTERFERENCE IN WHICH CASE THE USER MAY BE REQUIRED TO TAKE ADEQUATE MEASURES.
INFORMATION ON INTELLECTUAL PROPERTY
The Dremel 3D45 is intended for 3D printing objects from digital files that you create or own, or have the right to print using the Dremel 3D45. When making objects using the Dremel 3D45, it is your responsibility to ensure that you do not infringe any third party intellectual property rights or violate any applicable laws or regulations, such as U.S. or foreign intellectual property laws. The Dremel 3D45 may not be used to make objects protected by intellectual property rights owned by third parties without such third parties' permission. Using the Dremel 3D45 to do any of the following may require the permission of third parties: to make a duplicate or facsimile (in whole or in part) of any object not created by you, to make an object from a digital file you do not own, or to make an object from a scan of a physical object that you did not create. It is your responsibility to obtain such permission. In some cases, you may not be able to obtain such permission.
Where such permission cannot be obtained, you should not 3D print such object, or you do so at your own risk. You may not modify, reverse engineer, decompile, or disassemble the Dremel 3D45 or its software or firmware, except as permitted by applicable law. If you use the Dremel 3D45 in any way other than as recommended and described in these Operating/Safety Instructions, you do so at your own risk. Using the Dremel 3D45 to make objects that infringe any intellectual property rights owned by third parties could result in civil or criminal prosecution and penalties, and you could be liable for money damages, fines, or imprisonment.
FUNCTIONAL DESCRIPTION AND SPECIFICATIONS
BUILDING
Extruder: Single extrusion Extruder temperature: Up to 280°C (536°F) Build Platform Temperature: Up to 100°C (212°F) Operating Interface: 4.5" full color IPS touch screen Maximum Build Volume: 10" x 6" x 6.7" (255mm x 155mm x 170mm) Layer Thickness: 100 microns | 0.10 mm Filament types and colors: See dremel3d.com Internal Storage: 8GB External Storage: USB Flash Drive
WEIGHT & DIMENSIONS
Weight (without spool): 19.4kg (42.8lbs) Dimensions: 20.25" x 16" x 15.9" (515mm x 406mm x 394mm)
FILAMENT
Works with Dremel 1.75mm filament
FILAMENT STORAGE
All polymers degrade with time. Do not unpack until filament is needed. Filament should be stored at room temperature: 16-29°C (60-85°F) and in dry conditions.
SOFTWARE
Dremel 3D45 comes with complimentary file slicing software for Windows and Mac OSX. This application converts your 3D digital files into buildable files.
• CPU: 64-bit processor (32-bit not supported)
• Memory: 3 GB RAM (4 GB or more recommended)
- Disk space: \~2 GB free disk space for installation
- Display card: 1,024 MB GDDR RAM or more. Microsoft® Direct3D® 11 capable graphics card or higher
- Pointing device: Three-button mouse
ELECTRICAL REQUIREMENTS
3D45 input rating: 100-240V, 47-60Hz, 0.85-2.3Amps
OPERATING ENVIRONMENT
Room Temperature: 16-29°C (60 - 85°F)
Level workspace
Dry workspace environment
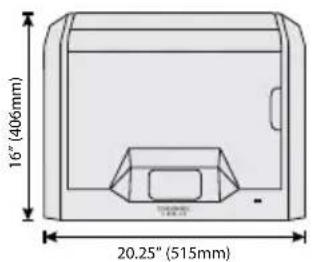
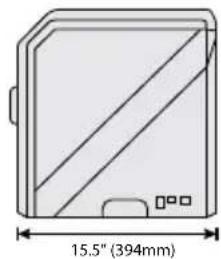
natural_image
Technical drawing of a rectangular device with diagonal stripes and a 15.5" height dimension (394mm), no text or symbols present.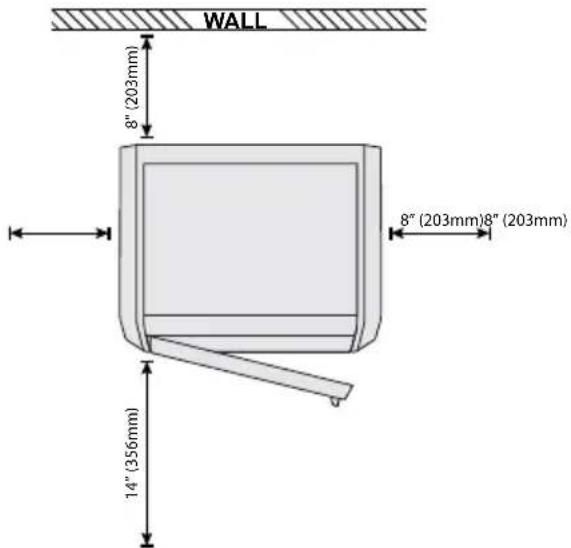
3D45 RESOURCES
| Resource | Description Location | |
| Quick Start Guide | Provides illustrated walk through of how to un-box your 3D45 and start building out of the box. | Printed version of the Quick Start Guide is located in the carton with the printer. It is also available on www.dremel3d.com |
| Dremel 3D Website | Provides the latest 3D45 software, product information, customer support, and 3D model and project downloads. | www.dremel3d.com |
| Dremel 3D Customer Support | Contact Dremel for product support, maintenance, and service. | www.dremel3d.com |
| File Slicing Software | Allows you to upload, edit, and build 3D files. | Install from www.dremel3d.com or from USB flash drive provided with the Dremel 3D45. |
GLOSSARY OF TERMS
| Term Definition | |
| Build Platform The flat surface used by your Dremel 3D45 to build objects. The build platform is comprised of a tempered glass plate with a plastic holder. | |
| Build Platform Clips | Clips located at the front of the build platform base that are used to secure the build platform in place. |
| Build Volume The three dimensional (3D) amount of space that an object will use once it is completed. Your Dremel 3D45 has a maximum build volume which means that objects with a larger build volume cannot be built unless they are resized or broken into subobjects. | |
| Door Your Dremel 3D45 has a door located on the front panel. This allows for easy access to the build platform, extruder, filament, and your objects. This door is made with a transparent material so you can monitor the progress of your objects while keeping the build environment stable. | |
| ECO-ABS Natural thermoplastic that provides users with durable and impact resistant parts. | |
| Ethernet Port A local area wired networking technology that allow electronic devices to communicate. | |
| Extruder An assembly that uses gears to pull filament through the extruder intake, heat the filament to the build temperature, and push the heated filament out of the extruder tip. | |
| Extruder Fans Fans used to cool the outer assembly of the extruder and gear motor. | |
| Extruder Fan Baffle | A plastic piece that directs air from the extruder fan onto the build platform to assist in cooling the active build. |
| Extruder Intake An opening located at the top of the extruder where filament is inserted for building. | |
| Extruder Lever A lever located on the side of the extruder that is used to loosen the grip of the extruder gear motor. | |
| Extruder Tip A nozzle located at the bottom of the extruder where heated filament is forced out for building. | |
| Filament A threadlike strand of plastic material. | |
| Filament Guide Tube | A plastic tube that guides the filament from the spool holder to the extruder of the printer, preventing any snags. |
| Filament Runout Sensor | A sensor in the extruder intake that pauses your printer if it runs out of filament during a build. |
| Filament Spool A cylindrical piece on which a long strand of filament is wound for storage and continuous use. | |
| .g, .gcode, .g3drem | A buildable file format compatible with your Dremel 3D45. |
| Glue Stick | Non-toxic and acid-free stick of glue that is applied to the build platform to help prints stick. |
| Leveling Knobs | Knobs located under the base of the build platform that allow users to easily level the build platform before each print. |
| Leveling Sensor | A sensor that detects the height of the build platform and assists in proper leveling. |
| Lid | Your Dremel 3D45 has a pivoting lid on the top. This allows for more access to the build platform, extruder, filament, and objects when necessary. |
| Needle Nose Pliers | Common tool used to hold small objects and to grab excess material that may be too hot to touch directly. |
| Nylon | Synthetic polymer that provides strong and flexible prints with heavy wear resistance. |
| OBJ File | A common digital file format used in a wide range of 3D model software. This file is created in 3rd party 3D software or downloaded from Dremel3d.com. |
| Object Removal Tool | A tool used to separate your objects from the build platform. |
| PLA. A bioplastic derived from renewable resources such as corn starch | |
| PETG | A thermoplastic filament that combines flexibility, strength and durability similar to Nylon but is easier to print, similar to PLA |
| Spool Holder | A plastic piece located to the left of the build platform inside your Dremel 3D45 build area that is designed to hold a filament spool. |
| Spool Door | A removable door which locks the filament spool to the spool holder. |
| Stepper Motor | A brushless DC electric motor used to drive the guide rails and extruder gears. |
| .STL File | A common digital file format used in a wide range of 3D model software. This file is created in 3rd party 3D software or downloaded from Dremel3d.com. |
| Touch Screen | Full color display that is touch activated. It allows you to monitor your Dremel 3D45 and objects while also providing commands directly to your Dremel 3D45 without the use of a computer. |
| USB Flash Drive | A portable memory card used on a wide array of devices. |
| WIFI | A local area wireless networking technology that allow electronic devices to communicate. |
| X-Axis Guide Rails | A set of rails on either side of the extruder that allow a stepper motor to move the extruder to the left or right side of the build area. |
| Y-Axis Guide Rails | A set of rails on either side of the build area that allow a stepper motor to move the extruder to the front or back of the build area. |
| Z-Axis Guide Rails | A set of rails located at the back of the build area that allow a stepper motor to move the build platform up or down. |
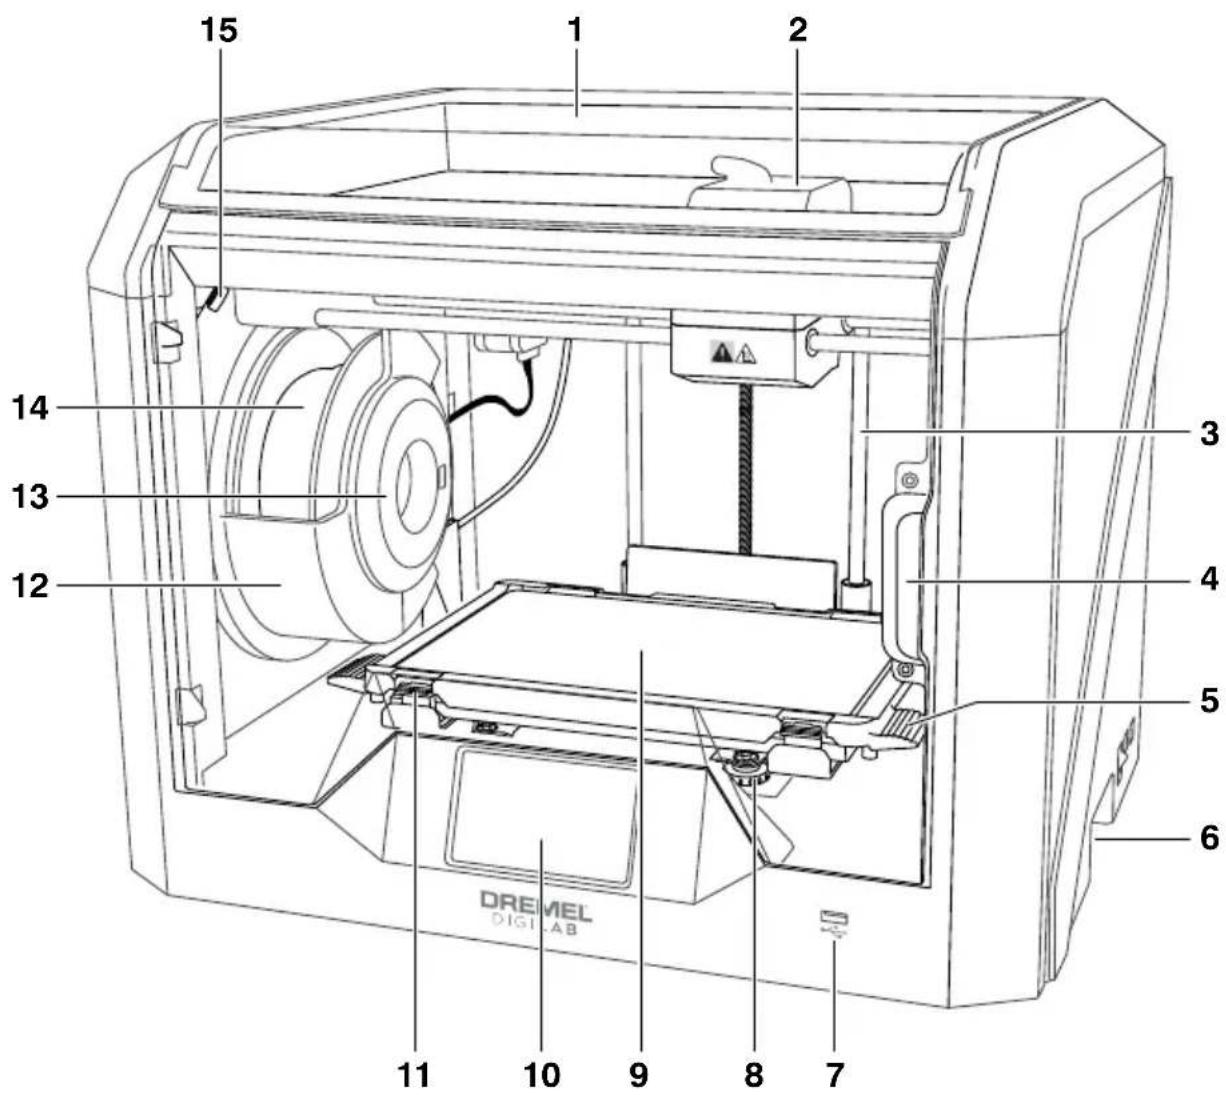
- Lid
- Extruder
- Z-Axis Guide rail
- Door
- Build Platform Tabs
- Gripping Handles
- USB A Port
- Leveling Knobs
- Build Platform
- Touch Screen
- Build Platform Clips
- Filament Spool Holder
- RFID Reader
- Filament Spool
- Camera
-
Y-Axis Guide Rail
-
Stepper motor
- Filament Guide Tube
- Extruder Lever
- Filament Guide Clip
- Extruder Intake
- Chamber Fan (With optional filtration hook-up)
- Ribbon Cable
- X-Axis Guide Rail
- Leveling Sensor
- Extruder Tip
- Power Switch
- USB B Port
- Ethernet Port
- Nameplate
- Power Input
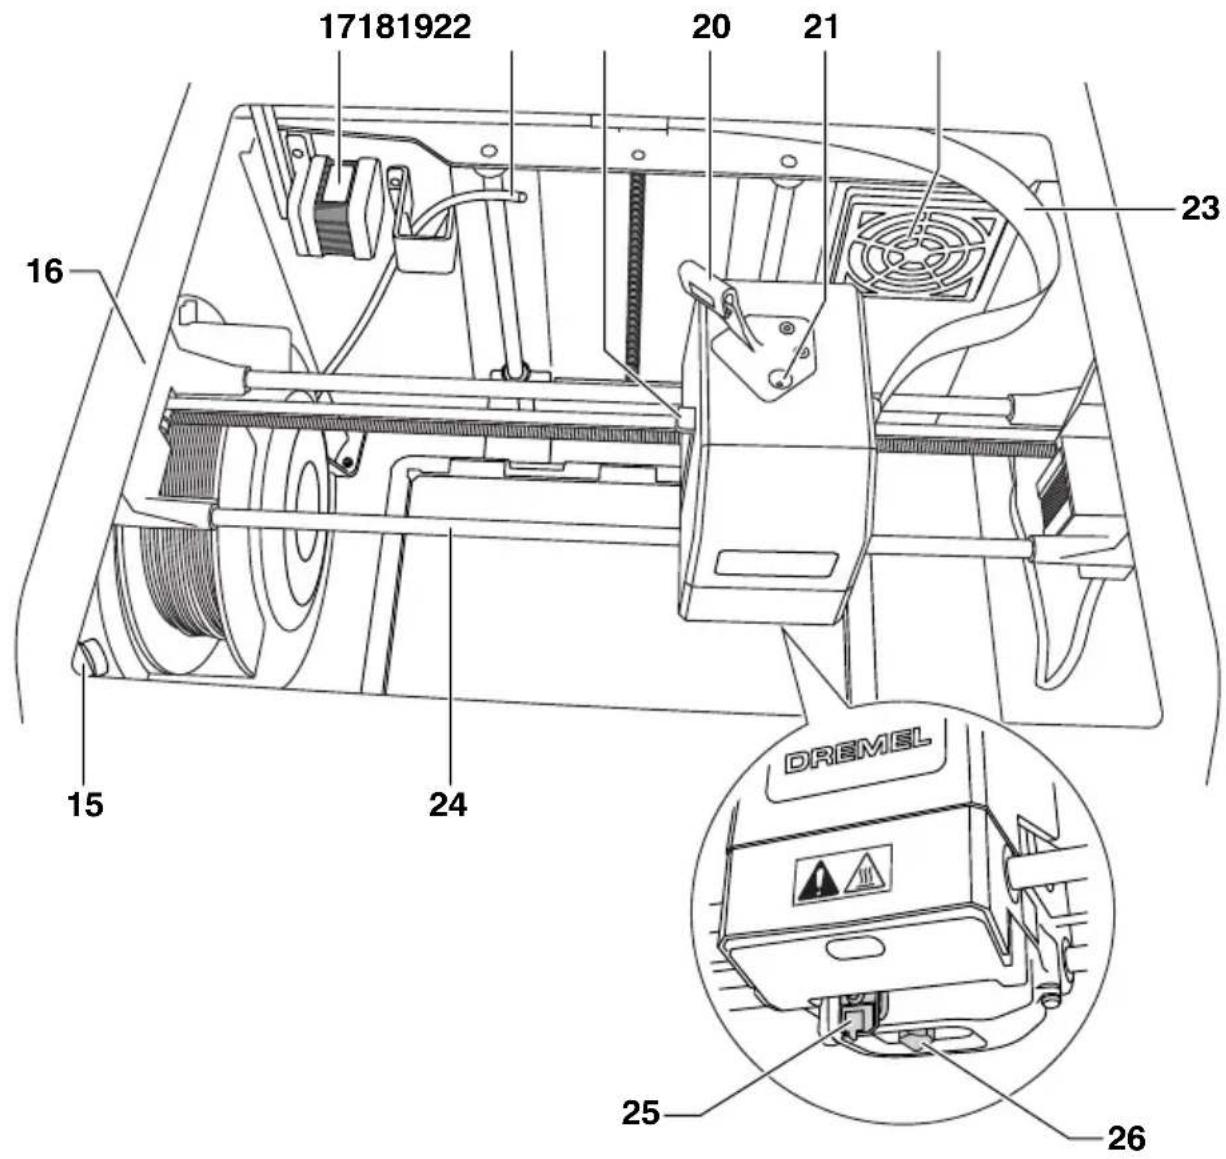
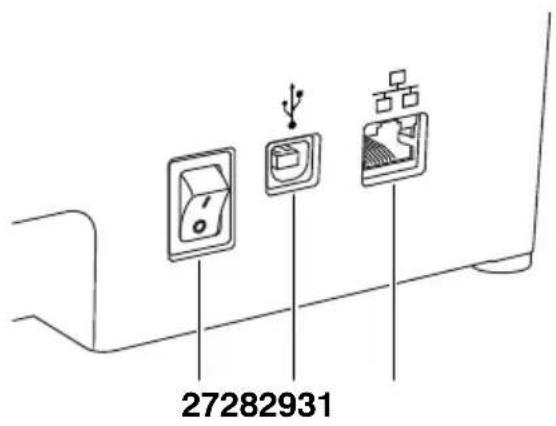
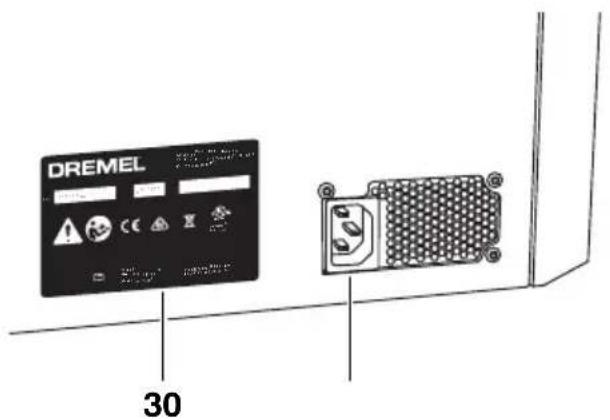
INTRODUCTION
Welcome to the world of Dremel Digilab. Our mission is to mentor you through the digital fabrication process and share best practices for bringing your ideas to life. 3D building is a process that will involve experimentation and persistence. Thankfully, the Dremel experts are here to make your job easier with online tips and support. Dremel 3D45 brings new functionality, such as network connectivity and remote 3D printing via local area network connection. To get started with 3D45 follow the initial setup routine on the touch screen.
KIT CONTENTS\*
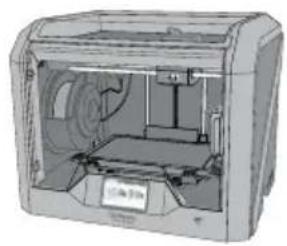
natural_image
Illustration of an open industrial machine with internal components (no visible text or symbols)Dremel 3D45
Instruction Manual
Quick Start Guide
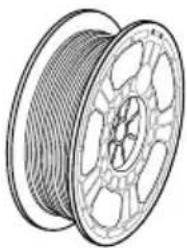
natural_image
Line drawing of a spool of cable or wire (no text or symbols)(2) Filament Spool**
natural_image
Pure diagram of a coiled cable or wire with no text, numbers, or symbolsPower Cable
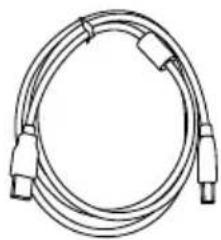
natural_image
Coiled cable or connector with two connectors and a central connector (no text or symbols visible)USB Cable
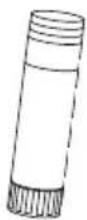
(2) Glue Stick
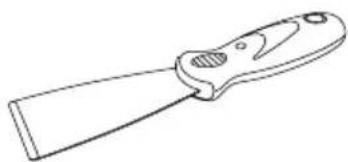
natural_image
Line drawing of a folding knife (no text or symbols)Object Removal Tool
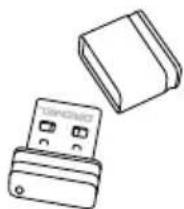
natural_image
Line drawing of two electronic components: a rectangular block and a USB flash drive (no text or symbols)USB Flash Drive
* Quantities may vary depending on kit.
**Do not store in moist or hot environment.
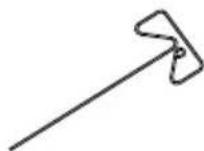
Unclog Tool
UNPACKING
- Place box on table, cut tape, and open.
- Remove top insert.
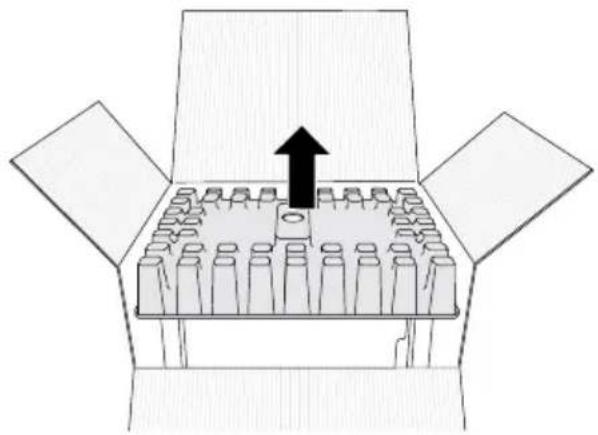
natural_image
Diagram of a box with multiple test tubes and an upward arrow, no text or symbols present- Remove 3D45 and place on table.
- Open lid and remove top insert.
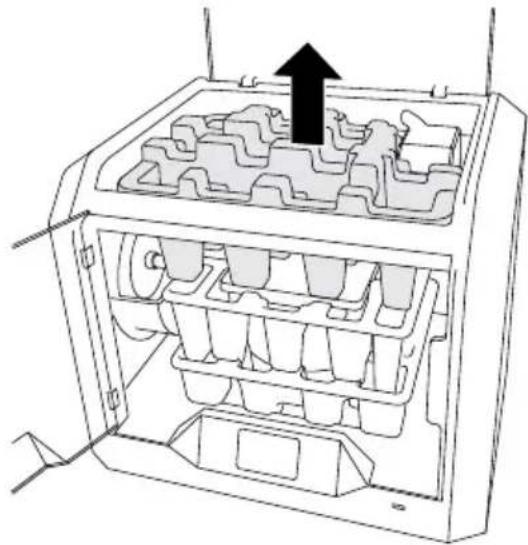
natural_image
Technical line drawing of a mechanical device interior with internal compartments and a black arrow indicating upward motion (no text or symbols)- Raise build plate by lifting from both sides.
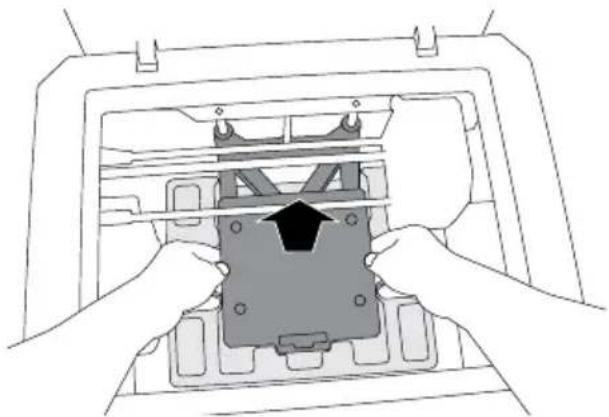
natural_image
Illustration of hands installing a component into a device frame (no text or symbols visible)- Open door and remove middle insert.
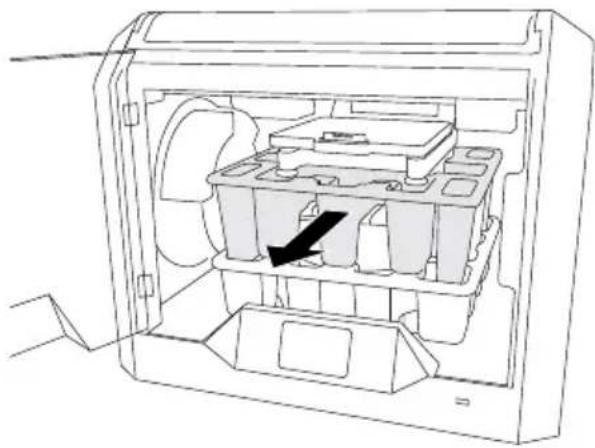
natural_image
Technical line drawing of an open computer case with internal compartments and a black arrow indicating a specific component (no text or symbols present)- Remove bottom insert.
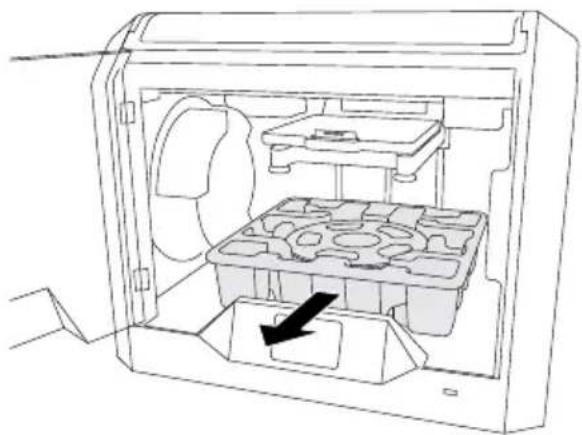
natural_image
Technical line drawing of an open mechanical device with internal compartments and a black arrow indicating a component (no text or symbols present)Tip: Keep packaging for future transportation and storage.
TOUCH SCREEN
Using your Dremel 3D45 without a computer is easy with the onboard software and full colour touch screen. Before building your model we want to familiarize you with the touch screen menu structure and options.

WARNING
OBSERVE ALL PROVIDED WARNINGS AND SAFETY INSTRUCTIONS WHEN USING THE DREMEL 3D45. FAILURE TO DO SO MAY RESULT IN FIRE, EQUIPMENT DAMAGE, GE OR PERSONAL INJURY.
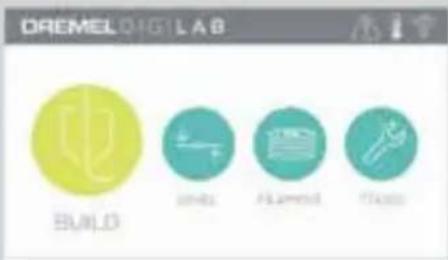
BUILD
Tap to select a 3D model and begin build process. (See page 621 for detailed build instructions)
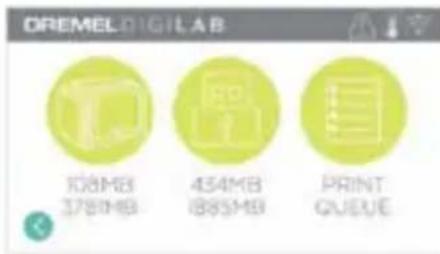
BUILD MENU
Tap Printer, USB Flash Drive, or Print Queue to choose the destination of your desired file.
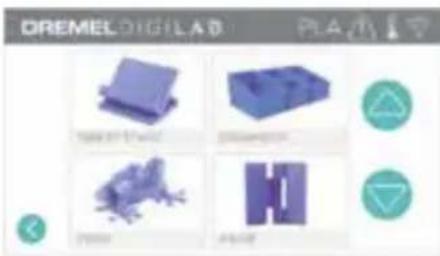
MODEL MENU
Tap to select the desired model or use arrows to scroll through pages to find your model.
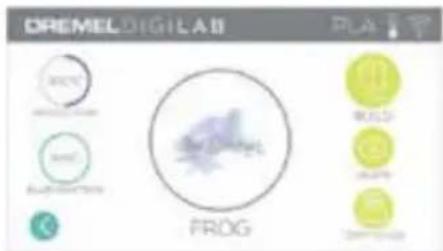
FILE DETAILS
Nozzle and plate temperatures settings referenced for the current build.
BUILD – Tap to begin build process.
DELETE – Tap to remove model file from on- printer storage or USB flash drive.
COPY TO PRINTER – From USB flash drive, tap to copy model file to on-printer storage.
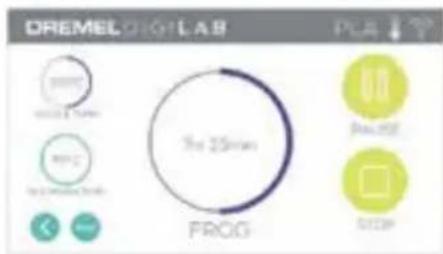
BUILD STATUS
STOP – Tap to cancel the current build process.
PAUSE/PLAY – Tap to pause or resume the current build process. Pause will allow you to access the filament button.
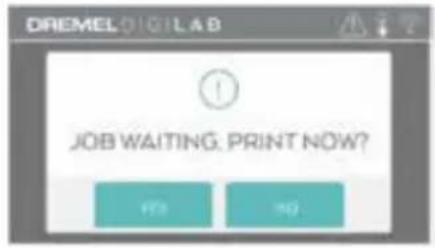
PRINT QUEUE NOTIFICATION
YES – Proceed to print file.
NO – Cancel printing of file.
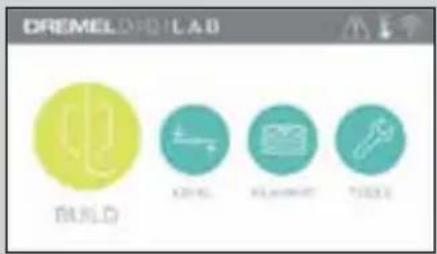
FILAMENT
Tap to begin heating and start filament load/change process. (See page 615 for instructions on filament load/change process)
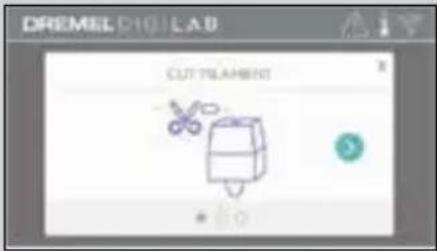
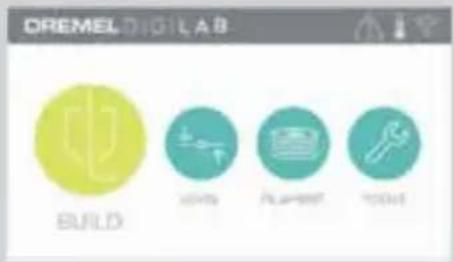
LEVEL
Tap to begin build platform leveling process. (See page 620 for instructions on leveling the build platform)
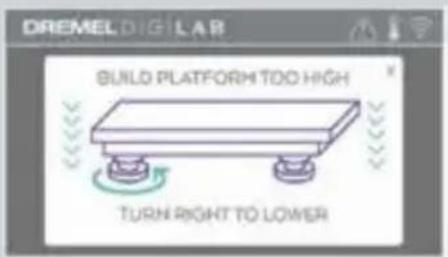
TOOLS
Tap to access the following individual printer functions and settings.
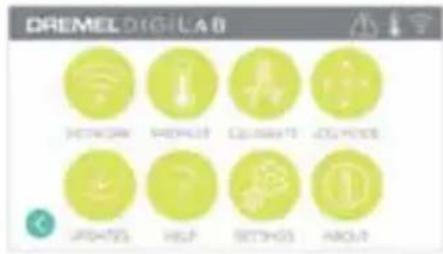
SERVICE
Tap to enter service menu to see customer service contact information.
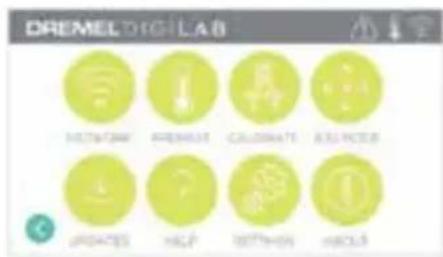
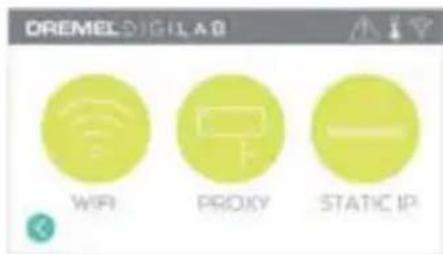
NETWORK
Tap to enter Network menu to connect or disconnect WiFi and Set Proxy. CONNECT WIFI – Tap to connect to WiFi. SET PROXY – Tap to set manual proxy. SET STATIC IP – Tap to setup static IP.
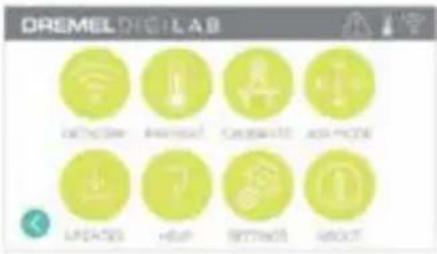
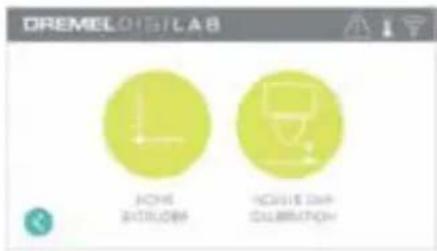
CALIBRATE
Tap to move extruder and build platform to zero position.
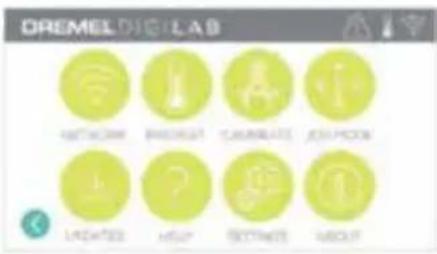
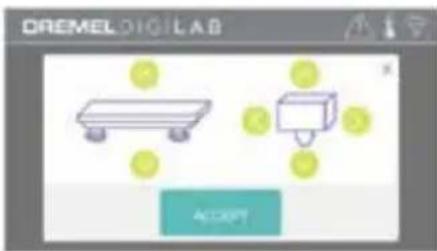
JOG MODE
Tap to display options to move extruder and build platform along the X, Y, and Z-axis.
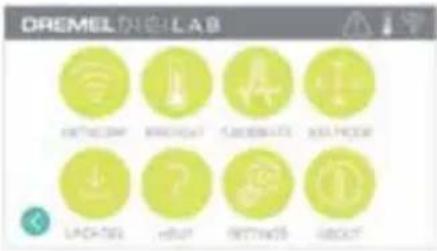
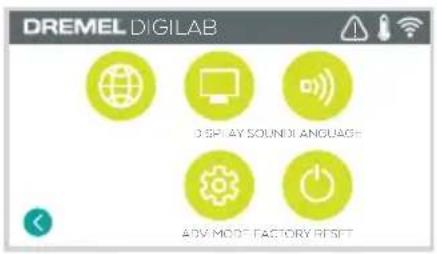
SETTINGS
LANGUAGE – Tap to pick alternate menu language.
DISPLAY – Tap to customize cabinet LEDs or main menu hotkeys.
SOUNDS – Tap to turn 3D45 sounds On/Off.
ADVANCED MODE – Tap to manually prioritize GCode settings.
FACTORY RESET – Tap to remove all information stored on 3D45 and return it to factory defaults.
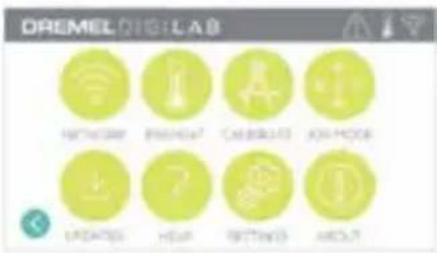
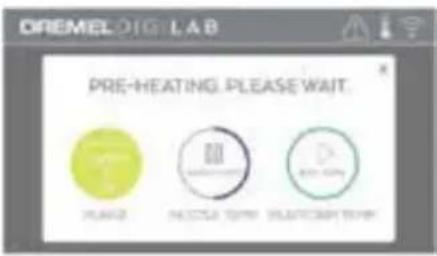
PREHEAT
Tap "Nozzle Temp" to automatically begin preheating the extruder for building or removing excess debris. Once your optimal temperature is achieved, tap "Platform Temp" to begin preheating the build platform.
PURGE – Once extruder is hot, tap to manually extrude filament.
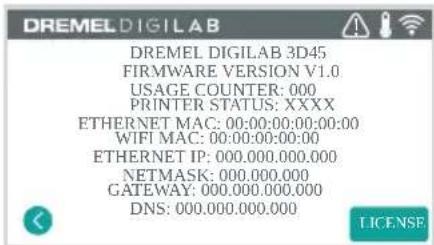
ABOUT
Tap to see 3D45 information such as firmware version, usage counter, printer status, and MAC address.
TOUCH SCREEN ICONS

Indicates that there is an error such as filament empty or door open.
Indicates that Ethernet is connected.
Indicates WiFi signal strength and if connected to WiFi symbol will be blue.
Indicates that the extruder and build platform are cool.
Indicates that the extruder and build platform are warm.
Indicates that the extruder and build platform are hot.
INITIAL SETUP
The first time you power on your Dremel 3D45 you will be prompted to perform an initial setup of network. Completing this process will give you access to features such as remote 3D printing via local area network connection, notifications of firmware updates, and printer status monitoring. You will then be walked through how to loading your first roll of filament and how to properly level the build platform.
- To complete initial setup, tap "Start" when prompted on the initial setup screen. If you decline this setup you can always setup network later.
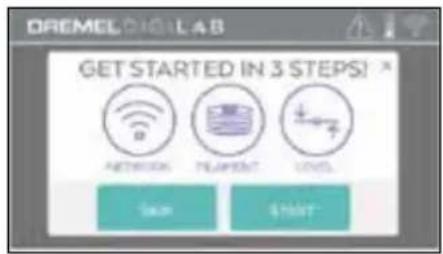
- If you choose "Start", 3D45 will automatically connect to your ethernet or search for available wireless networks.
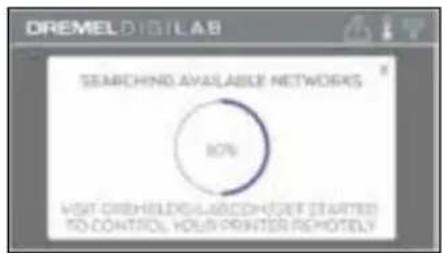
- Choose your wireless network using the touchscreen. Use the arrows to scroll through the list of available wireless networks. Tap on your network name to accept it.
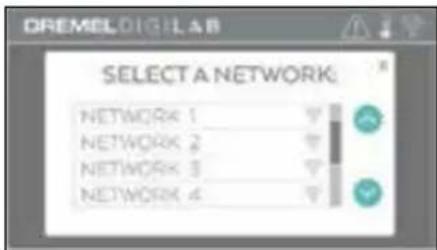
- Enter your wireless network password and tap "Done".
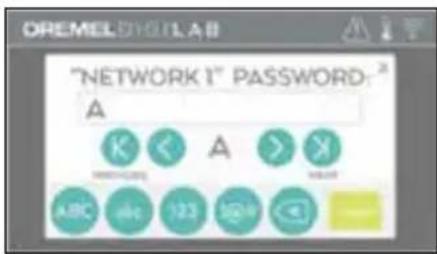
REMOTE 3D PRINTING VIA LOCAL AREA NETWORK CONNECTION USING DREMEL DIGILAB 3D SLICER
Dremel Digilab 3D Slicer allows you to upload, edit, and build 3D files and connect to your 3D45 (requires wireless or Ethernet connection). In the software, you can view models and projects, send, pause and cancel builds, monitor build status, receive push notification updates, and more. You can install Dremel Digilab 3D Slicer from www.dremel3d.com or from USB flash drive provided with the Dremel 3D45.
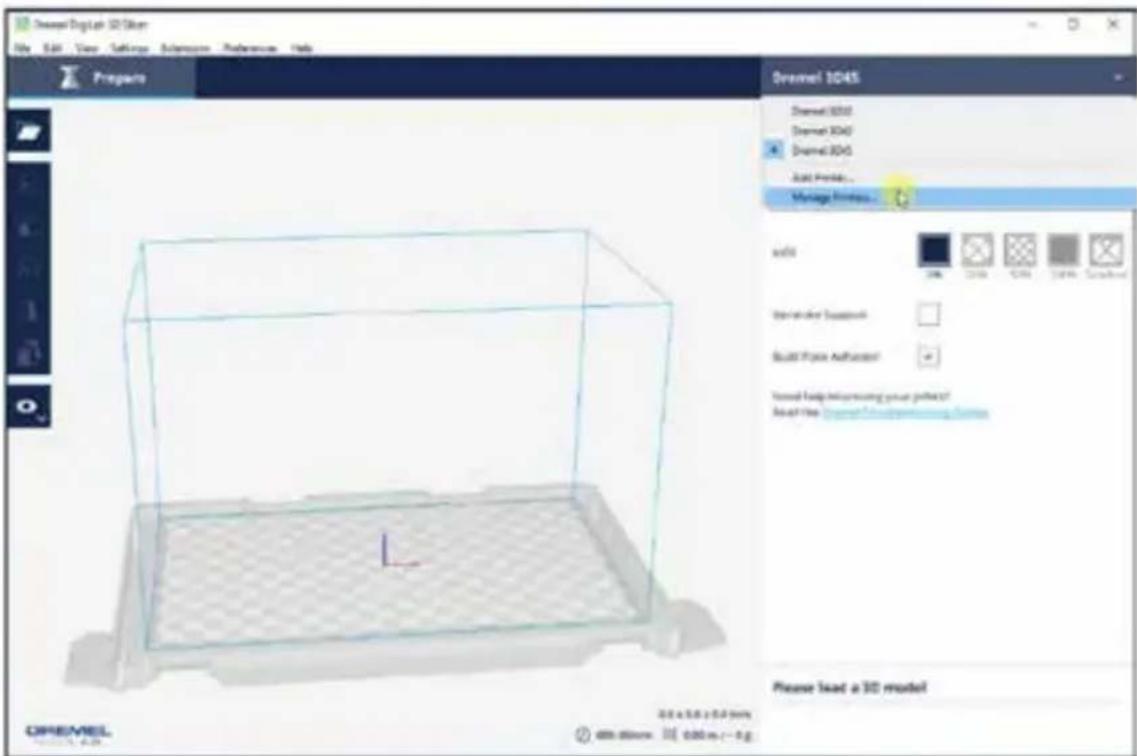
- Open the Dremel slicer, click the printer name in the top right corner and click Manage Printers
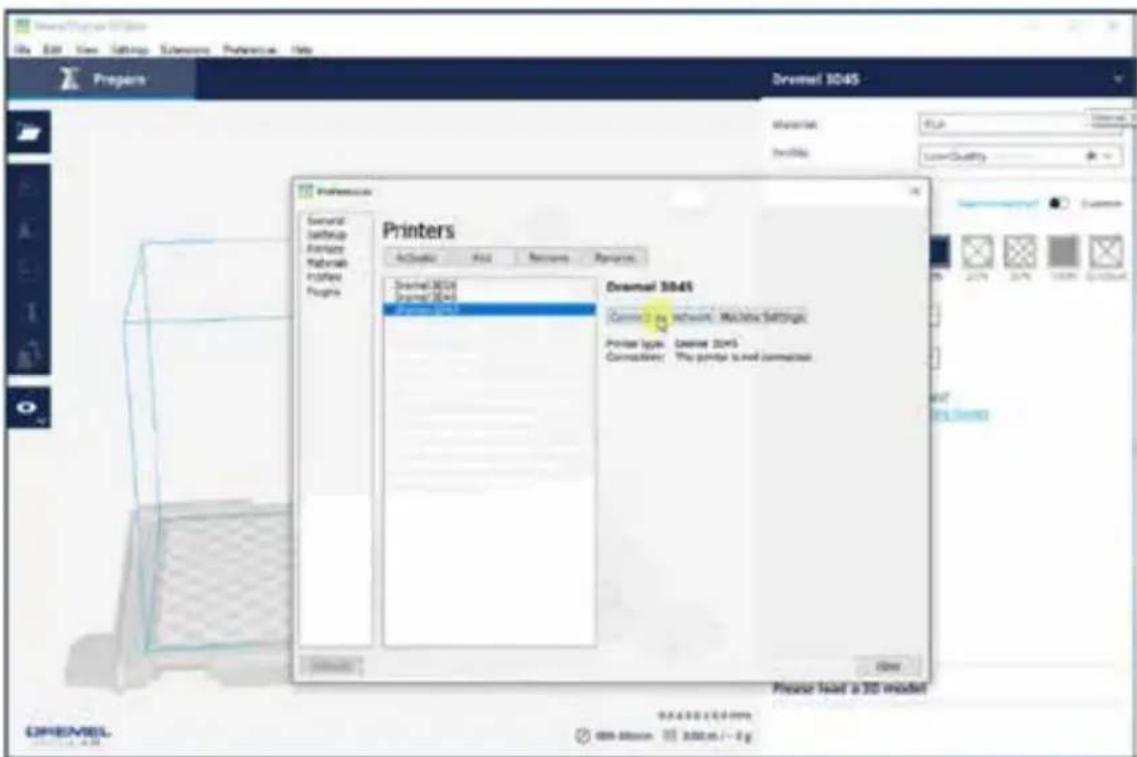
- Select your Dremel 3D45 and click Connect via Network
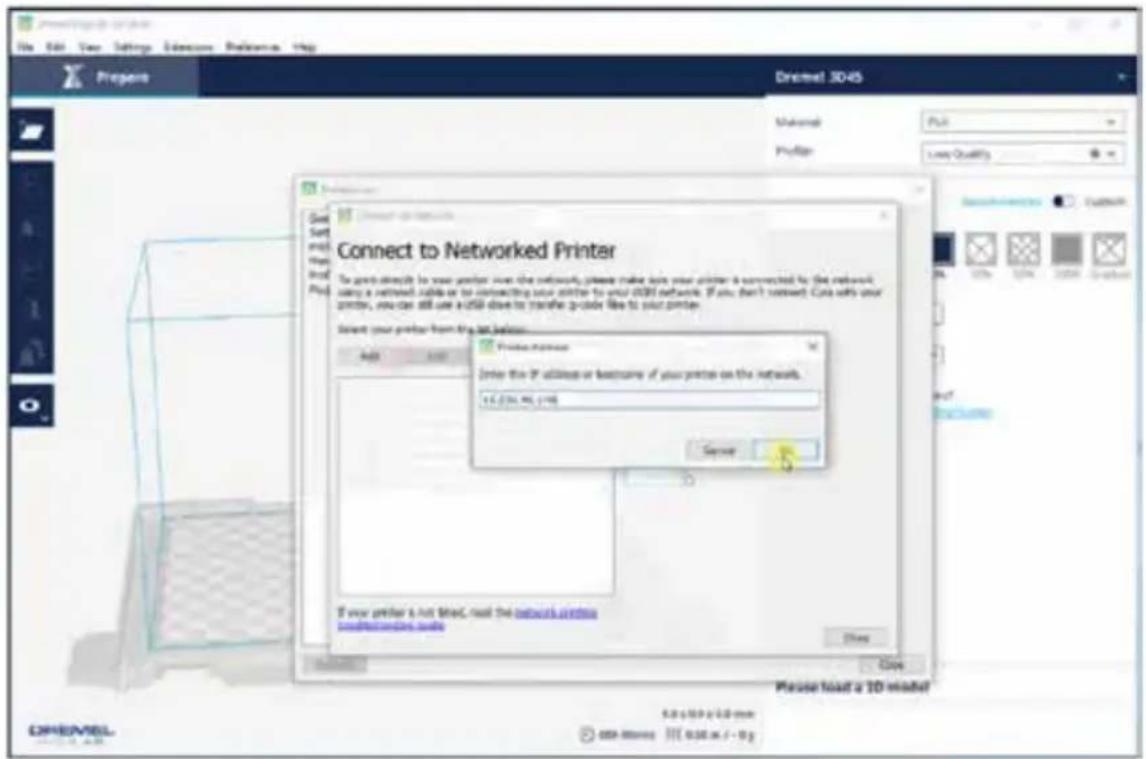
- Click Add and type in your printer's IP address
- Click OK then Connect
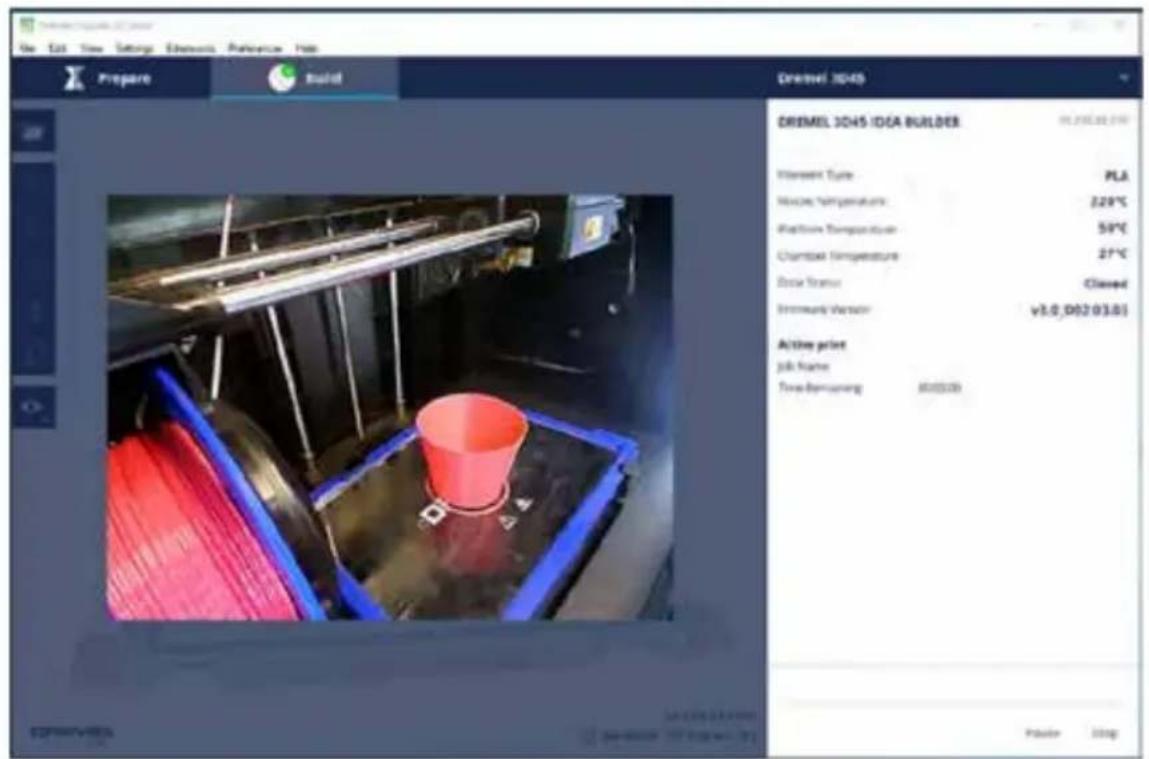
- Close out the settings windows. You should now see a green check on the Build screen button indicating you are successfully connected.
- Clicking the Build button will display the live camera feed for your printer.
- You can manage your build using pause and stop buttons on this screen.
GETTING READY TO BUILD

WARNING
OBSERVE ALL PROVIDED
WARNINGS AND SAFETY
INSTRUCTIONS WHEN USING THE DREMEL 3D45.
Failure to do so may result in fire, equipment damage, property damage or personal injury.

WARNING
DO NOT TOUCH THE EXTRUDER TIP OR HEATED BUILD
PLATFORM DURING DREMEL 3D45 OPERATION OR UNTIL IT HAS COOLED DOWN TO AT LEAST 60°C (140°F). Contact with the extruder tip or build platform during or after operation before tip and build platform has cooled may result in personal injury.

WARNING
USE ONLY DREMEL FILAMENT. Use of filament not authorized by
Dremel may result in equipment, property damage, or personal injury.

WARNING
DO NOT ADJUST EXTRUDER SETTING TO EXCEED THE MAXIMUM RATED TEMPERATURE OF THE FILAMENT TYPE BEING USED. Heating filament above recommended range can cause emissions that may result in personal injury.

CAUTION
DO NOT PULL THE FILAMENT OUT. Doing so may damage the
extruder.
LOADING/CHANGING FILAMENT
- Start filament load/change process by tapping
"Filament" button on touchscreen. Extruder will move to front right corner of print area and extruder tip will begin to heat.
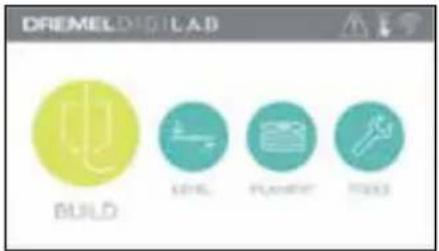
- After extruder stops moving, open the 3D45 Lid for better access to extruder.
- If existing filament is loaded, cut existing filament near extruder intake and tap the arrow button on touchscreen.
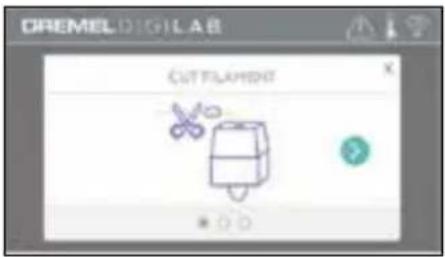
- Remove Spool door by rotating it counter clockwise and remove existing spool if one is present, see figure1.
FIG. 1
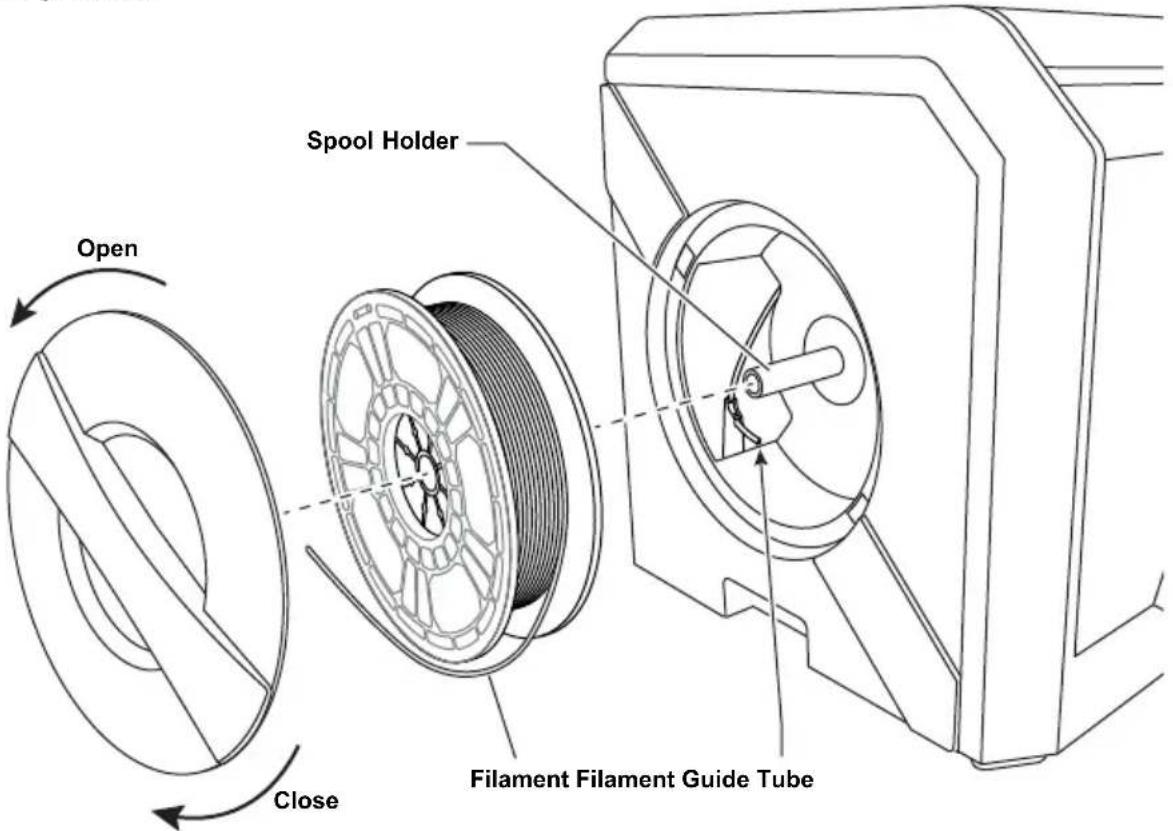
Guide Tube Filament Filament Guide Extruder intake
FIG. 2
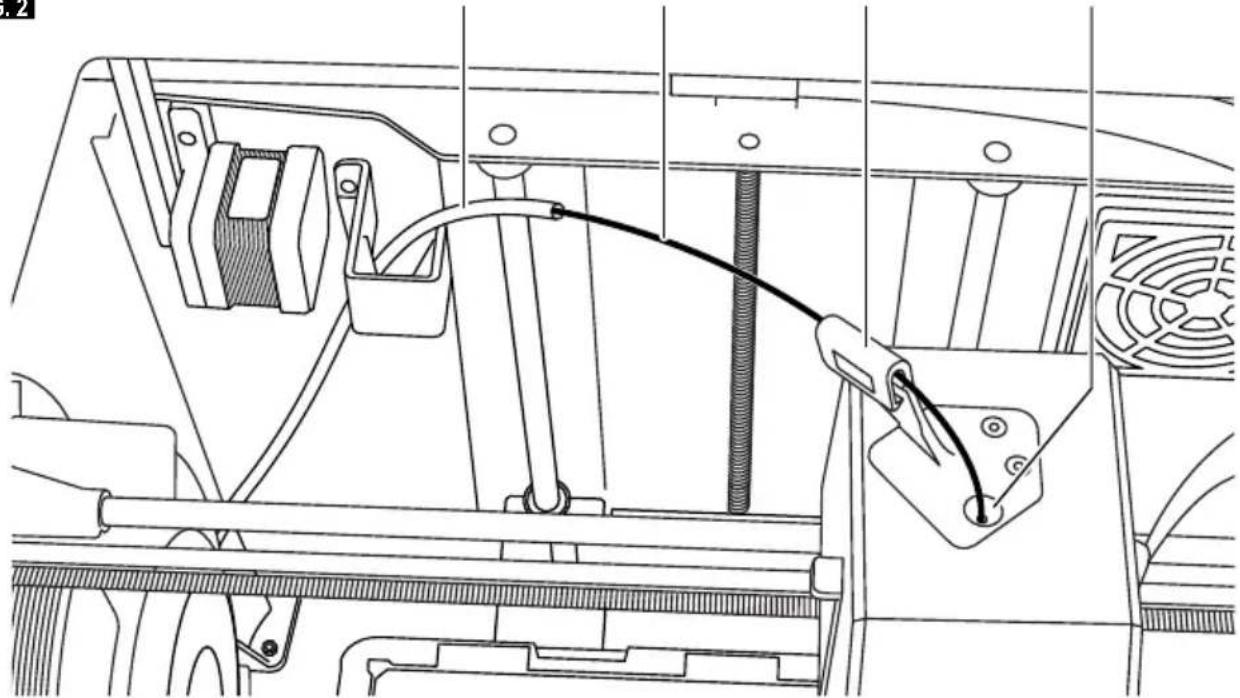
natural_image
Technical line drawing of a vehicle chassis with attached cable and fan (no text or symbols)-
Thread tip of new filament through guide tube, place spool on spool holder, replace spool door by aligning locking tabs and rotating clockwise, see figure 1.
-
When you place a roll of Dremel filament into the spool holder, the printer will auto-recognize the filament type and adjust the printer settings to be optimized for the filament you are using. (This will bypass any print settings loaded in your sliced file). NOTE: You have the option to enter advanced printer mode to manually alter print settings after you change filament. Please check all settings (if manually entered) as improper settings may cause prints to fail, property damage, or personal injury, see "Filament Type and Settings" chart on page 617 or on dremel3d.com for the latest chart. NOTE: You also have the option to enter advanced printer mode, which allows you to pull print settings from the saved sliced file. This will prevent the printer from altering its print settings. Please check all settings prior to printing as improper settings may cause prints to fail, property damage, or personal injury.
-
If changing existing filament, 3D45 will automatically purge existing filament.
-
When Feed Filament screen appears, tap the arrow on touchscreen and thread filament coming from guide tube into extruder intake until extruder feeds through on its own, see figure 2.
NOTE: Ensure the gears inside of the extruder have properly grabbed the filament before you finish the filament change. You will feel a tug and see the filament start to feed itself into the extruder when this occurs.
- Filament will be drawn into the extruder and begin to exit from the hot extruder tip. NOTE: Your Dremel 3D45 was tested by building objects before leaving the factory. These test objects may have been made with a different filament color than you are using. Therefore, a small amount of filament may be remaining in the extruder.
- When new filament appears from extruder tip, tap "done" on touchscreen to complete filament load process, return to main menu, and calibrate extruder. Carefully remove excess filament without touching hot extruder tip. If necessary, carefully remove debris from extruder tip with needle nose pliers.
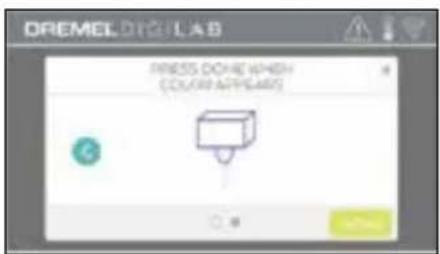
CAUTION
USE EXTRA CARE NOT TO DAMAGE THE EXTRUDER TIP
WHEN CLEARING DEBRIS. DREMEL 3D45 WILL NOT WORK PROPERLY WITH A DAMAGED EXTRUDER TIP AND WILL REQUIRE REPLACEMENT.
- Close 3D45 lid and door.
FILAMENT TYPE AND SETTINGS
| Filament Type PLA ECO-ABS Nylon PETG | ||||
| Nozzle Temperature Range | 190 - 230 °C | 190 - 230 °C | 220 - 280 °C | 230 - 260 °C |
| Optimal Nozzle Temperature | 220 °C | 220 °C | 255 °C | 250 °C |
| Build Platform Temperature Range | 0 - 60 °C | 0 - 70 °C | 0 - 100 °C | 0 - 80 °C |
| Optimal Build Platform Temperature | 35 °C | 45 °C | 100 °C | 70 °C |
| Print Speed Multiplier | 10 - 300% | 10 - 300% | 10 - 300% | 0 - 100% |
| Recommended Speed Multiplier | 100% | 100% | 90% | 100% |
| Fan Range | 0 - 100% | 0 - 100% | 0 - 100% | |
| Object cooling fan setting | 100% | 100% | 50% | 100% |
NOTE: Please check website dremel3d.com for latest filament settings.
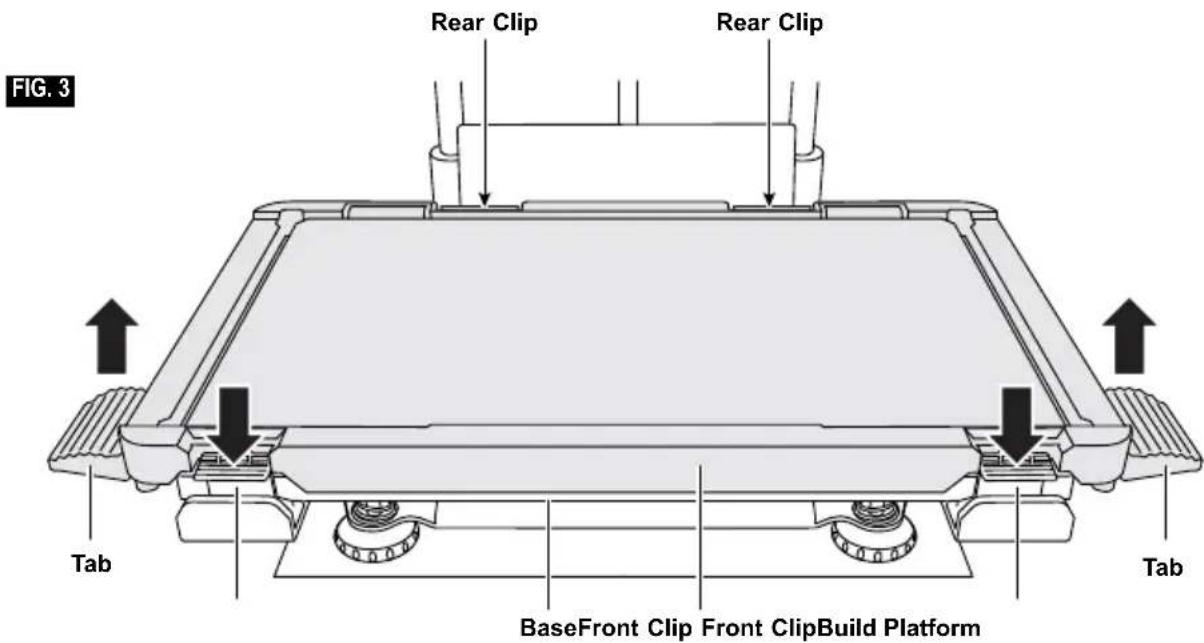
PREPARING BUILD PLATFORM
WARNING DO NOT TOUCH THE EXTRUDER TIP OR HEATED BUILD PLATFORM DURING DREMEL 3D45 OPERATION OR UNTIL IT HAS COOLED DOWN TO AT LEAST 60°C (140°F). Contact with the extruder tip or build platform during or after operation before tip and build platform has cooled may result in personal injury.
WARNING DO NOT DROP THE BUILD PLATFORM. Tempered glass plate may break and result in personal injury.
WARNING DO NOT REMOVE TEMPERED GLASS PLATE FROM PLASTIC HOLDER. Contacting with tempered glass plate edge may result in personal injury.
CAUTION BEFORE EVERY BUILD MAKE SURE THAT THE BUILD PLATFORM IS COVERED WITH GLUE FROM THE SUPPLIED GLUE STICK. If glue is not used, it may cause poor object build quality.
-
Remove build platform by first pressing down and releasing the two clips located at the front of the build platform, then lift the build platform off the base using the build platform tabs (figure 3).
-
For best results, apply a thin layer of glue with the provided glue stick to the build platform, figure 4. Please check the "Glue Application Instructions" for detailed information.
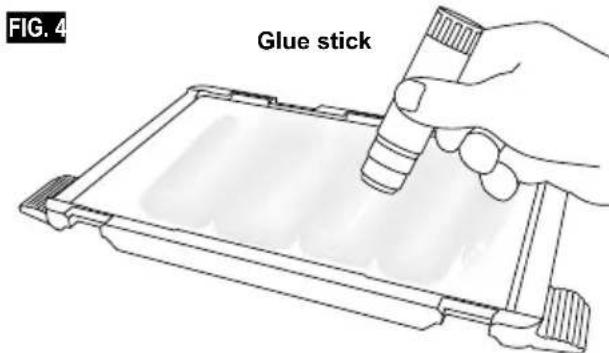
NOTE: To clean the build platform, rinse the platform with warm water and dry with a towel.
- Install the build platform by first inserting the rear of the platform onto the rear clips, then press down on the front of the platform until it snaps in place.
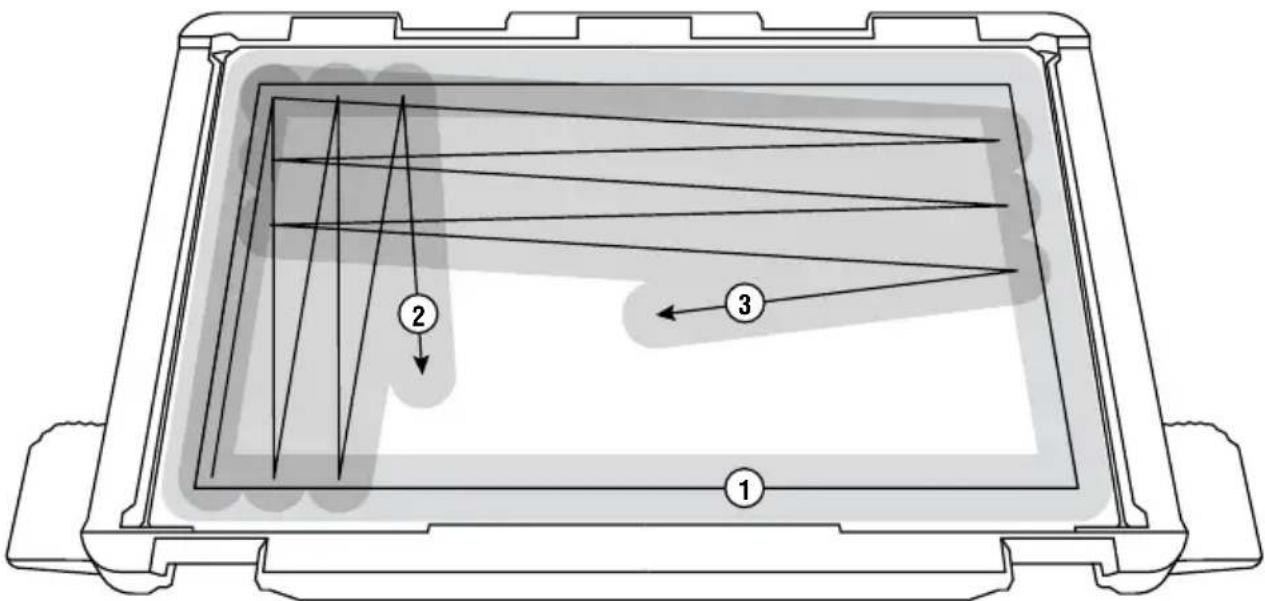
It is important to ensure that the 3D45 build platform is covered with Dremel specified glue before each build. A properly maintained glue layer helps parts adhere to the build plate during prints and prevents warping and curling, especially in large prints.
You should apply a layer of glue every 1-3 prints. When you apply glue, make sure you apply it to the whole area of the bed where the part will print. Make sure that the build plate is cool before removing it or applying glue.
Each time you apply glue, make sure to apply two overlapping layers. You can apply the glue to the perimeter of the print area first (1), and then zigzag up and down while overlapping over the entire area (2). Wait for 10 seconds and then apply another layer zigzagging left to right (3). This ensures a uniform layer over the entire build area.
Allow the glue to dry before leveling or starting a print. Preheating the build plate can help speed up this process.
Every 7-10 glue applications, or if the glue layer becomes uneven, you should completely clean the build platform. You can do this in one of two ways:
Option 1: Remove the build platform from the printer. Wet the platform in water, by holding it under warm water for a few seconds. Make sure not to get the warning label on the front of the build plate wet. After that, you should easily be able to scrape or wipe the glue off. Make sure the build platform is completely dry before putting it back in the 3D45.
Option 2: Remove the build platform from the printer. Use the scraper to scrape the glue off the entire surface of the build plate. You can scrape from left to right and then from up to down to ensure that all the glue has been removed. Make sure to remove the build platform from the printer before scraping as glue dust can get sucked into the filter and clog it.
Apply two full layers of glue to the clean build plate allowing the first layer to dry in-between. Once the second layer has dried, re-level the platform before starting your next print.
WARNING DO NOT TOUCH THE EXTRUDER TIP OR HEATED BUILD PLATFORM DURING DREMEL 3D45 OPERATION OR UNTIL IT HAS COOLED DOWN TO AT LEAST 60°C (140°F). Contact with the extruder tip or build platform during or after operation before tip and build plate has cooled may result in personal injury.
It is important you level the build platform every time you reinstall the build platform to ensure that the build platform is evenly spaced from the extruder head. Not leveling the build platform may cause objects to not build properly.
- Tap "Level" on 3D45's touchscreen.
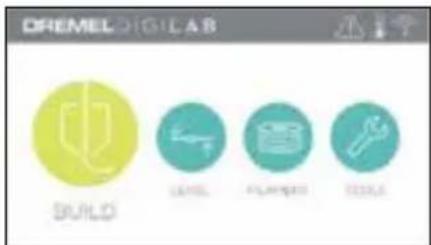
-
The extruder and build platform will move into position to level the build platform. 3D45 will first check level at the back center of the build platform. The two knobs under the build platform are used to raise and lower the build platform on the left and right. The extruder contains a sensor that detects if the bed is level, no additional tools are necessary.
-
The touchscreen will indicate if your build platform is too high or too low. If the build platform is too high, adjust the appropriate knob by rotating right until you hear a "beep" and the touchscreen indicates that it is ready to verify that the bed is level.
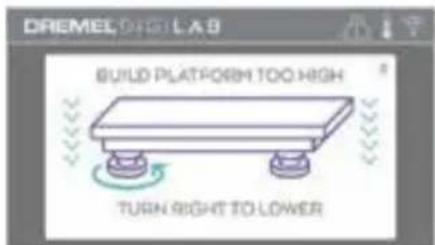
- If the build platform is too low, adjust the knob by rotating left until you hear a "beep" and the touchscreen indicates that it is ready to verify that the bed is level.
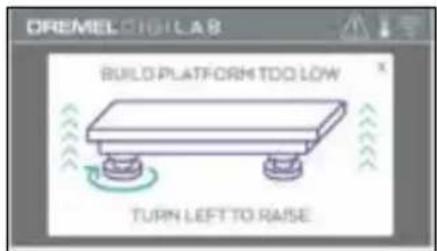
- Tap "Verify" to check the bed level. If further adjustment is needed the touchscreen will indicate the direction, if the level is correct, the extruder will move to the next point and the level process can be repeated.
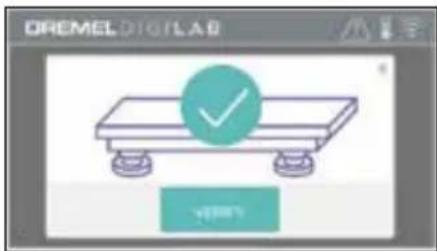
- Repeat steps 3-5 for the second position, when the bed is fully level the extruder will automatically move to the calibration position and complete the leveling process.
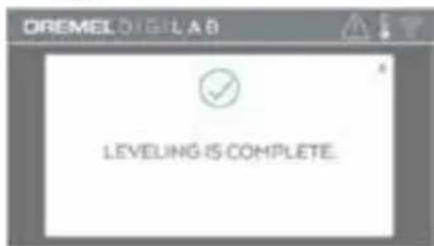
CONNECTING USB CABLE
- Ensure 3D45 power switch is in the off position.
- Connect the included USB cable to your 3D45 and computer, figure 5.
- Open software.
- Turn your Dremel 3D45 on using the power switch to sync your computer to your Dremel 3D45.
CONNECTING ETHERNET
- Ensure 3D45 power switch is in the off position.
- Plug ethernet cable into your 3D45, figure 6.
- Turn your Dremel 3D45 on using the power switch. Ethernet connection should be detected automatically. Tap "Accept" to confirm connection.
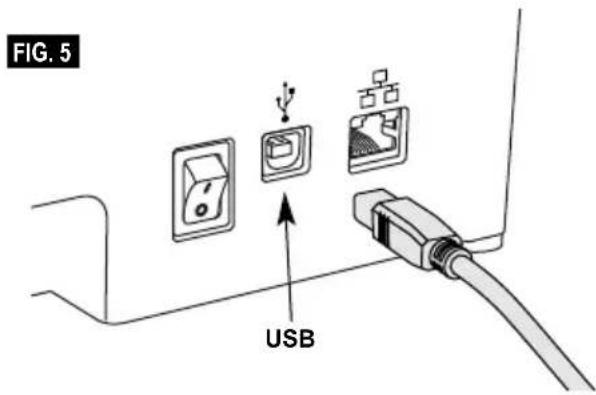
BUILDING
OBSERVE ALL PROVIDED WARNINGS AND SAFETY
INSTRUCTIONS WHEN USING THE DREMEL 3D45.
Failure to do so may result in fire, equipment damage, property damage or personal injury.
DO NOT REACH INSIDE THE DREMEL 3D45 WHILE IT IS IN
OPERATION. Contact with Dremel 3D45 moving parts during operation may result in poor build quality, equipment damage or personal injury.
NOTE: Your Dremel 3D45 will build test objects before leaving the factory. These test objects may have been made with a different filament color than you are using. Therefore, a small amount of filament may be remaining in the extruder. The start of your first object may have some of this filament color until it transitions over to your filament color.
You have several options when building on your 3D45:
1) On-Printer Storage
2) USB Flash Drive
3) Computer
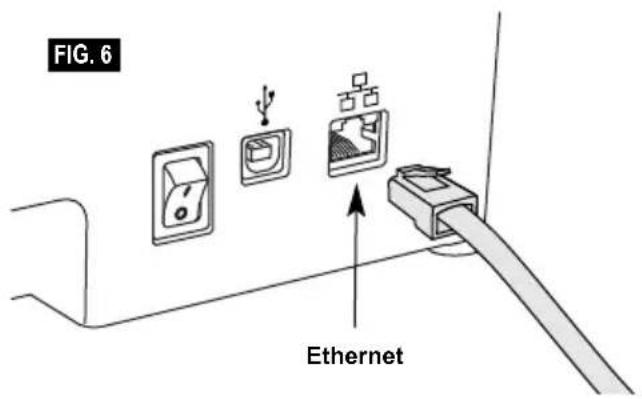
BEFORE YOU BUILD
-
Ensure an adequate amount of filament is loaded (see page 615). If 3D45 runs out of filament during a build, it will pause until more filament is added.
-
Ensure glue is applied, build platform is level and clear of objects.
-
Ensure the extruder and build platform temperature is set according to the filament type used, see page 617 for details.
BUILDING FROM ON-PRINTER STORAGE
- On the main menu tap "Build".
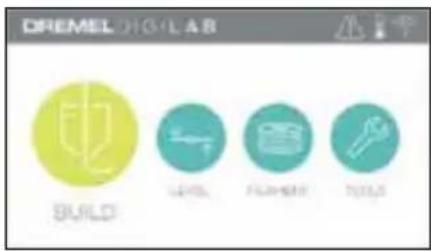
- On the build menu tap the printer icon.
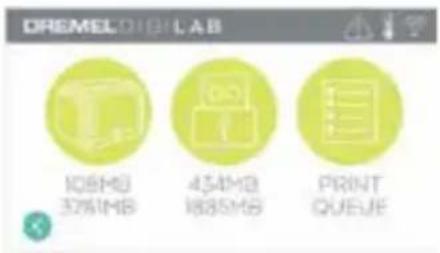
- Tap the model file you would like to build. (Use arrows to scroll through pages)
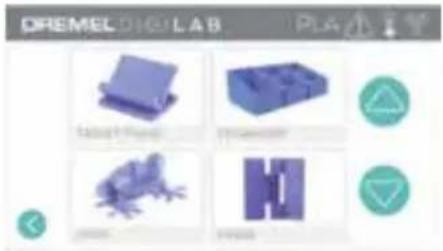
- In the model detail page tap "Build" to begin building process.
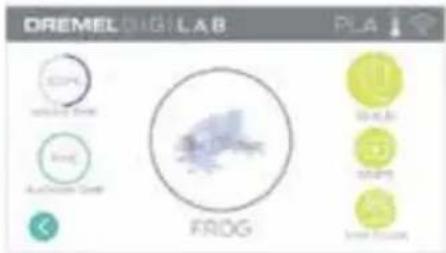
-
Your 3D45 will first align the extruder and build platform to their zero positions then the level sensor will lightly touch the build platform to complete alignment. Your extruder tip and build platform will begin to heat which may take a few minutes. Once the proper temperature is reached your model will begin to build.
-
Once your object is finished your 3D45 will automatically align the extruder and build platform to their calibration positions and cool the extruder tip and build platform.
-
Wait until the touch screen indicates that the extruder and build platform are "cool" to remove your object. See section "Removing Object from Build Platform" for object removal instructions.
BUILDING FROM USB FLASH DRIVE
- On main menu tap "Build".
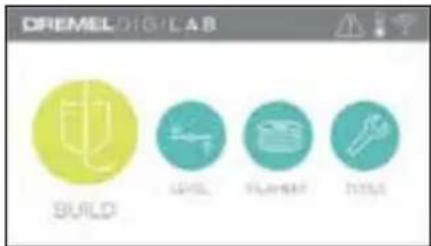
- Tap USB icon to access contents of USB flash drive.
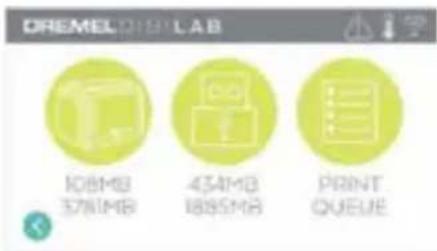
- Follow steps 3-7 from Build from On-Printer storage to complete build from USB flash drive.
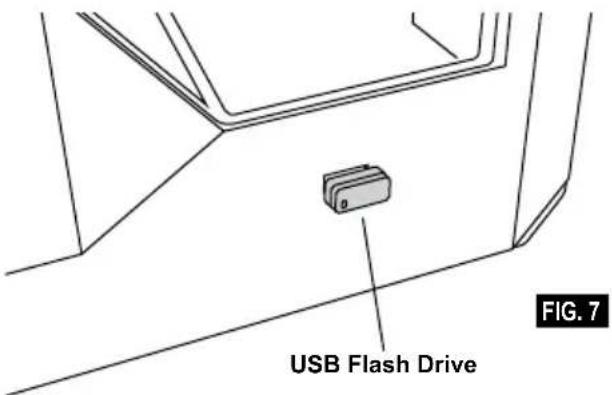
BUILD FROM COMPUTER
Dremel 3D45 is compatible with Dremel Digilab 3D Slicer and Simplified 3D. Follow the instructions that came with this software to complete a Build from your computer.
CANCELING YOUR BUILD ON 3D45
To cancel your object during preheating or building, tap "Stop" on the touch screen. If you confirm "Yes" the extruder and build platform will move to their calibration positions.
REMOVING YOUR OBJECT FROM THE BUILD PLATFORM

WARNING
DO NOT TOUCH THE EXTRUDER TIP OR HEATED BUILD
PLATFORM DURING DREMEL 3D45 OPERATION OR UNTIL IT HAS COOLED DOWN TO AT LEAST 60°C (140°F). Contact with the extruder tip or build platform during or after operation before tip and build plate has cooled may result in personal injury.

WARNING
USE PERSONAL PROTECTIVE EQUIPMENT. The use of
protective equipment such as heat resistant gloves and safety glasses will reduce personal injuries.

WARNING
BE AWARE OF YOUR BODY POSITION WHEN USING HAND
TOOLS TO REMOVE OBJECTS FROM THE BUILD PLATFORM. Sudden tool slip and improper body position during object removal from the build platform may result in personal injury.

WARNING
DO NOT DROP THE BUILD PLATFORM. Tempered glass plate
may break and result in personal injury.

WARNING
DO NOT TWIST OR BEND THE BUILD PLATFORM WHILE
REMOVING OBJECTS. Tempered glass plate may separate from plastic holder and result in personal injury.

CAUTION
AVOID SCRATCHING THE BUILD PLATFORM WHEN REMOVING
OBJECTS. SCRATCHES IN THE BUILD PLATFORM WILL RESULT IN IMPROPER OBJECT CREATION.
- Wait for the extruder to cool before removing your object.
- With the object still attached, remove build platform from the build area.
- Peel your object from the build platform. If needed, gently use the object removal tool to remove object from build platform (figure 8).
REMOVING SUPPORTS (IF REQUIRED)
Use needle nose pliers to remove supports that are inside your object or hard to reach.
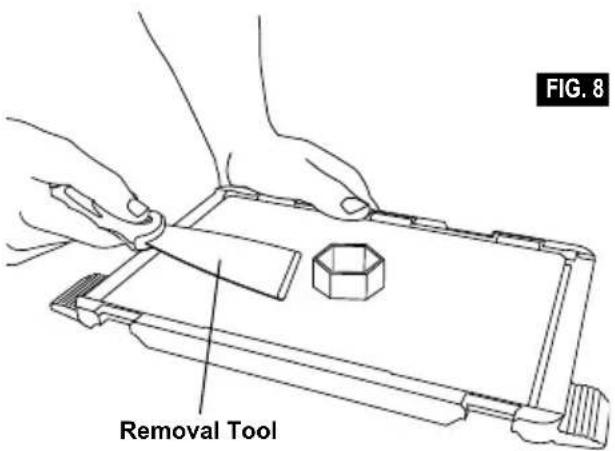
USING THE CAMERA
Your 3D45 is equipped with a camera that can be used to remotely monitor prints as long as your printer is connected to a network. There are two ways to access the camera: through the Dremel Digilab 3D Slicer (see page 613) or directly via a web browser.
DIRECT THROUGH WEB BROWSER
- Make sure the device you want to view the camera on is connected to the same network as the 3D printer. This could be via Wi-Fi or via Ethernet.
- On the main menu of your 3D45 tap "Tools"
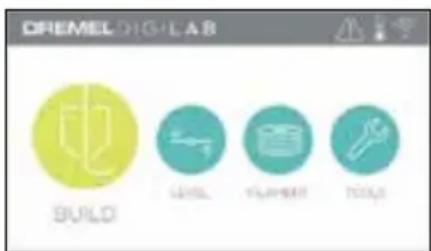
- In the tools menu tap "About"
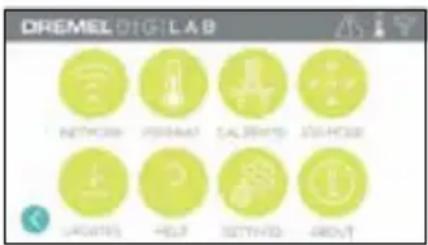
Locate the IP address of your printer. If your printer is connected to the network via Ethernet, this is the address next to "Ethernet IP". If it is connected via Wi-Fi this is the address next to "WiFi IP". It will be a sequence of three or four numbers separated by dots.
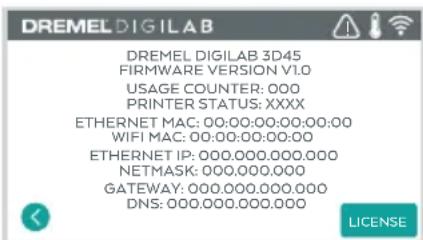
- Open any web browser on the device you want to view the camera on.
-
In the address bar, enter the string: http://IPADDRESS:10123/stream_simple.html For example, http://000.000.000.000:10123/stream_simple.html
-
Press enter and you will see a screen with a view of the camera as below.
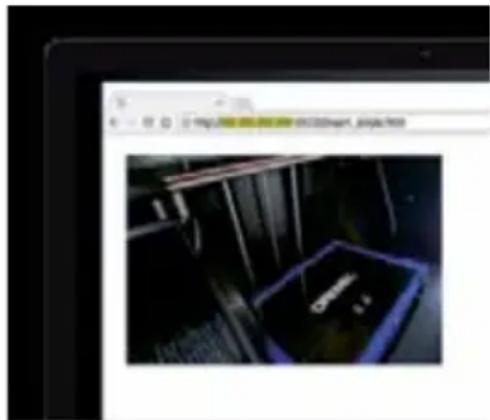
natural_image
Interior view of a server room with illuminated equipment and a dark tray (no visible text or symbols)BEST PRACTICES
- ALWAYS USE PROVIDED GLUE STICK.
- Ensure your build platform is level before every print.
- For proper adhesion of filament to the build platform, regularly wash the glue from the build platform with warm water, dry the build platform, re-apply a fresh layer of glue and re-level.
- Ensure spool is installed properly and can rotate freely.
- When using your Dremel 3D45 for the first time or after changing filament, allow Dremel 3D45 to extrude until material is consistent with the installed filament color.
- It is important to watch your Dremel 3D45 begin building objects. Your object is most likely to experience difficulty in the beginning. Thankfully, this is also the most convenient time to cancel the object, clean the build platform, and start your object again. Remain near the Dremel 3D45 during the building process.
- It is important to save your Dremel 3D45 packaging as it will make re-boxing and transporting your Dremel 3D45 easier.
- Ensure that you store filament spools in an environment that is not moist or too hot. It is recommended that you do not remove the filament spool from its airtight packaging until use.
- Use object removal tool gently to avoid damaging the build platform or object.
- Whenever possible, it is best to locate your object in the center of the build platform. Using the best orientation for your object is critical. Ensure that your object is located on the build platform and that you are using the best orientation for building.
- For steep overhangs (Less than 45 degree angle) it is recommended to build with support.
- Always remove the build platform before removing the object.
UNCLOGGING THE EXTRUDER
Use the unclogging tool to clean the extruder and unclog built up filament, fig 9.
- Click on the filament change button on the screen and wait for extruder to heat up. As filament starts to purge, insert the unclog tool into the extruder intake (top).
- Clogged debris will be pushed down and will extrude from the extruder tip. You should push the unclog too all the way down to ensure all filament is purged. You do not need to push with excessive force, as this may damage the extruder.
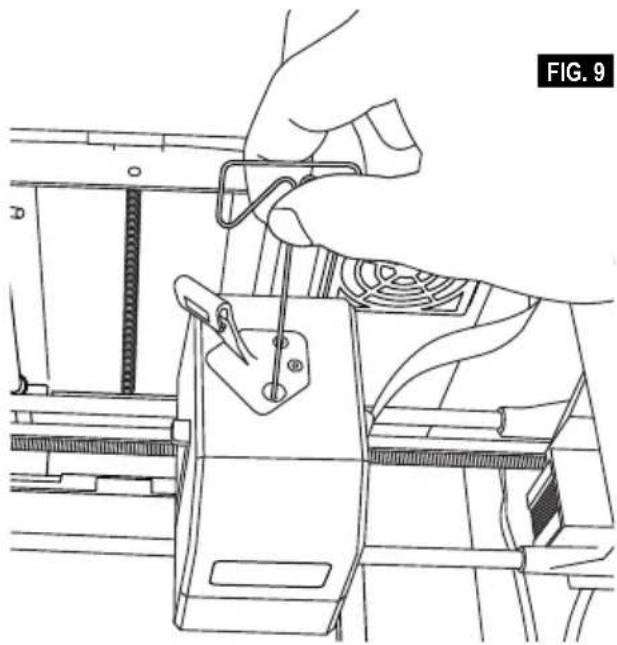
natural_image
Line drawing of a hand using a tool to adjust or install a component, no text or symbols presentUPDATING FIRMWARE VIA NETWORK
If your 3D45 is connected to WiFi, it should check for firmware updates each time it boots up. You can also update its firmware directly from the touchscreen. To update firmware:
- Tap "Tools", then tab "Updates".
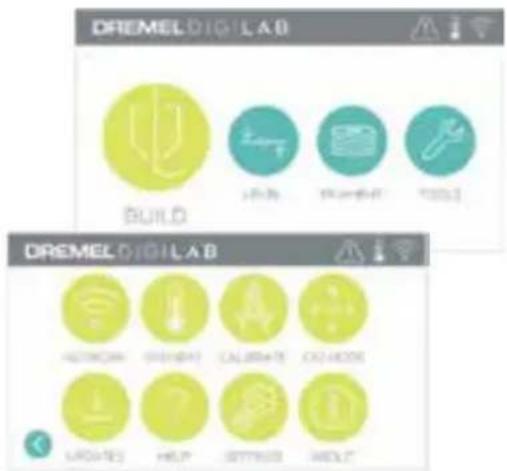
- Your 3D45 will check to see if it has the latest firmware installed and ask if you would like to update if one is needed.
- Choose accept to download and install the latest firmware.
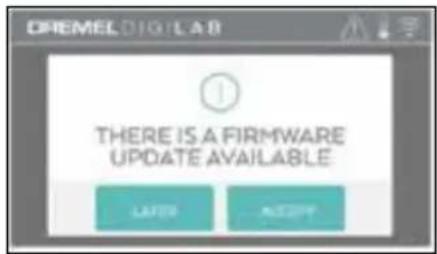
- When the 3D45 starts up and returns to the Home Screen, firmware update is complete.
UPDATING FIRMWARE MANUALLY
If your 3D45 is not connected to a network, you can update firmware directly from a USB Flashdrive.
- On your web browser go to www.dremel3d.com and download the latest 3D45 firmware file.
- Add the 3D45 firmware file to an empty, FAT32 formatted, USB flashdrive.
- Turn off your 3D45 using the ON/OFF switch.
- Insert the USB flashdrive into the USB-A port.
- Turn on your 3D45 and it should automatically detect and install the new firmware.
- Turn your 3D45 OFF, remove the USB flashdrive, and turn ON again to complete the update.
CLEANING THE EXTERIOR
Clean the 3D45's exterior with a lint free cloth. Clear the outer surfaces of any debris that is visible. To avoid damaging your Dremel 3D45 do not use water, chemicals or other cleaners on the 3D45.
CLEANING THE EXTRUDER TIP

CAUTION
USE EXTRA CARE NOT TO DAMAGE THE EXTRUDER TIP
WHEN CLEARING DEBRIS. DREMEL 3D45 WILL NOT WORK PROPERLY WITH DAMAGED EXTRUDER TIP AND WILL REQUIRE REPLACEMENT.

WARNING
DO NOT TOUCH THE EXTRUDER TIP OR HEATED BUILD
PLATFORM DURING DREMEL 3D45 OPERATION OR UNTIL IT HAS COOLED DOWN TO AT LEAST 60°C (140°F). Contact with the extruder tip or build platform during or after operation before tip and build plate has cooled may result in personal injury.
Using small needle nose pliers, pull away any plastic debris from the extruder tip. If the debris is stubborn, the extruder may need to be heated.
Wipe the touch screen with the soft, lint-free cloth. Do not spray cleaners on the touch screen.
| Problem Cause Corrective Action | ||
| Filament is not extruding or sticking to the build tape properly. | This can be caused by the build platform not being level with the extruder head. | Leveling the build platform will align the extruder head and ensure a better object quality. Cancel your object, clear build platform, level the build platform, and restart the object. |
| Dremel 3D45 froze before my object started. | Dremel 3D45 may have received conflicting commands. | Turn power switch off, wait 30 seconds, and turn power switch on. |
| Support material does not break away during cleaning and results in decreased quality of the final object. | Orientation of the part is not optimized. | Reorient the position of the 3D file in your slicing software to minimize the support material or place the support material on a non-critical surface. |
| Spaghetti mess at end of build. A layer of your object did not stick properly, model was saved with minimal surface area contacting the build platform, or object was built floating above the build platform with no support selected. | Use the preview feature in your slicing software to see the first layer height and position. Build with supports when necessary. | |
| Z-Gap offset may not be correct and the extruder tip is not properly spaced with the build platform. | ||
| Part only built halfway. Filament ran out. | Replace filament and resume build. See “No filament coming out”. | |
| No filament coming out. Clogged extruder. Contact customer service. | ||
| Filament not properly loaded. Try running a filament change again to ensure the extruder gears have properly caught the filament. | ||
| Extruder will not home. Contact customer service. | ||
| Stringy or fraying plastic layers on steep overhangs. | Object overhangs are too far apart or too steep (<45 degree angle). | Build with supports. |
| 3D45 will not find my Wi-Fi network. | Printer too far from wireless router. | Reposition 3D45 to be closer to your router. Connect to network with Ethernet. |
| 3D45 will not connect to my network. | Printer too far from wireless router. | Reposition 3D45 to be closer to your router. |
| Network password or SSID incorrect. | Re-enter your password/SSID or verify your password with your network owner. | |
| Build did not start when sent over network. | Filament ran out. Load additional filament and resume build. | |
| Doors open. Doors must be closed to start builds over your network, start build from print queue. | ||
| Model was already building The build plate must be clear to start a build over your network, clear the build plate and start build from print queue. | ||
Firmware Updates
Dremel recommends that firmware be updated whenever Dremel provides an update.
Dremel will provide firmware updating to improve performance and add additional features for the Dremel 3D45 throughout the life of the product. There are two ways of updating the Dremel 3D45: (1) Download update from dremel3d.com and install using USB memory drive. (2) Connect the Dremel 3D45 to the internet and update from the Dremel 3D45 touch screen.
Open Source Software used in this Dremel product
This product contains software components that are licensed by the holder of the rights under any version of the GNU General Public License (GPL), GNU Lesser General Public License (LGPL) or any other open source software license which requires that source code be made available. You can receive a complete machine-readable copy of the corresponding source code by sending a written request to:
Dremel
Attn: Open Source Software Officer
P.O Box 081126
Racine, WI USA 53408-1126
Your request should include: (i) the name of the Dremel product, (ii) the serial number (if applicable), (iii) the software version (if applicable), (iv) your name, (v) your company name (if applicable) and (vi) your return mailing and email address (if available).
We may charge you a nominal fee to cover the cost of the physical media and distribution.
You may send your request (i) within three (3) years of the date you received the product that included the software which is subject of your request or (ii) in the case of code licensed under the GPL version 3 for as long as Dremel offers spare parts or customer support for that product.
Warranty regarding further use of the Open Source Software:
DREMEL provides no warranty for the Open Source Software programs contained in this device, if such programs are used in any manner other than the program execution intended by DREMEL. The licenses listed below define the warranty, if any, from the authors or licensors of the Open Source Software. DREMEL specifically disclaims any warranties for defects caused by altering any Open Source Software program or the product's configuration. You have no warranty claims against DREMEL in the event that the Open Source Software infringes the intellectual property rights of a third party. Technical support, if any, will only be provided for unmodified software.
Robert Bosch (Australia) Pty Ltd (Bosch) Power Tools
Voluntary Repair or Replacement Warranty
Applicable for purchases of specified power tools, garden tools, rotary tools, 3D printing systems, pneumatic tools and measuring tools after 1 September 2015
All Bosch power tools, garden tools, rotary tools, 3D printing systems, pneumatic tools and measuring tools are carefully checked, tested and are subject to the stringent quality controls of Bosch Quality Assurance.
Important Note: Consumer Protections
If you have purchased your product in Australia, you should be aware that:
This warranty is provided in addition to other rights and remedies held by a consumer at law. Our goods come with guarantees that cannot be excluded under the Australian Consumer Law. You are entitled to a replacement or refund for a major failure and for compensation for any other reasonably foreseeable loss or damage. You are also entitled to have the goods repaired or replaced if the goods fail to be of acceptable quality and the failure does not amount to a major failure.
If you have purchased your product in New Zealand, you should be aware that:
This warranty is supplemental to any other rights and remedies you have under the Consumer Guarantees Act 1993 NZ, unless your purchase is made for commercial purposes, in which case Bosch excludes all consumer guarantees implied in the Consumer Guarantees Act 1993 NZ in respect of your product.
(A reference to “Bosch” in this Voluntary Repair or Replacement Warranty is a reference to Robert Bosch (Australia) Pty Ltd, unless from the particular context it is obvious that it is being used as a trade mark or brand name.)
Warranty
Bosch warrants, at its option, to repair or exchange those ranges of power tools, garden tools, rotary tools, 3D printing systems, pneumatic tools and measuring tools described below (Products) if such Products are faulty or defective in manufacture or materials during the warranty period which is also specified below.
Repair or replacement under this warranty does not extend to repair or replacement, or any cost of replacement, of consumables or accessories incorporated into or supplied with the Products (for example, drill bits or jigsaw blades).
This warranty only extends to repair or replacement of the Products. It does not extend to cover:
- any costs incurred by the end user in normal or scheduled maintenance of the Products; or
- any damage to property, personal injury, direct or indirect loss, consequential losses or other expenses arising from breach of this warranty. Any end user concerned with this exclusion should consider the “Important Note: Consumer Protections” above.
Warranty Period and Coverage
The following warranty period will apply in respect of the following Products in Australia and New Zealand.
- Bosch Green Tools (including measuring tools) used solely for DIY / domestic purposes: 2 years
- Bosch Professional (Blue) Tools (including measuring tools) used for commercial / professional purposes: 1 year
- Bosch Lawn and Garden Tools: 2 years
- Skil Tools: 2 years
• Dremel Corded Rotary Tools: 5 years
• Dremel Cordless Rotary Tools: 2 years
• Dremel Non-Rotary Tools: 2 years
• Dremel 3D Printers: used solely for DIY / domestic purposes: 1 year
• Dremel 3D Printers: used for commercial / professional purposes: 60 days
The warranty period commences on the date of purchase of the Product by the end user of the Product.
Optional Extended Warranty – Bosch Professional (Blue) Tools
The warranty period for Bosch Professional (Blue) Tools (details of which are available at www.bosch-pt.com.au/warranty) may be extended from 12 months to 3 years and the warranty period for Bosch Professional (Blue) Lithium Ion batteries and chargers (details of which are available at www.bosch-pt.com.au/warranty) (collectively, Extended Warranty Products) may be extended from 12 months to 2 years if registered with Bosch, as follows:
- The Extended Warranty Products must be registered with Bosch within 12 months of the date of purchase by the end user.
- Registration can only be made at www.bosch-pt.com.au/warranty or www.bosch-pt.co.nz/warranty.
- This warranty extension is not available for Bosch Professional (Blue) high frequency tools, production cordless screwdrivers, air tools, supplied accessories and normal wear items and consumables such as jig saw blades, drill bits etc.
Warranty Conditions
- The warranty period is not renewed or extended as a result of a warranty repair or replacement.
- The warranty is not transferable and is only offered to the original end user of the Product.
- The warranty does not extend to any Products that have been completely or partially disassembled.
• These warranty terms cannot be amended except in writing by an authorised representative of Bosch. - The warranty only applies to Products purchased by an end user in Australia or New Zealand from Bosch or from a reseller where the Products have been originally sold by Bosch.
- The warranty claim must meet the requirements below in respect to "How to Make a Warranty Claim."
Warranty Exclusions
This warranty will not apply to a defect or fault to the extent to which it arises:
- due to storage, handling or installation of the Products otherwise than in accordance with instructions provided for the Products by Bosch or without reasonable care;
- due to operation, use or maintenance of the Products otherwise than in accordance with instructions provided for the Products by Bosch or without reasonable care;
- due to accidental damage or to use of the Products
for a purpose or in environmental conditions for which the Products were not designed or sold, or use of the products outside the specified or normal operating ranges for such Products (such as commercial / professional use of Green Tools or Dremel 3D printers);
- as a result of changes which occur in the condition or operational qualities of the Products due to climate or other environmental influence, foreign material contamination or water entry or as a result of exposure to excessive heat or solvents;
- from normal wear and tear or when replacement or repair of parts would be part of normal maintenance or service of the Products (for example, carbon brushes, o-rings, cords, build platforms or build tape) or where the damage is only to surface coating, varnish or enamel;
- as a result of repairs, alterations or modifications to the Product which have been performed by a third party; or
• from the use of any spare parts not manufactured, sold or approved by Bosch in connection with the repair or replacement of the Product.
Neither will this warranty apply to products where damage has been caused by continued use of the products after it is known they are defective.
Wrong Deliveries and Transit Damage
Wrong deliveries, incorrect or damaged packing and transit damage claims are not warranty claims. Such cases should be directed to Bosch's Customer Service line in Australia on 1300 307 044 or in New Zealand on 0800 543 353.
How to Make a Warranty Claim
If a Product fails within the warranty period, the end user must stop using the Product and store the Product in a safe, dry environment.
The Product must be returned before the end of the Warranty Period (see Deadlines for Submitting Warranty Claims below) to the place of purchase or to a Bosch Silver Service Dealer or other Bosch Authorised Service Dealer together with proof of purchase and documentation detailing facts relevant to the claim. To locate a Bosch Silver Service Dealer or other Bosch Authorised Service Dealer, please call 1300 307 044.
For claims under the Optional Extended Warranty in respect of the Extended Warranty Products, a copy of the warranty confirmation certificate must also be provided with the warranty claim.
Costs of Submitting a Warranty Claim
For invalid claims under this voluntary warranty, Bosch will not be liable for the end user's costs in making the warranty claim, including transport or return freight.
In respect of valid claims under this supplementary voluntary warranty, the end user will not be charged for costs associated with making a warranty claim, including warranty processing costs, the cost of replacement parts or freight. Reimbursement for necessary and reasonably incurred costs or expenses in making valid warranty claims under this manufacturer's warranty may be sought from Bosch. To enquire how to make a claim for reimbursement for costs incurred in submitting a warranty claim, please call 1300 307 044 in Australia or 0800 543 353 in New Zealand. Documentary evidence in support of such claim will be required.
Deadlines for Submitting Warranty Claims
Bosch aims to rectify genuine quality problems as a priority. This is generally achieved by investigating why defective products have failed and by introducing immediate corrective action measures to prevent reoccurring warranty failures. It is therefore critical that all warranty claims are promptly submitted to Bosch as soon as the product fails, and in any event before the end of the warranty period.
Packaging
Products do not need to be returned with the original packaging to make a warranty claim.
Product Liability and Product Safety
Bosch should be informed immediately about any potential product safety concerns within and outside the warranty period. Bosch is well aware of its product liability and product safety obligations and responsibilities. It is our aim to ensure appropriate product safety standards are met in order to avoid injury, loss and damage caused by defects in any Products.
Privacy
Bosch is required to seek personal information from an end user who seeks to make a claim under this warranty.
Such personal information may be used by Bosch and/or any Authorised Service Dealer (who is authorised to process warranty claims and/or carry out warranty repairs on behalf of Bosch) for the purpose of processing such warranty claim and also for the provision of customer support and further information about Bosch's products and services (Purpose).
If an end user does not wish to provide Bosch and/or its Authorised Service Dealer with personal information, Bosch may be unable to process the end user's warranty claim or to provide the end user with additional customer support, services and information.
Bosch is committed to protecting the privacy of personal information and will act in compliance with applicable privacy laws, including the National Privacy Principles under the Australian Privacy Act 1988 (Cth) (as amended) and New Zealand's Information Privacy Principles described in the Privacy Act 1993 (NZ).
Bosch takes security measures in order to protect any personal information collected in the warranty claim process against manipulation, loss, destruction, access by unauthorized persons or unauthorized disclosure.
Bosch will not disclose any personal information to third parties other than for the Purpose or except as required by law.
An end user has the right to access the personal information Bosch or its Authorised Service Dealers hold about them. The end user can request to see, change or modify the personal information held about them, or withdraw consent for its usage, by contacting Bosch at the Bosch Contact Details below.
Bosch Contact Details
This warranty is offered by Robert Bosch (Australia) Pty Ltd (ACN 004 315 628) of 1555 Centre Road, Clayton, Victoria 3168. Please call Robert Bosch (Australia) Pty Ltd on 1300 307 044 in Australia or 0800 543 353 in New Zealand or email at
customerservice.pt@au.bosch.com if you have any queries in relation to this warranty.
DISPOSAL
The machine, accessories and packaging should be sorted for environmental-friendly recycling.
ONLY FOR EC COUNTRIES
Do not dispose of power tools with household waste!
According to the European Guideline 2012/19/EC for Waste Electrical and Electronic
Equipment and its implementation into national law, power tools that are no longer usable must be collected separately and disposed of in an environmentally-correct manner.
CONTACT DREMEL
For more information on the Dremel product range, support and hotline, go to www.dremel.com.
ROBERT BOSCH AUSTRALIA
1555 CENTRE RD
CLAYTON, VIC 3168
Australia
1300 30 70 44
New Zealand
0800 54 33 53
دليل التعليمات
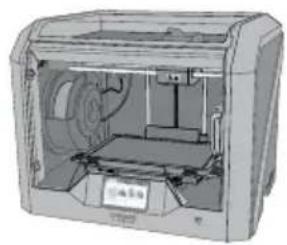
natural_image
Illustration of a printer internal structure (no text or symbols visible)Dremel 3D45
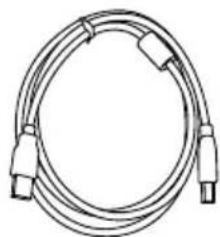
natural_image
Coiled cable with connectors, no text or symbols visibleUSB كابل
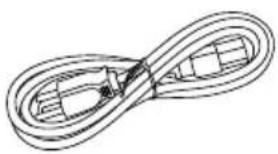
natural_image
Pure line drawing of a twisted rope or cable structure without any text, numbers, or symbolsكابل الطاقة
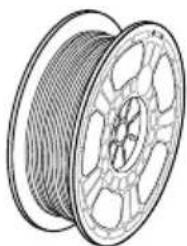
natural_image
Line drawing of a spool of cable or wire (no text or symbols)** مسلكة السلك (2)
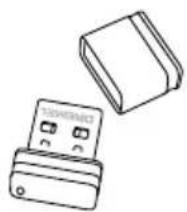
natural_image
Line drawing of two electronic components: a rectangular block and a USB card (no text or symbols)USB محرك فلاش
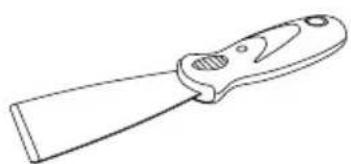
natural_image
Line drawing of a flat tool with a blade and handle (no text or symbols)أداة إخراج الأغراض
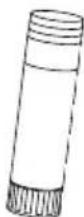
(2) قلم الصغ
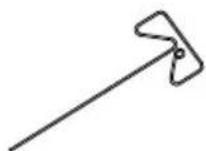
أداة إزالة العوائق
natural_image
Technical line drawing of an open computer case with internal compartments and a black arrow indicating a specific component (no text or symbols present)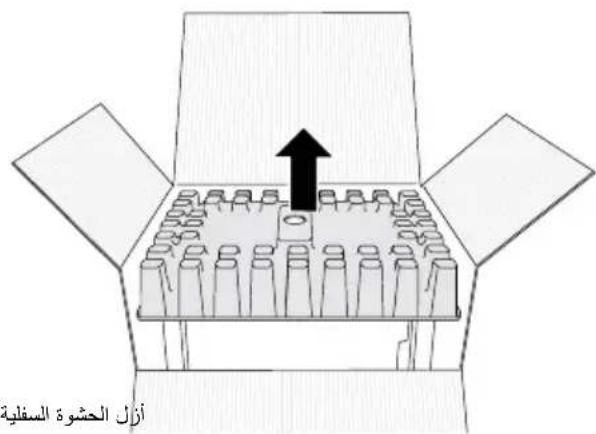
natural_image
Line drawing of an open refrigerator interior showing internal compartments and a black arrow indicating a location (no text or symbols)natural_image
Technical line drawing of a mechanical device interior with internal compartments and a black arrow indicating upward motion (no text or symbols)natural_image
Illustration of hands installing a computer into a device (no text or symbols visible)المعايرة
الإعدادات
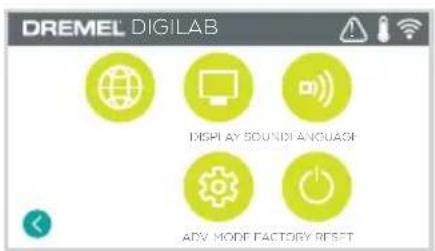
التسخين المسبق
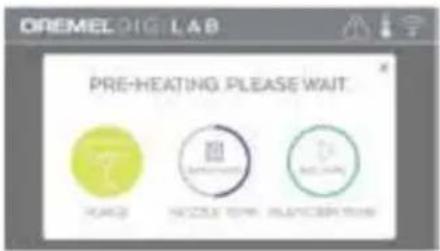
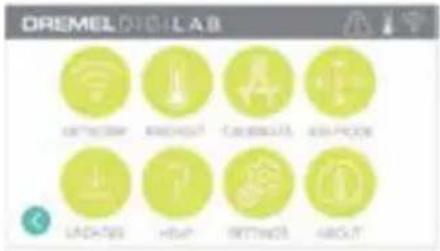
نيدة
الإعداد الأولى
natural_image
Technical line drawing of a vehicle chassis with attached cable and fan (no text or symbols)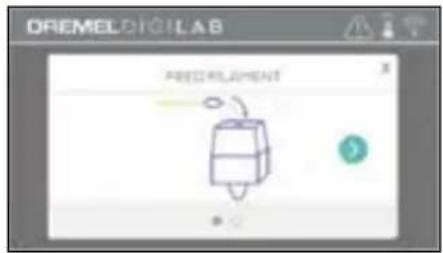
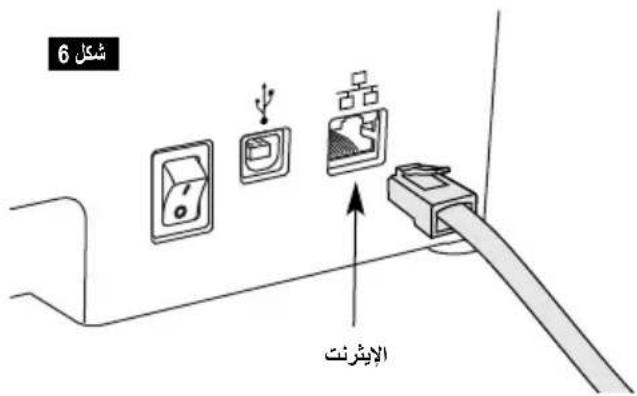
ستقوم 3D45 أولا
natural_image
Computer monitor displaying a dark image of a server room with a glowing blue overlay (no visible text or symbols)أفضل الممارسات
Attn: Open Source Software Officer
P.O Box 081126
Racine, WI USA 53408-1126
إنياني أن يتضمن طلك ما يلى: (i) اسم منتج (ii) Darremel (iii) إصدار البرنامج ( IV ) اسم شركك (iv) و (ii) دremel (iii) و (iv) و (iii) و (iv) و (iv) و (iv) و (iv) و (iv) و (iv) و (iv) و (iv) و (iv) و (iv) و (iv) و (iv) و (iv) و (iv) و (iv) و (iv) و (iv) و (iv) و (iv) و (iv) و (iv) و (iv) و (iv) و (iv) و (iv) و (ii) (ii) بريد للردن عليه et عنوان البحandes ELECTRONI (في حالة التوفر).
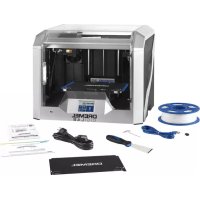
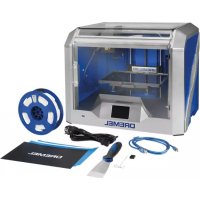
- GENERAL SAFETY WARNINGS
- WARNING
- WORK AREA SAFETY
- ELECTRICAL SAFETY
- PERSONAL SAFETY
- DREMEL 3D45 USE AND CARE
- SERVICE
- TABLE OF CONTENTS
- USED SYMBOLS
- WARNING THIS IS A CLASS A PRODUCT. IN A DOMESTIC ENVIRONMENT THIS PRODUCT MAY CAUSE RADIO INTERFERENCE IN WHICH CASE THE USER MAY BE REQUIRED TO TAKE ADEQUATE MEASURES.
- INFORMATION ON INTELLECTUAL PROPERTY
- FUNCTIONAL DESCRIPTION AND SPECIFICATIONS
- BUILDING
- WEIGHT & DIMENSIONS
- FILAMENT
- FILAMENT STORAGE
- SOFTWARE
- ELECTRICAL REQUIREMENTS
- OPERATING ENVIRONMENT
- 3D45 RESOURCES
- INTRODUCTION
- KIT CONTENTS\*
- UNPACKING
- TOUCH SCREEN
- BUILD
- BUILD MENU
- MODEL MENU
- FILE DETAILS
- BUILD STATUS
- PRINT QUEUE NOTIFICATION
- LEVEL
- TOOLS
- NETWORK
- CALIBRATE
- JOG MODE
- SETTINGS
- PREHEAT
- ABOUT
- TOUCH SCREEN ICONS
- INITIAL SETUP
- REMOTE 3D PRINTING VIA LOCAL AREA NETWORK CONNECTION USING DREMEL DIGILAB 3D SLICER
- GETTING READY TO BUILD
- CAUTION
- LOADING/CHANGING FILAMENT
- Guide Tube Filament Filament Guide Extruder intake
- 2
- PREPARING BUILD PLATFORM
- CONNECTING USB CABLE
- CONNECTING ETHERNET
- BEFORE YOU BUILD
- BUILDING FROM ON-PRINTER STORAGE
- BUILDING FROM USB FLASH DRIVE
- BUILD FROM COMPUTER
- CANCELING YOUR BUILD ON 3D45
- REMOVING YOUR OBJECT FROM THE BUILD PLATFORM
- REMOVING SUPPORTS (IF REQUIRED)
- USING THE CAMERA
- DIRECT THROUGH WEB BROWSER
- BEST PRACTICES
- UNCLOGGING THE EXTRUDER
- UPDATING FIRMWARE VIA NETWORK
- UPDATING FIRMWARE MANUALLY
- CLEANING THE EXTERIOR
- CLEANING THE EXTRUDER TIP
- Firmware Updates
- Open Source Software used in this Dremel product
- Warranty regarding further use of the Open Source Software:
- DREMEL® CONSUMER LIMITED WARRANTY
- DISPOSAL
- ONLY FOR EC COUNTRIES
- CONTACT DREMEL
- REPARATUREN
- KALIBRIEREN (CALIBRATE)
- POSITION (JOG MODE)
- 3D-FERNDRUCK ÜBER LOCAL-AREA-NETWORK-VERBINDUNG MIT DREMEL DIGILAB 3D SLICER
- TIPPS
- FIRMWARE-UPDATE ÜBER DAS NETZWERK
- DÉTAILS DU FICHIER
- REPARATION (SERVICE)
- CALIBRER (CALIBRATE)
- MODE JOG (JOG MODE)
- IMPRESSION 3D À DISTANCE VIA UNE CONNEXION À UN RÉSEAU LOCAL À L'AIDE DE DREMEL DIGILAB 3D SLICER
- AVERTISSEMENT
- CONSTRUCTION
- ATTENTION
- MEILLEURES PRATIQUES
- MISE À JOUR DU FIRMWARE PAR LE RÉSEAU
- DETALLES DE ARCHIVO
- SERVICIO
- CALIBRAR (CALIBRATE)
- MODO DE DESPLAZAMIENTO (JOG MODE)
- CONSTRUCCIÓN
- ATENCIÓN
- MEJORES PRÁCTICAS
- SÍMBOLOS UTILIZADOS
- MENU DE MODELOS (MODEL)
- COPIAR PARA IMPRESSORA (COPY TO
- ASSISTÊNCIA (SERVICE)
- MODO REGULAR (JOG MODE)
- SOBRE (ABOUT)
- IMPRESSÃO 3D REMOTA VIA LIGAÇÃO A UMA REDE LOCAL (LAN) UTILIZANDO O DREMEL DIGILAB 3D SLICER
- LIGAR O CABO USB
- ANTES DE CONSTRUIR
- BOAS PRÁTICAS
- ATUALIZAR O FIRMWARE ATRAVÉS DE UMA REDE
- APENAS PARA PAÍSES DA CE
- MENU MODELLO (MODEL)
- ASSISTENZA (SERVICE)
- CALIBRARE (CALIBRATE)
- MODALITÀ SBALZO (JOG MODE)
- STAMPA 3D IN REMOTO TRAMITE CONNESSIONE ALLA LAN CON DREMEL DIGILAB 3D SLICER
- CREAZIONE
- PROCEDURE CONSIGLIATE
- AGGIORNAMENTO DEL FIRMWARE DALLA RETE
- SOLO PER I PAESI DELLA CE
- VEILIGHEIDSWAARSCHUWINGEN
- LET OP
- BOUWSTATUS
- POSITIE (JOG MODE)
- INSTELL. (SETTINGS)
- 3D PRINTEN OP AFSTAND VIA LAN-VERBINDING MET DREMEL DIGILAB 3D SLICER
- BOUWEN
- BOUWEN VANAF COMPUTER
- GEBRUIKERSTIPS
- FIRMWARE UPDATEN VIA HET NETWERK
- DETTE ER ET KLASSE A PRODUKT. I HJEMLIGE
- INFORMATION OM INTELLEKTUEL EJENDOMSRET
- 3D45 RESSOURCER
- BYGGESTATUS [BUILD STATUS]
- FILAMENT [FILAMENT]
- SERVICE [SERVICE]
- NETVÆRK [NETWORK]
- KALIBRÉR [CALIBRATE]
- JOG TILSTAND [JOG MODE]
- INDSTILLINGER [SETTINGS]
- FJERNBETJENT 3D-UDSKRIVNING VIA LOCAL AREA NETWORK FORBINDELSE VED HJÆLP AF DREMEL DIGILAB 3D SLICER
- G∅R KLAR TIL AT BYGGE
- ADVARSEL
- BYGNING FRA USB-FLASHDREV
- BYGNING FRA COMPUTEREN [BUILD FROM COMPUTER]
- ANNULLERING AF DIN BYGNING PÅ 3D45
- GODE RÅD
- OPDATERING AF FIRMWAREN VIA NETVÆRKET
- RENG∅RING AF DEN BER∅RINGSF∅LSOMME SKÆRM
- INNEHÅLLSFÖRTECKNING
- 3D45-RESURSER
- JOGG-LÄGE
- INLEDANDE INSTALLATION
- FJÄRRUTSKRIFT I 3D VIA LOKAL NÄTVERKSANSLUTNING MED DREMEL DIGILAB 3D SLICER
- FÖRBEREDA BYGGPLATTAN
- BYGGA FRÅN MINNET I SKRIVAREN
- BYGGA FRÅN USB-FLASHMINNE
- METODTIPS
- UPPDATERA FIRMWARE VIA NÄTVERK
- SIKKERHET FOR ARBEIDSOMRÅDET
- ADVARSEL DETTE ER ET KLASSE A-PRODUKT. DETTE
- INFORMASJON OM ÅNDSRETT
- 3D45-RESSURSER
- OPPRETTINGSMODUS (JOG MODE)
- INNSTILLINGER (SETTINGS)
- 3D-FJERNUTSKRIFT VIA LOCAL AREA NETWORK (LAN)-TILKOBLING VED BRUK AV DREMEL DIGILAB 3D SLICER
- BYGGING
- BESTE PRAKSISER
- OPPDATER FATSVARE VIA NETTVERK
- OPPDATERER FASTVARE MANUELT
- TOIMINNAN KUVAUS JA TEKNISET TIEDOT
- RAKENTAMINEN
- 3D45:N TUKIRESURSSIT
- MALLI (MODEL) -VALIKKO
- FILAMENTTI
- HUOLTO
- JOG-TILA (JOG MODE)
- 3D-ETÄTULOSTUS LÄHIVERKON KAUTTA DREMEL DIGILAB 3D SLICER -OHJELMISTOA KÄYTTÄEN
- PARHAAT KÄYTÄNNÖT
- LAITEOHJELMISTON PÄIVITTÄMINEN VERKON KAUTTA
- Service (SZERVIZ)
- JOG MODE (LÉPTETŐ MÓD)
- TÁVOLI 3D NYOMTATÁS HELYI HÁLÓZATI KAPCSOLATON KERESZTÜL, A DREMEL DIGILAB 3D SLICER SZOFTVERREL
- LEGJOBB GYAKORLATOK
- РЕСУРСЫ 3D45
- SERVICE (СЕРВИС)
- CALIBRATE (КАЛИБРОВКА)
- УДАЛЕННАЯ 3D-ПЕЧАТЬ ЧЕРЕЗ ЛОКАЛЬНУЮ СЕТЬ С ПОМОЩЬЮ DREMEL DIGILAB 3D SLICER
- 3D45 资源
- 打印线材
- 服务 (SERVICE)
- JOG 模式
- 最佳实践
- 通过网络更新固件
- ΟΡΙΖΟΝΤΙΩΣΗ
- ΣΕΡΒΙΣ
- ΔΙΚΤΥΟ
- ΚΑΤΑΣΤΑΣΗ ΩΘΗΣΗΣ
- ENHMEPΩΣH TOY FIRMWARE MEΣΩ ΔΙΚΤΥΟΥ
- 3D45 KAYNAKLARI
- BUILD STATUS (YAPIM DURUMU)
- FILAMENT (FİLAMENT)
- SERVICE (SERVİS)
- JOG MODE (JOG MODU)
- DREMEL DIGILAB 3D SLICER KULLANILARAK YEREL ALAN AĞI BAĞLANTISI ÜZERINDEN UZAKTAN 3D YAZDIRMA
- EN İYI UYGULAMALAR
- BELLENİMİN AĞ ÜZERİNDEN GÜNCELLENMESİ
- INFORMACJE O WŁASNOŚCI INTELEKTUALNEJ
- DRUK
- SZCZEGÓŁY PLIKU
- SERWIS
- TRYB RE CZNY
- ZDALNE DRUKOWANIE 3D Z POZIOMU SIECI LOKALNEJ ZA POMOCA DREMEL DIGILAB 3D SLICER
- NAJLEPSZE PRAKTYKI
- Robert Bosch (Australia) Pty Ltd (Bosch) Power Tools
- Voluntary Repair or Replacement Warranty
- Applicable for purchases of specified power tools, garden tools, rotary tools, 3D printing systems, pneumatic tools and measuring tools after 1 September 2015
- Important Note: Consumer Protections
- Warranty
- Warranty Period and Coverage
- Optional Extended Warranty – Bosch Professional (Blue) Tools
- Warranty Conditions
- Warranty Exclusions
- Wrong Deliveries and Transit Damage
- How to Make a Warranty Claim
- Costs of Submitting a Warranty Claim
- Deadlines for Submitting Warranty Claims
- Packaging
- Product Liability and Product Safety
- Privacy
- Bosch Contact Details
- الإعداد الأولى
- أفضل الممارسات
Brand : DREMEL
Model : Digilab 3D45
Category : 3D Printer