
3D20 Idea Builder - 3D Printer DREMEL - Free user manual and instructions
Find the device manual for free 3D20 Idea Builder DREMEL in PDF.


| Product Type | FDM 3D Printer |
| Brand | Dremel |
| Model | 3D20 Idea Builder |
| Print Volume | 230 x 150 x 140 mm |
| Layer Resolution | 100 to 300 microns |
| Filament Diameter | 1.75 mm |
| Filament Types | PLA |
| Max Printing Speed | 100 mm/s |
| Nozzle Diameter | 0.4 mm |
| Heated Bed | No |
| Leveling | Assisted (leveling sensor) |
| Display | 5-inch Touchscreen |
| Connectivity | USB, SD card |
| Compatible Software | Dremel DigiLab 3D Slicer, Cura |
| Printer Dimensions | 381 x 381 x 483 mm |
| Weight | 13.5 kg |
| Power Supply | 100-240 V AC, 50-60 Hz |
| Max Power | 200 W |
| Noise Level | 50 dB |
| Maintenance and Cleaning | Clean nozzle with a needle, grease threaded rods |
| Safety | Automatic stop in case of jam, door sensor |
| Spare Parts and Repairability | Nozzle, build plate, belts available |
Frequently Asked Questions - 3D20 Idea Builder DREMEL
User questions about 3D20 Idea Builder DREMEL
0 question about this device. Answer the ones you know or ask your own.
Ask a new question about this device
Download the instructions for your 3D Printer in PDF format for free! Find your manual 3D20 Idea Builder - DREMEL and take your electronic device back in hand. On this page are published all the documents necessary for the use of your device. 3D20 Idea Builder by DREMEL.
USER MANUAL 3D20 Idea Builder DREMEL
IMPORTANT Read Before Using
IMPORTANT Lire avant usage
IMPORTANTE Leer antes de usar

natural_image
Silhouette of a person reading a book inside a circle (no text or symbols)Operating/Safety Instructions Consignes d'utilisation/de sécurité Instrucciones de funcionamiento y seguridad
3D20 Idea Builder

natural_image
Illustration of a DREMEL 3D printer with internal components and control panel (no text or symbols on the device itself)DREMEL®
P.O. Box 081126 Racine, WI 53408-1126
Call Toll Free for Consumer Information & Service Locations Pour obtenir des informations et les adresses de nos centres de service après-vente, appelez ce numéro gratuit Llame gratis para obtener información para el consumidor y ubicaciones de servicio
1-844-4DRML3D (1-844-437-6533) www.digilab.dremel.com
For English Version See page 2
General Safety Warnings....3
Symbols....5
FCC Compliance ....6
Information on Intellectual Property....6
Specifications ....7
3D20 Resources....8
Glossary of Terms....8
Getting To Know Your Dremel 3D20....10
Introduction....12
Kit Contents and Unpacking 12
Touch Screen....14
Software Install and Registration....21
Dremel Software Overview....22
Installing Filament and Getting Ready to Build....25
Building....28
Building From The SD Card 29
Building From Your Computer ....30
Removing Your Object....31
Troubleshooting 32
Maintenance and Service ....33
Best Practices....34
Open Source Software 35
Dremel® Consumer Limited Warranty 36
| Safety SymbolsThe definitions below describe the level of severity for each signal word. Please read the manual and pay attention to these symbols. | |
| This is the safety alert symbol. It is used to alert you to potential personal injury hazards. Obey all safety messages that follow this symbol to avoid possible injury or death. | |
| DANGER indicates a hazardous situation which, if not avoided, will result in death or serious injury. | |
| WARNING indicates a hazardous situation which, if not avoided, could result in death or serious injury. | |
| CAUTION, used with the safety alert symbol, indicates a hazardous situation which, if not avoided, will result in minor or moderate injury. | |
General Safety Warnings
WARNING
Read all instructions in this manual and familiarize yourself with the Dremel 3D20 before setup and use. Failure to comply with the warnings and instructions may result in fire, equipment damage, property damage, or personal injury.
READ ALL INSTRUCTIONS
SAVE ALL WARNINGS AND INSTRUCTIONS FOR FUTURE REFERENCE
Work Area Safety
Keep work area clean and well lit. Cluttered or dark areas invite accidents.
Do not operate Dremel 3D20 in the presence of flammable liquids, gases or dust. Dremel 3D20 creates high temperatures which may ignite the dust or fumes.
Store idle 3D20s out of reach of children and other untrained persons. Injury can occur in hands of untrained users.
Electrical Safety
Always use the Dremel 3D20 with a properly grounded outlet. Do not modify Dremel 3D20 plug. Improper grounding and modified plugs increase risk of electric shock.
Do not use Dremel 3D20 in damp or wet locations. Do not expose Dremel 3D20 to rain. Presence of moisture increases risk of electric shock.
Do not abuse the cord. Never use the cord for pulling or unplugging the Dremel 3D20. Keep cord away from heat, oil, sharp edges or moving parts. Damaged or entangled cords increase the risk of electric shock.
Avoid using this product during an electric storm. There may be a remote risk of a power surge from lightning that may result in electric shock hazard.
In case of emergency unplug Dremel 3D20 from outlet.
Personal Safety
Stay alert, watch what you are doing and use common sense when operating a Dremel 3D20. Do not use Dremel 3D20 while you are tired or under the influence of drugs, alcohol or medication. A moment of inattention while operating Dremel 3D20 may result in personal injury.
Use personal protective equipment. The use of protective equipment such as heat resistant gloves and safety glasses will reduce the risk of personal injuries.
Dress properly. Do not wear loose clothing or jewelry. Keep your hair, clothing and gloves away from moving parts. Loose clothes, jewelry or long hair can be caught in moving parts.
Dremel 3D20 Use and Care
Before every use check Dremel 3D20 for misalignment or binding of moving parts, breakage of parts and any other condition that may affect the Dremel 3D20's operation. If damage is suspected have the Dremel 3D20 repaired by authorized Dremel service center before use. Use of Dremel 3D20 when damaged may result in poor quality of object creation, further equipment damage, property damage or personal injury.
Do not touch the extruder tip during Dremel 3D20 operation or until it has cooled down to at least 60°C (140°F).
Contact with the extruder tip during or after operation before tip has cooled may result in personal injury.
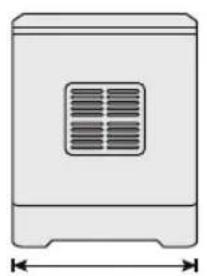
Set up the Dremel 3D20 in a well-ventilated area. Provide at least 8 inches of unobstructed spacing around Dremel 3D20. Dremel 3D20 melts plastic during building. Plastic odors emitted during Dremel 3D20 operation may irritate eyes and airways. Locating Dremel 3D20 close to surrounding objects prevents proper ventilation.
Do not reach inside the Dremel 3D20 while it is in operation. Contact with Dremel 3D20 moving parts during operation may result in poor build quality, equipment damage or personal injury.
Do not leave the Dremel 3D20 unattended during operation. Use of Dremel 3D20 by persons unfamiliar with these warnings and instructions may result equipment or property damage and personal injury.
Use only DREMEL PLA filament. Use of filament not authorized by Dremel may result in equipment and property damage.
Ensure small objects created by Dremel 3D20 are not accessible to young children. Small objects are potential choking hazards for young children.
Do not create illegal or inappropriate objects using Dremel 3D20.
Do not use Dremel 3D20 to create objects intended for use with candles, liquid fuels, and other heat sources. Plastic may melt when exposed to fire or other heat sources. Such use of objects created by Dremel 3D20 may result in fire, property damage and personal injury.
Do not use Dremel 3D20 to create objects intended for food or drink applications such as preparation, decoration, storage, or consumption. Such use of objects created by Dremel 3D20 may result in illness or personal injury.
Do not use Dremel 3D20 to create objects intended with use with electrical components or housings of electrical components. PLA plastic is not suitable for electrical applications. Such use of objects created by Dremel 3D20 may result in property damage and personal injury.
Do not put plastic objects in or around your mouth. PLA plastic is not suitable for food or drink preparation and food utensils. Such use of objects created by Dremel 3D20 may result in illness or personal injury.
Do not use Dremel 3D20 to create objects intended for chemical storage. PLA plastic is not suitable for chemical storage. Such use of objects created by Dremel 3D20 may result in property damage and personal injury.
Do not modify Dremel 3D20 or alter factory settings. Modifications may result in equipment and property damage, and personal injury.
Do not expose Dremel 3D20 to temperatures exceeding 70°C (158°F). Dremel 3D20 may become damaged. Dremel 3D20 is intended to operate in
temperature between 16-29°C (60 - 85°F).
Do not move or bump Dremel 3D20 or the extruder during operation. The object may build incorrectly.
Do not change filament spool unless the building process is completed, stopped, or paused. Changing the filament during building will cancel the object and may damage the extruder.
Do not pull the filament out of the extruder. Pulling filament out of the top of the extruder can result in clogs. Follow on-screen instructions to properly load filament.
Use extra care not to damage the extruder tip when clearing debris. Dremel 3D20 will not work properly with damaged extruder tip and will require replacement.
Before every build make sure that the build platform is covered with Dremel specified build tape. Use of improper build tape may result in equipment damage and poor object build quality.
Be aware of your body position when using hand tools to remove objects from the build platform. Sudden tool slip and improper body position during object removal from the build platform may result in personal injury.
Avoid scratching the build platform when removing objects. Scratches in the build platform will result in improper object creation.
Dremel is not responsible for structural integrity or utility of objects created using Dremel 3D20. Structural models created by inexperienced designers may result in property damage and personal injury.
Service
Always unplug Dremel 3D20 from its power before performing any service procedures. Failure to do so may result ion personal injury and equipment damage.
Have your Dremel 3D20 serviced only by an authorized Dremel service center using only Dremel replacement parts. This will ensure that proper operation and safety of Dremel 3D20 is maintained.
Use only Dremel approved materials and components. Use of object materials, or 3D objects other than Dremel® approved object materials and genuine Dremel® components may void warranty.
Symbols
IMPORTANT: Some of the following symbols may be used on your tool. Please study them and learn their meaning. Proper interpretation of these symbols will allow you to operate the tool better and safer.
| Symbol Designation / Explanation | |
| V Volts (voltage) | |
| A Amperes (current) | |
| Hz Hertz (frequency, cycles per second) | |
| W Watt (power) | |
| kg Kilograms (weight) | |
| min Minutes (time) | |
| s Seconds (time) | |
| ∅ | Diameter (size of drill bits, grinding wheels, etc.) |
| 0 Off position (zero speed, zero torque...) | |
 | Arrow (action in the direction of arrow) |
 | Alternating current (type or a characteristic of current) |
 | Direct current (type or a characteristic of current) |
 | Alternating or direct current (type or a characteristic of current) |
| [A2XH] | Earthing terminal (grounding terminal) |
 | Warning symbol, alerts user to warning messages |
 | Hot surface hazard symbol. Contact may cause burn. Allow to cool before servicing. |
 | Read manual symbol, alerts user to read manual |
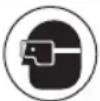 | Wear eye protection symbol |
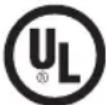 | This symbol designates that this tool is listed by Underwriters Laboratories. |
 | This symbol designates that this tool is listed by Underwriters Laboratories, to United States and Canadian Standards. |
Symbol Designation / Explanation
FCC Compliance
NOTE: This equipment has been tested and found to comply with the limits for a Class B digital device, pursuant to Part 15 of the FCC Rules. These limits are designed to provide reasonable protection against harmful interference in a residential installation. This equipment generates, uses, and can radiate radio frequency energy and, if not installed and used in accordance with the instructions, may cause harmful interference to radio communications. However, there is no guarantee that interference will not occur in a particular installation. If this equipment does cause harmful interference to radio or television reception, which can be determined by turning the equipment off and on, the user is encouraged to try to correct the interference by one or more of the following measures:
- Reorient or relocate the receiving antenna.
- Increase the separation between the equipment and receiver.
- Connect the equipment into an outlet on a circuit different from that to which the receiver is connected.
- Consult the dealer or an experienced radio/TV technician for help.
Changes and Modifications not expressly approved by the manufacturer or registrant of this equipment can void your authority to operate this equipment under Federal Communications Commission's rules.
Information on Intellectual Property
The Dremel 3D20 is intended for 3D printing objects from digital files that you create or own, or have the right to print using the Dremel 3D20. When making objects using the Dremel 3D20, it is your responsibility to ensure that you do not infringe any third party intellectual property rights or violate any applicable laws or regulations, such as U.S. or foreign intellectual property laws. The Dremel 3D20 may not be used to make objects protected by intellectual property rights owned by third parties without such third parties' permission. Using the Dremel 3D20 to do any of the following may require the permission of third parties: to make a duplicate or facsimile (in whole or in part) of any object not created by you, to make an object from a digital file you do not own, or to make an object from a scan of a physical object that you did not create. It is your responsibility to obtain such permission. In some cases, you may not be able to obtain such permission. Where such permission cannot be obtained, you should not 3D print such object, or you do so at your own risk. You may not modify, reverse engineer, decompile, or disassemble the Dremel 3D20 or its software or firmware, except as permitted by applicable law. If you use the Dremel 3D20 in any way other than as recommended and described in these Operating/Safety Instructions, you do so at your own risk. Using the Dremel 3D20 to make objects that infringe any intellectual property rights owned by third parties could result in civil or criminal prosecution and penalties, and you could be liable for money damages, fines, or imprisonment.
SAVE THESE INSTRUCTIONS
Functional Description and Specifications
BUILDING
Extruder: Single extrusion
Extruder temperature: Up to 230°C (397°F)
Operating Interface: 3.5" full color IPS touch screen
Maximum Build Volume: 9" x 5.9" x 5.5"
(230mm x 150mm x 140mm)
Layer Thickness: 4 mil | 0.004 inches 100
microns | 0.10 mm
Filament Colors: See
www.digilab.dremel.com for color choices
SD Card: Up to 32GB in size (3D20 will not work with SD cards larger than 32GB)
Internal Storage: 4GB
WEIGHT & DIMENSIONS
Weight (without spool): 8.8kg (19lbs 8oz)
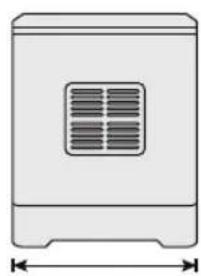
Dimensions: 19.1" x 15.7" x 13.2" (485mm x 400mm x 335mm)
FILAMENT
ONLY works with Dremel PLA filament
Filament: 1.75mm PLA
(Biodegradable/Renewable)
FILAMENT STORAGE
All polymers degrade with time. Do not unpack until filament is needed. Filament should be stored at room temperature: 16-29°C (60-85°F)
SOFTWARE
Dremel 3D20 comes with complimentary Dremel 3D software for Windows and Mac OSX. This application converts your 3D digital files into buildable files.
MINIMUM HARDWARE REQUIREMENTS
A PC with these minimum requirements will be required to run the Dremel® 3D Software
Processor: Multi-core processor - 2 GHz or faster per core
System RAM: 2 GB
Screen Resolution: 1024x768
USB port
WINDOWS REQUIREMENTS
Dremel® Software runs on 32 and 64-bit
Operating Systems
Windows Vista or later
MAC OSX REQUIREMENTS
Dremel® Software runs on Mac OSX 10.8 or later
ELECTRICAL REQUIREMENTS
3D20 input rating: 120V, 60Hz, 1.2A
OPERATING ENVIRONMENT
Room Temperature: 16-29°C (60 - 85°F)
Level workspace
Dry workspace environment

natural_image
Simple line drawing of a rectangular appliance with a side panel and dimension lines (no text or symbols)
3D20 Resources
| Resource Description | Location | |
| Quick Start Guide Provides illustrated walkthrough of how to un-box your 3D20 and start building out of the box. | Printed version of the Quick Start Guide is located in the rectangular component carton. It is also available on www.digilab.dremel.com | |
| 3D20 Website Provides the latest 3D20 software, product information, and customer support. | www.digilab.dremel.com | |
| 3D20 Customer Support | Contact Dremel for product support, maintenance, and service. | 1-844-4DRML3D(1-844-437-6533)www.digilab.dremel.com |
| Dremel 3D20 Software | Allows you to upload, edit, and build 3D files. You can also change device settings and order supplies. | Installed from www.digilab.dremel.com or from SD card provided with the Dremel 3D20. |
Glossary of Terms
Term Definition
| Build Platform The flat surface used by your Dremel 3D20 to build objects. | |
| Build Platform Clip Clip located at the front of the build platform base that is used to secure the build platform in place. | |
| Build Tape Adhesive tape similar to blue painter's tape that improves the consistency of your objects and helps them stick to the build plate surface. | |
| Build Volume The three dimensional (3D) amount of space that an object will use once it is completed. Your Dremel 3D20 has a maximum build volume which means that objects with a larger build volume cannot be built unless they are resized or broken into sub-objects. | |
| Door Your Dremel 3D20 has a door located on the front panel. This allows for easy access to the build platform, extruder, filament, and your objects. This door is made with a transparent material so you can monitor the progress of your objects while keeping the build environment stable. | |
| Lid | Your Dremel 3D20 has a removable lid on the top. This allows for more access to the build platform, extruder, filament, and objects when necessary. |
| Limit Switch | Switch that is activated by the motion of the extruder or build platform when the end of travel is reached. |
| Extruder | An assembly that uses gears to pull filament through the extruder intake, heat the filament to the build temperature, and push the heated filament out of the extruder tip |
| Extruder Fan | A fan used to cool the outer assembly of the extruder and gear motor. |
| Extruder Intake An opening located at the top of the extruder where filament is inserted for building. | |
| Extruder Push Lever A lever located on the side of the extruder that is used to loosen the grip of the extruder gear motor. | |
| Extruder Tip A nozzle located at the bottom of the extruder where heated filament is forced out for building. | |
| Filament A threadlike strand of plastic material. | |
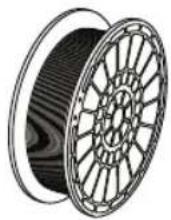
| Filament Spool A cylindrical piece on which a long strand of filament is wound for storage and continuous use. | |
| Filament Guide Tube A plastic piece that guides the filament from the filament spool through a passage in the outer housing of your Dremel 3D20. | |
| Leveling Knobs Knobs located under the build platform base that are used to create proper spacing between the extruder tip and the build platform. | |
| Leveling Tool Calibrated leveling pad with detailed markings and directions for use. | |
| PLA A bioplastic derived from renewable resources such as corn starch. | |
| Needle Nose Pliers Common tool used to hold small objects and to grab excess material that may be too hot to touch directly. | |
| Object Removal Tool A tool used to separate your objects from the build platform. | |
| SD Card A portable memory card used on a wide array of devices such as cameras. | |
| Spool Holder A plastic piece located to the left of the build platform inside your Dremel 3D20 build area that is designed to hold a filament spool. | |
| Spool Lock | A plastic piece which locks the filament spool to the spool holder. This piece is inserted through the center of the filament spool, into the spool holder, and turned to lock. |
| Stepper Motor | A brushless DC electric motor used to drive the guide rails and extruder gears. |
| .STL File A common digital file format used in a wide range of 3D model software. This file is created in 3rd party 3D software or downloaded from www.digilab.dremel.com. | |
| .3dremel File | Dremel's digital file format that is used by your Dremel 3D20 to properly process models. |
| .G3Drem File | A buildable file format compatible with your Dremel 3D20. |
| Touch Screen | Full color display that is touch activated. It allows you to monitor your Dremel 3D20 and objects while also providing commands directly to your Dremel 3D20 without the use of a computer. |
| Unclog Tool | A tool used to clear the extruder of excess debris. |
| X-Axis Guide Rails | A set of rails on either side of the extruder that allow a stepper motor to move the extruder to the left or right side of the build area. |
| Y-Axis Guide Rails | A set of rails on either side of the build area that allow a stepper motor to move the extruder to the front or back of the build area. |
| Z-Axis Guide Rails | A set of rails located at the back of the build area that allow a stepper motor to move the build platform up or down. |
Getting To Know Your 3D20
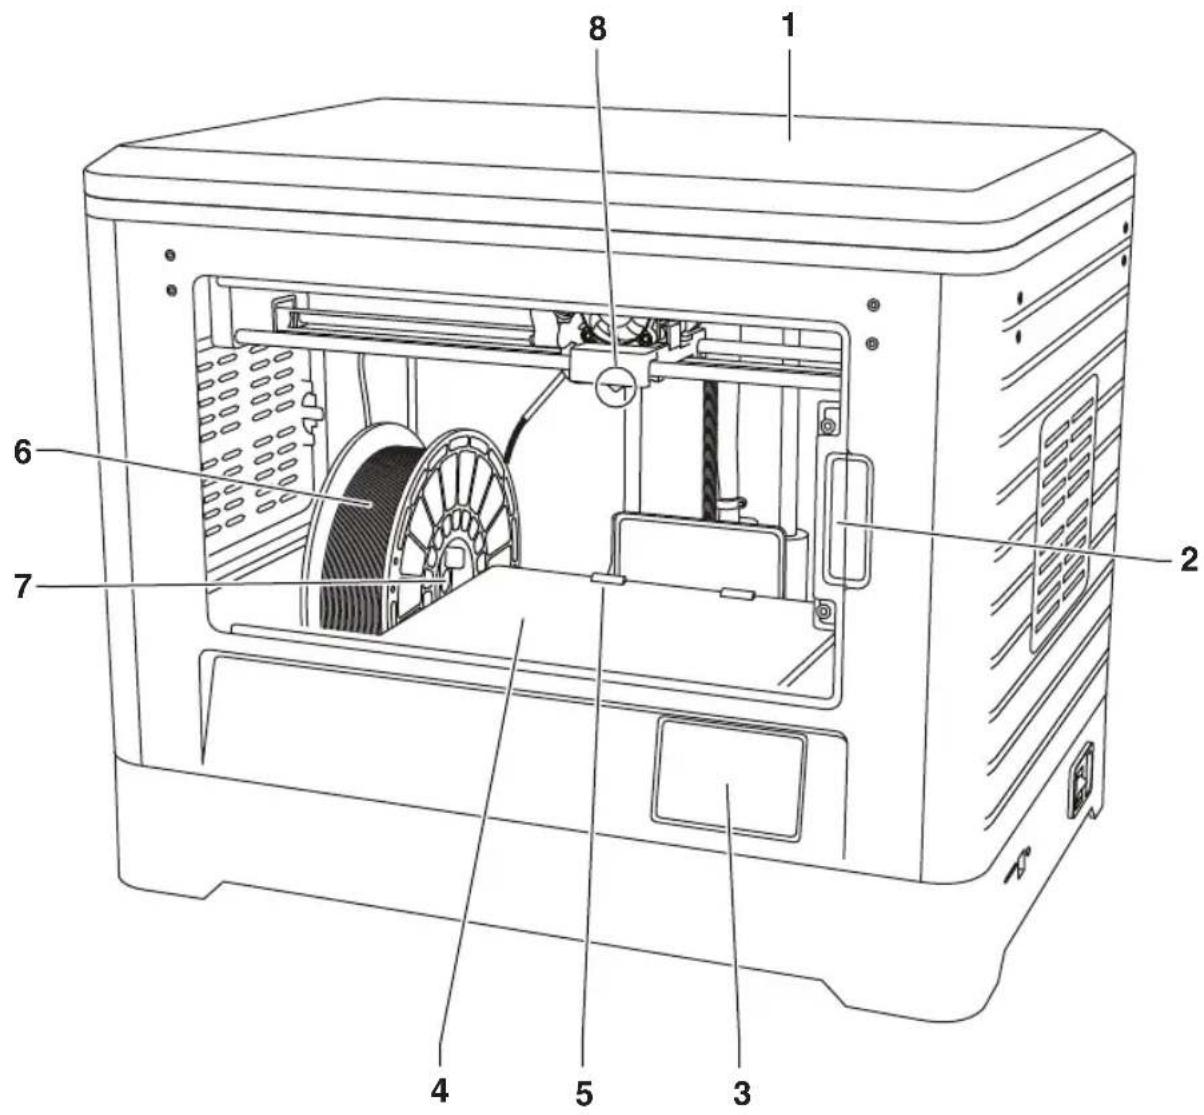
- Lid
- Door
- Touch Screen
- Build Platform
- Build Platform Clips
- Filament Spool
- Filament Spool Holder/Lock
- Extruder Tip
- Extruder Fan
-
Extruder
-
Extruder Intake
- X-Axis Guide Rails
- Stepper motor (1 of 3)
- Z-Axis Guide rail
- Filament Guide Tube
- Y-Axis Guide Rails
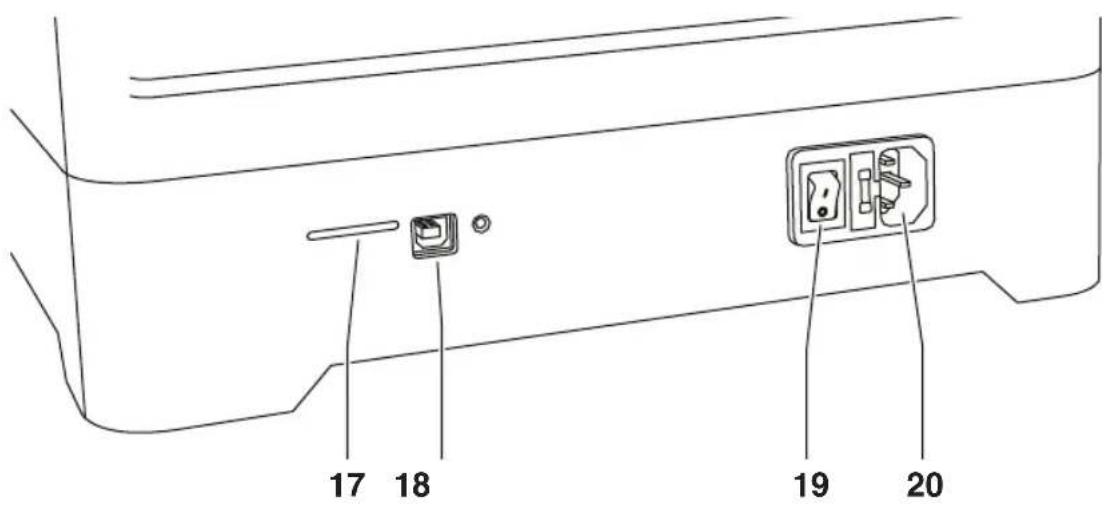
- SD card Input
- USB Input
- Power Switch
- Power Input
Getting To Know Your 3D20
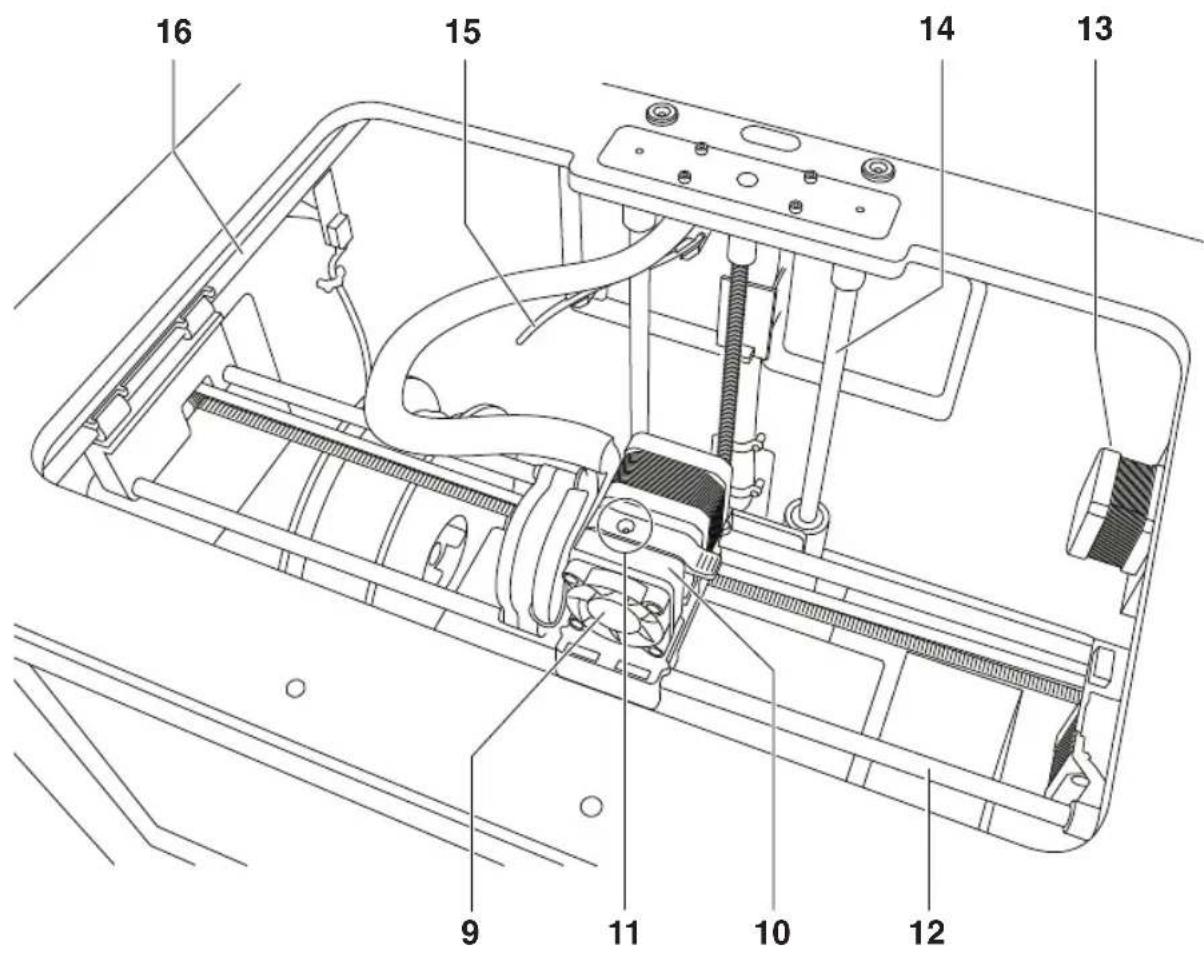

Introduction
Welcome to the world of Dremel 3D. Our mission is to mentor you through the 3D building process and share best practices for bringing your ideas to life. 3D building is a process that will involve experimentation and persistence. Thankfully, the Dremel experts are here to make your job easier with online tips and live support. With Dremel, you can build on your own ideas, build them better and make them yours.
Kit Contents

natural_image
Line drawing of a 3D printer with open casing and internal structure (no text or symbols)

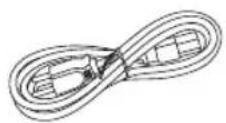
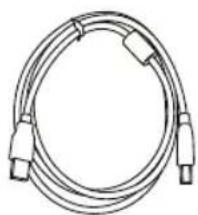
Dremel 3D20 Instruction Manual Quick Start Guide 1 Filament Spool*

natural_image
Coiled cable with connectors and connectors (no text or symbols visible)
Spool Lock Power Cable USB Cable SD Card
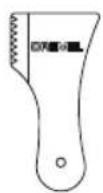

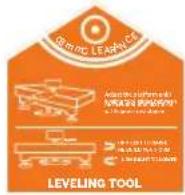
Build Tape Object Removal Tool Unclog Tool Leveling Tool
*Do not store in moist or hot environment.
Unpacking
- Place box on table and cut tape.
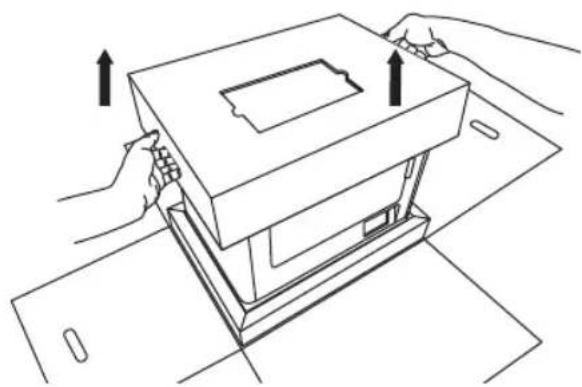
- Lift outer box and allow inner box to open.

natural_image
Line drawing of two hands pressing a rectangular block with upward arrows indicating force or motion (no text or symbols)- Remove the kit contents located inside.

natural_image
Line drawing of a hand placing a paper into a stack of documents on top of a filing cabinet (no text or symbols)- Remove carton lid from top of your Dremel 3D20.
natural_image
Line drawing of hands installing or adjusting a device casing with an upward arrow indicator (no text or symbols present)- Remove insert from top of your Dremel 3D20.
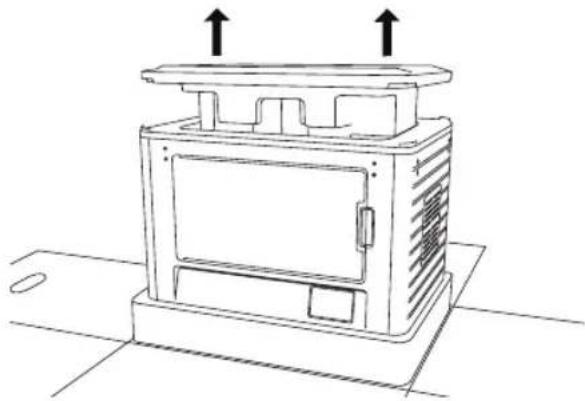
natural_image
Line drawing of a box-like device with two upward arrows indicating top and bottom components (no text or symbols)-
Remove tape from your Dremel 3D20 door.
-
Firmly lift the build platform to the top position.
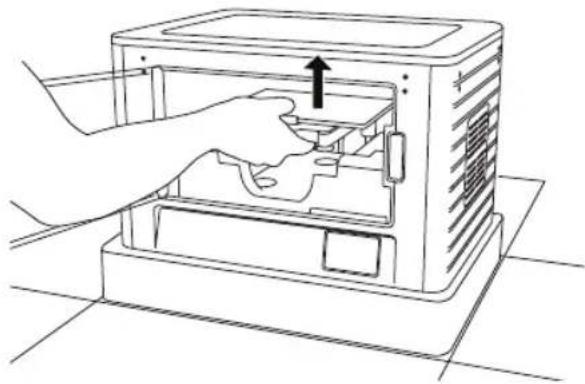
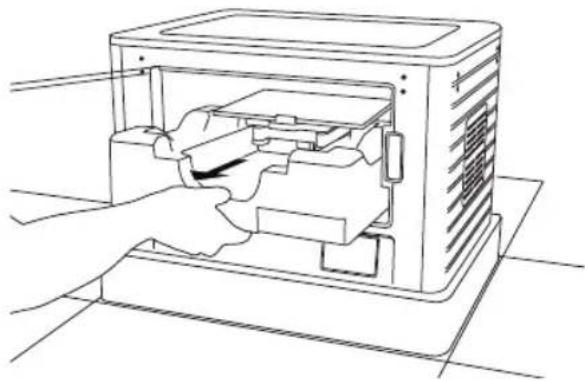
natural_image
Line drawing of a 3D printer casing with an arrow indicating a component, no text or symbols present- Remove inserts from inside of your Dremel 3D20.
natural_image
Technical line drawing of a mechanical device with internal components and mounting base (no text or symbols)- Using a firm grip, lift your Dremel 3D20 out of packaging and place gently on stable work surface.
Tip: Keep packaging for future transportation and storage.
Touch Screen
Using your Dremel 3D20 without a computer is easy with the onboard software and full color touch screen.
Before building your model we want to familiarize you with the touch screen menu structure and options.

WARNING
Observe all provided warnings and safety instructions when using the
A WARNING Dremel 3D20. Failure to do so may result in fire, equipment damage, property damage or personal injury.
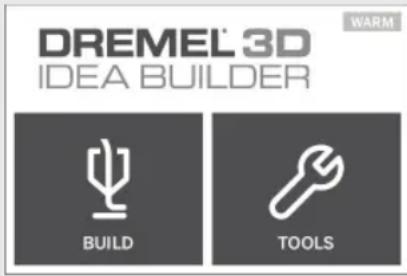 | BUILD |
 | Select a model file from your Dremel 3D20's onboard memory by tapping the Dremel 3D20 icon or select a model file from SD card by tapping the SD card icon. |
 | After a model is selected, a pop-up window will appear on the touch screen with the following options: |

BUILD
Tapping this option will begin the building process while displaying useful information and object status.

STOP – Tapping this option will cancel the object. You will be asked whether to cancel building or continue building.
PAUSE/PLAY – Tapping this option will pause or resume the building process. This will allow you to access the "filament" button.
FILAMENT – Tapping this option will allow you to load new filament while the build is paused.

COPY
Tapping this option will allow you to copy a model file from an SD card to your Dremel 3D20 onboard memory. You cannot copy a model file from your Dremel 3D20 to an SD card.

COPY MODEL
Tapping this option will confirm your decision to copy your model file from your Dremel 3D20's onboard memory or an SD card.

COPY MODEL SUCCESSFUL
A pop-up alert notifying you that the model file has been successfully copied.

DELETE
Tapping this button to permanently delete the selected model file from the onboard Dremel 3D20 memory drive or an SD card.

DELETE MODEL
A pop-up will ask you to confirm that you want to permanently delete a model file from your Dremel 3D20's onboard memory or an SD card.
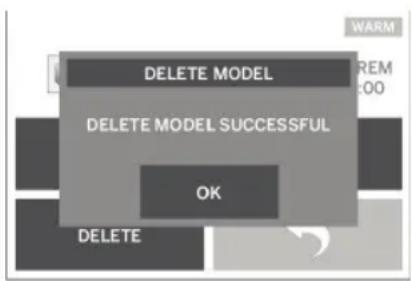
DELETE MODEL SUCCESSFUL
A pop-up alert notifying you that the model file has been successfully deleted.

RETURN
Return to previous menu.

TOOLS
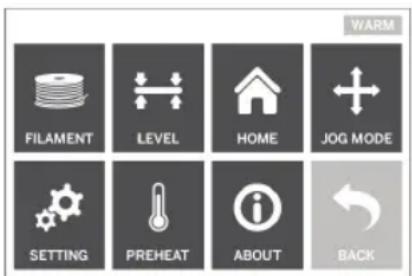
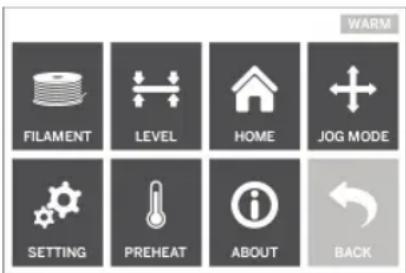
FILAMENT
Tapping this option will instruct your Dremel 3D20 to begin heating the extruder for loading filament (see page 25 for instructions on loading filament). The touch screen will display a status bar and will let you know when it is time to load the filament.
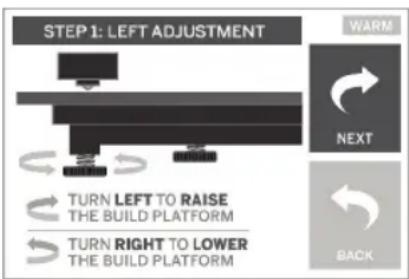
LEVEL
Tapping this option will begin the build platform leveling process (see page 27 for instructions on leveling the build platform). The touch screen will display instructions on how to level the build platform.
flowchart
graph TD
    A["STEP 1: LEFT ADJUSTMENT"] --> B["TURN LEFT TO RAISE THE BUILD PLATFORM"]
    A --> C["TURN RIGHT TO LOWER THE BUILD PLATFORM"]
    B --> D["WARM"]
    C --> E["BACK"]

HOME
Tapping this option moves the extruder and build platform to the zero position.


flowchart
graph TD
    A["EXTRUDER"] --> B["Y+ FORWARD"]
    B --> C["X- LEFT"]
    B --> D["X+ RIGHT"]
    D --> E["Y- BACK"]
    F["BUILD PLATFORM"] --> G["RAISE"]
    F --> H["LOWER"]
    I["WARM"] --> F
JOG MODE
Tapping this option will display the options for positioning the extruder and build platform along the X-axis, Y-Axis, and Z-axis.

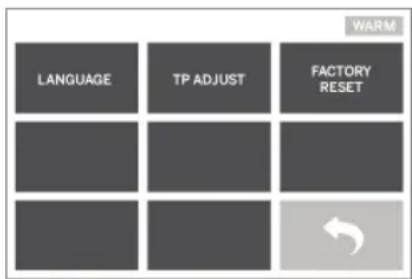
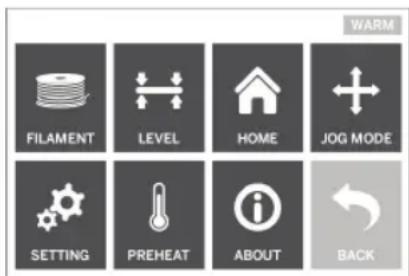
SETTING
Tapping this option will allow you to change the manufacturer settings for language or revert back to manufacturer settings.

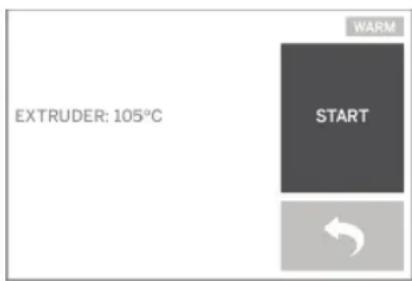
PREHEAT
Tapping this option will begin preheating the extruder for building or excess debris removal. The touch screen will display the approximate extruder temperature. You can use the touch screen to START or STOP the preheating process at any time.

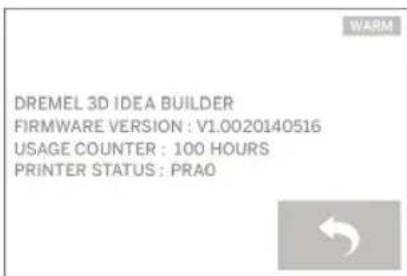
ABOUT
Tapping this option will display your Dremel 3D20 serial number, current firmware version, usage (hours), and the Dremel 3D20 status.

RETURN
Return to previous menu.
Software Install
-
Go to www.digilab.dremel.com.
-
From a PC: Download and install software onto your PC.
a. Download the Dremel 3D software from www.digilab.dremel.com.
b. Click on the file in the folder location that you downloaded the file. The install wizard will open.
c. Follow the prompts in the install wizard to load the software on your computer.
- From a MAC: Download and install software onto your MAC.
a. Click Downloads and select Dremel 3D software. Double click on the zip file and the the Dremel 3D installer will appear.
b. Double click on the Dremel 3D installer to make a new window open. Drag the install file to the APPLICATIONS folder.
c. If the "Drag to Install" window did not open, locate the Dremel 3D driver in you device panel. Click on Dremel 3D to download software.
NOTE: Safari users will not have to unzip the INSTALLER.DMG file.
d. Click NEXT to launch the setup wizard. The Dremel 3D software setup wizard will guide you through the steps to install the software on your computer. Click NEXT to launch the setup wizard.

natural_image
Technical line drawing of a mechanical component with a rod inserted into a housing (no text or symbols)Connecting USB Cable
-
Ensure power switch is in the off position.
-
Plug your Dremel 3D20 into the computer with the USB cable.
-
Open software.
-
Turn your Dremel 3D20 on using the power switch to sync your computer to your Dremel 3D20.
Dremel Software Overview

1 TOOLBAR ICONS
The toolbar icons in the Dremel 3D Software lets you load, share, build, view, move, rotate, and scale your objects.
Load – Click on "Load" and select a .STL file from your computer. The model that you selected will appear on the Dremel 3D20 home screen. The software's home screen is a simulation of your Dremel 3D20's build platform.
Build – Dremel 3D Software gives you the ability to select build quality settings. This allows you to customize both the build quality and build time.
a. Export Option – Saves your model file to local drive or portable memory drive for building later.
b. Resolution Options – Models set to Standard resolution will be built using the
default settings. "Standard" resolution builds will build quickly and have good surface quality. Models set to "Fast" resolution will be built with thicker layers and will build faster. Models set to "Detailed" resolution will have finer layers and will build more slowly.
View – Changes your view of the Dremel 3D20 home screen to one of six viewing angles.
TIP: You can view the Dremel 3D20 home screen from any angle by holding the right click button of your mouse and moving the mouse. You can also use your mouse wheel to zoom in and out.
Move – Change your object location on the build platform using X, Y, and Z axis positioning. You can also center your object in the build area and ensure that your object is located on the platform. You can choose to enter a custom axis position value.
| X | Moves the model to the left or right side of the build area. |
| Y | Moves the model to the front or back side of the build area. |
| Z | Moves the model up and down in relation to the build platform. |
a. On Platform – Places the model onto the build platform.
b. Center – Centers the model on the 3D build area.
c. Reset – Resets the model position to the original position.
Rotate - Changes the orientation of your object on the build platform using X, Y, and Z axis positioning. You can choose to rotate your object +/- 90 degrees or enter a custom axis position value. You can reset the model to the original orientation.
Scale – Change the size of your object on the build platform using X, Y, and Z positioning. You can choose to enter a custom scale value in X,Y, and Z. You can also increase the size of your object by a percentage of its original design.
| X | Rotates the model towards or away from the front of the build area. |
| Y | Rotates the model to towards the left or right side of the build area. |
| Z | Rotates the model clockwise or counterclockwise in the build area. |
a. Maximize - Uniformly scale the model to the largest size possible for building.
b. Reset – Undo all scale changes. Model reverts back to original size.
TIP: If your object was designed in using inches (Imperial Units), you can convert to mm (metric) units by increasing your object by 2540%.
Idea Builder – Check the status of your Dremel 3D20. As long as your Dremel 3D20 is connected to your computer you can see whether your Dremel 3D20 is ready to build or currently building an object. You can also see the temperature of your extruder.
2 BUILD STATUS
Dremel 3D software continuously provides you with the status of your Dremel 3D20.
a. The top panel displays the current status of both your Dremel 3D20 and your object.
b. The status circle located in the top right corner provides a graphical representation of your progress.
3 MENUS
File Menu
a. Load File – Select this option to load a model file (.STL or .3dremel) from your computer or external storage device connected to your computer. Once you have loaded the model file you can begin editing the file as desired.
NOTE: You cannot load a model file to your computer from an SD card connected to your Dremel 3D20. SD card must be connected directly to your computer.
b. Save Build Platform – Saves all of the objects and layout of the current build platform to a .3dremel file. Select this option to save a model file to your computer or external storage device connected to your computer.
NOTE: You cannot save a model file to an SD card connected to your Dremel 3D20. SD card must be connected directly to your computer.
c. Save as... – Saves current build platform with new name. This will not overwrite the original .3dremel file.
d. Examples – Select this option to view a list of free model files that are included with your Dremel 3D software. These model files are excellent test objects to ensure your Dremel 3D20 is working properly.
e. Recent Files – Select this option to view a list of recently viewed model files.
f. Preferences – Select this option to set the language of your Dremel 3D software and change the automatic update setting.
g. Quit – To close the Dremel 3D software, click on the "X" in the upper right corner. If you have a model file open the software will ask you if you want to save your model file before closing.
Edit Menu
a. Undo – Select this option to undo the most recent edit you made to your model file. Selecting this option multiple times will continue to undo edits in reverse order in which they were performed.
b. Redo – Select this option to redo the most recent edit you have undone to your model file. Selecting this option multiple times will continue to redo edits in reverse order in which they were removed.
c. Select All – Select this option to select all of the model files that you have loaded to the 3D Build Home Screen
d. Duplicate – Select this option to duplicate a selected model file.
e. Delete – Select this option to delete a selected model file.
Build Menu
NOTE: The power to your Dremel 3D20 must be turned on for your Dremel 3D20 to be recognized.
a. Disconnect – Select this option to disconnect your Dremel 3D20 from your computer.
b. Build – Select this option to convert your work to a buildable file. You will be asked to save your model in a .3dremel file format so that your Dremel 3D20 can begin building.
View Menu
a. Change your view of the 3D Build home screen to one of seven viewing angles.
b. Show Model Outline – This view will highlight the outer surfaces of your model file to improve viewing of your model.
c. Show Steep Overhang – This view will highlight areas of your object that have steep angles that may require supports.
Tools Menu
a. Control Panel – Select this option for manual diagnostics of your Dremel 3D20. Your Dremel 3D20 must be connected to your computer to view this menu.
b. Update Firmware – Allows you to update your Dremel 3D20 with the latest firmware. To update the Dremel 3D20 firmware, connect a USB cord to the computer and Dremel 3D20. Click the latest version of the firmware and choose upload. The firmware will update on the Dremel 3D20. After the firmware has successfully updated, you need to reboot (turn off and back on) the machine.
Note: Firmware updates will be automatically downloaded when the Dremel 3D software is started. You will be informed that a new version of the firmware is available.
Help Menu
a. Help Contents – Select this option to be directed to www.digilab.dremel.com help and support contents.
b. Check for Update – Select this option to manually check for Firmware and Software updates.
c. About – Select this option to review the current software version you are running for Dremel 3D.
Installing Filament and Getting Ready to Build
WARNING
Observe all provided warnings and safety instructions when using the Dremel 3D20. Failure to do so may result in fire, equipment damage,
property damage or personal injury.
- Ensure the power switch is in the off position.
- Remove the Dremel 3D20 lid for better access to extruder and build platform.
- If build platform is installed, remove by pinching the clamp located at the front of the build platform and lifting the build platform off the base.

- Mount filament spool to spool holder and secure with spool lock.
a. Place filament spool onto spool holder with spool being fed from the bottom towards the back of the Dremel 3D20.
b. Insert spool lock into spool holder and rotate 90 degrees to lock in place.

- Thread filament through filament guide tube. The filament can then be inserted into the extruder intake. This will ensure the extruder experiences minimal resistance while building.
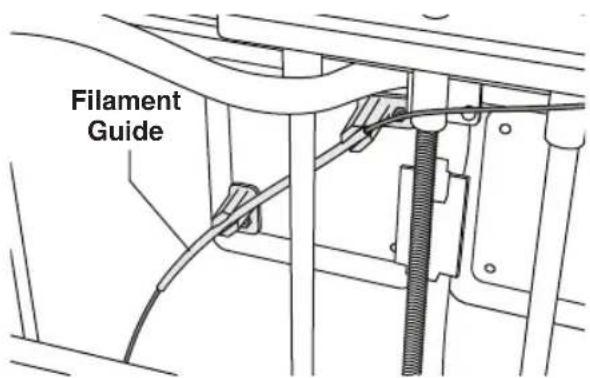
- Place Build Tape over Build Platform.


- Install the build platform using the build platform clip to secure.
- Plug power cord into outlet and turn on Power Switch (Dremel 3D20 will take approximately 30 seconds to properly warm up).
- Tap "Tools" on your Dremel 3D20's touch screen then tap "Filament", then tap "Load Filament".
- Insert the filament coming from the filament guide tube into the extruder intake (top). Tap "Next".

natural_image
Technical line drawing of a vehicle chassis frame with hoses and structural components (no text or symbols)- Your Dremel 3D20 will begin to heat the extruder. The Dremel 3D20 touch screen display will update you when extruder is "HOT" and ready to load.
- Once your Dremel 3D20 is ready to begin extruding, gently guide the filament into the extruder until it feeds through on its own.
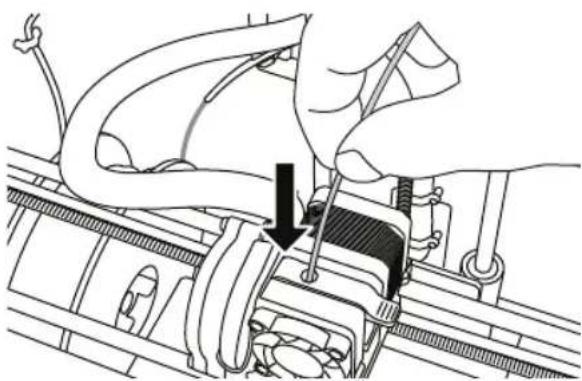
natural_image
Mechanical assembly diagram showing a hand adjusting a component with a black arrow indicating motion (no text or symbols present)WARNING
Do not touch the extruder tip during Dremel 3D20
operation or until it has cooled down to at least 60°C (140°F). Contact with the extruder tip during or after operation before tip has cooled may result in personal injury.
- Filament will then be drawn into the extruder and begin to exit from the heated tip at the bottom of the extruder. After the filament has extruded from the heated tip, press the return arrow to complete the loading process. Carefully remove excess filament without touching the hot extruder tip.
NOTE: Your Dremel 3D20 was tested by building objects before leaving the factory. These test objects may have been made with a different filament color than you are using. Therefore, a small amount of filament may be remaining in the extruder. When loading filament for the first time make sure to allow filament to exit the extruder until your filament color is consistently visible.
CAUTION: Use extra care to not damage the extruder tip when clearing debris. Dremel 3D20 will not work properly with damaged extruder tip and will require replacement.
- After filament has been loaded, ensure the extruder tip is clear of any debris. Carefully remove debris with needle nose pliers to ensure the extruder tip is clean.
- If filament does not get pulled into the extruder or does not come out of the extruder tip, please reference troubleshooting section for further advice.
BUILD PLATFORM PREPARATION

WARNING
Do not touch the extruder tip during Dremel 3D20
operation or until it has cooled down to 60° C ( 140° F). Contact with the extruder tip during or after operation before tip has cooled may result in personal injury.
CAUTION: Before every build make sure that the build platform is covered with Dremel specified build tape. Use of improper build tape may result in equipment damage and poor object build quality.
LEVELING BUILD PLATFORM
It is important you level the build platform every time you replace the build tape or reinstall the build platform to ensure that the build platform is evenly spaced from the extruder head. Make sure to remove any air bubbles from between the build platform and the build tape. Not leveling the build platform or eliminating air bubbles may cause objects to not build properly.
Wait for the extruder head to cool to at least 60C (140F) before leveling build platform. Extruder temperature can be monitored on the touch screen (See Preheat section on page 19).
- Make sure you have placed build tape over the build platform. Applying build tape to the build platform after leveling may effect the consistency of your object.

-
Tap "Tools" on your Dremel 3D20's touch screen and tap "Level". (See page 17)
-
The extruder and build platform will move into position to level the build platform. You will first level the front left section of the build platform. The three knobs under build platform are used to raise or lower the build platform on the left, right, and rear of the build platform.

flowchart
graph TD
    A["STEP 1: LEFT ADJUSTMENT"] --> B["TURN LEFT TO RAISE THE BUILD PLATFORM"]
    B --> C["TURN RIGHT TO LOWER THE BUILD PLATFORM"]
    C --> D["WARM"]
    D --> E["NEXT"]
    E --> F["BACK"]
- Place the leveling tool between the extruder and build platform. If the leveling tool cannot slide between the extruder and build platform, adjust the appropriate knob (turning counterclockwise) until you can slide the leveling tool between the extruder and build platform with some resistance. If the leveling tool can slide between the extruder and build platform too easily, adjust the appropriate knob (turning clockwise) until you can slide the leveling tool between the extruder and build platform with some resistance.
TIP: Standard printer paper can also be used to level the build platform in the same manner as the leveling tool.
- Tap "Next" to move the build platform toward the right knob and repeat step 4 above.
- Tap "Next" to move the build platform toward the rear knob and repeat step 4 above.
- Tap "Finish" to complete the leveling process.
- Repeat steps 1 through 6 above to ensure that build platform is completely level.
Building
WARNING
Observe all provided warnings and safety instructions when using the Dremel 3D20. Failure to do so may result in fire, equipment damage,
property damage or personal injury.
NOTE: Your Dremel 3D20 will build test objects before leaving the factory. These test objects may have been made with a different filament color than you are using. Therefore, a small amount of filament may be remaining in the extruder. The start of your first object may have some of this filament color until it transitions over to your filament color.
You have 2 options when building on your Dremel 3D20:
- On-Printer Storage - On the main screen, tap the "Build" option. Then tap the machine icon to select from pre-installed models.
- Computer – Build directly from your computer through the USB cable.
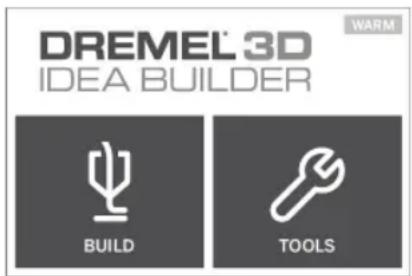

natural_image
3D wireframe model of a rectangular prism displayed in DREMEL 3D software interface (no text or symbols on the model itself)Building from the SD Card
- Insert SD card containing your model into the SD port located on the right side of your Dremel 3D20. Your Dremel 3D20 comes with an SD card containing free model files ready to be built. Additionally, you can save new .G3Drem files to your SD card from the accompanying Dremel 3D software.

natural_image
Line drawing of a hand inserting a small device into a wall-mounted device (no text or symbols)- Ensure an adequate amount of filament is loaded (see page 25)
TIP: You can determine whether you have enough filament to complete your object before building by weighing the filament and spool then subtracting the weight of the empty spool. The Dremel 3D software will display the approximate weight of each model.
NOTE: You cannot edit model files directly on the Dremel 3D20. Ensure that you are building .G3Drem files when building directly from SD card.
- Ensure build tape is applied and build platform is leveled (see page 27).
- Tap "Build" on the touch screen, tap the SD card option, and use the up/down arrows to scroll.
- Tap on the model file you would like to build.
- Your Dremel 3D20 will first align the extruder and build platform. Your Dremel 3D20 will then begin the heating process which may take a few minutes. During the heating process, the extruder will reach the temperature required for proper building with PLA. Once this temperature is reached, your model will begin to build.
- Once the object is finished building, your touch screen will display "Object Finished". Tap the check box to confirm.
- Wait until the touch screen indicates that the extruder temperature is "COOL" to remove you object. See section for removing you object from the build platform below for object removal instructions.
CANCELLING YOUR OBJECT ON DREMEL 3D20
To cancel your object during warm up or building, tap the "STOP" button on touch screen. The next screen will read, "Cancel build now?" Tap the "Yes" to cancel or tap "No" box to abort the cancel command. Wait until the extruder and build platform completely cools before reaching inside the build area.
Building From Your Computer

BUILDING DIRECTLY FROM COMPUTER
- Install Dremel 3D software to your computer. See "Software Install" on page 21 for details. Ensure that you have administrative rights to your computer to properly install the Dremel 3D software.
- Connect your Dremel 3D20 to your computer with the USB cable supplied with your Dremel 3D20.
- Ensure an adequate amount of filament is loaded (see page 25)
TIP: You can determine whether you have enough filament to complete your object before building by weighing the filament and spool then subtracting the weight of the empty spool. The Dremel 3D software will display the approximate weight of each model.
- Prepare build platform (see page 27).
- Open Dremel 3D Software. Your computer is now connected to your Dremel 3D20.
- Click on "Load" and select a file from the model files downloaded from www.digilab.dremel.com or approved STL or G3DREM file. The object that you selected will appear on the Dremel 3D software home screen. The Dremel 3D software's home screen is a simulation of your Dremel 3D20's build platform.
-
In the software you can view, move, rotate, and scale your object to ensure that you obtain the optimum results.
-
To prepare your model file, click on "Build" and save your model file. Immediately after you have completed build setup and saved the file, the Dremel 3D software will being preparing your model file.
- After your model file has been prepared, click "Build" to begin building process.
a. If the Dremel 3D software has not already detected your Dremel 3D20, then you will be prompted to select the USB port being used by your Dremel 3D20. Select the correct port and click "OK".
b. Click "Rescan" if the USB port your Dremel 3D20 is using is not shown. Repeat step 10-a.
- Your Dremel 3D20 will first align the extruder and build platform. Your Dremel 3D20 will then begin the heating process which may take a few minutes. During the heating process, the extruder will reach the temperature required for proper building with PLA. Once this temperature is reached, your model will begin to build.
- Once the object is finished building, your touch screen will display "Object Finished". Tap the check box to confirm.
- Wait until the touch screen indicates that the extruder temperature is "COOL" to remove your object. See "Removing your object from the build platform" section below for object removal instructions.
CANCELLING YOUR OBJECT ON DREMEL 3D20
To cancel your object during warm up or building, tap the "STOP" button on touch screen. The next screen will read, "Cancel build now?" Tap the "Yes" to cancel or tap "No" box to abort the cancel command. Wait until the extruder and build platform completely cools before reaching inside the build area.
Removing Your Object
REMOVING YOUR OBJECT FROM THE BUILD PLATFORM

WARNING
Use personal protective equipment. The use of
protective equipment such as heat resistant gloves and safety glasses will reduce personal injuries.

WARNING
Be aware of your body position when using hand tools to remove objects from the build platform. Sudden tool slip and improper body position during object removal from the build platform may result in personal injury.
CAUTION: Avoid scratching the build platform when removing objects. Scratches in the build platform will result in improper object creation.
- Wait for the extruder to cool before removing your object.
-
With the object still attached, remove build platform from the build area.
-
Peel your object from the build platform. If needed, gently use the object removal tool to remove object from build platform. If desired, remove the build tape from the build platform while separating the object from the build platform. The build tape can then be removed from the object.

natural_image
Illustration of hands using a tool to cut a mechanical component on a flat surface (no text or symbols)Removal Tool
REMOVING SUPPORTS (IF REQUIRED)
Use small needle nose pliers to remove supports. In places where the supports are inside your object and are hard to reach.
Troubleshooting
| Problem Cause Corrective Action | ||
| Extruder head building off center | Dremel 3D20 has lost track of the extruder head's exact location and is failing to build. | Sending the extruder head to the home position will recalibrate the Dremel 3D20. Cancel your object, clear build platform, send the extruder head to the home position, and restart the object. |
| PLA is not extruding or sticking to the build tape properly | This can be caused by the build platform not being leveled with the extruder head. | Leveling the build platform will align the extruder head and ensure a better object quality. Cancel your object, clear build platform, level the build platform, and restart the object. |
| Dremel 3D software froze during use or computer froze. | Sometimes software isn't as smart as you are and locks up. | Save any open files if possible and either restart the Dremel 3D software or your computer. |
| Dremel 3D20 froze before my object started. | Dremel 3D20 may have received conflicting commands. | Turn power switch off, wait 30 seconds, and turn power switch on. |
| 3D file loads with a warning stating that the file is not closed. | 3D file has not been properly designed and has open surfaces. | Open 3D file in a CAD editing software to close all the open surfaces. |
| Support material does not break away during cleaning and results in decreased quality of the final object. | Orientation of the part is not optimized. | Reorient the position of the 3D file in Dremel 3D to minimize the support material or place the support material on a non-critical surface. |
| Spaghetti mess at end of build. A | layer of your object did not stick properly, model was saved with minimal surface area contacting the build platform, or object was built floating above the build platform with no support selected. | Use the preview future in Dremel 3D to see the first layer height and position. Build with supports when necessary. |
| Part only built halfway. Filament ran out. | Filament clogged during build. | Replace filament and start build over. See “No filament coming out”. |
| No filament coming out | Clogged extruder | Use unclog tool to push through filament.Contact customer service |
| Extruder will not home Limit switch wire failure Contact customer service. | ||
| Stringy or fraying plastic layers on steep overhangs | Object overhangs are too far apart or too steep (<45degree angle). | Build with supports. |
Maintenance and Service
UNCLOGGING THE EXTRUDER
Use the unclogging tool to clean the extruder and unclog built up filament.
- Wait for extruder to heat up insert the unclog tool into the extruder intake (top)
- Clogged debris will be pushed down and will extrude from the extruder tip

natural_image
Line drawing of a hand adjusting a mechanical component with no visible text or symbolsCLEANING THE EXTRUDER TIP
CAUTION: Use extra care not to damage the extruder tip when clearing debris. Dremel 3D20 will not work properly with damaged extruder tip and will require replacement.
WARNING
Do not touch the extruder tip during Dremel 3D20
operation or until it has cooled down to 60° C ( 140° F). Contact with the extruder tip during or after operation before tip has cooled may result in personal injury.
Using small needle nose pliers, pull away any plastic debris from the extruder tip.
If the debris is stubborn, the extruder may need to be heated to make the debris soft enough to remove.
Wipe the touch screen with the soft, lint-free cloth. Do not spray cleaners on the touch screen.
CLEANING THE EXTERIOR
Clean the 3D20's exterior with a lint free cloth. Clear the outer surfaces of any debris that is visible.
To avoid damaging your Dremel 3D20 do not use water, chemicals or other cleaners on the 3D20.
Best Practices
- ALWAYS USE BUILD TAPE.
- Ensure your build platform is level before every object.
- Ensure spool is installed properly and can rotate freely.
- When using your Dremel 3D20 for the first time or after changing filament, allow Dremel 3D20 to extrude until material is consistent with the installed filament color.
- It is important to watch your Dremel 3D20 begin building objects. Your object is most likely to experience difficulty in the beginning. Thankfully, this is also the most convenient time to cancel the object, clean the build platform, and start your object again. Remain near the Dremel 3D20 during the building process.
- It is important to save your Dremel 3D20 packaging as it will make re-boxing and transporting your Dremel 3D20 easier.
- Ensure that you store filament spools in an environment that is not moist or too hot. It is recommended that you do not remove the filament spool from its airtight packaging until use.
-
Use object removal tool gently to avoid damaging the build platform or object.
-
Whenever possible, it is best to locate your object in the center of the build platform. Using the best orientation for your object is critical. Ensure that your object is located on the build platform and that you are using the best orientation for building.
- For steep overhangs (Less than 45 degree angle) it is recommended to build with support.
- To prevent build tape from peeling during the build, wrap the build tape underneath the build platform.
- Always remove the build platform before removing the object.
- Use the home feature before loading a filament spool. Also, it is recommended to remove the build platform before loading a filament spool.
- Low speed sanding is recommended to prevent remelting of the object.
- The Dremel 3D software will display the weight of each model. You can determine whether you have enough filament to complete your object before building by weighing the filament and spool then subtracting the weight of the spool.
Open Source Software
Open Source Software used in this Dremel product
This product contains software components that are licensed by the holder of the rights under any version of the GNU General Public License (GPL), GNU Lesser General Public License (LGPL) or any other open source software license which requires that source code be made available. You can receive a complete machine-readable copy of the corresponding source code by sending a written request to:
Dremel
Attn: Open Source Software Officer
P.O Box 081126
Racine, WI USA 53408-1126
Your request should include: (i) the name of the Dremel product, (ii) the serial number (if applicable), (iii) the software version (if applicable), (iv) your name, (v) your company name (if applicable) and (vi) your return mailing and email address (if available).
We may charge you a nominal fee to cover the cost of the physical media and distribution.
You may send your request (i) within three (3) years of the date you received the product that included the software which is subject of your request or (ii) in the case of code licensed under the GPL version 3 for as long as Dremel offers spare parts or customer support for that product.
For your convenience, the source code may also be found at:
http://www.dremel.com/en-us/customerservice
Warranty regarding further use of the Open Source Software:
DREMEL provides no warranty for the Open Source Software programs contained in this device, if such programs are used in any manner other than the program execution intended by DREMEL. The licenses listed below define the warranty, if any, from the authors or licensors of the Open Source Software. DREMEL specifically disclaims any warranties for defects caused by altering any Open Source Software program or the product's configuration. You have no warranty claims against DREMEL in the event that the Open Source Software infringes the intellectual property rights of a third party. Technical support, if any, will only be provided for unmodified software.
Dremel® Consumer Limited Warranty
If used for non-commercial purposes, your Dremel 3D20 is warranted against defective materials or workmanship for a period of one year from the date of purchase. If the Dremel 3D20 is used for commercial purposes, this warranty will apply for 60 days from the date of purchase. In the event of the product fails to conform to this written warranty, please take the following action:
- DO NOT return your product to the place of purchase.
-
Please contact customer service
b. A written statement about the nature of the problem.
c. Your name, address and phone number to: -
Carefully package the product by itself, in original packaging, with no other items, and return it, freight prepaid, along with:
a. A copy of your dated proof of purchase (please keep a copy for yourself).
| CONTINENTAL UNITED STATES CANADA | ||
| Dremel Service Center4915 21st StreetRacine, WI 53406Phone: 1 (800) 437-3635 | Giles Tool Agency47 Granger Av.Scarborough, ON M1K 3K9Phone:1-416-287-3000 | West Coast Tool4008 Myrtle StreetBurnaby, B.C. V5C 4G2Phone: 1-604-873-5394 |
| OUTSIDE CONTINENTAL UNITED STATESSee your local distributor or write to Dremel, 4915 21st Street Racine, WI 53406. | ||
We recommend that the package be insured against loss or in-transit damage, for which we cannot be responsible.
This warranty applies only to the original registered purchaser. DAMAGE TO THE PRODUCT RESULTING FROM TAMPERING, ACCIDENT, ABUSE, NEGLIGENCE, UNAUTHORIZED REPAIRS OR ALTERATIONS, PRODUCT USE IN VIOLATION OF THE "GENERAL SAFETY AND USE WARNINGS," UNAPPROVED ATTACHMENTS OR OTHER CAUSES UNRELATED TO PROBLEMS WITH MATERIAL OR WORKMANSHIP ARE NOT COVERED BY THIS WARRANTY.
No employee, agent, dealer or other person is authorized to give any warranties on behalf of Dremel. If Dremel inspection shows that the problem was caused by problems with material or workmanship within the limitations of the warranty, Dremel will repair or replace the product free of charge and return the product prepaid. Repairs made necessary by normal wear or abuse, or repair for products outside of the warranty period, if they can be made, will be charged at regular factory prices.
DISCLAIMER OF IMPLIED WARRANTIES: DREMEL MAKES NO OTHER WARRANTY OF ANY KIND WHATEVER, EXPRESSED OR IMPLIED, AND ALL IMPLIED WARRANTIES OF MERCHANTABILITY AND FITNESS FOR A PARTICULAR PURPOSE ARE HEREBY DISCLAIMED BY DREMEL AND EXCLUDED FROM THIS LIMITED WARRANTY.
This warranty gives you specific legal rights, and you may also have other rights which vary from state to state. The obligation of the warrantor is solely to repair or replace the product. The warrantor is not liable for any incidental or consequential damages due to any such alleged defect. Some states do not allow the exclusion or limitation of incidental or consequential damages, so the above limitations or exclusion may not apply to you.
For prices and warranty fulfillment in the continental United States, contact a Dremel service location.
Imported for Dremel® in the U.S. by:
Robert Bosch Tool Corporation
1800 West Central Road
Mount Prospect, Illinois 60056
Table des matières
natural_image
Simple line drawing of a rectangular appliance with a side panel and height dimension (no text or symbols)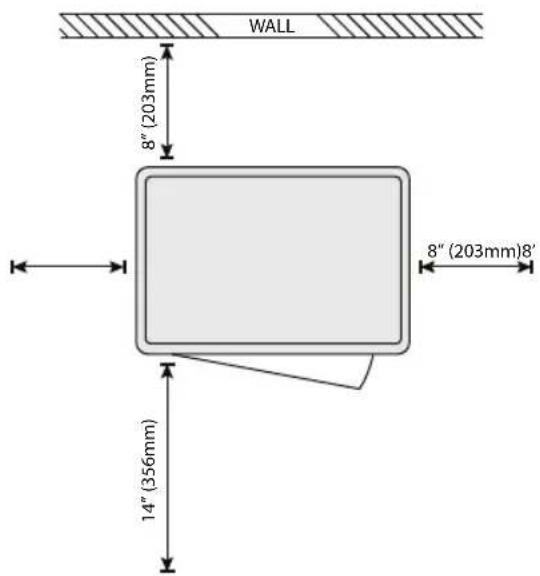

Introduction
natural_image
Line drawing of a 3D printer with open lid and internal structure (no text or symbols)

natural_image
Coiled cable with connectors and connectors (no text or symbols visible)
natural_image
Line drawing of two hands pressing a rectangular block with upward arrows indicating force or movement (no text or symbols)natural_image
Line drawing of a hand holding a paper over a stack of documents (no text or symbols)natural_image
Line drawing of hands installing or adjusting a device casing with arrows indicating motion (no text or symbols)natural_image
Line drawing of a portable air conditioner unit with two upward arrows indicating top and bottom components (no text or symbols)natural_image
Line drawing of a device interior with a hand inserting a component into a housing (no text or symbols)natural_image
Technical line drawing of a mechanical device with internal components and mounting base (no text or symbols)

flowchart
graph TD
    A["EXTRUDER"] --> B["Y+ FORWARD"]
    B --> C["X- LEFT"]
    B --> D["X+ RIGHT"]
    D --> E["Y- BACK"]
    F["BUILD PLATFORM"] --> G["RAISE"]
    F --> H["LOWER"]
    I["WARM"] --> J["←"]
MODE JOG
natural_image
Line drawing of a cable connector inserted into a car body (no text or symbols)natural_image
Technical line drawing of a mechanical assembly with hoses and brackets (no text or symbols)natural_image
Mechanical assembly diagram showing a hand adjusting a component with a black arrow indicating a detail (no text or symbols present)AVERTISSEMENT
natural_image
3D wireframe model of a rectangular prism displayed in DREMEL 3D IDEA BUILDER software interface (no text or symbols on the model itself)natural_image
Line drawing of a hand holding a small device with an arrow pointing to it, against a plain background (no text or symbols)natural_image
Line drawing of a hand adjusting a mechanical component (no text or symbols present)NETTOYAGE DE L'EXTÉRIEUR
Attn : Open Source Software Officer
P. O. Box 081126
Racine, WI 53408-1126 (É.-U.)
Robert Bosch Tool Corporation
1800 West Central Road
Mount Prospect, Illinois 60056
Índice

natural_image
Simple line drawing of a rectangular appliance with a side panel and height dimension (no text or symbols)
Introducción
natural_image
Line drawing of a 3D printer internal structure (no text or symbols)

natural_image
Coiled cable with connectors and connectors (no text or symbols visible)
natural_image
Line drawing of two hands pressing a rectangular box with upward arrows indicating force or movement (no text or symbols)natural_image
Line drawing of a printer with a paper being placed on top, no text or symbols presentnatural_image
Line drawing of a device with hands holding a box, showing a tray and panel (no text or symbols)natural_image
Line drawing of a portable air conditioner unit with two upward arrows indicating airflow or ventilation (no text or symbols)natural_image
Line drawing of a device interior with an arrow indicating a component (no text or symbols present)natural_image
Technical line drawing of a mechanical device with internal components and mounting base (no text or symbols)INICIO
natural_image
Line drawing of a cable connector inserted into a car body (no text or symbols)natural_image
Technical line drawing of a mechanical assembly with hoses and brackets (no text or symbols)natural_image
Technical illustration of a mechanical assembly with a hand holding a tool, showing no text or symbols.ADVERTENCIA
natural_image
3D wireframe model of a rectangular prism displayed in DREMEL 3D IDEA BUILDER software interface (no text or symbols on the model itself)natural_image
Line drawing of a hand inserting a small device into a button (no text or symbols)natural_image
Line drawing of a hand adjusting a mechanical component with a tool (no text or symbols)NETTOYAGE DE L'EXTÉRIEUR
Attn: Open Source Software Officer
P.O Box 081126
Racine, WI USA 53408-1126
Robert Bosch Tool Corporation
1800 West Central Road
Mount Prospect, Illinois 60056
2610035691 03/18

2610035691


- DREMEL®
- General Safety Warnings
- WARNING
- READ ALL INSTRUCTIONS
- SAVE ALL WARNINGS AND INSTRUCTIONS FOR FUTURE REFERENCE
- Work Area Safety
- Electrical Safety
- Personal Safety
- Dremel 3D20 Use and Care
- Do not touch the extruder tip during Dremel 3D20 operation or until it has cooled down to at least 60°C (140°F).
- Service
- Symbols
- FCC Compliance
- Information on Intellectual Property
- SAVE THESE INSTRUCTIONS
- Functional Description and Specifications
- BUILDING
- WEIGHT & DIMENSIONS
- FILAMENT
- FILAMENT STORAGE
- SOFTWARE
- MINIMUM HARDWARE REQUIREMENTS
- WINDOWS REQUIREMENTS
- ELECTRICAL REQUIREMENTS
- OPERATING ENVIRONMENT
- Introduction
- Kit Contents
- Unpacking
- Touch Screen
- BUILD
- COPY
- COPY MODEL
- COPY MODEL SUCCESSFUL
- DELETE
- DELETE MODEL
- DELETE MODEL SUCCESSFUL
- RETURN
- TOOLS
- LEVEL
- HOME
- JOG MODE
- SETTING
- PREHEAT
- ABOUT
- Software Install
- Connecting USB Cable
- Dremel Software Overview
- TOOLBAR ICONS
- BUILD STATUS
- MENUS
- File Menu
- Edit Menu
- Build Menu
- View Menu
- Tools Menu
- Help Menu
- Installing Filament and Getting Ready to Build
- BUILD PLATFORM PREPARATION
- LEVELING BUILD PLATFORM
- You have 2 options when building on your Dremel 3D20:
- Building from the SD Card
- CANCELLING YOUR OBJECT ON DREMEL 3D20
- Building From Your Computer
- BUILDING DIRECTLY FROM COMPUTER
- Removing Your Object
- REMOVING YOUR OBJECT FROM THE BUILD PLATFORM
- REMOVING SUPPORTS (IF REQUIRED)
- Maintenance and Service
- UNCLOGGING THE EXTRUDER
- CLEANING THE EXTRUDER TIP
- CLEANING THE EXTERIOR
- Best Practices
- Open Source Software
- Open Source Software used in this Dremel product
- Warranty regarding further use of the Open Source Software:
- Dremel® Consumer Limited Warranty
- Table des matières
- MODE JOG
- AVERTISSEMENT
- NETTOYAGE DE L'EXTÉRIEUR
- Índice
- Introducción
- INICIO
- ADVERTENCIA
Brand : DREMEL
Model : 3D20 Idea Builder
Category : 3D Printer