
PLS 48 D2 - Soldering iron PARKSIDE - Free user manual and instructions
Find the device manual for free PLS 48 D2 PARKSIDE in PDF.


| Brand | Parkside |
| Model | PLS 48 D2 |
| Product type | Soldering iron (adjustable soldering station) |
| Intended use | Electronic soldering, hobby and DIY, plastic welding |
| Rated voltage | 230 V ~ (AC) |
| Rated frequency | 50 Hz |
| Rated power consumption | 48 W |
| Temperature range | Approx. 100 - 500 °C |
| Temperature setting | 5 levels (100 °C, 200 °C, 300 °C, 400 °C, 500 °C) |
| Mains cable length | 2.00 m (plug to station); 1.00 m (iron to station) |
| Package contents | Soldering station, 2 standard tips (1 pre-assembled), solder ∅1.0 mm (5 g) and ∅1.5 mm (5 g), soldering sponge, manual |
| Main features | On/off, continuous temperature adjustment, multifunction holder with spiral spring, tip storage compartment |
| Soldering tip | Fine tip, replaceable by screwing, must be tinned before first use |
| Safety | Automatic shutdown not mentioned; do not leave unattended; use the stand; unplug after use; do not immerse in water |
| Maintenance and cleaning | Clean the housing with a soft cloth and mild detergent; do not use solvents; clean the tip with a damp sponge |
| Spare parts and repairability | Replacement tips available via customer service; address: CFH Soldering and Gas Appliances GmbH |
| Warranty | 3 years from date of purchase, covers material and manufacturing defects, does not cover normal wear |
| General information | Soldering station for private and non-commercial use; follow safety instructions; do not dispose of with household waste |
Frequently Asked Questions - PLS 48 D2 PARKSIDE
User questions about PLS 48 D2 PARKSIDE
0 question about this device. Answer the ones you know or ask your own.
Ask a new question about this device
Download the instructions for your Soldering iron in PDF format for free! Find your manual PLS 48 D2 - PARKSIDE and take your electronic device back in hand. On this page are published all the documents necessary for the use of your device. PLS 48 D2 by PARKSIDE.
USER MANUAL PLS 48 D2 PARKSIDE
natural_image
Illustration of a soldering iron with a power supply and coiled cable (no text or symbols visible)REGELBARE LÖTSTATION/ADJUSTABLE SOLDERING STATION/STATION DE SOUDAGE RÉGLABLE PLS 48 D2
DE AT BE
Instructions for use
FR BE
Symbol explanations 19
Safety....20
Safety instructions....20
Before starting 25
Fitting the spiral spring 25
Inserting / replacing the soldering tip 25
Starting 26
Switching on/off and setting the temperature. 26
Solder sponge 27
Soldering 27
Maintaining and cleaning 28
Disposal 28
Solder waste. 29
Device disposal. 29
Congratulations on your purchase of your new product.
You have decided to buy a high quality product. This instruction manual is an integral part of this product. It contains important information on safety, use and disposal. Be sure to familiarise yourself with all of the operating and safety instructions before you use the product. Use the product only as described and for the specified areas of application. Hand over all documents to third parties when transferring the product.
Intended use
The device has been designed for electronic soldering in the recreational and DIY sectors. It is intended for uses such as soldering, welding of plastics and attaching decorations. The device is only to be used as described and only for the specified areas of application. The device has not been designed for commercial use. Any other use or any modification made to the device will be considered to be improper use, and it will involve a considerable risk of accidents. The manufacturer will not accept liability for any damage resulting from improper use.
Equipment
① Fine soldering iron
② Solder
3 Soldering tip storage compartment
4 Temperature controller
⑤ ON/OFF switch
6 Solder sponge
⑦ Soldering tip
⑧ Spiral spring (multifunction holder)
9 Transparent cover
Delivery
1 Adjustable soldering station PLS 48 D2 includes 2 x standard soldering tips (1 x pre-assembled) 1 x solder, ∅ 1.0 mm, 5 g 1 x solder, ∅ 1.5 mm, 5 g 1 x solder sponge 1 User manual
Technical specifications
Voltage rating: 230 V \~ (AC)
Frequency rating: 50 Hz
Consumption rating: 48 W
Temperature range: approx. 100 - 500°C
Mains cable: 2.00 m from mains plug to the station;
1.00 m from fine soldering iron to the station
Symbol explanations

Read through this instruction manual carefully

Danger signs with information on the prevention of personal injury or damage to property

Danger sign with information about preventing personal injuries from an electric shock

Inhaling the vapours might cause headaches and fatigue symptoms

Never put electrical tools in your household waste!
Safety Safety instructions ⚠ WARNING!
Important note: Read through this instruction manual carefully to become familiar with the device. Keep the leaflet for further reference. Assembly and settings made by the manufacturer are not to be changed. It can be dangerous to make unauthorised structural changes to the device, to remove parts or to use other parts that are not approved for the device by the manufacturer (e.g. there is a risk of burns if unauthorised structural changes are made to the device).
The soldering station is intended solely for private, non-commercial use in dry indoor areas.
- This device can be used by children aged 8 years or older as well as by persons with reduced physical, sensory or mental capabilities or lack of experience and knowledge provided that they are being supervised or have been trained in the safe use of the device and understand the hazards that might occur. Children must never be allowed to play with the device. Children must never clean or handle the device without supervision.
- If the connection cable is damaged, it must be replaced by the manufacturer or his service agent or a similarly qualified person in order to avoid hazards.
ATTENTION! RISK OF ELECTRIC SHOCK! Do not use the soldering station if the handle, the power cord or the plug is damaged. Never open the device!
- DANGER OF BURNS! Always check that the tool tip is fitted correctly in the device before you use it. Never touch the hot soldering tip or the molten solder. There is a risk of burns. Always leave the device to cool down before changing, cleaning or checking the device's components. The hot tool tip and its mounting must never come into contact with skin, hair etc. Danger of burns!
- Leave the fine soldering iron to cool down in the air after it has been used. Never quench it in water!
- CAUTION! FIRE HAZARD! The multifunction holder is to be used for the exclusive purpose of storing the hot fine soldering iron.
- The fine soldering iron must be stored in the multifunction holder during work breaks and the device must also be disconnected from the power source.
- Keep the device well away from combustible
materials.
- Do not apply high pressure to the tips during use. When pressed, the thin tips can bend.
- A fire might occur if the device is not handled with care.
- Never leave the switched-on device unattended.
- CAUTION! RISK OF INJURY! Keep your hands away from the heated workpiece. Heat can be released through the workpiece.
- Never let the hot soldering tip touch the multifunction holder's plastic parts. Otherwise this might result in the unit being damaged.
- Pull the power plug out of the socket immediately if a dangerous situation occurs.
- CAUTION! DANGER FROM TOXIC FUMES! Do not inhale the fumes.
- Always ensure that the workplace is adequately ventilated when working for long periods of time where vapours that are hazardous to health may be produced. We recommend that you always wear personal protective clothing
such as protective gloves, a breathing mask and an apron.
- Do not eat, drink or smoke in areas where soldering is taking place. Otherwise traces of lead on your hands might get into your organs through the food or cigarettes.
- Remove all flammable objects, liquids and gases from the working area around the device before use. Keep the working area clean to prevent accidents.
- Place the unit on a horizontal, stable and non-slip surface.
- Check the stability of the unit before inserting the power cord plug.
• Always thoroughly wash your hands after soldering. - Never put soldering waste in your household waste. Solder waste should be disposed of as hazardous waste. You must always abide by national and international safety, health and
accident-prevention regulations.
• After use, place the device on the stand and allow to cool before putting it away.
- When the device is not being used it should be kept in a safe place away from dust and moisture.
Before starting Fitting the spiral spring
- Insert the bracket of the spiral spring ⑧ into the recess in the soldering station as far as it will go (see fold-out page).
Inserting / replacing the soldering tip ⚠️ CAUTION! DANGER OF BURNS!
Never heat the soldering iron ① without a soldering tip ⑦ fitted to it.
- The soldering tip is to be removed only after the device has been switched off and the soldering tip has cooled down.
- The soldering tip has a screw thread and this means that it can be quickly and easily replaced on the soldering iron.
- Unscrew the soldering tip counter-clockwise to remove it.
- Screw the soldering tip in clockwise to secure it in place.
NOTE
- Remove the protective cap from the soldering tip ⑦ before use.
- Before starting up the soldering station for the first time and also when using a new soldering tip, the soldering tip ⑦ must first be tinned.
Starting-up
Switching on/off and setting the temperature Switching on and setting the temperature:
Plug the mains plug into a suitable mains socket and then put the ON/OFF switch ⑤ in the "I" position.
Turn the temperature control ④ to configure it to the desired temperature.
NOTE
- Remove the protective cap from the soldering tip ⑦ before use.
- Before starting up the soldering station for the first time and also when using a new soldering tip, the soldering tip ⑦ must first be tinned.
NOTE
- A prerequisite for perfect soldering is the use of a suitable soldering tin. Perfect soldered joints can only be realised after the correct soldering temperature has been reached. If the soldering temperature is too low, the solder will not flow adequately and this will cause poor soldered joints (so-called cold or dry joints). In excessive soldering temperatures, the soldering agent burns and the solder does not flow. This can also destroy the materials being soldered.
The temperature settings for the most common uses are shown below. Differences are possible depending on the solder/manufacturer. The different levels do not have locking functions, which ensures that the setting remains the same at the selected level. Slight deviations are possible.
Minimum level = room temperature
- Level 1 = Approx. 100^ C - Warm-up stage and for solders with a correspondingly low melting temperature. Heating-up time: approx. 1 minutes and 00 seconds
- Level 2 = Approx. 200^ C - Melting point of the most frequently used soft solders.
Heating-up time: approx. 1 minutes and 40 seconds
- Level 3 = Approx. 300^ - For normal operation, e.g. when using
lead-free solder.
Heating-up time: approx. 3 minute and 00 seconds
- Level 4 = Approx. 400^ C - High soldering temperature, e.g. for removing solder from small soldered joints.
Heating-up time: approx. 4 minutes and 30 seconds
- Level 5 = Approx. 500^ C - Maximum soldering temperature, e.g. for desoldering large solder joints.
Heating-up time: approx. 6 minutes and 30 seconds
Switching off NOTE
Always replace the soldering iron 1 in the
spiral spring 8 after use.
- Put the ON/OFF switch ⑤ into the "0" position. When not in use, unplug the power cord from the power outlet.
Solder sponge

ATTENTION
- The hot soldering tip ⑦ must never come into contact with a dry solder sponge ⑥. Otherwise, the solder sponge might sustain damage.
NOTE
- The solder sponge is used to clean the soldering tip.
- Moisten the soldering sponge slightly before you use it. Any excess liquid must be removed from the vicinity of the device before it is used.
Soldering

When inhaled, vapours can cause headaches and fatigue, among other things.
- The soldering iron's rated power is 48 watts which makes it ideal for electronic soldering.
- Its design makes it especially suitable for difficult-to-access and fine soldering work.
- Clean the soldering tip ⑦ on the moist solder sponge ⑥.
- The soldering tip must be tinned again after cleaning. Re-tin the hot soldering tip by melting solder ② onto it.
- Place the soldering tip on the soldering joint and heat it up.
- Position the solder (with flux) between the soldering joint and the soldering tip so that it can melt.
- Keep the solder there until it melts and runs over the entire soldering joint.
- Immediately remove the soldering tip afterwards so that you do not overheat the molten solder.
- Let the solder solidify and avoid vibrations.
NOTE
The flux is either included in the solder or it is applied separately. When you make your purchase, you should check
the type of application it should be used for and which solder is suitable for use.
Maintaining and cleaning

WARNING! RISK OF INJURY! Always disconnect the power cord from the power outlet, and wait for the machine to cool down before you attempt to work on the machine.
- Clean the device after you finish your work.
- To clean the housing, use a cloth and a mild detergent (if necessary).
- Never use sharp objects, petrol, solvents or cleaning agents that can damage plastic.
- Do not allow liquids to get inside the device.
NOTE
Spare parts (e.g. soldering tips) can be ordered from our service hotline.
Disposal
Solder waste
Never put soldering waste in your household waste. Soldering waste is hazardous waste. Always abide by the national and international health and safety regulations.
Device disposal

The packaging is made from environmentally friendly materials that you can dispose of at local recycling stations.
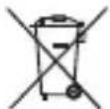
Never put electrical tools in your household waste!

Dispose of the packaging in an environmentally friendly way. Pay on to the labelling on the various
packaging materials and dispose of them separately if necessary. The packaging materials are marked with abbreviations (a) and numerals (b) that have the following meanings: 1–7: plastics, 20–22: paper and cardboard, 80–98: composites

Information on how to properly dispose of the used product can be ned from your municipality or nistration.
According to European Directive 2012/19/EU, used electrical tools must be collected separately and recycled in an environmentally friendly manner. You can find out how to dispose of old devices from your local authority or town council.
Dear customer, you will receive a 3-year guarantee on this device from the date of purchase. In the event of defects in this product, you have legal rights against the seller of the product. These legal rights are not restricted by the guarantee shown below.
Terms of the Guarantee
The warranty starts with the date of purchase. Always save the original receipt. It will be needed as proof of purchase. If a material or manufacturing defect occurs within three years from the date of purchase of this product, we will either repair or replace the product for you free of charge or refund the purchase price at our discretion. This guarantee requires that the defective device, proof of purchase (receipt) and a written short description of the defect and when it occurred are submitted to us within the three-year period. You will receive the repaired device or a new product if the defect is covered by our guarantee. A new guarantee period will not start with a repaired or replacement product.
Warranty period and statutory warranty claims
The guarantee period will not be extended by the defects liability. This also applies to replaced or repaired parts. Damage and defects already existing at the time of purchase must be reported immediately after unpacking. After the warranty period incurred repairs are chargeable.
Guarantee coverage
The device was carefully produced according to strict quality guidelines and it was diligently tested before delivery.
The warranty applies to material or manufacturing defects. This guarantee does not cover product parts that are subject to normal wear and tear and are therefore considered to be consumables or damage to extremely fragile parts, e.g. the switch, batteries or parts made from glass.
This warranty is void if the product is broken, improperly used or maintained. For proper use of the product, follow all of the instructions outlined in this user manual. Any use or action advised against or warned against in these operating instructions must be avoided without fail.
The product has been designed solely for private use and not for commercial use. The guarantee will be invalidated in the event of misuse or improper handling, the use of force or interventions not carried out by one of our authorised service branches.
Settlement in the warranty case
Follow the instructions given below to ensure that your claim will be dealt with quickly:
- For all enquiries, please have the receipt and item number (e.g. IAN 436729_2304) ready as proof of purchase.
- The article number can be found on the type plate on the product, an engraving on the product, the title page of your operating instruction (bottom left) or the sticker on the back or bottom of the product.
- If malfunctions or other defects occur, first contact the service department indicated below by phone or e-mail.
- If a product is found to be defective, you can send it to the service address you have been given free of charge, enclosing the receipt and stating what the defect is and when it occurred.
You can download these and many other manuals, product videos and installation software from www.lidl-service.com. This QR code will take you directly to the Lidl service page (www.lidlservice.com) and you can open the operating instructions by entering the article item number (IAN) 436729_2304.
Service addresses & importers
CFH soldering and gas appliances GmbH
Bahnhofstraße 50
D-74254 Offenau
GERMANY
Tel.: +49 (0) 7136 / 95 94-0
Fax: +49 (0) 7136 / 95 94-44
We reserve the right to make technical and visual changes.
Table des matières
Introduction 34
CFH soldering and gas appliances GmbH
Bahnhofstraße 50
D-74254 Offenau
NIEMCY
Tel.: +49 (0) 7136/95 94-0
Faks: +49 (0) 7136 / 95 94-44
CFH soldering and gas appliances GmbH
Bahnhofstraße 50
D-74254 Offenau
Nemecko
Tel.: +49 (0) 7136/95 94-0
Fax: +49 (0) 7136/95 94-44


- REGELBARE LÖTSTATION/ADJUSTABLE SOLDERING STATION/STATION DE SOUDAGE RÉGLABLE PLS 48 D2
- Safety....20
- Before starting 25
- Starting 26
- Maintaining and cleaning 28
- Disposal 28
- Intended use
- Equipment
- Delivery
- Technical specifications
- Symbol explanations
- Safety Safety instructions ⚠ WARNING!
- Before starting Fitting the spiral spring
- Inserting / replacing the soldering tip ⚠️ CAUTION! DANGER OF BURNS!
- NOTE
- Starting-up
- Switching on/off and setting the temperature Switching on and setting the temperature:
- Minimum level = room temperature
- Switching off NOTE
- Solder sponge
- ATTENTION
- Soldering
- Maintaining and cleaning
- Disposal
- Solder waste
- Device disposal
- Never put electrical tools in your household waste!
- Terms of the Guarantee
- Warranty period and statutory warranty claims
- Guarantee coverage
- Settlement in the warranty case
- Table des matières
- Introduction 34
Brand : PARKSIDE
Model : PLS 48 D2
Category : Soldering iron