
NE1098 - Meat Grinder TEFAL - Free user manual and instructions
Find the device manual for free NE1098 TEFAL in PDF.

| Product Type | Electric Meat Grinder |
| Brand | TEFAL |
| Model | NE1098 |
| Power | Approximately 300 W |
| Weight | Approximately 3 kg |
| Dimensions (L x W x H) | Approximately 25 x 15 x 20 cm |
| Motor Unit | With ON/OFF/REVERSE button |
| Mincer Head | Removable with release button |
| Included Grinding Grids | Fine, medium, and coarse |
| Accessories | Sausage accessory, shredder drums and cones, coulis accessory |
| Pusher | Included for safe feeding |
| Removable Tray | Plastic, easy to clean |
| Cleaning | Hand wash accessories; do not put in dishwasher |
| Lubrication | Apply cooking oil to perforated plates and blades |
| Safety Precautions | Read manual before use; handle sharp blades with care |
| Reverse Function | Yes, to clear blockages |
| Application | Meat mincing, sausage making, vegetable chopping, coulis preparation |
Frequently Asked Questions - NE1098 TEFAL
User questions about NE1098 TEFAL
0 question about this device. Answer the ones you know or ask your own.
Ask a new question about this device
Download the instructions for your Meat Grinder in PDF format for free! Find your manual NE1098 - TEFAL and take your electronic device back in hand. On this page are published all the documents necessary for the use of your device. NE1098 by TEFAL.
USER MANUAL NE1098 TEFAL
| BG p. | 6 | - | 8 |
| BS p. | 9 | - | 11 |
| CS p. | 12 | - | 14 |
| HU p. | 15 | - | 17 |
| ROP p. | 18 | - | 20 |
| SK p. | 21 | - | 23 |
| ESL p. | 24 | - | 26 |
| ESR p. | 27 | - | 29 |
| HR p. | 30 | - | 32 |
| ET p. | 33 | - | 35 |
| ELV p. | 36 | - | 38 |
| ELT p. | 39 | - | 41 |
| EPL p. | 42 | - | 44 |
| EN p. | 45 | - | 47 |
| ENL p. | 48 | - | 50 |
| FTR p. | 51 | - | 53 |
| ES p. | 54 | - | 56 |
| EUK p. | 57 | - | 59 |
| EDE p. | 60 | - | 62 |
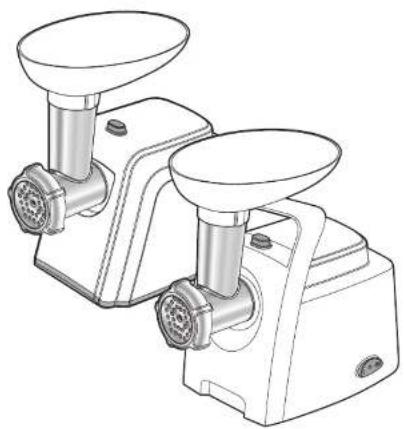
natural_image
Line drawing of a two-wheeled kitchen tool with two flanges and a base (no text or symbols)BG BS CS HU RO SK SL SR HR ET LV LT PL EN NL TR ES UK DE
* в зависимости от модела - ovisno o modelu - závislosti na modelu - A modellől függően in funcje de model - v závislosti na modeli - Ovisno od modela - U závisnosti od modela - ovisno o modelu - olnevalt modelist - Atkanba no modela - priklausomai nuo modelo - W zależności od modelu - depending on model - Afhankelijk van het model - modele gore En función del modelo - Залежно від моделі - je nach Modell
* в зависимости от модела - ovisno o modelu - v zavislosti na modelu - A modeltiől függően in funcje de model - v zavislosti na modeli - Odvisno od modela - U zavisnosti od modela - ovisno o modelu - olcnvolt muckelist - Atkanba na modelja - prikausomal nuo modello W zaliczności od modelu - depending on model - Afhankottik van het model - module qorc En función del modelo - sanexno bia mozeni - je nach Modell

natural_image
Mechanical assembly diagram showing a shaft and housing with an arrow indicating direction (no text or symbols)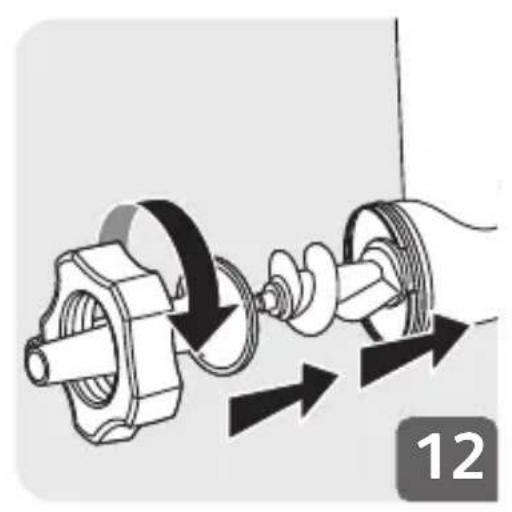
natural_image
Mechanical assembly diagram showing a shaft and gear mechanism with directional arrows (no text or symbols)
natural_image
Illustration of a hand holding a pipe with arrows indicating flow direction (no text or symbols)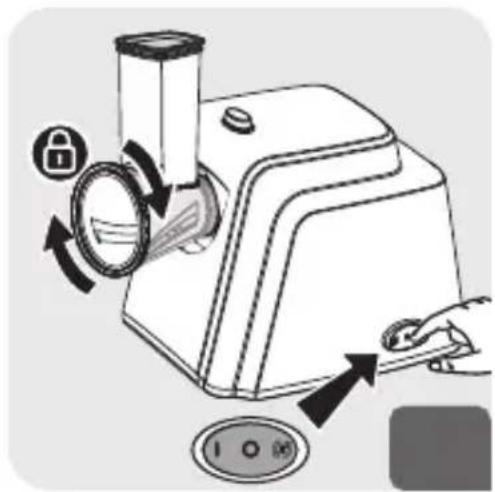
natural_image
Illustration of a hand pouring liquid into a blender with a downward arrow indicating flow (no text or symbols)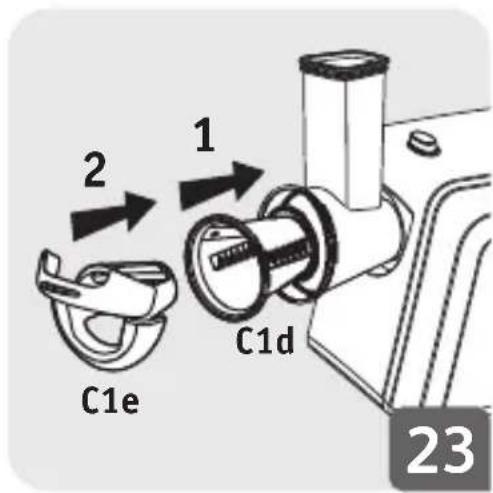
natural_image
Mechanical assembly diagram showing a hairdryer with parts including a nut, meshing, and a tool (no text or labels)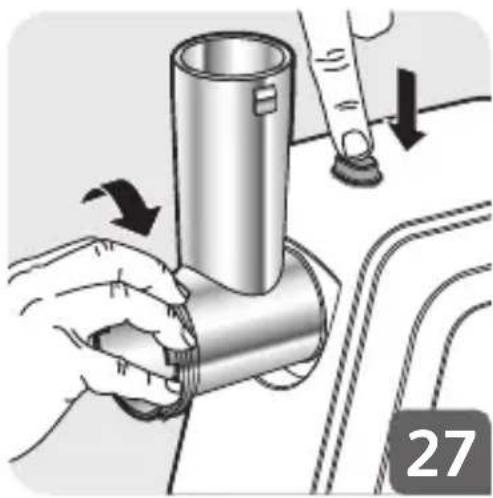
natural_image
Illustration of hands performing a mechanical assembly with a cylindrical component and directional arrows (no text or symbols)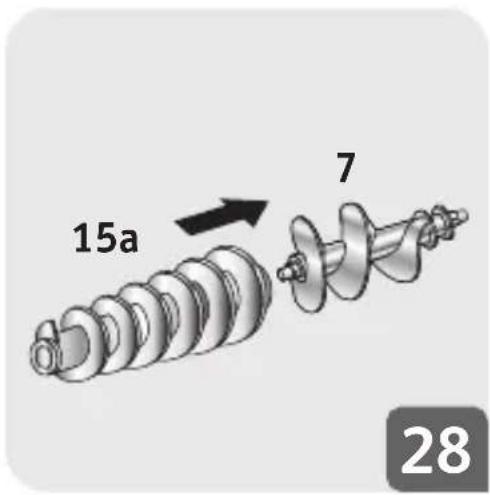

natural_image
Mechanical component diagram showing a worm gear with a directional arrow indicating motion (no text or symbols)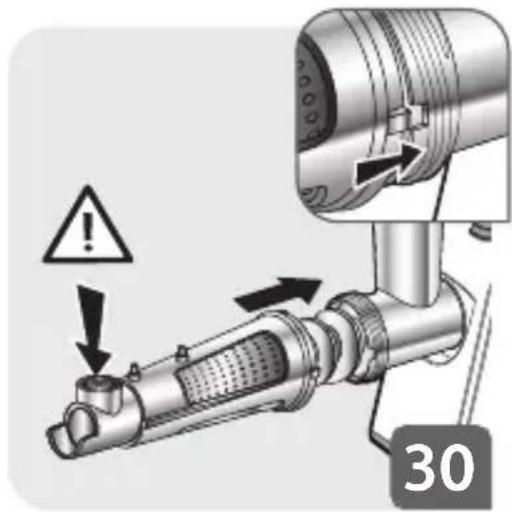
natural_image
Illustration of hands operating a mechanical device with a circular arrow indicating motion (no text or symbols)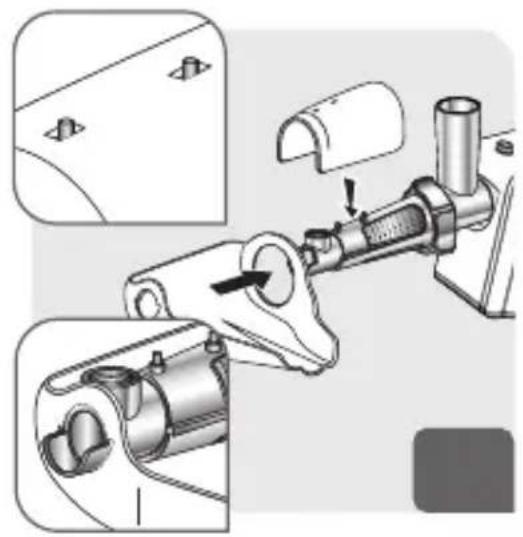
natural_image
Mechanical assembly diagram showing a motor with adjustment parts and mounting bracket (no text or symbols)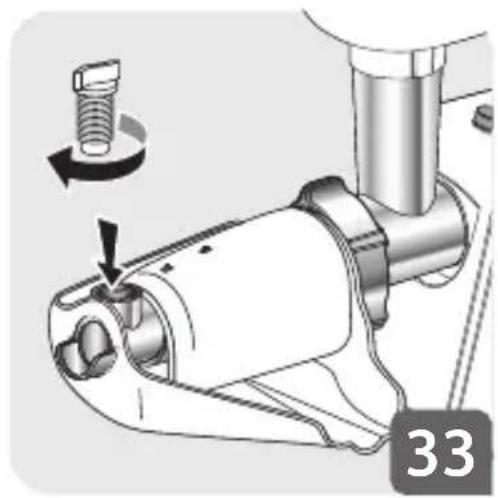
natural_image
Mechanical assembly diagram showing a screw being inserted into a motor (no text or symbols visible)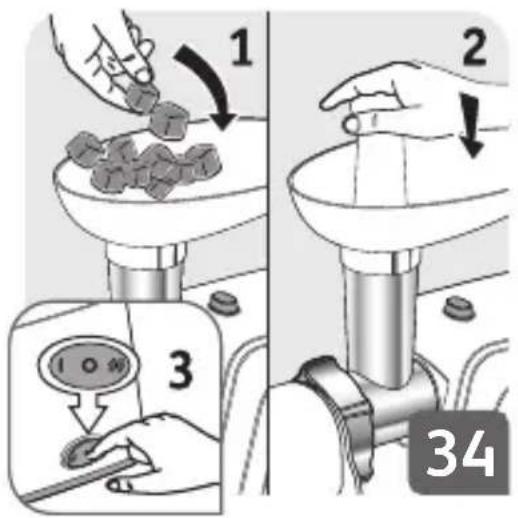

POUŽITÍ: HLAVA MLÝNKU NA MASO (OBR. 1 AŽ 9)
Safety instruction booklet LS-123456 is supplied with the appliance.
CAUTION: the safety precautions are part of the appliance. Read them carefully before using your new appliance for the first time. Keep them in a place where you can find and refer to them later on.
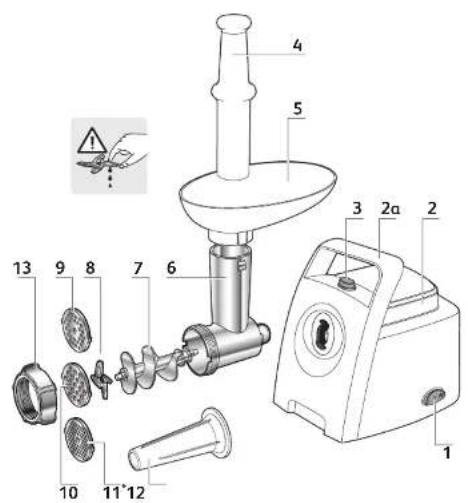
DESCRIPTION
1 ON/OFF/REVERSE button
a Motor unit
2 Handle*
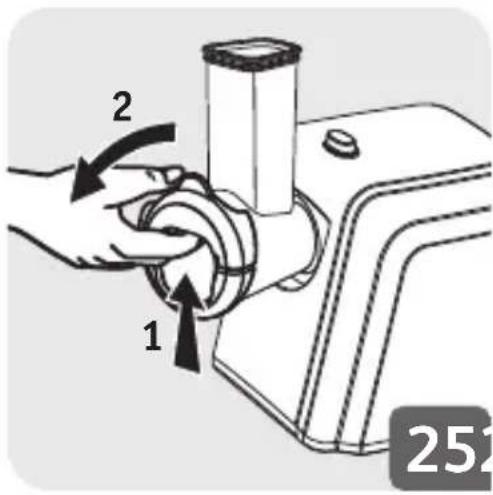
3 Mincer head release button
4 Pusher
5 Removable plastic tray
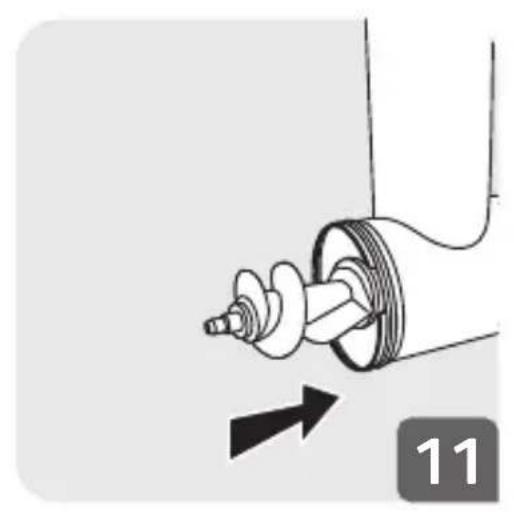
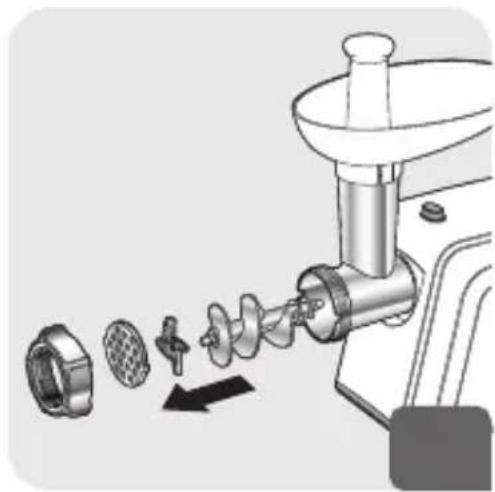
6 Meat mincer head
7 Screw
8 Blade
9 Medium mincing grid
10 Coarse mincing grid
11 Fine mincing grid
12 Sausage accessory
13 Aluminium nut
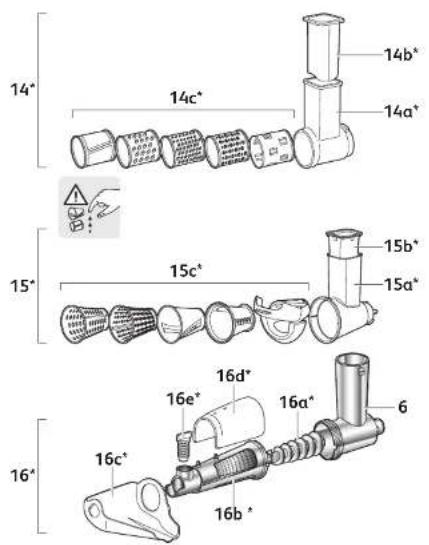
14 Shredder drums accessory*
15 Shredder cones accessory*
16 Coulis accessory*
16a Screw
16b Filter
16c Juice tray
16d Juice jid
16e Plastic screw
USE
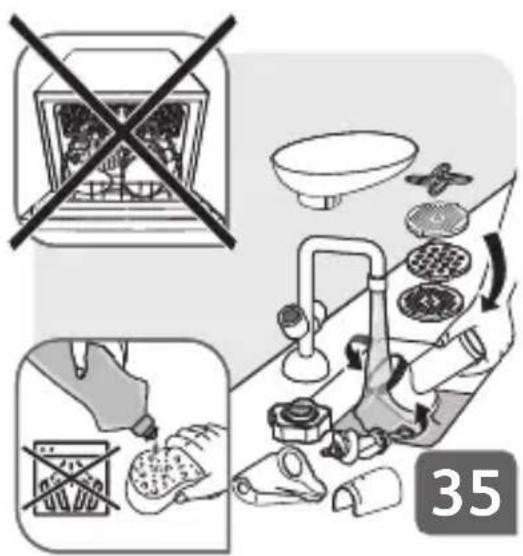
Wash all accessories in warm water and washing up liquid. Rinse and dry carefully. Do not put these parts into the dishwasher.
The perforated plates and blades must be kept lubricated. Apply a little cooking oil to them.
Do not run the appliance empty or if the perforated plates have not been oiled.
WARNING! Handle the drums and cones carefully as the blades are extremely sharp.
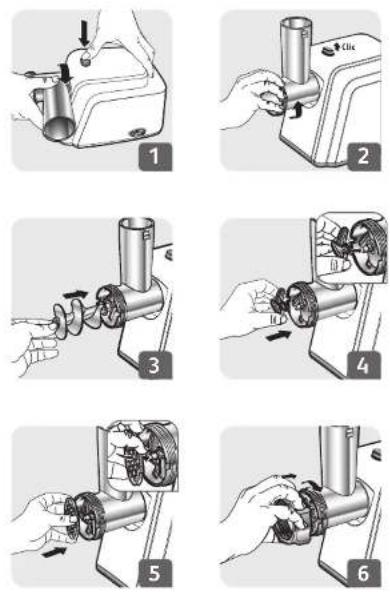
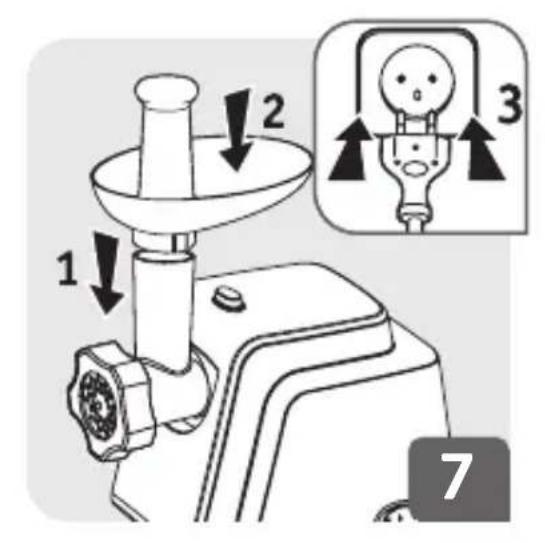
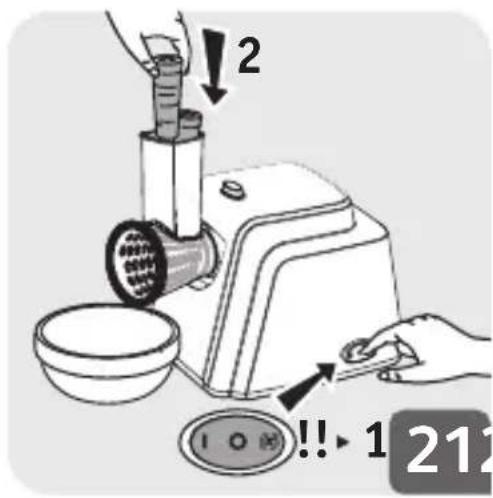
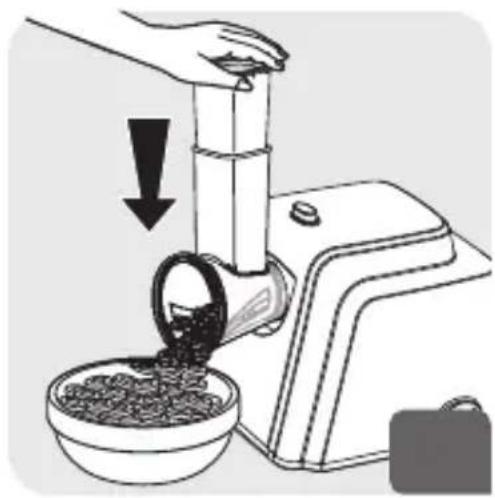
USE : MEAT MINCER HEAD (FIG.1 TO 9)
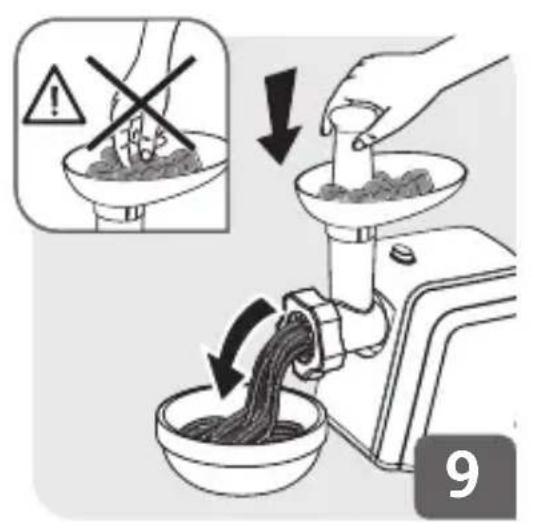
Prepare all the food you wish to mince, removing any bones, cartilage, skin or nerves. Thaw frozen food completely before mincing.
Cut the meat into pieces (approximately 2 cm x 2 cm).
Tip: When you have finished mincing, put a few pieces of bread into the appliance to get all of the mince out.
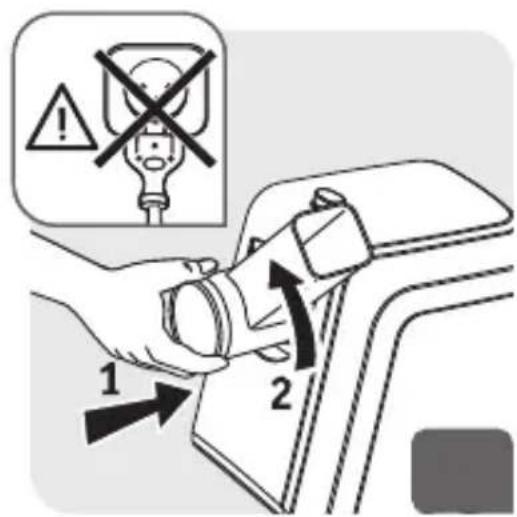
What should you do in the event of a blockage?
Stop the mincer by pressing position “R” on the ON/OFF button(1) one time. Then press the same position “R” on the ON/OFF button for a few seconds in order to clear the blocked food.
Press position "I" on the start/stop button (G). to continue mincing.
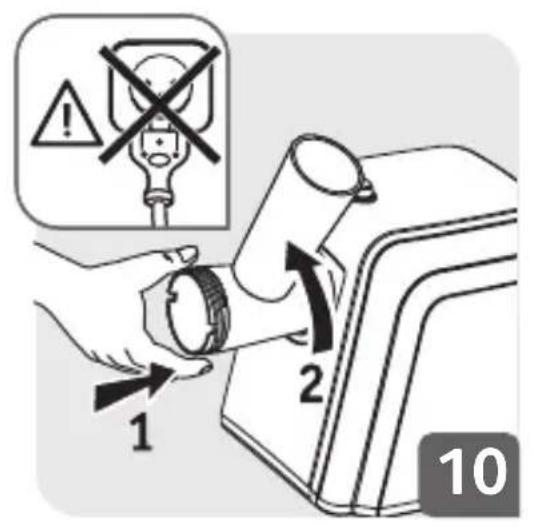
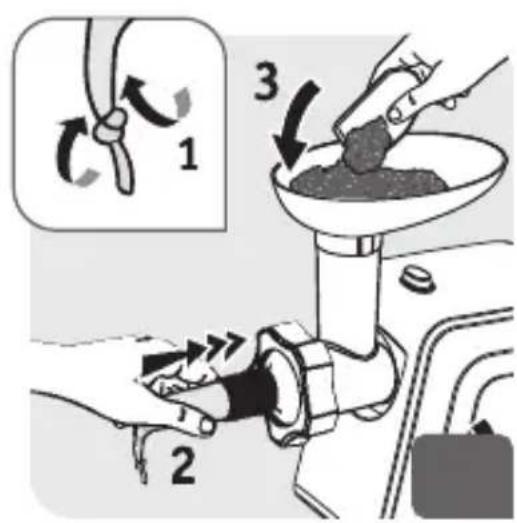
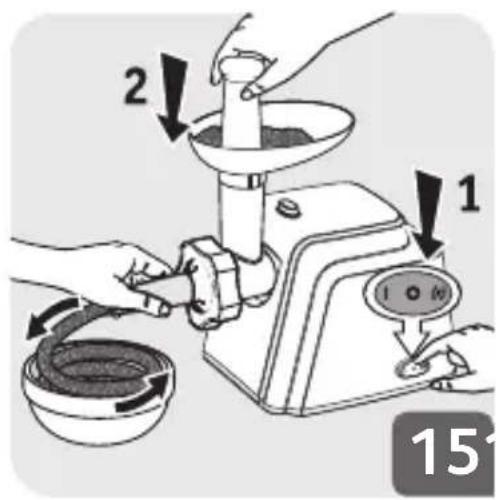
USE : SAUSAGE ACCESSORY (FIG. 10 TO 15)
N.B.: this accessory should only be used after having minced, seasoned and mixed the food.
Put the sausage casing in warm water to make it elastic again, then place it on the funnel and let it overhang by around 5 cm (which you will seal by tying a knot with a clip). Turn on the appliance, fill up the mincer with mince and hold on to the casing in order for it to fill up properly.
N.B.: it is easier to carry out this task with two people - one person can fill up the mincer and the other person can take care of filling the casing. Make the sausages as long as you want by pinching and turning the casing. To prepare quality sausages, ensure there is no air in the casings when filling them and make 10-15 cm sausages (separate the sausages by placing a clip and tying a knot).
Purchasing sausage skin casings (for UK only)
If your local butcher is unable to sell you some sausage skins suitable for thick sausages, we suggest contacting some of the following companies (information correct at March 2012):
Ascott Smallholding Supplies Ltd Units 21/22
Whitewalls - Easton Grey - Malmesbury
Wiltshire SN16 ORD
United Kingdom
Tel: 0845 130 6285 - Fax: 01666 826931
e-mail:sales@asc ott.biz
www.ascott.biz
Scobie & Junor (Estd. 1919) Ltd, 1 Singer Road,
East Kilbride,
Glasgow G75 0XS
Scotland
Tel: 0800 783 7331 (free phone)
Tel: 01355 237041
Fax: 01355 576343
e-mail: info@scobiesdirect.com
www.scobiesdirect.com
W Weschenfelder and Sons Ltd,
2–4 North Road
Middlesborough
TS2 1DD
United Kingdom
Tel: 01642 247524
e-mail: via contact us section on website
HYPERLINK "http://www.weschenfelder.co.uk"
www.weschenfelder.co.uk
Designa Sausage
15 Buxton Road
Disley
Stockport
Cheshire SK12 2DZ
United Kingdom
Tel: 01663 733499
e-mail: via contact us section on website
HYPERLINK "http://www.designasausage.com"
www.designasausage.com
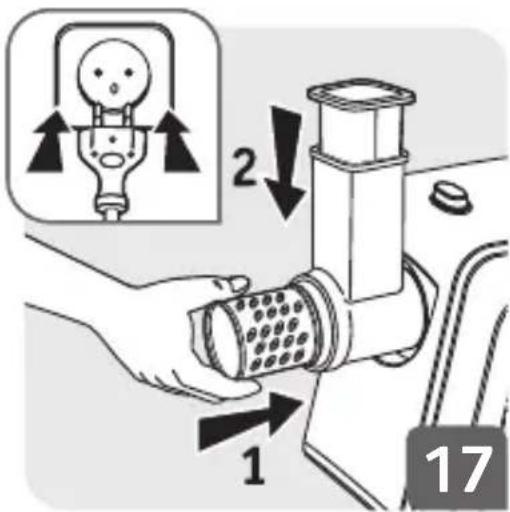
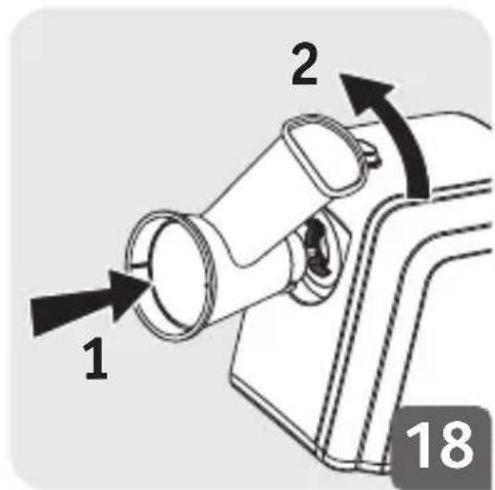
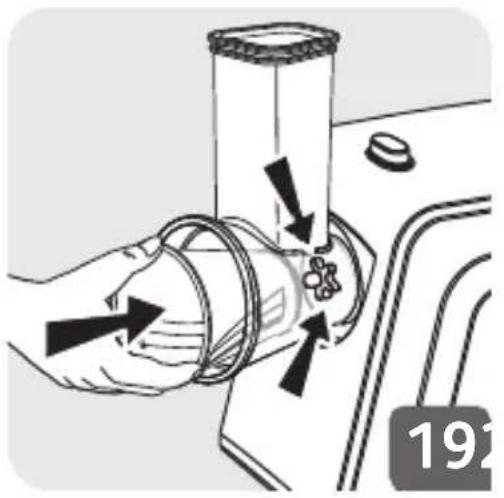
USE : VEGETABLE CHOPPER\* (FIG.16 TO 27)
Useful tips for best results:
For best results the ingredients you use should be firm. Do not allow food remains to build up inside the unit. Do not use the appliance to grate or mince substances which are too hard, such as sugar or large pieces of meat. Cut food into small pieces so that it can be fed easily into the hopper.
Do not use the device to grate or cut food products that are too hard such as sugar cubes or pieces of meat with skin or nerves.
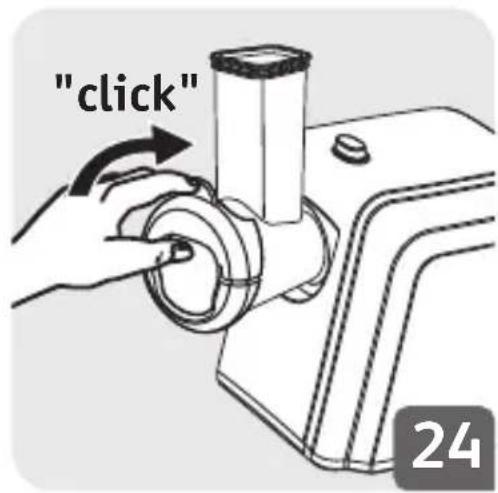
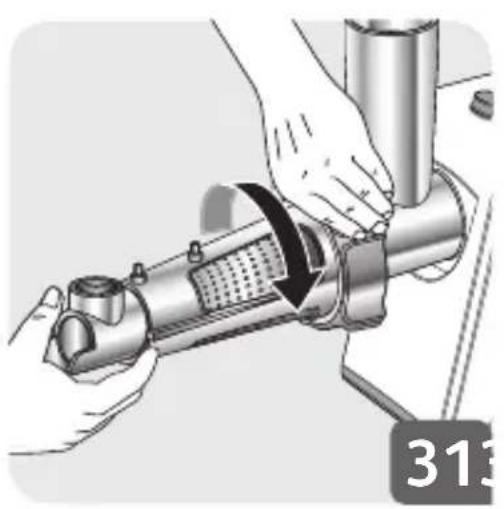
USE COULIS ACCESSORY (FIG. 28 TO 34)
Use : Place a container under the juice tray (15c) to collect the juice and another one at the end of the filter to collect any residues. If you wish to make coulis or juice, using fresh fruits only is an imperative. Cut the tomato into 4 pieces before feeding the tube. According to the season and to the quality of your fruits, we recommended that you run the pulp through a second time to extract the maximum possible amount of coulis or juice.
CLEANING (FIG. 35)


- POUŽITÍ: HLAVA MLÝNKU NA MASO (OBR. 1 AŽ 9)
- Safety instruction booklet LS-123456 is supplied with the appliance.
- DESCRIPTION
- USE
- USE : MEAT MINCER HEAD (FIG.1 TO 9)
- USE : SAUSAGE ACCESSORY (FIG. 10 TO 15)
- USE : VEGETABLE CHOPPER\* (FIG.16 TO 27)
- Useful tips for best results:
- USE COULIS ACCESSORY (FIG. 28 TO 34)
- CLEANING (FIG. 35)
Brand : TEFAL
Model : NE1098
Category : Meat Grinder