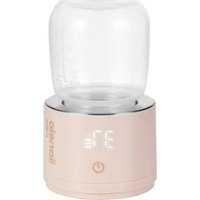
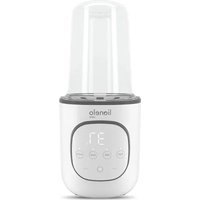
Thermup 3.0 - Bottle warmer Lionelo - Free user manual and instructions
Find the device manual for free Thermup 3.0 Lionelo in PDF.

| Product type | 2-in-1 bottle warmer and sterilizer |
| Brand | Lionelo |
| Model | Thermup 3.0 |
| Main functions | Rapid heating, keep warm, food warming, sterilization |
| Recommended water capacity | 40-50 ml (rapid), max 160 ml (keep warm/warming), 120-160 ml (sterilization) |
| Temperature range (keep warm) | 35-60 °C |
| Temperature range (warming) | 30-80 °C |
| Default temperature (keep warm) | 37 °C |
| Time setting (rapid heating) | 1 to 8 minutes |
| Time setting (sterilization) | 5 to 15 minutes |
| Automatic shut-off | Yes: after 24 h (keep warm), 2 h (warming) or end of cycle |
| Silent mode | Yes, activated by pressing + and - buttons simultaneously |
| Bottle compatibility | Glass, plastic, silicone, breast milk storage bags |
| Removable parts | Lid, bottle basket |
| Care and cleaning | Clean with a damp cloth; do not use abrasive products |
| Descaling frequency | Approximately every 4 weeks |
| Descaling method | 30 ml vinegar + 90 ml demineralized water, sterilization cycle |
| Safety | Do not use without water; do not immerse; hot surfaces; hot steam |
| Power supply | Mains (see label) |
| Warranty | Details at www.lionelo.com |
Frequently Asked Questions - Thermup 3.0 Lionelo
User questions about Thermup 3.0 Lionelo
0 question about this device. Answer the ones you know or ask your own.
Ask a new question about this device
Download the instructions for your Bottle warmer in PDF format for free! Find your manual Thermup 3.0 - Lionelo and take your electronic device back in hand. On this page are published all the documents necessary for the use of your device. Thermup 3.0 by Lionelo.
USER MANUAL Thermup 3.0 Lionelo
2-in-1 bottle warmer and sterilizer

1
natural_image
Diagram showing a wall socket connected to an electrical plug with a black arrow indicating direction (no text or symbols)2
natural_image
Line drawing of a hand performing a finger massage on a wrist, no text or symbols present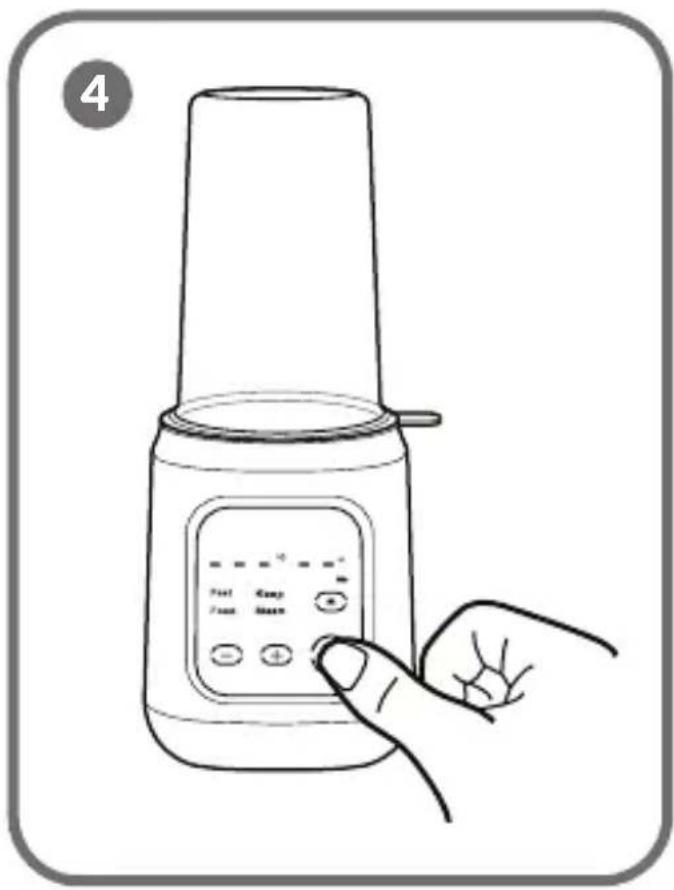
Dear Customer!
In case of any questions or comments on the purchased product, please contact us: help@lionelo.com
Manufacturer:
BrandLine Group Sp. z o. o., A. Kręglewskiego 1, 61-248 Poznań, Poland
Important information
Please read these instructions before operating the product to familiarise yourself with its functions and use it as intended.
Failure to observe safety instructions and use contrary to instructions may result in damage to your health. Keep these operating instructions for future reference.
- Never try to repair or modify the appliance on your own. These actions may only be undertaken by an authorised service centre.
- This appliance is not a toy. Do not allow children to play with it. Keep the appliance out of the reach of children.
- This appliance may be used by children aged 3 or older and persons with reduced physical, sensory or mental abilities, as well as by persons without relevant knowledge and experience in the use of the appliance if they are supervised or have been previously instructed in the safe use of the appliance and the risks involved.
- Cleaning and maintenance of the appliance may be carried out by children aged 8 or older, who are
properly supervised. Keep the appliance and power cord out of the reach of children aged 3 or younger.
- The appliance is intended for home use only. It is not suitable for outdoor use. Do not use it for any other purpose incompatible with its intended use.
- Do not let the power cord hang over the edge of a table or worktop. Do not expose the power cord to any hot elements. Keep the power cord away from sharp edges.
- Only connect the appliance to a mains socket outlet with a ground connection. Make sure the power cord is properly connected to a power source.
- To power the appliance, connect it to a mains network that matches the parameters specified on the appliance label.
- Use the appliance on a flat heat-resistant surface. Do not move the appliance while it is in operation or contains hot water.
- Use only original accessories and spare parts.
- Check the appliance regularly for damage. Do not use the appliance if it is damaged. Do not attempt to repair the appliance by yourself – contact an authorised repair centre. If the power cord becomes damaged, it should be replaced by the manufacturer to avoid danger.
- After use, during assembly, disassembly, and cleaning, the appliance must be turned off and
disconnected from the power supply.
- Keep the appliance away from sharp edges, and sources of heat and moisture. Do not expose the appliance to direct sunlight.
- Do not immerse the appliance or power cord in water or any other liquids.
- Avoid overheating the appliance.
- Ensure the bottle is firmly capped before placing it in the warmer and adding water.
- Always check that there is water in the appliance before switching it on. Never operate the appliance without water.
- Hot water can cause severe burns. If the appliance contains hot water, use caution when handling it.
- Once the baby food has reached the desired temperature, remove the bottle from the warmer. Do not overheat the food.
- Always test the food temperature before feeding your baby.
- Allow the appliance to cool down before cleaning.
- The appliance should be descaled regularly, approximately every four weeks.
- After use, the surface of the heating element may retain residual heat.
Surfaces may become hot during use. Exercise caution to prevent burns.
List of parts (Fig. A)
- Appliance body and control panel
- Lid
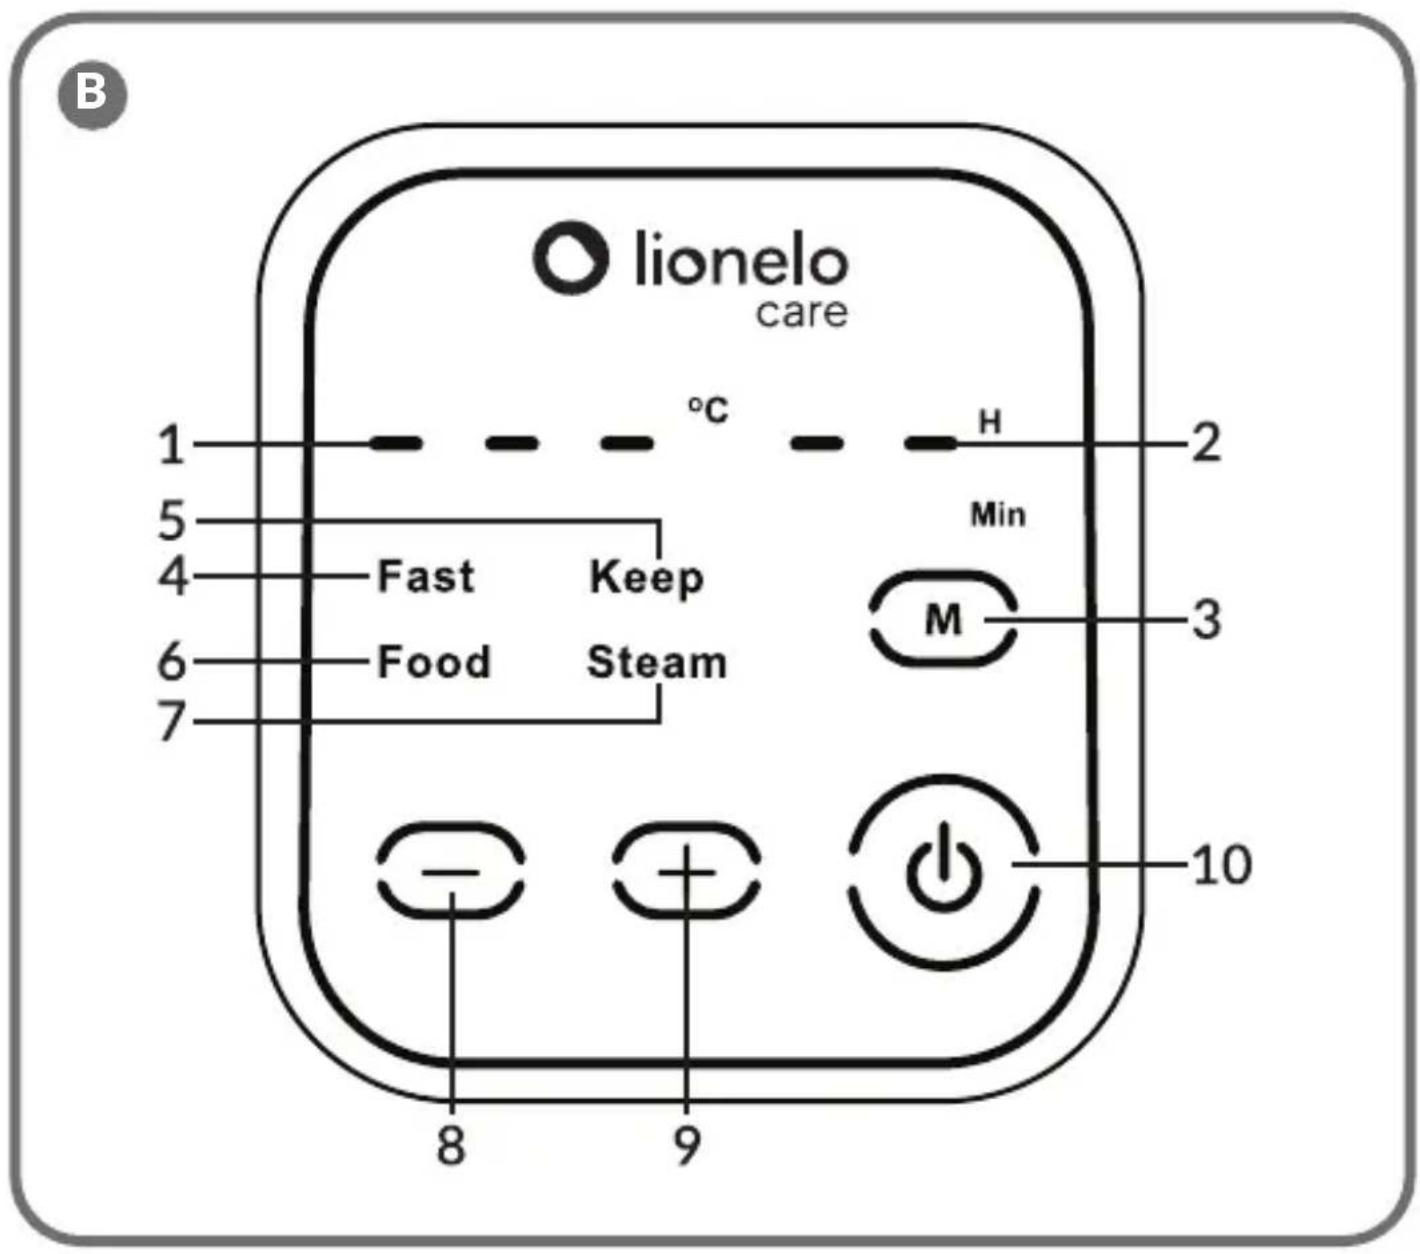
Control panel diagram (Fig. B)
- Temperature indicator
- Time indicator
- Operating mode selection button
- Quick heating function
-
Temperature maintenance function
-
Bottle/container basket
- Baby food heating function
- Disinfection function
- Decrease temperature/time button
- Increase temperature/time button
- ON/OFF switch
Recommended water volume table
| Mode Recommended volume of water | |
| Quick heating function 40–50 ml | |
| Temperature maintenance function Max 160 ml | |
| Baby food heating function Max 160 ml | |
| Sterilisation function 120–160 ml | |
Important! In the “Quick” and “Sterilisation” modes, the water reaches boiling temperature. Never touch the steam lid or the baby bottle during or immediately after use! Always use the handles and tilt the steam lid away from your body to prevent burns.
Before first use
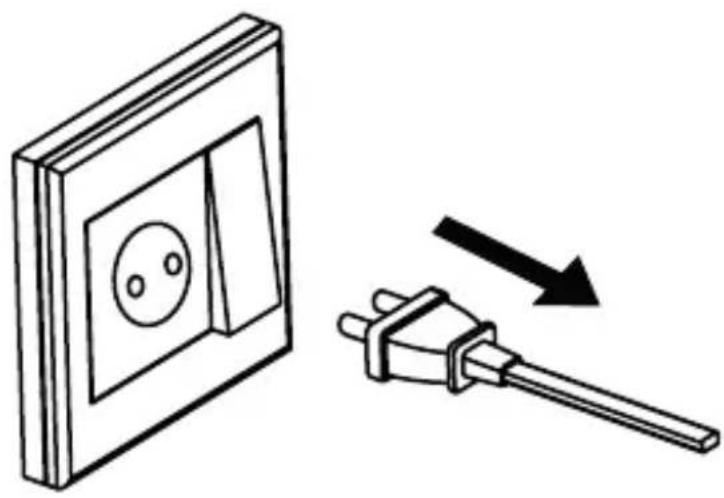
- Make sure the appliance is unplugged (Fig. 1).
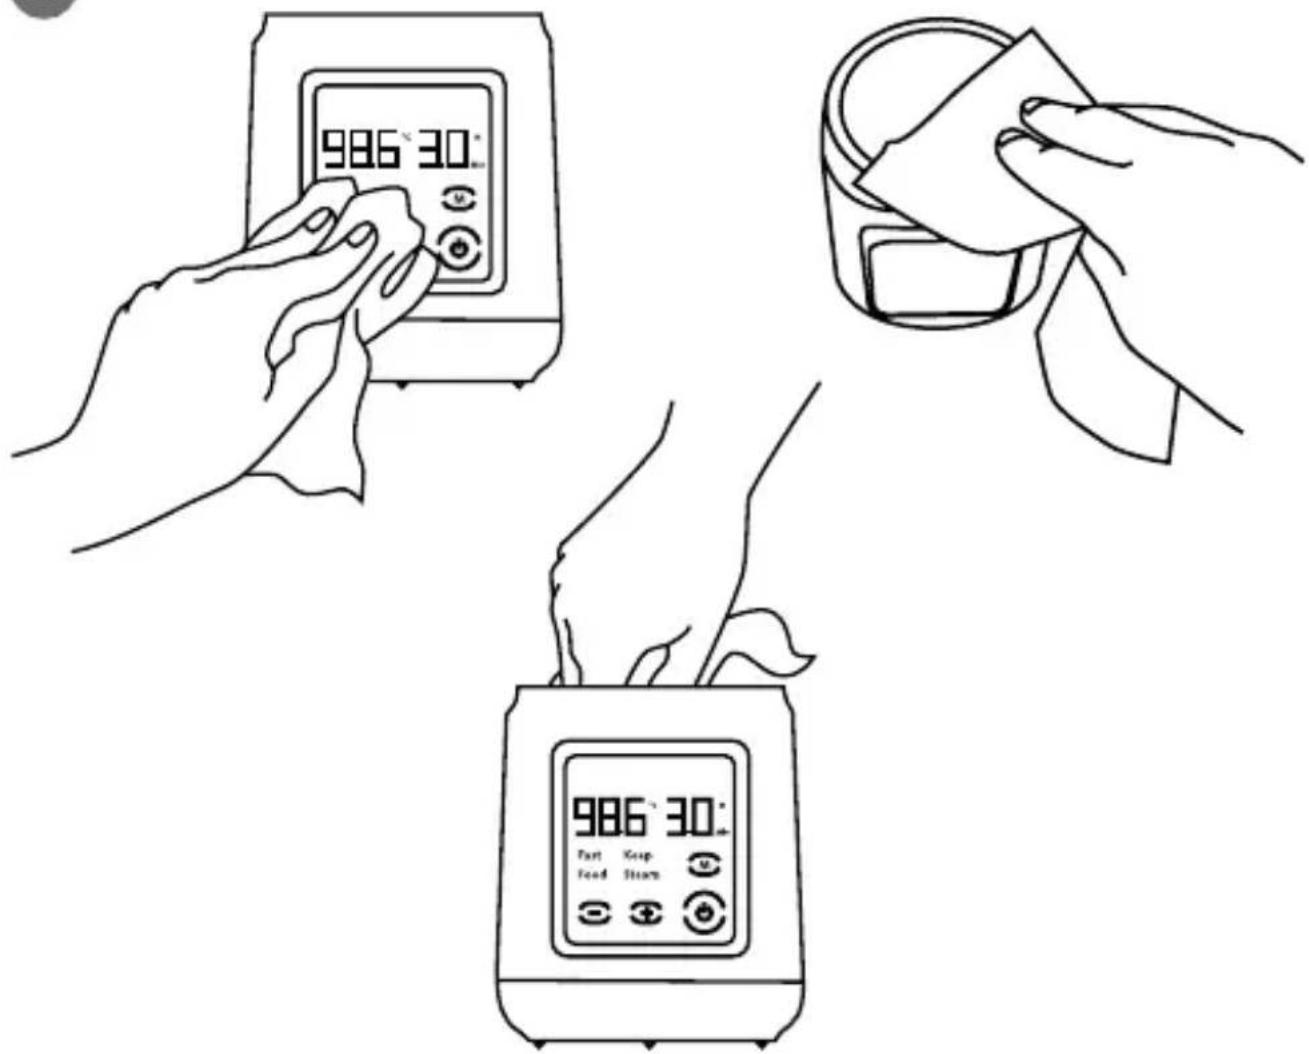
- Clean the exterior and interior parts using a damp cloth (Fig. 2).
- Wash the lid (2, Fig. A) and basket (3, Fig. A) under running water.
- Pour 120 ml of water into the warmer.
- Reattach the basket and lid, then plug the appliance into the power supply.
- Turn on the appliance and select the sterilisation function (7, Fig. B).
- Once the cycle is complete, allow the appliance to cool down and pour out any remaining water.
Quick heating function
- Place the bottle in the basket (3, Fig. A).
- Fill the warmer with water (at least 40 ml and no more than 50 ml). Put the lid on the appliance (2, Fig. A). Plug the appliance into the power supply (Fig. 1).
- On the control panel, select the quick heating function (4, Fig. B).
- Set the operating time (1–8 minutes). Adjust the time using the decrease and increase buttons (8, 9, Fig. B).
- The appliance will start operating automatically 3 seconds after a function is selected.
- The appliance features a smart memory system that remembers the last used heating time setting.
- When the cycle is complete, the screen will flash and the appliance will emit 3 beeps. The
default temperature is 37^ C.
- After the cycle is complete, the warmer will automatically switch to the temperature maintenance function.
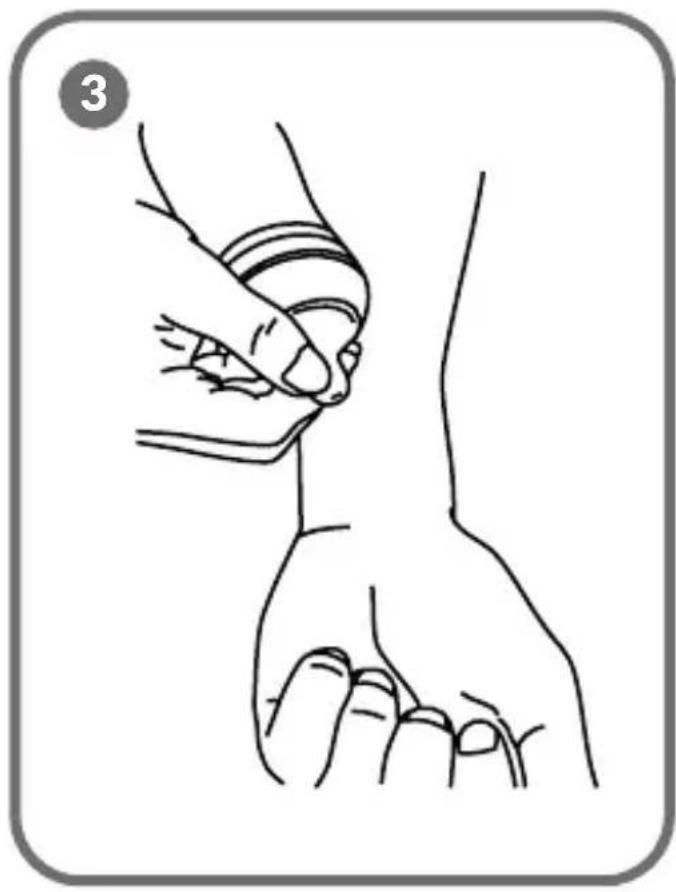
- Before feeding, shake the bottle and make sure the temperature is appropriate (Fig. 3).
Important! During the quick heating mode, use the appliance with the lid on.
| Recommended heating time for the quick heating function | |||||
| Material | Milk/formula temperature | Volume | |||
| 60 ml 120 ml 180 ml | 240 ml | ||||
| Glass bottle | 4-7°C 2,6 min | 3 min 3,4 min | |||
| 17-25°C 1,4 min | 2 min 2,4 min | ||||
| Milk/formula storage bag | 4-7°C 1 min | 4 min 1,8 min | |||
| 17-25°C <1 min | <1 min 1 min | 1 min | |||
| Plastic bottle | 4-7°C 2,6 min | 3,4 min 4,8 min | |||
| 17-25°C 1,4 min | 2 min 2,8 min | 3,2 min | |||
| Silicone bottle | 4-7°C 3,4 min | 4 min 5,4 min | 6,4 min | ||
| 17-25°C 1,6 min | 2,4 min 2,8 min | 3,8 min | |||
| *Results may vary depending on food type and initial temperature. | |||||
Important! Fill with water only when the appliance is unplugged. After connecting it to the mains, turn the appliance on using the ON/OFF switch (Fig. 4).
Temperature maintenance function
- This function keeps the food at a constant temperature. The default temperature is 37^ C.
- Place the bottle in the basket (3, Fig. A).
- Fill the warmer with water approximately up to the level of the milk/formula in the bottle. Never pour in more than 160 ml of water!
- Put the lid on the appliance (2, Fig. A), then plug the appliance into the power supply (Fig. 1).
- On the control panel, select the temperature maintenance function (5, Fig. B).
- The display shows the temperature of the liquid being heated. The temperature can be adjusted between 35^ C and 60^ C using the decrease and increase buttons (8, 9, Fig. B).
- The appliance will start operating automatically 3 seconds after a function is selected.
- When the selected temperature is reached, the appliance will emit 3 beeps.
-
Before feeding, shake the bottle and make sure the temperature is appropriate (Fig. 3).
-
The warmer will operate for 24 hours and maintain the temperature. After this time, the appliance will automatically switch off.
Baby food heating function
- Place a heat-resistant food container in the basket (3, Fig. A).
- Fill the warmer with water to approximately the same level as the food in the container, then place the lid on the appliance (2, Fig. A) and plug it into the power supply (Fig. 1). Never pour in more than 160 ml of water!
- On the control panel, select the food heating function (6, Fig. B).
- The display will show the temperature of the heated food and the remaining time. The default temperature is 75^ C. You can adjust the temperature between 30^ C and 80^ C using the decrease and increase buttons (8, 9, Fig. B).
- The appliance will start operating automatically 3 seconds after a function is selected.
- To ensure even heating of the food, regular stirring is recommended.
- The appliance will automatically turn off 2 hours after reaching the selected temperature and will signal the end of the process with 3 beeps.
| Recommended heating time for the temperature maintenance function and the food warming function* | |||||
| Material | Milk/formula temperature | Volume | |||
| 60 ml 120 ml 180 ml | 240 ml | ||||
| Glass bottle 17-25°C | 1,4 min 2 min 2,4 min 2,6 min | ||||
| Milk/formula storage bag 17-25°C <1 min <1 min 1 min 1 min | |||||
| Plastic bottle | 17-25°C 1,4 min 2 min 2,8 min 3,2 min | ||||
| Silicone bottle | 17-25°C 1,6 min 2,4 min | 2,8 min 3 | 8 min | ||
| *Results may vary depending on food type and initial temperature. | |||||
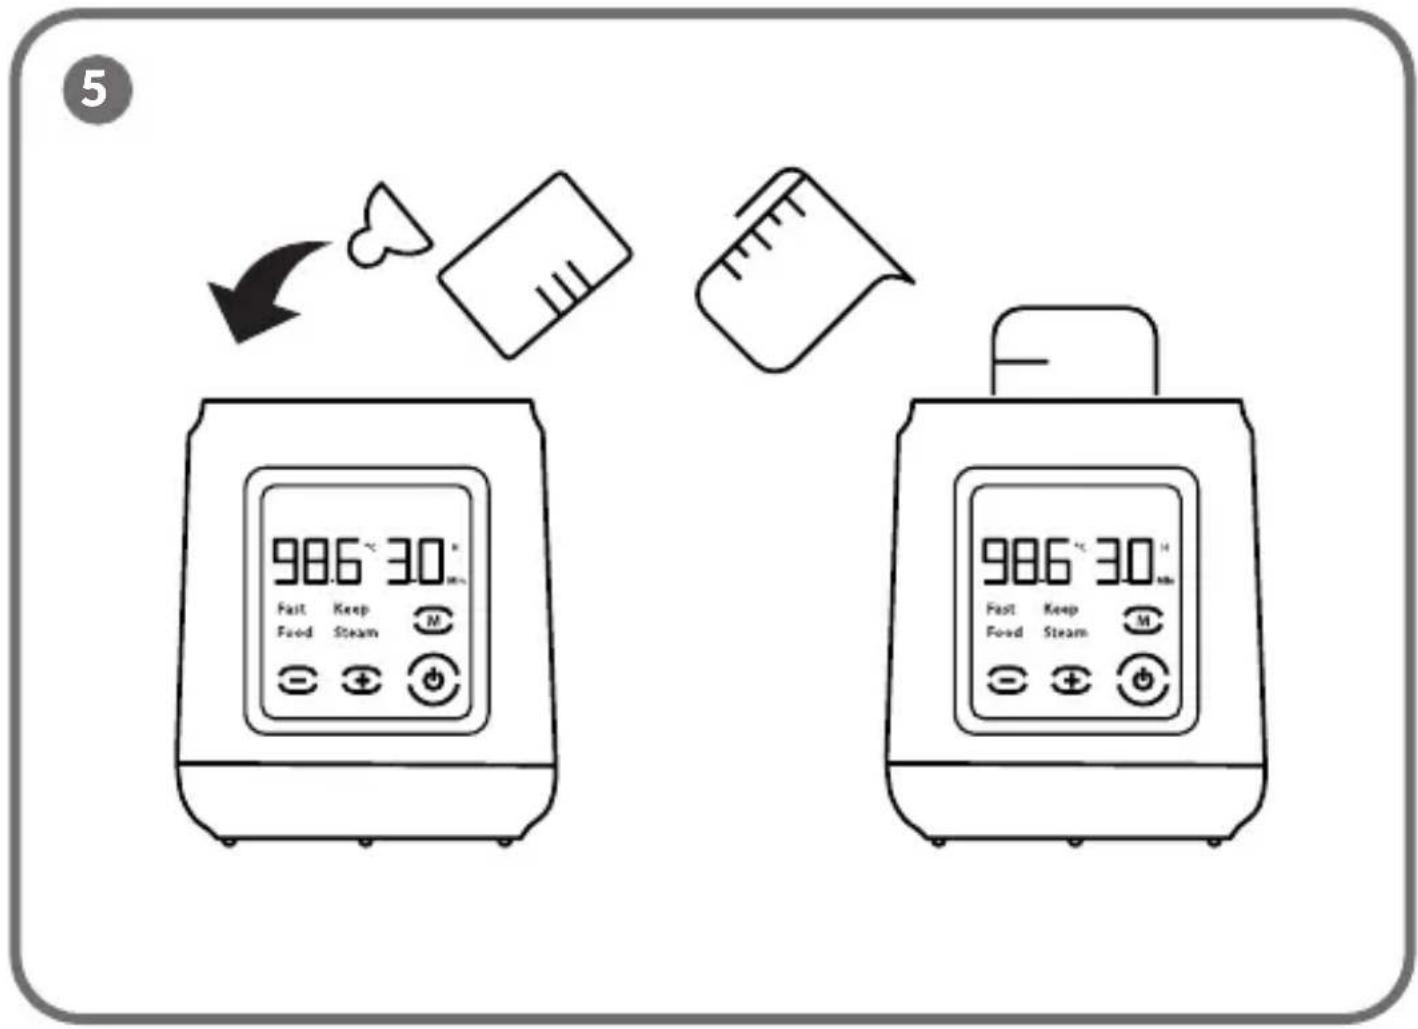
Sterilisation function
- Place the accessories and the bottle upside down in the warmer, then fill the warmer with at least 120 ml and no more than 160 ml of water (Fig. 5).
- Put the lid on the appliance (2, Fig. A), then plug the appliance into the power supply.
- On the control panel, select the sterilisation function (7, Fig. B).
- The display shows the selected disinfection time. The time can be adjusted between 5 and 15 minutes using the decrease and increase buttons (8, 9, Fig. B).
- The appliance will start operating automatically 3 seconds after a function is selected.
- The display shows the remaining time until the end of the operation.
Important! When removing the bottle, be especially careful – the appliance operates at boiling temperature!
- The appliance switches off once the water has evaporated.
Important! Due to the wide variety of baby food textures, it is recommended to stir frequently and monitor the temperature while defrosting.
Do not feed your child milk/formula or food immediately after defrosting. Frozen milk or food should not be heated directly.
Milk or food can be reheated after defrosting.
Silent mode
To activate silent mode, press the increase and decrease buttons simultaneously on the control panel (8, 9, Fig. B).
Cleaning
- Unplug the appliance from the power supply (Fig. 1). Allow the appliance to cool down before cleaning.
- Empty the appliance of water.
- If food has been heated, ensure no residue is left at the bottom.
- Wipe the housing and interior with a soft, damp cloth, then dry thoroughly with a clean cloth or paper towel (Fig. 2).
- Do not use abrasive sponges, scouring agents, or harsh chemicals for cleaning.
Descaling
- Pour 30 ml of vinegar and 90 ml of demineralised water into the warmer.
- Fit the lid, switch on the appliance, and select the sterilisation function (7, Fig. B). The appliance will run the cleaning cycle automatically.
- Once complete, disconnect the appliance from the power supply and allow it to cool.
- Pour out the vinegar solution and clean the appliance with a slightly damp cloth.
- Leave the parts of the appliance to air dry.
- If limescale residue remains, repeat the descaling process.
Troubleshooting table
| Problem Cause Solution | ||
| Milk/formula is not warm enough. | The selected time/temperature is insufficient. | Refer to the Recommended heating time... table and ensure the correct settings are applied. |
| The teat has not been fitted to the bottle. | Ensure the teat is properly attached to the bottle. | |
| Milk/formula is too hot. | The bottle remained in the warmer for too long. | After the quick heating cycle ends, immediately remove the bottle and let it cool for 10–20 seconds. |
| The selected time is too long. | Check the Recommended heating time... table and ensure the correct settings are applied. | |
| The warmer's display shows error code E3. | Steam is evaporating too quickly during the quick heating cycle. | Pour 40–45 ml of water into the warmer. |
PL
Drogi Kliencie!
natural_image
Warning symbol with three steam lines inside a triangle (no text or numbers)natural_image
Warning symbol of a triangle with steam lines inside, no text or numbers presentnatural_image
Warning symbol of steam inside a triangle (no text or numbers)natural_image
Warning symbol of steam inside a triangle (no text or numbers)natural_image
Warning symbol of a triangle with steam lines inside, no text or numbers presentnatural_image
Warning symbol of steam inside a triangle (no text or numbers)EN: The product complies with the requirements of European Union directives. Pursuant to Directive 2012/19/EU, this product is subject to separate waste collection. The product should not be disposed of with municipal waste, as it may pose a risk to the environment and human health. Return the used product to a recycling centre for electrical and electronic equipment.