Rhythm Tune - Bluetooth speaker SILVERCREST - Free user manual and instructions
Find the device manual for free Rhythm Tune SILVERCREST in PDF.

| Product type | Bluetooth speaker with DAB+ and FM receiver |
| Brand | SilverCrest |
| Model | Rhythm Tune |
| Dimensions | Approx. 18 x 8 x 7 cm (L x D x H) |
| Weight | Approx. 500 g |
| Power supply | 5 V ⎓ 1 A (via USB-C port, mains adapter not included) |
| Built-in battery | Lithium-Ion 3.7 V, 2000 mAh, 7.4 Wh (non-replaceable) |
| Battery life | Approx. 9 hours (at medium volume) |
| Charging time | Approx. 3.5 hours |
| Wireless connectivity | Bluetooth 5.0 (A2DP, AVRCP, max. range 10 m) |
| Radio reception | DAB+ (174–240 MHz), FM (87.5–108 MHz) |
| Station presets | 30 DAB + 30 FM |
| Wired audio input | 3.5 mm jack socket (AUX) |
| Speaker | Max. music power 5 W RMS |
| Display | Backlit display with brightness adjustment |
| Antenna | Telescopic for DAB/FM |
| Operating conditions | +5 °C to +35 °C, 40–85 % RH |
| Cleaning | With a slightly damp cloth; do not immerse |
| Safety | Do not open the housing; do not expose to flames; keep out of reach of children |
| Warranty | 3 years (excluding normal wear and tear and consumable parts) |
Frequently Asked Questions - Rhythm Tune SILVERCREST
User questions about Rhythm Tune SILVERCREST
0 question about this device. Answer the ones you know or ask your own.
Ask a new question about this device
Download the instructions for your Bluetooth speaker in PDF format for free! Find your manual Rhythm Tune - SILVERCREST and take your electronic device back in hand. On this page are published all the documents necessary for the use of your device. Rhythm Tune by SILVERCREST.
USER MANUAL Rhythm Tune SILVERCREST
natural_image
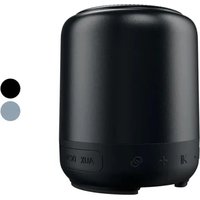
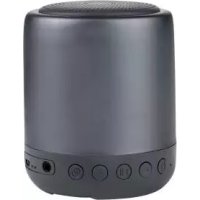
Close-up of a cylindrical black object with textured surface and metallic rim (no visible text or symbols)BLUETOOTH®-LAUTSPRECHER/ BLUETOOTH® SPEAKER/ ENCEINTE BLUETOOTH® RHYTHM TUNE
DE AT CH
BLUETOOTH®- LAUTSPRECHER
Operation and safety notes
FR DE
ENCEINTE BLUETOOTH®
versorgung: 5 V = 1,0 A
WARNUNG! EXPLOSIONSGEFAHR! Werfen
AUS, 10, 20, 30, 45, 60, 90,
120, 180 Sekunden
● = Schwaches Signal
Warnings and symbols used.... Page 39
Introduction ...... Page 41
Intended use..... Page 41
Trademark notices ..... Page 42
Scope of delivery ..... . Page 42
Description of parts ..... . Page 42
Technical data....Page 43
Safety instructions..... Page 44
Safety instructions for
built-in rechargeable
batteries....Page 47
Before use ...... Page 48
Unpacking....Page 48
Charging the battery ..... Page 48
Switching the product
on/off..... Page 49
Mode selection ...... Page 49
System settings.... Page 49
FM operation.... Page 51
Searching stations....Page 52
Scanning functions ..... Page 52
FM display modes ..... Page 53
DAB+ operation..... Page 53
Full scan....Page 53
Manual tuning....Page 54
Deleting unavailable
stations....Page 54
DAB display modes ..... Page 55
Presetting currently active station.... Page 56
Recalling a preset station.... Page 56
Bluetooth operation.... Page 56
Disconnecting the product
from a Bluetooth playback
device.... Page 57
Button functions ..... Page 58
Aux-In operation.... Page 59
Cleaning Page 59
Storage during
non-use..... Page 59
Troubleshooting..... Page 60
Glossary ...... Page 61
Simplified EU declaration of
conformity ...... Page 61
Disposal...... Page 62
Warranty Page 63
Warranty claim procedure.... Page 64
Service....Page 64
| Warnings and symbols usedThe following warnings are used in the user manual, short manual, on the packaging, and on the product: | |
 | DANGER! This symbol in combination with the signal word “Danger” marks a high-risk hazard that if not prevented could result in death or serious injury. |
 | WARNING! This symbol in combination with the signal word “Warning” marks a medium-risk hazard that if not prevented could result in death or serious injury. |
 | CAUTION! This symbol in combination with the signal word “Caution” marks a low-risk hazard that if not prevented could result in minor or moderate injury. |
 | ATTENTION! This symbol with the signal word “Attention” indicates a possible property damage. |
  | WARNING! EXPLOSIONHAZARD! A warning with this symbol and word “WARNING! EXPLOSION HAZARD” indicates the potential threat of explosion.Failure to observe this warning may result in serious or fatal injuries and potential property damage.Follow the instructions in this warning to prevent serious injuries, a danger to life or property damage!This mandatory sign indicates to wear suitable protective gloves!Follow the instructions of this warning to avoid hand injuries caused by objects or contact with hot or chemical materials. |
 | NOTE: This symbol in combination with “Note” provides additional useful information. |
 | This symbol means that the operating instructions must be observed before using the product. |
 | CE mark indicates conformity with relevant EU directives applicable for this product. |
 | Direct current/voltage |
 | Battery charging input port |
 | Safety informationInstructions for use |
BLUETOOTH® SPEAKER
● Introduction
We congratulate you on the purchase of your new product. You have chosen a high quality product. The instructions for use are part of the product. They contain important information concerning safety, use and disposal. Before using the product, please familiarise yourself with all of the safety information and instructions for use. Only use the product as described and for the specified applications. If you pass the product on to anyone else, please ensure that you also pass on all the documentation with it.
Intended use
This Rhythm Tune Bluetooth ^® speaker (hereinafter called "product") is a consumer electronics device.
The product is intended to render audio transmitted via Bluetooth ^® or jack lead. It is also used for the reception and playback of analogue and digital radio programs.
This product may only be used privately and not for industrial or commercial purposes. This product may not be used in tropical climates.
Any other use is considered improper. Any claims resulting from improper use or due to unauthorised modification of the product will be considered un-warranted. Any such use is at your own risk.
Trademark notices
☐USB® is a registered trademark of USB Implementers Forum, Inc.
☐ The Bluetooth®word mark and logos are registered trademarks owned by Bluetooth® SIG, Inc. and any use of such marks by OWIM GmbH & Co. KG is under license.
☐ The SilverCrest trademark and trade name is the property of their respective owners.
□ Any other names and products are trademarks or registered trademarks of their respective owners.
- Scope of delivery
After unpacking the product, check if the delivery is complete and if all parts are in good condition. Remove all packaging materials before use.
1 Rhythm Tune Bluetooth ^® speaker
1 Charging cable
(USB Type-C/USB Type-A)
1 Short manual
1 Quick start guide
● Description of parts
1 button
2 button
3 button
4 M button
5 button
6 *SCAN button
7 8 > button
9 - button
10 + button
11 Telescopic antenna
12 Speaker
13 Display
14 USB Type-C socket
15 3.5 mm jack socket
16 Charging cable
(USB Type-C/USB Type-A)
17 Short manual
18 Quick start guide
- Technical data
Power supply:
| -USBType-C | 5 V 7.10 A |
| socket: | 1 x 3.7 V rechargeable |
| - Battery: | Lithium-Ion batterywith 2000 mAh (notreplaceable) |
| Battery power: | 7.4 Wh |
| Music output: max. 5 W RMS |
| Wireless standard: Bluetooth 5.0 |
| Bluetooth frequency |
| band: 2400 to 2483.5 MHz |
| Max. transmitted |
| power: 1 mW |
| DAB reception |
| range: 174 to 240 MHz |
| FM reception range: 87.5 to 108 MHz |
| Preset stations | 30 (DAB) |
| (storage): | 30 (FM) |
| AUX-IN connection: | 3.5 mm jack socket |
| Dimensions: | approx. 18 x 8 x 7 cm |
| (W × D × H) |
| Weight: | approx. 500 g |
| Operating | +5 to +35 °C, |
| conditions: | 40 to 85 % rel. |
| humidity |
| Storage temperature: 0 to +40 °C |
| Bluetooth protocols: AVRCP (remotely controls key audio functions via mobile phone), A2DP (wireless audio transmission) |
| Operation time: approx. 9 hours music playback (at medium volume) |
Charging time: approx. 3.5 hours

Safety instructions
This chapter provides important safety information for handling the product. Improper use can result in personal injury and property damage.
Before using the product, familiarise yourself with all of the safety instructions and instructions for use! When passing this product on to others, also include all the documents!
⚠️ DANGER! DANGER TO LIFE AND RISK OF ACCIDENT FOR INFANTS AND CHILDREN!
DANGER!
RISK OF SUFFOCATION! Packaging materials are not a toy. Never leave children unsupervised with the packaging material. The packaging material represents a danger of suffocation. Children frequently underestimate the dangers. Always keep children away from the packaging material.
This product can be used by children aged from 8 years and above and persons with reduced physical, sensory or mental capabilities, or lack of experience and knowledge if they have been given supervision or instruction concerning use of the product in a safe way and understand the hazards involved. Cleaning and user maintenance shall not be made by children without supervision. Children shall not play with the product. The product is not a toy.
WARNING!
- Never open the housing of the product! It has no internal parts requiring maintenance.
- Do not throw the product into fire and do not expose it to high temperatures.
RISK OF DAMAGE!
This product does not contain any parts which can be serviced by the user. The rechargeable battery cannot be replaced.
- Check the product before every use! Discontinue use if any damage to the product or the charging cable is detected!
If you notice anything unusual during use (e.g. unusual noise, strange odour or smoke), switch the product off immediately and disconnect all cables. Do not use the product anymore.
■ Sudden temperature changes may cause condensation inside the product. In this case, allow the product to acclimate for some time before using it again!
- Do not place burning candles or open fire on or near the product.
- Do not use the product near heat sources such as radiators or other devices emitting heat!
- Only use/charge the product in a dry environment as it is not protected from drip and splash water.
Do not place the product on treated surfaces. Otherwise the rubber feet and/or the surface may be damaged.
■ Never charge the product via the USB port of a PC/notebook.
Only charge the product using a USB power adaptor (not included). The output current of the USB power adaptor must be at least 1 A.
WARNING!
Wireless interface
- Switch the product off on airplanes, in hospitals, service rooms (e.g. boiler room, electric supply room), or near medical electronic systems.
The wireless signals transmitted could impact the functionality of sensitive electronics. Keep the product at least 20 cm from pacemakers or implantable cardioverter defibrillators, as the electromagnetic radiation may impair the functionality of pacemakers. The radio waves transmitted could cause interference in hearing aids.
Do not place the product near flammable gases or potentially explosives areas (e.g. paint shops) with the wireless components on, as the radio waves emitted can cause explosions and fire.
ATTENTION!
The range of the radio waves varies by environmental conditions. In the event of wireless data transmission, unauthorised third parties receiving the data cannot be excluded. OWIM GmbH & Co. KG is not responsible for interference with radios or televisions due to unauthorised modification of the product. OWIM GmbH & Co. KG further assumes no liability for using or replacing cables and devices not distributed by OWIM. The user of the product is fully responsible for correcting interference caused by such unauthorised modification of the product, as well as replacement of such devices.
● Safety instructions for built-in rechargeable batteries
Never open the product, repairs may only be carried out by qualified personnel.

WARNING! RISK OF
EXPLOSION! Do not throw the product into fire.
- Avoid extreme environmental conditions and temperatures, which could affect rechargeable batteries, e.g. radiators/direct sunlight.

If rechargeable batteries have leaked, avoid contact with skin, eyes and mucous membranes with the chemicals! Flush immediately the affected areas with fresh water and seek medical attention!
- Do not cover the product during operation or charging. Otherwise the product can be overheated
This product contains a rechargeable battery, which can lead to fire, explosion or leakage of hazardous substances in case of incorrect application.
Before use
Unpacking
- Remove all packaging materials (including foils).
- Verify the package contents are complete and undamaged!
- Place the product on a level, even surface.
● Charging the battery
NOTE: Never charge the product via the USB port of a PC/notebook.
Only charge the product using a USB power adaptor (not included). The output current of the USB power adaptor must be at least 1 A.
☐ Charge the integrated rechargeable battery prior to first use.
☐ When the battery is drained, is flashing in the display 13. In this case, charge the battery as soon as possible.
-
Insert the USB Type-C plug of the charging cable 16 into the USB Type-C socket 14. Insert the USB Type-A plug into a USB port on a USB power adaptor.
-
The display 13 shows whether the product's battery is being charged:
Display/Charging level status

Battery is charging

Battery is fully charged
Charging a drained battery takes approx. 3.5 hours.
You may use the product during charging. However, doing so will extend the charging time significantly.
- Once charging is complete, unplug the USB Type-C plug.
- Switching the product on/off
□Switching on: Briefly press 1.
☐ Switching off: Press and hold ⏻1 for 2 seconds.
☐ The standby mode is called up when ☐ 1 is briefly pressed during operation. In standby, the time, date and current battery charge status are displayed.
Mode selection
□Select from the modes DAB, FM, Bluetooth or Auxiliary Input: Press M 4.
System settings
-
Display the menu: Press and hold ≡2.
-
Select menu point: Press < 7 or > 8.
-
Select the menu item System. The menu display differs depending on the selected operating mode.
-
Change values: Press < 7 or > 8.
-
Confirm value/selection: Press *SCAN 6.
-
Return to previous level: Press 2.
System settings
1. Time
Set Time/Date
Set time
00:00
Set date
Auto Update
(Automatic time update)
No Update
(No automatic time update)
Update from FM
(Automatic time update from FM)
Update from DAB
(Automatic time update from
DAB)
Update from Any
(Automatic time update from FM
or DAB)
Set 12/24 hour
(12 or 24 hour display)
Set 24 hour
(24 hour display)
Set 12 hour
(12 hour display)
Set date format
DD-MM-YYYY
("Day-Month-Year")
MM-DD-YYYY
("Month-Day-Year")
2. Light setting
Timeout OFF, 10, 20, 30, 45, 60, 90, 120, 180 seconds
NOTE: If you select the setting On, the backlight will be switched on permanently.
Dim level High - Medium - Low On level High - Medium - Low
3. Language
→ English, German, Italian, French, Dutch, Spanish, Swedish, Norwegian
4. Factory Reset
NO YES
NOTE: All previously saved stations will be lost after factory reset.
5. SW version
→ Version number
Volume adjustment
☐ Increase volume: Briefly press + button 10 or press and hold for fast increase.
☐ Reduce volume: Briefly press – button 9 or press and hold for fast reduction.
● FM operation
NOTE: The antenna 11 must be fully extended for FM operation.
☐ Press M 4 repeatedly, until FM is shown in the display 13.
- Searching stations
- Press and hold 2 for 2 seconds.
- Select Scan setting: Press < 7 or > 8.
- Confirm selection: Press ✦SCAN 6.
- Select setting: Press < 7 or > 8.
Setting Function
Strong stations only Search for stations with strong signal only.
All stations Search for all stations.
- Confirm selection: Press ✦ SCAN 6.
- Scanning functions
☐ Choose from 3 scanning functions to select a radio station.
Setting Function
| Auto scan | Start scanning in the desired direction:Press and hold 7 or 8 . The scan stops automatically at the next station received. |
| Manual scan | Search for FM stations manually: Briefly press 7 or 8 (each press changes the frequency by 0.05 MHz). |
| AMS | Full automatic scan:Briefly press × SCAN 6.All detected stations are automatically assigned to the 30 station slots. The search starts at the lowest frequency. Depending on the reception quality, not all station slots might be assigned. |
FM display modes
- Choose FM display mode: Briefly press ≡ 2.
| Display mode Function | |
| Program Type | Displays the genre of the broadcast programme. |
| Frequency | Displays the station's frequency. |
| Audio channel Stereo/Mono | Display of current setting. |
| Time | Displays the current time (provided by the broadcaster). |
| Date | Displays the current date (provided by the broadcaster). |
| Radio text | Displays a scrolling message giving real-time information, e.g. song title, news headlines, etc. |
- Each time you press 2, the next item is displayed.
DAB+ operation
☐ Press M 4 repeatedly, until DAB is shown in the display 13.
Full scan
☐ Perform a complete station search in the DAB frequency range:
-
Press and hold 2 for 2 seconds.
-
Select the menu item Full scan by pressing the <7 and >8 buttons.
-
Confirm selection: Press ✦ SCAN 6.
-
All detected stations are stored automatically.
- Select station: Press < 7 or > 8.
- Confirm selection: Press ✦SCAN 6.
NOTE: The scan also starts when you press ✕ SCAN 6 in playback mode.
- Manual tuning
- Press and hold ≡ 2 for 2 seconds.
- Select Manual tune: Press < 7 or > 8.
- Confirm selection: Press ✦SCAN 6.
- Select channel: Press < 7 or > 8.
- Confirm selection: Press ✗SCAN 6 twice.
NOTE: No sound is emitted by the product while manually tuning.
□ Newly tuned stations can be found in the Station list.
- Deleting unavailable stations
NOTE: Unavailable stations can only be detected after another complete search (e.g. at a different location). In this case, the affected station is preceded by ?. After the Prune function has been performed, the correspondingly marked stations are no longer available in the station list.
- Press and hold ≡ 2.
- Select Prune: Press < 7 or > 8
- Confirm selection: Press ✦SCAN 6.
- Select YES: Press < 7 or > 8.
- Confirm selection: Press ✦SCAN 6.
DAB display modes
- Choose DAB display mode: Press ≡ 2.
Display mode Function
| Signal strength | Displays a bar indicating the signal strength. |
| Program Type | Displays the genre of the broadcast programme. |
| Ensemble | Displays the name of the multiplex containing the station you are listening to. |
| Frequency | Displays the station's frequency. |
| Signal error | Displays the signal error rate. |
| Bitrate and Codec | Displays the radio mode and the received audio bit rate. |
| Time | Displays the current time (provided by the broadcaster). |
| Date | Displays the current date (provided by the broadcaster). |
| Radio text | Displays a scrolling message giving real-time information, e.g. song title, news headlines, etc. |
- Each time you press ≡2, the next item is displayed.
● Presetting currently active station
☐ You can store up to 60 stations (30 FM and 30 DAB).
-
Press and hold 📁 3 for about 2 seconds.
-
Preset store<#:(Empty)> appears on the display 13.
-
Select a desired station number: Press <7 or >8.
-
Confirm selection: Press ✦SCAN 6.
-
The station is stored. Preset # stored appears on the display 13.
NOTE: Station numbers under which stations are already stored will be overwritten.
● Recalling a preset station
-
Recall a previously saved station: Briefly press 📁 3.
-
Select the desired preset station number: Press < 7 or > 8.
-
Confirm selection: Press ✦SCAN 6.
NOTE: Preset Empty is displayed if the preset number is unoccupied.
- Bluetooth operation
☐ Select Bluetooth mode: Press M 4 repeatedly, until Bluetooth is shown in the display 13. The product attempts to connect to the playback device (e.g. smartphone or computer).
Establishing a Bluetooth connection
☐ The maximum reception range is approx. 10 m. The range may be reduced due to the geometry of the space (obstructing furniture, walls, etc.)
☐ The playback device must support Bluetooth standard 5.0. Otherwise you may not be able to use all button functions.
☐ If you exceed the reception range, Disconnected is flashing in the display 13. If the connection is not restored within 15 minutes, the product switches off.
☐ If you enter the reception range with the product switched on in Bluetooth mode, the Bluetooth connection will be established automatically.
☐ You may need to approve the connection on the playback device.
-
Turn on the playback device (e.g. smartphone or computer). Turn on the search for Bluetooth devices. Note the instruction manual of the playback device. Disconnected is flashing in the display 13.
-
Connect your playback device with the product via Bluetooth. Refer to the instructions for your playback device. Select the entry Rhythm Tune from the device list on your playback device. Once the connection has been established, the display 13 shows Connected and an acoustic signal sounds. When the product is successfully paired, you can use it for wireless playback of your favourite music.
- Disconnecting the product from a Bluetooth playback device
-
In Bluetooth mode, press and hold ✦ SCAN 6 for approx. 2 seconds. Disconnected is flashing in the display 13.
-
The product is in pairing mode and allows for another playback device to be connected.
- Button functions
-
Start a playlist on your playback device. You can adjust the volume on the product as described in the following table. Music is played back through the speaker 12.
-
The product offers 6 buttons for Bluetooth operation:
1 ☐ Switch product on or off: Press and hold the button for approx. 2 seconds.
5 ▷ □ Start, pause or resume playback: Press the button briefly.
6 ☐ Enable/disable Bluetooth
SCAN connection: Press and hold the button for approx. 2 seconds.
7 < □ Skip to previous song in the playlist (or jump back to the beginning of the current song, if the song has already been played for more than 3 seconds): Press the button during playback. □ Press and hold the button to start fast-rewinding of the current track.
8 ▶ □ Skip to next song in the playlist: Press the button during playback. □ Press and hold the button to start fast-forwarding the current track.
9 - □ Reduce volume: Press the button briefly during playback or press and hold the button for fast reduction.
10 + □ Increase volume: Press the button briefly during playback or press and hold the button for fast increase.
Aux-In operation
-
Select Aux-In mode: Press M 4 repeatedly, until Aux-In is shown in the display 13.
-
Switch off the product and the playback device.
-
Plug a 3.5 mm jack cable (not included) into the 3.5 mm jack socket [15].
-
Plug the other end of the 3.5 mm jack cable into a suitable output socket (e.g. headphone socket) on the playback device.
-
Switch on the product and the playback device.
-
Start playback. Set the playback device's volume to the highest level.
-
Adjust the volume on the product to your preferred level.
- Cleaning
⚠️ ATTENTION! Never immerse the product in water or other liquids. Never hold the product under running water.
- Do not allow any water or other liquids enter the product's interior.
-
Do not use solvent-based cleaning agents, abrasives, harsh cleaning solutions or hard brushes for cleaning.
-
Before cleaning: Immediately remove the connected cable.
-
Clean the product with a slightly moistened cloth.
-
Allow the product to dry.
● Storage during non-use
■ Store the product in its original packaging.
■ Store the product in a dry, secure location away from children.
The rechargeable battery needs to be charged regularly.
Troubleshooting
● = Fault
● = Possible cause
O = Action
● = No function
● = Battery drained
O = Recharge the battery (see "Charging the battery").
● = No Bluetooth connection
◎ = Product error
O = Switch the product off and on again.
● = Playback device error
O = Check if the product can be detected by the playback device.
O = Check if the playback device detects other devices with Bluetooth standard 5.0.
● = No music playback via Bluetooth
◎ = Product error
O = Switch the product off and on again.
O = Press ✦ SCAN 6 to start a new connection process. You need to rebuild the Bluetooth connection to your playback device.
O = Press + 10 to increase the volume.
● = Playback device error
O = Increase the volume on the playback device.
● = No music playback via cable connection
● = Product error
O = Reconnect the cable to the playback device.
O = Increase the volume of the playback device or the product.
● = FM station not found
● = Weak signal
O = Search manually.
● = DAB station not found
● = No DAB coverage in your area or poor reception
O = Adjust the position of the telescopic antenna [11].
Glossary
☐ Multiplex: In DAB+ mode, several radio programmes can be transmitted on each frequency. These radio stations are combined in a so-called multiplex. In this multiplex, additional services, such as pictures and text information, can also be transmitted.
☐ Signal error: The greater the number of signal errors, the more distorted the audio signal arrives at the product. The built-in error protection can compensate for this to a certain extent without deteriorating the audio quality. Displaying the number of signal errors can be helpful in finding a better location to place the product.
● Simplified EU declaration of conformity
Hereby, OWIM GmbH & Co. KG, Stiftsbergstraße 1, 74167 Neckarsulm, GERMANY, declares that the product BLUETOOTH® SPEAKER HG09051 is in compliance with Directives 2014/53/EU and 2011/65/EU. The full text of the EU declaration of conformity is available at the following internet address: www.owim.com

Disposal
Packaging:
The packaging is made of environmentally friendly materials, which may be disposed of through your local recycling facilities.
Observe the marking of the packaging materials for waste separation, which are marked with abbreviations (a) and numbers (b) with following meaning: 1–7: plastics/20–22: paper and fibreboard/80–98: composite materials.
Product:
The product incl. accessories and packaging materials are recyclable and are subject to extended producer responsibility.
Dispose them separately, following the illustrated Info-tri (sorting information), for better waste treatment.
The Triman logo is valid in France only.

Contact your local refuse disposal authority for more details of how to dispose of your worn-out product.

acent symbol of a crossed out dustbin on wheels indicates this product is subject to directive 2012/19/EU. This directive states at the end of the life this product must not be disposed of through regular household refuse but must be returned to special collection sites, recycling depots or waste management companies.
This disposal is free of charge to you.
Protect the environment and dispose of properly.
The built-in rechargeable battery cannot be removed for disposal. Return the product completely to a collection site for used electronics.
Warranty
The product has been manufactured to strict quality guidelines and meticulously examined before delivery. In the event of product defects you have legal rights against the retailer of this product. Your legal rights are not limited in any way by our warranty detailed below.
The warranty for this product is 3 years from the date of purchase. The warranty period begins on the date of purchase. Please keep the original sales receipt in a safe location. This document is required as your proof of purchase.
Should this product show any fault in materials or manufacture within 3 years from the date of purchase, we will repair or replace it – at our choice – free of charge to you. This warranty becomes void if the product has been damaged, or used or maintained improperly.
The warranty applies to defects in material or manufacture. This warranty does not cover product parts subject to normal wear, thus possibly considered consumables (e.g. batteries) or for damage to fragile parts, e.g. switches, rechargeable batteries or glass parts.
● Warranty claim procedure
To ensure quick processing of your case, please observe the following instructions:
Please have the till receipt and the item number (IAN 423976_2204) available as proof of purchase.
You will find the item number on the rating plate, an engraving, on the front page of the instructions for use (bottom left), or as a sticker on the rear or bottom of the product.
If functional or other defects occur, please contact the service department listed either by telephone or by e-mail.
You can return a defective product to us free of charge to the service address that will be provided to you. Ensure that you enclose the proof of purchase (till receipt) and information about what the defect is and when it occurred.
Service
GB Service Great Britain
Tel.:08000569216
E-Mail:owim@lidl.co.uk
IE Service Ireland
Tel.:1800200736
E-Mail:owim@lidl.ie
CE
DÉS., 10, 20, 30, 45, 60, 90, 120, 180 secondes
● = Aucune station DAB trouvée
- USB type C-bus: 5 V = - - - , 1,0 A
- Accu: 1 × 3.7 V
←Uit, 10, 20, 30, 45, 60, 90,
120, 180 seconden
WYPADKU DLA MAŁYCH DZIECI I
NIEMOWLAT!
⚠️ NIEBEZPIECZEŃSTWO!
NIEBEZPIECZEŃSTWO
→OFF (WYt.), 10, 20, 30, 45,
60, 90, 120, 180 seconds
(sekund)
→OFF (VYP), 10, 20, 30, 45,
60, 90, 120, 180 seconds
(sekund)
i UPOZORNĚNÍ: Pokud vyberete
Dutch (holandština), Spanish
Norwegian (norština)
4. Factory Reset
OFF (VYP), 10, 20, 30, 45,
60, 90, 120, 180 seconds
(sekúnd)
i UPOZORNENIE: Ak máte
zvolené nastavenie On (Zapnuté),
Strong stations only (Kun kraftige stationer)
Off, 10, 20, 30, 45, 60, 90, 120, 180 secondi
→OFF (KI), 10, 20, 30, 45,
60, 90, 120, 180 seconds
(másodperc)
i MEGJEGYZÉS: Ha az On (Be)
→English (angol), German (német), Italian (olasz), French (francia), Dutch (holland), Spanish (spanyol), Swedish (svéd), Norwegian (norvég)
⚠️ NEVARNOST GMOTNE ŠKODE!
→OFF (Izklop), 10, 20, 30, 45,
60, 90, 120, 180 seconds
(sekund)
French (Francoščina), Dutch
Pooblaščeni serviser:
OWIM GmbH & Co. KG
Stiftsbergstraße 1
74167 Neckarsulm
NEMČIJA
→ English (Engleza), German
(Germana), Italian (Italiana), French (Franceza), Dutch (Olandeza), Spanish (Spaniola), Swedish (Suedeza), Norwegian (Norwegian)
5. SW version (Versiune SW)
→ Număr versiune
Control volum
(μνήμη): 30 (FM/VHF)
20, 30, 45, 60, 90, 120,