Conga Y100 - Robot vacuum CECOTEC - Free user manual and instructions
Find the device manual for free Conga Y100 CECOTEC in PDF.

| Product Type | Robot Vacuum |
| Brand | Cecotec |
| Model | Conga Y100 |
| Dimensions (approx.) | 35 x 35 x 10 cm |
| Weight (approx.) | 3.8 kg |
| Power Supply | Rechargeable lithium-ion battery via automatic emptying base |
| Battery Voltage | 14.4 V |
| Battery Capacity | 2600 mAh |
| Battery Life (estimated) | Up to 120 minutes |
| Connectivity | Wi-Fi 2.4 GHz, mobile app |
| Main Functions | Laser mapping, vacuuming, floor cleaning with rotating cloths, automatic return to base, automatic emptying |
| Cleaning Modes | Scheduled cleaning, manual mode, restricted zone, selected area cleaning, Do Not Disturb mode |
| Suction Power | 5 levels adjustable via app |
| Water flow for floor cleaning | 3 levels adjustable via app |
| Water Tank Capacity | 200 ml |
| Disposable Dust Bag | Capacity not specified, replace regularly |
| Sensors | Laser, object recognition sensor, wall sensor, ultrasonic sensors, anti-collision sensors |
| Brushes | Main brush and side brush, removable and cleanable |
| Filter | Filter in tank, cleanable by tapping |
| Maintenance | Brushes and sensors cleaned weekly, tank emptied after each use, filter cleaned weekly |
| Safety | Drop sensors, automatic stop if stuck, use only with original battery |
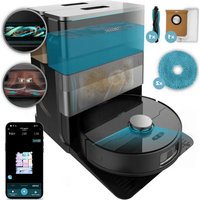
| Included Accessories | Automatic emptying base, base mat, 2 rotating cloths, side brush, water tank, self-cleaning brush, replacement filter, instruction manual |
Frequently Asked Questions - Conga Y100 CECOTEC
User questions about Conga Y100 CECOTEC
0 question about this device. Answer the ones you know or ask your own.
Ask a new question about this device
Download the instructions for your Robot vacuum in PDF format for free! Find your manual Conga Y100 - CECOTEC and take your electronic device back in hand. On this page are published all the documents necessary for the use of your device. Conga Y100 by CECOTEC.
USER MANUAL Conga Y100 CECOTEC
- Parts and components 69
- Before use 70
- Installation 70
- Operation 71
- Cleaning and maintenance 73
- Troubleshooting 74
- Recycling of electrical and electronic equipment 76
- Copyright 76
- Simplified EU Declaration of Conformity 76
SOMMAIRE
EU01_115945_Conga Y100 Spin AI
EN • The coding in this manual is generic and applies to all code variants of the appliance.
Read the following instructions carefully before using the appliance. Keep this instruction manual for future reference or new users.
- This appliance must be used in accordance with these operating instructions. Cecotec will not be held liable or responsible for any damages or injuries caused by improper use.
- Ensure that the mains voltage matches the voltage stated on the product's rating label and that the socket is properly earthed.
- Check the power cord regularly for visible damage. If the cord is damaged, it must be repaired by Cecotec's Official Technical Support Service to avoid any hazard.
- This appliance is intended for domestic use only and is not suitable for use in commercial establishments such as bars, restaurants, farms, hotels, motels, and offices.
- Do not attempt to repair the appliance yourself. Contact Cecotec's Official Technical Support Service for any query or repair.
- Do not use the appliance to vacuum liquids, lit matches, cigarette ends, hot ash, or on wet surfaces.
- Do not use this appliance on concrete, asphalt, or other rough surfaces.
- Stop using the appliance if you notice an abnormal sound or sense a temperature higher than usual.
- Do not block the appliance openings or airflow. Keep openings free of any objects, and do not block them with clothes or your fingers.
- Switch off and ensure the appliance is unplugged from the mains power supply when not in use for extended periods,
before cleaning, before assembling or disassembling components and before removing the battery. To unplug the appliance, pull the plug, not the cord.
- WARNING: the appliance has rotating parts which may pose a risk of entrapment. Exercise extreme caution.
- Do not immerse the cord, plug, or any other non-removable part of the appliance in water or any other liquid or expose electrical connections to water. Make sure your hands are dry before handling the plug or switching on the appliance.
- This appliance can be used by children aged 8 years and above and people with reduced physical, sensory, or mental capabilities or lack of experience and knowledge if they have been given supervision or instruction concerning the use of the appliance in a safe way and understand the hazards involved. Children must not play with the appliance. Cleaning and user maintenance must not be carried out by children without supervision.
- Never touch the cord or the power socket with wet hands.
- Do not expose the appliance to direct sunlight, fire, water, or moisture.
- Do not sit or place sharp or heavy objects on top of the appliance.
- Before operating the robot vacuum cleaner, prepare the room and supervise it. To do so, remove any objects and cables that may affect its operation.
- Keep the appliance away from clothing, curtains, and similar materials.
- Always place the appliance on a flat and stable surface. Avoid placing it on unstable surfaces it could fall from (such as tables or chairs).
- Before switching on the robot vacuum cleaner, check that all connections, both on the robot and on the self-emptying
base, are in good condition.
- Avoid operating the robot vacuum cleaner under extremely high or low temperatures.
- The appliance must only be used with the battery supplied with the appliance or with compatible charging units approved by Cecotec.
- Non-rechargeable batteries must not be recharged.
- Make sure the appliance is not plugged to a mains socket before cleaning it or carrying out maintenance on it.
- Make sure the self-emptying base is not connected to a power outlet before cleaning.
Battery instructions
- The appliance includes a Li-ion battery. Do not incinerate or expose it to high temperatures, as it may explode.
- Batteries may leak under extreme conditions. Should that be the case, do not touch the liquid. If the liquid comes into contact with skin, wash immediately with soap and water. If the liquid gets into the eyes, rinse them immediately with clean water for at least 10 minutes and seek medical attention. Wear gloves when handling the battery and dispose of it immediately in accordance with local regulations.
- Avoid contact between batteries and small metal objects such as paper clips, coins, keys, nails, or screws.
- Never modify the battery in any way.
- Batteries must be removed from the appliance for safe disposal.
- Keep batteries out of the reach of children if they can be swallowed.
- Battery ingestion can cause burns, perforation of soft tissue, and death. It can cause severe burns within two hours of the ingestion.
- In case of battery ingestion, please seek medical help
immediately.
- WARNING: to recharge the battery, use only the self-emptying base supplied with the appliance.
- The batteries' supply terminals must not be short-circuited.
- If the appliance is to be stored for a long period of time, it is advisable to remove the batteries.
- Batteries must be inserted in the correct position. Pay attention to polarity when inserting it.
INSTRUCTIONS DE SECURITE
J 1 J 1 J 1 J 1 J 1 J 1 J 1 J 1 J 1 J 1 J 1 J 1 J 1 J 1 J 1
J 1 J000000000000000000000000000000000000000000
- 1
Jc0d Jc22gJcS JcG C G 1Jc0j j
- 1
J Cecotec Jc
1 1
gJgUgUgUgU
- 1J 1J JUJ UJ JUJ JUJ JUJ JUJ JUJ JUJ
Cecotec 1
JgJ 1 JJ 1 JJ 1 JJ 1 JJ 1 JJ 1 JJ 1 JJ 1 JJ 1
J
- 2
JcJ. 1Jr Jssd.
- 1
1 1
-8 8
1Jp20 1
J 1 J 1 J 1 J 1 J 1 J 1 J 1 J 1 J 1 J 1 J 1 J 1 J 1 J 1
gss
JU 1 JU U
- 1
Jb
-
1J JgJgJgJgJgJgJgJgJgJgJgJgJgJgJgJgJgJgJgJgJgJgJgJgJgJgJgJgJgJgJgJgJgJgJgJgJgJgJg
-
1
1
GgJgSgJol.
- 12
1
- 1Jc0jEJgS uBc w
- d 1 J 1 J 1 J 1 J 1 J 1 J 1 J
J 1 J.
1
10 1
JgJgJgJgJgJgJgJgJgJgJgJgJgJgJgJgJgJgJgJgJgJgJgJgJgJgJgJgJgJgJgJgJgJgJgJgJgJgJgJgJgJgJgJgJgJgJgJgJgJgJ
JgJgJgJgJgJgJgJgJgJgJgJgJgJgJgJgJgJgJgJgJgJgJgJgJgJgJgJgJgJgJgJgJgJgJgJgJgJgJg
- 1
1Jp
1J
J 1 J
-
1
-
12
JbU.
- 1
Jg 1Jg.
J
-111111111111111111111111111
- 1
1J 1Jr j0j0
- 8eBcDgCgRgSdSgIaIbI
-1
1JpWcGwJlJbUj
- 1
Jol.
ESPANOL
1. PIEZAS Y COMPONENTES
Vista superior del robot
Fig. 1
https://cecotec.es/es/information/declaration-of-conformity
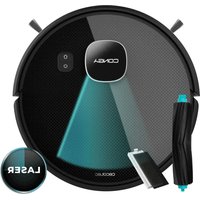
1. PARTS AND COMPONENTS
Top view of the robot
Fig. 1
- Laser
- Top cover
- Power button
- Back Home button
- Object recognition sensor
- Bumper
- Wall sensor
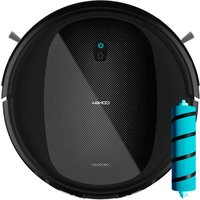
Bottom view of the robot
Fig. 2
- Main brush
- Side brush
- Ultrasonic sensor
- Anti-collision sensors
- Omnidirectional wheel
- Drive wheels
- Main brush cover latch
- Tank
- Spinning mops
Other components
Fig. 3
- Charging contacts
Tank components
Fig. 4
- Tank cover
2.Filter - Water inlet
- Suction outlet
Note:
The graphics in this manual are schematic representations and may not exactly match the product.
ENGLISH
2. BEFORE USE
-
This appliance comes in a packaging designed to protect it during transport. Remove the appliance from its box. You can keep the original box and other packaging materials in a safe place to prevent damage to the appliance if you need to transport it in the future. If you wish to dispose of the original packaging, make sure all items are recycled properly.
-
Check that all parts and components are included and in good condition. If any of them are missing or damaged, please contact Cecotec's Official Technical Support Service immediately.
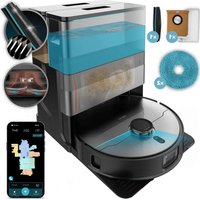
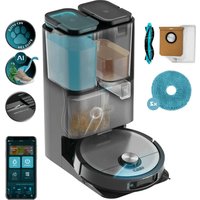
Box content:
Fig. 5.
- Robot
- Self-emptying base
- Docking mat
- Mops
- Side brush
- Tank
- Instruction manual
- Self-cleaning brush
- Filter
Do not remove the product's serial number in order to keep proper traceability if technical assistance is required.
3. INSTALLATION
Installing the spinning mops
- Place the mop on the holder ensuring it fits securely.
- Align and install the mop shafts into the robot until you hear a click.
Installing the tank
- Open the silicone cover of the water tank and fill it with water, ensuring it does not overflow. Make sure to properly close the silicone tab to prevent water leakage. Do not immerse the tank in water or any other liquids.
- To install the tank in the robot vacuum cleaner, push it until it fits into position. You will hear a click indicating it is properly installed.
Recommendations:
- It is not recommended to use the mopping function during first use.
-
Do not use the mopping function when the robot vacuum cleaner is unsupervised.
-
Do not use excessive cleaning products as they may block the water outlets.
Installing the self-emptying base
- Leave at least 0.6m of clearance on both sides and 1.5m in front. Make sure the location has good Wi-Fi access to enhance the mobile app experience. Fig. 6.
- Place the base against a wall on a hard, level surface (wood, tile, etc.). Connect the base and verify the status indicator light is on.
- Make sure you pick up cables, hard or sharp objects (such as nails and glass), and loose items from the floor. Move any unstable, fragile, valuable or hazardous items that could block or slow down the robot vacuum cleaner's operation.
- When using the robot in an elevated area, always use a physical safety barrier to prevent accidental falls that could result in personal injury or property damage.
Note:
To ensure all functions operate correctly and achieve the best cleaning results:
- Fully charge the robot before first use.
- Fill the tank with clean water before initial operation.
4. OPERATION
Power On/Off
Press and hold this button to turn the robot on or off. The power indicator light will illuminate when the robot is on.
Wi-Fi reset
Press and hold the Back Home button simultaneously for 5 seconds.
Pause
When the robot is operating, press any button to pause it and press the power button to resume cleaning. Press the Back Home button to send the robot back to the base.
Note: Manually place the paused robot on the base.
Charging
After cleaning, the robot will automatically return to the base to charge. In Pause mode, press the Back Home button to send the robot back to the base.
Start cleaning
Press the power button to begin cleaning. The robot will plan its cleaning path by scanning the room. It divides the room into zones, first drawing the zone edges and then cleaning in a zigzag pattern. Thus, the robot cleans all zones one by one, cleaning the house efficiently.
ENGLISH
Notes:
- To allow the robot to vacuum automatically and return to the base, start operation from the base. Do not move the base during cleaning.
- Cleaning cannot begin if the battery level is too low. Allow the robot to charge before starting cleaning.
- Before cleaning, pick up cables (including the base power cord) and valuable objects from the floor. Loose objects may be dragged by the robot, causing electrical devices to disconnect or property damage.
- If the battery runs low during cleaning, the robot will automatically return to the base. After charging, the robot will resume where it left off.
- The robot will retract the mop holders when cleaning carpets. You can also set the carpet as a restricted zone in the app to avoid it.
- Before starting cleaning, ensure the mops are properly installed.
Suction power and mopping flow:
To customise the suction power and water volume for mopping, activate the 'Custom mode' button in the app. Then select from the five suction power levels and three water flow levels to adjust operation according to your needs.
Manual mode
The robot vacuum cleaner can be moved manually by selecting manual mode in the app and using the arrow keys.
Restricted Area mode
Mark specific areas on the map that you do not want the robot vacuum cleaner to clean.
Selected area cleaning
Mark specific areas on the map that you want the robot vacuum cleaner to clean.
Sleep mode
If no operation is performed for more than 10 minutes, the robot will automatically enter sleep mode and the power indicator light will turn off.
In Sleep mode, users can press any button to wake the robot.
If no operation is performed for more than 13 hours, the robot will automatically power off.
Do Not Disturb mode
It can be modified or cancelled from the app. When this mode is activated, the robot will not automatically resume cleaning or perform dust collection after cleaning, and the power indicator light and voice will be off.
5. CLEANING AND MAINTENANCE
Side brush
- Pull the side brush upward to remove it.
- Clean any dirt or debris from both the brush and its housing.
- Reinstall the side brush.
Main brush
- Gently press inward on the two main brush cover latches to remove it.
- Remove the main brushes and clear any dirt or debris tangled in the brush or at the fixed end of the main brush.
- Reinstall the main brush and its cover.
Tank and filter
- Remove the tank.
- Open the tank and empty its contents.
- Use the self-cleaning brush to clean the interior.
- Remove the filter and gently tap it to remove as much dirt as possible, then reinstall it.
- Reinstall the tank in the robot vacuum cleaner.
Note: Do not touch the filter surface with hands, brushes or hard objects to avoid possible damage.
Sensors
Use a soft, dry cloth to clean all sensors.
Note: Do not apply force or insert objects into the sensors, they are sensitive parts.
Front wheel
- Use a flat-head screwdriver as a lever, firmly hold the wheel and pull.
- Clean the wheel and all its components, including the wheel assembly and housing.
- Replace the wheel by pushing down to lock it in place.
Disposable dust bag replacement
To change the dirt disposal bag, open the base cover, pull the handle, remove the bag and dispose of it.
Spinning mops
- Empty any remaining water inside the tank.
- Remove the mop attachment.
- Shake out any residue that may have accumulated inside the attachment.
- Wash the mop cloth. Air dry all parts after replacing them.
Note: The tank must be emptied after use to prevent possible water damage.
ENGLISH
Battery charging and replacement
- Use a Phillips head screwdriver to open the battery compartment.
- Unplug the old battery and connect the new one, then reattach the battery cover.
Note:
To extend battery life, leave the robot vacuum cleaner charging on the emptying base whenever not in use.
Remove the battery and store it in a safe, dry place if the robot vacuum cleaner will not be used for an extended period.
| Part Maintenance frequency | Frequency Replacement frequency | |
| Tank Daily | ||
| Filter Weekly Every 3-6 months | ||
| Side brush Weekly Every 3-6 months | ||
| Main brush Weekly Every 3-6 months | ||
| Sensors Weekly | ||
| Front wheel Weekly | ||
| Battery - Every 12-24 months | ||
6. TROUBLESHOOTING
| Problem Solution | |
| The robot does not switch on. | Low battery. Place the robot on the base and wait for it to charge before use. |
| The battery temperature is too low or too high. Use the robot only within 0-40°C range. | |
| Unable to charge battery. | Low battery. Place the robot on the charging base and wait for it to charge before use. |
| The battery temperature is too low or too high. Use the robot only within 0-40°C range. | |
| It does not return to the self-emptying base. | Too many obstacles near the base. Move it to an open area. |
| The robot is too far from the charging base. Place it closer and try again. | |
| The base locator may be dirty. Clean it with a dry cloth. | |
| Unable to connect to Wi-Fi. | Wi-Fi disabled. Reset the Wi-Fi and try again. |
| Weak Wi-Fi signal. Move the robot to an area with good Wi-Fi reception. | |
| Abnormal Wi-Fi connection. Reset the Wi-Fi, download the latest mobile app and try again. | |
| The Wi-Fi connection is unstable. Reset the router, check for app updates and try again. | |
| Noise during cleaning. | The main brush, side brush, drive wheels or front wheel may be stuck. Switch off the robot and clean them. |
| Cleaning does not resume after recharging. | Make sure the Do Not Disturb mode is not activated. |
| Check the settings in the app. | |
| The robot does not follow the schedule. | Make sure the Do Not Disturb mode is not activated. |
| The robot can only follow the programmed schedules if the battery is above 20%. | |
| The dust container does not empty automatically. | Automatic emptying is disabled. Check the settings in the app. |
| The dust bag is not properly installed or is full. Check and install. | |
| Automatic emptying does not take place if the robot returns to the base without cleaning. | |
| Automatic emptying is not performed if the Do Not Disturb mode is activated. Check the settings in the app. |
ENGLISH
| Reduced emptying performance or unusual noise when emptying. | The main brush or main brush cover is not properly installed. Check and install correctly. |
| The filter, air duct, suction inlet, air inlet, dust container or dust bag is blocked. Clean to remove obstructions. | |
| Wet mopping is not effective. | Check the flow rate settings in the app. |
| Make sure there is water in the tank. | |
| The mopping function is disabled. Check the settings in the app. |
7. RECYCLING OF ELECTRICAL AND ELECTRONIC EQUIPMENT
This symbol indicates that, according to the applicable regulations, the product and/or battery must be disposed of separately from household waste. When this product reaches the end of its shelf life, you should dispose of the batteries/accumulators and take them to a collection point designated by the local authorities.
For detailed information on how to properly dispose of electrical and electronic equipment and/or the corresponding batteries, consumers should contact their local authorities.
Compliance with the above guidelines will help protecting the environment.
8. COPYRIGHT
The intellectual property rights over the texts in this manual belong to CECOTEC INNOVACIONES, S.L. All rights reserved. The content of this publication may not, either in part or in its entirety, be reproduced, stored in a retrieval system, transmitted or distributed by any means (electronic, mechanical, photocopying, recording or similar) without prior authorisation from CECOTEC INNOVACIONES, S.L.
9. SIMPLIFIED EU DECLARATION OF CONFORMITY
CE Cecotec Innovations hereby declares that the robot vacuum cleaner model EU01_115945 - Conga Y100 Spin AI is in conformity with the Radio Equipment Directive 2014/53/EU. The full text of the EU Declaration of Conformity can be found
on the following website:
https://cecotec.es/es/information/declaration-of-conformity
1. PIECES ET COMPOSANTS
https://cecotec.es/es/information/declaration-of-conformity
1. PARTI E COMPONENTI
https://storececotec.it/it/information/declaration-of-conformity
ITALIANO
1. PEÇAS E COMPONENTES
https://cecotec.pt/pt/information/declaration-of-conformity
1. ONDERDELEN EN COMPONENTEN
https://cecotec.es/es/information/declaration-of-conformity
POLSKI
1. CZEŚCI I PODZESPOŁY
Widok robota z góry
Rys.1
https://cecotec.es/es/information/declaration-of-conformity
1. SOUÇÁSTI A KOMPONENTY
Pohled na robota shora
Obr.1
https://cecotec.es/es/information/declaration-of-conformity
1. PARÇALAR VE BILEŞENLER
https://cecotec.es/es/information/declaration-of-conformity
CATALA
1. PECESI COMPONENTS
Vista superior del robot
Fig. 1
https://cecotec.es/ca/information/declaration-of-conformity
https://cecotec.es/es/information/declaration-of-conformity
1.
- U
- jJJJJJ
- | x,y| = | x,y| = 1 的二.
5.
6.
7.
12
- 2.
3.
-
l0j5 u wvovrpuu
-
EJ
-
E
-
pJJIe EcbI UJUJIa UJISU
-
| x - 2| = 1| x|
- peoocic 2olj
1jagc1 1jzss
UJ3
1.
心
UJ4
- 电电
- p2cUpyslo
- 电荷量
Eduardo.
2.
-
1000000000000000000000000000000000000000000000000000000
-
1u uusse Uusse gususususususususususususususususususususususususususususususususususususususususususususususususususususususususus
CgS
5
1.
J 1 J 1 J 1 J 1 J 1 J 1 J 1 J 1 J 1 J 1 J 1 J 1 J 1 J 1 J 1 J 1 J 1 J 1 J 1 J 1 J 1 J 1 J 1 J 1 J 1 J 1 J 1 J 1 J 1 J 1 J 1 J 1 J 1
S OBC = S COD + S_ BOC
3.
i
-
1
-
1
-1 电电电电电电电电电电电电电电电电电电电电电电电电电电电电电电电电电电电电电电电电电电电电电电电电电电电电电电电电电电电电电电电电电电电电电电电电电电电电电电电电电电电
Lusuususususususususususususususususususususususususususususususususususususususususususususus
J 1 J 1 J 1 J 1 J 1 J 1 J 1 J 1 J 1 J 1 J 1 J 1 J 1 J 1 J 1 J 1 J 1 J 1 J 1 J 1 J 1 J 1 J 1
- 2.5 = 12( lg34 - 1)
1 1 1 1 1 1 1 1 1 1 1 1 1 1 1 1 1 1 1 1 1
gue 1joofo 1ooc
e 1 1 1 1 1 1 1 1 1 1 1 1 1 1 1 1 1 1 1 1 1
C
J 1 J 1 1 1 1 1 1 1 1 1 1 1 1 1 1 1 1 1 1
gge 1.
1J 10 10 10 10 10 10 10 10 10 10 10 10 10 10 10 10 10 10 10
sue 电 电
J 1 J 1 J 1 J 1 J 1 J 1 J 1 J 1 J 1 J 1 J 1 J 1 J 1 J 1 J 1 J 1 J 1 J 1 J 1 J 1 J 1 J 1 J 1 J 1 J 1 J 1 J 1 J 1 J 1
5.
c
-
UeUJrJUeJUeJUeJUeJUeJUeJUeJUeJUeJUeJUeJUeJUe
-
1
-
12
1J 1Jis