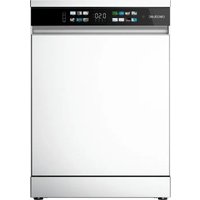
Bolero Aguazero 2500 S-BI - Dishwasher CECOTEC - Free user manual and instructions
Find the device manual for free Bolero Aguazero 2500 S-BI CECOTEC in PDF.

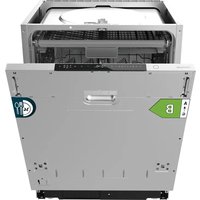
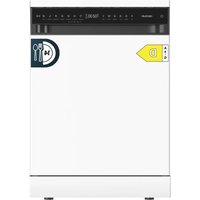
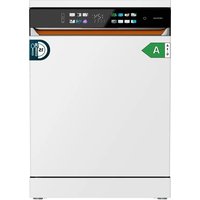
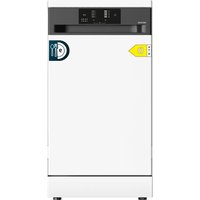
| Product Type | Built-in dishwasher |
| Brand | Cecotec |
| Model | Bolero Aguazero 2500 S-BI |
| Capacity | 6 place settings |
| Energy class | D |
| Energy consumption (ECO program) | 0,474 kWh/cycle |
| Water consumption (ECO program) | 7,4 L/cycle |
| Duration of ECO program | 2h51 |
| Wash programs | ECO, Normal, Intensive, Glass, Rapid |
| Noise level | 48 dB(A) |
| Voltage / Frequency | 220-240 V ~ 50 Hz |
| Total power | 1380 W |
| Water pressure | 0,04 – 1,00 MPa |
| Water softener | 6 adjustment levels (H1-H6) |
| Child safety | Yes |
| Delayed start | Up to 24 hours |
| Tub material | Stainless steel |
| Wash arms | 2 (upper and lower), removable |
| Filter | Filtration system (cylindrical + stainless steel) |
| Indicators | Salt, rinse aid, water supply |
| Country of origin | China (designed in Spain) |
Frequently Asked Questions - Bolero Aguazero 2500 S-BI CECOTEC
User questions about Bolero Aguazero 2500 S-BI CECOTEC
0 question about this device. Answer the ones you know or ask your own.
Ask a new question about this device
Download the instructions for your Dishwasher in PDF format for free! Find your manual Bolero Aguazero 2500 S-BI - CECOTEC and take your electronic device back in hand. On this page are published all the documents necessary for the use of your device. Bolero Aguazero 2500 S-BI by CECOTEC.
USER MANUAL Bolero Aguazero 2500 S-BI CECOTEC
natural_image
Exterior view of two modern white refrigerators with black lids, displayed against a solid teal background (no text or symbols visible on the devices themselves)bolero
Safety instructions 8
- Parts and components 60
- Before use 60
- Installation 61
- Operation 62
- Loading the dishwasher 66
- Cleaning and maintenance 67
- Troubleshooting 68
- Technical specifications 73
- Disposal of old electrical and electronic appliances 74
- Technical support and warranty 75
- Copyright 75
- Simplified EU Declaration of Conformity 75
SOMMAIRE
EN · The coding in this manual is generic and applies to all code variants of the appliance.
Read these instructions thoroughly before using the appliance. Keep this instruction manual for future reference or new users.
- Read these instructions carefully before assembling or using the appliance. These instructions contain important information that will help you get the best out of your equipment. It is your responsibility to make sure every user is informed about the warnings and precautions stated in this instruction manual.
- Warning: Knives and other utensils with sharp points should be loaded in the basket with the points facing downwards or placed in a horizontal position.
- The maximum number of cutlery to be washed is 6.
- This appliance is designed for domestic use only and is not intended for bars, restaurants, farmhouses, hotels, motels, and offices.
- Check the power cable regularly for visible damage. If the power cable is damaged, it must be replaced by the official Cecotec Technical Support Service or similar qualified personnel to avoid risks.
- This appliance can be used by children aged 8 years and above and people with reduced physical, sensory, or mental capabilities or lack of experience and knowledge if they have been given supervision or instruction concerning use of the appliance in a safe way and understand the hazards involved. Children must not play with the appliance. Cleaning and user
maintenance should not be carried out by unsupervised children.
- Children must not play with the appliance.
- After using the dishwasher, there may be remains in the interior. Keep children away from the appliance when it is open.
- WARNING: check the dishwasher and package are not damaged. Never use the dishwasher if it is damaged, contact the official Cecotec Technical Support Service immediately.
- Packaging material may be dangerous to children. Remove it and place it out of their reach.
- Choose a suitable and safe place to install the dishwasher.
- Never use an extension lead or a multi-socket connection.
- The socket must be accessible after the dishwasher installation.
- After the installation, the first time you run the dishwasher, do it while it is empty.
- Always use the plug provided with the dishwasher. Do not modify the plug provided with the appliance if it does not match the power socket.
- Do not operate the appliance if its cable, plug, or structure show visible damage, do not operate properly, or have been dropped.
- In case of malfunctioning, repairs must be carried out by the official Cecotec Technical Support Service; otherwise, the warranty will be void. Before repairing the dishwasher, you must disconnect it from the power supply and close the stopcock.
- To unplug the dishwasher, pull from the socket, never from the cord.
- During use, the dishwasher uses less energy and water than washing dishes by hand, provided that the household dishwasher is used according to these instructions.
- Do not misuse it, do not stand, sit or place any heavy object on the door or baskets.
- Do not use the dishwasher if all interior elements are not correctly placed.
- Only use detergents and rinse aids specific for dishwashers.
- Some dishwasher detergents are very alkaline. They may be extremely dangerous if you ingest them. Avoid contact with skin and eyes and keep children away from the dishwasher when the door is open.
- Due to the danger of explosion, do not place chemical solvents in the interior of the machine.
- Do not place tableware which is not dishwasher safe in the appliance.
- Do not fill the basket over its capacity.
- Cecotec is not responsible for any deformation produced in the interior of the machine due to misuse.
- Do not open the door while the dishwasher is running, as it could spill hot water. The machine features safety devices which will stop the operation if you open the door.
- Do not leave the door open, as it could cause accidents.
- Place knives and other sharp objects in the cutlery drawer with the blade facing down.
- For safety reasons, disconnect the mains plug after the programme has finished.
- To avoid electric shock, do not disconnect the dishwasher with your hands wet.
- Cecotec is not responsible for any damage, accident, or incident resulting from the misuse of this appliance. It is the responsibility of the user to operate and maintain the appliance according to the instructions and recommendations detailed in this manual. Failure to follow instructions may result in personal injury, property damage, or loss of product warranty.
INSTRUCTIONS DE SÉCURITÉ
- Housing
- Front panel
- Baseboard
- Spray arm
- Filter
- Water softener system
- Bottom door gasket
- Detergent dispenser
- Door
- Cup/mug holder
- Basket
- Cutlery basket
NOTE:
The graphics in this manual are schematic representations and may not exactly match the product.
2. BEFORE USE
- This appliance is packaged in a way as to protect it during transport. Take the appliance out of its box and remove all packaging materials. You can keep the original box and other packaging elements in a safe place to prevent damage to the appliance if you need to transport it in the future. In case the original packaging is disposed of, make sure all packaging materials are recycled accordingly.
- Make sure all parts and components are included and in good conditions. If there is any piece missing or in bad conditions, contact the official Cecotec Technical Support Service immediately.
Box content
- Dishwasher
- Inlet hose
- Drain hose
- Cutlery basket
- Instruction manual
- Do not remove the serial number of the appliance in order to keep a correct traceability of it in case of assistance.
3. INSTALLATION
Installation dimensions: (unit: mm)
- The installation of the dishwasher will depend on the position of the drain hose or sink.
- The installation place should measure 60 x 60 cm.
Figure 2 shows all the measurements necessary for the correct installation of the dishwasher.
Water supply hose connection. Fig. 3
- Connect the end of the water supply hose to the water inlet of the dishwasher.
- Connect the other end of the hose to the corresponding water tap or valve.
Note: Use a new water supply hose for installation.
Fig. 3
- Water pipe
- Valve
- Connection
- Water supply hose
- Dishwasher water inlet
- Water supply hose connection
Drain hose connection. Fig. 4
Once the appliance has been built-in to the kitchen cabinet, pass the power cable, water supply hose and drain hose through the pre-drilled hole.
- Insert the end of the drain hose into the sink drainpipe. The height of the drain hose must not exceed 40 cm from the top of the dishwasher.
- Connect the other end of the hose to the dishwasher and make sure there are no water leaks.
- Make sure the socket is properly earthed and connected to the mains.
Note:
- Make sure the drain hose is not kinked. If it is necessary to extend it, do not exceed 5 metres, otherwise it may affect the operation of the dishwasher.
- The water supply hose, drain hose and power socket must be installed in the cabinet adjacent to the dishwasher so that they are not directly behind the appliance.
Fig. 4 key:
- Clamp
- Drain hose
ENGLISH
- Worktop
- Dishwasher
- Drain hose
- Drainpipe
- Valve
- Water supply hose
- Power socket
Dishwasher installation
- Bottom vent
- Place the appliance on the floor and make sure that it does not wobble, otherwise leakage may occur.
- If the floor is uneven, you can level the dishwasher by adjusting the height of the feet.
- If the dishwasher is installed under the worktop or built-in in a kitchen cabinet, secure the appliance firmly to the adjacent cabinets after levelling it.
- Although it is not necessary to fix the dishwasher to the worktop, still place the protective caps in the screw holes. Fig. 5
- Built-in installation. Secure the dishwasher to the adjacent cabinets with the screws.
- Fit the protective caps into the screw holes. Fig. 6
Once the installation is complete:
-
Check that the appliance is properly supported on the floor and fixed to the kitchen unit.
-
Make sure that the circuit breaker of the domestic mains is correctly installed and that the mains power is on.
-
Check if the water supply hose and the drain hose are connected to the appliance.
-
Remove all packaging from inside the appliance.
Tips:
- After installation, keep the instruction manual and all components for later use or for the next owner.
- This appliance has undergone factory tests, so it is normal for water to be present inside the appliance.
4. OPERATION
Control panel
Fig. 7
-
Power icon
-
Salt refill indicator light
- Rinse aid refill indicator light
- Water supply indicator light
- Child Lock function indicator light
- Child Lock function icon
- Delay Start icon
- Digital display
- ECO programme indicator light
- Normal programme indicator light
- Intensive programme indicator light
- Glass programme indicator light
- Rapid programme indicator light
- Programme selection icon
- Start/Pause icon
Starting the dishwasher
- Close the door and press the Power icon to start the dishwasher.
- Press the Programme selection icon to select the desired programme.
- To start the selected programme, press the Start/Pause icon .
- When the dishwasher starts, the indicator lights will start flashing.
Child Lock
This function allows you to lock the control panel to prevent children from interrupting the programme or tampering with the appliance accidentally.
- Activating the child safety lock: Press and hold the Child Lock icon 📊 for 3 seconds until the corresponding indicator light lights up.
- Deactivating the child safety lock: Press and hold the Child Lock icon 📄 for 3 seconds until the corresponding indicator light switches off.
Delay start
This function allows you to delay the start time of the washing programme by up to 24 hours.
- Switch on the appliance.
- Select a washing programme.
- Press the Delay Start icon Ⓛ. The display will show the time in a cyclical manner: H:00, H:01, H:02... H:24. Then, set the delay start time of the selected programme. To deactivate this function, press and hold the Delay Start icon for 3 seconds. The setting will be cancelled, and the display will be reset to H:00.
- The display shows the delay start time for about 3 seconds if no operation is performed.
- Press the Start/Pause icon to confirm the setting.
ENGLISH
Programmes
| Programme Soiling | type Detergent consumption Duration | |
| Powder detergent | ||
| ECO Standard program[EXB4] | gramme for medium soiling loads that saves water and energy. | 14 g 2:55 |
| Normal For normal [AADD4] | soiling loads, such as lightly soiled dishes and frying pans. | 14 g 1:00 |
| Intensive For dirtier [MCT7] | loads or loads that have had food residues adhering to them for several days. | 14 g 2:55 |
| Glass For lightly soiled [TAX6] | soiled loads and delicate glassware. | 14 g 1:30 |
| Rapid Shorter program[OWX2] | gramme for lightly soiled loads that do not require drying. | - 0:25 |
Note:
- Do not add more detergent than necessary. If the amount of detergent used is exceeded, a lot of bubbles will be produced, and the cleaning effect will be reduced.
- The actual running time of each programme may differ from the above chart depending on the water temperature, the number of items inserted, the type of soiling and the water hardness level.
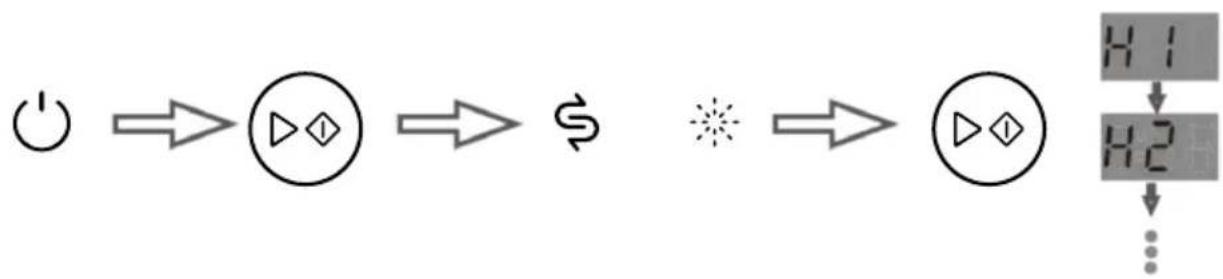
Water softener
-
The water softener is designed to soften hard water and remove limescale, leaving your dishes sparkling clean. It is very useful in places where the water is particularly hard.
-
Contact your local water supply company to check the degree of water hardness in your area.
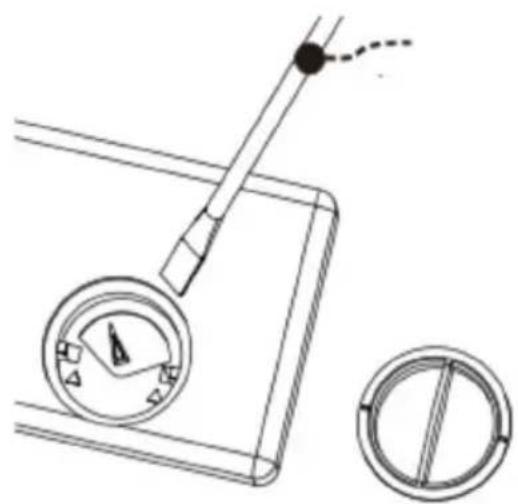
- Setting the water softener. Fig. 8
-
Close the door and press the Power icon to start the dishwasher.
-
Within 60 seconds after switching on the appliance, press and hold the Start/Pause icon for 5 seconds to access the water softener settings menu.
-
The salt refill and water softener refill indicator lights will light up, indicating that you have entered the settings menu.
-
Press the Start/Pause icon to select the desired setting value. If you do not press the Start/Pause icon for 5 seconds, the appliance will exit the settings menu and enter standby mode. In addition, the selected configuration will be saved.
Suitable setting according to the water hardness in your area:
| Water hardness (ppm) | 0-90 91 | -200 201 | -300 301-40 | 0 401-500 More than 500 | |
| Setting value H1 H2 | H3 H4 | (default) | H5 H6 |
Tips: When the setting value is H1, the water softener does not start, so there is no need to add salt. In this case, the salt refill indicator light will switch off.
- Adding salt into the water softener system. Fig. 9
- Remove the basket and loosen the tank cap.
- Add dishwasher salt (approx. 400-500 g). The first time you start the appliance, fill the tank with water.
- Carefully screw the cap back on.
Tips:
- Add the salt into the tank just before starting the programme.
- The salt refill indicator light will light up when the tank needs to be refilled.
- If you have spilt salt, run the Rapid programme to dissolve it.
- After adding salt, it is normal that the indicator light does not switch off immediately.
Detergent. Fig. 10
- Press the tab on the detergent dispenser.
- The cover will open.
- Add the required amount of detergent.
- Close the cover.
Fig. 10 key:
A: powder detergent
B: detergent tablets
Tips:
- The detergent removes dirt and food residues from the dishes.
- If no detergent is added, the washing effect will be poor.
- The necessary detergent quantity will depend on the load size and the tableware soiling level.
ENGLISH
- For full loads with heavy soiling, use 14 g of detergent.
IMPORTANT:
For best cleaning and drying results, we recommend using DuoGel liquid detergents (detergent
+ rinse aid) or powder detergents. However, the use of detergent tablets is less recommended, as they are not as effective as liquid detergents.
Rinse aid
The rinse aid helps to dry and polish the tableware, preventing drips and stains.
Tips:
- Add the rinse aid just before starting the washing programme.
- The rinse aid refill indicator light will light up when the dispenser needs to be refilled.
- Adjust the rinse aid dosing value according to the frequency with which the tableware is washed.
- The default setting is 3. The higher the setting value, the higher the amount of rinse aid dosed.
- If you notice that the tableware comes out greasy, set the dispenser to a lower setting to reduce the amount of rinse aid dosed and restart the washing programme.
- Wipe up any spilled rinse aid with a cloth.
- Use a screwdriver to remove the dispenser. Fig. 11
5. LOADING THE DISHWASHER
Fig. 12
- Cup
- Serving spoon
- Coffee spoon
- Glass
- Mug
- Dessert plate
- Small plate
- Melamine bowl
- Soup plate
- Shallow plate
- Platter
- Fork
- Serving fork
- Dessert spoon
-
Small pot
-
Bowl
- Soup spoon
- Knife
- Saucer
Dishwasher safe tableware
Ceramic tableware, glassware and stainless-steel tableware.
Tableware not suitable for dishwashers
- Metal, aluminium and enamelled tableware may discolour.
- Bamboo or wooden utensils may break or splinter when in contact with water.
- Plastic utensils can be deformed by the heat of the dishwasher.
- Iron utensils can rust.
Recommendations for loading the dishwasher
- Remove larger food debris.
- Objects such as glasses, pots, cups, etc. should be placed upside down so that water does not accumulate inside.
- All utensils must be stacked securely so that they do not tip over.
- Position the tableware so that it does not obstruct the rotation of the spray arms during washing.
- Very small tableware should not be washed in the dishwasher, as it could fall out of the basket and obstruct the rotation of the spray arms.
- When pushing the basket backwards, do not let the utensils touch the bottom of the dishwasher.
- Do not let utensils scratch the surface of the basket, as this makes it more likely to rust.
- Place the cutlery downwards in the cutlery basket.
- Knives and other sharp objects should be loaded in the basket with the point downwards or in a horizontal position.
Tip: After loading the dishwasher, rotate the spray arms to check that they can move smoothly.
6. CLEANING AND MAINTENANCE
After the appliance has been operating for some time, it is normal for debris to accumulate in the filtering system and spray arms. Check these components regularly and clean them.
To do that:
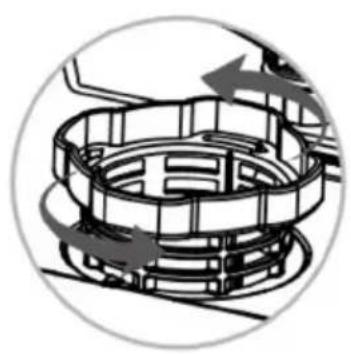
- Remove the filtering system.
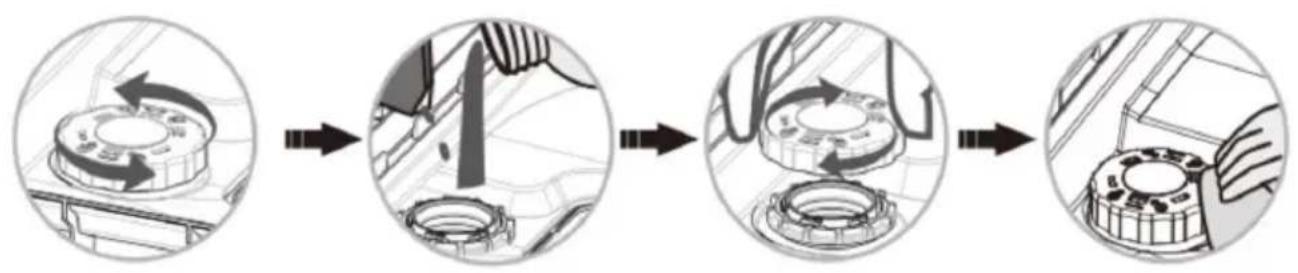
A Turn the cylinder filter counterclockwise. Fig. 13
ENGLISH
B Remove the stainless-steel filter. Fig. 14
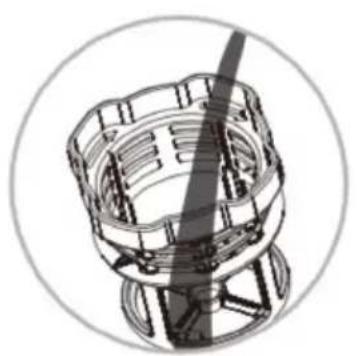
- Clean the filtering system under running water.
A Rinse the filters under running water. Do not use a steel brush to clean them, as this may damage them. Fig. 15
B Wash the cylinder filter and the mesh filter with a soft brush. Fig. 16
C Put the filtering system back in place. To do so, follow the disassembly process in reverse order. Fig. 17
- Clean the spray arms.
A Pull the basket out of the dishwasher and pull the bottom spray arm upwards to remove it. Fig. 18
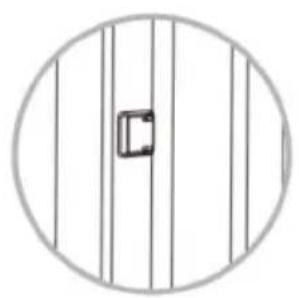
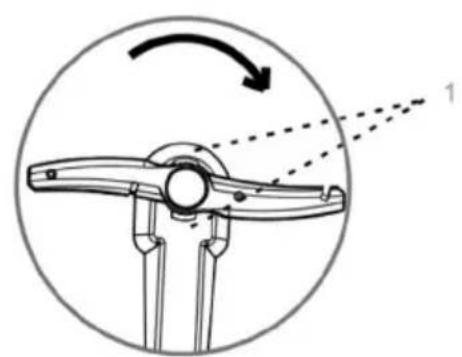
B Turn the upper spray arm clockwise and remove the retaining clip to remove the arm. Fig. 19
C Check the holes in the spray arms for clogging. If they are, clean them with a toothpick or pin and rinse them under running water to remove any debris. Fig. 20
Fig. 19 key:
- Upper spray arm retaining clip
7. TROUBLESHOOTING
Error code list
| Error code | Meaning Solution | |
| E01 Thermistor short-circuit Contact the official Cecotec Technical Support Service. | ||
| E02 Thermistor open circuit Contact the official Cecotec Technical Support Service. | ||
| E03 The appliance does not heat water | Make sure that the heating elements are working properly. | |
| Contact the official Cecotec Technical Support Service. | ||
| E04 | Valve failure | Contact the official Cecotec Technical Support Service. |
| E05 Overflow Tilt the appliance between 30° and 45° to drain the water from the bottom of the dishwasher. | |
| E06 Failure of the heating system | Contact the official Cecotec Technical Support Service. |
| E10 No water in the dishwasher | Check if the tap is open. |
| Check the water pressure. | |
| Check that the water supply has not been cut off. | |
| Contact the official Cecotec Technical Support Service. | |
Warning:
- If an overflow occurs, turn off the main water supply before contacting the Technical Service.
- If there is water in the base due to overfilling or a small leak, water must be removed before running the dishwasher again.
- If you cannot solve the error code, contact the official Cecotec Technical Support Service.
Troubleshooting
| Problem Description | Solution | |
| The tableware comes out wet | There is no rinse aid in the dispenser. | Add the rinse aid and set the dispenser to the highest setting. |
| You have piled up the tableware too much. | Refer to the dishwasher loading recommendations. | |
| The washing programme is not yet finished. | Wait for the washing programme to finish. | |
| The selected programme has no drying function. | Select a washing programme with drying function. |
ENGLISH
| The detergent has not dissolved | The holes of the spray arms are clogged, so the detergent is not released during the washing programme. | Unclog the holes in the spray arms and run the Rapid programme to remove detergent residues from the tableware. |
| You have added too much detergent. | Rerun the Rapid programme and add less detergent next time. | |
| You used an inadequate type of detergent. | Be sure to use a special powder or detergent tablet for dishwashers. | |
| The tableware comes out with many white spots or water droplets | There is no rinse aid in the dispenser. | Add rinse aid. |
| The tableware comes out with some white spots or water droplets | This is normal. | |
| There is foam inside the dishwasher | You have not used special dishwasher detergent or you have used too much detergent. | If there is not much foam, open the dishwasher door and let it dissipate or evaporate. If there is too much foam, wipe it off directly with a cloth. Then, start any washing programme for about 3 minutes to remove the foam residues. Repeat this process until the foam disappears completely. |
| The dishwasher fan sounds and the display shows “FAN” | The air circulation system is in operation. | This is normal. |
| Dishwasher door opens with difficulty or is jammed | There are traces of dirt on the gasket or on the door opening mechanism. | Clean the gasket. |
| The dishwasher does not start when the Power icon is pressed | If pressing the Power icon does not start the appliance and the indicator lights do not light up, the appliance may not be plugged into the mains socket. | Make sure that the power cable is plugged into the socket properly. |
| There has been a power failure. | Check that the residual current circuit breaker has not tripped. | |
| If the indicator lights are on, it means that the Child Lock function might be activated. | Deactivate the Child lock function. | |
| You have not pressed the Power icon long enough. | Press the Power icon for at least one second. | |
| Only the Power icon works | The dishwasher door is not properly closed. | Close the door. |
| There is dirt, water or fingerprints on the control panel. | Clean the control panel and make sure it is dry. | |
| If the indicator lights are on, it means that the Child Lock function might be activated. | Deactivate the Child lock function. | |
| The door lock is damaged. Contact the official Cecotec Technical Support Service. | ||
| The water supply indicator light lights up when water enters the dishwasher | There is a problem with the water supply. | Make sure there are no problems with the water supply. |
| The flowmeter is damaged. Contact the official Cecotec Technical Support Service. | ||
| The fill valve is damaged. Contact the official Cecotec Technical Support Service. | ||
| Knocking noise is heard in the dishwasher | It is possible that the tableware is not positioned correctly and is obstructing the rotation of the spray arms. | Stop the programme and reposition the tableware. |
ENGLISH
| The tableware does not come out clean | You have piled up the tableware too much. | Refer to the dishwasher loading recommendations. |
| The selected washing programme is not the right one. | Select the suitable washing programme. | |
| You have not used special dishwasher detergent or you have added too little. | Always use special dishwasher detergent and add enough amount before starting the washing programme. | |
| The filtering system is incorrectly installed and food debris has clogged the duct. | Place the filtering system properly in its position. | |
| The spray arms are clogged. Clean the spray arms. | ||
| The spray arms are blocked. Check for objects obstructing the rotation of the spray arms. | ||
| There are adhering or dried food remains from several days. | Soak the utensils for a while before putting them in the dishwasher. | |
| A power failure occurred while the appliance was running. | Restart the washing programme. | |
| Some food residues are more difficult to remove in the dishwasher. | Wash the dirtiest utensils with a scouring pad before putting them in the dishwasher. | |
| The dishwasher does not drain at the end of the washing programme | The drain hose is installed too high. | See section on connecting the drain hose. |
| Check if the drain hose is bent, kinked or clogged. | Straighten the drain hose and remove any foreign objects that are causing the blockage. | |
| The drain pump is broken. Contact the official Cecotec Technical Support Service. | ||
| The fill valve is damaged. Contact the official Cecotec Technical Support Service. | ||
- Do not repair or replace any part of the appliance unless specifically instructed to do so in this instruction manual. It may lead to a dangerous incident that endangers your health and/or damages property.
- In the event of a fault, please contact the official Cecotec Technical Support Service.
- Only use original spare parts.
8. TECHNICAL SPECIFICATIONS
You can find more information on this model by scanning the QR code on the energy label.
| Reference EU01_1 | 00467 EU01_100640 | ||
| Model Bolero Aguazero 2500 S-BI Black Glass | Bolero Aguazero 2500 S-BI White Glass | ||
| QR code |  |  | |
| Voltage 220-240 | V AC 220-240 V AC | ||
| Frequency 50 Hz | 50 Hz | ||
| Water pressure M | Maximum 1.00 MPa Maximum 1.00 MPa | ||
| Minimum 0.4 MPa Minimum 0.4 MPa | |||
| Total power 1380 | W 1380 W | ||
| Capacity 6 place settings | 6 place settings | ||
| IPX | IPX1 | IPX1 | |
| Reference | EU01_100467 / EU01_100640 | ||
| Model | Bolero Aguazero 2500 S-BI Black Glass / Bolero Aguazero 2500 S-BI White Glass | ||
| Characteristics | Measured values | ||
| Standard programme ECO | |||
| Energy Efficiency Class | D | ||
| ECO programme energy consumption (EPEC) (kWh/cycle) | 0.474 | ||
ENGLISH
| ECO programme energy consumption in kWh per 100 cycles (kWh) | 47.4 |
| Standard programme energy consumption (EPEC) (kWh/cycle) | 0.990 |
| Energy Efficiency Index (EEI) 47.9 | |
| ECO programme water consumption (EPWC) | 7.4 |
| Cleaning performance index (lc) 1.123 | |
| In Wc 0.010 | |
| CT / CR, Cleanliness index 4.382 / 3.696 | |
| Drying performance index (ID) 0.940 | |
| In WD 0.027 | |
| DT / DR,t, Drying index 4.131 / 3.679 | |
| Rated capacity (ps) 6 | |
| ECO programme duration (Tt) (h:min) 2:51 | |
| Power consumption in off mode (P0) (W) | N/A |
| Power consumption in standby mode (Psm) (W) | 0.39 |
| Power consumption at Delay start (Pds) (W) | 1.37 |
| Airborne noise emissions dB(A) 48.37 |
Technical specifications may change without prior notification to improve product quality.
Made in China | Designed in Spain
9. DISPOSAL OF OLD ELECTRICAL AND ELECTRONIC APPLIANCES
This symbol indicates that, according to the applicable regulations, the appliance and/or batteries must be disposed of separately from household waste. When this product reaches the end of its shelf life, you should dispose of the cells/batteries/accumulators and take them to a collection point designated by the local authorities.
Consumers must contact their local authorities or retailer for information concerning the correct disposal of old appliances and/or their batteries.
Compliance with the above guidelines will help protecting the environment.
10. TECHNICAL SUPPORT AND WARRANTY
Cecotec shall be liable to the end user or consumer for any lack of conformity that exists at the time of delivery of the product under the terms, conditions and deadlines established by the applicable regulations.
Repairs should be carried out by qualified personnel.
If at any moment you detect any problem with your product or have any doubt, do not hesitate to contact the official Cecotec Technical Support Service at +34 96 321 07 28.
11. COPYRIGHT
The intellectual property rights over the texts in this manual belong to CECOTEC INNOVACIONES, S.L. All rights reserved. The contents of this publication may not, in whole or in part, be reproduced, stored in a retrieval system, transmitted, or distributed by any means (electronic, mechanical, photocopying, recording or similar) without the prior authorization of CECOTEC INNOVACIONES, S.L.
12. SIMPLIFIED EU DECLARATION OF CONFORMITY
CE Cecotec Innovaciones hereby declares that this appliance complies with the essential requirements and other relevant provisions of the regulations applicable in the European Union. This appliance has been designed, manufactured and tested to meet the required safety and quality standards. The full text of the EU Declaration of Conformity can be found at the following website: https://cecotec.es/es/information/declaration-of-conformity
FRANÇAIS
1. PIÈCES ET COMPOSANTS
Image 1
7. PROBLEEMOPLOSSING
Lijst van foutcodes
Fig./Img./Abb./Afb./Rys. 3

Fig./Img./Abb./Afb./Rys. 4
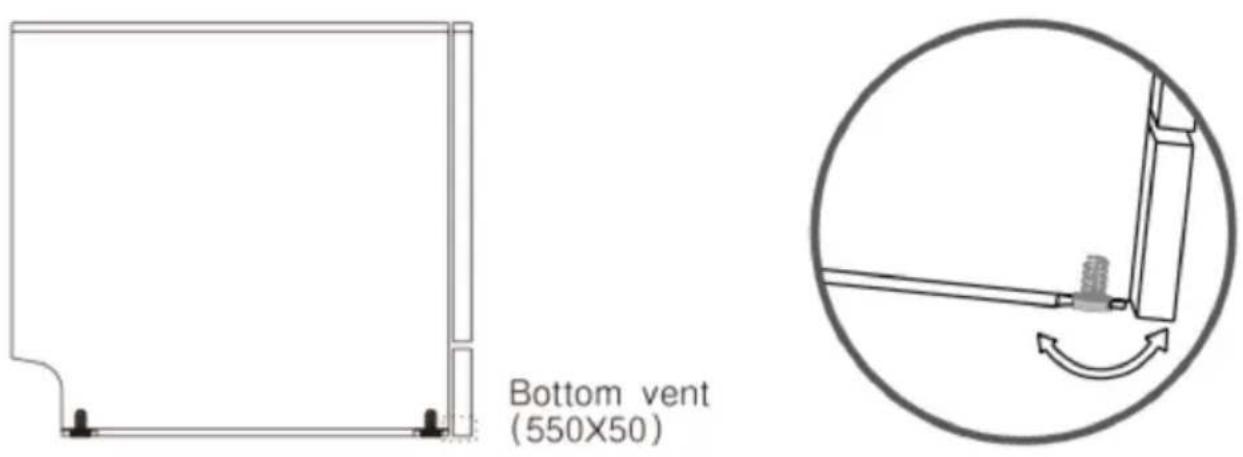
Fig./Img./Abb./Afb./Rys. 5
natural_image
Circular diagram with vertical lines and a central rectangular cutout (no text or symbols)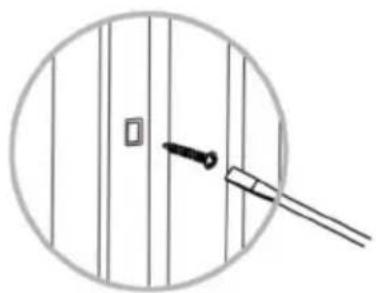
natural_image
Simple line drawing of a door with a handle and a small square on the left, enclosed in a circle (no text or symbols)
natural_image
Circular diagram with vertical lines and a central rectangular cutout (no text or symbols)Fig./Img./Abb./Afb./Rys. 6
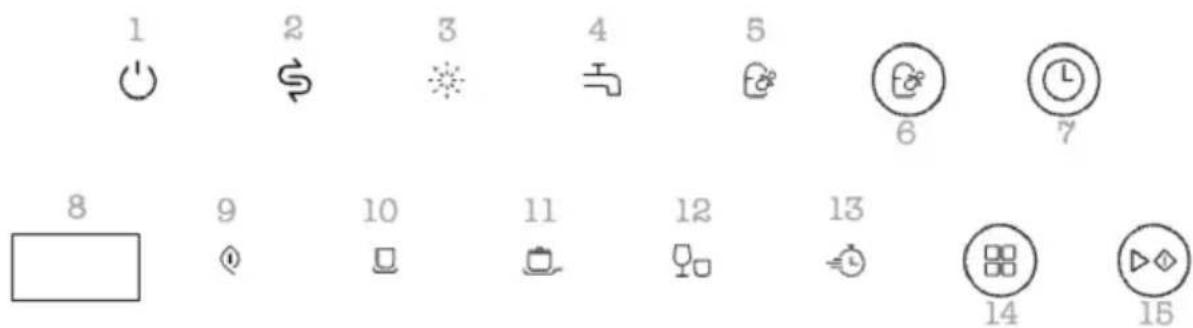
Fig./Img./Abb./Afb./Rys. 7
flowchart
graph LR
    A["Power"] --> B["Circle with triangle"]
    B --> C["S Dollar"]
    C --> D["Star Symbol"]
    D --> E["H1 H2 Control Signals"]
    E --> F["..."]
Fig./Img./Abb./Afb./Rys. 8
flowchart
graph LR
    A["Wheel with directional arrows"] --> B["Assembly step"]
    B --> C["Car component with hand and wrench"]
    C --> D["Assembly step with tool and valve"]
    D --> E["Gear shift with gear mechanism"]
Fig./Img./Abb./Afb./Rys. 9
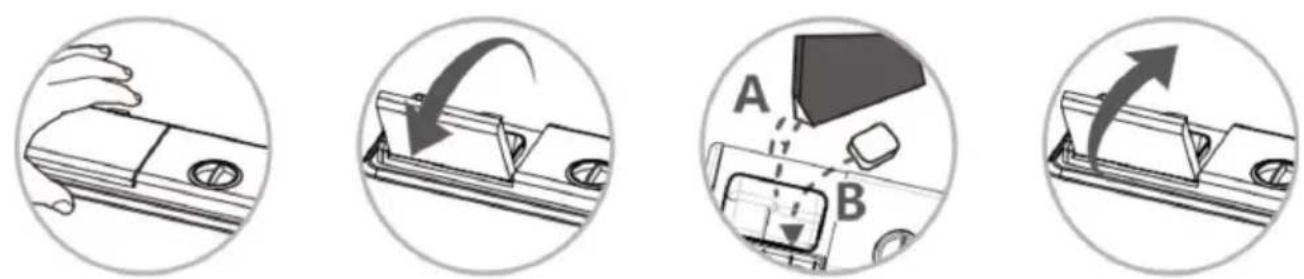
Fig./Img./Abb./Afb./Rys. 10
natural_image
Technical line drawing of a mechanical device with circular gauges and a handle, alongside a circular dial (no text or symbols)Fig./Img./Abb./Afb./Rys. 11
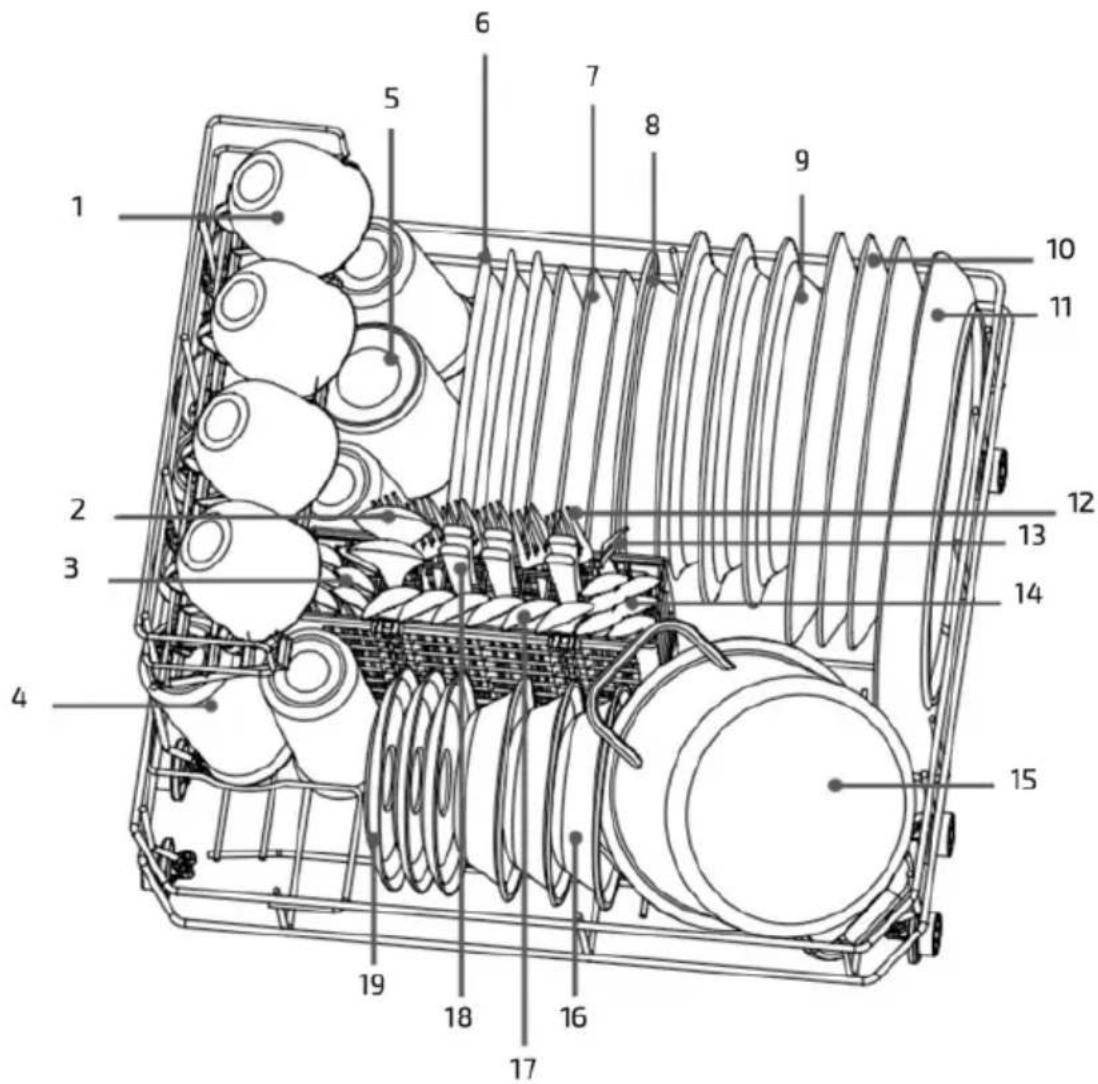
Fig./Img./Abb./Afb./Rys. 12
natural_image
Mechanical assembly diagram showing a circular component with internal components and directional arrows (no text or labels)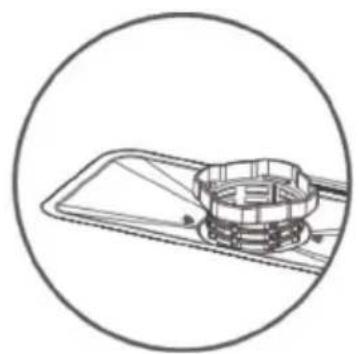
natural_image
Technical line drawing of a mechanical component inside a circular frame (no text or symbols)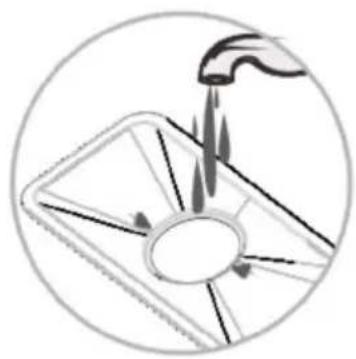
natural_image
Diagram of a hand using a tool to lift a circular component with arrows indicating motion (no text or symbols)Fig./Img./Abb./Afb./Rys. 13 Fig./Img./Abb./Afb./Rys. 14 Fig./Img./Abb./Afb./Rys. 15
natural_image
Technical illustration of a mechanical component with a central shaft and housing (no text or symbols)
natural_image
Diagram showing mechanical components with rotational arrows, no text or symbols present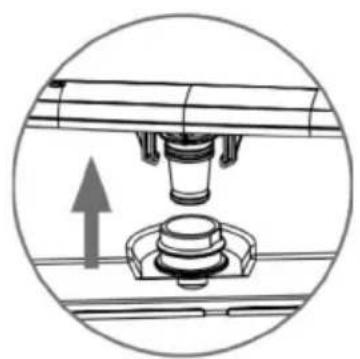
natural_image
Mechanical assembly diagram showing a piston and housing component with an upward arrow (no text or symbols)Fig./Img./Abb./Afb./Rys. 16 Fig./Img./Abb./Afb./Rys. 17 Fig./Img./Abb./Afb./Rys. 18
natural_image
Diagram of a mechanical tool with an arrow indicating rotational motion, no text or symbols present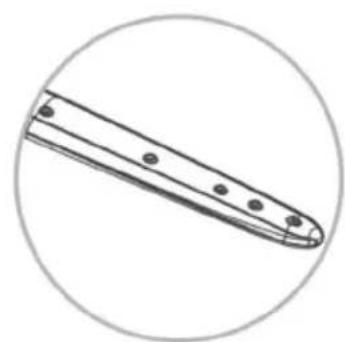
natural_image
Simple line drawing of a tool or blade with circular outline (no text or symbols)Fig./Img./Abb./Afb./Rys. 19 Fig./Img./Abb./Afb./Rys. 20
www.cecotec.es