USER MANUAL SE 5.100 Plus Kärcher
Symbols in the operating instructions EN 6
Description of the Appliance EN 6
Operation EN 6
Care and maintenance EN 8
Troubleshooting EN 8
Technical specifications EN 8
General notes

Before using your appliance for the first time, read these original operating instructions, act in compliance with them, and keep them for later use or for subsequent owners.
Proper use
This appliance has been designed for use in private households and is not intended for commercial use.
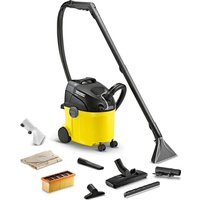
- By purchasing this appliance you have become the owner of a spray extraction appliance for maintenance or basic cleaning of carpeting with a deep cleaning effect.
- With a hard floor attachment for the washing nozzle (in the scope of delivery) hard floors can also be cleaned.
- With the relevant accessories (in the scope of delivery) it can also be used as a multi-purpose vacuum cleaner.
Environmental protection

The packaging material can be recycled. Please do not place the packaging into the ordinary refuse for disposal, but arrange for the proper recycling.
cycling
Old appliances contain valuable materials that can be recycled. Please arrange for the proper recycling of old appliances. Please dispose of your old appliances using appropriate collection systems.
tems.
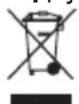
Electrical and electronic devices often contain components which could potentially pose a danger to human health and the environment if handled or disposed of incorrectly. However, these components are necessary for the proper operation of the device. Devices marked with this symbol must not be disposed of with regular household rubbish.
Disposing of the filters and filter bags
Filters and filter bags are made from environment-friendly materials.
They can therefore be disposed of through the normal household garbage provided you have not sucked in substances that are not permitted to be thrown into household garbage.
Notes about the ingredients (REACH)
You will find current information about the ingredients at:
www.kaercher.com/REACH
Warranty
The terms of the guarantee applicable in each country have been published by our respective national distributors.
We will repair possible faults on your unit free of charge within the warranty period, insofar as the faults are caused by material defects or defective workmanship. Guarantee claims should be addressed to your dealer or the nearest authorized customer service centre, and supported by documentary evidence of purchase.
Customer Service
Our KÄRCHER branch will be pleased to help you further in the case of questions or faults.
(See address on the reverse)
Accessories and Spare Parts
Only use original accessories and spare parts, they ensure the safe and trouble-free operation of the device. For information about accessories and spare parts, please visit www.kaercher.com.
Safety instructions
Apart from the notes contained herein the general safety provisions and rules for the prevention of accidents o the legislator must be observed.
Any use of the machine in contravention with the following instructions will lead to warranty claims being rendered void.
△DANGER
- Only connect the appliance to properly earthed sockets.
- The appliance may only be connected to alternating current. The voltage must correspond with the type plate on the appliance.
- Never touch the mains plug and the socket with wet hands.
- Do not pull the plug from the socket by pulling on the connecting cable.
- Turn off the appliance and remove the mains plug prior to any care and maintenance work.
- Repair works may only be performed by the authorised customer service.
- Check the power cord with mains plug for damage before every use. To avoid risks, arrange immediately the exchange by an authorized customer service or a skilled electrician, if the power cord is damaged.
- To avoid accidents due to electrical faults we recommend the use of sockets with a line-side current-limiting circuit breaker (max. 30 mA nominal tripping current).
- Only use a splash-proof extension cable with a minimum cross-section of 3 x 1 mm².
- If couplings of the power cord or extension cable are replaced, the splash protection and the mechanical tightness must be ensured.
- Please switch off the machine first using the main switch before disconnecting the machine from the mains.
- Immediately switch off the appliance or pull the mains plug in case of formation of foam or fluid escape!
WARNING
- This appliance is not intended for use by persons with limited physical, sensory or mental capacities or lacking experience and/or skills, unless such persons are accompanied and supervised by a person in charge of their safety or they have received precise instructions on the use of this appliance and have understood the resulting risks.
son in charge of their safety or they have received precise instructions on the use of this appliance and have understood the resulting risks.
- Children must not play with this appliance. Supervise children to prevent them from playing with the appliance.
- Cleaning and user maintenance must not be performed by children without supervision.
- Keep packaging film away from children - risk of suffocation!
- Switch the appliance off after every use and prior to every cleaning/maintenance procedure.
- Risk of fire. Do not vacuum up any burning or glowing objects.
- The operator must use the appliance properly. He must consider the local conditions and must pay attention to third parties, in particular children, when working with the appliance.
- The operator must use the appliance properly. He must consider the local conditions and must pay attention to third parties, in particular children, when working with the appliance.
- Check the faultless condition of the appliance and the accessories before using it. Otherwise, the appliance must not be used.
- Never dip the machine, the cable, or the plugs in water or other liquids.
- It is not allowed to use the appliance in hazardous locations. If the appliance is used in hazardous areas, the corresponding safety provisions must be observed.
- Protect the appliance against external weather, humidity, and heat sources.
- Should the appliance fall down, it must be checked by an authorized after-sales service, as internal disturbances could be present, which constrain the safety of the product.
- Do not suck in toxic substances.
- Do not use the machine to vacuum clean plaster of Paris, cement, etc., that can harden on coming into contact with water and can thus hamper the functioning of the machine.
- Always place the machine in a horizontal position during operation.
- Only use cleaners recommended by the manufacturer and comply with their application, disposal, and warning guidelines.
- Do not use abrasives, glass, or universal cleaners! Never immerse the appliance in water.
Certain materials may produce explosive vapors or mixtures when agitated by the suction air! Never vacuum up the following materials:
- Explosive or combustible gases, liquids, and dust particles (reactive dust particles)
- Reactive metal dust particles (such as aluminum, magnesium, zinc) in combination with highly alkaline or acidic detergents
- Undiluted, strong acids and alkalies
- Organic solvents (such as petrol, paint thinners, acetone, heating oil).
- In addition, these substances may cause the appliance materials to corrode.
Symbols in the operating instructions
△DANGER
Immediate danger that can cause severe injury or even death.
△ WARNING
Possible hazardous situation that could lead to severe injury or even death.
CAUTION
Possible hazardous situation that could lead to mild injury to persons or damage to property.
ATTENTION
Pointer to a possibly dangerous situation, which can lead to property damage.
Description of the Appliance
Illustrations on fold-out page!
When unpacking the product, make sure that no accessories are missing and that none of the package contents have been damaged. If you detect any transport damages, please contact your dealer.
Illustration 1
1 Container 2 Connection spray hose 3 Filter flap release button 4 Connection for suction hose of the wash vacuum cleaner
5 Filter deducting 6 Appliance head 7 Carrying handle 8 Button for vacuuming 9 Spray button 10 Holder for spray suction pipes 11 Container release 12 Flat fold filter * 13 Dirt water reservoir, detachable * 14 Fresh water reservoir, detachable * 15 Spray/suction hose 16 Handle 17 Surrounding air separator 18 Spray lever 19 Lock key for spray mist 20 Lock lever 21 Spray / suction tubes 2 x 0.5 m 22 Washing nozzle for carpet cleaning, with hard floor attachment 23 Carpet cleaner RM 519 (100 ml)
Additional vacuuming accessories
24 Attachment for wet/dry vacuuming 25 Switchable floor nozzle for carpets and hard floors 26 Crevice nozzle 27 Upholstery nozzle 28 Filter bag 29 Washer nozzle for cleaning upholstery ** already installed in the appliance * SE 5.100 Plus
Operation
Before Startup
Illustration 2
Turn both releases in the direction of the arrow, remove the appliance head and take accessories out of the container.
Illustration 3
Mount wheels and steering rollers.
Illustration 4
Attach the accessories holder.
Start up
Wet cleaning
(see chapter "Fill wet cleaning/fresh water reservoir")
Dry vacuum cleaning
(see chapter "Dry vacuuming")
Vacuuming up moist dirt/water
(see chapter "Vacuuming up moist dirt/water")
Illustration 5
Insert and lock the appliance head.
Illustration 6
Attach the suction hose and the spray hose to the connectors on the appliance.
Note:
Press the suction hose tightly into the connection so that it locks into place.
Illustration 7: Connect the spray/suction pipes and attach to the handle. Center the locking lever when attaching it, turn clockwise to lock. Attach the washing nozzle to the spray suction pipes and secure it by means of the locking lever.
The appliance is now prepared for wet cleaning.
Wet cleaning carpets/hard floors/upholstery
ATTENTION
Check the object to be cleaned prior to using the appliance in an inconspicuous place for colour fastness and water resistance.
Do not clean water-sensitive floor coverings such as wood floors (the moisture could penetrate and damage the floor).
Note
Warm water (max. 50°C) will increase the cleaning effect.
Only use the detergent pump while operating. Avoid dry runs as well as unnecessary pressure buildup (dynamic pressure) as much as possible.
If there is a risk of overheating, the thermal protection switch shuts off the detergent pump. After cooling down (20-30 min), the pump is ready for use again.
Fill the fresh water reservoir.
Illustration 8
You can remove the water reservoir to fill it.
Add 100-200 ml of the carpet cleaner RM 519 (volume depends on degree of soiling) into the fresh water tank, top up with tap water, do not overfill (observe MAX marking).
Wet cleaning of carpeted floors.
Use washing nozzle for carpet cleaning. Work without hard floor attachment.
Please only use the carpet cleaner RM 519.
Wet cleaning of hard floors.
Do not clean laminate or parquet floors! Use washing nozzle for carpet cleaning. Slide the hard floor attachment onto the washing nozzle from the side.
The squeegee points towards the front, the brush strip towards the back.
Wet cleaning of upholstery.
Use washing nozzle for upholstery cleaning.
Start working
Illustration 9
Insert the mains plug into the socket. Press the switch for vacuuming, suction turbine is running.
Illustration 10
Close fully the surrounding air separator at the handle. Illustration 11 Press the switch for spraying, the detergent pump is ready. Illustration 12 Use the lever on the spray handle to spray on detergent solution. Illustration 13 For continuous spray, the spray lever can be locked; for this, activate the spray lever and pull the locking key toward the rear. Run across the surface to be cleaned in overlapping paths. Pull the nozzle backwards (do not push).
Empty the wastewater reservoir during operation
Once the wastewater container is full, the appliance switches off automatically. Note: Once the appliance shuts off, switch off the appliance, because the suction turbine will otherwise start running again once you open the appliance. Release and remove the appliance head. Remove the wastewater container and empty it.
End wet cleaning process
Rinse the spray tubes in the appliance as follows: Fill the fresh water container with approx. 1 litre of clear water.
Hold the nozzle above the drain, and switch on the spraying pump until the clear water has been consumed.
Cleaning tips/mode of operation
- Always work from the light to the shade (from the window to the door).
- Always work from the cleaned to the uncleaned surface.
- Carpets with jute backing can shrink and colours may fade if too much water is used.
- Brush high-fiber rugs in the direction of the weave after cleaning (using a fiber brush or a scrubber).
- Impregnating the fabric using the detergent Care Tex RM 762 after wet cleaning prevents quick resoiling of the textile surface.
- Do not step on cleaned surfaces until they have dried, and do not place furniture on them to avoid pressure spots or rust stains.
Cleaning methods
With light to normal contamination (regular cleaning):
Turn on suction and spraying. Spray and simultaneously suction off detergent solution in one work cycle. Switch off the spray switch and suction off the remaining cleaning solution. After cleaning the carpets, reclean them using clear, warm water and waterproof if needed.
Heavy soiling or stains (basic cleaning):
Switch on the spray. Apply detergent solution and allow to react for 5 minutes (vacuuming is switched off). Clean the surface just like you would with light/normal soiling. After cleaning the carpets, reclean them using clear, warm water and waterproof if needed.
Dry vacuum cleaning
ATTENTION
Container and accessories must be dry, otherwise dirt may adhere.
Remove the wastewater and fresh water containers.
Illustration 14
Recommendation: Insert the filter bag for vacuuming.
Illustration 15
Use the adapter for wet/dry vacuuming. Attach the adapter to the handle, turn the locking handle to secure it. Select the desired accessories and attach to the spray/suction pipes or directly to the attachment. Switch on the vacuum.
Note: Do not switch on the spray.
Vacuuming of hard floors
Illustration 16
Use your foot to press the reversing switch of the floor nozzle. The brush strips at the bottom of the floor nozzle are extended.
Vacuuming carpeted floors
Illustration 16
Use your foot to press the reversing switch of the floor nozzle. The brush strips at the bottom of the floor nozzle are retracted. Use the surrounding air separator to adapt the suction force.
Note:
Close the surrounding air separator again after use!
Vacuuming up moist dirt/water
ATTENTION
Do not use a filter bag!
Remove the fresh and waste water containers, vacuum the wet dirt/water directly into the container. Use washing nozzle to vacuum up wet dirt/water. Once the wastewater container is full, the appliance switches off automatically.
Note: Once the appliance shuts off, switch it off using the vacuum button, because the suction turbine will otherwise start running again once you open the appliance.
If you use a crevice nozzle:
Attach and secure the adapter for wet/dry vacuuming. Install the crevice nozzle directly to the adapter. Switch on the vacuum.
Finish operation
Turn off the appliance. Drain the full container. Rinse the reservoir thoroughly with clear water. Separate handle, spray suction pipes, and washing nozzle by opening the locking lever (central position). Flush the accessories separately under running water and let them air dry. Leave the appliance open to let it dry.
Illustration 17
Accessories storage: Suction hose, suction pipes, and accessories can be comfortably stored on the appliance.
Storing the appliance. Store the appliance in a dry room.
Care and maintenance
Clean the spray nozzle
With an uneven spray jet.
Illustration 18
Loosen nozzle attachment and pull out, clean or replace spray nozzle.
Clean the sieve in the fresh water reservoir
1 x year or as needed. Illustration 19 Clean sieve.
Clean flat fold filter
For heavy contamination:
Illustration 20
Unlock and open the cover, remove the flat fold filter, remove the grid, and brush off the filter.
Troubleshooting
No water exiting from nozzle
Fill up the fresh water reservoir. The sleeve in the fresh water container is clogged. The thermal protection switch has switched off the pump as it was overheated. Switch off the appliance and let it cool down (approx. 20-30 min). The detergent pump is defective; contact customer service.
Spray stream uneven
Clean the spray nozzle of the washing nozzle.
Close the surrounding air separator at the handle. Accessories, suction hose, or suction tubes are clogged; please remove the obstruction. The filter bag is full: insert a new filter bag. The flat fold filter is contaminated; use the filter cleaning mechanism, remove the flat fold filter if heavily soiled, and clean it (see chapter "Cleaning flat fold filter").
Detergent pump noisy
Fill up the fresh water reservoir.
Strong foam generation in the container
Use the correct detergent from KÄRCHER.
Appliance is not running
Plug in the mains plug.
Technical specifications
| Voltage
1~50-60 Hz | 220 - 240 V |
| Output Pnom | 1200 W |
| Output Pmax | 1400 W |
| Mains fuse (slow-blow) 10 A |
| Sound pressure level (EN
60704-2-1) | 77 dB(A) |
| Weight (without accessories) 7,1 kg |
Subject to technical modifications!
Table of contents
General instructions FR 5
www.kaercher.com/REACH
Warranty
www.kaercher.com/REACH
Warranty
Wet cleaning
www.kaercher.com/REACH
Warranty
www.kaercher.com/REACH
Warranty
Rens/DDKE laminat ell parketgulve!
www.kaercher.com/REACH
Warranty
10 Holder for spray-sugeror
11 Beholderåsing
12 Foldefilter*
Recommendation: Use the filter bag for suction.
Figure 15
→ Use adapter for wet/dry suction. Attach adapter to handle or suction tube, turn locking lever to release. → Select desired accessory and attach it to spray-suction tube or directly to adapter. → Switch on suction.
www.kaercher.com/REACH
Warranty
www.kaercher.com/REACH
www.kaercher.com/REACH
Warranty
This device is designed for household use and is not intended for professional requirements.
- With this device you have acquired a spray extractor for basic cleaning of carpets with a deep cleaning effect. With the help of the mounting kit for the hand nozzle, intended for hard surfaces (included in the delivery kit), you can even clean hard floors. With the appropriate accessories (also included in the delivery kit), it can also be used as a universal vacuum cleaner.
Environmental protection

Packaging materials are recyclable. Please do not dispose of packaging with household waste, but
take it to one of the recycling collection points.
Old devices contain recyclable materials that should be sent to recycling collection points. Therefore, dispose of old devices properly
through the appropriate waste collection systems.
Electrical and electronic devices often contain components that, if handled incorrectly or disposed of improperly, may pose a potential hazard to people and the environment. However, these components are necessary for the proper operation of the device. Devices marked with this symbol are prohibited from being disposed of with household waste.
Disposal of the filter and dust bag
The filter and dust bag are made of environmentally friendly materials.
If they do not contain any substances that are prohibited for disposal with household waste, they can be disposed of with normal household waste.
Instructions on components (REACH)
Current information on components can be found on the website at the following address:
www.kaercher.com/REACH
Warranty
In each country, the warranty conditions published by our authorized sales organization apply. Possible malfunctions of the device during the warranty period will be repaired free of charge if they are due to material or manufacturing defects. In case of a claim during the warranty period, please contact, with the purchase receipt, the dealer who sold you the device or the nearest authorized customer service.
The date of manufacture is displayed on the factory plate in encoded form.
The identification numbers mean:
The following value:
Example: 30190
3rd digit of year of manufacture 0 digit of year of manufacture 9 decade of year of manufacture 2nd digit of month of manufacture 0 first digit of month of manufacture
Thus, in this example, the code 30190 means the date of manufacture 09/(2)013.
(Address indicated on the reverse)
Warranty
In each country, the warranty conditions published by our authorized sales organization apply. We will repair any malfunctions free of charge during the warranty period, provided that the cause is proven to be a material or manufacturing defect. In the event of a claim during the warranty period, please contact, with the proof of purchase, the dealer who sold you the device or the nearest authorized customer service.
Customer service
In case of questions or malfunctions, our KARCHER branch will help you resolve them.
(Address indicated on the reverse)
Accessories and spare parts
Use only original accessories and spare parts - they guarantee safe and trouble-free operation of the device.
Information on accessories and spare parts can be found at www.kaercher.com.
Safety instructions
In addition to the safety instructions contained in this operating manual, the general safety regulations and instructions for the prevention of accidents must also be observed.
Any use that contradicts these instructions will void the warranty.
DANGER
- The device should only be connected to a properly grounded mains power supply.
- The device should only be connected to an AC power supply. The voltage must correspond to the specifications on the device's nameplate. Do not touch the mains plug and socket with wet hands. Do not pull the mains plug out of the socket by pulling on the cable.
- When carrying out any maintenance or servicing work on the device, it must be switched off and the mains plug must be pulled out of the socket.
- Repair work on electrical components may only be carried out by authorized service personnel.
- Before starting work with the device, check the mains cable and the mains plug for damage. A damaged mains cable must be replaced immediately by authorized service personnel or a qualified electrician. To avoid accidents caused by electricity, we recommend using sockets with a residual current device (max. rated tripping current: 30 mA). Use only a splash-proof extension cable with a cable cross-section of at least 3x1 mm².
- When replacing connecting elements on the mains cable or extension cable, splash-proof protection and mechanical strength must be ensured.
- Before disconnecting the device from the power supply, first switch it off using the main switch.
- If foam forms or liquid leaks from the device, switch it off immediately and disconnect it from the power supply!
WARNING
- This device is not intended for use by persons with reduced physical, sensory or mental capabilities, or lack of experience and/or lack of necessary knowledge, unless they are under the supervision of a person responsible for their safety or have received instructions from them on how to use the device, and are aware of the resulting risks.
Do not allow children to play with the device. Make sure that children do not play with the device. Do not allow children to clean or service the device without supervision. - Keep the packaging film away from children; there is a risk of suffocation! - The device should be switched off after each use and before cleaning/maintenance. - Fire hazard. Do not allow hot or glowing objects to be sucked in. - The device must be placed on a stable surface. - The user is responsible for using the device in accordance with its intended purpose. They must take into account local conditions and, when working with the device, watch out for other people nearby, especially children. - Before use, check the device and accessories for damage. If they are not in a safe condition, their use is not permitted. Never drop the device or the suction hose into water or other liquids. - Operation of the device in damp rooms is not permitted. When using the device in a hazardous area, the relevant safety regulations must be observed. - The device should be protected from strong weather influences, moisture, and heat sources. - After a fall, the device must be checked by an authorized service center, as there may be internal damage that reduces the safety of the device. Do not vacuum up flammable substances. Do not vacuum up dust, dirt, and similar substances, as they may ignite and damage the device when in contact with water. During operation, the device must be placed horizontally. Only use cleaning agents recommended by the manufacturer, and follow the instructions for use, disposal of waste, and warnings from the manufacturer. Do not use abrasive cleaners, cleaning agents for glass, or universal cleaning agents! It is forbidden to immerse the device in water.
Some substances, when mixed with the air being sucked in, can form explosive vapors or mixtures!
Never vacuum up the following substances:
Explosive or flammable gases, liquids, and dust (reactive dust) Reactive metal dust (e.g., aluminum, magnesium) in combination with strong alkalis and acids - Undiluted strong acids and alkalis - Organic solvents (e.g., benzene, solvent, acetone, fuel oil).
In addition, these substances can damage the materials used in the device.
Symbols in the operating instructions
DANGER
Immediate or imminent danger that leads to serious injury or death.
WARNING
A potentially dangerous situation that could lead to serious injury or death.
CAUTION
A potentially dangerous situation that could lead to minor injury or property damage.
NOTE
Instruction regarding a potentially dangerous situation that could lead to property damage.
Device description
Figure 1
When unpacking the device, check its completeness and integrity. In case of damage incurred during transport, notify the trade organization selling the device. 1 Tank 2 Sprayer for flat surfaces 3 Cover release button 4 Nozzle for upholstery cleaning 5 Filter insert 6 Device head 7 Handle for carrying the device 8 On/Off button 9 Spray release button 10 Fastening of spray hoses 11 Reservoir release 12 Flat folding nozzle* 13 Reservoir for dirty water, removable* 14 Reservoir for clean water, removable* 15 Spray hose 16 Handle 17 Additional air flap 18 Spray gun 19 Trigger for spray gun 20 Locking lever 21 Spray hoses 2x0.5 m 22 Power nozzle for cleaning carpets, with mounting kit for hard surfaces 23 Cleaning agent for carpets RM 519 (100 ml) Additional accessories for work 24 Adapter for dry vacuuming 25 Crevice nozzle for corners, for carpets and hard floors 26 Nozzle for upholstery and fabrics 27 Nozzle for crevices 28 Filter bag 29 Washing nozzle for upholstery* *already installed in the device ** SE 5.100 Plus
Controls
Before starting work
Figure 2
Turn both releases in the direction of the arrow, remove the device head and take out the accessories from the container.
Figure 3
Figure 4
Install the wheels and guide rollers. → Install the accessory holder.
Start-up
Wet cleaning
(see section "Wet cleaning/Filling the clean water reservoir")
→ Dry vacuuming
Fill the fresh water tank with approx. 1 liter of clean water.
Depress the switch to turn on the pump until the cleaning process is complete.
Cleaning tips / method of operation
- Always work from light to dark (from window to door).
- Always work in the direction from the cleaned surface to the uncleaned one. -Carpet covering with a backing made of jute may wrinkle and lose shape when cleaned wet.
- High-pile carpets after cleaning in a damp state should be brushed in the direction of the pile (for example, with a carpet brush or a broom). -Treatment with cleaning agent Care Tex RM 762 after wet cleaning prevents rapid re-soiling of the textile covering. -Walk on the cleaned surface only after it has dried; install furniture to avoid dents or rust stains.
Cleaning methods
For normal soiling (brush):
Turn on suction and spray. During one pass, simultaneously spray the cleaning solution. Then turn off the "Spray" switch and collect the remaining cleaning agent. → After cleaning, rinse the carpet again with clean, warm water and, if desired, apply the treatment.
For heavy soiling or stains (thorough cleaning):
Turn on spraying. Apply the cleaning solution and let it act for at least 5 minutes. (Suction is off). Then clean the surface as with normal/regular soiling. → After cleaning, rinse the carpet again with clean, warm water and, if desired, apply the treatment.
Dry cleaning
CAUTION
The tank and accessories must be dry, otherwise they may be damaged.
→ Remove the dirty and clean water tanks. Figure 14 → Recommendation: For suction, use a filter bag.
Figure 15
Connect the adapter to a clean, dry surface. Put the adapter on your hands or insert it into the socket, turn the locking ring and fix it. Select the desired attachments, put them on the suction hoses or directly on the adapter. Turn on the suction. Note: Do not turn on the spray.
Vacuuming hard floors
Figure 16
Press the floor nozzle switch pedal. The bristles on the underside of the nozzle are extended.
Removing dust from carpeted surfaces
Figure 16
Press the floor nozzle switch pedal. The bristles on the underside of the nozzle are retracted.
For more suction power, press the additional air valve. Note:
After use, close the additional air valve!
Vacuuming wet dirt/water
ATTENTION
Do not use any dust filter bag!
Take the container for fresh and dirty water, vacuum the wet dirt/water directly into the container. For vacuuming wet dirt/water, use the wet nozzle. If the reservoir is full, the device switches off automatically.
Note: If the device switches off, you must switch it off using the "Suction" button, because otherwise, when the device is opened, the suction turbine will start working again.
Using the accessories:
Attach and secure the adapter for dry vacuuming. Attach the crevice nozzle directly to the adapter. Switch on the vacuum.
End of work
→ Switch off the appliance. Empty the entire reservoir. Thoroughly rinse the reservoir with clean water. → Detach the handle, hose, spray nozzle, and suction nozzle from each other, for this close the shut-off valve (set it to the middle position). → Rinse the additional equipment elements separately under running water and then let them dry. Leave the appliance open for drying.
Figure 17
Storage of accessories: The suction hose, suction tube, and accessories can be stored compactly and practically on the appliance. Storage of the appliance. Store the device in dry rooms.
Care and maintenance
Clean the spray nozzles
In case of uneven spray pattern
Figure 18
Loosen and remove the nozzle retaining screws, clean or replace the spray nozzle.
Clean the sieve filter of the clean water reservoir
Once a year or as needed.
Figure 19
Clean the sieve.
Cleaning the sieve filter
Heavy contamination:
Figure 20
→ Open and tilt back the lid, remove the pleated filter, take out the mesh and rinse it.
Help in case of malfunctions
Water leaking from the spray gun
Fill the fresh water reservoir. The mesh in the fresh water tank is clogged. The thermal protection switch has switched off the detergent pump due to overheating. Switch off and let the device cool down (approx. 20-30 min). → The detergent pump is defective, contact the customer service department.
Uneven spray pattern
Clean the spray nozzle in soapy water.
Insufficient suction power
Close the additional air flap on the handle. Accessories, suction hose or suction tubes are clogged - remove the clog. → The filter bag is full: insert a new filter bag. → The pleated filter is dirty, clean the filter, if heavily soiled remove it and rinse it (see section "Cleaning the pleated filter".
Detergent pump is weak
Fill the fresh water reservoir.
Heavy foaming in the reservoir
→ Use original KARCHER detergent.
Device does not work
Insert the mains plug into the socket.
Technical data
| Haprägenne
1~50-60 Hz | 220 - 240 V | |
| Мошносты P_HOM | 1200 BT | |
| Мошносты PMRBC | 1400 BT | |
| Сetime村村民ахнисты
(nheptный) | 10 | A |
Sound pressure level 77 dB(A) (EN 60704-2-1)
Weight without (accessories) 7.1 kg
We reserve the right to make technical changes!
Table of contents
www.kaercher.com/REACH
Warranty
www.kaercher.com/REACH
Warranty
www.kaercher.com/REACH
Warranty
www.kaercher.com/REACH
Warranty
www.kaercher.com/REACH
Warranty conditions
www.kaercher.com/REACH
Warranty
In each country, the warranty conditions issued by our responsible distribution company apply. During the warranty period, we will free of charge eliminate any malfunctions of the device caused by material defects or manufacturing defects. When claiming warranty, please contact your dealer together with the device and proof of purchase.
www.kaercher.com/REACH
Warranty
www.kaercher.com/REACH
Warranty
In each country, the warranty conditions issued by our sales service apply. During the warranty period, we will free of charge eliminate all malfunctions on the device if they are due to material defects or manufacturing defects. In case of claiming warranty rights, please contact your dealer.
Safety instructions BG 5
Symbols in the operating instructions BG 6
Description of the device BG 6
Maintenance BG 7
Troubleshooting BG 9
Help and support BG 9
Operation

Before first use, read the original operating instructions for the product and act in accordance with them. Keep them for later use or for the subsequent owner.
Wet cleaning of surfaces with KM
→ Insert the KM detergent cartridge. → Work without a seat for hard floors.
For cleaning, use only the KM 519 cleaning agent from KARCHER.
Wet cleaning of hard floors
Do not clean floors made of laminate or parquet!
→ Use the dosing agent for cleaning KM. Attach the hard floor nozzle to the dosing agent.
The spray mist is emitted, the brush rotates backwards.
Wet cleaning of upholstered furniture
→ Use the dosing agent for cleaning upholstered furniture.
Shutting down
Figure 9
Switch off the device at the socket. → Press the suction button, the suction turbine works.
Figure 10: Close the drain valve behind the page for the sprayer.
Figure 11
Press the button for spraying, the pump for cleaning the preparation is ready.
Figure 12
For spraying the cleaning solution, the sprayer handle is ready.
Figure 13: For continuous spraying, the sprayer can be fixed, so that the sprayer handle and the fixing button can be pulled back. The cleaning surface should be cleaned before use. The ready position should be checked (do not press).
Draining the fresh water tank during operation
If the fresh water tank is full, the device switches off automatically.
Note: If the device is switched off, switch it off at the main switch, otherwise the suction turbine will be damaged when the device is opened.
Clean and dry the head of the device. Drain the fresh water tank and empty it.
Rinsing the wet cleaning
Remove the spray nozzles of the device, for this:
Fill the fresh water tank with approx. 1 liter of clean water.
Close the drain valve and switch on the spray pump until the clean water is expelled.
Advice for storage/start of work
- Work from the light towards the socket (from the nozzle to the valve).
- Work from the cleanest to the least clean surface.
- Pieces with rubber lips from the vacuum cleaner may become dirty and should be cleaned. -Clean the rubber lips after each use to prevent them from becoming dirty in wet conditions, following the direction of the bristles (e.g., with a damp cloth or a brush for wet use. -Rinsing with cleaning agent Care Tex RM 762 after wet cleaning prevents rapid re-soiling of the textile parts. -Only walk on or place furniture on the cleaned surfaces after they have dried completely, to avoid stains or color changes from moisture.
Cleaning methods
For light to normal soiling (surface cleaning):
Turn on the suction or spraying. The cleaning solution should be sprayed and sucked up simultaneously in one working pass. → The spray nozzle should be used to spray and suck up the remaining cleaning solution. → After cleaning, rinse the rubber lips with clean water, then dry them if desired.
For heavy soiling or stains (basic cleaning):
Turn on the spraying. Apply the cleaning solution and let it act for about 5 minutes (suction is switched off). → Then clean as with light/normal soiling. → After cleaning, rinse the rubber lips with clean water, then dry them if desired.
Dry suction
ATTENTION
The reservoir and accessories must be dry, otherwise mold may form. → Empty the reservoirs for dirty and clean water.
Figure 14
→ For drying, place the filter bag on the nozzle.
Figure 15
→ Use the adapter for wet/dry suction. Place the adapter on the handle of the suction hose, turn it to lock, and secure it. → Collect the desired accessories and place them on the spray suction hose directly on the adapter. Turn on the suction. Note: Do not turn on the spraying.
13cMyKBaHe Ha TBbpDn noOBe
Figure 16
→ With a quick press, the pre-selection is activated for the position. Pull out - the brushes are removed from the position.
Cleaning the surface with a brush
Figure 16
→ With a quick press, the pre-selection is activated for the position. Pull out - the brushes are removed from the position. For the task of the cleaning force, the brushes are selected for the side air.
Note:
After use, close the air side!
Cleaning of wet deposits/water
WARNING
Cleaning the flat filter
Dry-wet cleaning: Figure 20
→ Disconnect the hose and open it, remove the flat filter, remove the filter and pull it out.
Help in case of malfunctions
Do not pull water from the position
→ The water tank is empty. → The water tank is filled. The protective thermostat is exclusively designed for cleaning agents. Risk of damage! Remove the device and let it cool down (approx. 20-30 min). → If the cleaning agent pump is defective, contact the service department.
Uneven spray pattern
→ Clean the spray nozzle of the spray gun.
Insufficient suction power
Close the air bleed valve on the device. → Check that the suction hose and suction hose connections are tight, and tighten if loose. → The dirt filter bag is full: insert a new dirt filter bag. → The flat filter is clogged: clean the flat filter, or if it is heavily clogged, replace it (see chapter "Cleaning the flat filter").
The cleaning agent pump is noisy
→ Fill the water tank.
Strong foam formation in the tank
→ Use KÄRCHER cleaning agents.
The device does not work
Connect the device to the electrical mains.
Technical data
Nominal power P: 1200 W
Maximum power P: 1400 W
Fuse (slow-blow) 10 A
Noise level 77 dB(A)
(EN 60704-2-1)
Weight (depending on equipment) 7.1 kg
We reserve the right to make technical changes!
Table of contents
General notes ET 5
Safety notes ET 5
www.kaercher.com/REACH
Warranty
www.kaercher.com/REACH
Warranty
www.kaercher.com/REACH
Warranty
www.kaercher.com/REACH
Warranty
The manufacturer warranty is valid if the device is operated by competent personnel. Malfunctions in the device operation are eliminated free of charge during the warranty period, if they are caused by material or manufacturing defects. In the warranty case, please contact with the receipt and documents confirming the purchase of the device, your dealer or the nearest authorized customer service center.
Customer service
For various questions and in case of malfunctions, our KÄRCHER representatives will help you. (See address on the back)
Spare parts
Use only original accessories and original spare parts, because they guarantee safety and uninterrupted operation of the device.
Information about accessories and spare parts can be found at www.kaercher.com.
Safety instructions
Along with the instructions in this manual, observe the general safety regulations and legal norms.
Any use that contradicts the instructions may lead to loss of warranty.
DANGER
- The device must only be connected to a properly grounded socket.
- The device must only be connected to AC power. The voltage must match the specifications on the type plate of the device. Never touch the mains plug and socket with wet hands. Do not pull the mains plug out of the socket by the cable.
- Before carrying out any work with accessories or maintenance of the device, unplug it and pull the mains plug out of the socket. Repair work and work on electrical components may only be carried out by authorized customer service.
- Check the device for damage before each use. Have damaged cables replaced by an authorized service/electrician.
- To avoid unsafe incidents during use of the electrical device, we recommend using sockets with a residual current circuit breaker (max. 30 mA rated current). Use only extension cables with a minimum cross-section of 1 mm² that are protected against splashing water and moisture.
- When replacing the connecting cable or plug, it is necessary to ensure protection against moisture and mechanical strength.
- Before cleaning or maintenance, unplug the device using a 20-amp switch.
- When forming or unplugging the device, it is necessary to disconnect it from the electrical network.
WARNING
These devices are not intended for use by persons with reduced physical, sensory or mental capabilities or with lack of experience and/or lack of knowledge, unless they are supervised by a person responsible for their safety or receive instructions from them on the use of the device, and they understand the risks. Do not allow children to play with the device. - Supervise children to ensure they do not play with the device. Do not allow children to carry out cleaning and maintenance of the device without supervision. - Keep the device away from children, as there is a danger of injury! - The device should be turned off after each use and before cleaning/maintenance. Danger of injury. Do not allow operation of the device by children or other persons. - The device must be placed on a flat and stable surface. The user must use the device in accordance with the instructions. They must take into account the working conditions and when working with the device, always remember the possibility of the presence of third parties, especially children. - Before use, check the condition of the device and accessories. If the accessories are in an unsafe condition, they cannot be used. Never immerse the device, cable, or plug in water or other liquids. It is forbidden to use the device in explosive atmospheres. In case of using the device in hazardous areas, it is necessary to follow the relevant safety instructions. Protect the device from adverse atmospheric conditions, water, and heat sources. - If the device falls, it must be checked by an authorized service center, as internal damage may affect safety. Do not use the device for toxic substances. Do not use the device for collecting and removing materials such as cement, dust, etc., as they may harden upon contact with water and damage the device. - During operation, the device must be installed horizontally. Only use mild cleaning agents recommended by the manufacturer, as well as follow the manufacturer's instructions for the cleaning agent regarding application, disposal, and warnings. Do not use solvents or abrasive cleaning agents! It is forbidden to immerse the device in water.
These substances may contain hazardous acids or alkalis that can be released during use.
Never use the device with the following substances:
- Explosive or flammable gases, liquids, or solids (reactive substances)
PeakmuHu Memaneeu nun (HanpuKnad, aHOMHiu, MaHi, uHK) y cOnnyi 3 cunbHonykHumu ma KucnomHumu 3ac6amu dna yueHH Hepo3eedeHi cunbHi kucnomu ma ny2u OpaehiHipo3uHHKU (HaPpuKnad, 6eH3uH, po3piKyaap6u, auemoh, Ma3ym). - Mo zo K, u peoBuH Mokymb nouodum Ma-mepiau, uO buKOpucmoeyiombc y npucmpoi.
3NaKu y noci6Hnky
HE6E3NEKA
Iy He6e3neku, kka 6e3nocepedHbO 3aapoxye ma npu38oumb do mxxmpaM yu Cmepmi.
△NONEPEDXEHN
Iy nomeHuiHo moKnUoOHe63neuHoi cumyaui, uO MoKe npu3BecMu do mKaKux mpaem Yu cmepi.
OBEPEXHO
IЯnomenuho moKnueoi Hebe3neuHoi cumyaui, uO MoKe npu38ecmu do neaKux mpaem Yu cnpuunHumu MamepiabHi 36umku.
YBAGA
Bka3ieKa 0do MoKnueoI nomEnuH He6e3neHi cumyaui, uO moKe cnpuunmu Mamepiabhi 3bumku.
Onnc npncTpo
3o6paXeHHaNb.Ha po3Bopoti!
Pn po3nakyBaHHi nepeBipTe Bmict ynaKOBKn Ha HaaBHiCTb DoaTkoBOrO 6bn-
HaHHa Nn NOxKOJKeHb. Y BnApAky NoxKOJKeHb npi TpaHcnopTyBaHHi NobiOmTe npo Ipe CBOeMy npoDaB- 10.
PncyHok 1
1 Tank cleaning valve 3 Cleaning valve for filter rinse 4 Nozzle for rinsing the tank, MION NINO-COC 5 Filter error 6 Device head 7 Handle 8 Self-cleaning valve 9 Disassembly valve 10 Fastening of the self-cleaning pipe 11 Reservoir disassembly 12 Flat filter folds* 13 Reservoir for clean water, ZIMN* 14 Reservoir for dirty water, ZIMN 15 Self-cleaning valve 16 Handle 17 Float air vent 18 Disassembly handle 19 Valve for disassembly of the handle 20 Suction fitting 21 Self-cleaning pipes 2 x 0.5 m 22 Spray nozzle for cleaning, with mounting kit for hard surfaces 23 Foam nozzle RM 519 (100 ml)
Float for self-cleaning
24 Adapter for wet and dry cleaning
25 Set of nozzles for soft and hard floors
26 Nozzle for filling
27 Nozzle for soft brush
28 Microfiber filter
29 Spray nozzle for cleaning 66NB-KI
*Included in delivery
** SE 5.100 Plus
Operation
Before commissioning
Figure 2
Turn the disassembly handle counterclockwise, remove the device head and take the device out of the container. Figure 3 Install the wheels on the guide rollers. Figure 4 → Install the handle of the device.
Commissioning
Wet cleaning (see section "Filling/Refilling the clean water reservoir") → Dry cleaning (see section "Changing to dry mode") → Suction of water/dirt (see section "Suction of water/dirt") Figure 5 Install and lock only the handle. Figure 6 Insert the suction hose and the spray hose into the connection on the device.
Instructions:
Turn the suction hose in the device so that it locks.
Figure 7
Insert the spray/suction hose and press it onto the handle. The locking latch is set to the center when connecting; turn it clockwise. → Insert the spray nozzle into the hose for spraying/suction and lock it with the locking ring.
The device is now ready for operation.
Wet cleaning of hard floors/soft floors/objects
ATTENTION
Instructions
Before using the device for the first time, check the device for leaks and ensure it is not damaged. Do not use the device if it is damaged. Using hot water (max. temperature 50°C) increases cleaning effectiveness. Turn off the pump when using detergent. Avoid dry cleaning and excessive pressure (dynamic pressure) if possible.
Turn off the thermal protection switch if the device overheats. After cooling (20-30 min.), the pump is ready for operation again.
Filling the clean water reservoir
Figure 8
The clean water reservoir can be removed.
Add 100-200 ml of detergent for hard floors RM 519 (the amount can be varied depending on the degree of soiling) to the tank with clean water, fill with tap water, do not overfill (note the MAX marking).
Apply the minimum dose for cleaning the adhesive. → Work without the mounting kit on hard surfaces.
For cleaning, use the minimum amount of RM519 adhesive remover.
Apply to a hard surface
Do not use on laminate or parquet coatings!
Apply the minimum dose for cleaning the adhesive. Slide the mounting kit for hard surfaces onto the spray nozzle.
The foam pads are placed in front, which are marked with stripes.
Apply to the adhesive
Apply the minimum dose of adhesive remover.
Work sequence
Figure 9
Insert the plug into the socket. → Press the button to switch on, then the wet-dry vacuum turbine will operate.
Figure 10
Figure 11
→ Completely close the rotary nozzle on the handle. → Press the spray trigger for the device to be ready.
→ Apply the detergent solution to the surface with a spray bottle.
→ The spray handle can be fixed in the required position; to do this, press the spray handle and turn it clockwise. → Wipe the surface that is being cleaned with a dry cloth. In this case, do not press the handle (do not move it).
During operation, empty the tank for dirty water.
→ When the tank for dirty water is full, the device switches off automatically. Note: If the device switches off, you must empty the tank, because if you continue working with a full tank, water may leak when opening the device. → Press the release button on the device. → Remove the tank for dirty water and empty it.
Finish water cleaning
→ Rinse the spray tubes: pour about 1 liter of clean water into the tank.
Hold the device over the sink and turn on the pump until the water runs out.
Tips for cleaning//Method of operation
- Work from the light to the dark (from the window to the door).
- Work in strips from the cleaned surface to the uncleaned one.
- The film coating on the back of the brush may wrinkle and stick during very wet cleaning. - After cleaning, brush the film with a soft brush in the direction of the pile (for example, with a brush for clothes or a vacuum cleaner). - Using the Care Tex RM 762 cleaning agent after water cleaning prevents rapid re-soiling of the textile covering. - Clean the cleaned surface only after it has dried or after installing furniture to avoid stains or streaks.
Cleaning methods
For light and normal soiling (H)
Disconnect the device from the power supply. Before cleaning, make sure the device is completely disconnected. → Then turn off the "Cleaning and Maintenance" switch. → Rinse the device with clean water, then wipe it dry, and if necessary, apply a disinfectant.
For heavy soiling or stains (especially stubborn ones):
Disconnect the device from the power supply. Apply a mild detergent and leave it on for 5 minutes (use of the device is prohibited). → Then wipe the surface with a soft, damp cloth. → Rinse again with clean water, then wipe dry, and if necessary, apply a disinfectant.
Maintenance and technical service
Cleaning the spray nozzles
In case of uneven spray pattern.
Figure 18
→ Loosen the nozzle retaining screws, clean or replace the spray nozzle.
Clean the filter element of the clean water reservoir.
Once a year or as needed. Figure 19 Clean the filter.
Clean the filter components
In case of contamination:
Figure 20
→ Unlock and remove the cover, take out the filter components, remove the filter and clean the filter.
Troubleshooting assistance
Fill the reservoir with clean water. → The sieve in the tank for dirty water is clogged. Clean the thermostat and switch off the pump for the cleaning agent via the circuit breaker. Switch it off and let it cool down (approx. 20-30 min.). If the pump for the cleaning agent is defective, contact customer service.
Irregular jet
Clean the nozzle of the cleaning agent.
Insufficient suction
→ Close the metering screw on the handle. If the suction hose, suction hose connection or suction hose is clogged, remove the clog. → The filter bag is full: install a new filter bag. → The flat pleated filter is clogged: remove it and clean it (see section "Cleaning the flat pleated filter".
Cleaning agent pump is weak
Fill the reservoir with clean water.
Strong foaming in the reservoir
Use only original cleaning agents from KÄRCHER.
Electrical connection
Insert the mains plug.
Technical specifications
Voltage 220-240V 1~50-60Hz
Power consumption nominal 1200W
Power consumption 10 A
Sound pressure level 77 dB(A) (EN 60704-2-1)
Weight (without packaging) 7.1 kg
Possible changes in design!
Contents
Hoses and connections 5
Water inlet hose 5
Connecting the water inlet hose
Symbols and labels 6
Installation instructions 7
Connection 7
Operation and technical specifications
kg
Safety instructions and warnings 9
TexHnKaIbIK MaFJMyMaTTap KK 9
Kannbl HycKaynap

BmybmbHb3dbI aIraW pet KOndaHy anDbIHda ocb TynHcyKa naIaIaNHy 6oBuHwa HcaybIKbI MyKnT OKbl WbIfbHb3, HyckaynapdbI opbHdAn,
KeiH naIanaHny yuiH Hemece OcbI 6yIbIMdbI KeiH naIanaHaTbIH TynFaJnap yuiH caKTan KOiBiHbI3.
BmybIMdbMaKcaTbHa cOKeC KOJaHy
Eyn KpybIfbl Xeke KOJdaHbIcKa apHaJIFaH XeHe EHNdiPicTik MaKCaTTapMeH KOJdaHbIyRa apHaJIMa - Byn KypblfnbHb caTb n any apkblc i3 Tepeh Ta3anaaTbH Ka6iNeti 6ap kinem Tceenre H eEndepni Ty6ereNt Ta3anaaTbH XHe KYTIM 6epTeH 6ypikkiu 3KCTpaKTopra (Xyy WAnCOPfblb) Ne 60JDbHbI3. Kyy uahricih ymeriHe (keTki3y xNHaftbHda KaMTbIraH) apHaIraH KaTTbI eDeH cANTaMaCbIHbH KEMerimeH KaTTbI eDeHepdi Ta3anayra 60anabl. -TnictiKepeK-KapaKTapdbH KemerimEn (KHaKaTa KaMTbJlFaH) OHblAm6e6an copbIw petiHde Je KondaHyra 6oJaB1.
Kopwafah opTaHbI Kopfay

KanTay MaTePnAnJaBle ekHwi eHDeyRe JkapamDbI. KanTaMaHbI yu KOKbICbHa
eHney
JaKtbpMaybHb3DbCypaMb3,OnapDbI eKiHliyWIn 6eNEK KObIHb3.
O3 MEP3iMH aKaTaraH KypaIapda 6aranbl, ekHIe HneyeRe XapaMdbI MaTePnAndap 6ap. CoHbIKTaH KOJaHaBInFaH XHe ecki
6yibImapdbaHaNbipikTeNxHayKyuJenepi
apkblbKaIdbkTapFa TancbipyHb3 Ja3bIM.
3NeKtpnik KHe 3JeKtpOnHbIK 6yBIMapdbIH KypambHa KaTe KOJaHy Hemece KaTe KeDere XapaTy HtNkeciHde aadm DeHCaybIbHa XHe KOpwaFaH opTara Kayin THeDipyi bIKTMaJb6JIWeKTEp XNi Ke3Decei. AnaJa atanraH 6JIWeKTEp 6YbIMDbI TnicHwe naDaJAnhy yWIn KaKeT 6OJaDbI. OcbI TaHbAmen 6eJIrIneHReH 6yBIMdApDbI yI KOKbCTapBImeH 6ipre TaCtayRa 6OJMaJdbI.
Cy3rihi xhe cy3riw kantbTbTacay
Cy3ri MeH cy3iI KAN 3KoJornJIbIK Ta3a MaTePnaIapdAn JkacalfA H.
ErepKanDbIKTapbi ywiH pykcat etinmereh 3aTTap KOK6oJCa, KaIbINTbl yKanDbIKTapbImeH 6ipre Tactayfa 6oJaNbl.
KypamblHaftb3aTTapTypaIblaHbIKTaMaIap (REACH)
BnmbHbH KypambHdafb3aTapTypaNbcoHfMaFmattapdblaactbdaKepcetiren HHTepHet6eTTepimi3de OKn anacb3:
www.kaercher.com/REACH
Keninme
BiybIMapbIMb3 ywiH ep enDe kayanTbI eTIM cepikTecepim3 TapanbIHAN bIFapbINaTbIH KeiINdeme wapTTapb KywTe 60ana. Erep MaepnAIDapdbIH akaylbfbI HEmece daBHday 6abbcIHdafbI KaTeJIkTe Ta6bIcA, 6i3 bIKTmAmJ AkaybIKTapdbI KeniMep3imi iwiHde aKbICb3 XeHneM3. KeniMep3mi iwiHde Hapa3blbIKTapbIHb3 6oNca, acnTbI caTKaH cayda MekeMeciHe HEmece XaKbIHdaFBI eKiNeTTi cepBnCTIK Kbi3Met KepCETy OPhbHa caTbIN any YerIH KepCetIn, xaBapNaCbIHbI3.
OHHdpinreH KyHi KepceTirreH Typ KecTeciHde WnΦpnaHraH.
Keke caHapdbin MaBihacbi KeeneiJe bona:
Mbicanbl:30190
3 ΘHdiipinreHkblb 0 ΘHdpinreH facbipbl 1 EHdpinreH OHXbINdbIK 9 ΘHπipinreH aibHbH ekihui caHbI 0 ΘHπipinreHaibHbH6ipHwCaHbI
COhbIMeH 6yI Mbicanda 30190 KoDbI
09/(2)013 eHdiipinre H KyHH 6iHipei.
(MeKeHkaBApTbKaFbIHda6epiInreH)
Буным Колдауншыларма Кызmet Керсету 6eJimi
If you find any defects or if there are any signs of damage, our KARCHER service will be happy to assist you.
(Please provide the address)
Required and optional accessories
Only use original accessories and original spare parts. They ensure the device is fault-free and safe to operate. For information on accessories and spare parts, please visit www.kaercher.com.
Safety instructions
In addition to the notes in these operating instructions, you must also take into account the general safety regulations and accident prevention guidelines applicable in your country.
Danger or hazard levels
DANGER
Connect the device only to a properly installed socket. Do not connect the device to a power outlet. The voltage must match the rating plate. Do not place the cable or the power plug in water or other liquids.
Do not pull the cable to unplug the device from the socket. - If the device is used in a wet area, unplug the device from the power supply and unplug the power plug from the socket before cleaning or maintenance. - For cleaning and maintenance, use only original accessories and spare parts. Do not use cables or plugs that are damaged or have been repaired. To replace damaged cables or plugs, use only original spare parts. - Do not use an extension cord or a socket that is not suitable for the device's power consumption (max. nominal power 30 mA). Using unsuitable extension cords can be dangerous. If an extension cord is necessary, use only a cable with a cross-section of at least 3x1 mm². - When replacing the cable or plug, ensure that the protective conductor and mechanical strength are maintained. Before starting the device, check that it is not damaged. - If the device is damaged or has a defect, unplug it or disconnect it from the power supply!
WARNING
By the physical and chemical properties, the product may be hazardous to health and/or the environment. Therefore, it is necessary to observe the safety measures when working with it and to follow the instructions for its use. - Do not allow children to play with the product. To prevent children from playing with it, keep it out of their reach. - Children must be supervised to ensure they do not play with the product. Keep the product away from children. There is a risk of injury! Keep the product away from heat, sparks, and open flames. - Avoid contact with eyes, skin, and clothing. Use appropriate protective equipment. - When using, do not eat, drink, or smoke. Use only in well-ventilated areas. - Avoid release to the environment. Refer to the safety data sheet for further information.
If it is not good, do not use it. Do not mix with water or other liquids. - If the product is frozen, thaw it slowly. When handling the product, avoid contact with skin and eyes. - Keep away from heat, sparks, and open flames. If the product catches fire, use appropriate extinguishing media. Do not use water. - Do not store in direct sunlight. - Do not store near oxidizing agents or combustible materials. When storing, keep the product in a cool, well-ventilated place. Only use approved containers. When using, follow the instructions and safety precautions. Do not use containers that are not approved. Do not immerse the product in water.
The product may be harmful to aquatic life with long-lasting effects. Avoid release to the environment. Further information:
Avoid contact with skin and eyes. In case of contact with eyes, rinse immediately with plenty of water and seek medical advice. - Do not breathe vapors. Use only in well-ventilated areas. - Wear protective gloves and eye/face protection. - In case of accidental ingestion, seek medical advice immediately and show the container or label.
Symbols and indications on the product label
DANGER
This product is classified as dangerous and may cause harm if swallowed. Avoid contact with skin and eyes. Keep out of reach of children.
WARNING
This product may be harmful if swallowed. Avoid contact with skin and eyes. Keep out of reach of children.
This device can be used with various types of cartridges, and it is possible to use them with cartridges and other accessories that are not original.
ATTENTION
Do not use the device if the material is damaged.
Device description
Look at the pictures and the table!
The device and its parts are shown in the pictures and table in a clean and undamaged condition. If any part is damaged, contact the seller or the service center.
Figure 1
1 Button
2 Cartridge compartment cover
3 Water tank cap
4 Water tank, empty it
5 Water tank
6 Base
7 Power cord
8 CopfbuT yImeuii
9 Bypikki TymMewiri
10 Bypikkiu/copfbiu Tytkepihe apHaIraH 6JIIM
11 BaKtbl 6ocaty
12 Teric 6yirmeni cy3ri
13 lac cy 6arbl, cbiptKa lbiFapbla naIb
14 Ta3a cy 6arbl, cblpTka wblfapblJaDbI
15 Bypkkiw/copfbiw wJnAhlici
16 Yctay TTKacbl
17 KocbIMwa aya xankbilbl
18 Wawbipaty TTKacbi
19 Bypikkiu Teirine aphaHan 6ekitkiu TymMeuik
20 Bekitkiw teTiri
* KypbInfbira eNdeekawah opHamblinraH
** SE 5.100 Plus
Figure 2
Do not touch the device with wet hands, do not cover the base of the device, and remove the necessary tools.
Figure 3
Accessories / Spare parts
Warning
CAUTION
Before connecting the device, make sure that the voltage indicated on the rating plate corresponds to the mains voltage.
Do not touch the device with wet hands: for example, when the device is plugged in, it is possible to close it.
Note
Use only cold water (maximum 50 °C) to fill the reservoir.
The device should only be used during operation. Do not leave the device unattended while it is in operation.
When the device is not in use, unplug it from the power outlet.
After use (20 - 30 min.), allow the device to cool down.
Fill the tank with water
Figure 8
Fill the tank with water until the level indicator shows the maximum mark.
For RM 519, add 100 - 200 ml (depending on the degree of soiling) of cleaning agent to the water tank, stir the water with the stirrer, and you can start cleaning (observe the MAX marking).
Cleaning with the cleaning agent
Use only the cleaning agent intended for this purpose. If you use other agents, foam will form. For cleaning, use only the KARCHER RM 519 cleaning agent.
Cleaning without the cleaning agent
Never use solvents, oils, or similar substances!
Use only the cleaning agent intended for cleaning. If you use other agents, foam will form. Rinse the tank with clear water after use.
Cleaning the filters
Use only the cleaning agent intended for cleaning the filters.
Starting the device
Figure 9
Plug the power plug into the socket.
Press the ON/OFF switch, the turbine will start running.
Figure 10
Press the button and hold it down.
Figure 11
Press the button to lower the lever.
Figure 12
For the intended use, press the button on the handle.
Figure 13
To release the lever, it may be necessary to press the button and pull the lever towards you.
Place the container on a flat surface and press down firmly. Then pull the handle upwards to open it.
Draining the water tank
If the water tank is full, the pump will stop automatically.
Note: When the pump stops, do not turn it off, but press the drain valve to empty the tank.
Do not operate the pump without water.
Drain the water tank and clean it.
Remove the filter and clean it.
To install the device, follow these steps:
Clean the surface and dry it thoroughly.
Place the device on the cleaned surface and press firmly to ensure good contact.
Installation instructions
- Do not use the device if it is damaged or has been dropped.
- Before cleaning, disconnect the device from the power source. It is possible to clean the device with a soft, dry cloth. After cleaning, allow the device to dry completely before reconnecting. Do not use abrasive cleaners or solvents. Cleaning should be performed only when the device is unplugged.
Cleaning steps
Follow the instructions below for cleaning and maintenance:
Disconnect the device. Wipe the surface with a soft, dry cloth. After cleaning, allow the device to dry completely before reconnecting.
For thorough cleaning and disinfection (if necessary):
Disconnect the device. Wipe the surface with a soft cloth and let it dry for 5 minutes. Then clean according to the maintenance instructions. After cleaning, allow the device to dry completely before reconnecting.
Dry cleaning
CAUTION
The device must be kept dry and clean, otherwise it may malfunction.
Use a soft, dry cloth. See Figure 14: Wipe the surface with a soft cloth. See Figure 15: Use a brush or soft cloth to remove dust. Do not use abrasive cleaners or solvents. Choose the appropriate cleaning method and wipe the device. Allow it to dry completely before use.
KaTbI eHeHepDi copfity
Cypet 16 EeH Ta3anay WymeriHH KockbIbH aarfbHb36eH 6acbHb3. EeH copy WymeriHH actbHaftbl KblTapak KOJaKTapbl WbIfapblIn TypaBl.
Kinem caIbIHraH eEHeHepDi copRbUneH Ta3anay
Cypet 16
EeH Ta3anay WymeriHH KockbIbH aarfbHb36eH 6acbHb3. EeH copy WymeriHH actbHaftbI KbIITapak KOJaKTapbl WbIFapblIN TypaBl. Copfbw KyatbH TaHay yuH KocbIMwa aya xankbwBn6acbHb3.
Hyckay:
KocbIMwa aya kankbiuBH KOndaHraHH KeuiH KaumadaH xa6bIHbI3!
blrfaIbI kip/cydIb copfby
HA3AP AYdAPbIHbI3
Cy3aiw kannbI kondaH6aHbI3!
Ta3a cy MeH Kip cy 6aBih aJIbIHbI3, bJIfAaIbI Kip/ cyDbI TiKeIeN 6aKa copbIHbI3. →blrfaIbI kip/cybl copfby ywiH xyu nHaHriciHi eHdipmecih naDanaHbIHb3. → lac cy 6aBb TObIn KeTce, Kypblfbl aBTOMaTTbl Typde eWeeDi.
HcyKay: Erep KypbIrfbl eipin KaJca, OHbI ceHdiipiH3, eTnece copy Typ6nHacbl KypbIrfbl awy Ke3iHde KaTt aicke KocblanaBl.
XancapblXKHe tiriicti opcyKaHbI KOJdaHy:
→ blrfaNb/kyprak copbIwka apHaIraH aadantepdi axbipatbn, caKTan KoBih3. Xancapbl XHe tiricti fopcyHKaHbI adanTepre KoBH3. CopfbIUtblKocblHb13.
Kmbictb aayTay
→ ByibIMdbI icTeH wBifapbIHb3. ToJfAH 6aKtbl 6ocatbHb3. → BaKbI Ta3a cyMeH KaKcbJnAn WaiBHyB3. → TyTkahbl, 6ypiKkiu copy TyTirih xHe kyy wJnHaHriciHin eHdpimecH 6ip-6ipiH en axbipaTaHb13, on ywiH 6ekTIkw Tetikti awbHb13 (opTacbHda). Kepek-kaapakTbIH 6eJIWeKTePiH aBihDbCy actbHda Waihbl3 XHe XaKaCbIan KenTipiH3. → KypbInfbHbKeNTipy ywiHaAwbK KaIdbipbHb3.
Cypet 17 KepeK-kaPakKaMepacb:CopfblwIaHaHrici, copfblw TyTiri XeHe KepeK-kaPakTap KEN Jepdi aJMaJ, Kpyblnfbda bHraNbOpHaJaaca anaDb. → KypblfblHbI caKmaHbI3. KypblfblHbI KypraK 6enmeDe caKaHbI3.
Kytmy MeH TexHnKaJIbIK TeKcepy XyMbICTapbl
Epyikkiu opcyHKacbIH Ta3aay
Opkenki wawbiparaH ke3de.
Cypet 18 → opcyHka 6ekitkiuin 6ocatbHb3 xhe anbin bIfbHb3, 6yipkkiopcyHKacbH Ta3aHaHb3 Hemece aybcTpIb3.
Ta3a cy 6arblHaftb1 Topbl Ta3anaHb13.
KbInbHa 1 pem HeMece kaxem bOnraHda.
Cypet 19 Topbl Ta3aJHaHb13.
Teric 6yrinmeni cy3rihi ta3anay
Te KaTbI NaCTaHFaHa:
Cypet 20
→ KaKaTbI aBtbn aBHB3, Teric 6yirmeJI cy3riHi aBtB3, TopbI aBn TactaHb3 XHe cy3riHi cInKIN WaKaHb3.
Kepeprinep 6oIraHda KeMeK any
ΦopcyHkara eUkaHdai cy Tmeyi KaKeT.
Fill the tank with clean water. Fill the tank with clean water and close it. -> The thermal protective cover must be removed before starting the device. Remove the cover and keep it (for 20-30 minutes). When the water in the tank has warmed up, hand it over to the medical staff.
Operation
-> Open the valve on the device's water supply hose.
Water supply without pressure
Connect the hose to the water supply tap.
If necessary, check the water supply hose or its connections. Check the connections. -> If the water is too hot: let the water run until it is cool. -> If the water is too cold, adjust the temperature by turning the knob, and let the water run until it is warm (see "Adjusting the water temperature").
The device's water tank is empty
Fill the tank with clean water.
Only use cold water
Use only clean water for the device.
If the device is not working
Check the power supply.
Technical data
| Kephey
1~50-60 Hz | 220 - 240 V | |
| HominaLdIbIK KyaATbIbIFbI P 1200 Bt | |
| KyaATbIbIFbI P M&Kc | 1400 Bt | |
| Жeелінік саКтандырfbIш
(inерцьлы) | 10 | A |
| Дыбіс дeнгrei
(EN 60704-2-1) | 77 dB(A) | |
| Буйыmнын кеpek-
жарakтapсыз салмагы | 7,1 кr | |
It is possible that technical changes may occur!

THANK YOU!
THANK YOU! DANKE! GRACIAS!

Register your product and benefit from many advantages.
www.kaercher.com/welcome


Rate your product and tell us your opinion.
www.kaercher.com/dealersearch
Alfred Kärcher SE & Co. KG
Alfred-Karcher-Str. 28-40
71364 Winnenden (Germany)
Tel.: +49 7195 14-0
Fax: +49 7195 14-2212