
AD 7752 - Heating ADLER - Free user manual and instructions
Find the device manual for free AD 7752 ADLER in PDF.
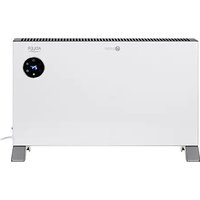


| Product type | Convection heater |
| Brand | Adler |
| Model | AD 7752 |
| Maximum power | 2000 W |
| Supply voltage | 230 V ~ 50 Hz |
| Power modes | 3 levels: 800 W, 1200 W, 2000 W |
| Temperature range | 5 °C to 50 °C |
| Timer | 0 to 24 hours (delayed stop and delayed start) |
| Anti-freeze function | Yes (automatic activation below 5 °C) |
| Display | Digital LED |
| Remote control | Yes |
| Approximate dimensions | 50 × 20 × 40 cm |
| Approximate weight | 3.5 kg |
| Cleaning | Wipe with a damp cloth; do not immerse |
| Maintenance | Monthly cleaning during the heating season |
| Repairability | Contact after-sales service or the seller |
| Protection rating | IPX4 (for bathroom if installed correctly) |
| Housing material | Steel |
| Intended use | Indoor domestic use |
| Safety | Automatic shut-off if temperature too high; hot surface |
| Included accessories | Feet, remote control, mounting screws |
| Error code E2 | Defective temperature sensor, contact customer service |
Frequently Asked Questions - AD 7752 ADLER
User questions about AD 7752 ADLER
0 question about this device. Answer the ones you know or ask your own.
Ask a new question about this device
Download the instructions for your Heating in PDF format for free! Find your manual AD 7752 - ADLER and take your electronic device back in hand. On this page are published all the documents necessary for the use of your device. AD 7752 by ADLER.
USER MANUAL AD 7752 ADLER
AD 7752
(GB) user manual 5 (BIH) upute za rad 43
ATTENTION:
The device is intended for domestic use only.
The device is NOT intended for commercial / professional use.
The device is NOT suitable for use outdoors.
Attention! Before use, it is essential that you read these operating instructions to avoid accidents and for the correct use of the device. Keep this manual and keep it so that you can easily use it.
I. GUIDELINES FOR SAFETY OF USE
- Before use, check that the voltage specified on the nameplate corresponds to the local parameters of salinity, but remember that the marking: AC- is alternating current and DC is DC.
- Connect the device only to a 220-240V ~ 50/60 Hz grounded outlet.
- Before use, unroll and straighten the power cord
- Make sure that the power cord and plug have no visible damage
- Before and during use, make sure that the power cord is not stretched over an open flame or other source of heat and sharp edges that can damage the insulation of the cable.
- Before first use, remove all packaging components. Attention! In the case of a casing with metal parts, on these elements a slightly visible protective foil can be stretched, which should also be removed.
- The device should not be used by children, persons with limited physical, sensory or mental capacity without the supervision of authorized or experienced persons and always in accordance with these instructions.
- The equipment is not intended for use with external time switches or a separate remote control system.
WARNING: This equipment may be used by children over 8 years of age and persons with limited physical, sensory or mental ability, or persons who have no experience or knowledge of equipment, ONLY if this is done under the supervision of a person responsible for their safety or have been given instructions about the safe use of the device and are aware of the dangers associated with its use. Children should not play with the equipment. Cleaning and maintenance of the device should not be performed by children unless they are over 8 years of age and are supervised.
- Do not leave the device unattended during operation.
- Do not immerse the appliance and the power cord in water or any other liquids.
- When the device is not in use, it should always be disconnected from the power outlet.
- When pulling the plug from the socket, never pull the power cord by the plug only.
- Do not put metal items inside the device.
- The manufacturer is not liable for damages resulting from improper use of the device.
- It should be remembered that some parts of the device and the cabinet during work get very hot, so be careful and do not touch them, you can get burned.
- NEVER cover the device during operation or when it does not cool down completely
- Remember that the heating elements of the device take time to cool down completely.
- When using the device, ensure adequate space above and around. The device must not touch any easily flammable objects during work, such as decorations, paper towels, curtains, clothing, etc.
- The heater installed in the bathroom should be installed so that connectors and other regulators can not be touched by a person in the bathtub or under the shower.
- In heaters for high-altitude fixtures, the positions of the different positions of the connectors should be visible from a distance of 1 m
- The labeling for covering the heater should be visible after installing the heater
- You cannot place the device near flammable materials such as curtains, etc. Keep 1 m distance to furnitures, walls or other objects.
- The device can not be used with external time switches or other separate remote control systems
- Do not expose the device to atmospheric conditions (rain, sun, etc.) or use in conditions of high humidity (bathrooms, damp camping houses)
- Periodically check the condition of the power cord. If the power cord is damaged, it should be replaced by a specialist repair facility in order to avoid a hazard
- Do not use the device near flammable materials
- Do not use this heater in the immediate vicinity of a bathtub, shower or swimming pool
- Do not use this heater if it has been dropped
- Do not use if there are visible signs of damage to the heater
- Use the heater on a level and stable surface or attach it to the wall, if provided for by the manufacturer
WARNING: Do not use this heater in small rooms where there are people who are unable to leave them by themselves, unless constant supervision is ensured.
WARNING: To reduce the risk of fire, keep textiles, curtains or other flammable materials at least 1 m away from the heater air outlet.
It is recommended that the electrical installation be equipped with an automatic residual current circuit breaker with a 30mA starting current for increased safety.
Note: If the power cord or power plug is damaged, it should always be replaced or repaired by a specialized repair shop.
II. WARNINGS
- Never use the device if it is damaged or does not function properly.
- Never use the device if it has fallen from a height before and shows visible signs of damage.
- Do not use extension cords or other electrical outlets that do not meet the applicable standards and electrical regulations.
- Any repairs, dismantling or replacement of any parts should always be made by a specialized facility.
- If the device and elements such as electrical contacts are wet, the plug or cable should be dried before using the device and its components.
- Do not use the device with wet hands.
- When there is a risk that the device has been damaged NEVER try to repair the device yourself.
- Never wash the device under running water or in such a way that water drips into it.
- Do not use accessories that are not recommended by the manufacturer. They may pose a danger to the user and may cause damage to the device.
- Ensure that the device has cooled down before storing.
- Do not touch the housing during use. During operation, use only knobs and switches. After switching off, wait for the device to cool down.
- CAUTION: Some parts of this device may become very hot during operation and cause burns.
- Remove all packing material and straighten the power cord.
- During installation, in no case may the device be covered with insulating material or similar material.
- Before first use read all instructions for use.
- Do not use the device unless the feet are correctly attached
- Keep the mains lead away from the hot body of the device.
- Do not use outdoors.
- Do not place any objects close to the outlet grills or the air intake openings of the device when operating.
- Do not place the device on carpets having a very high hairs.
- Always ensure that the device is placed on a firm level surface. Ensure that the device is not positioned close to curtains or furniture as this could create a fire hazard.
- Do not position the device in front of, or immediately below, a wall socket.
- Do not position the under the window.
- Do not insert any object through the heater outlet or air intake grills of the device.
- Do not use the device in areas where flammable liquids are stored or where flammable fumes may be present.
- Always unplug the device when moving it from one location to another.
INSTALLATION IN STANDING POSITION ON THE FLOOR
Before using the device, the feet (supplied separately in the carton) must be fitted to the device. These are to be attached to the base of the heater using the 4 screws provided. Take care to ensure that they are located correctly in the bottom ends of the air inlet ventilation grid (6) of the device.
PRODUCT DESCRIPTION: CONVECTION HEATER WITH REMOTE CONTROL – look at page 4
- Steel housing
- Feet
- Control Panel
- Power switch ON/OFF
- Air outlet grid
- Air inlet grid
- Handle (at both sides)
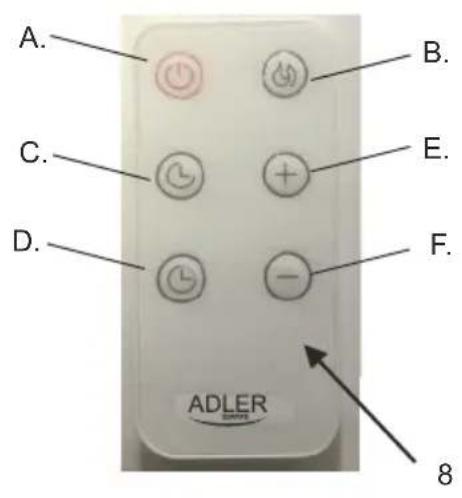
- Remote control
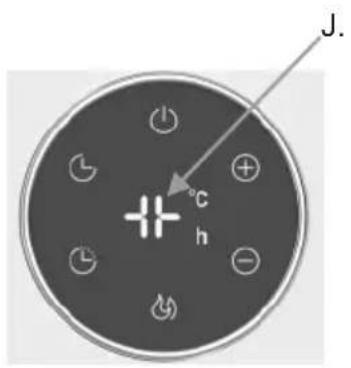
LED CONTROL PANEL (3) – each button becomes the icon after being active
A. Power button
B. Heating mode button
C. Timer for turning off
D. Timer for turning on
E. Plus button
F. Minus button
The remote control (8) operates the same way as the buttons on the LED control panel (3).
USAGE
Plug in and switch on the heater. After the "BI" voice, the heater enters standby mode and shows the Power icon (A) on the display (3). Press the Power button (A) to turn on the heater, and the digital display (G) will show the room temperature.
1. Temperature setting:
The temperature setting range is 5-50 degrees Celsius. The default temperature setting is 15 degrees Celsius.
1A. Press the Plus button (E) or the Minus button (F) to set the temperature. The digital display (G) flashes, and the temperature will increase or decrease by 1 degree Celsius with each press. If no action is taken for 3 seconds, the setting is saved. After setting, the display will show the room temperature on the digital display (G). 1B. If the room temperature is 1 degree Celsius higher than the set temperature, the heater will stop heating; if the room temperature is 2 degrees Celsius lower than the set temperature, it will start heating.
2. Heating mode setting:
Press the Heating mode button (B):
- Once, to set low heating power (800W) and "01" will be shown on the digital display (G).
- Twice, to set medium heating power (1200W) and "02" will be shown on the digital display (G).
- Third time, to set the highest heating power (2000W) and "03" will be shown on the digital display (G).
- Fourth time, to return to the low heating power (800W).
3. Timer setting:
3A. Delayed turn-off function.
When the device is on, press the upper Timer button (C) to enter the turn-off timer setting. The digital display (G) flashes. Then press the Plus button (E) or Minus button (F) to set the time after which the device will switch off automatically. The timer will increase or decrease by 1 hour with each press, and if no action is taken for 3 seconds, the setting is saved. The Hours icon (H) and the upper Timer icon (C) will be shown on the display (3). The timer setting range is 0-24 hours.
3B. Delayed turn-on function.
In standby mode, press the lower Timer button (D) to enter the turn-on timer setting. The digital display (G) flashes. Then press the Plus button (E) or Minus button (F) to set the time after which the device will switch on automatically. The timer will increase or decrease by 1 hour with each press, and if no action is taken for 3 seconds, the setting is saved. The Hours icon (H) and the lower Timer icon (D) will be shown on the display (3). The timer setting range is 0-24 hours.
You can also set the temperature and heating power for the turn-on timer. You can also cancel the turn-on timer by pressing the Power button (A), and the heater will turn on directly.
4. Anti-frost function
4A. If the heater is under standby mode and room temperature is lower than 5 degrees Celsius, the heater will start heating and shows the Frost protection icon (J) on the Digital display (G). 4B. When room temperature reaches 10 degrees Celsius, the heater will stop heating.
If temperature sensor fault, it will show "E2" on display, in this case the device needs to be repaired by professional after-sale service. Contact the seller you purchased the device from.
CLEANING AND MAINTENANCE
The heater must be cleaned at least once a month during the heating season.
- Always unplug the device and ensure it has cooled down before cleaning.
- The heater should never be immersed in water. Wipe the housing regularly with a damp cloth and dry the surface before turning on the heater again. If during cleaning items such as the power plug, thermostat, electrical contacts etc. are soaked before being used again, they should be thoroughly dried.
- Do not use aggressive detergents in the form of emulsions, lotions, pastes, etc. to clean the cabinet. They can, among other things, remove the information graphic symbols, such as signs, warnings, etc.
- When the device is not used for long periods of time, it should be protected against dust and stored in a clean dry place.
TECHNICAL DATA: Voltage: 230V ~50Hz Power: 2000W
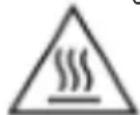
"Caution Hot Surface" - The temperature of accessible surfaces may be higher when the equipment is working, which means that the housing elements become very hot during operation. SAVE CAREFULLY!!!

DO NOT COVER - IMPORTANT INSCRIPTION
The inscription on the device means that the device is not to be covered with clothing, blankets and other textile products which could cause ignition.
(DE) GERMAN
CAUTION:
Electric Kettle AD 1282
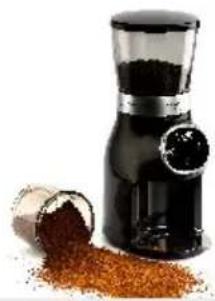
Burr Coffee Grinder AD 4450
Milk Frother
AD 4491
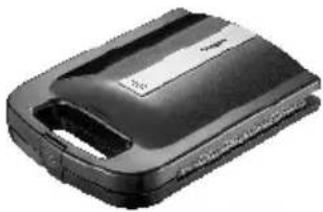
Sandwich Maker AD 3055
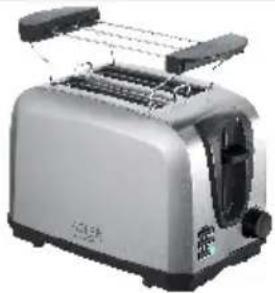
TOASTER 2 SLICE AD 3222
ELECTRIC GRILL AD 3052
CITRUS JUICER AD 4009
PERSONAL BLENDER AD 4081
FOOD PROCESSOR AD 4224
MIXER AD 4225
AIR FRYER AD 6310
PASTEURIZATION POT AD 4496
AIR CONDITIONER AD 7916
AIR HUMIDIFIER AD 7966
FAN HEATER AD 7725
KITCHEN SCALE AD 3166
ADLER
EUROPE
COFFEE GRINDER AD 4446
TOASTER 2 SLICE AD 3214
HAND BLENDER
AD 4625
MIXER WITH BOWL AD 4222
AIR FRYER OVEN AD 6309
MICROWAVE OVEN AD 6205
WAFFLE MAKER AD 3049
KITCHEN SCALE AD 3170
ELECTRIC KETTLE AD 1286
SANDWICH MAKER
AD 3043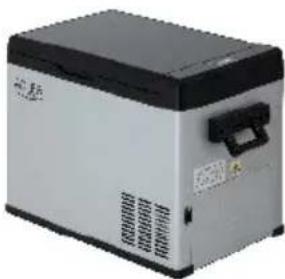
PORTABLE FRIDGE AD 8077
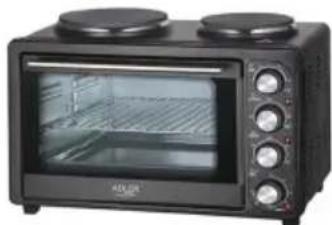
ELECTRIC OVEN WITH HOB AD 6020
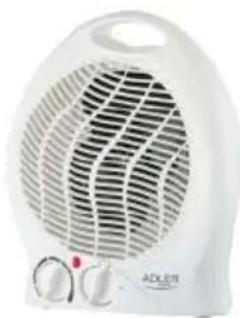
FAN HEATER AD 7728
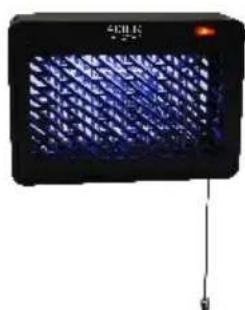
MOSQUITO LAMP AD 7938
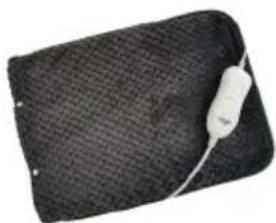
HEATED PAD AD 7433
ORAL IRRIGATOR
AD 2176
ADLER
EUROPE
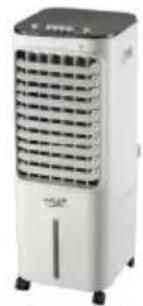
AIR COOLER AD 7913
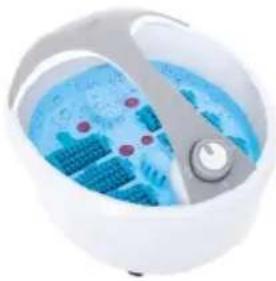
FOOT SPA AD 2177
HAIR CLIPPER
AD 2831
HAIR DRYER AD 2265
HEATED PAD AD 7412
CERAMIC FAN HEATER
AD 7731
OIL-FILLER RADIATOR AD 7811
KITCHEN SCALE AD 3171
CHOCOLATE FOUNTAIN AD 4487
HAND BLENDER
AD 4617
LINT REMOVER AD 9616
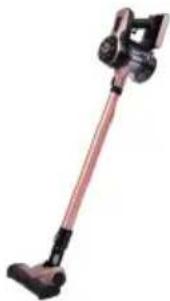
VACUUM CLEANER AD 7044
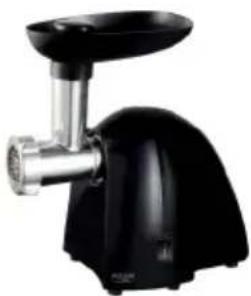
MEAT MINCER AD 4811
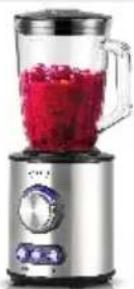
Blender AD 4078
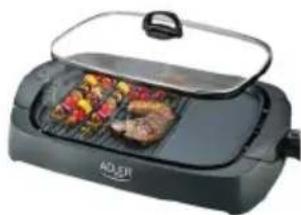
ELECTRIC GRILL AD 6610
ELECTRIC KETTLE AD 1293

AFTER SALE SERVICE NOTICE
| GB | If you want to buy spare parts or make any complaints, please contact the seller who issued the receipt directly. |
| DE | Wenn Sie Ersatzteile kaufen oder reklamieren möchten, wenden Sie sich bitte direkt an den Verkäufer, der die Quittung ausgestellt hat. |
| FR | Si vous souhaitez acheter des pièces de rechange ou faire des réclamations, veuillez contacter directement le vendeur qui a émis le reçu. |
| ES | Si desea comprar repuestos o presentar alguna queja, comuníquese directamente con el vendedor que emitió el recibo. |
| PT | Se você quiser comprar peças de reposição ou fazer alguma reclamação, entre em contato diretamente com o vendedor que emitiu o recibo. |
| LT | Jei norite ¡sigyti atsarginių dalių ar pateikti nusiskundimų, susisiekite tiesiogiai su kvitą išdavusiu pardavėju. |
| LV | Ja vēlaties iegādāties rezerves daļas vai izteikt pretenzijas, lūdzu, sazinieties tieši ar pārdevēju, kurš izsniedza čeku. |
| EST | Kui soovite osta varuosi või esitada pretensioone, võtke otse ühendust kviitungi väljastanud müūjaga. |
| HU | Ha pótalkatrészeket szeretne vásárolni, vagy panaszt szeretne tenni, forduljon közvetlenül a bizonylatot kiāllitó eladóhoz. |
| BS | Ako želite kupiti rezervne dijelove ili napraviti reklamaciju, obratite se direktno prodavaču koji je izdao račun. |
| RO | Если вы хотите купить запчасти или предъявить какие-либо претензии, пожалуйста, свяжитесь напрямую с продавцом, выдавшим чек. |
| CZ | Chcete-li zakoupit náhradní díly nebo uplatnit jakoukoli reklamacı, kontaktujte přímo prodejce, který účtenku vystavil. |
| RU | Dacă doriți să cumpărati piese de schimb sau să faceți vreo reclamație, vă rugăm să contactați direct vânzătorul care a emis chitanța. |
| GR | Eáv θέλετε να αγοράσετε ανταλλακτικά ἡ να κάνετε οποιαδήποτε παράπονα, επικοινωνήστε απευθείας με τον πωλητή που εξέδωσε την απόδειξη. |
| MK | Ако сакате да купите резервни делови или да поднесете какви било поплаки, контактирајте директно со продавачот koj ja издал сметката. |
| NL | Als u reserveonderdelen wilt kopen of een klacht wilt indienen, neem dan rechtstreeks contact op met de verkoper die de bon heeft afgegeven. |
| SL | Je želite kupiti nadomestne dele ali vložiti reklam acije, se obrnite neposredno na prodajalca, ki je izdal račun. |
| FI | Jos haluat ostaa varaosia tai tehdä valituksia, ota yhteyttä suoraan kuitin antaneeseen myyjään. |
| PL | W przypadku chęci zakupu części zamiennych lub zgło szenia ewentualnych reklamacji należy kontaktowa się bezpośrednio ze sprzedawcą, który w ystawił paragon. |
| IT | Se desideri acquistare pezzi di ricambio o presentare reclami, contatta direttamente il venditore che ha emesso la ricevuta. |
| HR | Se desideri acquistare pezzi di ricambio o presentare reclami, contatta direttamente il venditore che ha emesso la ricevuta. |
| SV | Im du vill köpa reservdelar eller göra nigra reklam ationer, vänligen kontakta säljaren som utfärdat kvittot direkt. |
| DK | Hvis du ønsker at købe reservedele eller reklamere, bedes du kontakte sülgeren, som har udstedt kvitteringen, direkte. |
| UA | İkö vi хочете придбати запчастини або подати будь- які претензії, зверніться безпосередньо до продавця, який видав чек. |
| SR | Ако желите да купите резервне делове или да уложите рекламацију, обратите се директно продавцу који је издао рачун. |
| SK | Ak si chcete küpii náhradné diely alebo uplatnii ak úkoïvek reklamáciu, kontaktujte priamo predajcu, ktorý účtenku vystavil. |
| AR | إذا تكنکب غرتی فشراء عُمَطَة رایغوا مهیدقّتًا يَوْكُثُه مِجريَفَ لاتصال عَنابلَايَذِي أ́صدر الایصال تَرْشَابِهِ |
| BG | Ако искате да закупите резервни части или да направите оплаквания, моля, свържете се директно с продавача, който е издал касовата бележка. |
| AZ | Ehtiyat hissələri almaq və ya hər hansı śikayət etmək istəyirsinizsə, qəbzi verən satıcı ilə birbaşa əlaqə saxlayın. |
| ALB | Nëse déshironi të blini pjesë këmbimi ose të bëni ndonjë ankesë, ju lutemi kontaktoni drejtpërdrejt shitësin që ka lëshuar faturën. |


- AD
- ATTENTION
- GUIDELINES FOR SAFETY OF USE
- WARNINGS
- INSTALLATION IN STANDING POSITION ON THE FLOOR
- PRODUCT DESCRIPTION: CONVECTION HEATER WITH REMOTE CONTROL – LOOK AT PAGE
- USAGE
- TEMPERATURE SETTING
- HEATING MODE SETTING
- TIMER SETTING
- ANTI-FROST FUNCTION
- CLEANING AND MAINTENANCE
- (DE) GERMAN
- CAUTION
- ADLER
- EUROPE
Brand : ADLER
Model : AD 7752
Category : Heating