
Homeland Ultimate - Vacuum Cleaner TAURUS - Free user manual and instructions
Find the device manual for free Homeland Ultimate TAURUS in PDF.

| Brand | Taurus |
| Model | Homeland Ultimate |
| Product type | Cordless stick vacuum cleaner |
| Power supply | Removable lithium-ion battery (ref. 3020E296YNK-XXX) |
| Charger | Mains charger supplied, full charge time: 4 to 5 hours (first charge: 6 hours recommended) |
| LED indicator | Power level, battery level (%), speed (low/high), battery overheating, dust cup full, roller jammed, incorrect charger use |
| Speeds | 2 speeds (low and high) selectable via button |
| Dust cup capacity | Transparent cup with full indicator |
| Filtration | Cyclone + washable HEPA filter |
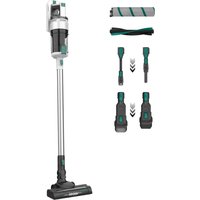
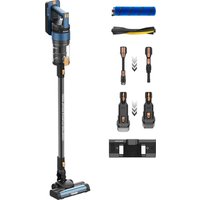
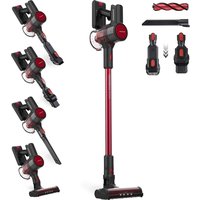
| Included brushes | Floor brush (All-road roller and Fuzzy depending on model), 2-in-1 brush, 2-in-1 crevice nozzle, Mini turbo brush (Animal model) |
| Run time | Not specified in the manual |
| Weight | Not specified |
| Dimensions | Not specified |
| Special features | Roller anti-clog system, thermal safety protection, wall mount for storage |
| Maintenance | Clean cup and filters regularly; change HEPA filter annually or every 50 hours; clean brushes |
| Safety | Do not use for liquids; do not short-circuit battery; store battery at < 40°C; use specific charger |
| Spare parts | Battery (ref. 3020E296YNK-XXX), filters, brushes available from after-sales service |
| Recycling | Appliance, accessories and battery recyclable (dispose of at store or recycling center) |
Frequently Asked Questions - Homeland Ultimate TAURUS
User questions about Homeland Ultimate TAURUS
0 question about this device. Answer the ones you know or ask your own.
Ask a new question about this device
Download the instructions for your Vacuum Cleaner in PDF format for free! Find your manual Homeland Ultimate - TAURUS and take your electronic device back in hand. On this page are published all the documents necessary for the use of your device. Homeland Ultimate by TAURUS.
USER MANUAL Homeland Ultimate TAURUS
natural_image
Line drawing of a vacuum cleaner with handle and control panel (no text or symbols)EN. Instructions for use
FR. Mode d'emploi
(*) Only available in the model Homeland Ultimate
(**) Only available in the model Homeland Ultimate Animal
D
1
②
natural_image
Simple line drawing of a curved door with two small circular features on the side (no text or symbols)③
natural_image
Simple line drawing of a curved object with a small triangular cutout on the side (no text or symbols)④
natural_image
Simple line drawing of a table with a small object inside, no text or symbols present5
natural_image
Simple line drawing of a door with two compartments, one labeled 'F' and the other a small icon (no text or symbols)6

7
natural_image
Simple line drawing of a 3D object resembling a stylized 'S' or container, enclosed in a curved boundary (no text or symbols)8
Fig. 5
natural_image
Technical line drawing of a mechanical device with a side view showing a detailed spiral drill bit (no text or symbols present)ES
ASPIRADORA ESCOBA HOMELAND ULTIMATE HOMELAND ULTIMATE ANIMAL
DESCRIPCIÓN
English (Original instructions)
STICK VACUUM CLEANER HOMELAND ULTIMATE HOMELAND ULTIMATE ANIMAL
DESCRIPTION
A Detachable battery button
B Speed selector buttons
C ON/OFF button
D LED screen
E Charging indicator lights
F Charge Socket
G Dust tank
H Tank removal lock lever
I Release dust button
J Tube
K Floor brush
K1 All-road roller brush
K2 Fuzzy roller brush (*)
L Filters
L1 Cyclon
L2 HEPA filter
M Accessories
M1 2 in 1 brush
M2 2 in 1 crevice nozzle
M3 Mini turbo brush (**)
M4 Wall bracket
N Charger
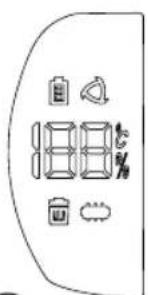
LED screen (D)
- Power level
- Battery level
- Low Speed
- High Speed
- Over temperature of battery
- Dust tank full
- Roller blocked
- Misuse of the charger
(*) Only available in the model Homeland Ultimate (**) Only available in the model Homeland Ultimate Animal
If the model of your appliance does not have the accessories described above, they can also be bought separately from the Technical Assistance Service.
USE AND CARE
- Do not use the appliance if the parts or accessories are not properly fitted.
- Do not use the appliance if the accessories or consumables attached to it are defective. Replace them immediately.
- Do not use the appliance to gather up water or any other liquid.
- Do not use the appliance if the on/off button does not work.
- Remove the batteries from the appliance if you are not going to use it for some time.
- Store this appliance out of reach of children and/or persons with physical, sensory or reduced mental or lack of experience and knowledge.
- Do not work on areas where there are metal objects, such as nails and/or screws.
- Never vacuum hot or sharp objects (cigarette butts, ashes, nails, etc.).
- Do not open the battery under any circumstances whatsoever.
- When the battery is not in use, keep it away from other metal objects like paper clips, coins, keys, screws ... that could connect a terminal to another.
- Do not short-circuit the battery terminals as this may cause an explosion or fire.
- The battery should be stored at a temperature of below 40^ .
- Only use the appliance for carrying out dry tasks.
- Never leave the appliance connected and unattended if is not in use. This saves energy and prolongs the life of the appliance.
- Do not use the appliance on any part of the body of a person or animal.
- Recharge the battery only with the charger supplied by the manufacturer. A charger that is suitable for one type of battery may cause explosion or fire hazard when used with other batteries.
- Use the device only with the batteries for which has been specifically designed. The use of any other batteries can cause an explosion or fire hazard.
INSTALLATION
- Be sure to remove all packaging material from inside the appliance.
ASSEMBLING THE WALL BRACKET:
- The appliance has a wall bracket (M.4) which must be fixed to the wall.
- Fix the wall bracket as you think appropriate, using plugs, screws.
- Make sure that the bracket is firmly fixed; it should be able to support twice the weight of the appliance.
• Fit the appliance into the wall support.
CHARGING THE BATTERY
Caution: A new battery is not fully charged and must therefore be charged before the appliance is used for the first time.
- Charge the battery at an atmospheric temperature of between 4 and 40^ .
- Approximately 4 to 5 hours are needed for a complete charge of the battery. Never attempt to over-charge the battery (although it is recommended that the first charge of the battery be of 6 hours in duration).
- You can charge the battery completely assembled or disassembled from the main body.
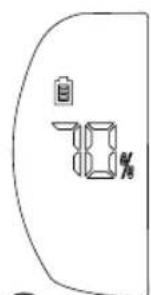
- The charging indicator lights (E) will come on to indicate that the charger is charging the battery.
- If the battery is assembled into the main body, the led screen (2) will show the battery % level.
- When the battery is charged, disconnect the charger from the mains supply.
Note: Do not use the appliance while it is connected to the charger.
INSTRUCTIONS FOR USE
BEFORE USE
- Make sure that product's packaging has been removed.
- Please read carefully the "Safety advice and warnings" booklet before first use.
- Before using this product for the first time, it is important to make a full charge of batteries.
- Prepare the appliance according to the function you wish to use.
VACUUMING FUNCTION
• Fit the tube unit to the main body
- Fit the desired accessory to the tube.
- Fit the desired accessory to the main body.
- Use the appliance in the surface you desire to vacuum.
USE
- Turn the appliance on, by using the on/off button (C).
-
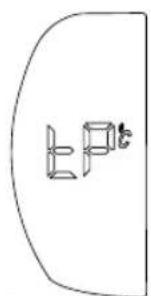
Select the desired speed with the speed selector button (B), when this screen appears, it means:
-
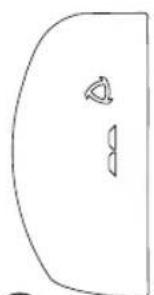
Low speed (3)
- High speed (4)
- This stick vacuum cleaner has an anti-block system:
- (7) When this screen appears, it means that the roller brush is blocked and may be entangled with hair, etc., and cannot rotate normally. Need to clean up the objects of the floor brush
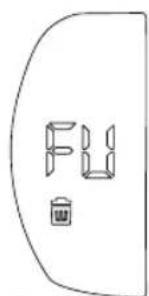
- (6) When this screen appears, it means dust tank is full. Clear the garbage and clean the filter materials in the dust cup
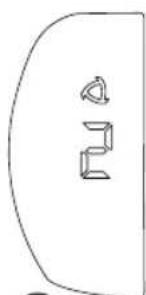
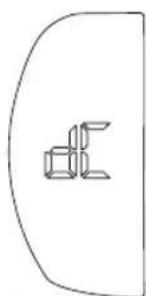
- (5) When this screen appears, it means over temperature of battery: the temperature should not exceed 75, and it will be reused after cooling at normal room temperature.
- (8) When this screen appears, it means misuse of the charger, indicates that it cannot be charged.
FITTING AN ACCESSORY
- The hand vacuum is designed in such a way that it allows the following accessories to be fitted. Use the combination that best meets your requirements. (Fig.1)
NOTE: Accessories can be fitted on the main body or on the tube.
- 2 in 1 brush: Equipped with a brush at the end, which brushes the surface as it is used.
- 2 in 1 Crevice nozzle: Specially designed for getting into cracks and difficult corners.
- Mini turbo brush (**) : Specially designed to remove areas with pet hair, mites, or hard fabrics. (Sofa, mattress, etc.)
- All-road roller brush: Specially desinged for hard floors and carpets.
- Fuzzy roller brush (*): Specially desinged for delicate floors like parquet.
ONCE YOU HAVE FINISHED USING THE APPLIANCE
- Turn the appliance off using the on/off button.
- Remove the battery from the appliance if you are not intending to use the appliance during an extended period.
- Clean the appliance.
PARKING POSITION
- This appliance has its own parking position for comfortable and straightforward storage.
SAFETY THERMAL PROTECTOR
- The appliance has a safety device, which protects the appliance from overheating.
- If the appliance turns itself off and does not switch itself on again, disconnect it from the mains supply, and wait for approximately 15 minutes before reconnecting. If the machine does not start again seek authorised technical assistance.
CLEANING
- Disconnect the battery charger from the mains and allow it to cool before undertaking any cleaning task.
- Clean the equipment with a damp cloth with a few drops of washing-up liquid and then dry.
- Do not use solvents, or products with an acid or base pH such as bleach, or abrasive products, for cleaning the appliance.
- Never immerse the appliance in water or any other liquid or place it under running water.
EMPTYING THE DUST TANK
- Empty the dust tank when it is full (observation facilitated by transparent tank), when vacuuming power is notably reduced, or when Dust tank full indicator (6) is on.
- Disconnect the tube from the dust tank.
- Disconnect the dust tank from the appliance (Fig.2).
- Open the dust tank lid by pressing the release dust button (I) and empty the contents into the appropriate waste disposal receptacle.
- Check the condition of the filter and clean it or replace it if it's necessary.
CHANGING THE FILTERS
- Dust tank filter (HEPA) (high efficiency air filter that efficiently retains spores, ash, sawdust, pollen...), it is advisable to change it a least once a year or after every 50 hours of use, or if its potency diminishes remarkably.
TO REMOVE THE FILTERS
- Remove the dust tank by pressing the tank removal lock lever (H) and turning it clockwise, as indicated by the arrow and the padlocks.
• HEPA filter can be taken put pulling it outwards. - Extract the cyclone by pulling it outwards.
- Clean the filter or replace it if it's necessary with clean water and let ir air dry (Fig.3).
- To reassemble the filter, proceed with the above instructions, in reverse order.
CLEANING THE FLOOR BRUSH
- To remove the roller brush, at the side of the shoe, move the tab towards the open padlock and unhook (Fig.4) the side piece that fixes the roller brush and releases it.
- Remove the roller brush and clean.
- To reassemble the roller brush, follow the above instructions in reverse order.
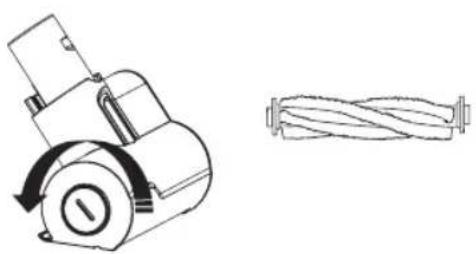
CLEANING THE MINI TURBO BRUSH (\*\*)
- To remove the mini roller brush ( ^** ), unlock the mini roller brush by turning the side lever anticlockwise (Fig.5) and pull it out.
- Remove hair, dust, etc., that may have been caught.
- To reassemble the mini roller brush, follow the above instructions but in reverse.
SUPPLIES
- Supplies can be acquired from distributors and authorised establishments (such as filters, etc...) for your appliance model.
- Always use original supplies, designed specifically for your appliance model.
• These supplies are available in specialist shops. - The type reference of the battery pack for this appliance is 3020E296YNK-XXX.
HOW TO REPLACE THE BATTERIES:
CAUTION: The appliance must be disconnected from the mains when inserting/removing the removable batteries.
CAUTION: Use only the type of battery with the specific reference for your hoover model.
- Using a different battery may cause an explosion or fire hazard.
- Remove the battery by pressing the detachable battery button (A).
- Insert the new battery respecting the polarity, and slide it in until you hear a click.
- To remove the batteries, once the life of the appliance, proceed as follows:
- Remove the battery by pressing the detachable batteries button.
- Then, dispose of it into special containers. Do not disassemble or dispose of in fire.
TROUBLESHOOTING
| Suction gets weak 1. Empty the dust cup.2. Check if the dust cup is installed correctly.3. Check if the filter case and the filter are installed correctly.4. Clean the filter. |
| Stop working 1. Charge the vacuum.2. Clean the roller brush and the bearing thoroughly. |
| Battery doesn't hold a charger 1. Check if the plug has been inserted already.2. Check if the socket is useful. |
FR
K1 Spazzola a rullo "All-road"
K2 Spazzola a rullo "Fuzzy" (*)
L Filtri
L1 Cyclon
L2 Filtro HEPA
M Accessori
M1 Spazzola 2-in-1
M2 Bocchetta lancia 2 in 1
M3 Spazzola "Mini turbo" (**)
M4 Staffa a muro
N Caricabatterie
Schermo LED (D)
L1 Cyclon
L2 HEPA-filter
M Accessoires
M1 2 in 1 borstel
M2 2 in 1 spleetmondstuk
M3 "Mini turbo" borstel (**)
M4 Muurbeugel
N Charger
LED-scherm (D)
PENTRU A ÎNDEPĂRTA FILTRELE
ΚΑΘΑΡΙΣΜΟΣ ΤΗΣ ΒΟΥΡΤΣΑΣ FLOOR
T∅MNING AF ST∅VBEHOLDEREN
RENG∅RING AF FLOOR-B∅RSTEN
T∅MMING AV ST∅VTANKEN
K1 Rullan harja "All-road"
K2 Rullan harja "Fuzzy" (*)
L Suodattimet
L1 Sykloni
L2 HEPA-suodatin
M Tarvikkeet
M1 2 in 1 harja
הכלה pH is transpiration, transpiration is, transpiration is
.הכלהה,הכלהה,הכלהה
•
"All-road"הַרְשָׁהִיָה K1

- ES
- ASPIRADORA ESCOBA HOMELAND ULTIMATE HOMELAND ULTIMATE ANIMAL
- DESCRIPCIÓN
- English (Original instructions)
- STICK VACUUM CLEANER HOMELAND ULTIMATE HOMELAND ULTIMATE ANIMAL
- DESCRIPTION
- LED screen (D)
- USE AND CARE
- INSTALLATION
- ASSEMBLING THE WALL BRACKET:
- CHARGING THE BATTERY
- INSTRUCTIONS FOR USE
- BEFORE USE
- VACUUMING FUNCTION
- USE
- FITTING AN ACCESSORY
- ONCE YOU HAVE FINISHED USING THE APPLIANCE
- PARKING POSITION
- SAFETY THERMAL PROTECTOR
- CLEANING
- EMPTYING THE DUST TANK
- CHANGING THE FILTERS
- TO REMOVE THE FILTERS
- CLEANING THE FLOOR BRUSH
- CLEANING THE MINI TURBO BRUSH (\*\*)
- SUPPLIES
- HOW TO REPLACE THE BATTERIES:
- FR
- Schermo LED (D)
- LED-scherm (D)
- PENTRU A ÎNDEPĂRTA FILTRELE
- ΚΑΘΑΡΙΣΜΟΣ ΤΗΣ ΒΟΥΡΤΣΑΣ FLOOR
- T∅MNING AF ST∅VBEHOLDEREN
- RENG∅RING AF FLOOR-B∅RSTEN
- T∅MMING AV ST∅VTANKEN
Brand : TAURUS
Model : Homeland Ultimate
Category : Vacuum Cleaner