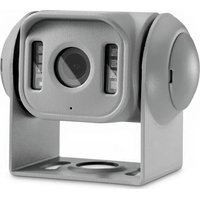
PerfectView CAM 55 - Rear Camera DOMETIC - Free user manual and instructions
Find the device manual for free PerfectView CAM 55 DOMETIC in PDF.


User questions about PerfectView CAM 55 DOMETIC
0 question about this device. Answer the ones you know or ask your own.
Ask a new question about this device
Download the instructions for your Rear Camera in PDF format for free! Find your manual PerfectView CAM 55 - DOMETIC and take your electronic device back in hand. On this page are published all the documents necessary for the use of your device. PerfectView CAM 55 by DOMETIC.
USER MANUAL PerfectView CAM 55 DOMETIC
EN Rear View Video Camera
Installation and Operating Manual. 8
Please read this instruction manual carefully before installation and first use, and store it in a safe place. If you pass on the product to another person, hand over this instruction manual along with it.
Contents
1 Explanation of symbols. 9
2 Safety and installation instructions 9
3 Scope of delivery 12
4 Accessories 12
5 Intended use 12
6 Technical description 13
7 Notes on the electrical connections 13
8 Mounting the camera 15
9 Cleaning and caring for the camera 19
10 Guarantee 19
11 Disposal. 20
12 Technical data 20
1 Explanation of symbols

WARNING!
Safety instruction: Failure to observe this instruction can cause fatal or serious injury.

CAUTION!
Safety instruction: Failure to observe this instruction can lead to injury.

NOTICE!
Failure to observe this instruction can cause material damage and impair the function of the product.

NOTE
Supplementary information for operating the product.
2 Safety and installation instructions
Please observe the prescribed safety instructions and stipulations from the vehicle manufacturer and service workshops.
The manufacturer accepts no liability for damage in the following cases:
- Faulty assembly or connection
- Damage to the product resulting from mechanical influences and excess voltage
- Alterations to the product without express permission from the manufacturer
- Use for purposes other than those described in the operating manual
Please observe the following instructions:
- To prevent short circuits, always disconnect the negative terminal of the vehicle's electrical system before working on it.
If the vehicle has an additional battery, its negative terminal should also be disconnected.
Insufficient supply line connections could result in short circuits which
- C\auserse c a b l e f i r e s
Trigger the airbags
- Damage electronic control devices
- Cause electric functions to fail (indicators, brake light, horn, ignition, lights)
-
When working on the following lines, only use insulated cable lugs, plugs and tab sleeves:
-
30 (direct supply from positive battery terminal)
- 15 (connected positive terminal, behind the battery)
- 31 (return line from the battery, earth)
- 58 (reversing light)
Do not use porcelain wire connectors.
- Use a crimping tool (fig. 1 10, page 2) to connect the cables.
-
When connecting to supply line 31 (earth), screw the cable
-
To the vehicle's earth bolt with a cable lug and a gear disc or
- To the sheet metal body work with a cable lug and a self-tapping screw.
Ensure that there is a good earth connection.
When the negative terminal of the battery is disconnected, all data stored in the volatile memories will be lost.
-
The following data must be set again, depending on the vehicle equipment options:
-
Räd i o c o d e
- Vehicle clock
- T i m e r
- On-board computer
- Seat position
You can find instructions for making these settings in the appropriate operating instructions.
Observe the following installation instructions:
- Secure the parts of the camera installed in the vehicle in such a way that they cannot become loose under any circumstances (sudden braking, accidents) and cause injuries to the occupants of the vehicle.
- Secure any parts of the system covered by the bodywork in such a manner that they cannot be come loose or damage other parts and cables and impair vehicle functions (steering, pedals, etc.).
- To prevent damage, when drilling ensure that there is sufficient room for the drill head to come out on the other side (fig. 2, page 3).
- Deburr all drill holes and treat them with a rust-protection agent.
Always follow the safety instructions of the vehicle manufacturer.
Some work (e.g. on retention systems such as the AIRBAG etc.) may only be performed by qualified specialists.
Observe the following instructions when working with electrical parts:
- When testing the voltage in electrical cables, only use a diode test lamp (fig. 1 8, page 2) or a voltmeter (fig. 1 9, page 2).
Test lamps with an illuminant (fig. 12, page 2) take up voltages which are too high and which can damage the vehicle's electronic system.
-
When making electrical connections, ensure that
-
They are not kinked or twisted
- They do not rub on edges
- They are not laid in sharp edged ducts without protection (see fig. 3, page 3)
Insulate all connections.
- Secure the cables against mechanical wear with cable binders or insulating tape, for example to existing cables.
The camera is watertight. However, the sealings on the camera cannot withstand a high-pressure cleaner (fig. 4, page 3). Therefore, you should observe the following instructions when handling the camera:
- People (including children) whose physical, sensory or mental capacities or whose lack of experience or knowledge prevent them from using this product safely should not use it without the supervision or instruction of a responsible person.
- Do not open the camera, as this impairs the sealing and the function of the camera (fig. 5, page 3).
- Do not pull at the cables, as this impairs the sealing and the function of the camera (fig. 6, page 3).
- The camera is not suitable for submerged operation (fig. 7, page 3).
3 S C O P E O F D
| No. in Quantity Description Reference no. | |||
| Fig. 8, page 4 | |||
| 11 Colour camera CAM55 | 9600000555 | ||
| Colour camera CAM55W | 9600000556 | ||
| 21 Camera bracket | |||
| 3 | 2 | S | i |
| 41 Extension cable 9600000208 | |||
4 A c c e s o r i
Available as accessory (not included in scope of delivery):
| Description Reference no. | |
| Extension cable 5 m | 9600000206 |
| Extension cable 10 m | 9600000207 |
| Extension cable 20 m | 9600000208 |
| Spiral cable for trailer operation SPK170 | 9600000235 |
5 Intended use
The CMOS CAM55 (ref. no. 9600000555) and CAM55W (ref. no. 9600000556) colour cameras are primarily intended for use in vehicles. They can be used in video systems to observe the space around the vehicle from the driver's seat when manoeuvring or parking, for example.

WARNING!
Risk of injury!
Since rear view systems are designed merely as an additional aid for reversing, it does not relieve you of the duty to take proper care when reversing.
6 Technical description
The camera with integrated microphone, which is encased in aluminium housing, transmits image and sound to a monitor via a cable. The built-in infrared LEDs improve night vision.
The camera transmits the image as if you are looking in the rear mirror.
The camera consists of the following main elements:
| No. in fig. 9, page 4 | Description |
| 1 6-pin connection cable | |
| 2 Infrared LEDs | |
| 3 Microphone | |
7 Notes on the electrical connections
7.1 Laying cables

NOTICE! Risk of damage!
- To prevent damage, when drilling ensure that there is sufficient space on the other side for the drill head to come out.
- Cables and connections which are not properly installed will cause malfunctions or damage to components. Correct installation of cables and connections is the basic prerequisite for lasting and trouble-free operation of the retrofitted components.
- The cables may not be exposed for long periods to solvents such as benzine, as the solvents can damage the cable.
Please observe the following instructions:
-
As far as possible, use original openings or alternative openings for the connecting cable duct, e.g. the paneling edges, ventilation grilles or blank panels. If no openings are available, you must drill holes for the cables. Check beforehand that there is sufficient room for the drill head to come out on the other side.
-
Wherever possible lay cables inside the vehicle, as they are better protected inside than outside the vehicle.
If you do need to lay a cable outside the vehicle, ensure that it is well secured (use additional cable ties, insulating tape, etc.).
- To prevent damage to the cables, when laying them ensure that there is sufficient distance to hot or moving vehicle components (exhaust pipes, drive shafts, light systems, fans, heater etc.). Use corrugated piping or other protective materials to protect against mechanical wear.
- Screw on the plug connections of the connecting cables to protect against water penetration (fig. 17, page 6).
-
When laying electric connections, ensure that
-
They are not kinked or twisted
- They do not rub on edges
-
They are not laid in sharp edged ducts without protection (fig. 3, page 3)
-
Attach the cables securely in the vehicles to prevent tripping hazards. Use cable binders, insulating tape or glue the cables in place.
- Protect every through-hole made in the bodywork against water penetration, e.g. by using a cable with a sealant and by spraying the cable and the cable sleeve with sealant.

NOTE
Do not start sealing the through-holes until all installation work has been finished for the camera, and the required cable lengths have been established.
8 Mo u n t i n g
8.1 Tools required
For installation and assembly you will require the following tools:
- Drill bit set (fig. 1, page 2)
- Drill (fig. 1 2, page 2)
Screwdriver (fig. 1 3, page 2) - Set of ring or open-ended spanners (fig. 1 4, page 2)
- Measuring ruler (fig. 1 5, page 2)
Hammer (fig. 1 6, page 2) - Centre punch (fig. 17, page 2)
To make and test the electrical connection, the following tools are required:
- Diode test lamp (fig. 1 8, page 2) or voltmeter (fig. 1 9, page 2)
Insulating tape (fig. 11, page 2) - Cable bushing sleeves, if necessary
To fasten the cables you may require additional cable binders.
8.2 Mounting the camera

CAUTION!
Select a location for the camera and attach it so securely that it cannot under any circumstances fall off and injure bystanders (e.g. by being knocked off by branches brushing over the roof of the vehicle).

NOTE
If installing the camera alters the vehicle height or length specified in the vehicle documents, your vehicle must be inspected by the appropriate authorities.
Make sure that you are in possession of documents verifying that your vehicle has passed this inspection.
Observe the following installation instructions:
- To provide a suitable viewing angle, the camera must be attached at a height of at least 2m Ensure that you have a firm place from which to work when mounting the camera.
- Ensure that the installation location of the camera is sufficiently firm (e.g. to prevent the camera from being knocked down by branches that may brush over the roof of the vehicle).
- Mount the camera bracket horizontally and in the middle of the rear of the vehicle (fig. 10, page 5).
-
The most secure type of attachment is with screws fitted through the body. Please observe the following instructions:
-
There must be sufficient space for the mounting procedure behind the chosen installation location.
- Suitable measures must be taken to prevent water penetrating through any holes made (e.g. by using screws and sealant and/or spraying the outer attachment parts with a sealant).
-
The location on the body where you wish to attach the camera must be rigid enough to allow the camera to be tightly fastened.
-
Check beforehand that there is sufficient room for the drill head to come out on the other side (fig. 2, page 3).
- If you are not sure about the location you have chosen, consult the vehicle manufacturer or dealer.

NOTE
We recommend greasing the threads of the bolts to prevent corrosion.
When mounting the camera, proceed as follows:
Hold the camera on the chosen location and mark at least two different points for the drill holes (fig. 11, page 5).
Using a hammer and centre punch, gently pre-punch the previously marked points to prevent the drill head from slipping off.
If you want to screw on the camera with self-tapping screws (fig. 12, page 5)

NOTICE! Risk of damage!
The holder may only be attached to steel panels with a minimum thickness of 1.5mm using self-tapping screws.
Drill 2mm holes at the points you have just marked.
Deburr all drill holes and apply rust-protection.
Screw on the camera bracket using 4× 10mm self-tapping screws.
If you would like to attach the camera with threaded screws fitted through the construction (fig. 13, page 5)

NOTICE! Risk of damage!
Ensure that that nuts cannot be pulled through the body shell when they are tightened.
Use larger washers or metal plates if necessary.
Drill 6.5mm holes at the points you have just marked.
Deburr all drill holes and apply rust-protection.
Screw on the camera bracket using M6 × 20 ~mm threaded screws. Depending on the thickness of the construction, you may require longer threaded screws.
Creating a through-hole for the camera connection cable (fig. 14, page 5)

NOTE
If possible, use available openings – such as ventilation grilles – to feed the connection cables through. If there are no existing openings, you must drill a hole with a 16 mm diameter.

NOTICE! Risk of damage!
Ensure that there is sufficient space on the other side for the drill head to come out
Drill a hole of 16 mm near the camera.
Deburr all drill holes that have been made in the sheet metal and apply rust-protection.
Place cable sleeves in all sharp edged ducts.
Mounting the camera

NOTICE! Risk of damage!
Only use the screws supplied to mount the camera in the camera bracket. Longer screws will damage the camera.
Push the camera into the camera bracket.
Secure the camera loosely in the holes at the side (fig. 15, page 5) by using the two M4 x 6 mm screws.
Align the camera provisorily so that the lens is at an angle of approx. 50^ to the perpendicular axis of the vehicle (fig. 16, page 6).
Connecting the camera

NOTE
- Lay the camera cable so that should you need to remove the camera, you can access the plug connection between the camera and the extension cable easily. This considerably eases dismantling work.
- To minimise corrosion in the plug, apply a small amount of grease – such as pin grease – inside the plug.
- Additional extension cables are available on request (see chapter "Accessories" on page 12).
Guide the camera cable into the vehicle interior.
Insert the plug of the camera cable into the socket of the extension cable.
Screw on the plug connections of the connecting cables to protect against water penetration (fig. 17, page 6).
Aligning the camera

NOTE
If necessary before aligning the camera connect the camera to a monitor and to a power supply (see connecting diagram, fig. 18, page 6)
Use the monitor image to align the camera:
The monitor image should show the bottom edge of the rear or the bumper of your vehicle (A). The middle of the bumper should be in the middle of the screen. (fig. 19, page 6).
Check the function of the camera after you have connected it to a monitor.
Fastening the camera
Tighten the two fastening screws in the holes at the side camera holder.
Click the side covers into the openings at the side provided for this purpose (fig. 20, page 7) and fasten them in place by turning them.
To remove the side covers, insert two blunt and flat objects into the openings on the covers provided for this purpose, and turn them.
9 Cleaning and caring for the camera

NOTICE! Risk of damage!
Do not use sharp or hard objects to clean the device as these may damage the device.
Clean the camera with a soft, damp cloth from time to time.
10 Guarantee
The statutory warranty period applies. If the product is defective, please contact the manufacturer's branch in your country (see the back of the instruction manual for the addresses) or your retailer.
For repair and guarantee processing, please send the following items:
- Defect components
A copy of the receipt with purchasing date - A reason for the claim or description of the fault
11 Disposal
Place the packaging material in the appropriate recycling waste bins wherever possible.
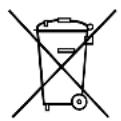
If you wish to finally dispose of the product, ask your local recycling centre or specialist dealer for details about how to do this in accordance with the applicable disposal regulations.
12 Technical data
| PerfectView CAM55 PerfectView CAM55W | ||
| Ref. no.: 9600000555 96000000556 | ||
| Image sensor: 1/4" CMOS | ||
| Pixels: 640 (H) x 480 (V) | ||
| Video standard: PAL, 1 Vpp | ||
| Light sensitivity: < 1 Lux / 0 Lux with infrared LEDs | ||
| Picture angle: | approx. 120° diagonal approx. 100° horizontal approx. 70° vertical | |
| Operating voltage: | 10 - 32 V== | |
| Power consumption: | max. 1.8 W | |
| Operating temperature: | -30 °C to +70 °C | |
| Protection class: | IP69K | |
| Resistance against vibration: | 10 g | |
| Dimensions W x H x D (with camera bracket): | 80 x 50 x 62 mm | |
| Weight: | approx. 165 g | |
Approval
The device has the E13 approval.

6 Description technique
Utilize eventually arruelas ouplaces de chaparaised.
N.in fig.8, vagina 4
I3rOToBnTeNb He HecET HNKaKoY OTBeTCTBeHHOCTN 3a yUepe6 B cNeDyIOuNX CnyaX:
He INCIOJIb3yIte KJEMMOBbie KOJODKN.
-Дя coeHHeHЯ ka6eNe IcNoIb3yIte o6xIMHbIe KJIeU (pnc. 1 10, ctp. 2).
- Ппвntte ka6eь ри coeHHeHnx K npObOy 31 (kopnyc)
- C NOMOUI KABENBHO 3axmua 3y6aTOI npyXHHo IaHbIK BnHTy dIPOeHNHeHNA KOpnyCOM, IMeIOUeMycs Ha aBTOMO6nne nnn
- C NOMOJIIO Ka6eJIbHOrO 3axIma IN cAmOHaPe3aIOUeIro BnHTa K NICTy Ky3OBa.
06ecneuBaIte xopoOoee coeINHeHne c Kopnycom!
Pn OTCoeHHeHn KneMMbI OTPuataTeBHO NOIOca aKKyMnyTOpHO 6aTaPeN Bce 3aONMHaIOUe yCTpoiCTBa 3NeKTPoHNI CnCTeM KOMopTa TepaOT COxpaHeHHbI B HIX DaHHbIe.
B 3aBnCmOCTn OT OChaSeHnA bTOMo6nI, Bam npndTe3aHOBO HAcTpOBcneDyUoNne DaHHbIe:
-KoIpaDIOONpneMHNka
- Yacbl aBTOMO6nna
-He nepen6aanncbn He cKpyuBaanCb,
-He Tepnncb O KpOMKn,
- He npoknaBbBnnc6e3 3aunTbI uepe3 BBOdbI, IMeIOune OCTpble KpOMKn (pnc. 3, ctp. 3).
- 3aunOpnyTe BCE nHHn N COeHNHeHn.
- PpeoXnTe Ka6eN oT MeaHuecknx HaRpy3OK, 3aΦNKcnpOBaB Nx Ka6eNb-HbIMCCTKAMN INN IN3OJauHOHNOJIeHTO, HApPImep, 3a IMeIOUneCnHNN.
Kamepa YBnEeTc BDOHePOnHuaem. Ho ynpoTHEnKaMepb He BbIepxNBAOT OunchKn BbICOKIM DaBneHnem (pnc. 4, ctp. 3). NToMy co6nOaTe cpeyUoune yka3aHnno o6paueHIO C kamepoi:
- Пица (ВКПЮУАДETe), KOTOPьE B CBЯЗИС OгранчЕНьIMN ФИЗЧЕСКИМN, ceHCOPHBIM ИИ NmYMCТВЕнБIMN CnOCO6HObTЯМN INI C HeIOCTaTKOM ONbITa Ип 3HaHи, He B COCTОHIN IOnb3OBaTbCЯ DAHHbIM И3deПиЕМ, He ДОЛХы ИСПОЛБ3O-BaTb ЭTO ИЗДЕПе 6e3 NOCTОВНОТОprpICMOTpa ИпИ NHCTpyKТaxa OTBETCTBEHHOТОпица.
- He BCKpbIbAaTe KaMepy, T. K. 3TO OTPnUaTeNbHO Cka3bIbAeTcHa RepeMeTuHocTn pa6oToocNo6HoCTn (pnc. 5, cTp. 3).
He TAHnTe 3a Ka6eHn, T. K. 3TO OTPuCaTeNbHO Cka3bIBaETcHa repMeTHUHOCTN pa6oToCnOco6HoCTN KaMepbl (pnc. 6, ctp. 3).
- Kamepa He npirodHa dIpa6OtBI IOB Odoi (pnc. 7, cTp. 3).
3 O6beM nocTaBKn
| № ha pnc. 8,ст. 4 | Kolbo HanmehoBanie № apt. |
| 1 1 LüBeTHa KaMepa CAM55 | 960000555 |
| LüBeTHa KaMepa CAM55W | 960000556 |
| 2 1 DePxxaTeNb KaMepbI | |
| 3 2 BokOBbIe KpbIshKn | |
| 4 1 YdΠHInTeNbHbI Ka6eNb 960000208 |
4Принадлжноctn
PpOdaetcB KaueCTBe PpHnAaIeXHoCTN (He BxOaNT B O6bem NocTaBKn):
3aHnM XoDOM, HO He ocbo6oxkaIoT Bac oT 6ra3aHHOCTn co6JIO
aTb NObBiIeHHyIO OCTOpOXHOCTb Ipn DnBxKeHm 3aDnM
XOДOM.
6 Texhnueckoe onncahne
Kamepa co BCTpoeHHbIM MKNpOoHOM pa3MeUeHa B aIOMnHneBOM KOpnyce I nepeaet n3o6paXeHne n 3Byk no Ka6eIIO K MOHtOpy. BnaToaIpaNcPaKpaChbIM CBETODNoam yIpyuAeTcB NIDMOCTb HOybIO.
Kamepa nepeetaet n3o6paxeHne, kaK 6ytdTo Bbl cmotpnte B 3epkaNo 3aHero Bnda.
Kamepa COCTOITN3 CNeIyUOUIX OCHOBbIX 3IeMeHTOB:
EcnBbIXOTHTe npNBHTb KaMepy camohape3aIOUHMN BnHTamn (pnc.12, ctp.5)

BHIMAHNE! Onachoctb nobpexdeHnA!
KpeHneHne cMOHaPe3aUOuIMN BnHTaMn pa3peuaeTcBbIOnHrTb TOnbKO B CTaNbHbIX NICTax TOUINHO He MeHee 1,5 MM.
ПосверпгБ в paHee pa3MeueHbIX TOUkax NO ODHOMY OTBepCTNIO 2 MM.
3aunCTte BCE OTBepCTnI n CmaXbTe INx aHTNKOpP03IOHHbIM cpeIDCTBOM.
PnBHTte depxatae b kamepbicamohape3aiouMMN BnHTamn 4 x 10 MM.
EcnBbIXOTHTe 3aKpeNITb KaMepy Uppynamn Upe3 Ky3OB (pnc.13, ctp.5)

BHIMAHNE! Onachoctb nobpexdeHn!
y6eNTecb B TOM, yTO npN 3aTnBAHn raIKN He npOdaBnBaIOTcYepe3 Ky3OB.
Ipn Heo6xOIMOCn, nCpONb3yIe 60nbIe POnknaHbIe IaN6blnn nnPnactnbl.
PocBepnTe B paHee pa3MeueHHbIX TOUkax IIO OAnHomy OTBepCTNIO 6,5 MM.
3aunCTte BCE OTBepCTnI n CmaXbTe INx aHTNKOpP03IOHHbIM cpeIDCTBOM.
ПрииВИNTIteДерхаTeNьКамерblушуРamM6x20MM. B3aBnCIMOCTNOTToIuINHbI Ky3OBA,MOrTNotpe6OBaTBc86OoneeДПИHHbI shypynbl.
BbInonHHTb OTBepCTne Ira nTaiooero Ka6eIaKamepbI (pnc. 14, ctp. 5)

YKA3AHNE
Дпя Ввда соединтельхкавенинспь3унTe, NO BO3MOXHOCTN, IMeIoUSeCЯСКВОЗHBIE OTBepCTnI, HApPIMeP, BeHTINRAUOnHbIe peWeTkn. EcIn cKBO3HbIe OTBepCTnI OTCyTCTByHOT, Heo6xOdmo npocBepnITb OTBepCTne 20 MM.

BHIMAHNE! Onachoctb nobpexdeHnA!
IpeBapntbNo npOBepbTe, IMeETcN IOCTaTOUHO CBO6OHoro MeCTa IIN BIXOda CBepna.
Посверпг Te B6и3и KaMEрbl OTBepctne 20 MM.
3aunCTte BCE OTBepCTnB nIcTe IN CmXbTe INx aHTNKOPPO3IOHHbIM cpeDCTBOM.
Bo BCE oTBepcTnC ocTpblM Kpaamu yCTaHOBnTe npoxoHbIe BTyJIKN.
MOThax Kamepbbl

BHIMAHNE! Onachoctb nobpexdeHnA!
ДпmaMOHTaJa KaMepbI nCNoJIb3yIe TOnbKO BVHTbl, BxOJaUne B O6beM NOCTaBKn. Boone dAnHHbIe BVHTbl NOBpeXdAIOr KaMepy.
BcTaBbTe KaMepy B dEpXaTeNb.
3aKpeNte KaMepy HEnnoTHO ABym BnHTamM M4x6 MM B 6OKOBbIX OTBepCTnX (pnc.15, ctp.5).
BpeMeHNO paCnoIoxnTe KaMepy TaK, yTo6bI o6beKTHB 06pa3OBbIbAyn yrO1 OKo1o 50^ OTHOCHTeNbHO BepTKaJIbHOJ OCNABTOMo6nna (pnc. 16, cTp. 6).
3neKtpnueckoe NpOKJIIOUeHne KaMepbl

YKA3AHNE
- PpoknaBbAte Ka6eNb Kamepb TaK, YTO npN BO3MOxHO Heo6XoDMOM demOHTaxe Kaepb 6blno NfKO DOCTyHbIM WTeKepeHoe coeINHeHne Mekdy KaepoN yDnHtEnbHbIM Ka6eNm. 3To 3HaHTeBHo 06neryaet demOHTax.
-ДЯУMeHbWeHnKoppO3Nn Do6aBbTe HEmHO KOHCnCTeHTHOm Cma3KN,HaPpIMeP, Cma3KNДЯ NOJIOCOB aKKyMnyTOpHbIX 6aTapei, BOdINnI3 WTeKePoB.
-Прин Heo6xOДIMOCTN,прдnaIaOTcN IpyrNe ydINHITeNBHbIe Ka6eni (cM. rN. «ПринадnexHocTN» Ha cTp. 154).
BBeInTe Ka6eInb KamepbI BHytpb aBTOMO6nna.
BCTaBbTe wTekep ka6eIyKamepbI B rHe3do ydHnHTeNbHO Ka6eIy.
CBrHTTE WTeKeHoe CoeINHeHne IaIITbI OT nonaHaNn BODbl (pnc. 17, ctp. 6).
Perynnpobka KaMepbl

YKA3AHNE
OtperynpyTe KaMepy, OCHOBbIbAcb Ha 3o6paXeHn Ha MOHTope.
Y HnXHeRo KpaI N3O6paXeHna MOHTope DoJxHa OTO6paXaTbCra 3aHnra YacTb IIN 6amnp BaJero aBtOMo6nla. LcHTp 6ampepa TAKKe DoJxEHN HaxOnTbCra B ceHTpe N3O6paXeHna MoHTope (pnc.19, ctp.6).
dometic.com/sales-offices


