440 X - Shredder Genie - Free user manual and instructions
Find the device manual for free 440 X Genie in PDF.
User questions about 440 X Genie
0 question about this device. Answer the ones you know or ask your own.
Ask a new question about this device
Download the instructions for your Shredder in PDF format for free! Find your manual 440 X - Genie and take your electronic device back in hand. On this page are published all the documents necessary for the use of your device. 440 X by Genie.
USER MANUAL 440 X Genie
natural_image
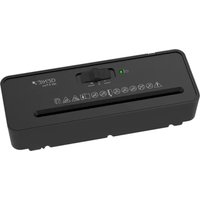
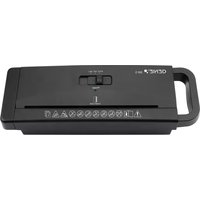
Black rectangular electronic device with control panel and indicator lights (no visible text or symbols)GO Europe GmbH
4 Status-LEDs (Power, Overheat)
5 Auffangbehälter
The operating manual represents a component part of the device. It contains important information regarding safety, use and disposal. Familiarize yourself with all the operating and safety information before starting to use the device. Only use the device as described and for the purpose for which it is intended. Hand over all the documents with the device if it is transferred to third parties.
1. Important Safety Regulations
- Keep the device out of reach of children and pets! The device may only be operated by adults.
- The device may only be used by one person at a time.
- Protect the equipment from direct sunlight, extreme heat and damp!
- Do not carry out any other activities when operating the device, such as clean it.
• Repairs may only be carried out by properly trained specialists. - Never place any objects on the device.
- Do not position the device near a source of heat or in the vicinity of water.
1.1 Safety Labels
 | Read the operating manual thoroughly before starting to use the device. | General indication of potential risks, so that particular care is required. |
 | Keep children and pets away from the shredder. | Do not spray any inflammable gases in the direction of the shredder. |
 | Never reach into the insertion slot. | Keep all loose pieces of clothing, jewellery or other loose items away from the shredder. |
 | Keep long hair away from the shredder. | Remove any foreign bodies, such as paper clips or rubber bands, before shredding the material. |
 | Keep ties and scarves away from the shredder. | Never exceed the maximum cutting capacity (max. 4 sheets). |

Warning! Risk of injury through the insertion mechanism. Loose items could get caught in the insertion slot and cause injuries. Keep fingers, hair, scarves, ties, jewellery etc. away from the insertion slot.

Caution! Risk of injury through sharp cutting mechanism. Do not touch the exposed blades under the top of the shredder.

Attention! Failure to observe the safety labels can result in severe personal injury! If an object (sleeve, tie, etc.) does enter the infeed accidentally, disconnect the power plug from the power socket immediately!
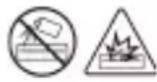
Warning! Never use air sprays (aerosols). These could ignite and cause serious injuries.
Safety note! The power socket must be located near the device and be easily accessible. This enables quick disconnection of the device from the power supply in an emergency.
1.2 Electrical Safety Guidelines
- Disconnect the power plug from the power socket:
-
if it will remain unused for a longer period,
• before emptying the waste bin,
• before cleaning the device,
• before moving the device. -
Do not put the device into operation in the case of damage to the power cable, the power plug or the device itself (risk of injury)!
- Do not complete any modifications to the power cable because it is designed for the power supply specified.
- Never exceed the recommended load capacity of the power socket or any connected extension cables!
Attention! It is forbidden to open the shredder attachment for repair purposes. In addition, all claims under the terms of guarantee will be deemed null and void.
2. Intended Use
The shredder has been designed to shred paper and staples. The shredder is exclusively intended for private use indoors.
Any other use is considered unintended use. Unauthorised modifications or reconstructions are not permitted and lead to loss of rights to claims under the terms of guarantee.
3. Checking the Package Contents
Check the package contents of your shredder before putting the shredder into operation. If anything is missing or damaged, do not use the shredder.
Contact our Service department.
- Genie 440 X shredder with waste bin for cuttings
- Operating manual
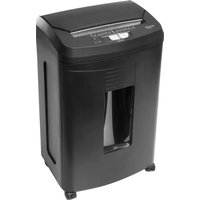
4. General View of the Shredder
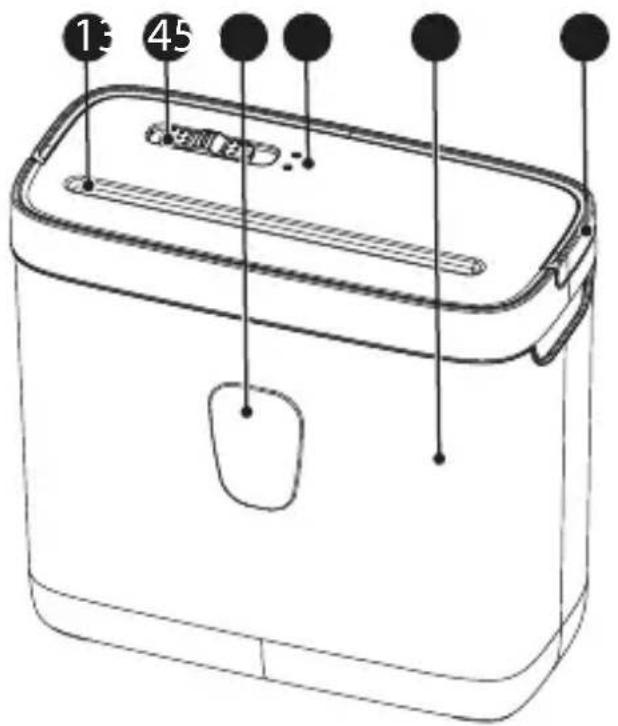
1 Insertion slot
② Main switch
3 Viewing window
4 Status LEDs (Power, Overheat)
5 Waste bin
6 Handle for the shredder attachment
5. Starting Up
-
Set the waste bin down on a stable, level, horizontal surface and in the vicinity of an easily accessible power socket.
-
Mount the shredder attachment on the waste bin. The shredder attachment latches audibly in place. If the shredder attachment is not fitted properly on the waste bin, the shredder cannot be operated.

Caution! Risk of injury through sharp edges of the cutting mechanism.
The underside of the shredder attachment has sharp edges. Only take hold of the cutting mechanism using the handle.
6. Main Switch
The main switch is used to control the cutting mechanism of the shredder. The main switch can be set to four positions:
• Position Fwd: Continuous forward running.
- Position Auto: When set to Auto, the shredding operation of the cutting mechanism is started automatically as soon as paper is fed into the paper infeed. The device switches to forward drive and draws the paper in. When shredding is finished, the device switches off automatically.
- Position Off: Paper shredder is switched off.
• Position Rev: Continuous reverse running.
7. Operating the Device
- Slide the main switch to Off.
- Connect the power plug to a power socket.
- Slide the main switch to Auto. The Power status LED lights up green.

Note! A maximum of 4 sheets of A4 paper with a weight of maximally 80 g/m^2 may be inserted in the paper infeed at a time. Do not forget that the thickness of the paper increases when folded, as a result of which the recommended sheet capacity can be exceeded. Also reduce the quantity of paper when shredding coarse paper.
- The paper must be straight when inserted in the paper infeed.
- Slide the main switch to Off to switch off the device completely.
- Unplug the power plug from the power socket if the device will not be used for a longer period.
Note! Let the device cool down for 30 minutes after 1.5 minutes of continuous operation before continuing shredding.
8. Overheating Protection
The shredder switches off automatically in the event of overheating. The Overheat status LED lights up red.
- Slide the main switch to Off.
- Disconnect the power plug from the power socket.
- Let the motor cool down for 30 minutes to room temperature.
- Then connect the power plug to the power socket again and continue operation.
Note! Observe the continuous operation time stipulated in Chapter "Technical Data".
9. Clearing Paper Jams
If too much paper is fed into the cutting mechanism, a paper jam occurs.
- Slide the main switch to Rev. The device ejects the paper.
- Remove the paper.
- Slide the main switch to Fwd to free the paper infeed from any residual paper.
Note! If the jam is not cleared by the reverse/forward running process, slide the main switch to Off, disconnect the power plug and remove the residual paper from the cutting mechanism manually.
- Slide the main switch to Auto.
- Reduce the quantity of paper being shred and continue with the shredding process.
10. Maintenance and Service
Attention! Maintenance work may only be completed when the main switch is set to Off, the power plug has been unplugged and the device has cooled down!
10.1 Emptying the Waste Bin
Note! Check the fill level of the waste bin through the viewing window at regular intervals and when it is about 80% full, empty it. This prevents the shredded material from accumulating, which could lead to malfunctions.
- Slide the main switch to Off.
- Disconnect the power plug from the power socket.
- Use the handle to lift the shredder attachment from the waste bin.
- Empty the waste bin.

Caution! Risk of injury through sharp edge of cutting mechanism.
The underside of the shredder attachment has sharp edges.
Only take hold of the cutting mechanism using the handle.
- Mount the shredder attachment on the waste bin.
10.2 Cleaning
- Slide the main switch to Off.
- Disconnect the power plug from the power socket.
- Clean the surfaces of the housing with a cloth which is slightly damp.
- Dry the device with a soft, lint-free cloth. Do not use any solvents or cleaning agents.
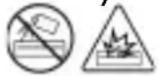
Warning! Never use air sprays (aerosols). These could ignite and cause serious injuries.
11. Technical Data
| GENIE 440 X | |
| Cutting capacity Max. 4 sheets of A4 (80 g/m2) | |
| Waste bin volume 8 l | |
| Cutting method, cut width Particle-cut, 4 × 38 mm | |
| Shredding speed 1.8 m/min | |
| Width of paper infeed 220 mm | |
| Continuous operation time / Cool down time | 1.5 min / 30 min |
| Noise level 72 dB(A) | |
| Range of operations Auto start & stop/Forwards/Reverse/Off | |
| Dimensions (W x H x D) 29.5 × 25.7 × 15 cm | |
| Weight 2.2 kg | |
| Power supply 220 - 240 V AC / 50 Hz, 1 | 3 A, 300 W |
Declaration of Conformity with Security Level Compliant with DIN 66399
We declare that this device, with regard to its task of the destruction of documents, fulfils the conditions defined for Security Level P-4 compliant with DIN 66399.
P-4: Recommended for data media containing particularly sensitive and confidential data. Material particle area ≤ 160 mm^2 and for regular particles: strip width ≤ 6 mm (e.g. particle 4 × 40 mm ).
12. Troubleshooting
| Problem Cause Solution | ||
| The device does not switch off automatically and continues operating. | The waste bin is full. | 1. Slide the main switch to Off.2. Disconnect the power plug from the power socket.3. Empty the waste bin. |
| Device no longer functions after a longer period out of service or stops during operation | The motor protection function has been activated to ensure the device does not overheat. | 1. Slide the main switch to Off.2. Disconnect the power plug from the power socket.3. Let the motor cool down to room temperature. |
| Paper jam Paper has been inserted in excess of the permitted paper capacity. | 1. Clear the paper jam. | |
Note! If you cannot clear the fault yourself, contact your dealer or call the GO Europe hotline.
13. Declaration of Conformity

The CE Mark on the device confirms conformity.
The Declaration of Conformity can be read online at www.go-europe.com.
14. GS tested safety mark
100000000
The «Geprüfte Sicherheit» mark (GS tested safety mark) certifies that the product satisfies the requirements defined by the German Product Safety Act (ProdSG).
The GS tested safety mark indicates that when implemented for its intended use and in the event of foreseeable misuse the identified
product will not endanger the safety and health of the user. It concerns a voluntary safety mark which was issued by an authorized testing institute.
15. Symbols
The following symbols are provided on the packaging or on the device itself. This section explains the significance of the individual symbols.
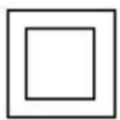
The symbol indicates that the design of the product complies with Protection Class II (double insulation). A safety connection to the electrical earthing (ground) is not necessary.
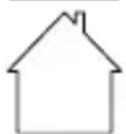
Only use the product indoors.
16. Disposal

Find out about the possibilities of taking back used appliances free of charge from your dealer.
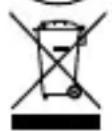
The adjacent symbol indicates laws dictate that electrical and electronic apparatus no longer required must be disposed of separate from domestic waste. Dispose of your device at a collection point provided by your local public waste authority. Packaging materials must be disposed of according to local regulations.
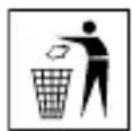
The packaging is made of environmentally friendly materials that you can dispose of at local recycling points. Advice on the options with which to dispose of your old device can be obtained from your municipal or local administration offices.
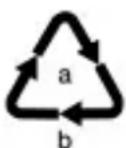
Observe the identification on the packaging materials during the waste sorting process; they are identified by abbreviations (b) and numbers (a) which have the following significance: 1–7: plastic/20–22: paper and cardboard/80–98: composite materials.

Packaging materials must be disposed of according to local regulations.
flowchart
graph LR
    A["Recycle icon"] --> B["FR + Box + Square"]
    B --> C["BAC DE TRI"]
    D["Recycle icon"] --> E["FR Cet appareil se recycle"]
    E --> F["À DÉPOSER EN MAGASIN"]
    E --> G["À DÉPOSER EN DÉCHÉTERIE"]
    F --> H["DUO"]
    G --> I["OU"]
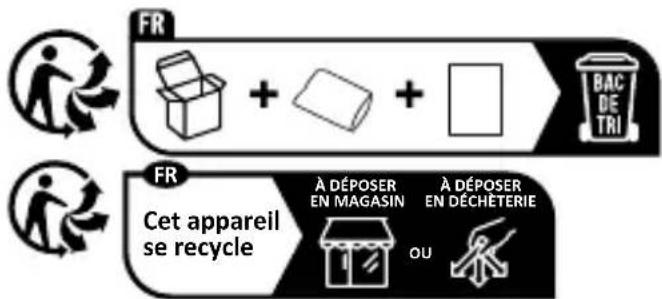
The Triman logo is only relevant for France.
The logo is only applicable to Italy.
17. Warranty
Dear customer,
We are delighted that you have chosen this equipment.
In the case of a defect, please return the device together with the receipt and original packing material to the point of sale.
4 Stavové LED (Power, Overheat)
5 Sběrná nádoba