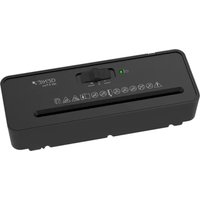
260 S Plus - Shredder Genie - Free user manual and instructions
Find the device manual for free 260 S Plus Genie in PDF.


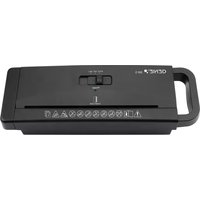
| Product type | Document shredder (strip cut) |
| Brand | Genie |
| Model | 260 S Plus |
| Dimensions (L x D x H) | 293 x 108 x 69 mm |
| Weight | 1.1 kg |
| Power supply | 220-240 V / 50/60 Hz / 60 W |
| Current | 0.8 A |
| Cutting capacity | Max 6 sheets DIN A4 (80 g/m²) or 1 credit card |
| Cut width | 6 mm (strips) |
| Cutting speed | 2.2 m/min |
| Feed width | 220 mm |
| Continuous operation | 3 min ON / 30 min OFF |
| Noise level | 72 dB(A) |
| Security level | DIN 66399 P-2 |
| Functions | Automatic start and stop, reverse, stop |
| Motor protection | Automatic shutdown in case of overheating (red LED) |
| Maintenance | Regular oiling of blades with special oil or lubricating sheets (ref. 9130); clean the housing with a dry, soft cloth |
| Usage | Indoor, dry, non-industrial |
| Warranty | In accordance with manufacturer's conditions |
| Manufacturer | GO Europe GmbH, Zum Kraftwerk 1, D-45527 Hattingen, Germany |
Frequently Asked Questions - 260 S Plus Genie
User questions about 260 S Plus Genie
0 question about this device. Answer the ones you know or ask your own.
Ask a new question about this device
Download the instructions for your Shredder in PDF format for free! Find your manual 260 S Plus - Genie and take your electronic device back in hand. On this page are published all the documents necessary for the use of your device. 260 S Plus by Genie.
USER MANUAL 260 S Plus Genie
Operating Instructions
Contents
- Important Safety Regulations 13
- Intended Use 14
- Operating Elements 14
- Starting up. 15
- Operation. 15
- Motor Protection 16
- Clearing Paper Jams. 16
- Maintenance and service. 16
- Technical Data. 17
- Troubleshooting 18
- Declaration of Conformity 18
- GS tested safety mark. 18
- Symbols 18
- Disposal. 18
- Warranty. 19
- Manufacturer. 19

The operating manual represents a component part of the device. It contains important information regarding safety, use and disposal. Familiarize yourself with all the operating and safety information before starting to use the device. Only use the device as described and for the purpose for which it is intended. Hand over all the documents with the device if it is transferred to third parties.
In order to be able to exploit all the functions provided by the shredder, please read this operating manual thoroughly before starting to use the device.
1. Important Safety Regulations
- Keep the device out of reach of children and pets! The device may only be operated by adults.
The device may only be used by one person at a time. - Protect the equipment from direct sunlight, extreme heat and damp!
- Do not carry out any other activities when operating the device, such as clean it.
- Repairs may only be carried out by properly trained specialists.
- Never place any objects on the device.
1.1 Safety labels

In order to be able to exploit all the functions provided by the shredder, please read this operating manual thoroughly before starting to use the device.

Attention: Improper use of the device can result in severe injury!

Keep ties away from the area of the paper infeed!

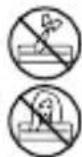
Keep scarves, jewellery and loose clothing away from the area of the paper infeed!

Keep your hair away from the area of the paper infeed!

The device must not be operated by children! Keep children away from the device.

Never spray any flammable gases or oil on the device. Risk of fire!

Never insert your hands in the paper infeed!

Never insert paper clips in the paper infeed!

Do not spray any inflammable gases in the direction of the shredder.

Caution! Risk of injury through sharp edge of cutting mechanism!

Warning! Risk of injury through the insertion mechanism. Loose objects could be caught in the insertion slot and cause injuries. Keep fingers, hair, scarves, ties, jewellery etc. away from the insertion slot.
Attention! Failure to observe the safety labels can result in severe personal injury! If an object (sleeve, tie, etc.) does enter the infeed accidentally, disconnect the power plug from the power socket immediately!
Safety information! The power socket must be close to the unit and easily accessible. This enables you to disconnect the machine from the power supply quickly in an emergency.
1.2 Electrical safety guidelines
-
Disconnect the power plug from the power socket:
-
if it will remain unused for a longer period,
- before emptying the waste bin,
- before cleaning the device,
-
before moving the device.
-
Do not put the device into operation in the case of damage to the power cable, the power plug or the device itself (risk of injury)!
- Do not complete any modifications to the power cable because it is designed for the power supply specified.
- Never exceed the recommended load capacity of the power socket or any connected extension cables!
Attention! It is forbidden to open the cutting mechanism attachment for repair purposes. Risk of fatal accident! In addition, all claims under the terms of guarantee will be deemed null and void.
2. Intended Use
- Only use the 260 S Plus shredder to shred paper and credit cards! The paper to be shredded must be dry and comply with the requirements stipulated in Chapter "Technical Data"! Attempting to shred other material can lead to personal injury (e.g. through splinters from hard material, etc.) and damage to the equipment (e.g. damage to the cutting mechanism etc.).
- Remove all paper clips from paper before feeding it in the device!
The unit may only be used in dry, indoor rooms. - Never shred the following items: Envelopes with windows or adhesive flaps, adhesives such as labels, stickers or glued paper, newspaper, tissue paper or similar thin paper, transparent film, film or laminated documents. Also avoid shredding continuous forms, paper rolls, cardboard, corrugated cardboard, fabric and plastic, as these can clog or damage the shredder.
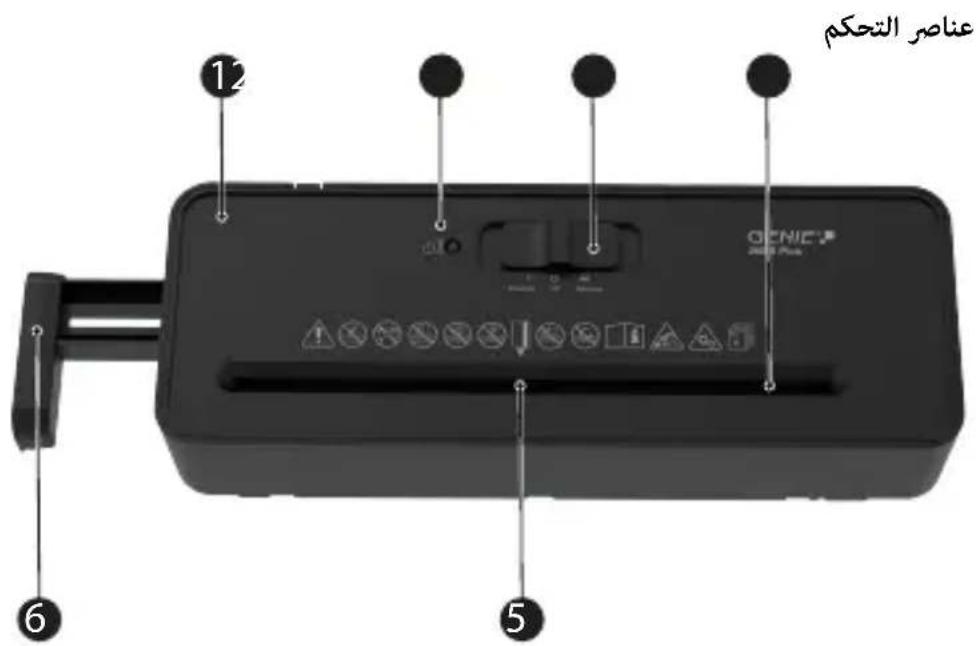
3. Operating Elements
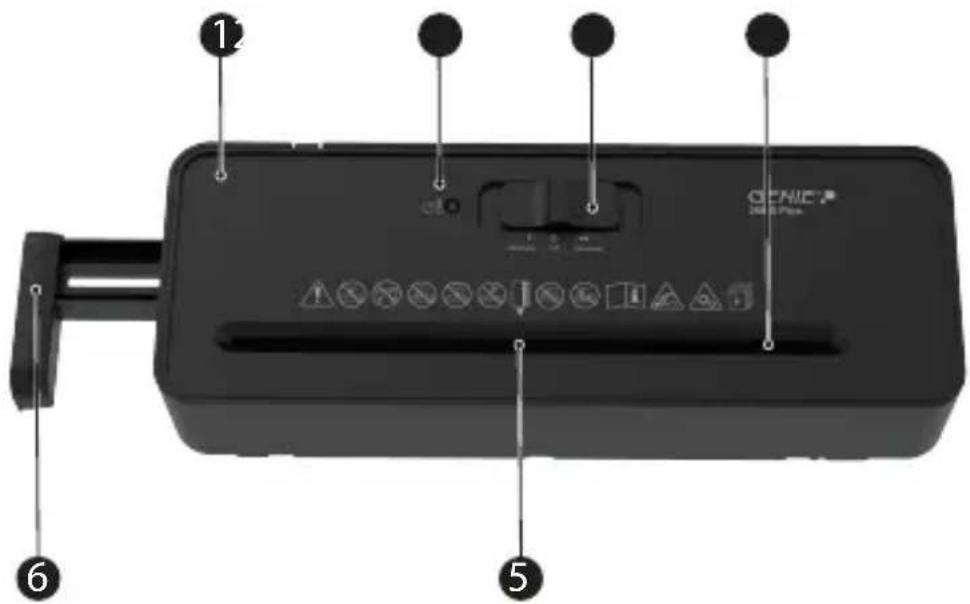

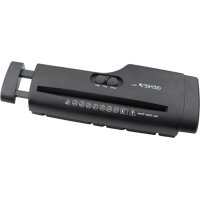
Shredder attachment

LED On/Overheat

Sliding switch

Paper infeed with cutting mechanism

Credit card infeed

Extension (to fit the shredder on larger waste bins)
4. Starting up
- Remove the device carefully from the packaging.

Attention! The underside of the cutting mechanism attachment has sharp edges. Risk of injury!
- Fit the shredder attachment on a suitable waste bin which has an even surface. Pull out the extension as far as necessary out of the cutting mechanism attachment.
Note! Thanks to the pull-out mechanism, the device fits round and square waste bins with a diameter of 29 to 36~cm
Note! The shredder attachment must not wobble!
Note! A waste bin is not part of the equipment supplied.
- Set the waste bin and shredder attachment on an even surface.
- Position the device near a power socket. However, do not position the waste bin and shredder attachment near a source of heat or in the vicinity of water.
- Connect the power plug to a power socket.
Note! Pay attention that the power cable is laid so that people or pets do not walk over it or that other objects can be set down on it. Pay attention to the information regarding power supply on the rear side of the device for the necessary precautions.
Safety information! For reasons of safety, the power socket to which the shredder power plug is connected must be near to the device and freely accessible so that the power supply can be disconnected quickly in an emergency!
5. Operation

Note! The recommended capacities stipulated in Chapter "Technical Data" must not be exceeded, otherwise paper will jam! Do not forget that the thickness of the paper increases when folded, as a result of which the recommended sheet capacity can be exceeded. Also reduce the quantity of paper when shredding coarse paper.
5.1 Sliding switch
The sliding switch is used to control the cutting mechanism in the paper shredder. The sliding switch can be set to three positions:
- Position Reverse: Continuous reverse running.
- Position Off: Paper shredder is switched off.
- On/Auto: In the On/Auto setting, the cutting mechanism starts automatically as soon as you feed paper or a credit card into the infeed slot. The shredder switches to forward running and draws in the paper or credit card. On completion of the shredding operation, the device continues running for approx. 2 to 4 seconds and then switches off automatically.
5.2 Switching the device on
- Connect the power plug to a power socket.
- Set the sliding switch to On/Auto.
- The LED On/Overheat lights up green.
5.3 Feeding in paper or credit cards
Note! A maximum of 6 sheets of A4 paper with a weight of maximally 80g / m^2 may be inserted in the paper infeed at a time.
- The shredder is connected to the mains power outlet and the sliding switch is set to On/Auto.
- The paper must be straight when inserted in the paper infeed. The position for inserting the credit card is marked with an arrow. Insert the credit card vertically.
Note! Ensure that the sliding switch is set to Off after the shredding operation has been completed.
5.4 Switching the device off
- Disconnect the power plug from the power socket.
6. Motor Protection
The motor switches off automatically when it overheats. The LED On/Overheat lights up red. First of all, disconnect the power plug from the power socket and allow the motor to cool down to room temperature. Then connect the power plug to the power socket again and continue operation.
Note! Observe the continuous operation time stipulated in Chapter "Technical Data".
7. Clearing Paper Jams
If too much paper is fed into the cutting mechanism, a paper jam occurs. The shredder switches off automatically in the event of a paper jam.
Proceed as follows:
- Press the Reverse button to activate reverse operation and feed the paper back out.
- Remove any residual paper from the infeed in forward feed (On/Auto).
Note! If the blockage has not been removed by the reverse/forward operation, pull out the mains plug and then remove the paper residue from the cutting unit manually.
- Set the sliding switch to On/Auto.
- Reduce the quantity of paper being shred and continue with the shredding process.
7.1 Reverse setting (reverse operation)
Set the sliding switch to Reverse so that the cutting mechanism runs in reverse and releases the paper.
7.2 Forward feed (On/Auto)
Set the sliding switch to On/Auto in order to ensure any residual paper is shredded and removed from the cutting mechanism.
8. Maintenance and service
Attention! Maintenance work may only be completed when the power plug has been disconnected from the power socket!
8.1 Emptying the Waste Bin
- Disconnect the power plug from the power socket.
- Remove the shredder attachment from the waste bin.
- Empty the contents of the collection container in a suitable place.
- Replace the shredder attachment back on the waste bin.
Note! It is recommended not to allow the waste bin to fill up against the cutting mechanism. This prevents the shredded paper congesting and jamming in the cutting mechanism. Empty the waste bin regularly.
8.2 Oiling the Cutting Mechanism
To ensure a long service life for your paper shredder, we recommend clearing any residue from the cutting mechanism regularly and applying a little special oil for paper shredders on the cutting tool. You can obtain the special CFC-free oil from your supplier or directly from our service centre in Hattingen. This helps lengthen the service life of the device.
Each time the waste bin is emptied, apply several lines of the special oil in a lateral direction on a suitable sheet of paper and feed this sheet through the shredder by setting the sliding switch to On/Auto.
- As an alternative, we offer lubricant sheets. The oil, which is on a vegetable basis, is impregnated in the paper and only escapes during the shredding process. This ensures simple, clean use. Simply insert the lubricant sheet in the paper shredder infeed, shred it and then switch the device to reverse running for approx. 10 seconds. The shredder is then ready for operation again. There are 12 lubricant sheets enclosed in one envelope and they can be obtained under Article Number 9130 from retailers or our Service department.
Attention! It is forbidden to use oil spray from aerosol cans containing CFC!
8.3 Cleaning
- Switch off the unit.
- Disconnect the power plug from the power socket.
- Clean the surface of the housing with a soft, dry, lint-free cloth. Do not use any solvents or cleaning agents.
9. Technical Data
| 260 S Plus | |
| Not intended for commercial use. | |
| Cutting capacity Max. 6 sheets of A4 (80 g/m2) or 1 credit card | |
| Cutting method, cut width Strip-cut, 6 mm | |
| Shredding speed 2.2 m/min. | |
| Width of paper infeed 220 mm | |
| Continuous operation time 3 min. ON/30 min. OFF | |
| Noise level 72 dB(A) | |
| Range of operations | Auto start/Auto stop Reverse running Off |
| Dimensions (W x D x H) 293 x 108 x 69 mm | |
| Weight 1.1 kg | |
| Power supply 220 - 240 V / 50/60 Hz / 160 W | |
| Amperage 0.8 A | |
Declaration of conformity with security level according to DIN 66399
We declare that, regarding shredding documents, this shredder complies with the requirements of security level P-2 according to DIN 66399.
P-2: Recommended for data media containing in-house data which should be rendered illegible. Material particle area ≤ 800mm^2 or strip width ≤ 6mm , strip length unlimited.
10. Troubleshooting
| Problem Diagnosis & Cause Solution | ||
| Device does not work Is the power plug connected properly in the power socket? | Connect the power plug in the power socket properly. | |
| Is the sliding switch set to On/Auto? | Set the sliding switch to On/Auto. | |
| Does the motor fail to start when paper is inserted? | Slide the paper in the respective infeed slot so that it makes contact with the sensor in the middle. | |
| Device no longer functions after a longer period out of service or stops during operation | Was the device shutdown for a longer time? Is the surface of the device hot? The permissible continuous operation time has probably been exceeded. | First of all, disconnect the power plug from the power socket and allow the motor to cool down to room temperature. For information on continuous operation, refer to Chapter "Technical Data". |
| Paper jam Have you exceeded the permissible paper capacity (refer to Chapter "Technical Data")? Has the paper been fed in askew? | Clear the paper jam, refer to Chapter "Clearing Paper Jams". | |
Note! If you cannot clear the fault yourself, contact your dealer or call the GO Europe hotline.
11. Declaration of Conformity
The CE Mark on the device confirms conformity.
The Declaration of Conformity can be read online at www.go-europe.com.
12. GS tested safety mark

The «Geprüfte Sicherheit» mark (GS tested safety mark) certifies that the product satisfies the requirements defined by the German Product Safety Act (ProdSG).
The GS tested safety mark indicates that when implemented for its intended use and in the event of foreseeable misuse the identified product will not endanger the safety and health
of the user. It concerns a voluntary safety mark which was issued by an authorized testing institute.
13. Symbols
The following symbols are provided on the packaging or on the device itself. This section explains the significance of the individual symbols.
The symbol indicates that the design of the product complies with Protection Class II (double insulation). A safety connection to the electrical earthing (ground) is not necessary.

Only use the product indoors.
14. Disposal

Find out about the possibilities of taking back used appliances free of charge from your dealer.
The adjacent symbol indicates laws dictate that electrical and electronic apparatus no longer required must be disposed of separate from domestic waste. Dispos of your device at a collection point provided by your local public waste authority. Packaging materials must be disposed of according to local regulations.
The packaging is made of environmentally friendly materials that you can dispose of at local recycling points. Advice on the options with which to dispose of your old device can be obtained from your municipal or local administration offices.
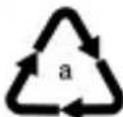
Observe the identification on the packaging materials during the waste sorting process; they are identified by abbreviations (b) and numbers (a) which have the following significance: 1-7: plastic/20-22: paper and cardboard/80-98: composite materials.

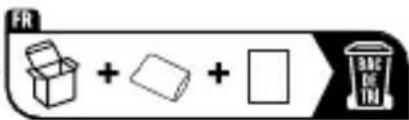

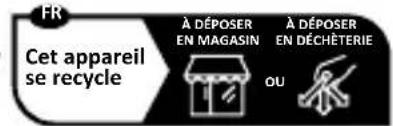
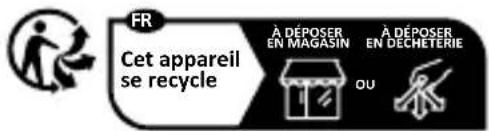
The Triman logo is only valid for France.
The logo is only applicable to Italy.
The logo is only valid in Spain.
15. Warranty
Dear customer,
We are delighted that you have chosen this equipment.
In the case of a defect, please return the device together with the receipt and original packing material to the point of sale.
16. Manufacturer
GO Europe GmbH
Zum Kraftwerk 1
D-45527 Hattingen
Germany
www.go-europe.com
service@go-europe.com
260 S Plus
Creditcard-invoeropening

5.3 Papier of creditcard invoeren

To loyoturo Triman 1oxue movo yia tn faiia.
To loyotunio 1oxuei movo yia tvnlaia.
To loyotuto ioxueovo yia tynlontavia.
15. Eyyunon
Aioiune πeλaTn,
Xaipopaote nou eIeEate autn th ouakeun.
Laijaj Boa Cllw Triman J
jll jll jll jll jll jll jll jll jll jll jll jll jll jll jll jll jll jll jll jll jll jll jll jll jll jll jll jll jll jll jll jll jll jll jll jll jll jll jll jll jll jll jll jll jll jll jll jll jll
:
.(Reverse) aesssssspsssssssssssssss
On/Auto) aaiy daiy plaiy yll ydiy 2
1
- On/
4.
Ggds yjyIg B,Reverse. 5y0y0y0y0y0y0y0y0y0y0y0y0y0y0y0y0y0y0y0y0y0y0y0y0y0y0y0y0y0y0y0y0y0y0y0y0y0y0y0y0y0y0y0y0y0y0y0y0y0y0y
abzll 1009 1009 1009 1009 1009 1009 1009 1009 1009 1009 1009 1009 1009 1009 1009 1009 1009 1009 1009
1y
pwr 19 19 19 19 19 19 19 19 19 19 19 19 19 19 19 19 19 19 19
!
y!
gus 1e 1000
3.
a 1 1 1 1 1 1 1 1 1 1 1 1 1 1 1 1 1 1 1 1 1 1 1 1 1 1
4
5.
Jaaa aagao bvy. 4e g g g g g g g g g g g g g g g g g g g g g g g g g g gg
a2jU1 cIbIyI yI aJyIyI yI aI bI
J 1
15gbl 0ylo 400
a
J 1
lll j 3gll 20 g 3gll aol Ljy 3gill 4gogbl 2aill jglo

yjy 2
eIgai 15i jyjll tao b Jx gabai all i gabai ldo g pssu jilb cia
Aulll J Jauu uai: Reverse gogll
.
On/Auto On/Auto
jglj1
- On/
- 22011
gjulbplusy
260 S Plus 11111111111111111111111111111111
1
.aaoloo
g 1 g 1 g 1 g 1 g 1 g 1 g 1 g 1 g 1 g 1 g 1 g 1 g 1 g 1 g 1 g 1 g 1 g 1 g 1 g 1 g 1 g 1 g 1 g 1 g 1 g 1 g 1 g 1 g 1 g 1 g 1 g 1 g 1 g 1 g
Zbll. 3gll d
jaiyilzilbui
()
4
5
6
aai 100g
LED On/Overheat
③ y ④ z 使 z^2 - 4z + 3 = 0
1
2
3
g j 10000000000000000000000000000000000000000000000000000000000000000000

aOslwAog61gU.
jgljglblbjol
.
·
.
.
.
aolwai oale
jglal plcslj 13 aie clll oio ool jy ciuiuubil gje dI sbg guo plauoi joo

gll aiaa aaiia jaiiaaii iaiii
- gJgJd aJzai zai 2000
15 15
aaiia aiaia iiaiaaii yllg 10ggbgdoaggl bieol

jai jbi jgl jgl jgl jgl jgl jgl jgl

jol jol jalbsl sll lalab 1o jol jol jol jol jol jol

1gjll Jdo 0000

13

105olalgloll cis gabaaol oog ciaa jao aollyj

3j 10000000000000000000000000000


1

1
y 1
aJyssJ aosu J
·
·dug
jL
4150 ÷ 2.6 = 11.2
!(a)yj)s jgljgjjl y.aaas jajgjjg jaiabll J5 g aal y 1y .
GENIE
260 S Plus
a
Jooosu Joo
Ugaa 1gua
106
106
107 205 GS
107 1
107
108 25
108 1
109.
110 2
110.
110
111
111
112
112
113 .

GO Europe GmbH
Zum Kraftwerk 1
45527 Hattingen
Deutschland
V1.16.2
07/2025
ID:12526
- Operating Instructions
- Contents
- Important Safety Regulations
- Safety labels
- Electrical safety guidelines
- Intended Use
- Operating Elements
- Starting up
- Operation
- Sliding switch
- Switching the device on
- Feeding in paper or credit cards
- Switching the device off
- Motor Protection
- Clearing Paper Jams
- Reverse setting (reverse operation)
- Forward feed (On/Auto)
- Maintenance and service
- Emptying the Waste Bin
- Oiling the Cutting Mechanism
- Cleaning
- Technical Data
- Declaration of conformity with security level according to DIN 66399
- Troubleshooting
- Declaration of Conformity
- GS tested safety mark
- Symbols
- Disposal
- Warranty
- Manufacturer
- S Plus
- Papier of creditcard invoeren
- Eyyunon
- gjulbplusy
- aOslwAog61gU.
- aolwai oale
- aJyssJ aosu J
- GENIE
- GO Europe GmbH
Brand : Genie
Model : 260 S Plus
Category : Shredder